Learn to use this powerful 3D modelling tool's Sculpt workflow in six simple steps.
When approaching a model or scene that requires the refined modelling offered by sculpting, many 3D artists might assume this would be best achieved in a dedicated sculpting application. However, this may not be the best route because many of the leading 3D applications have their own sculpting workflow.
This is true for Cinema 4D, which has an impressive sculpting platform, especially when mixed with BodyPaint, Cinema 4D’s 3D painting toolset. The sculpting toolset in Cinema 4D offers all the core features that most sculpting tasks will need, including symmetry, wax, and a non-destructive layer system, which is a powerful tool for managing the detail and additions in a sculpt.
There is also the ability to project a sculpted mesh onto another one. This enables versioning of topology from an initial sculpt, alongside a robust baking toolset, which can create normal and displacement maps from a sculpt to use on a low-poly mesh. This is particularly useful for game asset creation.
Latest Videos From Creative Bloq
It isn’t just the tools that make the Sculpt workflow in Cinema 4D so refined; it has its own dedicated layout as well as the ability to customise an interface to the artist’s liking, while working with other workflows such as dynamics and animation.
The Soloing function within Cinema 4D can be really useful for isolating a sculpted object in a scene to modify it. The fact that a sculpt can be tweaked while in the middle of an animation task is a potentially huge time-saver when compared to using an external sculpting application.
Couple this with the financial saving of not having to buy another sculpting application, and it’s clear that if any sculpting needs to be done, the tools that Cinema 4D offers may well be all that is needed.
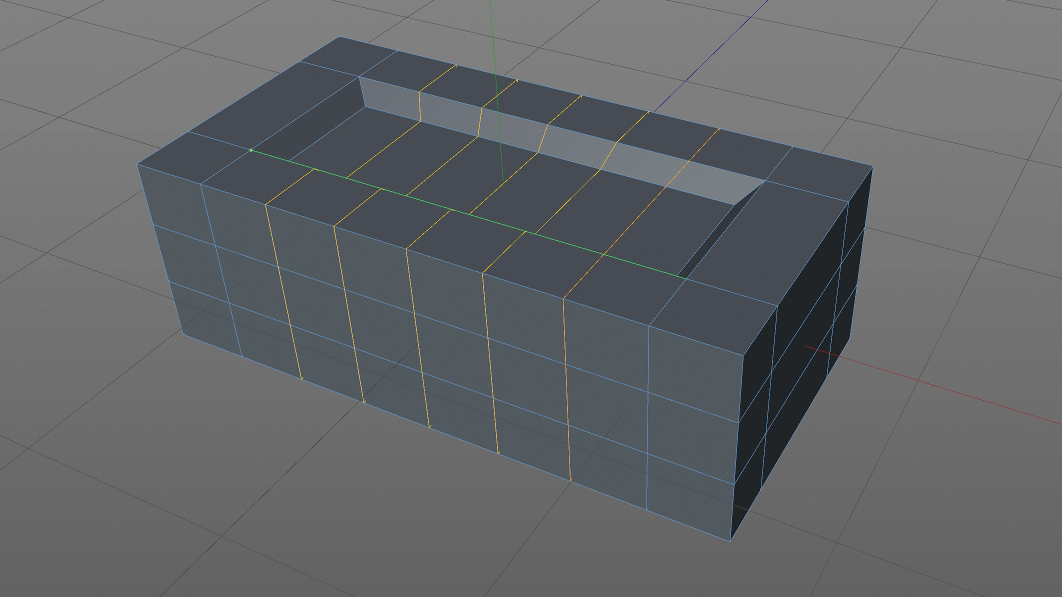
As with any 3D art, preparation is key. Before sculpting, ensure the base mesh has polygons of similar size over its surface. Doing this means that sculpting tools will flow consistently with no stretching of brush strokes. Having a polygon flow like this for the base mesh also means that when textures are baked from the finished sculpt, they should reapply to the base mesh reliably.
Get the Creative Bloq Newsletter
Daily design news, reviews, how-tos and more, as picked by the editors.
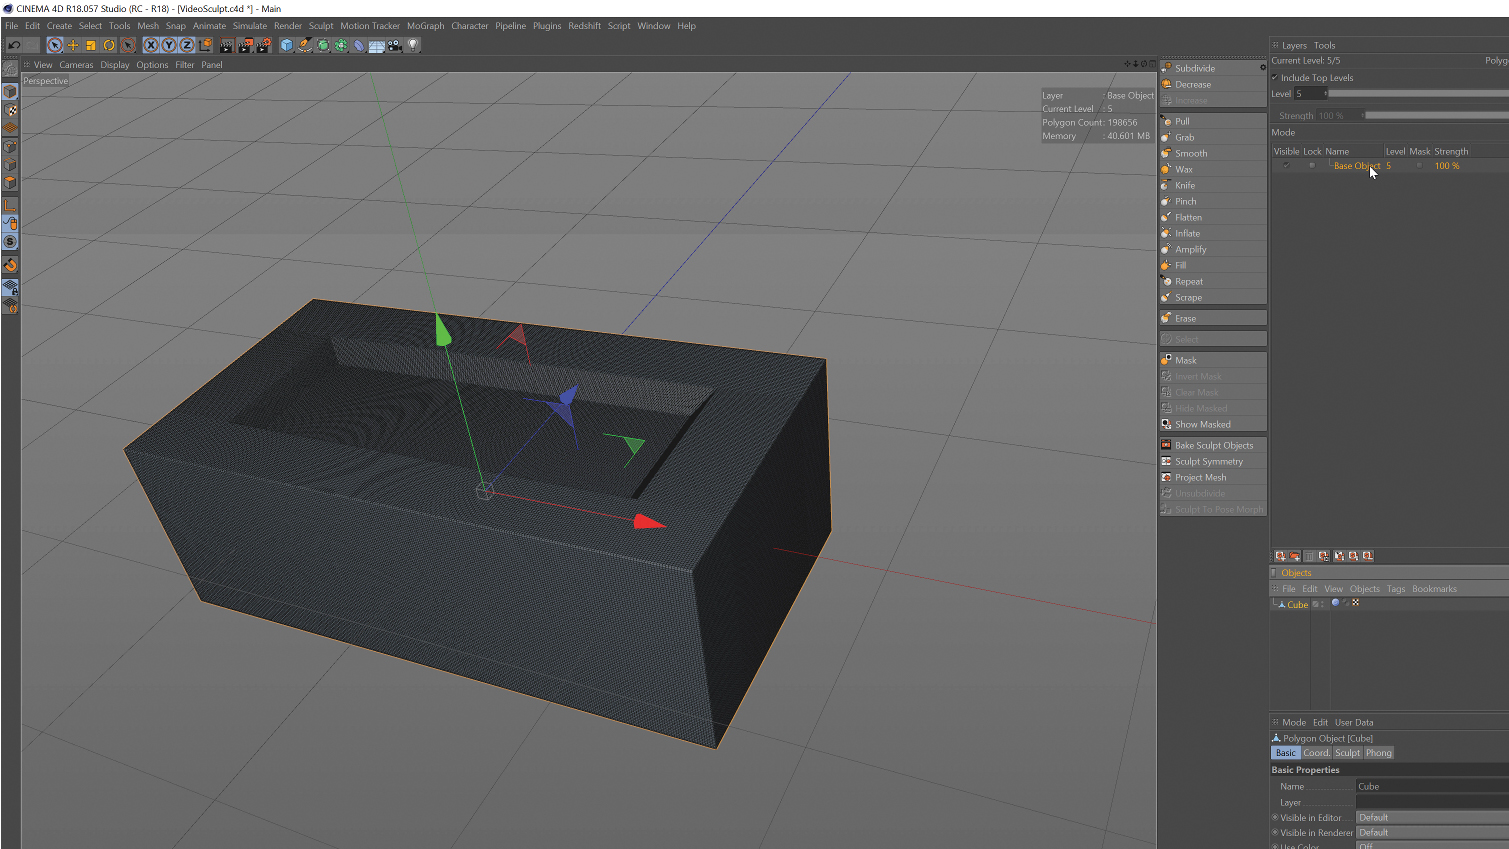
Switch to the Sculpt layout using the Layout dropdown. This reconfigures the Cinema 4D interface to present a toolset best suited for sculpting. Make sure that the base mesh is selected and press the Subdivide button to start increasing the amount of non-destructive subdivision levels upon which you can sculpt.
A Sculpt Tag is added to the mesh in the Object Manager. To stop a rectangular object turning into a blob when subdividing, press the cog beside the Subdvide tag to reduce the Smoothness options.
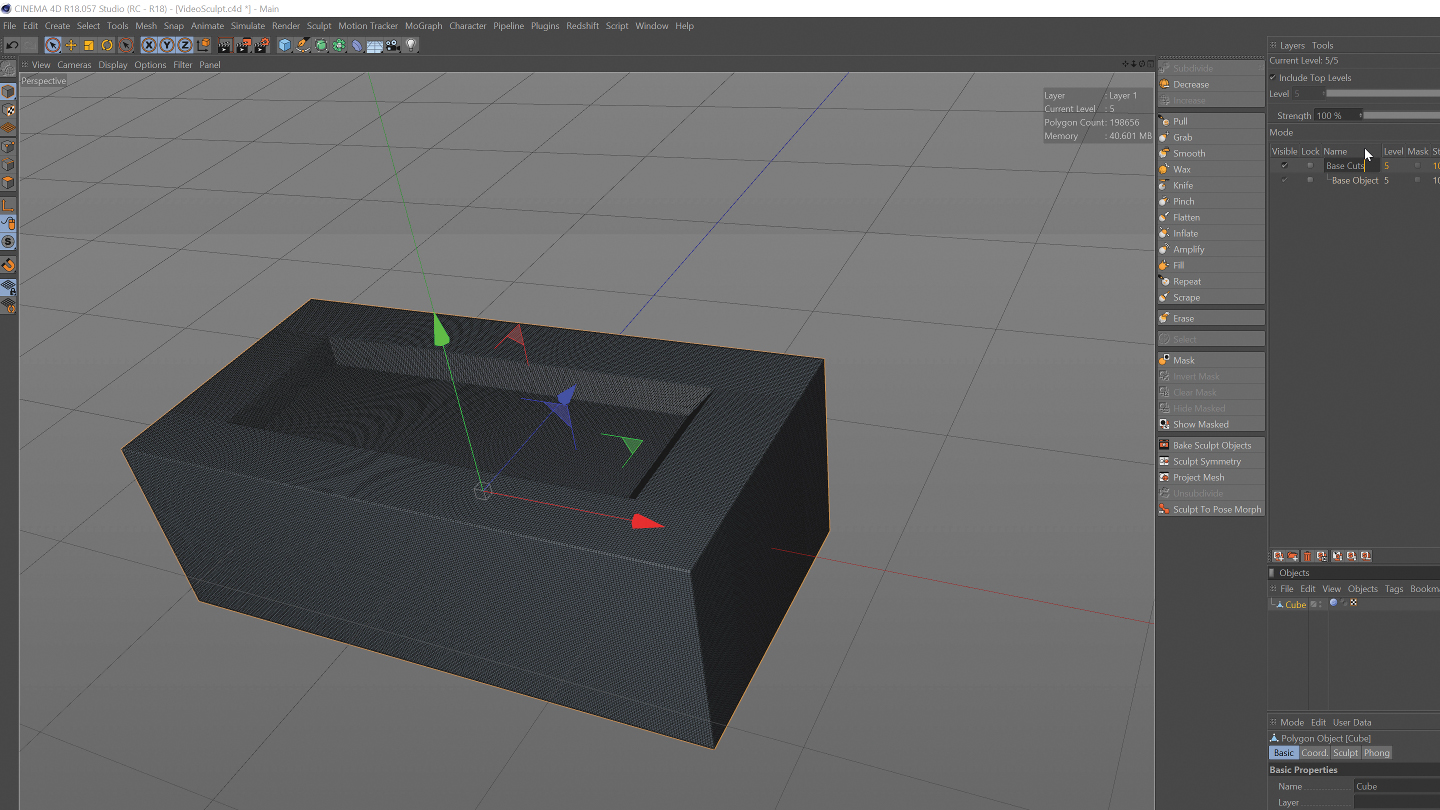
Although it is possible to jump in and just start sculpting straight away, if you want to keep organised it is a good idea to work with the sculpting layers system.
Press the Add Layer button. With this new layer highlighted and renamed, select the Pull tool and start sculpting. Use the Ctrl/Cmd key to invert the pull to make gouges. The size and pressure can be adjusted in the Attributes palette, as can symmetry control and the ability to control pressure and size with a tablet.
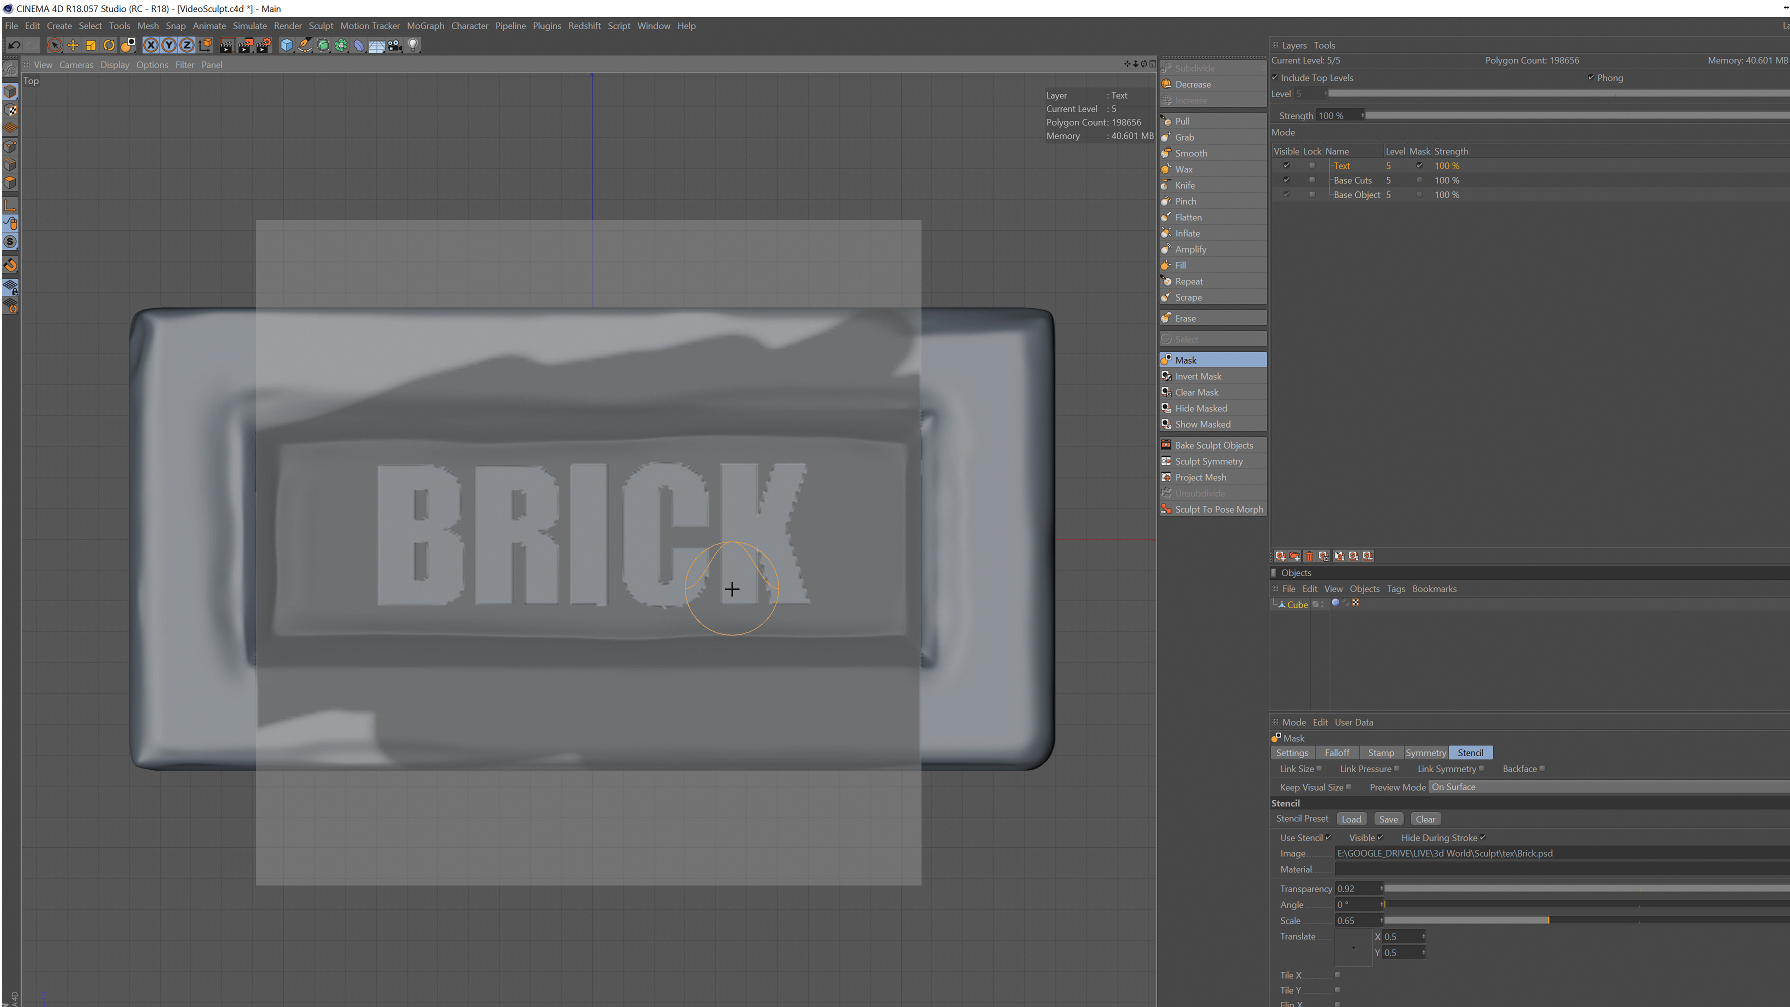
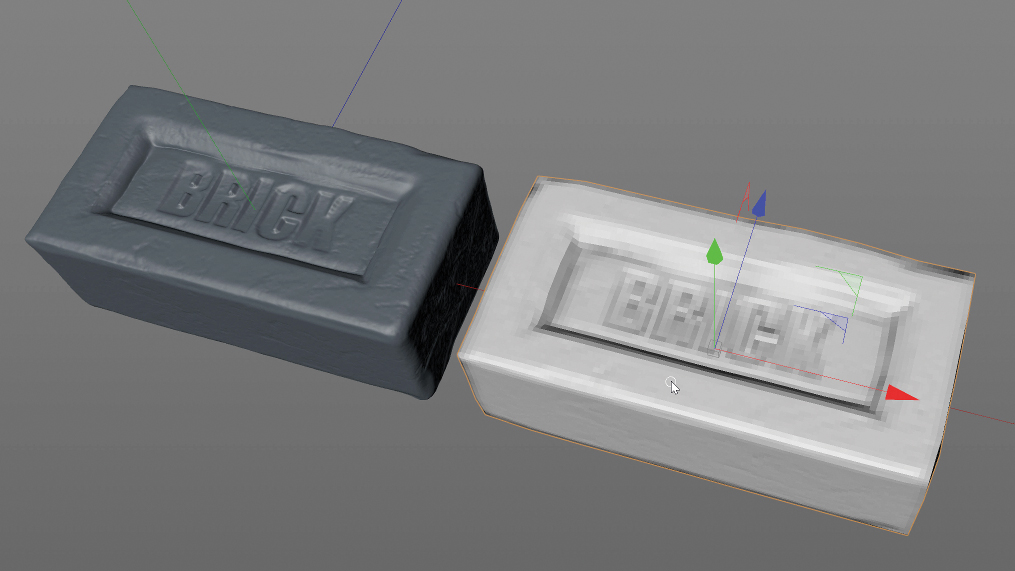
Images can be used for a range of tasks within the sculpting workflow, such as creating embossed text. Select the Mask tool and in the Stencil tab of the Attributes palette, import a black-and-white text bitmap. Apply this as a mask to the sculpted object.
Once the mask is painted on, use sculpting tools such as the Pull and Smooth tool to create the embossed text.
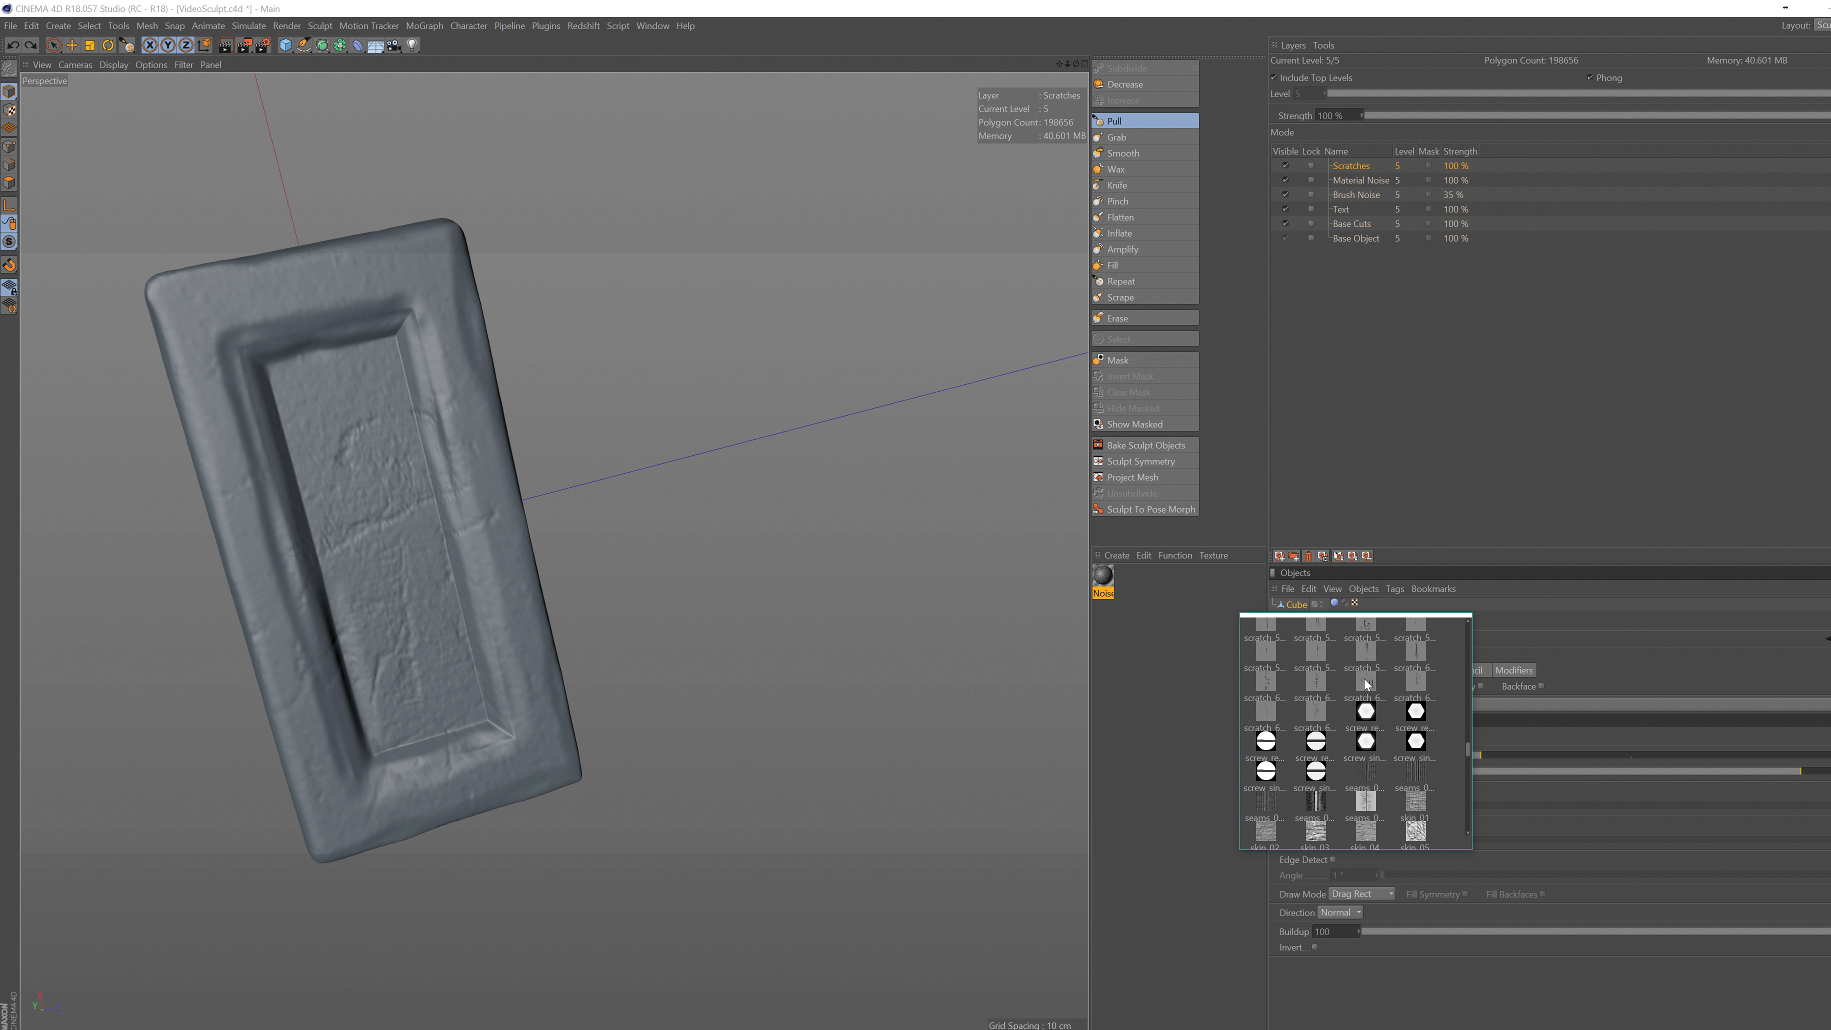
Cinema 4D’s sculpting workflow has many ways to add noise and details to a sculpt. In the Settings tab of a sculpting tool, press the Brush Preset Load button (all the brushes are also available in the Content Browser).
There is a choice of custom brushes, from noise to cracks, which are great for adding detail. Bitmaps can also be used, and materials are useful for bespoke noise brushes.
When the sculpt is finished, use the Bake tool to bake out normal and displacement maps that are mapped back onto a base mesh to provide a low polygon asset that can be exported to other 3D applications or game engines. These assets also require fewer resources, so will improve viewport performance.
When using the Bake Sculpt Objects tool, Cinema 4D creates a new low-poly mesh with all the correct maps applied and hides the sculpted object, finishing off a clean and simple approach to sculpting.
Mike Griggs is a veteran digital content creator and technical writer. For nearly 30 years, Mike has been creating digital artwork, animations and VR elements for multi-national companies and world-class museums. Mike has been a writer for 3D World Magazine and Creative Bloq for over 10 years, where he has shared his passion for demystifying the process of digital content creation.