The sky can make or break a photo, so it's important to consider the steps it's going to take to successfully replace it if needed in your photo editing. For a long time, this was a manual, time-consuming job for photographers, requiring a lot of skill, time and expertise.
For uncomplicated horizons, this process is less difficult. However, highly detailed tree-filled spaces or city skylines, with lots of gaps to fill, can prove so challenging, it's easier to give up. Until now, that is.
The arrival of the AI Sky Replacement filter, a major new tool in Luminar 4, means even the most complex of images can have the sky replaced with ease. This incredible feature can not only automatically identify and separate the sky in the original image, but mask it so effectively that it's almost impossible to notice any areas the mask has missed. Following even the most detailed tree lines to the finest pixels, the AI Sky Replacement tool recognises gaps that a regular selection tool would oversee. And if you do notice any areas that need attention, there are sliders for even further fine-tuning.
In order to make sure your replacement sky truly feels part of the original shot, you will need to pay close attention to the image exposure, lighting and colours and then let the tool do the rest. Here's a step-by-step guide on how to use the tool effectively, plus some top tips on how to make the final result even more standout.
01. Locate AI Sky Replacement filter

To start, select Luminar's Edit panel, which will show icons for the four main filter panels – Essentials, Creative, Portrait and Professional – on the far right of the screen. If you're familiar with Luminar 3 (or earlier versions), these are the equivalent to the previous Luminar preset workspaces. The one you want is the Creative section, which is where the AI Sky Replacement filter lives.
02. Navigate AI Sky Replacement panel

Once you've found the correct filter, select Sky Selection within the AI Sky Replacement panel. This is where you can choose a new sky and make any basic adjustments. There are advanced settings for further refinements, however, initial results are usually good enough to not warrant using these.
03. Select a new sky

The Sky Selection dropdown menu has multiple replacement sky options, which come inbuilt with Luminar 4. You can select each and see which one provides the right feel for your image. Try not to get carried away with all the options and instead pay close attention to the sky that fits best with your image.
04. Experiment!

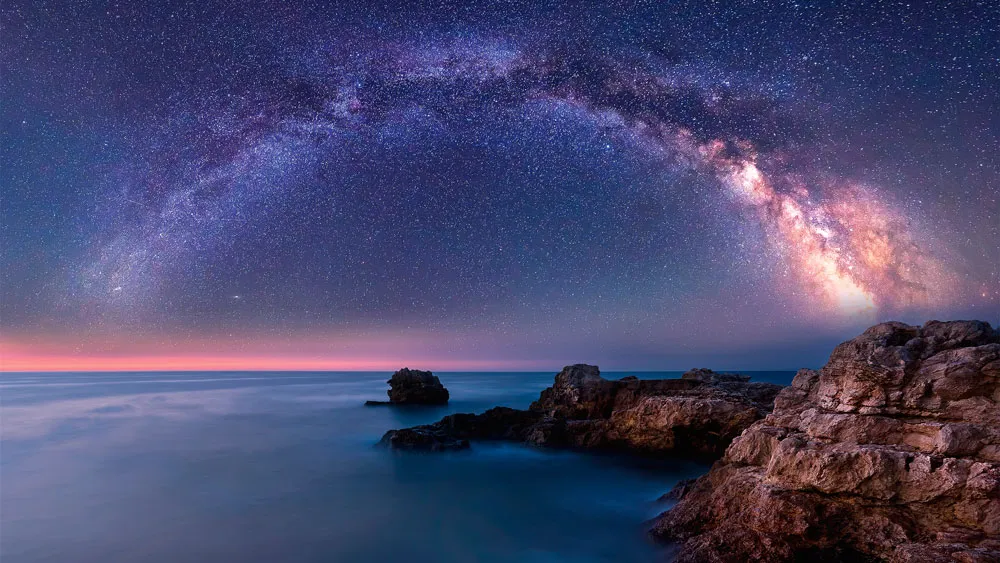
This powerful tool is super-clever and has a number of options to help you be really creative, so don't be afraid to experiment with it. The night skies in Luminar 4 are particularly special, and can work really well at transforming a regular daytime image in to a magical evening shot. A prime example is image (above), which has had its original overcast sky replaced with 'Galaxy 2' sky – what a difference!
05. Finishing touches

If you're almost done but feel like your image could still do with a few tweaks, the sliders in the AI Sky Replacement panel can really help. One to note is the Relight Scene slider, which this progressively applies the replacement sky’s tones and colours to the rest of the image to produce a much more natural blend.
The AI Sky Replacement panel

Here's a closer look at the AI Sky Replacement panel's features to help you get started:
1. Choose the perfect sky
As mentioned earlier, there are variety of options from this drop down menu, but try not to get too carried away. Pick the sky that's right for your scene. And if you can't find it here, you can insert your own sky image here too.
2. Horizon Blending
If you're struggling to join the sky with the horizon, or it looks a bit off, help make it a more natural fit by adjusting the Horizon Blending slider.
3. Relight Scene
Use the Relight Scene slider to gradually shift the tones and colours of your original photo to match those of the sky you’ve added.
4. Advanced Settings
It's unlikely you'll need these often, but handy to know they are there if you do. Options available are adding warmth and atmospheric haze in to images to really make your skies more authentic.
5. Sky Defocus
This is a brilliant feature for replacing skies on close-ups or portraits with blurred backgrounds.
6. Edit Mask
Useful for subtle blends, i.e. if you wanted to make the sky paler near the horizon, use the Edit Mask button and add a gradient mask.
Get the most from AI Sky Replacement: 5 top tips
AI Sky Replacement is a powerful tool, but it's no substitute for a photographer's eye. While it can certainly save you time, you will still need to ensure the replacement sky you are choosing fits perfectly, which will often require some tweaks. With that in mind, here are a few ways to get your skies just right, all of which are super-simple in Luminar.
01. Create your own sky library

Luminar 4.1 comes packed with a variety of skies to choose from, but it's just as easy to drop in your own and create your very own sky library. So get snapping and start your sky collection today.
02. Add a 'Look'

If you need that something extra to really bring your image and new sky together, try giving it a Luminar Look. Simply add an adjustment layer and then pick a Look that suits.
03. Match the lighting

Take a close look at the lighting in your original image and try to find a sky that matches it. The sun is a good source to use in this above image as it can be used to determine how the light falls in the rest of the photo.
04. Add a vignette

A quick and easy solution to adding a dark sky to a bright scene is to apply a vignetter. This edge-darkening effect will help balance the brightness and bring the image together seamlessly.
05. Use gradients

If you're struggling to find the right tone to meet your horizon, use the edit mask button and add a gradient that helps blend the sky to your image more naturally.
Get your copy of Skylum Luminar 4 today
If you want to give Luminar 4 a go for yourself, you can download a free seven-day trial (for both macOS and Windows) via the Skylum website. If after a couple of weeks you'd like to buy, use discount code CB to get an exclusive $10/£10 discount on the retail price.

