Picture perfect photography: Discover Luminar’s Erase and Clone & Stamp tools
Get rid of unwanted pixels with these powerful image editing features.

You’re just about to capture the perfect picture when, out of nowhere, someone walks into the shot. Or you’ve nailed the perfect landscape scene, only to notice an ugly road sign in the way. We’ve all experienced the annoyance and frustration of an otherwise perfect picture being spoilt by unwanted objects in the background. Good news is there’s now a quick and even simpler way to remove them.
Introducing Luminar 4’s Clone & Stamp and Erase tools.
The Clone & Stamp tool works in the same way as a regular clone tool, and is particularly effective on repeating patterns, fine details and man-made objects. Getting the tones and colours to match when using a clone tool is a well-known challenge, but this is where Luminar 4’s secret weapon – the Erase tool – excels.
The Erase tool removes objects intelligently, taking textures, patterns and tones from the surrounding image to cover up the object you want to remove automatically. The majority of the time, results are immediate and spot-on. However, a trickier subject will often require some fine tweaking. Let’s take a look at exactly how both of these tools work...
5 simple steps to remove objects from a photo

01. Prep your image
Luminar’s Erase tool creates a composite layer from all the already existing image layers, so it’s important to make any exposure adjustments beforehand. Any tweaks or changes made after the Erase tool has been applied won’t show up.
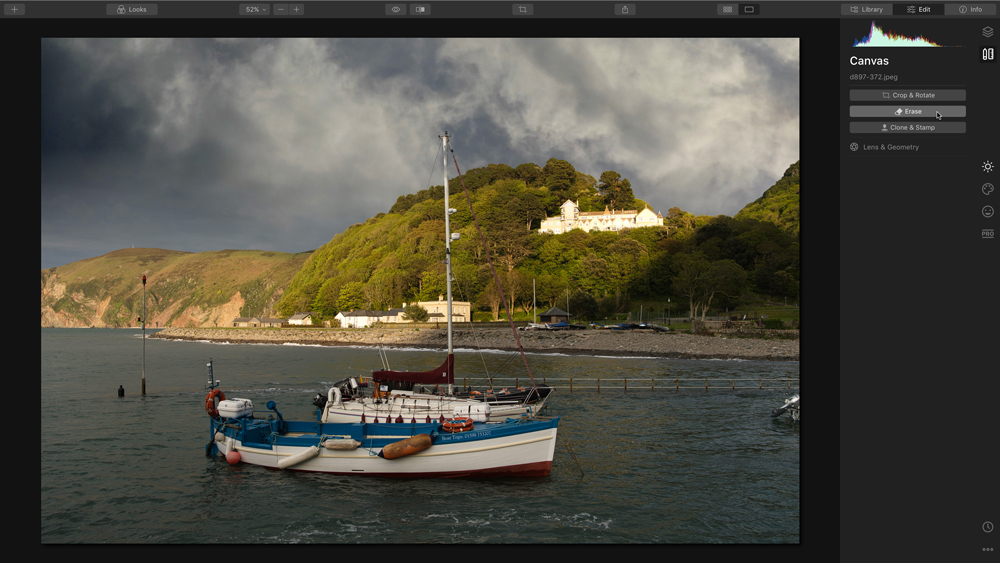
02. Select the Erase tool
In the main Luminar interface, select the Canvas workspace via the button towards the top-right corner. Here you’ll find all manner of useful tools, including Clone & Stamp and Crop & Rotate and, the one you’re looking for, the Erase tool. Select it, and a new layer will be created.
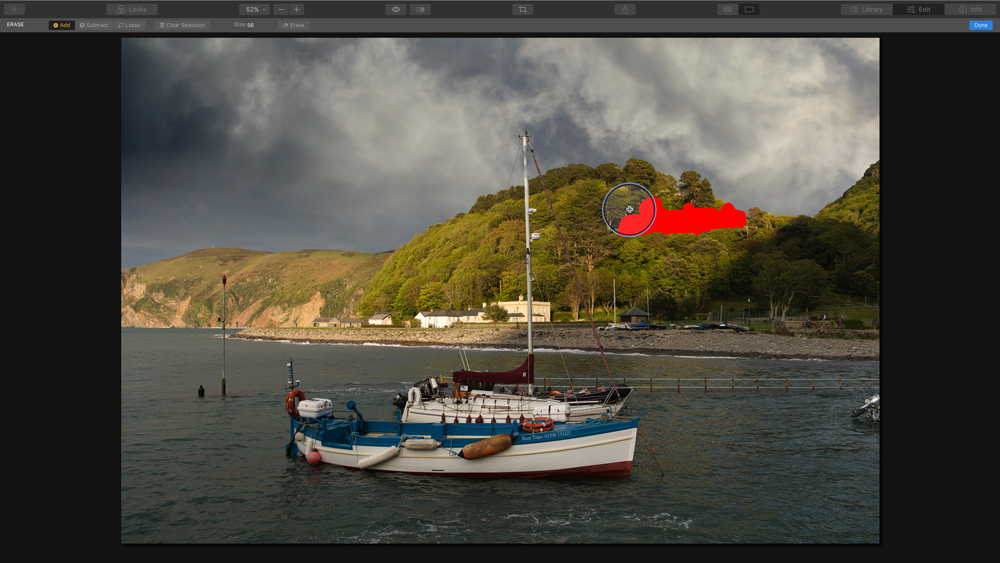
03. Erase an object
Once selected, you will see the Erase tool consists of a circular brush, with an adjustable slider to choose its size. Using the brush, simply paint over the object you want to remove. Don’t worry too much about being exact, but try to avoid the background as much as possible.
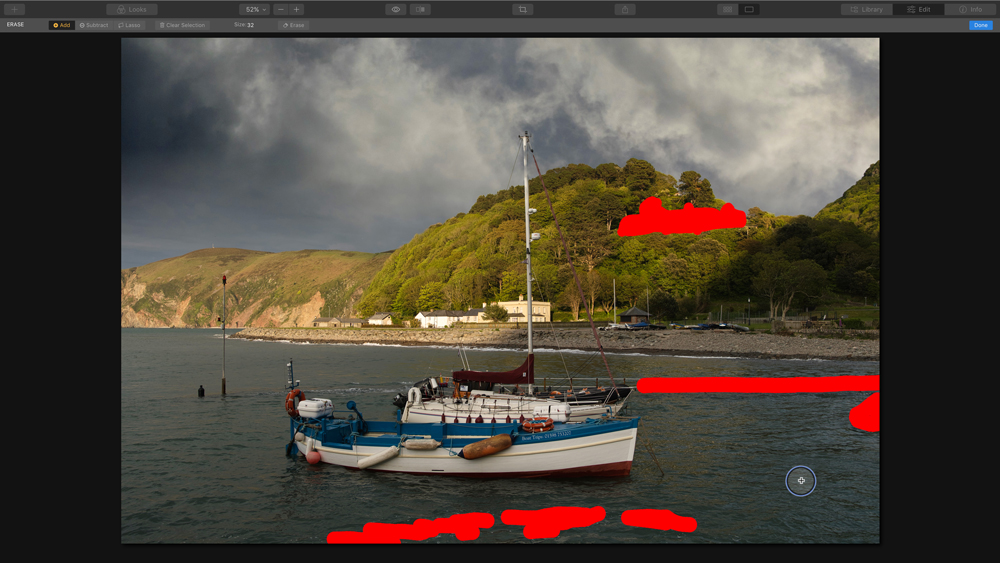
04. Remove multiple objects
The Erase tool allows you to remove many objects at the same time. Simply release the brush, alter the size to suit and paint over anything you want to get rid of.
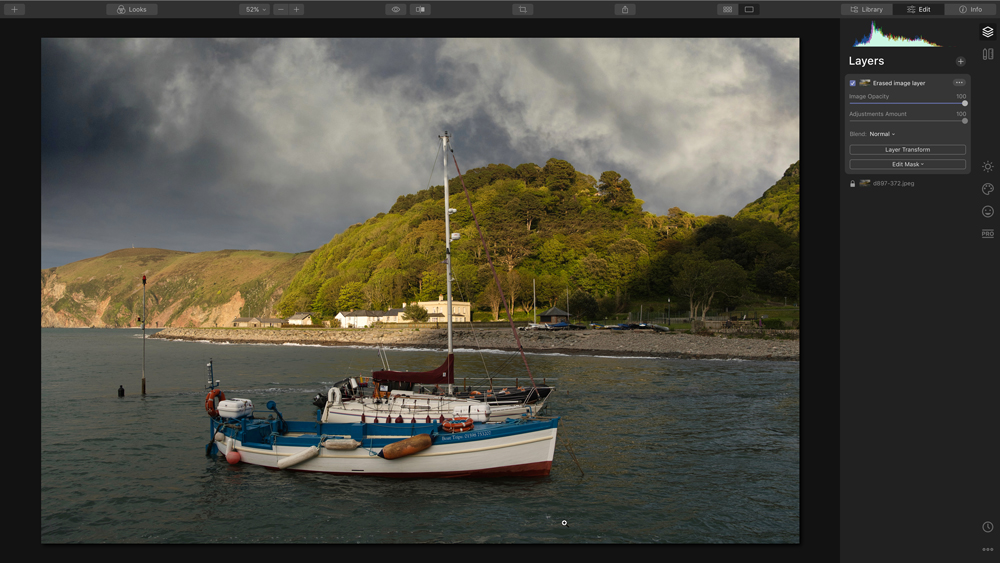
05. Clean up
When you have finished painting with the Erase tool and are happy with your selection, click ‘Done’. Use the visibility toggle in the layers panel to see the difference. If the results aren’t right the first time, you can try again on any problem areas, or alternatively use Luminar’s Clone & Stamp tool to make manual repairs…
How to use the Clone & Stamp tool
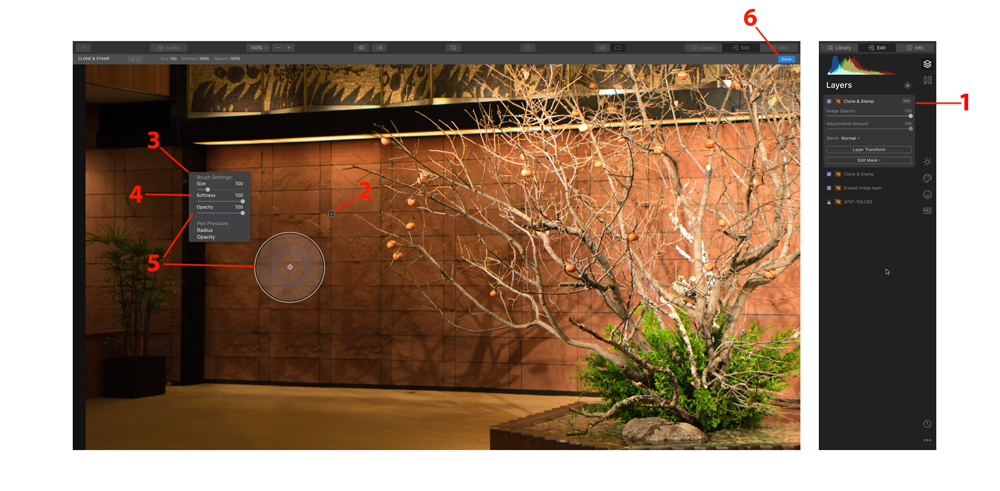
While Luminar’s Erase tool does a fantastic job of removing unwanted objects, more trickier, busy shots might need a bit of fine tuning. This is where the Clone & Stamp tool comes in really handy. Here’s how to make the most of this powerful feature.
01. Create a Clone & Stamp layer
Just like with the Erase tool, selecting the Clone & Stamp feature will create a new composite layer to work on.
02. Clone target area
To start, select the clone source and then paint over the area in need of repair. Press Alt (Option)-click to select a new clone source.
03. Brush size
The clone brush sizes can be changed to suit using the menu on the top toolbar, or right-click on the image to reveal the brush properties panel.
04. Brush sensitivity
You can also adjust a brush's soft and hardness options here. A hard brush tends to work well on hard edges, whereas a soft brush is better for blending in areas of softer, shaded areas.
05. Reduce the opacity
For really complex areas, which are proving troublesome, try reducing the opacity and using a larger soft brush to help disguise obvious repairs.
06. Review
Once finished, click ‘Done’ to generate the Clone & Stamp layer, which you can review or make more repairs on at a later date.
Get your copy of Skylum Luminar 4 today
Want to give Luminar 4 a go? Right now you can download a free seven-day trial via the Skylum website. Available on both macOS and Windows, should you decide to buy, be sure to use our exclusive discount code CB to save $10/£10 on the regular retail price.

Thank you for reading 5 articles this month* Join now for unlimited access
Enjoy your first month for just £1 / $1 / €1
*Read 5 free articles per month without a subscription

Join now for unlimited access
Try first month for just £1 / $1 / €1
Daily design news, reviews, how-tos and more, as picked by the editors.

The Creative Bloq team is made up of a group of art and design enthusiasts, and has changed and evolved since Creative Bloq began back in 2012. The current website team consists of eight full-time members of staff: Editor Georgia Coggan, Deputy Editor Rosie Hilder, Ecommerce Editor Beren Neale, Senior News Editor Daniel Piper, Editor, Digital Art and 3D Ian Dean, Tech Reviews Editor Erlingur Einarsson, Ecommerce Writer Beth Nicholls and Staff Writer Natalie Fear, as well as a roster of freelancers from around the world. The ImagineFX magazine team also pitch in, ensuring that content from leading digital art publication ImagineFX is represented on Creative Bloq.
