Recently, I was asked by French designer Fabien Barral of Mr Cup Studio to contribute to his beautiful Letterpress Calendar project. As part of this crowd-funded project, 13 designers were each given an inspirational phrase to incorporate into their design. My phrase was: If everything has already been done, try doing it even better.

This was the perfect opportunity to show what I could do in Affinity Designer, the Apple Award-winning vector graphics editor from Serif. I discovered Affinity Designer simply by chance online, and snapped it up when it was first released. I played about with it a few times, but I only really started to use it when my subscription to Adobe had ended. From there I decided to switch to Affinity full-time.
The first thing that really grabbed me about Affinity Designer was the sheer speed of the software and how intuitive and fun it was to use. There are so many features I love – especially the Symbols tool, which I will go into a little more depth about below. This software is a great option for professional designers and, given the price, there’s no excuse not to own it, even if you’re just using it as a backup.
For the Letterpress calendar, I was given free rein – the only requirement was that the piece included my given phrase. It was an opportunity I couldn’t pass up! Here’s a step-by-step guide to how I created by piece, with some tips for making the most of Affinity Designer.
01. Set up your project

In my work I almost always use a grid, because this allows me to quickly and accurately check the spacing of my lines and keep things contained. With the calendar piece I needed to fit a lot of detail into a small frame, so had to make sure my design was accurate and symmetrical from the start.
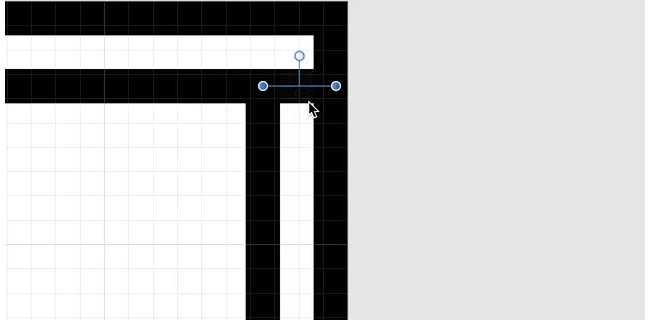
02. Try the snapping feature

One feature I love using is the ability to snap your lines to the grid. This makes precise linework very straightforward and helps streamline and speed up the design process, leaving you time to experiment.
I almost always work in mono-line and aim for utmost precision, as this can make or break a piece of work. You don’t want to let down a great concept with sloppy execution. Affinity Designer easily matches any other software for its precision, with the ability to zoom in over 100 million per cent.
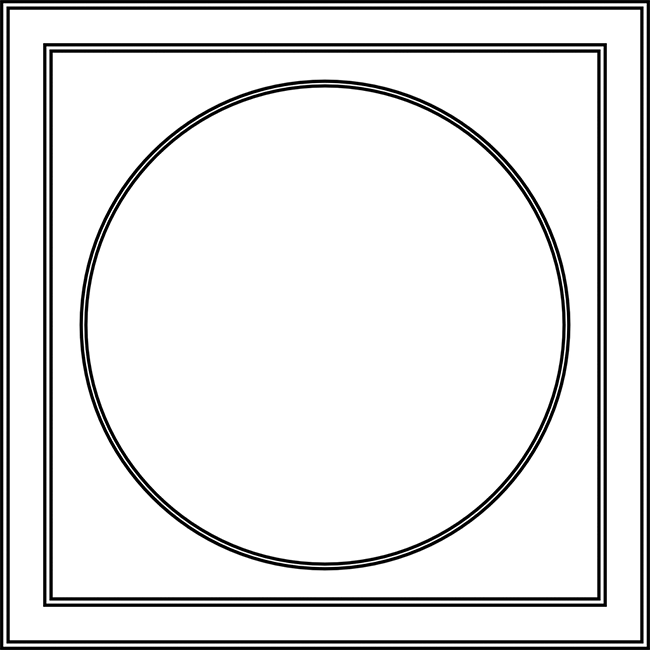
03. Build your basic frame
At this stage you want to build a basic frame that all your detailing will fit inside. This saves a lot of headaches, as you can be sure all the work you’re doing is in the right place. I usually go for a square or circle and build into it, adding smaller frames and filling the inners with hatching.
04. Add hatching in the gaps
Creating hatching in Affinity Designer is easy. Create a vertical or diagonal line using the Pen tool and simply hold cmd/ctrl and drag in the direction you wish the hatching to run in, then press cmd/ctrl+J repeatedly to duplicate the line as many times as you need.
You don’t just have to use hatching, you could use a small repeated pattern – just be careful you don’t make your design too complicated, or it may be lost in print.
05. Add detail with the Rotate and Duplicate tools
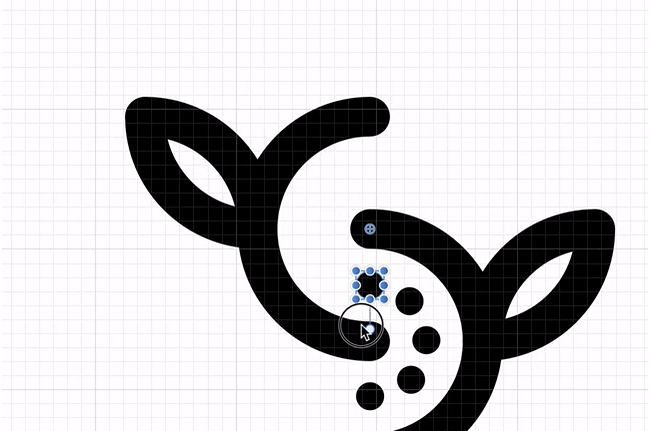
In my design I wanted to repeat the dots that appear around my vine motif. To do this, firstly make a circle to acts as a base to rotate around (this will later become part of my vine motif). Create a smaller circle above the base circle. Then with the smaller circle selected, use the Show Rotation Center tool from the top bar, and drag the crosshair symbol into the centre of the base circle.
Holding down shift+cmd, drag the smaller circle around the circumference of the base circle until you reach the angle of your choosing, and release. From there press cmd+J to duplicate the smaller circle around the base. It takes a little playing about to get things spot on and a little time to ensure your pattern is evenly spaced around the base.
06. Use the Symbol tool for pattern work
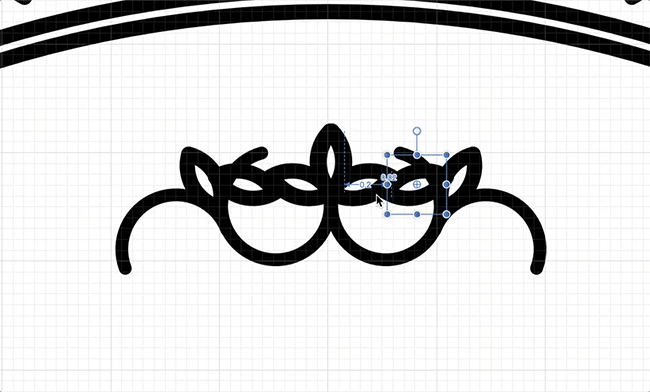
The Symbol tool in Affinity Designer is a genius feature that speeds my workflow up massively. With it, I’m able to create an object and mirror it in real-time. I can repeat the design as many times as I wish, anywhere on my artboard.
This enables me to create patterns incredibly quickly, and see whether a concept will work as I’m designing it. This feature makes me work in a completely different way – I’ve come up with visuals I would have had difficulty dreaming up without it.
07. Prepare your work for print
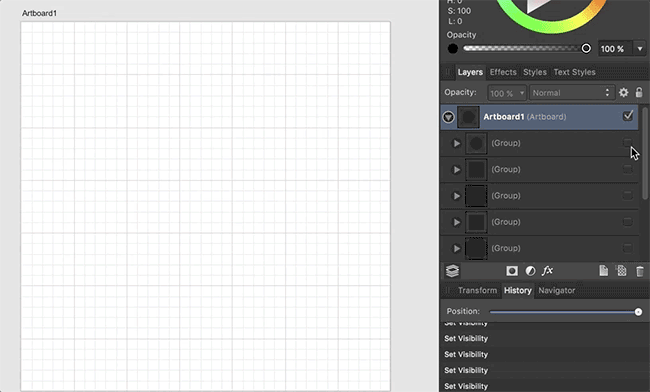
When preparing this illustration for print, I had made sure to group up specific segments of the piece (as pictured in the GIF above). This helped me hugely when it came to export this piece, as there were a whopping 4,578 separate objects.
From there I was able to easily expand the strokes and use the Pathfinder tool to join up all my overlapping objects. The aim is to end up with as few objects as possible, in order to minimise the chance of any details or information being lost in the printing process.

Get 40% off the official Affinity Designer Workbook
Affinity Designer, winner of an Apple Design Award, is available now for Mac and Windows, with an iPad version in advanced development. You can learn how to do similar projects to this with the help of the official Affinity Designer Workbook, which is currently available with 40 per cent off. It’s full of information ranging from core skills, design tips and tricks, to advanced techniques. The book takes you through the whole journey using enjoyable, easy to follow projects. Buy your copy now.

