This is still the best photography cheat sheet we’ve found online
It’s a handy shortcut to improving your photos.
Sign up to Creative Bloq's daily newsletter, which brings you the latest news and inspiration from the worlds of art, design and technology.
You are now subscribed
Your newsletter sign-up was successful
Want to add more newsletters?

Five times a week
CreativeBloq
Sign up to Creative Bloq's daily newsletter, which brings you the latest news and inspiration from the worlds of art, design and technology.

Once a week
By Design
Sign up to Creative Bloq's daily newsletter, which brings you the latest news and inspiration from the worlds of art, design and technology.

Once a week
State of the Art
Sign up to Creative Bloq's daily newsletter, which brings you the latest news and inspiration from the worlds of art, design and technology.

Seasonal (around events)
Brand Impact Awards
Sign up to Creative Bloq's daily newsletter, which brings you the latest news and inspiration from the worlds of art, design and technology.
It’s often said that everyone’s a photographer these days. As consumer cameras get more affordable and smartphones get more sophisticated, we’re all addicted to snapping shots of our daily lives.
That’s why modern smartphones sport beefy triple-camera arrays, with the new iPhone 13 Pro boasting one of the best yet (check out our iPhone 13 Pro review for more). With such powerful photographic tools at our fingertips, it makes sense to learn how to use them. And while auto modes will do a decent job of capturing a scene in front of you, to handle all shooting situations and make something special, you need to switch to manual and learn how to use a camera’s settings. And that goes for a smartphone, too!
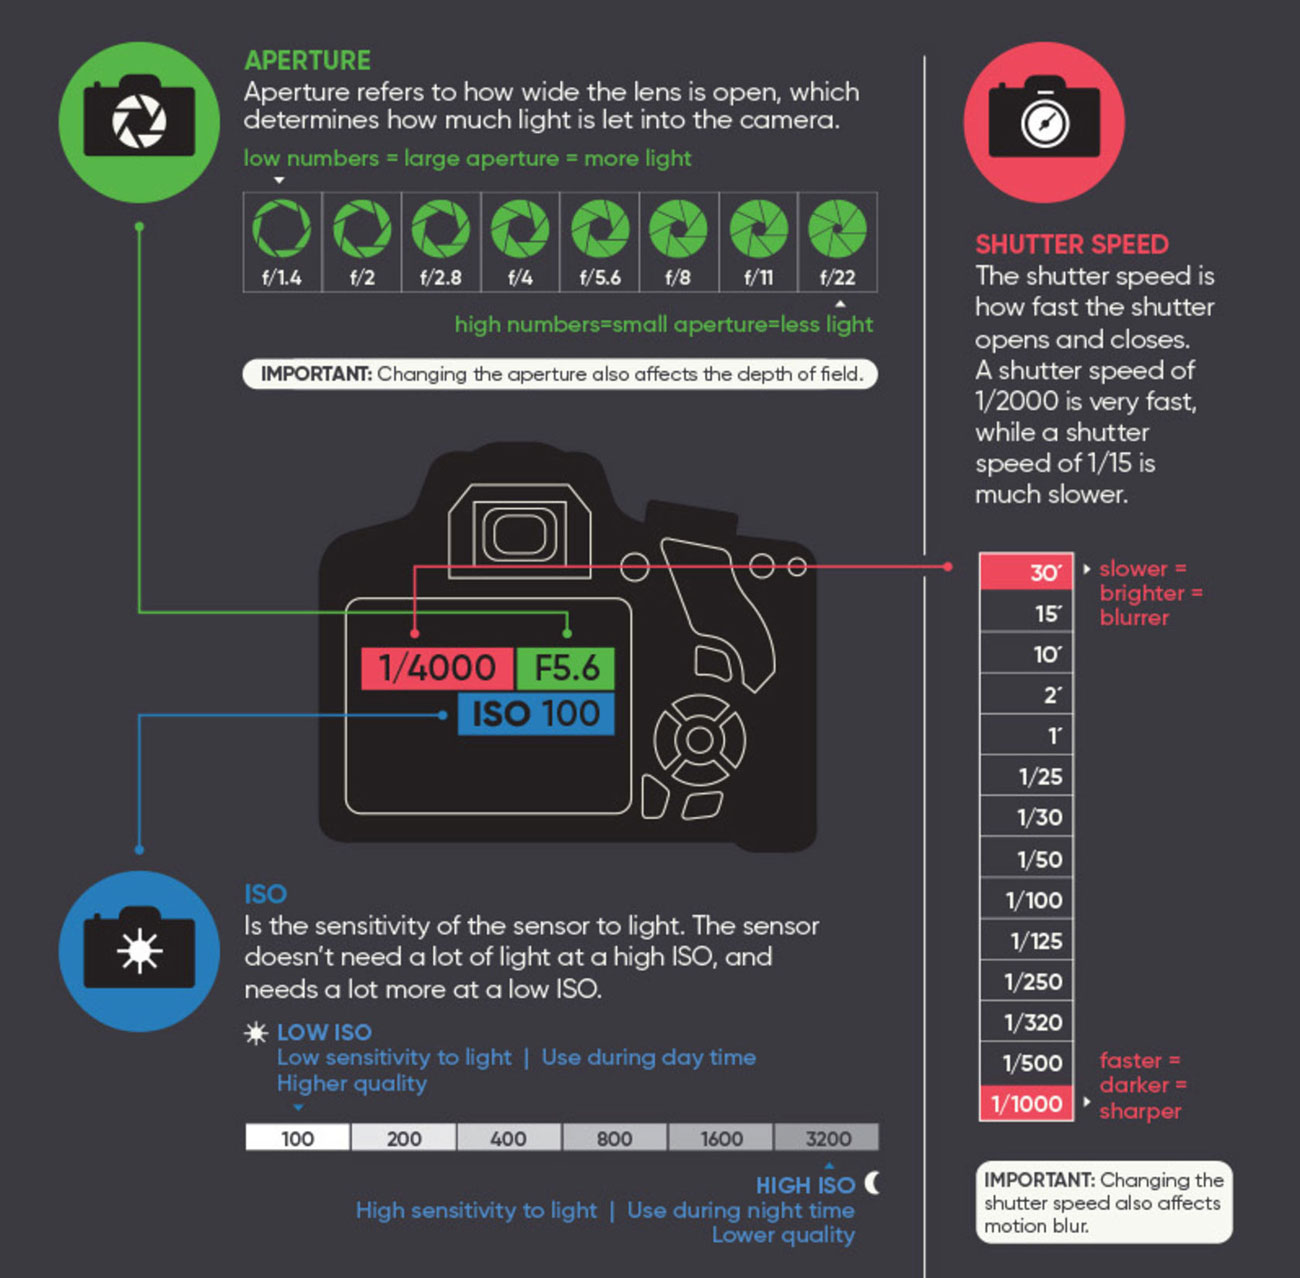
That’s where this excellent infographic from Skylum comes in. We first noticed this handy guide earlier this year, but it’s still the best photographic cheat sheet we’ve found online, as a clear, visual explanation of the exposure triangle.
Every time you take a photo, you’re balancing three things. First, the shutter speed, which is literally how quickly the shutter opens and closes, usually expressed in fractions of a second.
Second, the aperture, which is how wide open the lens is, and therefore how much light it’s letting in. It’s expressed as an F-number, formatted like this: f/2.8. The lower the number, the wider the aperture.
Third, the ISO, which is the sensitivity of the sensor. A higher ISO value means the sensor is more sensitive to light, but this also causes more image noise, which is digital grain that makes photos look muddy. ISO is expressed as a numerical value, which doubles for every stop of exposure. ISO 100 is generally used in daylight, while ISO 800 and higher is generally necessary for night shooting.
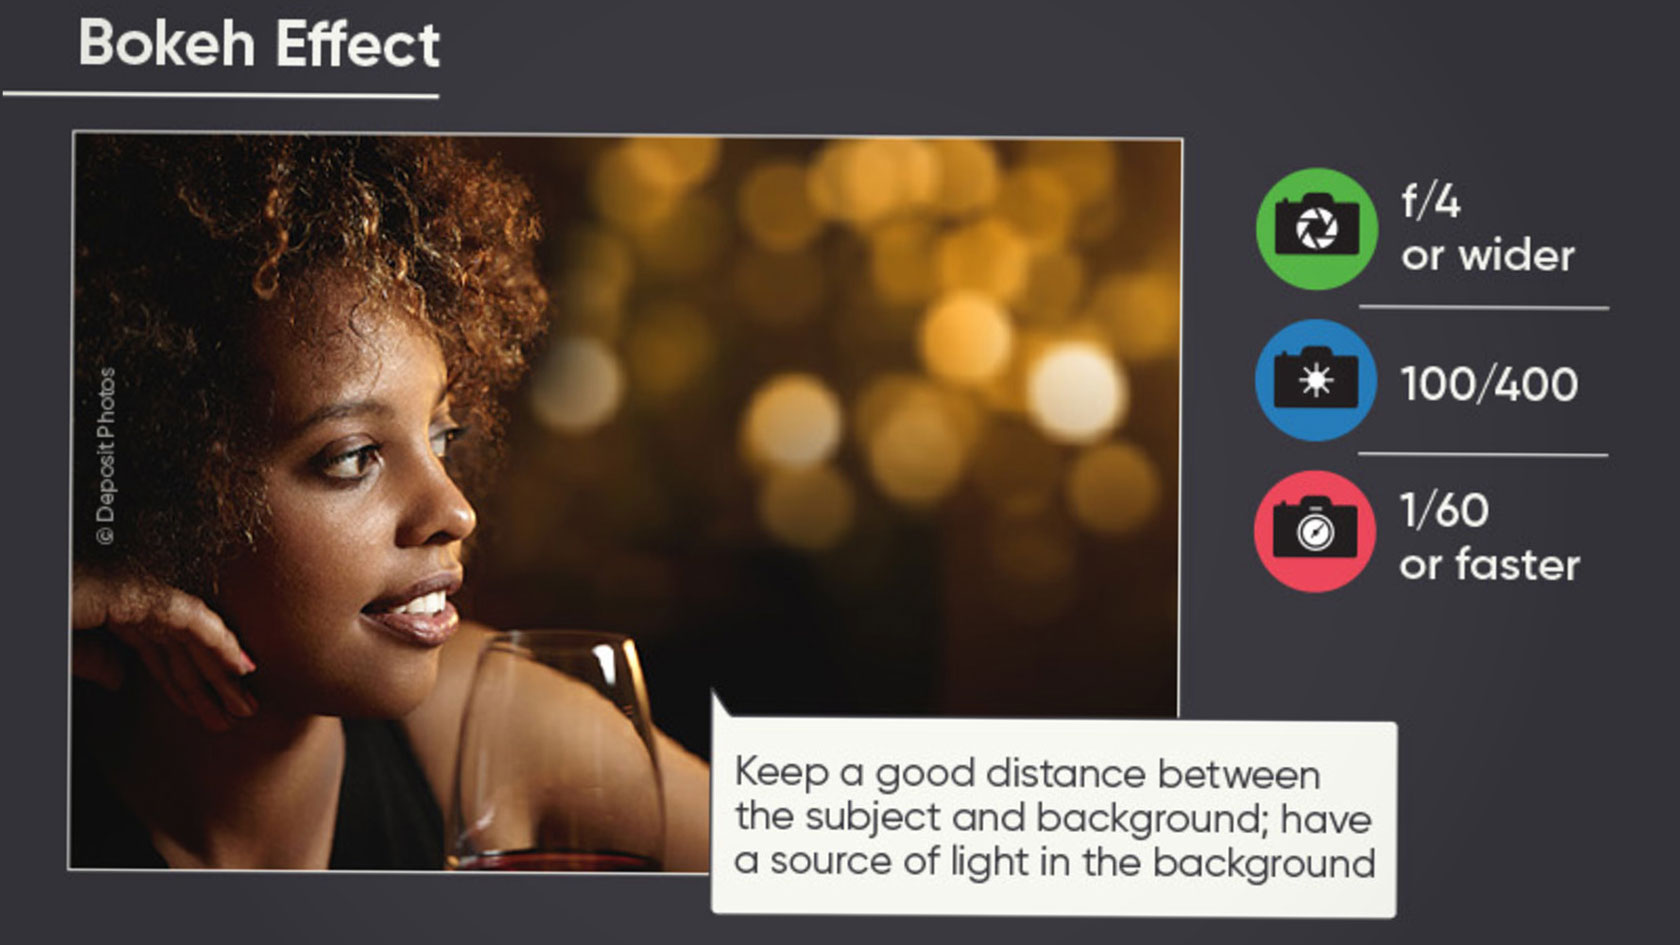
So if you want an ethereal bokeh effect, you'll need a wide aperture of at least f/4 to create a narrow depth of field, a fairly low ISO and a shutter speed of at least 1/60; Skylum also suggest keeping a good distance between the subject and the background, and having a light source in the background to create that blurred look.
Sign up to Creative Bloq's daily newsletter, which brings you the latest news and inspiration from the worlds of art, design and technology.
On the other hand, for a sharp action shot, you'll need a narrower aperture between f/11 and f/16, an ISO between 100 and 400, and a really fast shutter speed of about 1/2000. Remember, though, that between the aperture and shutter speed there's a limited amount of light getting to the sensor, so if your first shots turn out a little dark then you'll need to turn the ISO up to compensate.
The trick is that all these values also affect other aspects of an image as well as exposure, and if you adjust one for aesthetic reasons, you need to adjust the others to compensate. Fast shutter speeds like 1/500sec or 1/2000sec allow you to freeze fast action, but let in less light, so using one will mean you need to open the aperture wider and/or bump up the ISO.
Similarly, aperture controls depth of field, which essentially refers to how much of the image is in focus (on a horizontal plane between subject and camera). For example, portrait images where the person’s face is sharp and the background is artfully blurred have a shallow depth of field – which means the aperture has been opened very wide, probably at least f/2.8, and if they have an expensive lens, maybe even wider to f/1.8 or f/1.4. This will let in a lot of light, so the photographer will want to use a low ISO and/or a fast shutter speed to compensate.
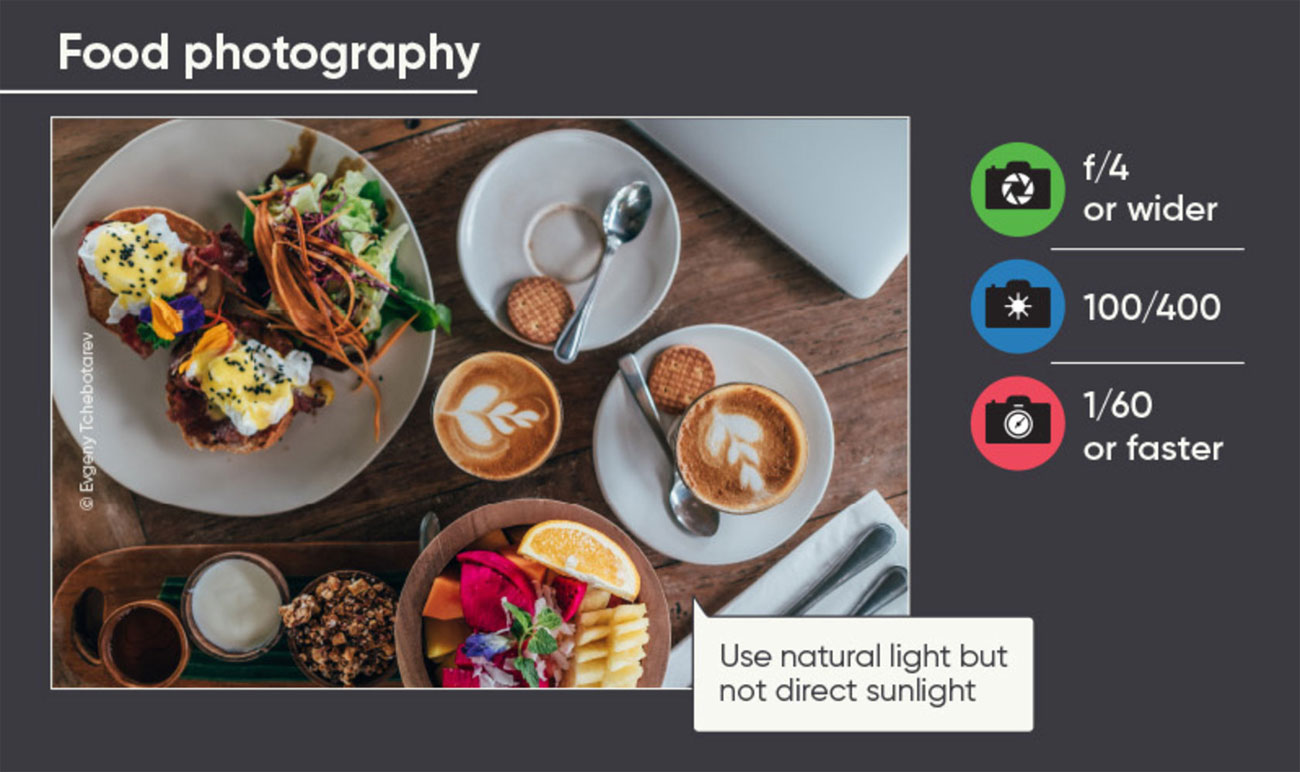
Skylum’s infographic provides a useful visual way to remember all this, and provides a few hints for different situations. Once you master the points on the exposure triangle, you can stop thinking of them as rules you have to follow and start thinking of them as tools in your toolkit, all of which can be used creatively with different effects.
Of course, these days, shooting the shot is only half the process – a lot of photography happens in the edit. Skylum’s Luminar AI is one of the fastest editing programs thanks to its machine learning tools – check out the latest deals on the software below:
Related articles:
- The best smartphone lenses: Best phone lens for iPhone and Android
- The best point-and-shoot cameras
- The best ring lights for photos, Zoom, videos, YouTube and more
Jim McCauley is a writer, performer and cat-wrangler who started writing professionally way back in 1995 on PC Format magazine, and has been covering technology-related subjects ever since, whether it's hardware, software or videogames. A chance call in 2005 led to Jim taking charge of Computer Arts' website and developing an interest in the world of graphic design, and eventually led to a move over to the freshly-launched Creative Bloq in 2012. Jim now works as a freelance writer for sites including Creative Bloq, T3 and PetsRadar, specialising in design, technology, wellness and cats, while doing the occasional pantomime and street performance in Bath and designing posters for a local drama group on the side.
