How to illustrate a YA book cover that readers will pick up
Learn to create captivating fantasy artwork that draws in readers.
Sign up to Creative Bloq's daily newsletter, which brings you the latest news and inspiration from the worlds of art, design and technology.
You are now subscribed
Your newsletter sign-up was successful
Want to add more newsletters?
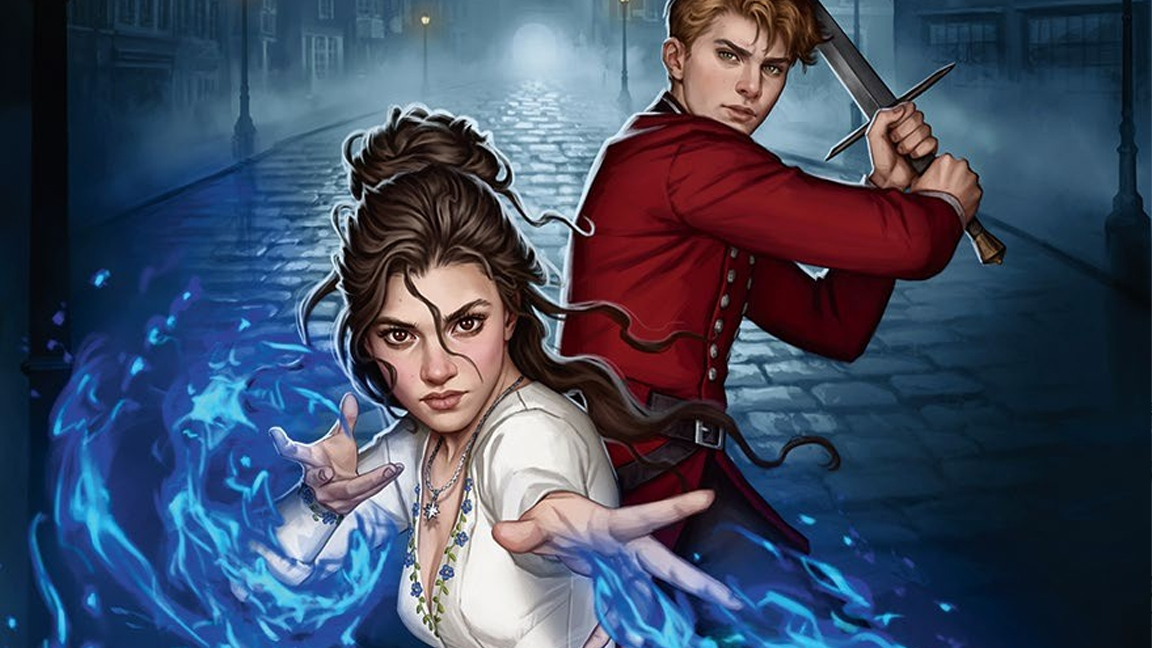
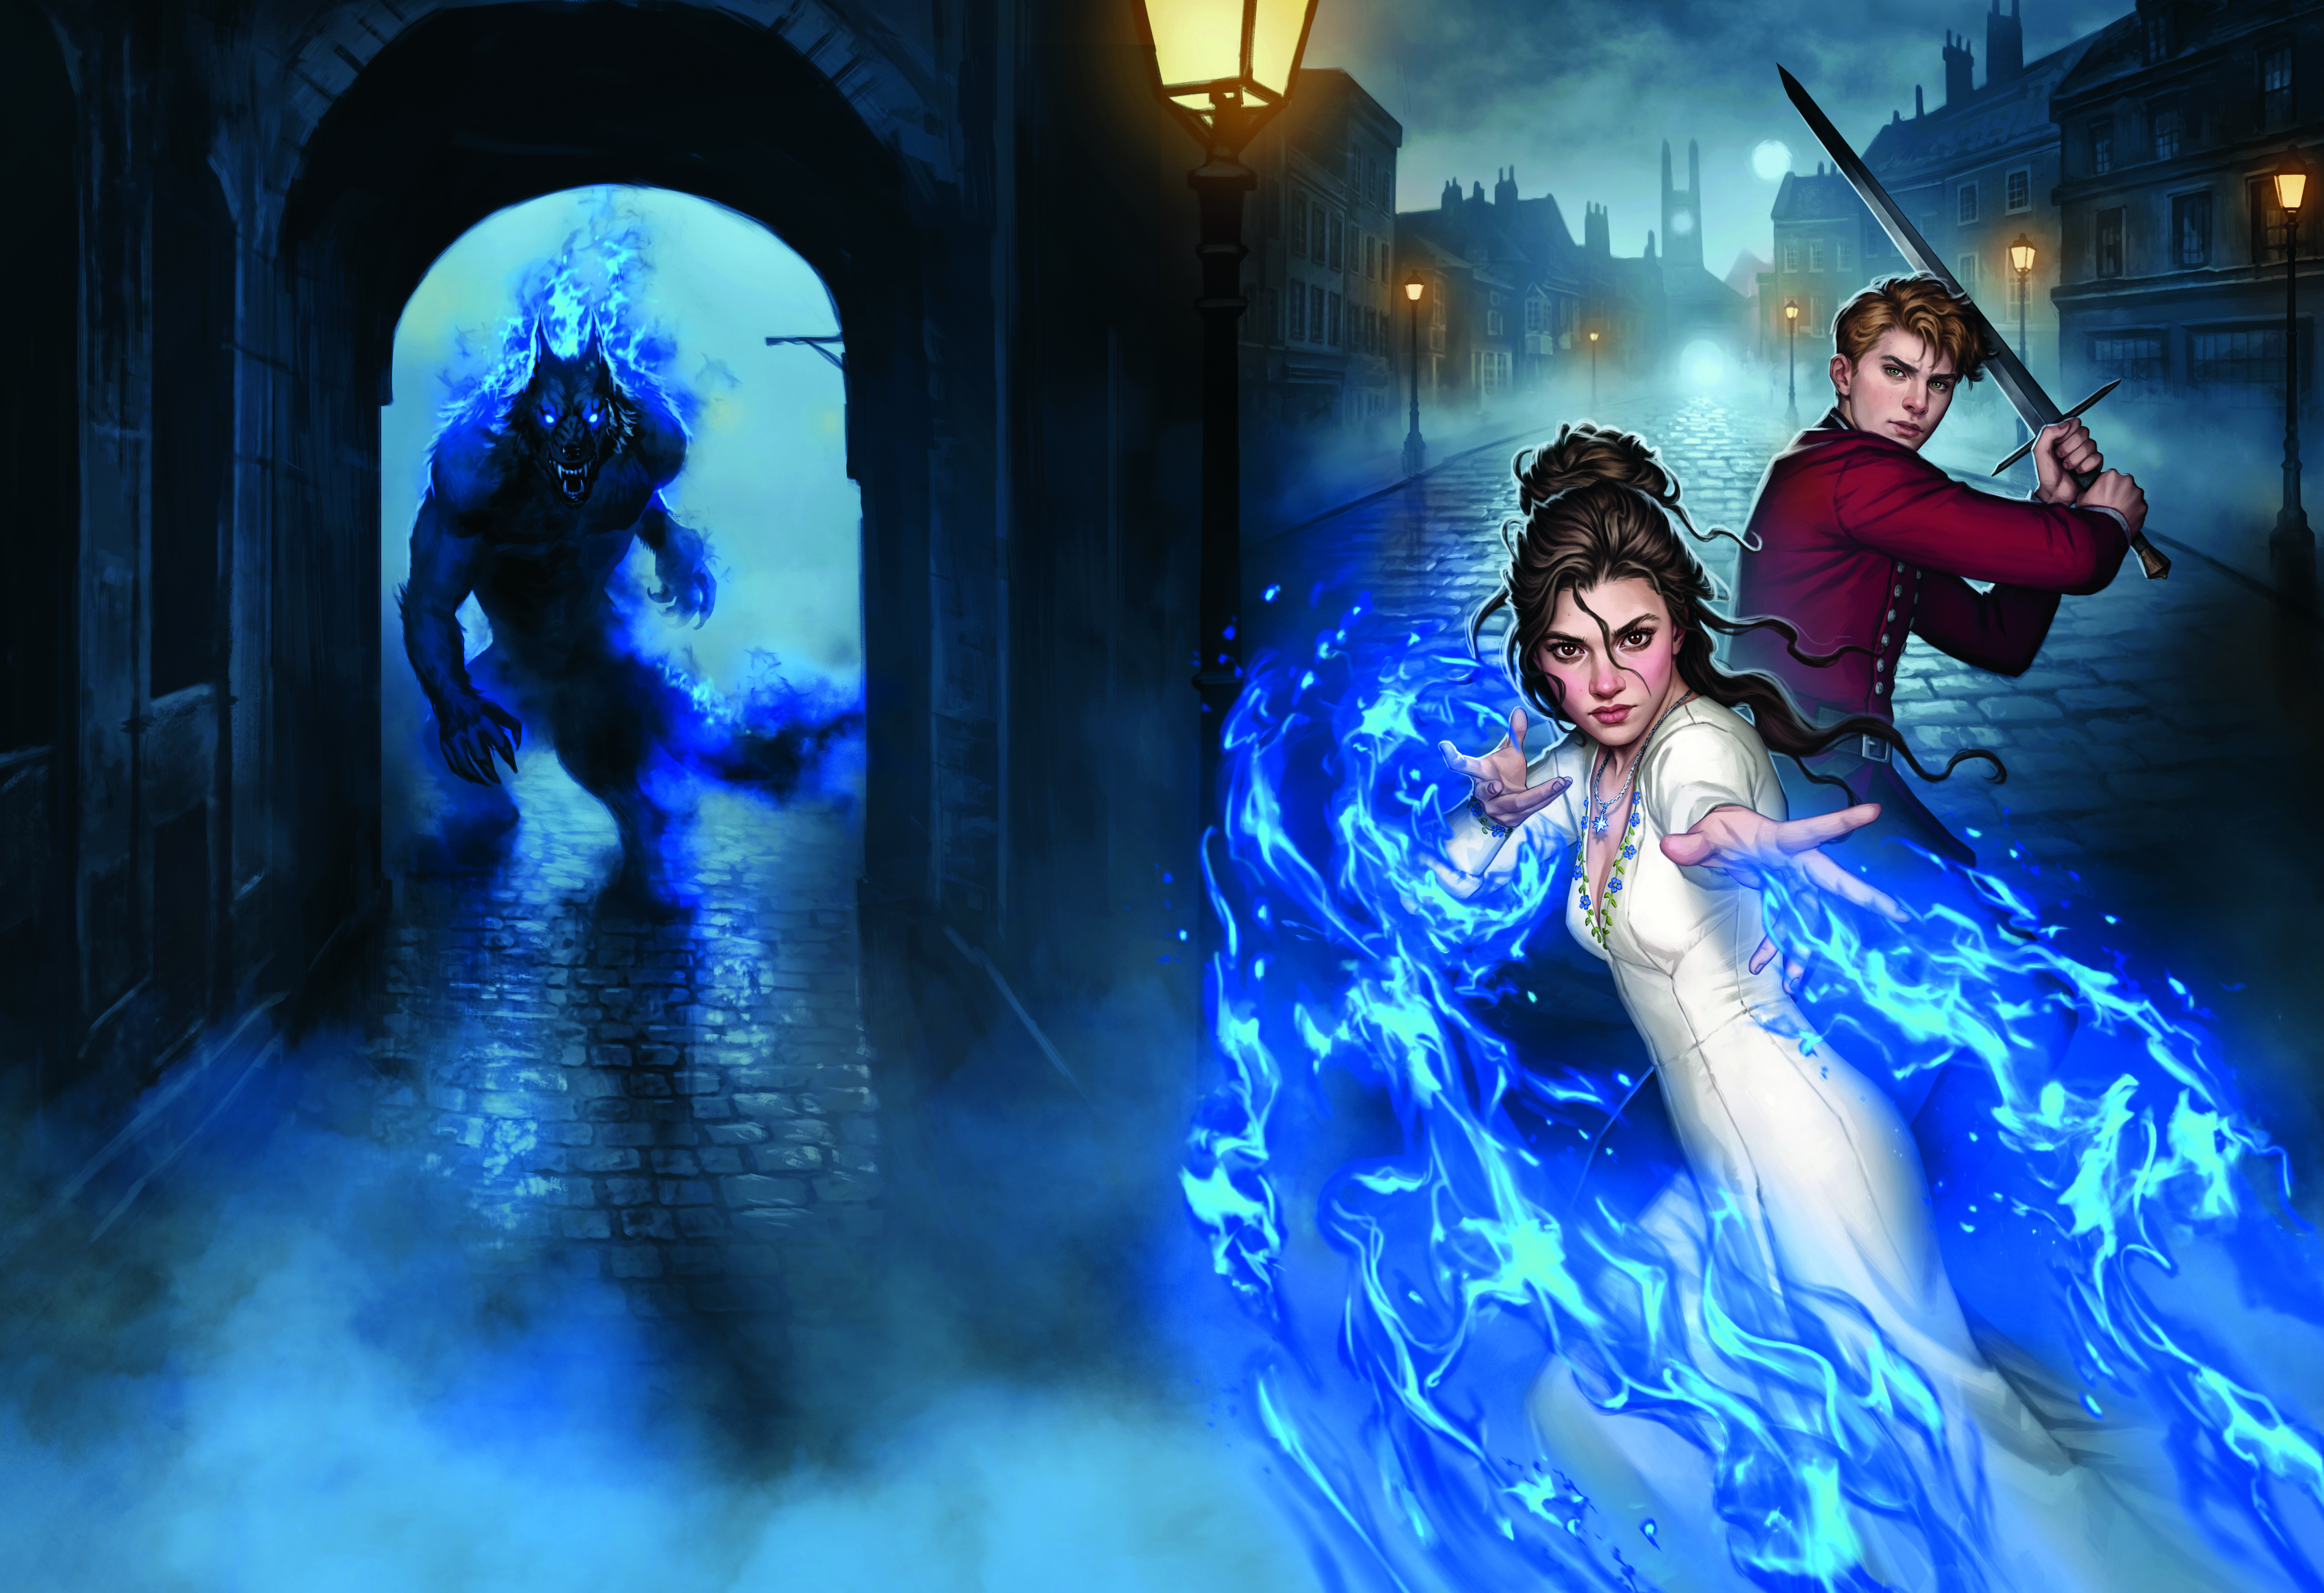
This is the cover art for Laura E. Weymouth’s fantasy novel Steel and Spellfire. It’s set in Valora, a city inspired by Victorian-era London. The main protagonists are Pandora Smalls, who has learned to hone and wield her magic in a way the world has never seen, and Kit Beacon, a promising young member of the Royal Guard. Pandora’s magic – called Spellfire – takes the form of blue flames. In the scene, we see Pandora and Kit facing up against a monster in a dark alley.
For this tutorial, I’ll guide you through the process of creating a book cover illustration just like this. We’ll explore drawing the rough concept, how to convey your idea at an early stage, and creating dynamic compositions, all the way through to finalising the details.
To follow along, you’ll need a solid understanding of anatomy – enough to be able to draw characters in a variety of poses and angles. Also handy is a grasp of basic composition fundamentals such as balance and focus, plus standard lighting and colour concepts.
Article continues belowI used Photoshop for this piece, but any of the best digital art software you’re comfortable with should work well, as we’ll be working with fairly standard tools. Having one of the best drawing tablets makes a real difference too, allowing you to take full advantage of pen pressure and brush control. If you’re new to Photoshop or want to refine your skills, I’d also recommend checking out some helpful Photoshop tutorials that cover techniques relevant to this kind of digital painting.
1. Get prepared with research and a mood board
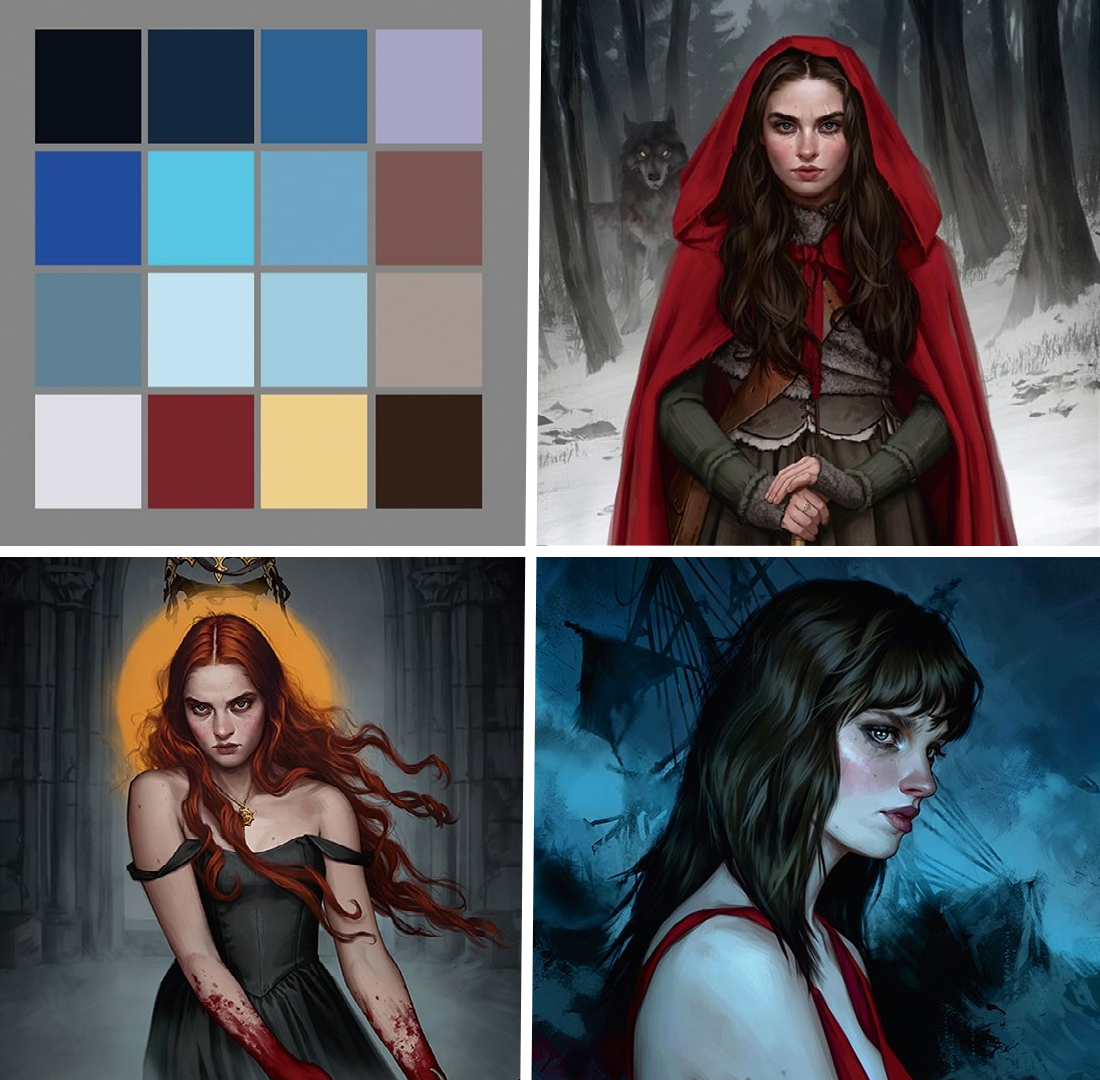
When working with a client, we’re given a brief with the basic concept for the cover. Having that, the first thing to do is get some research in. Look for images that work with the idea you have in mind, serve as references, or provide inspiration. When you’ve got a collection ready, create a mood board and a colour palette. The client might also show examples from your portfolio that they like.
2. Working on the initial sketch
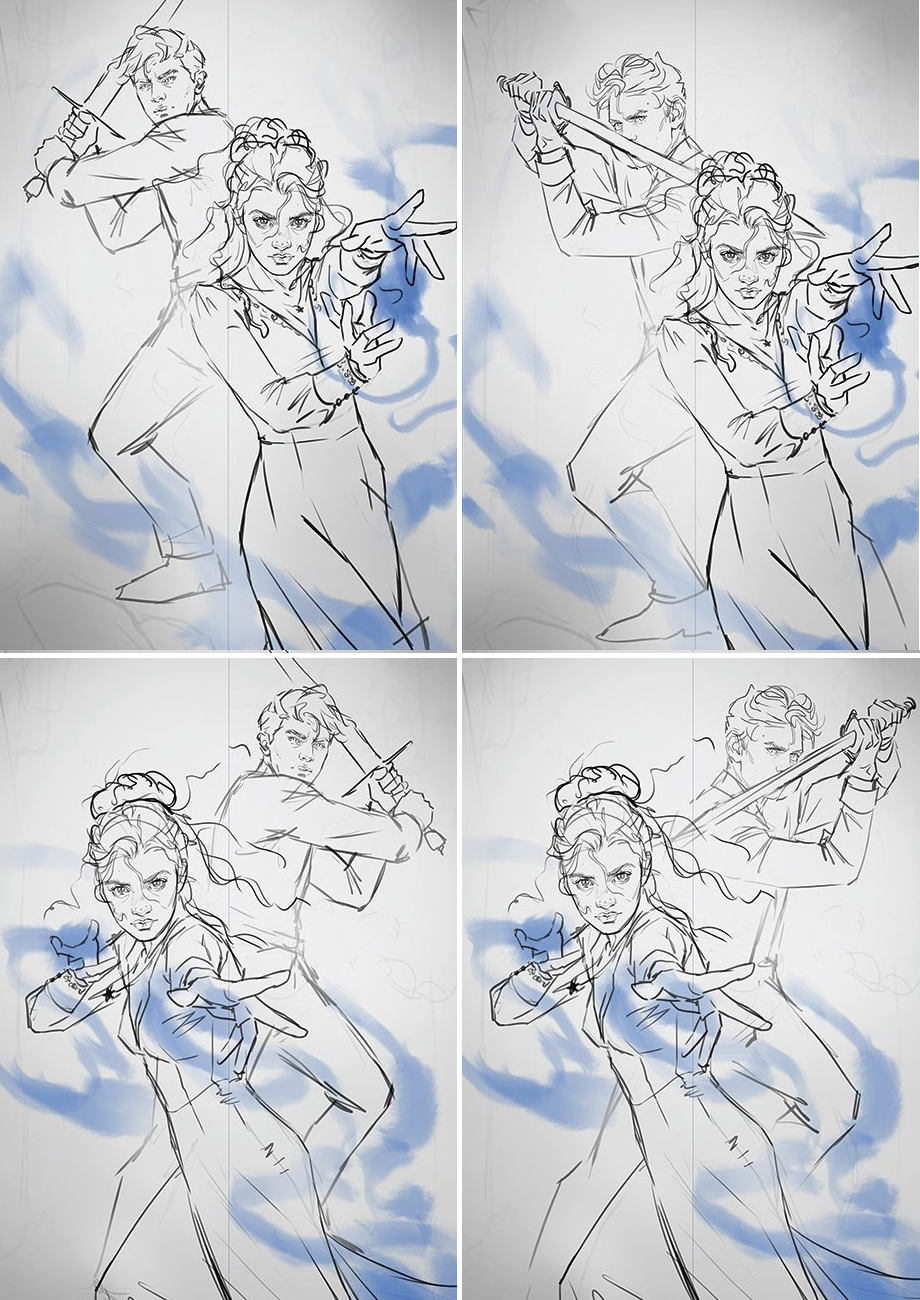
It’s time to work on the rough sketch. This can look messy, but don’t worry! We want to create something dynamic, so the characters’ poses require a feeling of movement. The idea is to try to capture a moment where the character is in motion rather than static. You can use diagonal lines to guide the placement of the characters and seek out balance within the composition, incorporating focal points while leaving other areas bare.
3. Cleaning and adjusting
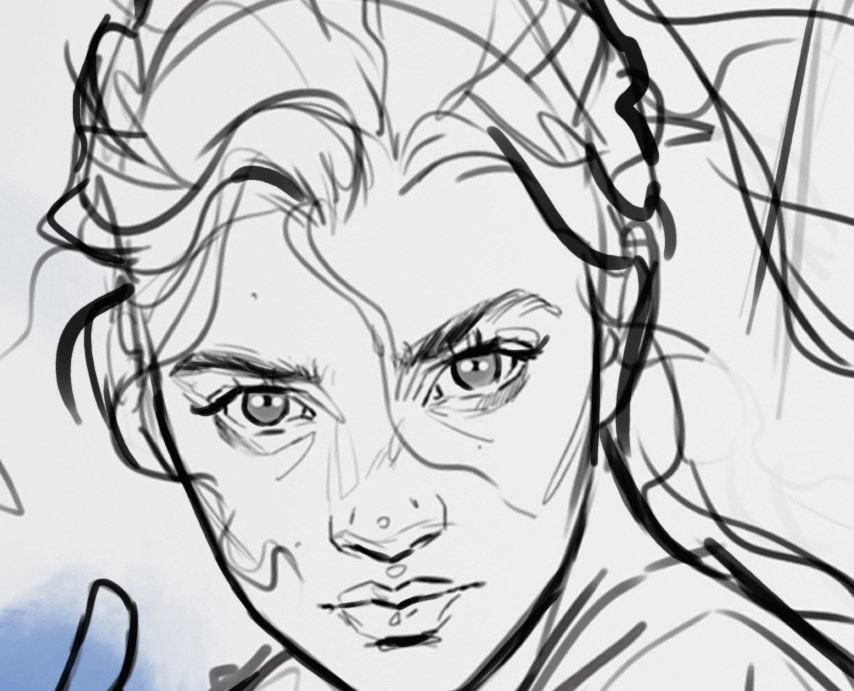
I like experimenting with different line weights, which can help create a visual hierarchy. You can also clean up the line work if it’s too messy; the important thing is to keep it readable for the client. Focus on the characters’ expressions to ensure they convey the right emotion and intensity needed. Having the characters look directly at the viewer creates stronger engagement.
4. Creating the colour mock-up
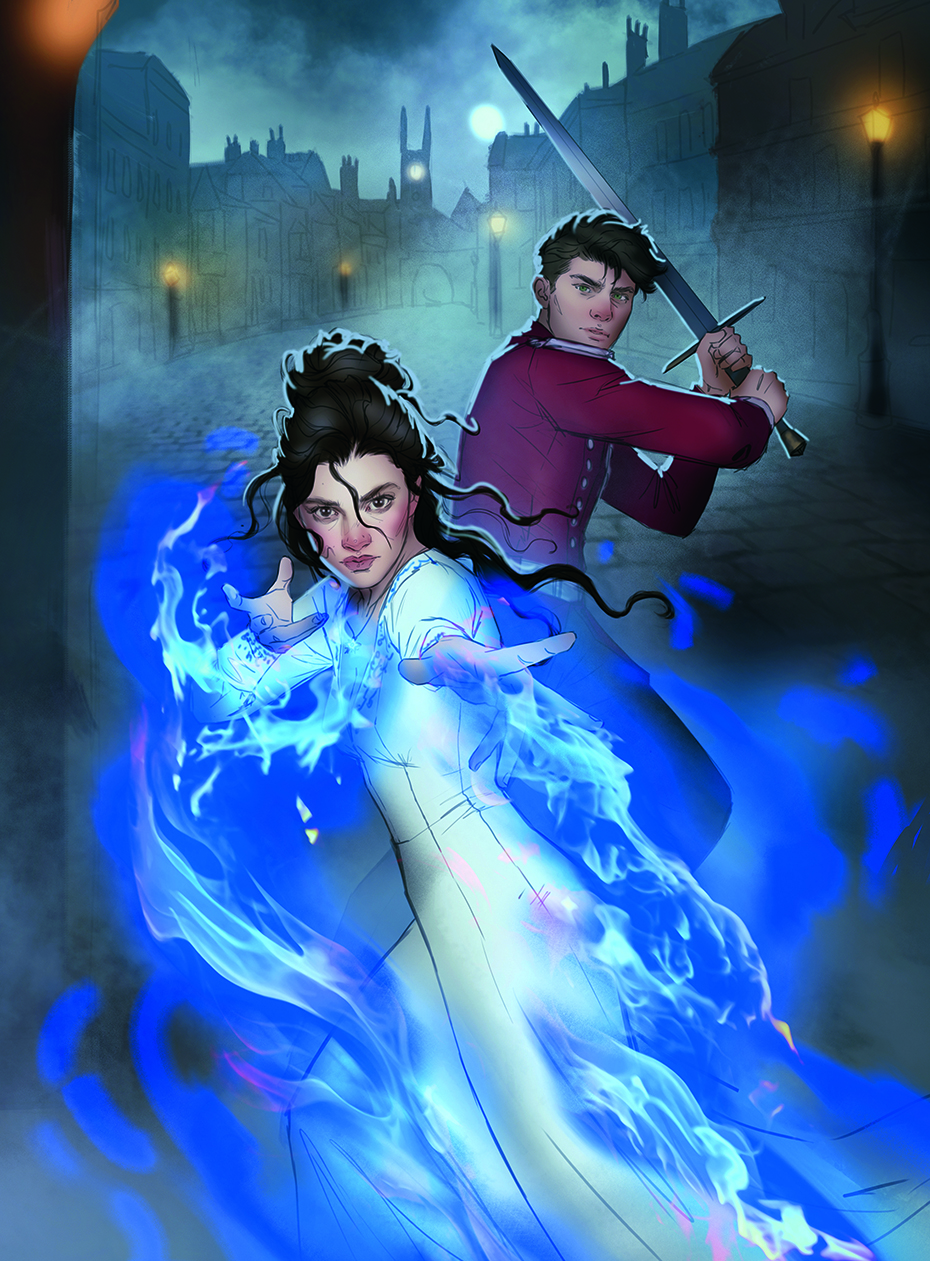
When you have a sketch approved, start work on the colour mock-up. This is where we decide on the colour scheme and lighting. Using a round soft-edged brush, quickly add colour and place light and shadow. We need to set the overall mood for the piece, so the values and colour are crucial. My image will have cool colour temperature and feature darker, ambient lighting.
5. Setting a good base
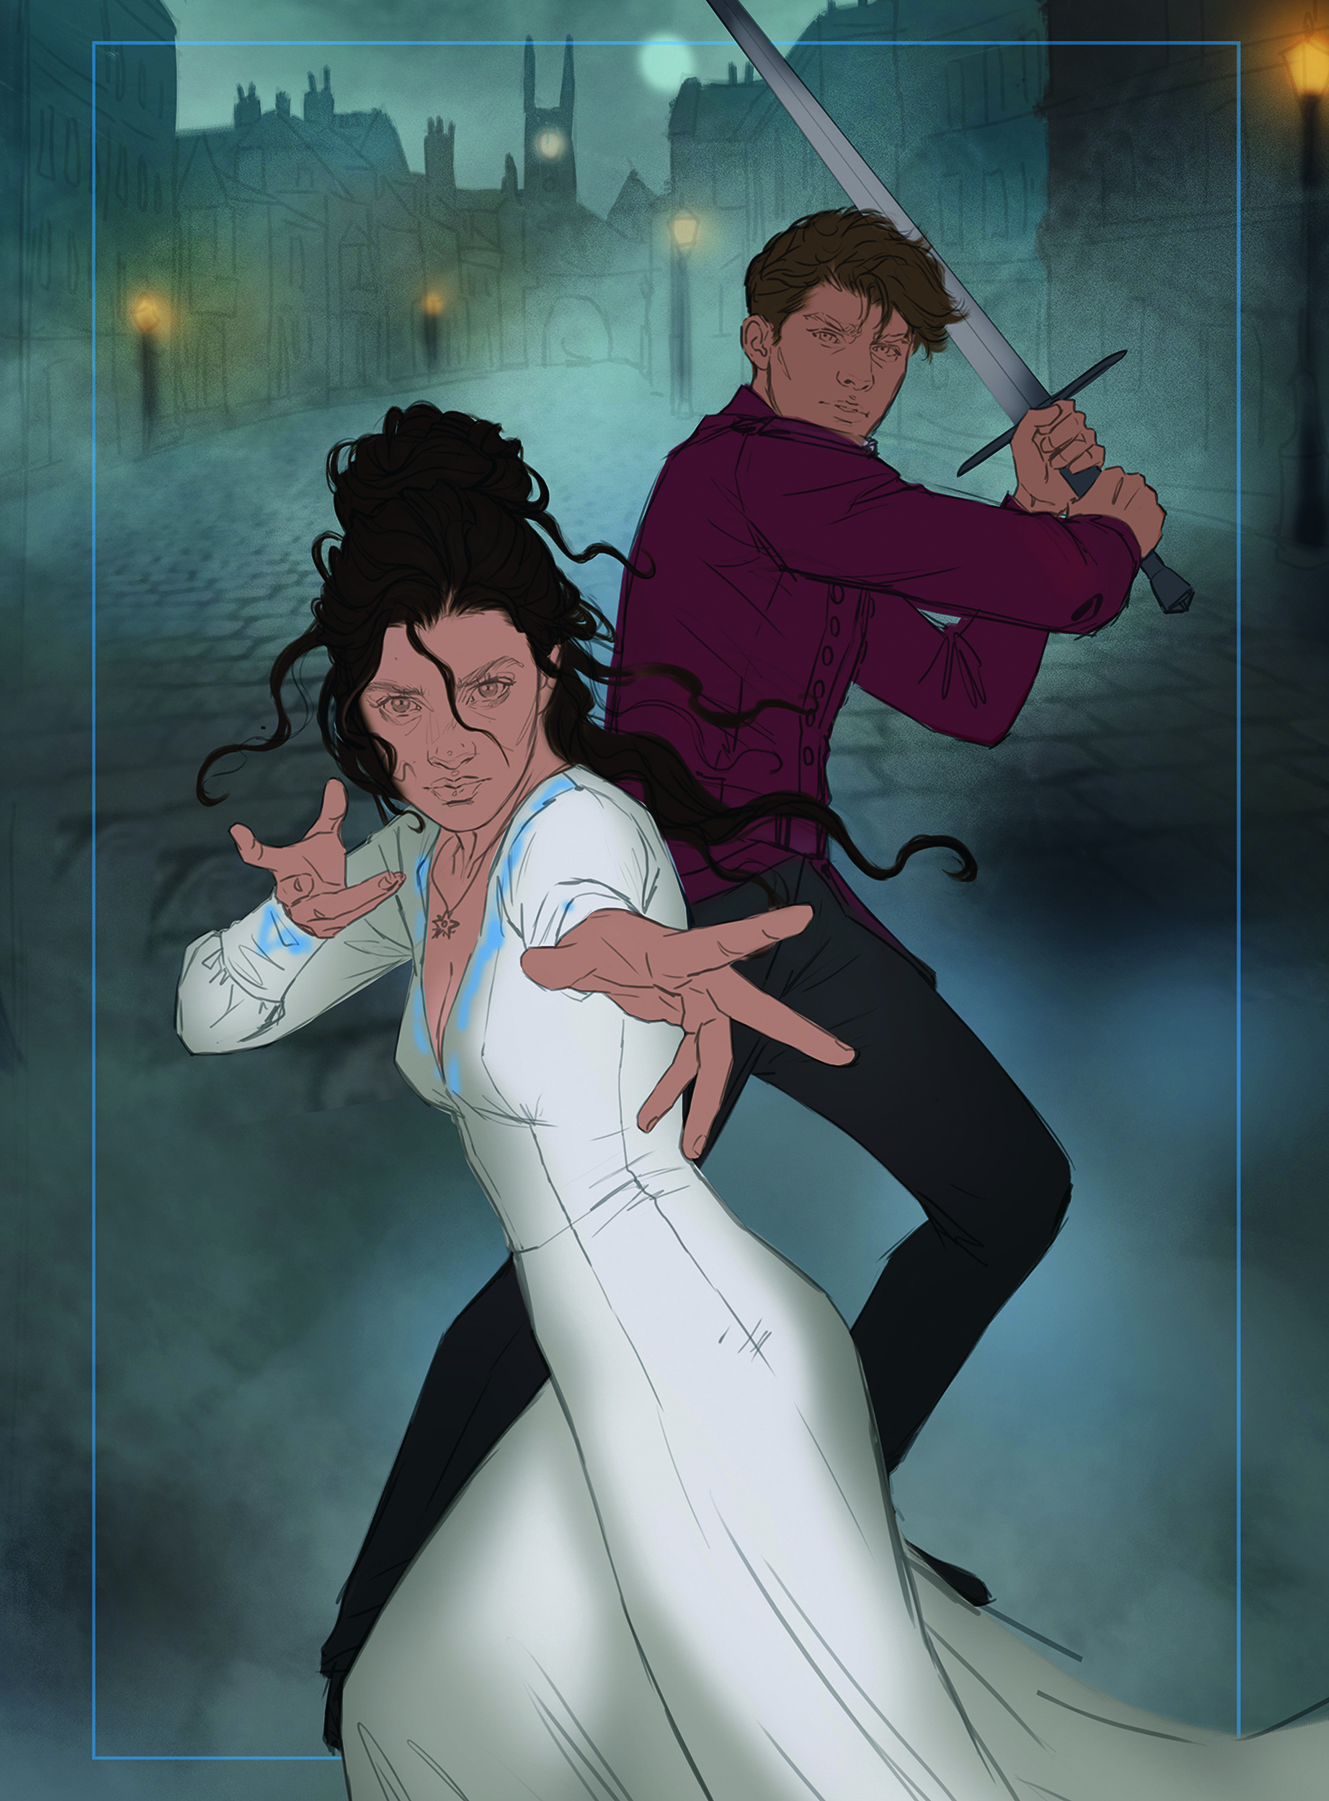
To begin the refined rendering stage, I like to create separate layers for all the different elements of the image, such as skin, hair, clothing, magic, and so on. Fill in the complete area or shape for each of those elements and then lock the layer when you’re done – then we can move on to adding flat colours.
6. Adding colour and light
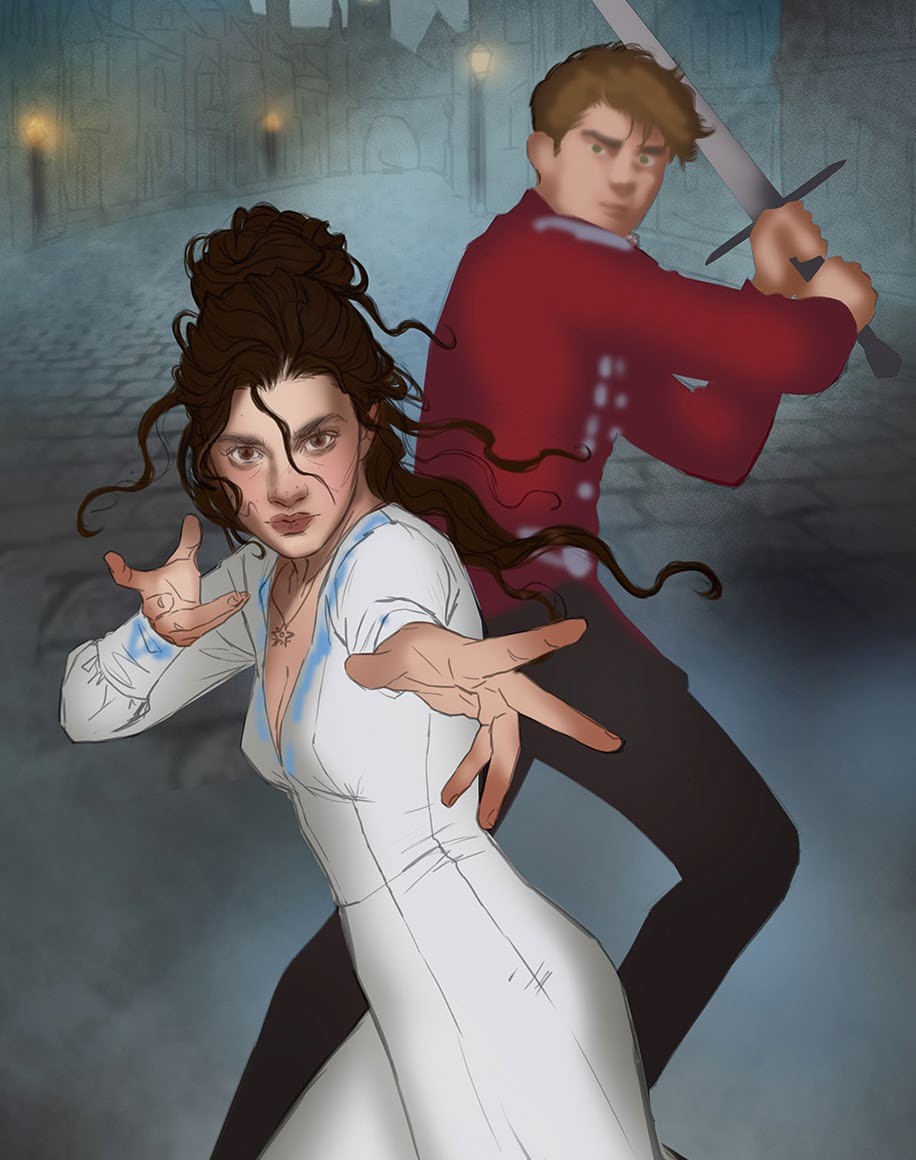
This is a polished version of the colour mock-up. With flat colours on all the separate layers, use a round soft-edged brush to add light and shadow where needed, as well as colour variation. It’s essential to keep in mind the lighting and colour scheme you’ve chosen. Adding some rim lighting to the characters also helps to create more depth. I suggest focusing on the characters to begin with and retaining the background from the mock-up.
7. Begin the rendering
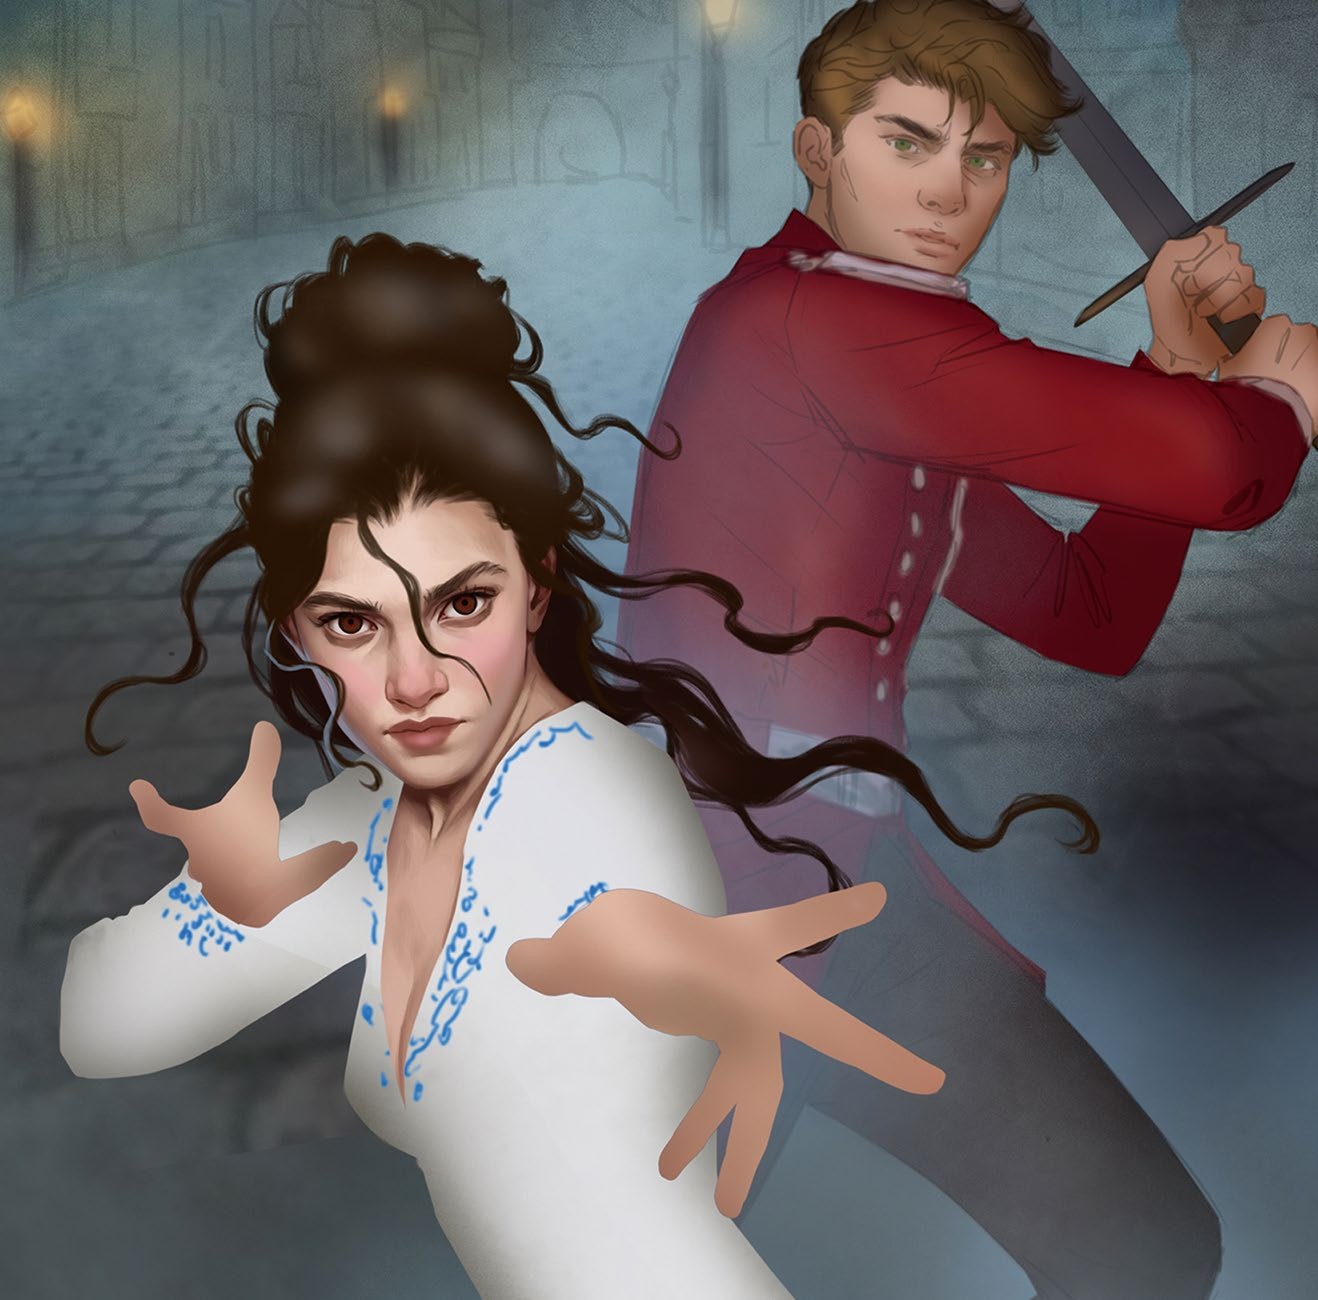
Now is the time for more refined rendering. Paint the characters with a slightly warmer colour palette at first, then adjust the temperature further down the line. Always focus first on the main focal point of the image, in my case, the two characters. Using a round, hard-edged brush, sculpt and define the bigger areas of the face. We’re creating hard edges with our brushstrokes now.
8. Go step-by-step developing the face
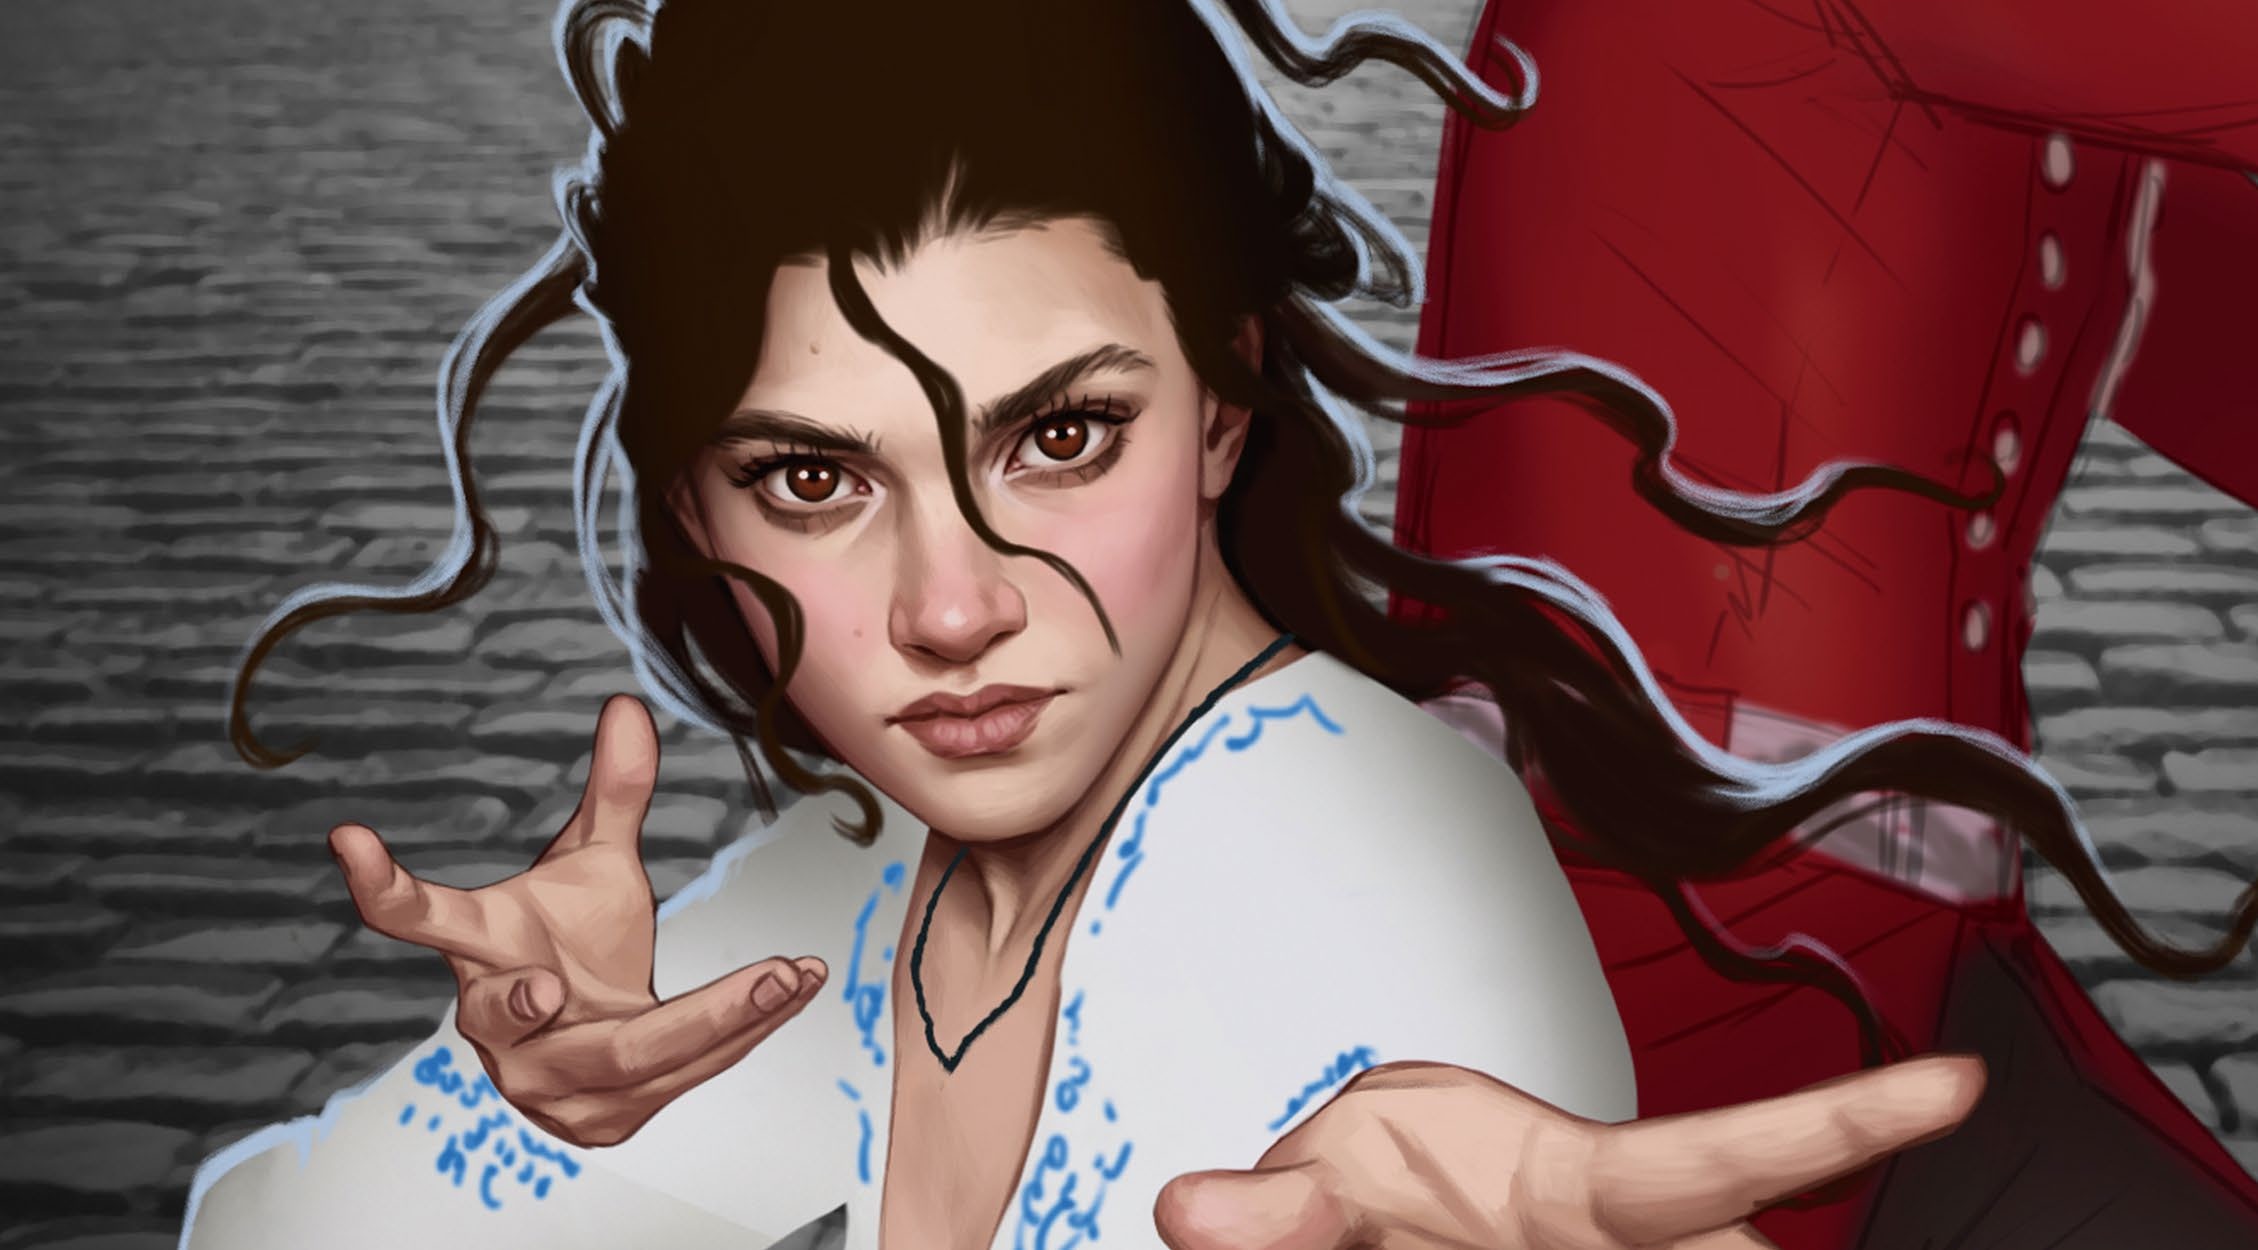
For the face, focus on the bigger volumes first, such as the forehead, cheeks, nose, and jaw. Next, add the finer details to the eyes, lips, and other features. To achieve a nice skin texture, avoid over-blending your brushstrokes. If it’s a realistic look you’re aiming for, you need colour variation – for example, adding red to the cheeks or a cooler colour underneath the eyes.
9. Use two layers for the hair
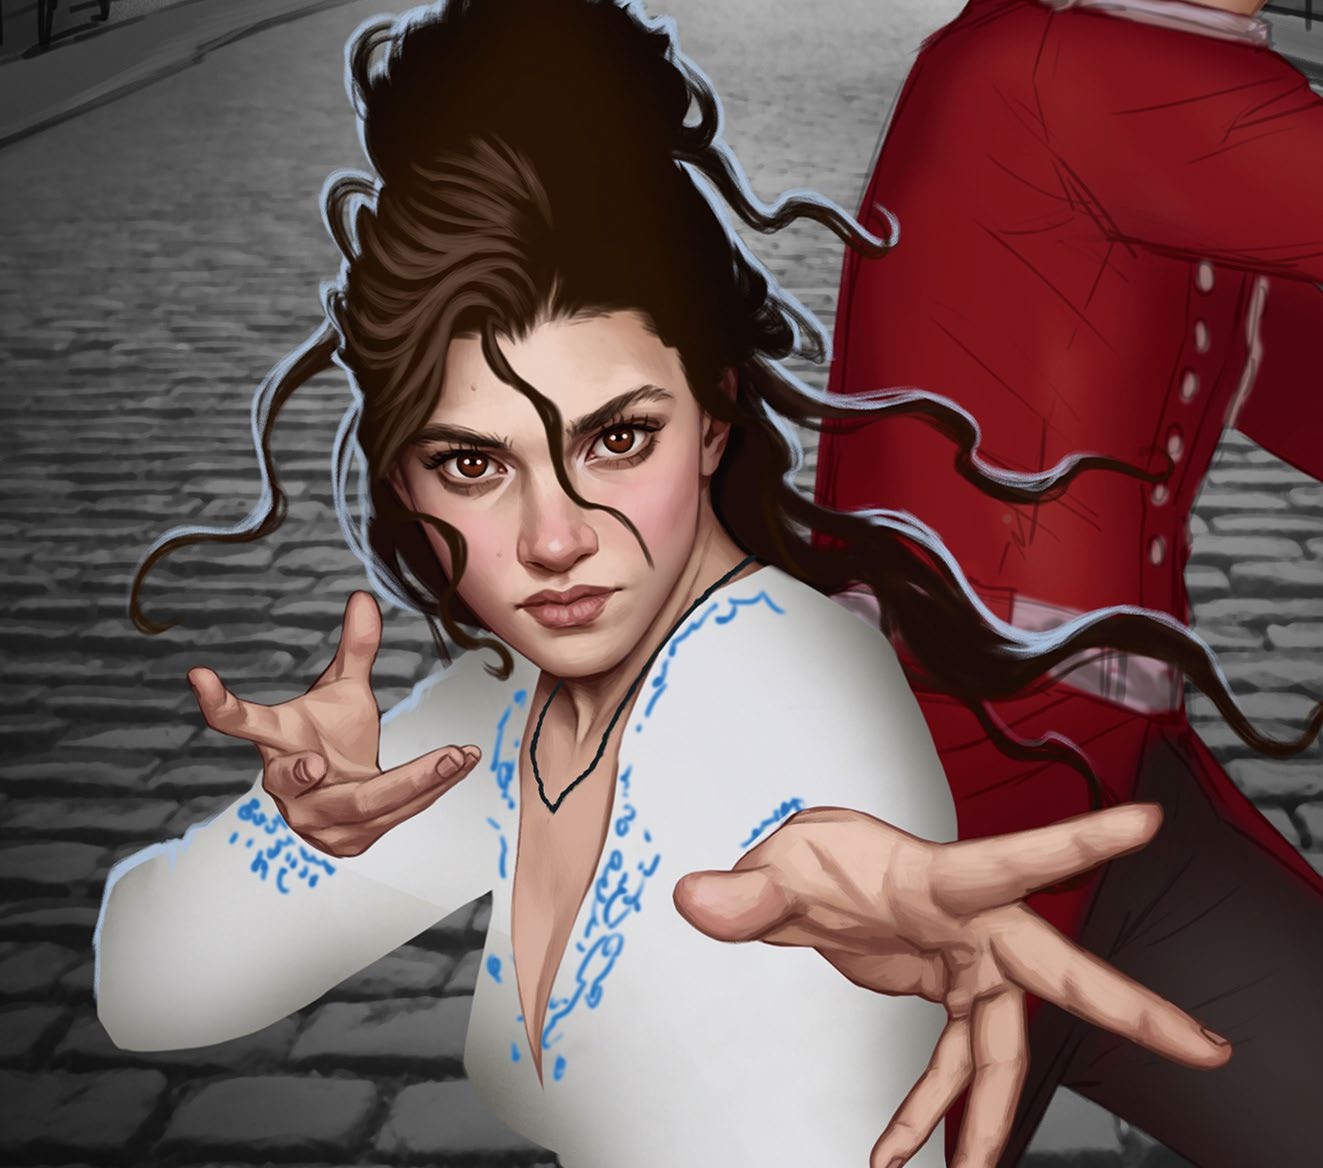
When you do hair, use a base layer that covers the entire shape. Add a new layer on top and start painting the highlights with a lighter colour – my Multitask and Multitask Soft brushes in this issue’s resources are great for this. Lock both hair layers and adjust the value and colour as needed for depth and volume.
10. Designing the clothing
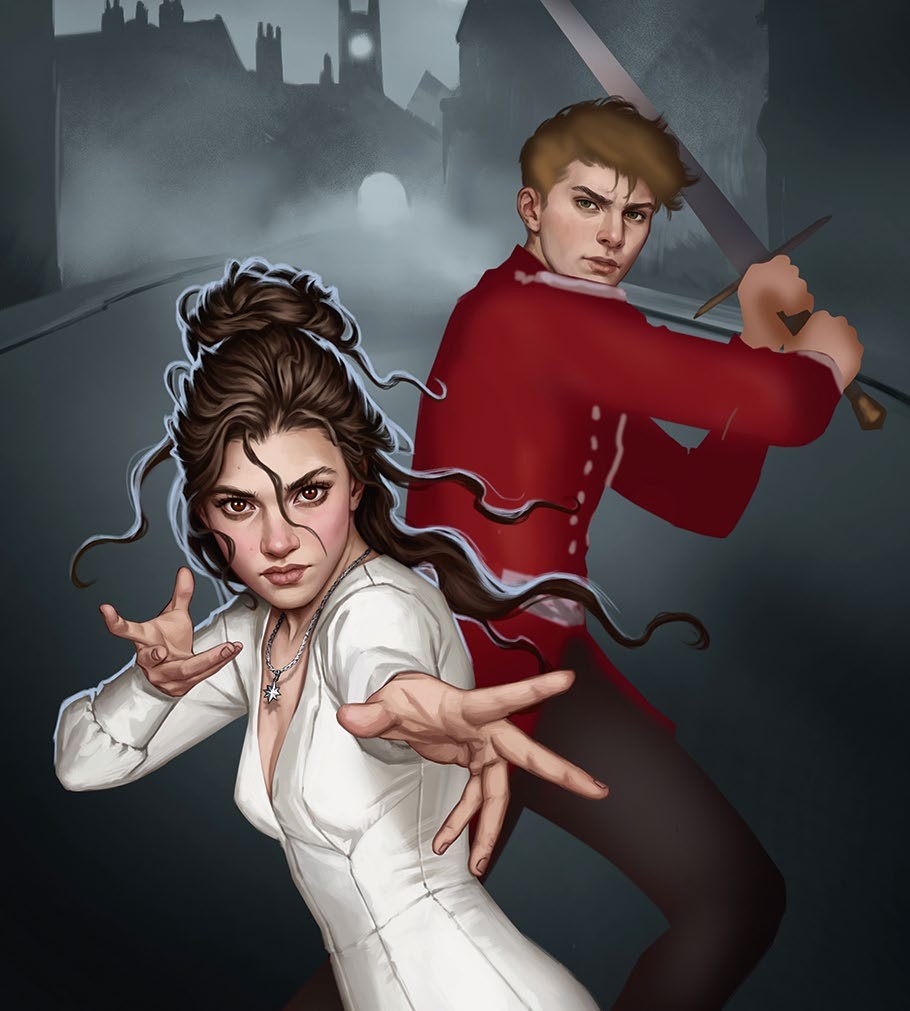
The Multitask brush is also suitable for clothes, featuring a round, hard-edged brush for finer details. It’s essential to know the type of material you’re painting to understand its qualities and how to translate them into a painting. In this case, I was painting a silky ivory dress that’s shiny and flowy, and a guard uniform that’s thick and opaque. Just as with the skin, I prefer to leave brushstrokes visible.
11. Fixing any mistakes
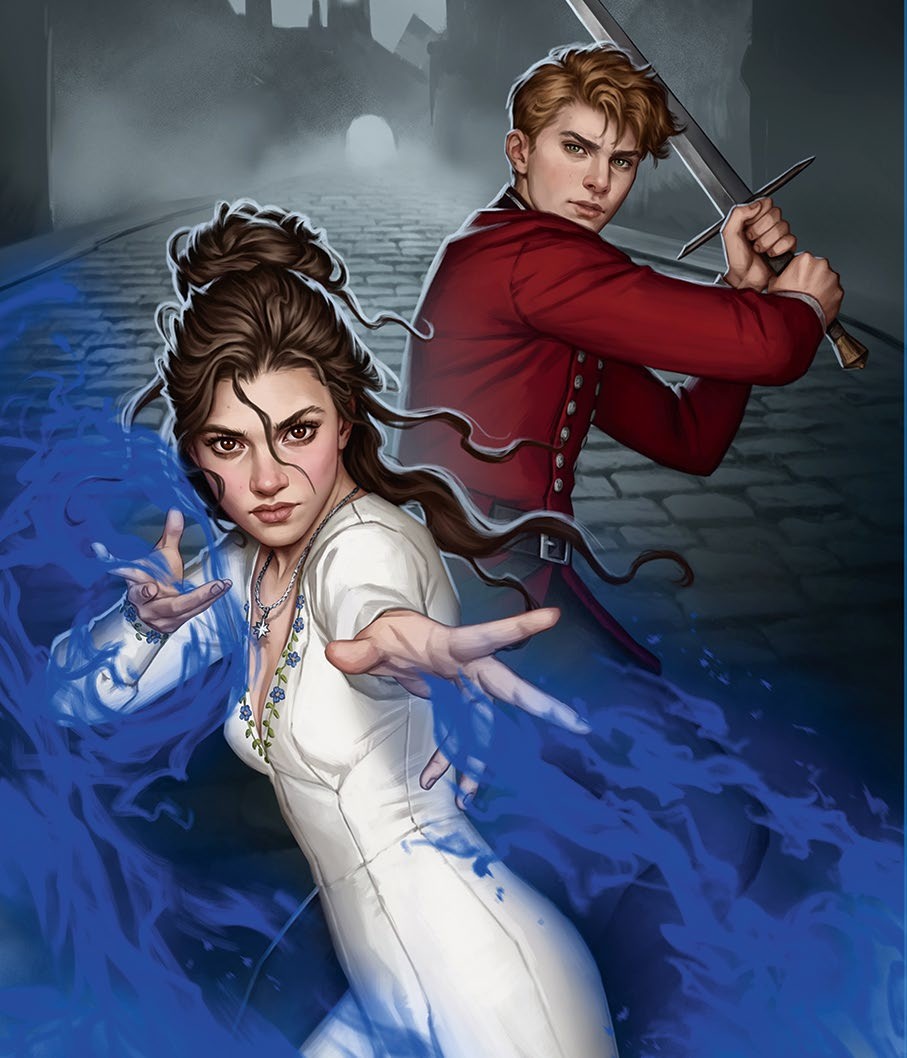
I worked on the male character at this point and added the blue flames using my Fire brushes. You might catch something that needs to be fixed at any moment. For example, I needed to adjust the angle of the male character’s head so it followed the line of movement and spine more effectively. If everything is on separate layers, it should be easy to change.
12. Working on the background
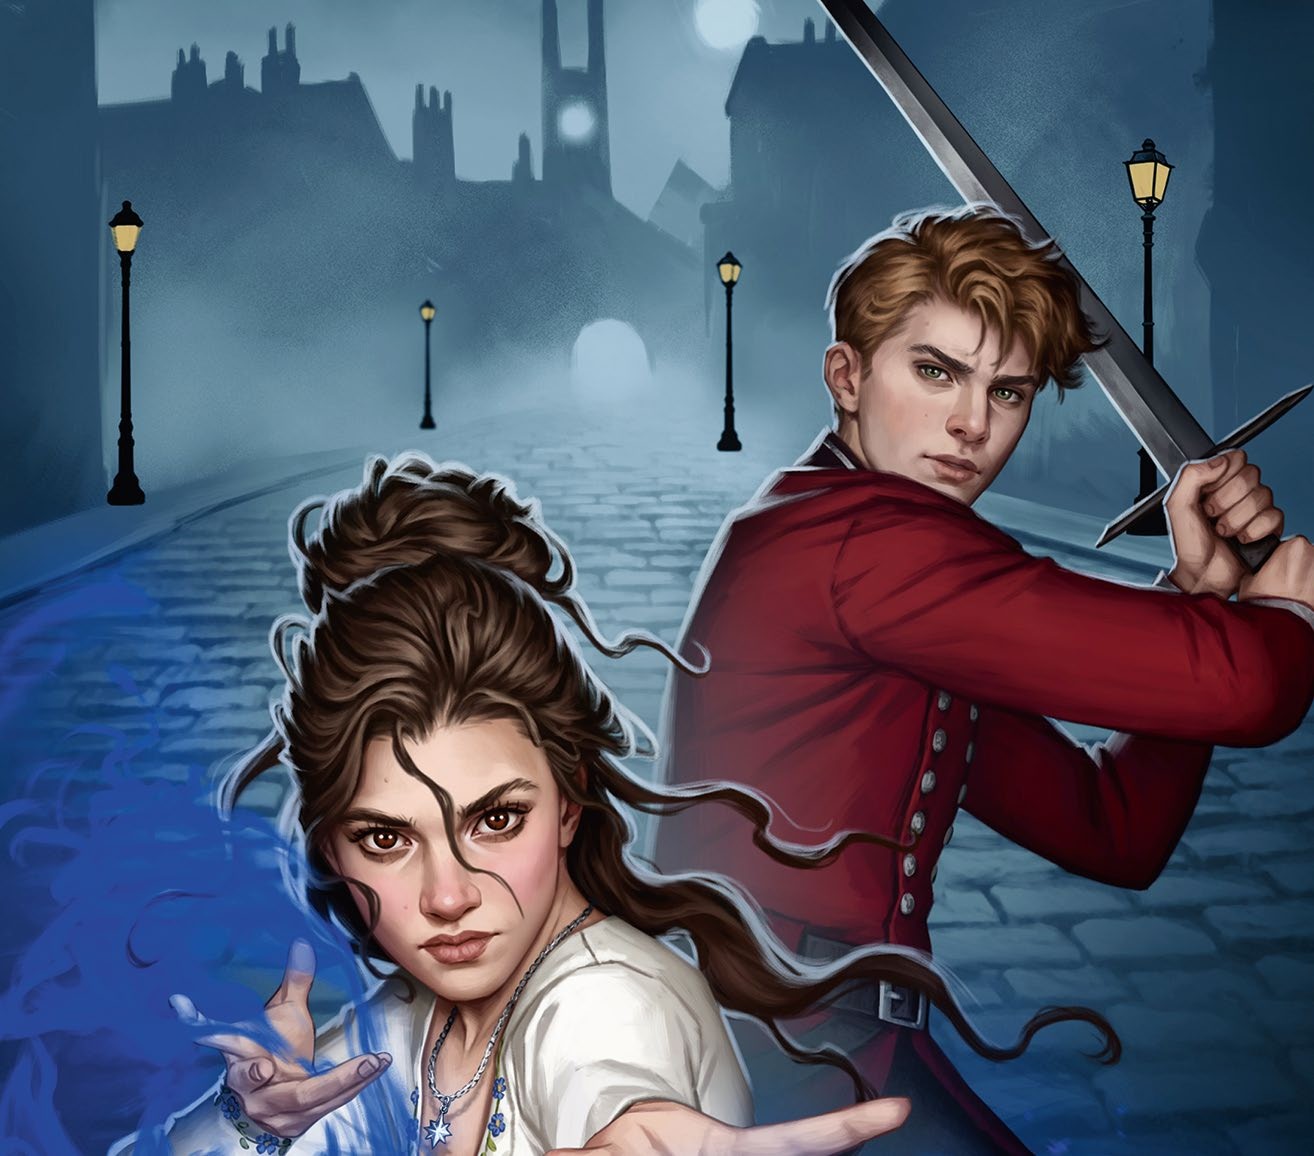
With your characters almost completed, switch your attention to the background. I have the objects and buildings of my background on separate layers as well. I initially worked on the design in black and white, then added colour back using Colour, Color Balance, and Overlay adjustments. I did this to save time and because it doesn’t require a lot of different colours.
13. Creating atmosphere with effects
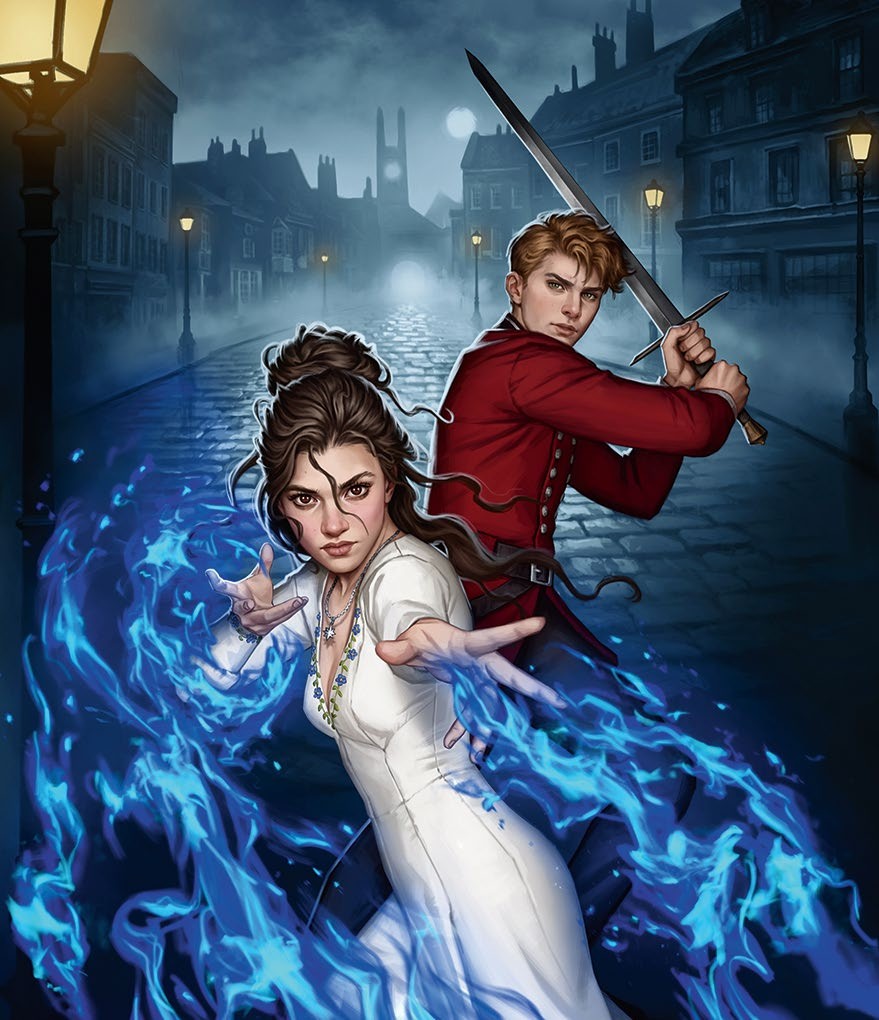
To complete the scene, pump up the atmosphere by adding depth through value adjustments. I also added fog to my image to enhance the mood and evoke a cold sensation, plus a warm glow to the lamps for contrast. The blue flames were also developed with highlights using the Multitask Soft and Fire brushes.
14. Make a mock cover design
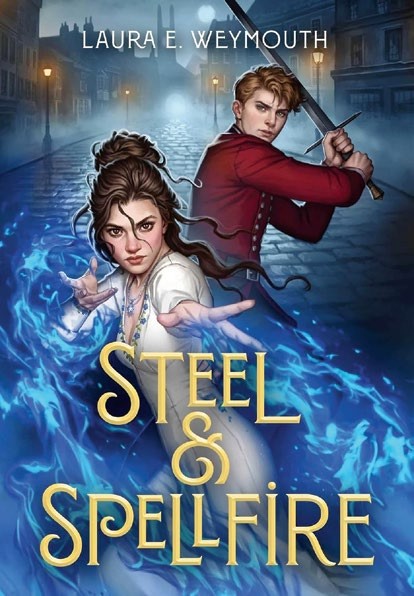
Finally, I want to tie everything together and enhance the image to look as good as possible. For example, you can adjust the contrast and values using a Levels layer, tweak the colours with a Color Balance layer, or intensify colour with an Overlay layer. These are subtle adjustments that finalise everything.
This content originally appeared in ImagineFX magazine, the world's leading digital art and fantasy art magazine. ImagineFX is on sale in the UK, Europe, United States, Canada, Australia and more. Limited numbers of ImagineFX print editions are available for delivery from our online store (the shipping costs are included in all prices).
Sign up to Creative Bloq's daily newsletter, which brings you the latest news and inspiration from the worlds of art, design and technology.

Santiago-born Fernanda is a digital artist who currently works as a freelance Illustrator. Character design and storytelling are her biggest passions.
You must confirm your public display name before commenting
Please logout and then login again, you will then be prompted to enter your display name.
