10 things you should do when drawing the human body
Renowned illustrator Chris Legaspi reveals how to use light and shadow in figure drawing.
Sign up to Creative Bloq's daily newsletter, which brings you the latest news and inspiration from the worlds of art, design and technology.
You are now subscribed
Your newsletter sign-up was successful
Want to add more newsletters?

Five times a week
CreativeBloq
Sign up to Creative Bloq's daily newsletter, which brings you the latest news and inspiration from the worlds of art, design and technology.

Once a week
By Design
Sign up to Creative Bloq's daily newsletter, which brings you the latest news and inspiration from the worlds of art, design and technology.

Once a week
State of the Art
Sign up to Creative Bloq's daily newsletter, which brings you the latest news and inspiration from the worlds of art, design and technology.

Seasonal (around events)
Brand Impact Awards
Sign up to Creative Bloq's daily newsletter, which brings you the latest news and inspiration from the worlds of art, design and technology.
Designing with light and shadow is one of the most powerful tools I use to bring my figures to life. It’s more than just copying what I see. I use light and shadow to shape the form, guide the viewer’s eye, and create mood and feeling. When used with purpose, they also help design the composition by adding structure, movement and clarity to the drawing.
There are two aspects to the process of designing light. First, I take a moment to observe quietly and with purpose. I look at the light, the pose, the background and anything else that sparks an idea or inspires me. Then, once I have a clear picture in my mind, I move on to the next phase: crafting and shading.
Shading is not just about copying values. It’s about showing form, leading the eye and telling a story. Whether I’m drawing from life, a photo or imagination, I’m always thinking about how my values, shapes and shading techniques support the figure and the message I want to share.
Here, I’ll show some of my favourite ways to design with light and build a strong, powerful image. They apply whether you're drawing with the best pencils for artists or on one of the best drawing tablets. If you're looking for a beginner introduction, see our breakdown of how to draw a person.
01. Where's the light?
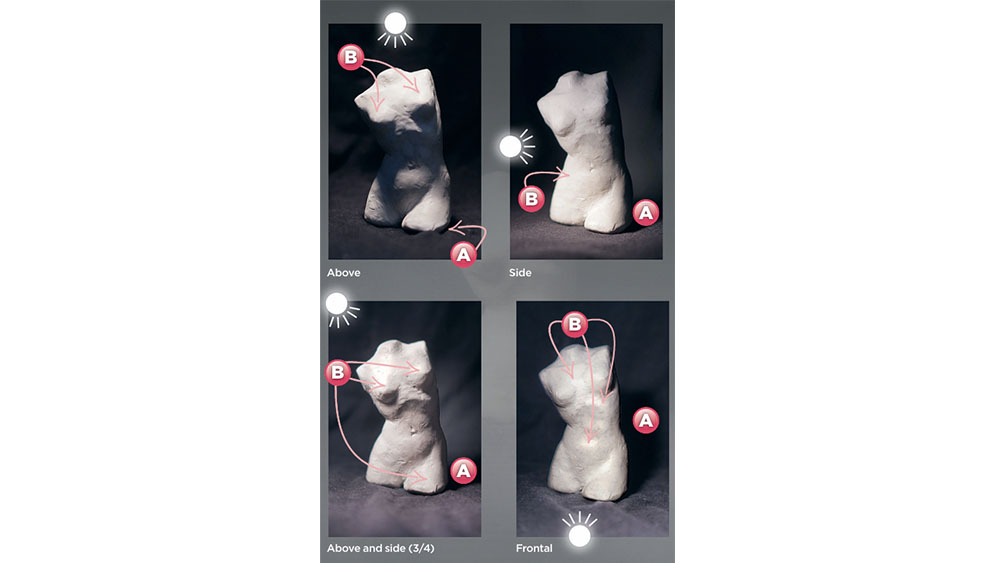
The first step in my observation process is to simply observe the light. The more I know and understand about the light, the more clarity I’ll have when designing the drawing. Understanding the light will also make the shading process smoother and more efficient.
The first observation I make is the location of the light. This answers the question: Where is the light? The most common locations are above, side or in front. Looking for clues such as cast shadows (A) and highlights (B) help me to accurately define the light.
02. What's the nature of the light?
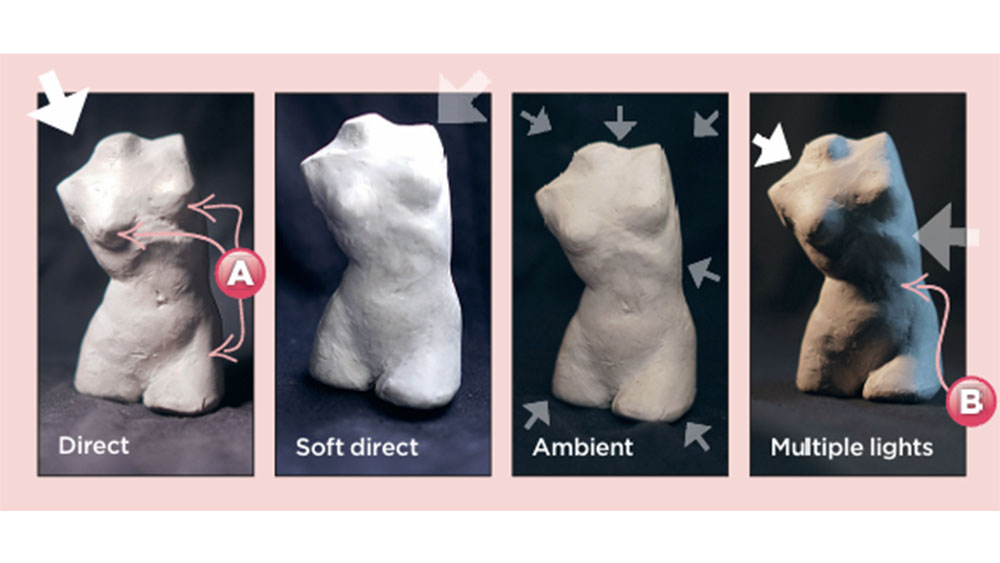
Once I identify the location of the light, I then observe and evaluate the nature of the light. This answers the question: What kind of light is it? Different light sources create different and unique looks, so the nature of the light will affect how I design the final drawing.
Sign up to Creative Bloq's daily newsletter, which brings you the latest news and inspiration from the worlds of art, design and technology.
Some common types of light are direct, soft and diffused, ambient, and multiple lights. To help me identify the light’s nature, I look for the shadow shapes (A), contrast and even colour (B).
03. Understand the pose
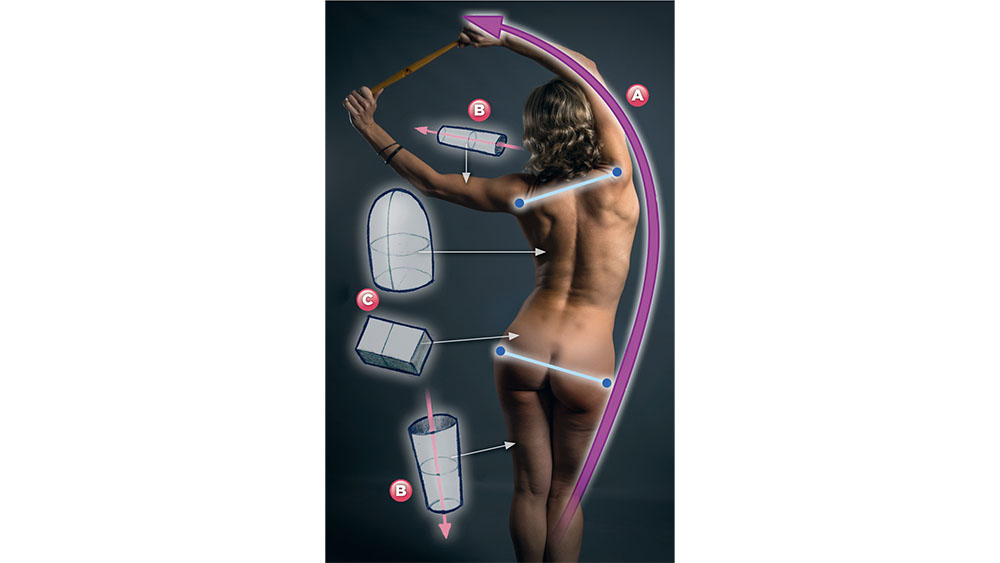
Next, I observe the model and their pose. The question in my mind is: What is the model doing? Answering this question helps me to define the gesture, movement and crucially the primary action of the pose, which becomes the foundation of my design (A).
After that, I look for key landmarks and forms. First, I define the shoulder line and hip line, then the action and position of the limbs (B). Finally, I define the position of the body’s forms in 3D space, especially big forms like the ribcage and hips
04. Decide what you want to say
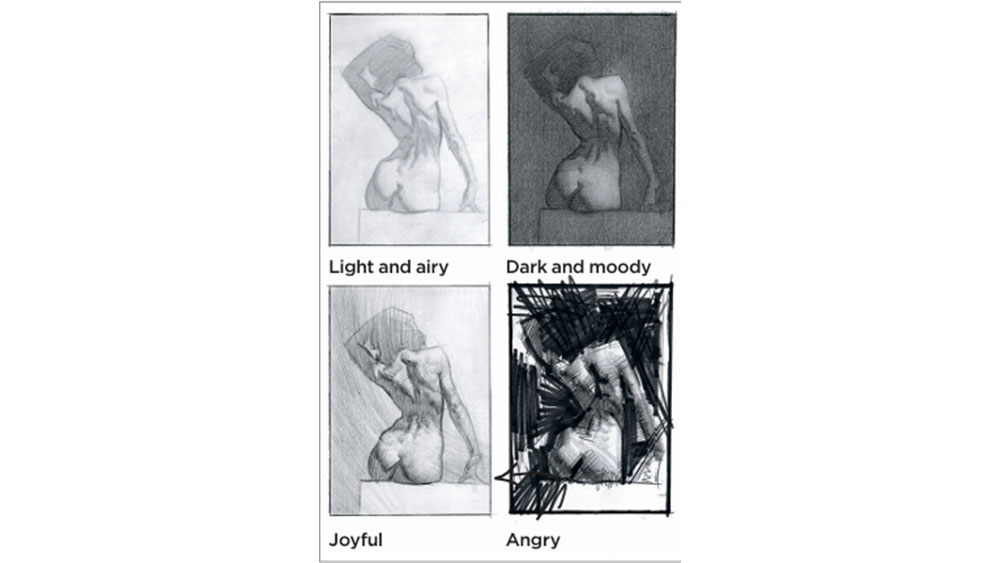
Light and shadow is more than just 3D form and shading techniques. It’s a way to tell a story or convey something meaningful. One question I ask myself is: What do I want to say? Imagining and defining a story helps me make decisions during the shading and finishing process.
To work out story ideas, I create multiple composition thumbnails, which helps me to quickly iterate, refine and test various compositions, lighting, atmosphere and mood
05. Simplify forms and tone washes
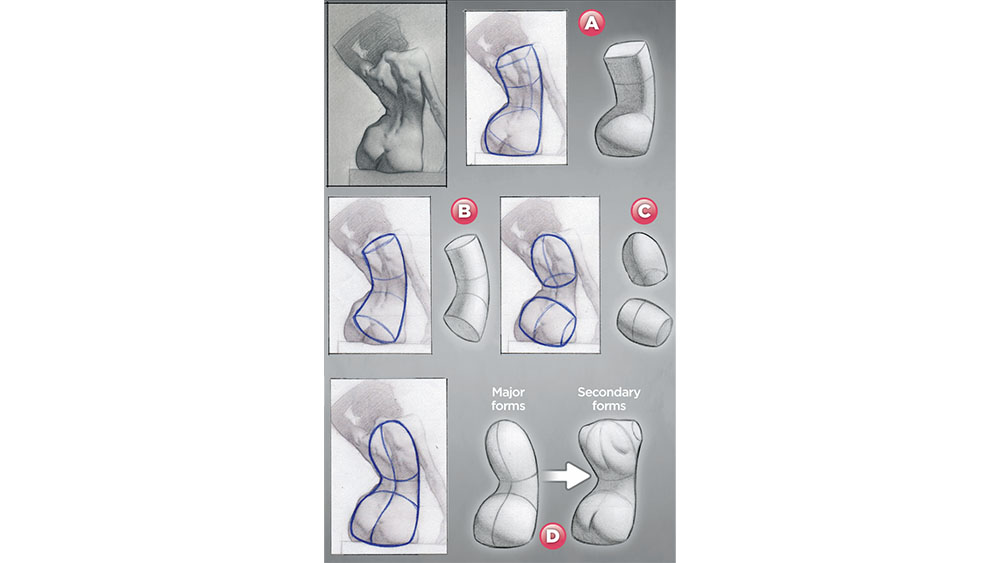
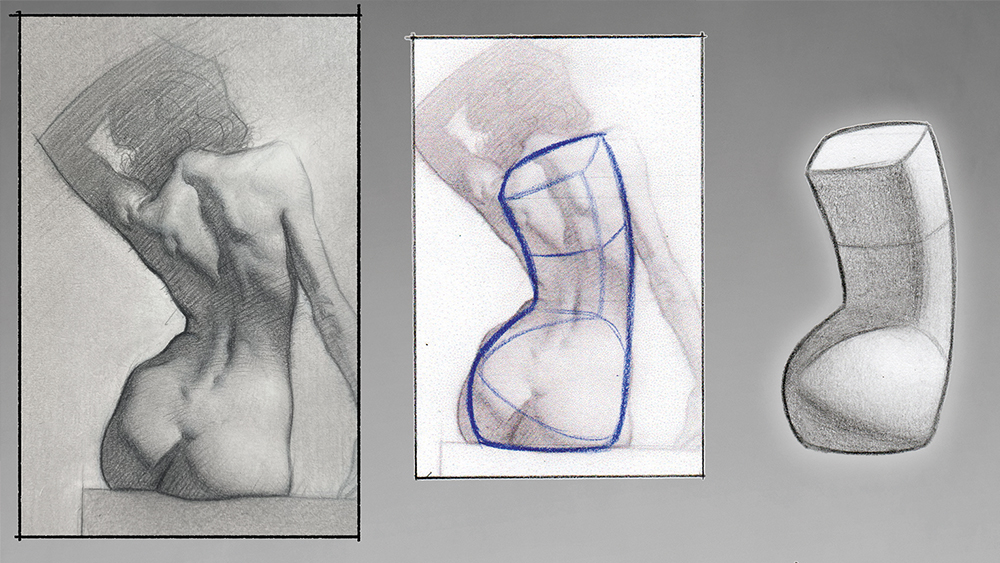
To create the illusion of realism, I focus on first describing form. I train my eye to see the simple, major forms of the figure (A). Then, when I start to apply tone and shading, I use large washes and soft, gradient style marks.
I apply this tone as if I were shading very simple, geometric forms such as cylinders (B) and eggs (C). Once I have these major forms established, I can easily add secondary forms, and smaller shapes and details (D) while maintaining a solid, believable structure.
06. Perfect tone masses with quality marks
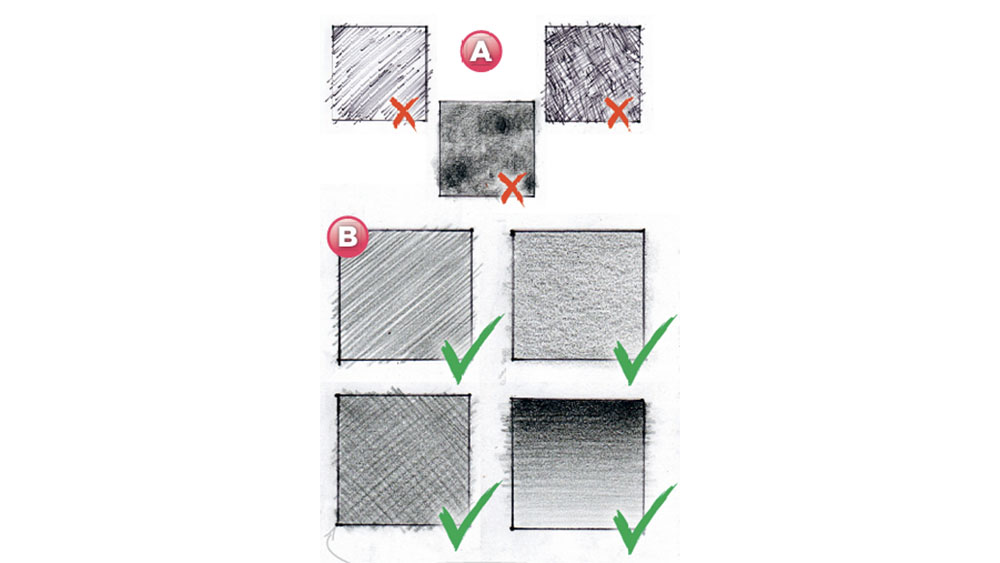
One way to easily ruin a drawing is to make careless, ugly, low-quality ‘spotty’ marks and tones (A). Conversely, one way to dramatically improve a drawing with very little effort is to create high-quality marks, lines and tones.
To improve my marks and tones, I practise filling boxes with various strokes, hatching techniques and gradients. I practise until my tone boxes are clean and smooth (B). Comparing the two sets of marks, it’s easy to see which is more attractive, pleasing and will add to the quality of the drawing rather than detracting from it.
07. Simplify and limit values
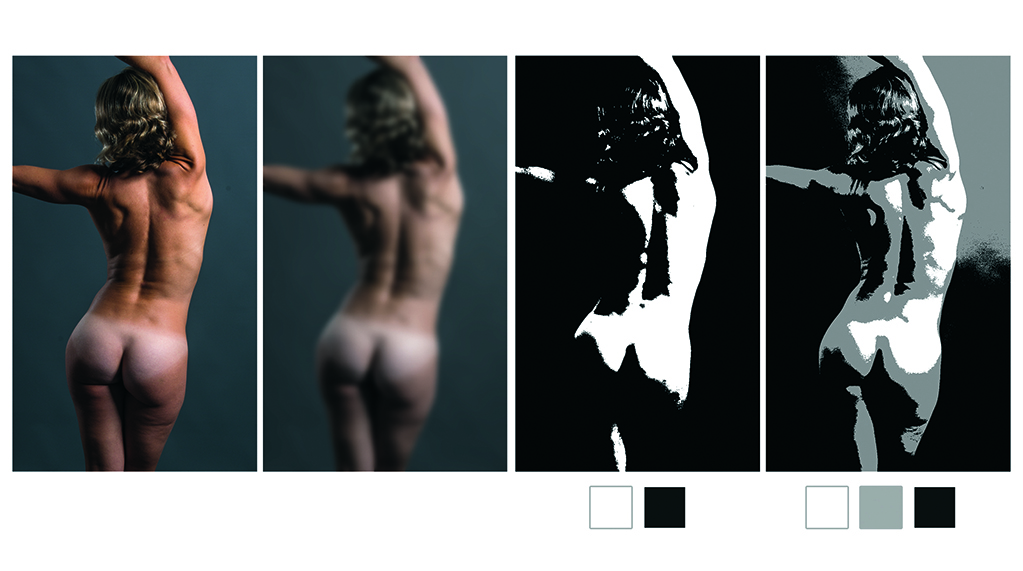
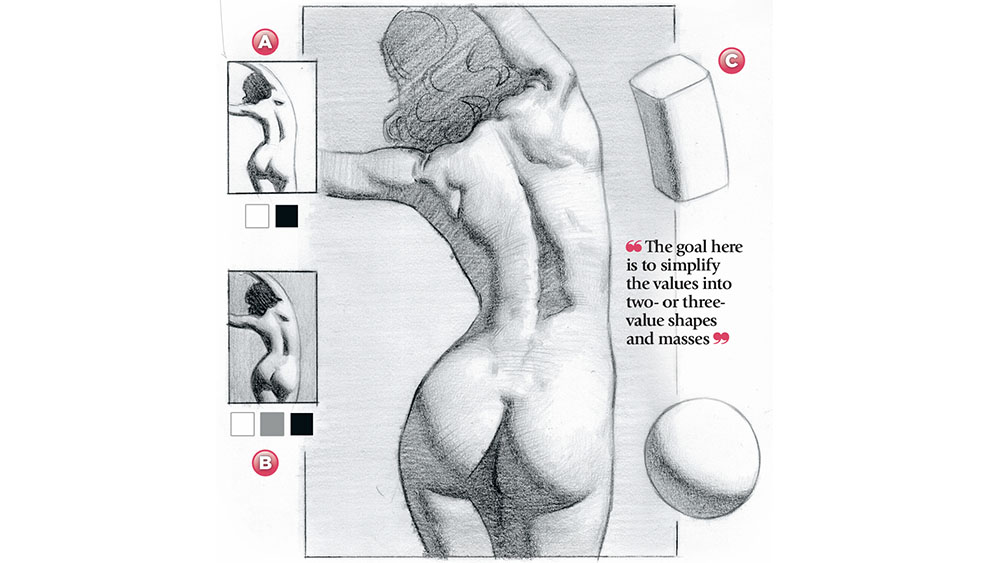
To help me control values, I first observe the pose and the light. Squinting helps me to see less colour and detail information, and more of the value information. The goal here is to simplify the values into two or three-value shapes and masses. To start the drawing, I begin with a simple two-value design (A).
Next, to achieve more form and realism, I add the half-tones to create a three-value design (B). Three values are enough for me to suggest form, especially when I simplify the forms into geometric volumes such as boxes, cylinders and spheres (C).
08. Design the contour
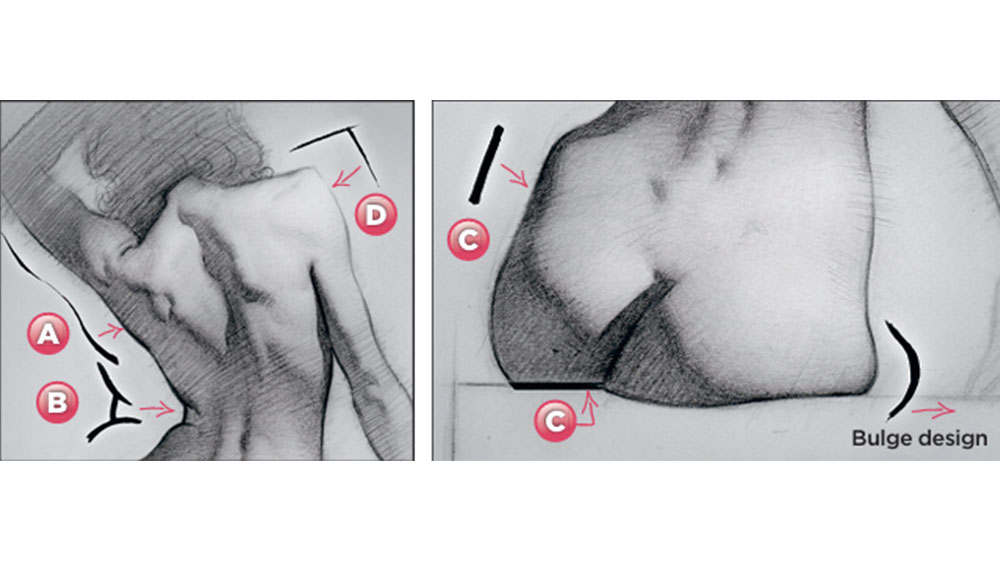
Although shading and a 3D-looking form are my goals, one of my favourite tools to create the look of realistic figure and form is with the contour. I use simple contour design techniques such as thick or thin (A) and dark accents (B) to suggest light and shadow.
Subtle straights (C) and corners (D) create contrast and suggest harder parts of the body (bone or muscle). Contour design can also define intersecting areas and suggest weight, such as when the model is seated or in contact with a surface.
09. Don't copy details – design instead
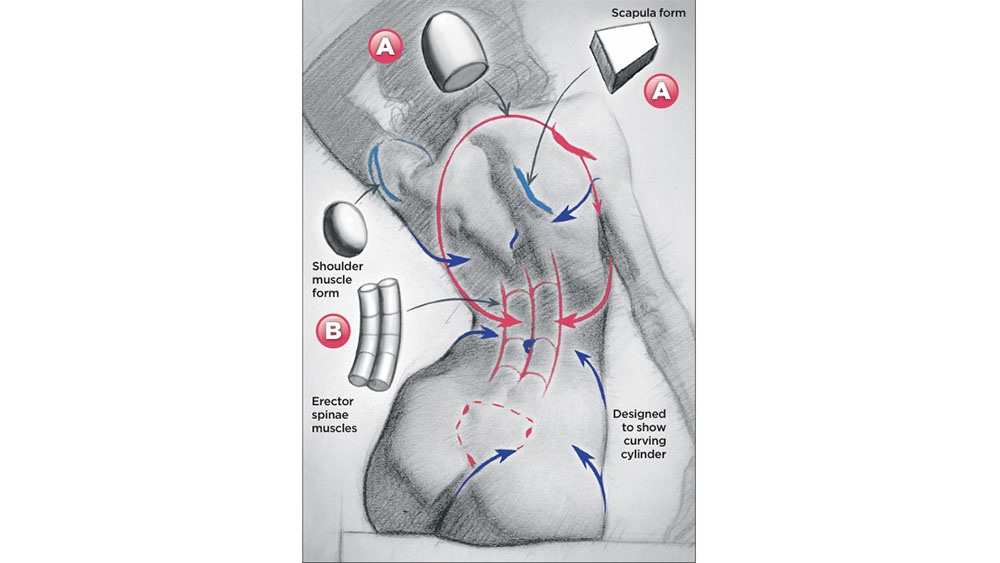
When drawing a pose with beautiful light and shadow, it’s easy to fall into the habit of ‘see-copy’ – blindly copying details without design or intention. To help me properly design a realistic drawing I focus on describing simple, geometric forms.
For example, I shade the upper body with egg-like and boxy forms (A). With simple cylinder forms I can communicate both the large masses of the torso, and secondary muscles and forms (B). Along with shading and tone, I emphasise contour lines that both lead the eye and reinforce the feeling of 3D form
10. Control contrast for the win
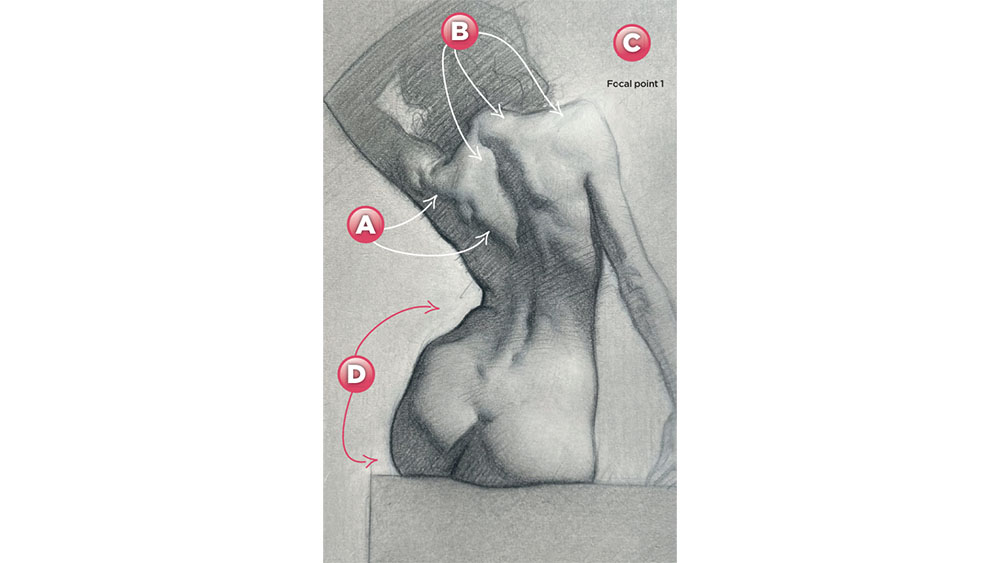
To make the drawing feel both finished and ‘real’, I thoughtfully and carefully design and control the contrast. For example, I direct the contrast of core shadows (A) to help emphasise light and shadow. Controlling the value and contrast in the highlights (B) helps to define form, set the direction of the light and create a sense of atmosphere.
To really make a drawing feel ‘finished’ I introduce a lot of contrast in key areas, especially around focal point areas (C) and parts of the background (D). This also suggests depth, atmosphere and develops a dynamic eye flow.
For more advice, see our tips for drawing the body. We also have a breakdown of how to draw a female figure.
This article originally appeared in ImagineFX. Subscribe to ImagineFX to never miss an issue. Print and digital subscriptions available.
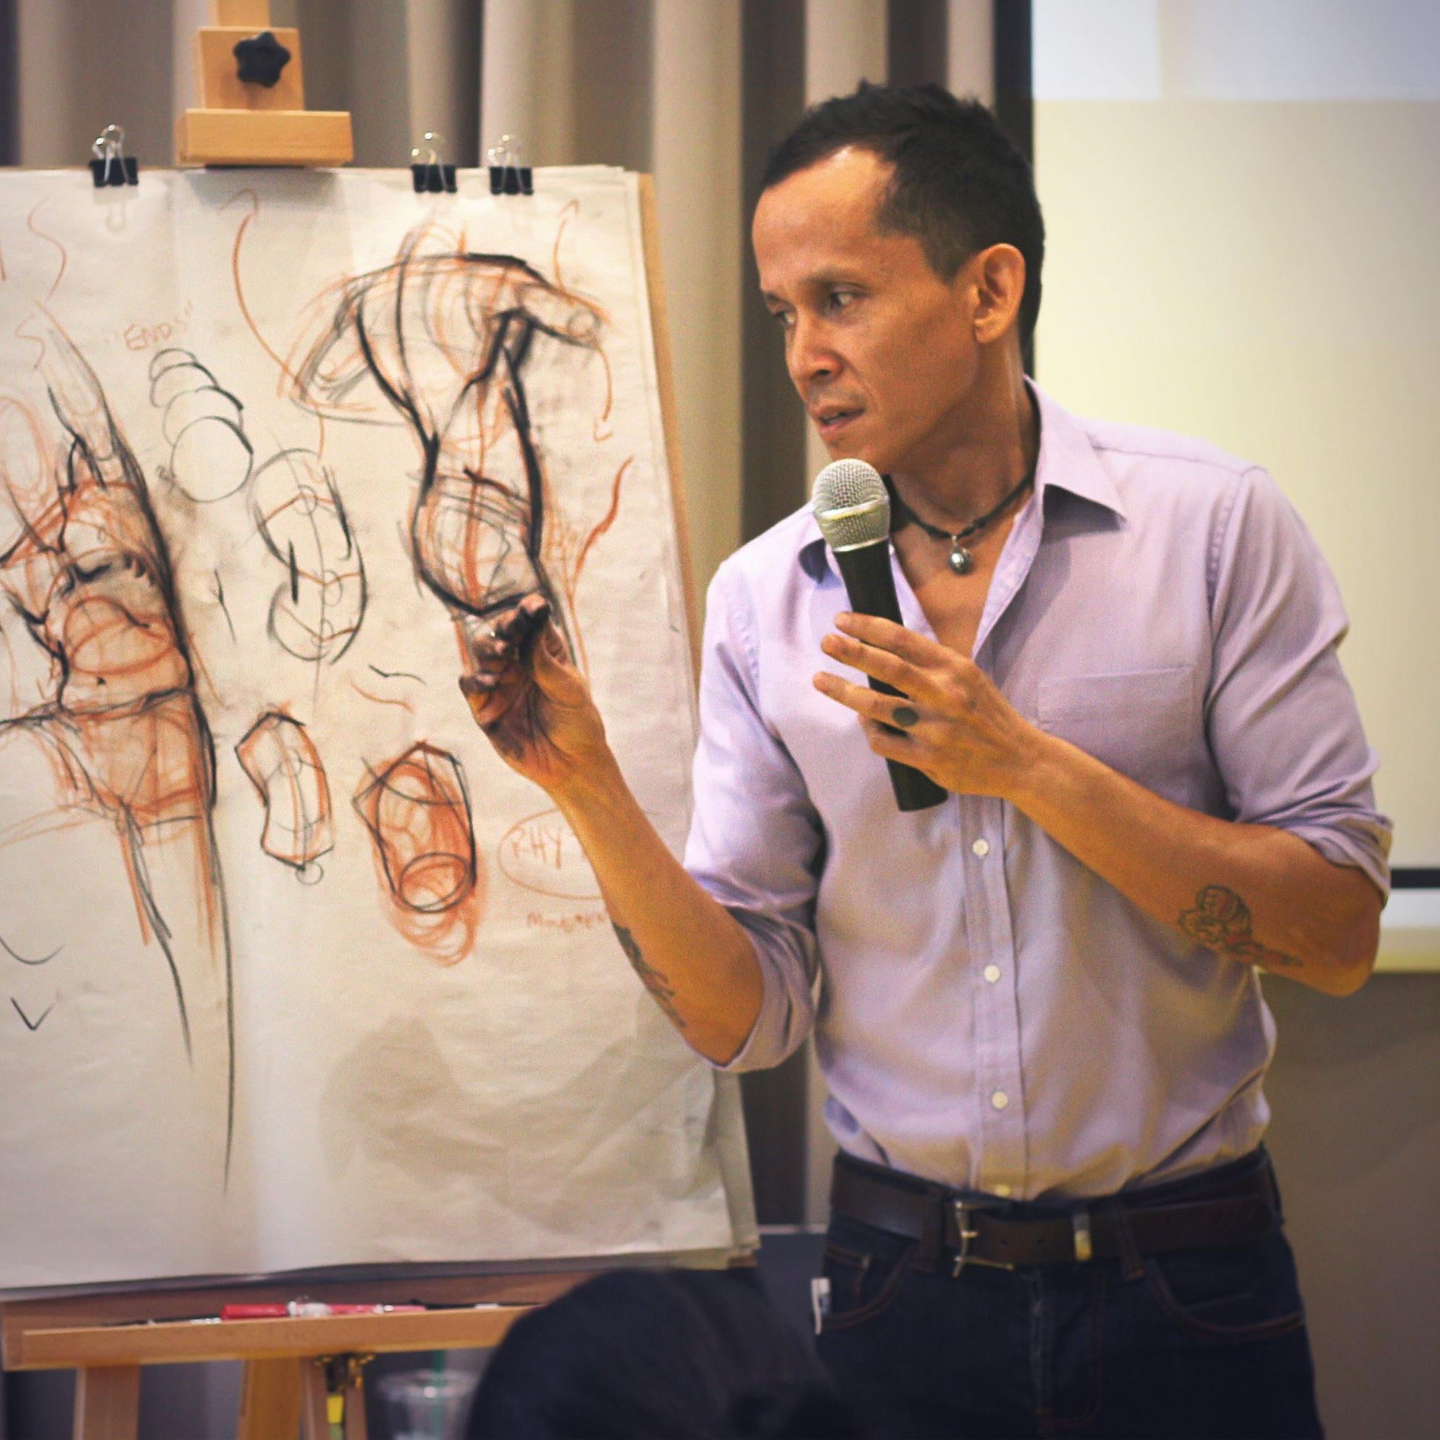
Chris is obsessed with figure drawing and painting. He loves sharing great information on art, picture-making and topics like which paint brush to use.
You must confirm your public display name before commenting
Please logout and then login again, you will then be prompted to enter your display name.
