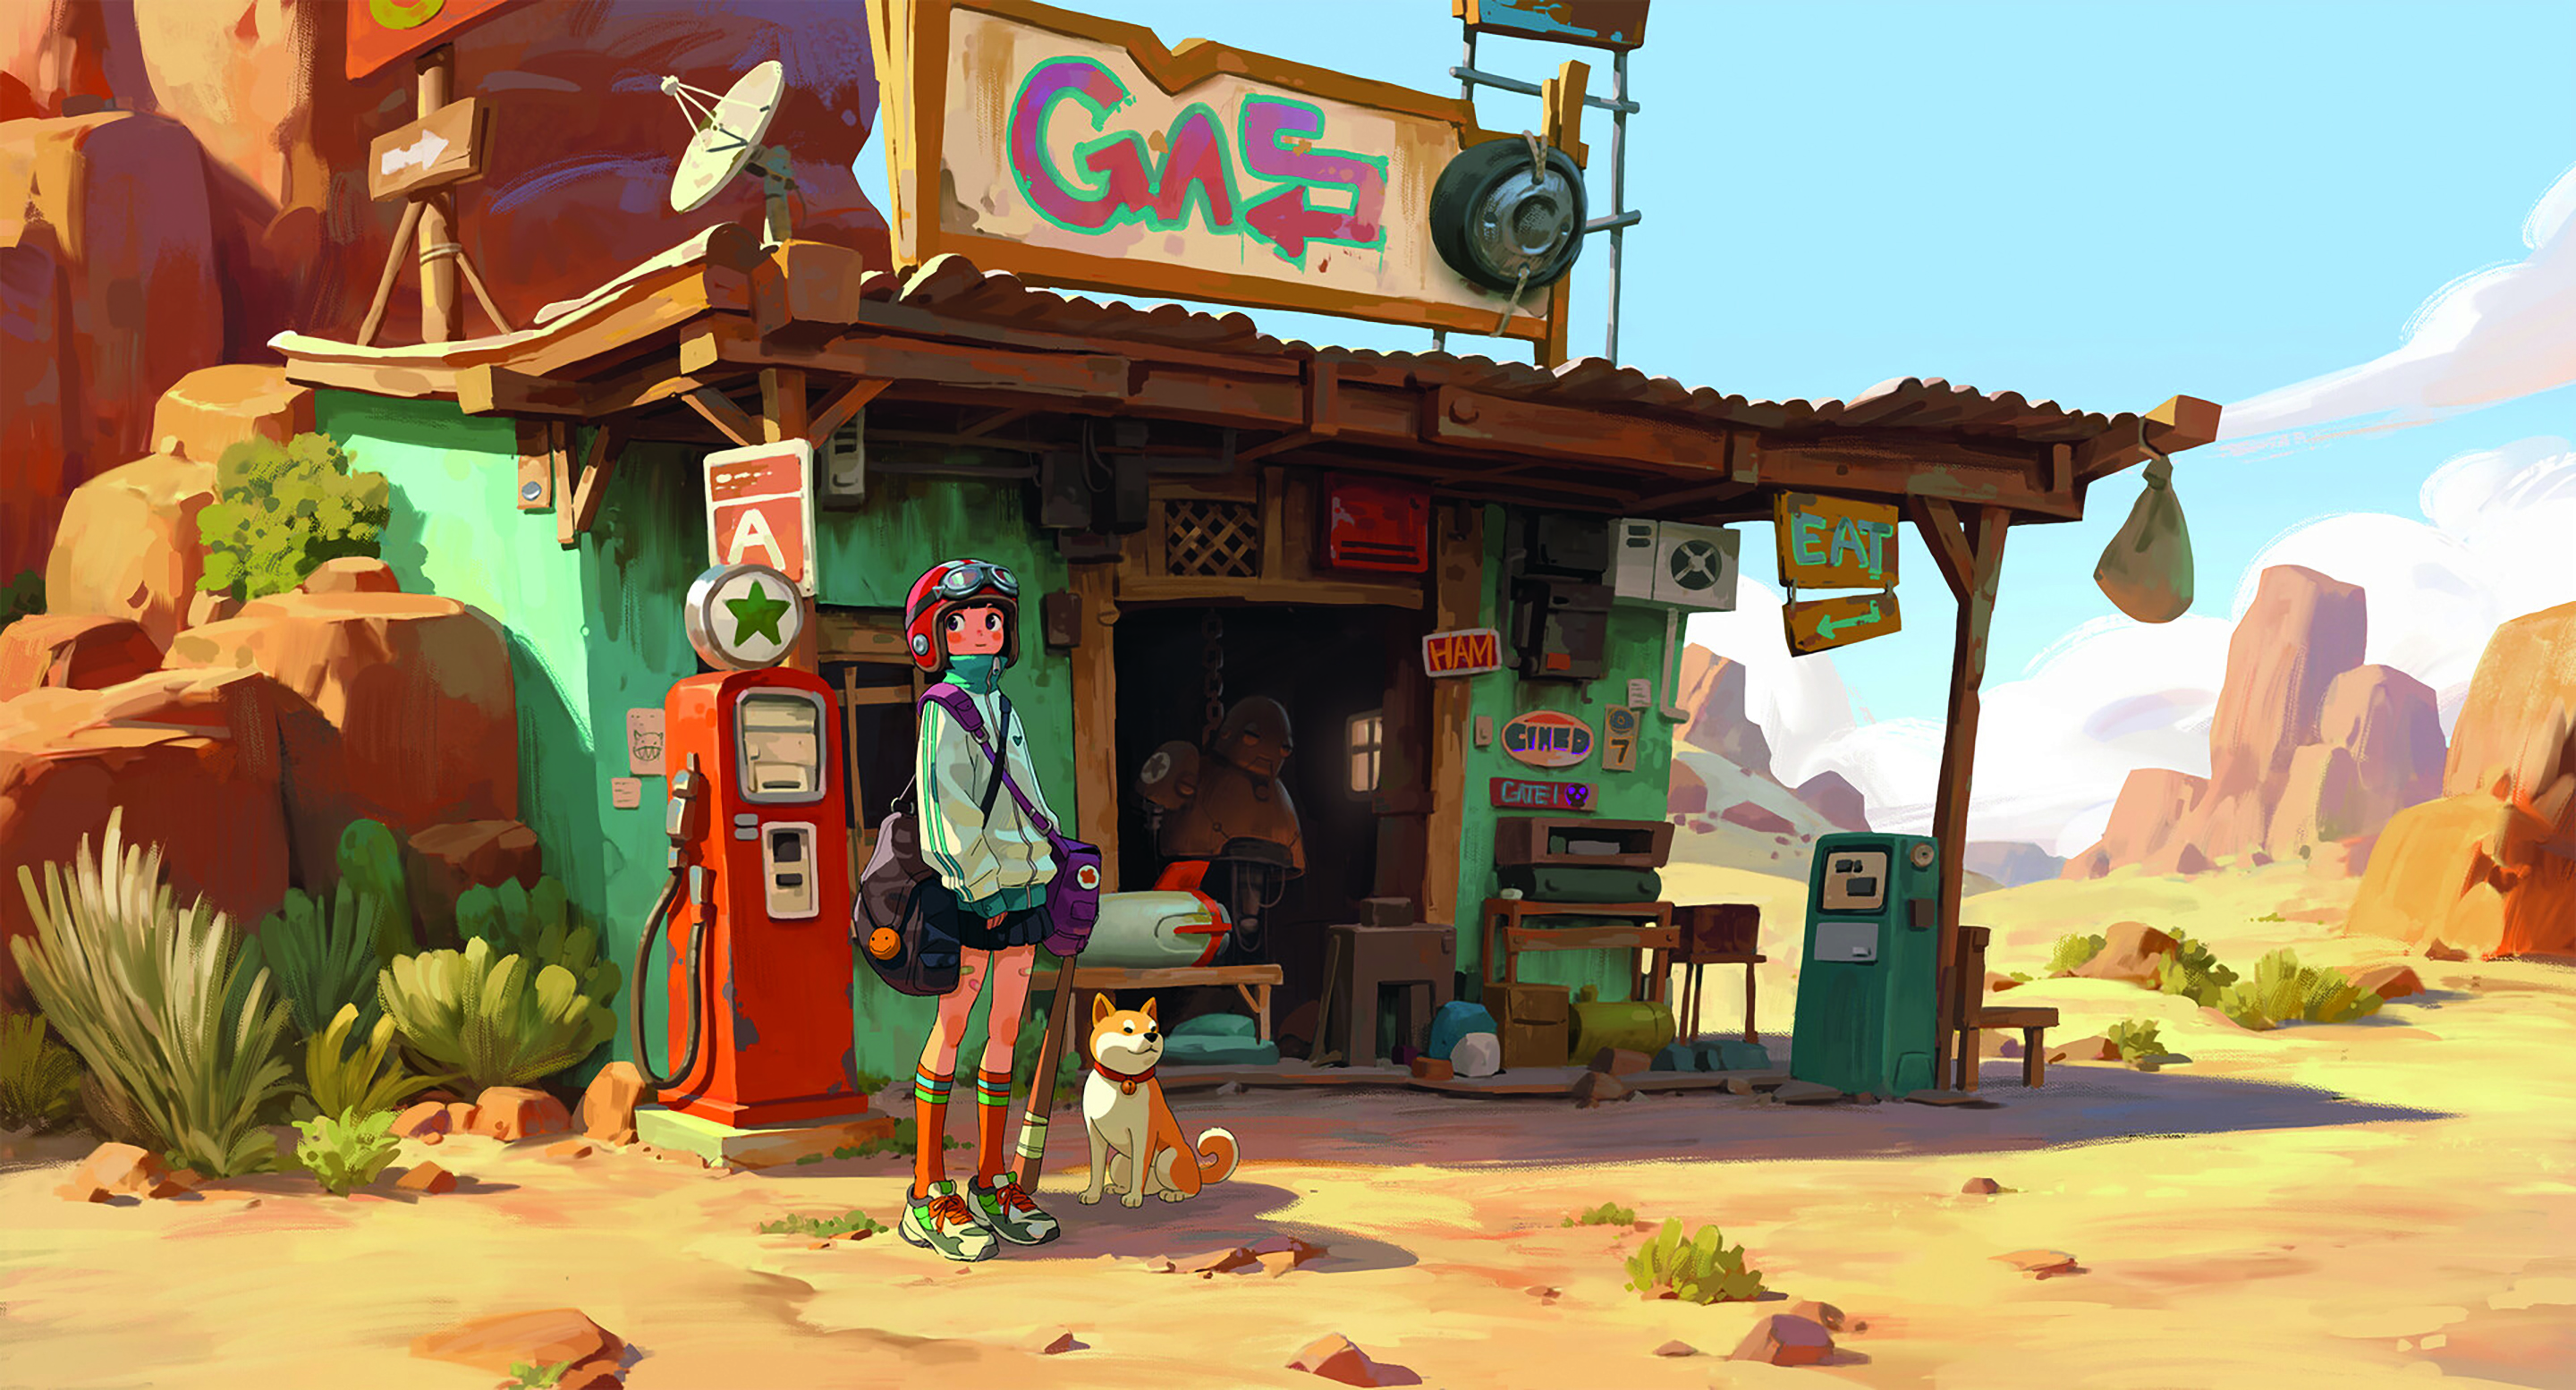
15 Blender tips for creating video game art fast
Produce studio-quality concept art with Rahul Chandwaney's Blender 3D workflow tips.
Sign up to Creative Bloq's daily newsletter, which brings you the latest news and inspiration from the worlds of art, design and technology.
You are now subscribed
Your newsletter sign-up was successful
Want to add more newsletters?
Blender is the one of the best 3D modelling programs, and it's completely free. That's really opened access to the creation of video game concept art to a lot more people, but some are still put off because they find the software daunting.
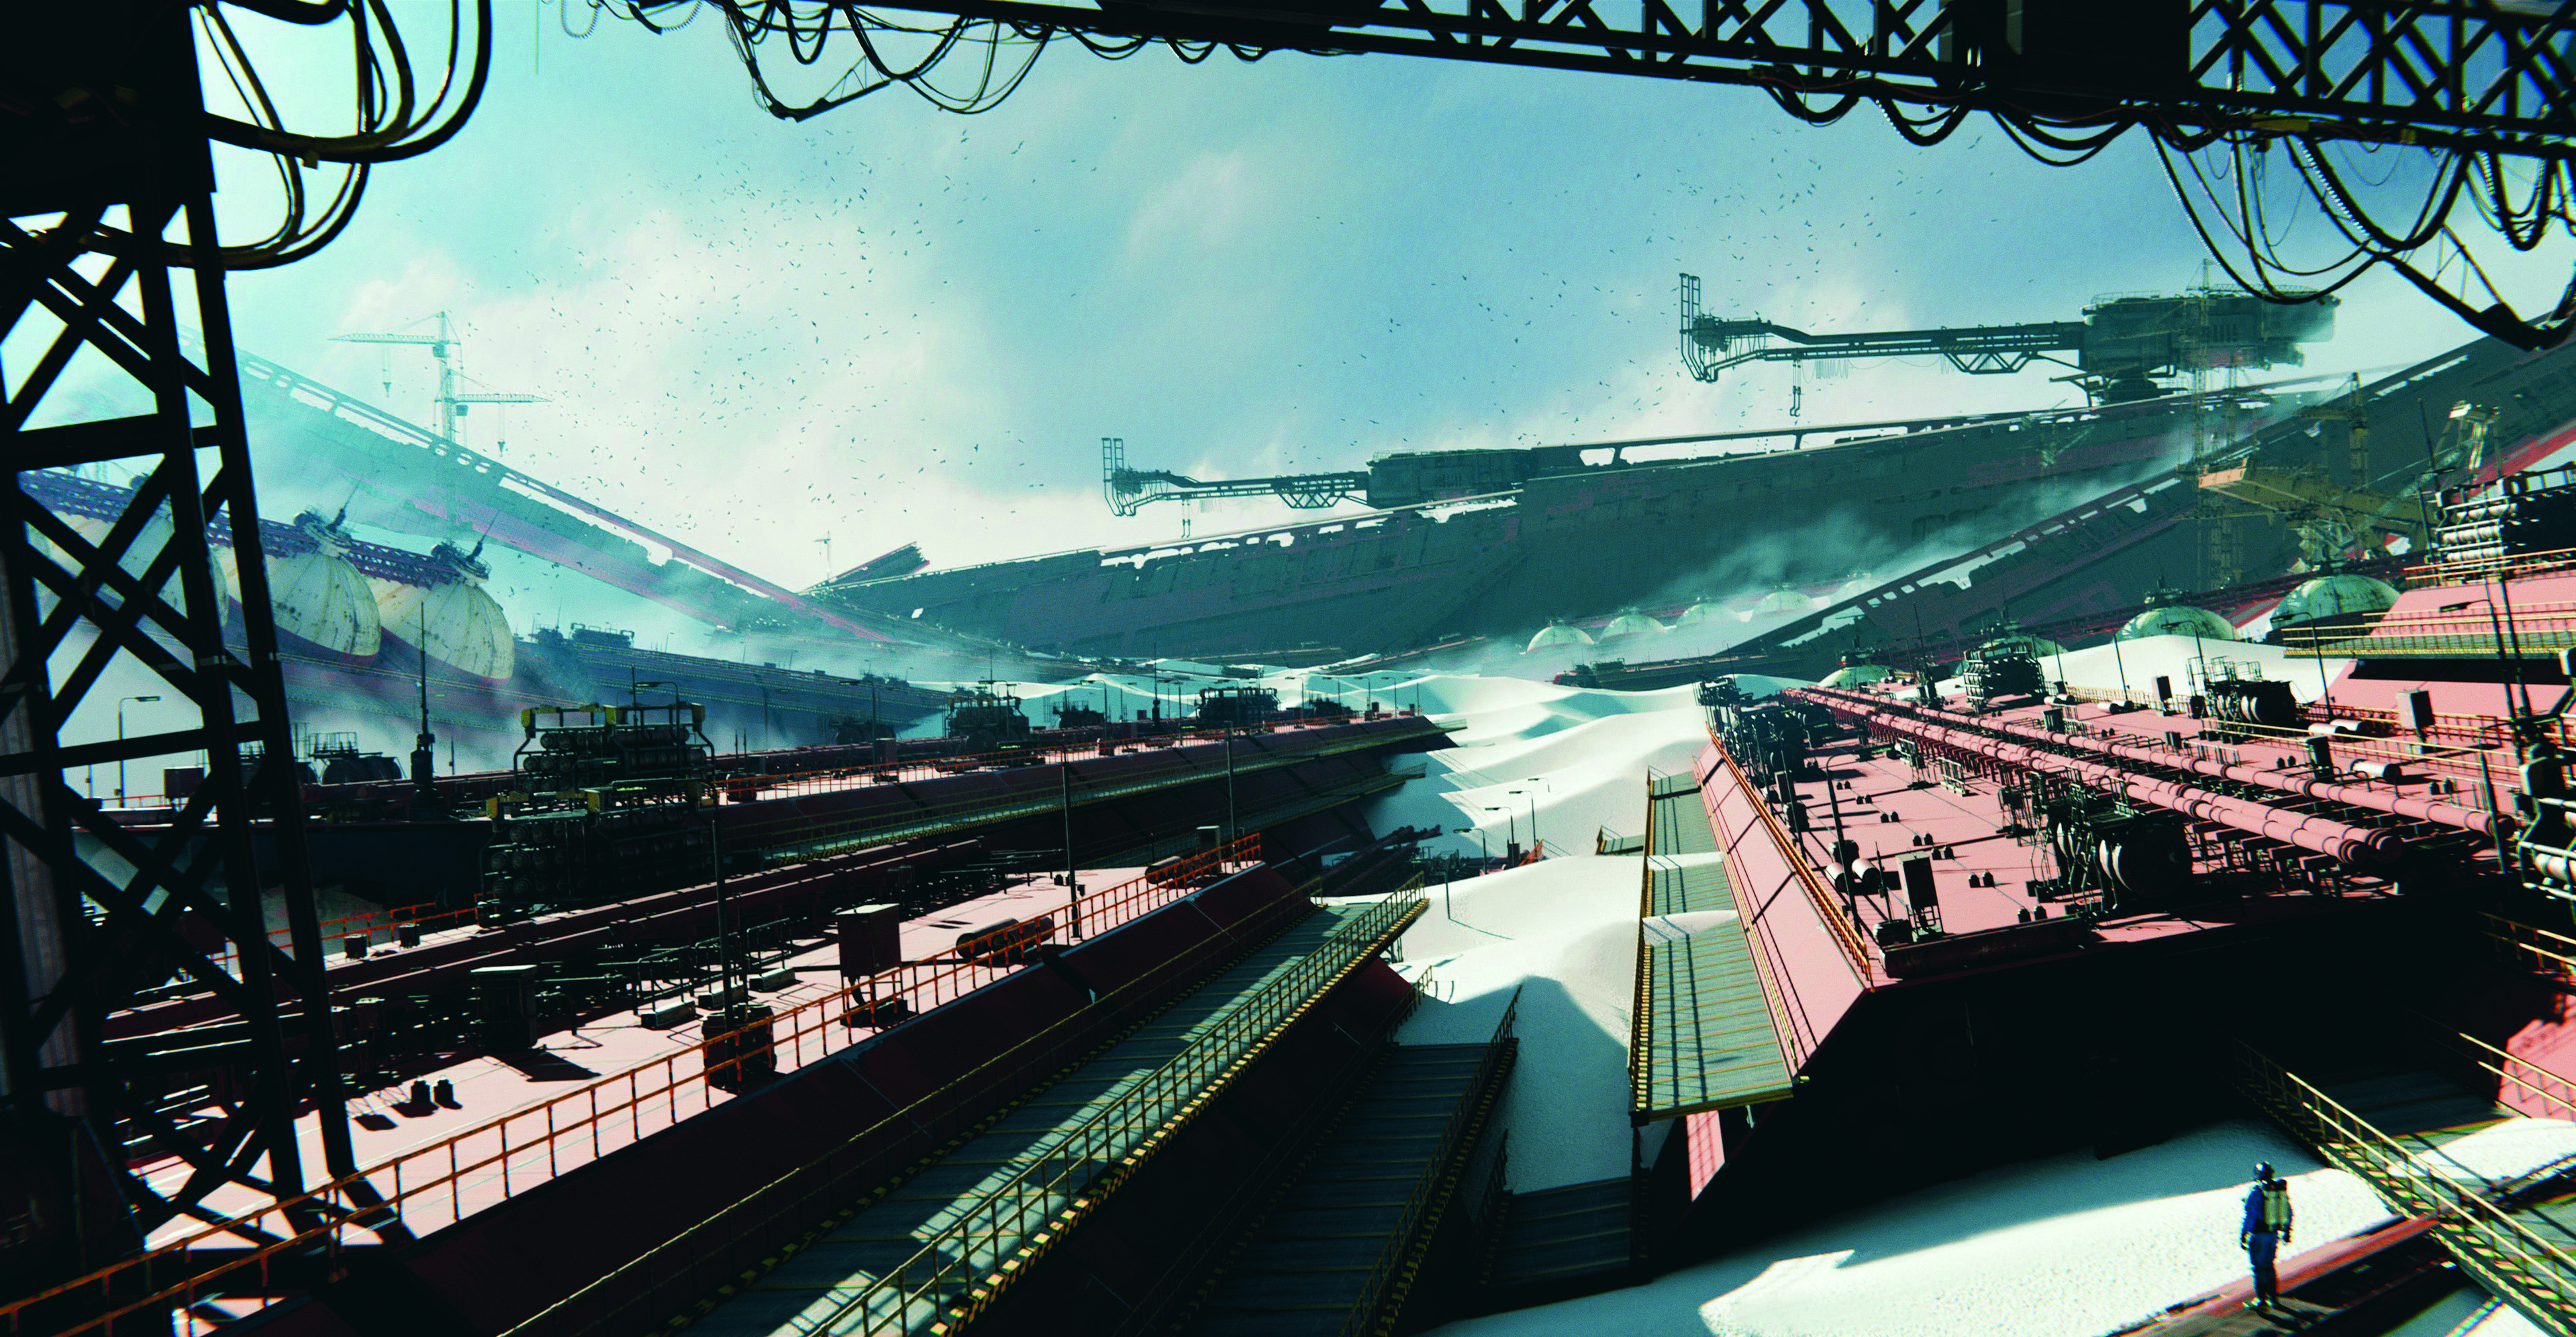
In this article, I'll provide some tips on how to become a more effective concept artist for video games using Blender. After working on many client and personal projects, I’ve learned the importance of working fast while also producing quality results. The ability to iterate on my designs is an important part of working on video games, and I've learned to adapt my workflow in Blender.
One of the reasons I prefer working in 3D is that it enables me to be of greater help to the production team. The software makes it possible for me to work directly on top of level block-outs and provide concepts with a greater level of depth and storytelling.
Article continues belowI want to make my visuals look as close to the desired final product as possible – for example, an environment in a first-person shooter. I take pride in the fact that I try to be as informative with every detail that I put into my work. This includes composing, designing and texturing my concepts.
In this piece I want to discuss a few important Blender tips I’ve learnt that will hopefully help you become a valued asset in the industry. For more wisdom, see our roundup of all of our Blender tutorials.
01. Just get going

I love spending hours researching for references in my free time – it’s important to build a vast and developed visual library. But there’s a moment during research when I’ll have an idea for an artwork, and it’s vital to get started on it as soon as possible. Ideas are mostly developed as you work on them, not in your head.
This is why it’s important for me to open Blender and start blocking out my idea, to avoid procrastinating and spending too much time on research. This is an important practice for client work too, as you’ll often have a limited time budget to complete a task
Sign up to Creative Bloq's daily newsletter, which brings you the latest news and inspiration from the worlds of art, design and technology.
02. Startup file
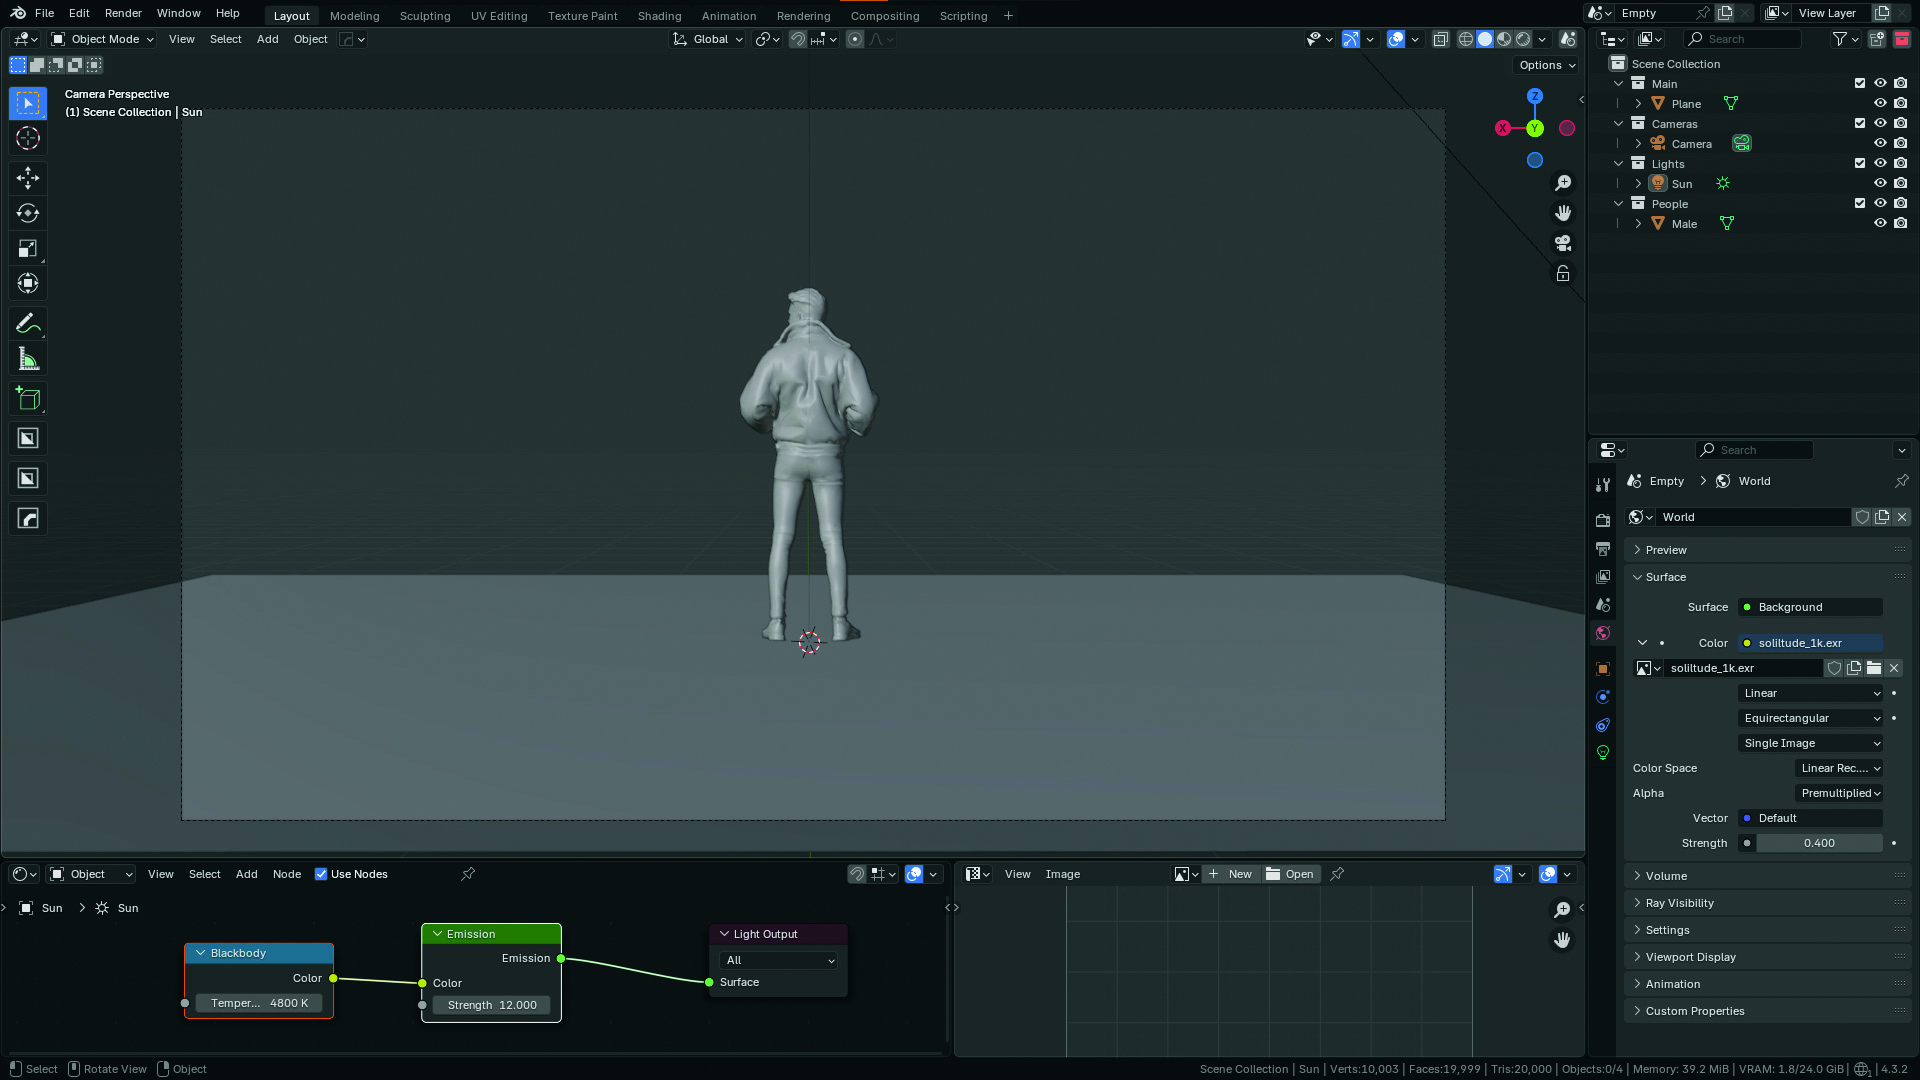
Creating a new environment from scratch can be time-consuming. It’s important to maintain a creative state of flow from having an idea and starting to execute it in Blender.
Since there are always going to be some repetitive decisions that I’ll make throughout my design process, I’ve found it’s important to personalise my Blender Startup file based on these decisions. For me, a good Startup file includes a human model for scale, an HDRI already established of my choice, my outliner setup with collections I know I’ll make use of, basic lighting and Compositor setups.
You can save any scene as your Startup file by going to File>Defaults>Save Startup File.
03. Level design
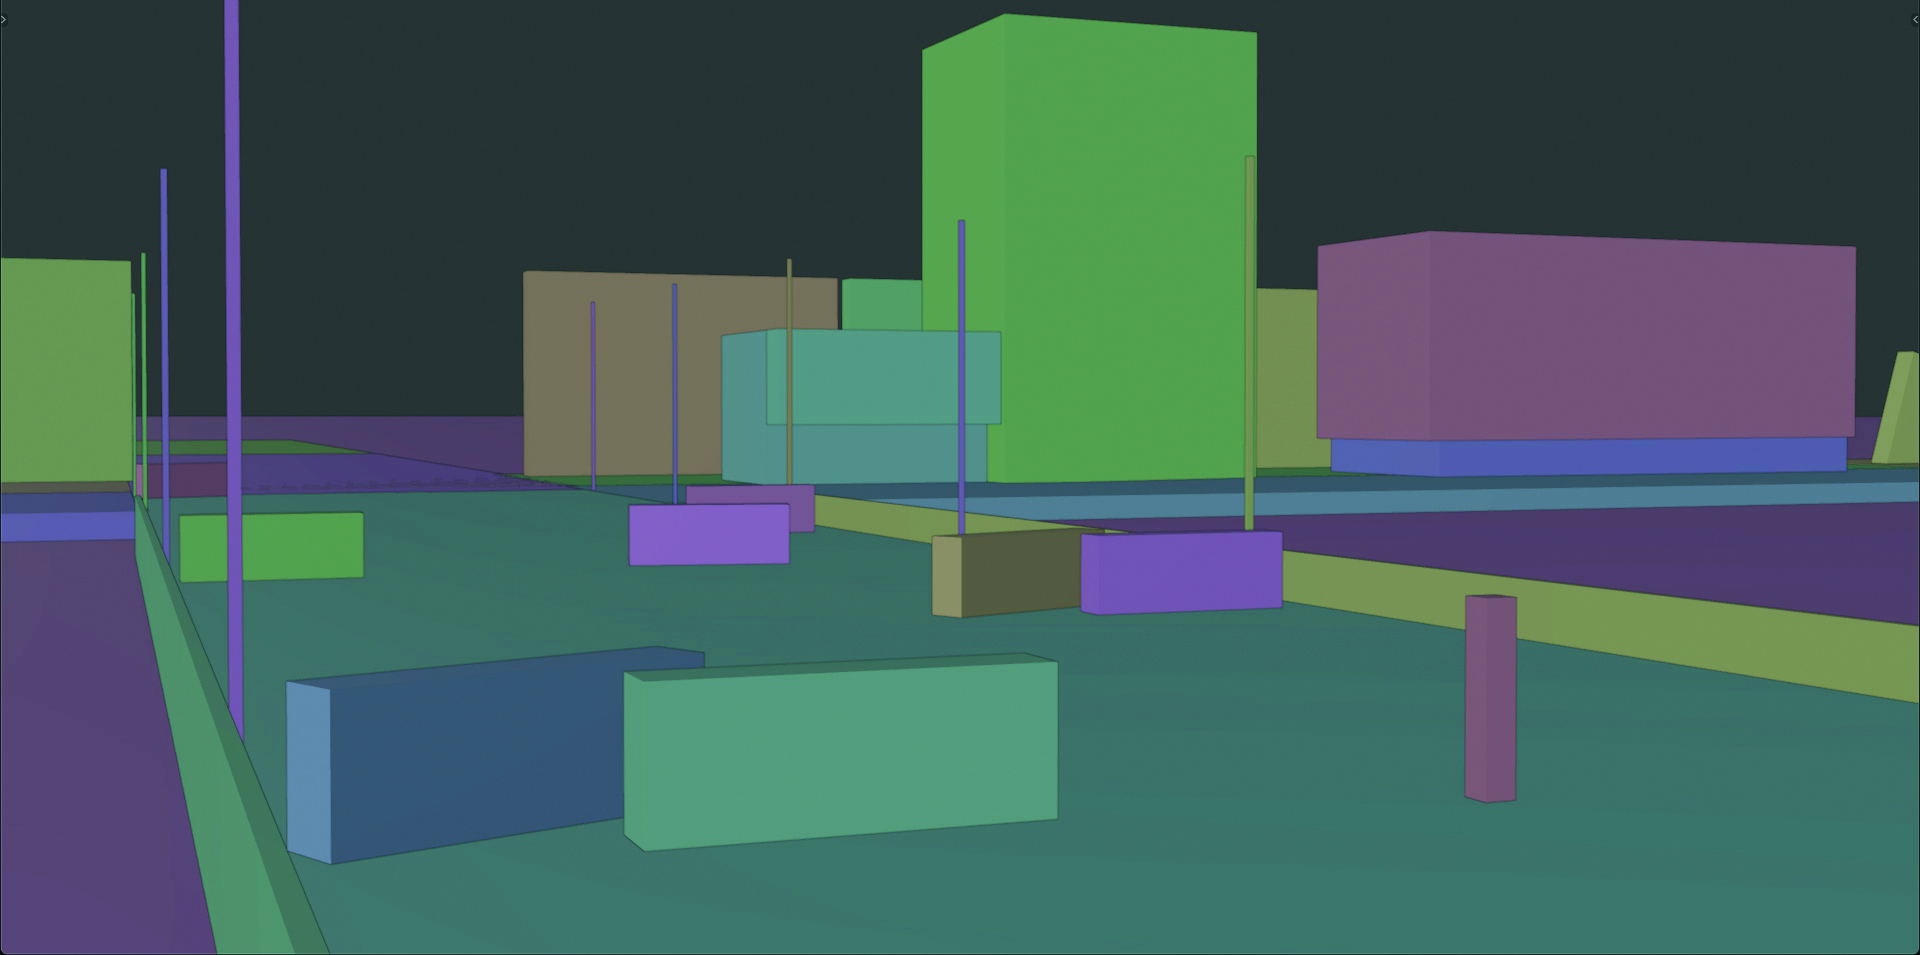
When you’re creating production concept art for games you’ll often be working off a block-out provided by level designers. I’ve realised that my environments usually turn out better when I start to think of them as a playable spaces. Imagining players being able to run around and explore a level really helps in building the environment from a storytelling perspective.
I’ve started to apply this thinking to my personal work as well. Instead of just seeing my pieces as a render or an image, I’ve begun to think of them as small levels or a place that exists in a livable, breathable world.
04. Photo textures
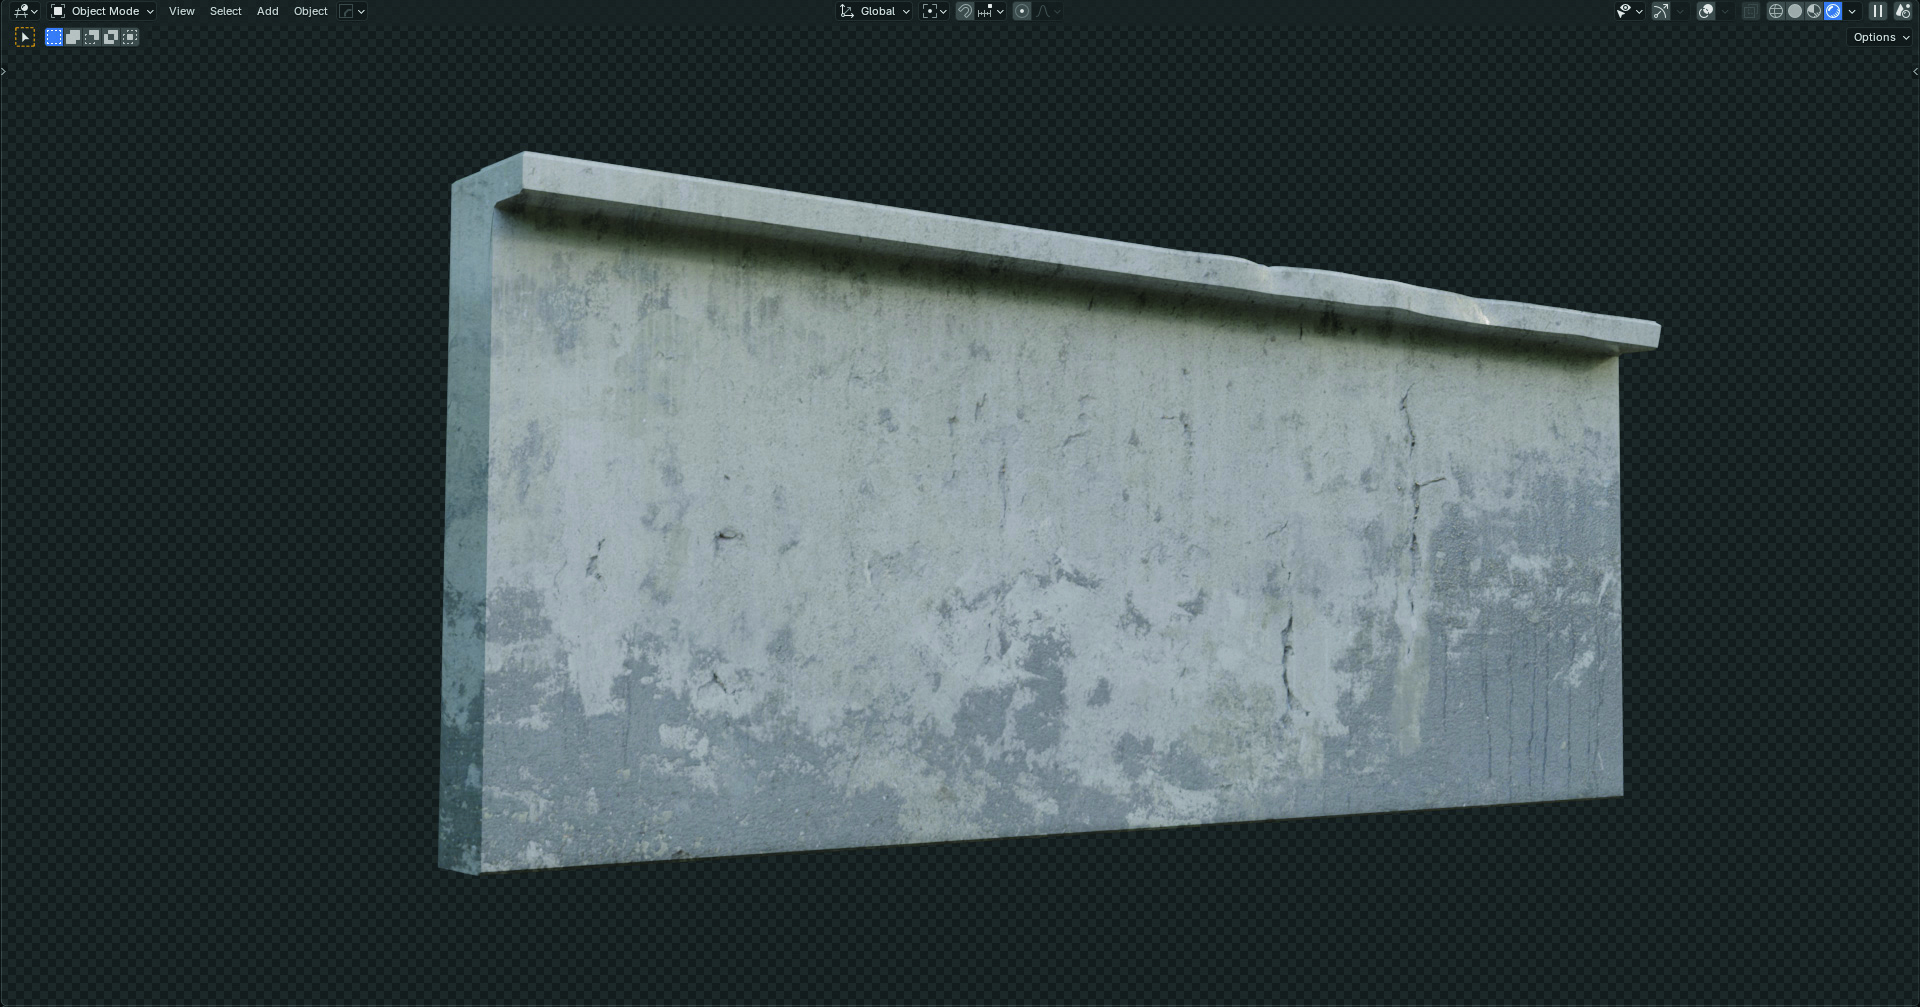
It’s normal in a 3D workflow to use PBR textures, and there are some parts of my workflow where I do. Yet for most of my work I’ll use photo textures. It’s less time-consuming and gives a more realistic result. I also mix different photo textures in Photoshop to create custom textures.
It means I spend less time mixing Nodes, instead focusing on more artistic decisions. Spending too much time on technical pursuits can take me away from making critical creative choices in my work
05. Screenshots and paintovers
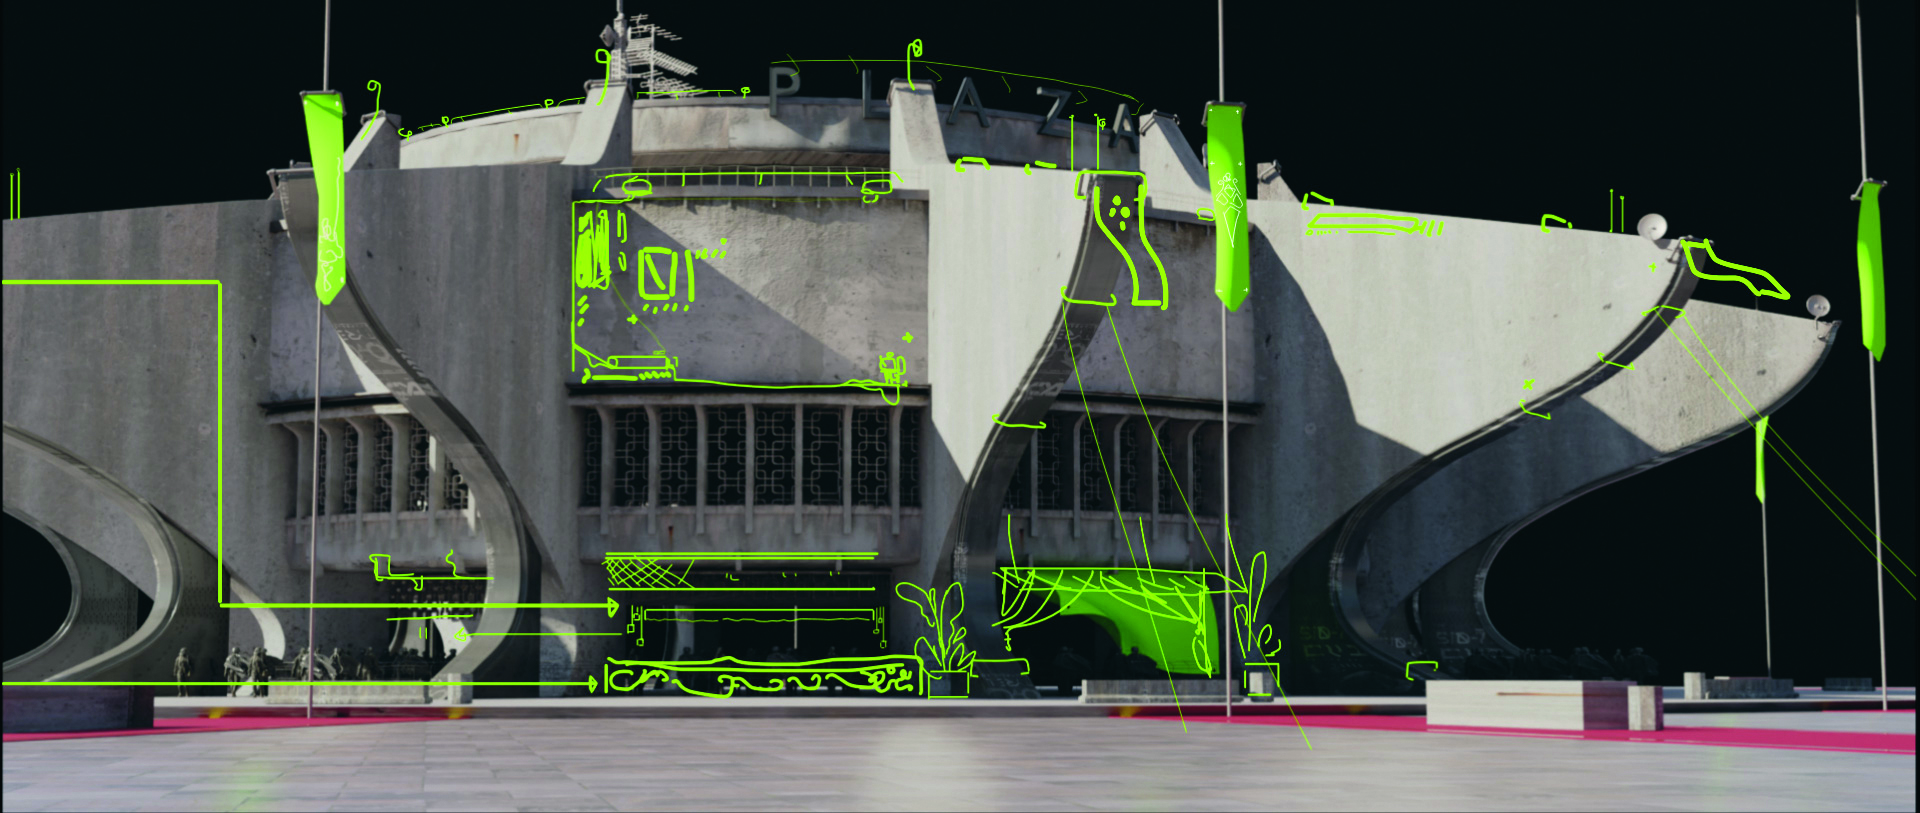
Often while working for several hours in 3D, it can be hard to make rapid creative decisions. This makes it harder to quickly iterate on several design ideas.
With this in mind, I’ve found it helpful to take a screengrab of my viewport, import it into Photoshop (or any 2D art software of your choice) and sketch over any design decisions I might want to make in 3D.
I can quickly iterate on ideas and see if they work. The aim here is to be as rough as possible: it’s supposed to act as notes for me to reference when I jump back into 3D. I’ll repeat this several times throughout my process.
06. Big medium small (BMS) theory
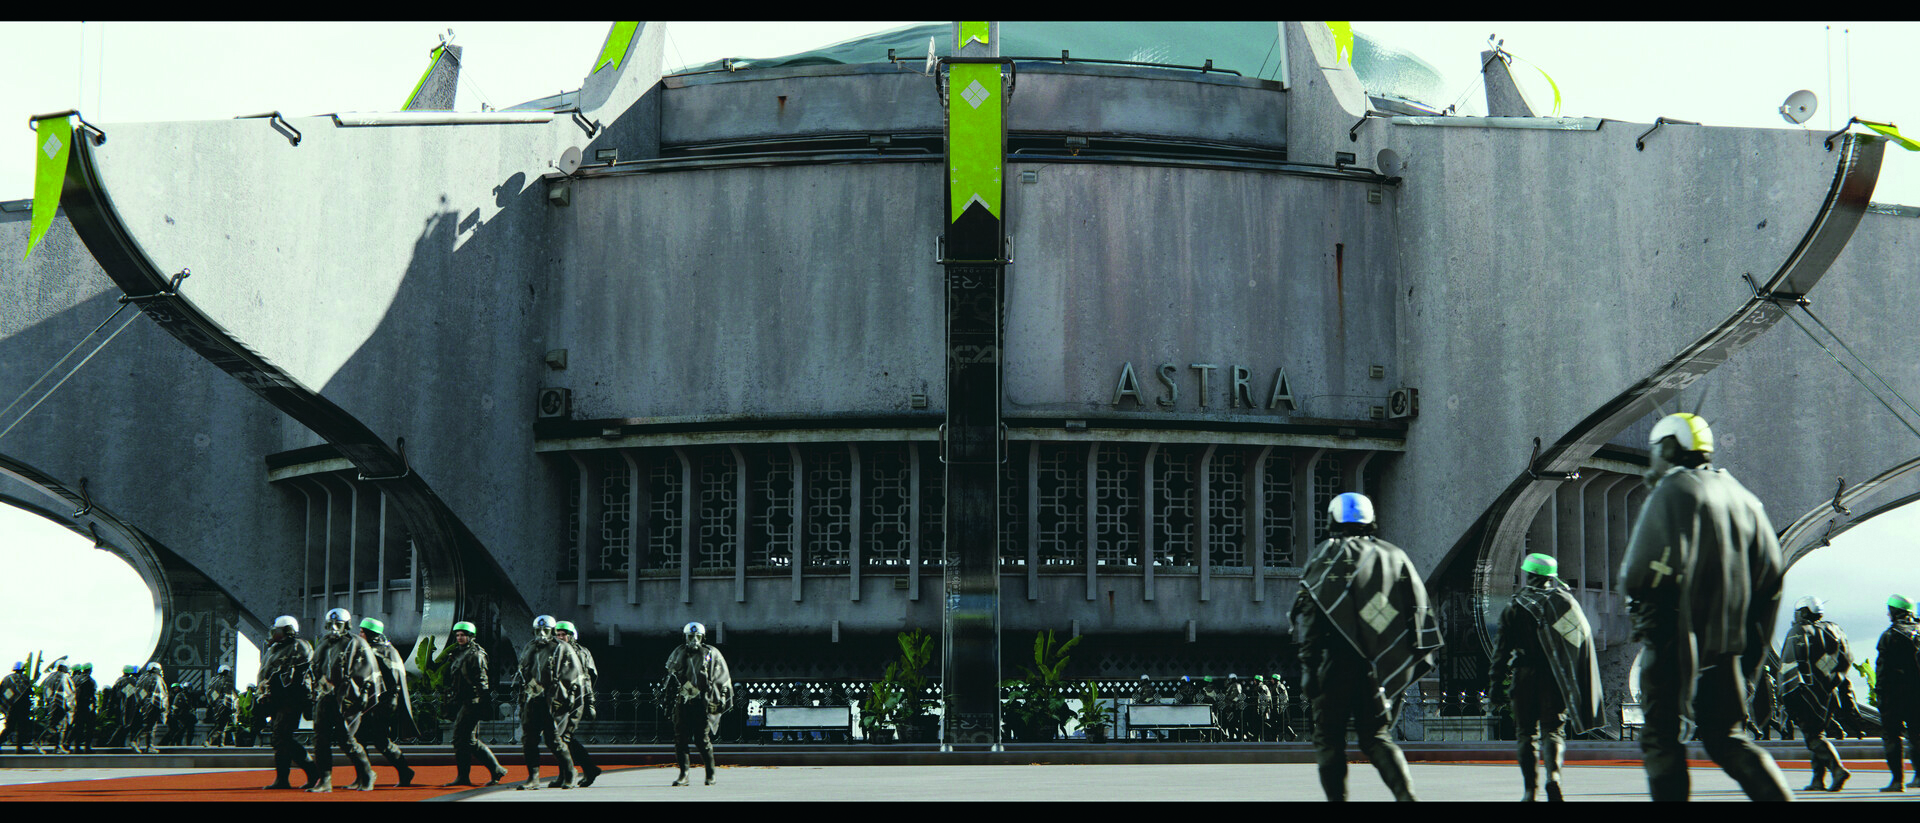
The idea of ‘Big Medium Small’, also known as ‘70:20:10’, is that most design shapes can be broken down into a big shape, a few medium shapes and a collection of small shapes. The brain is trained to see symmetry and place objects at equal distances, which can make for uninteresting design choices.
Keeping this theory in mind helps you consciously make more interesting and dynamic arrangements of shapes. This doesn’t just apply to how I design objects, but how I texture, distribute detail, group objects and compose my shots as well.
07. Graphic shapes
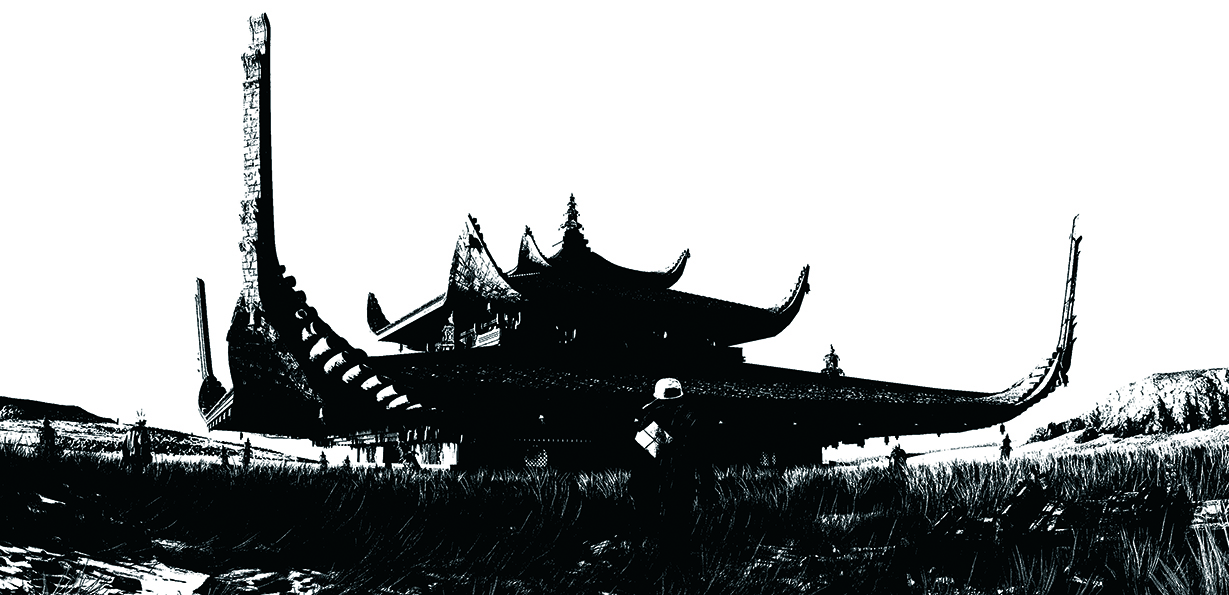
When I’m compositing my final shots, I like to think of my composition in two values: black and white. This enables me look at my composition purely as graphic shapes, which helps me light my scenes to create pleasing proportions and shapes using light and shadow.
I also think of the overlap between dark and light shapes. For example, in more overcast scenarios I’ll silhouette darker objects of importance over a lighter background such as the sky. Although this doesn’t have to apply to every lighting scenario, it’s something I fall back on when in doubt about my composition.
08. Blackbody noise
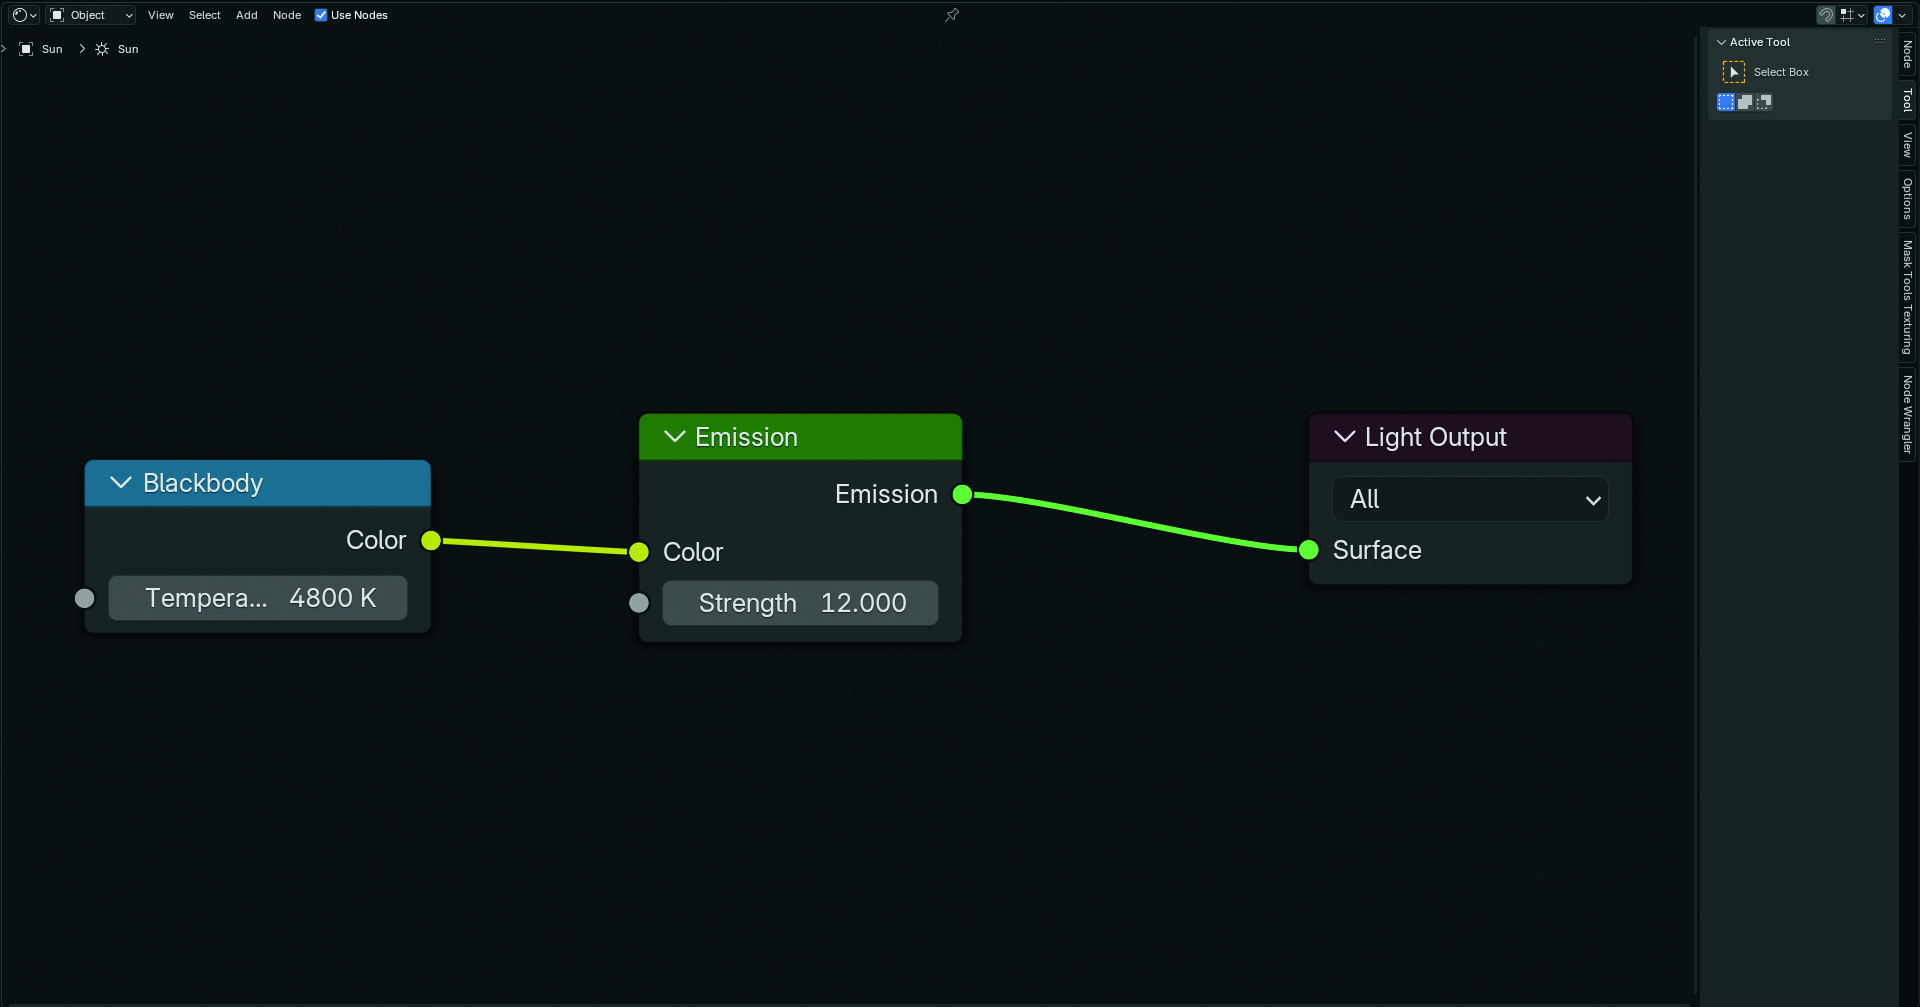
Here’s a useful tip if you’re ever confused about the temperature of your Sun in Blender and how to accurately judge it based on the time of day in your scene. Plug a Blackbody Node into the emission of your Sun.
The Blackbody Node converts a temperature value from Kelvin into an RGB colour. I usually reference a sunlight Kelvin chart (you can find these online) to input a temperature value based on my time of day. This leaves less room for guesswork. There’s always room for artistic liberty, but I find this approach is useful for giving me a starting point.
09. Greater depth
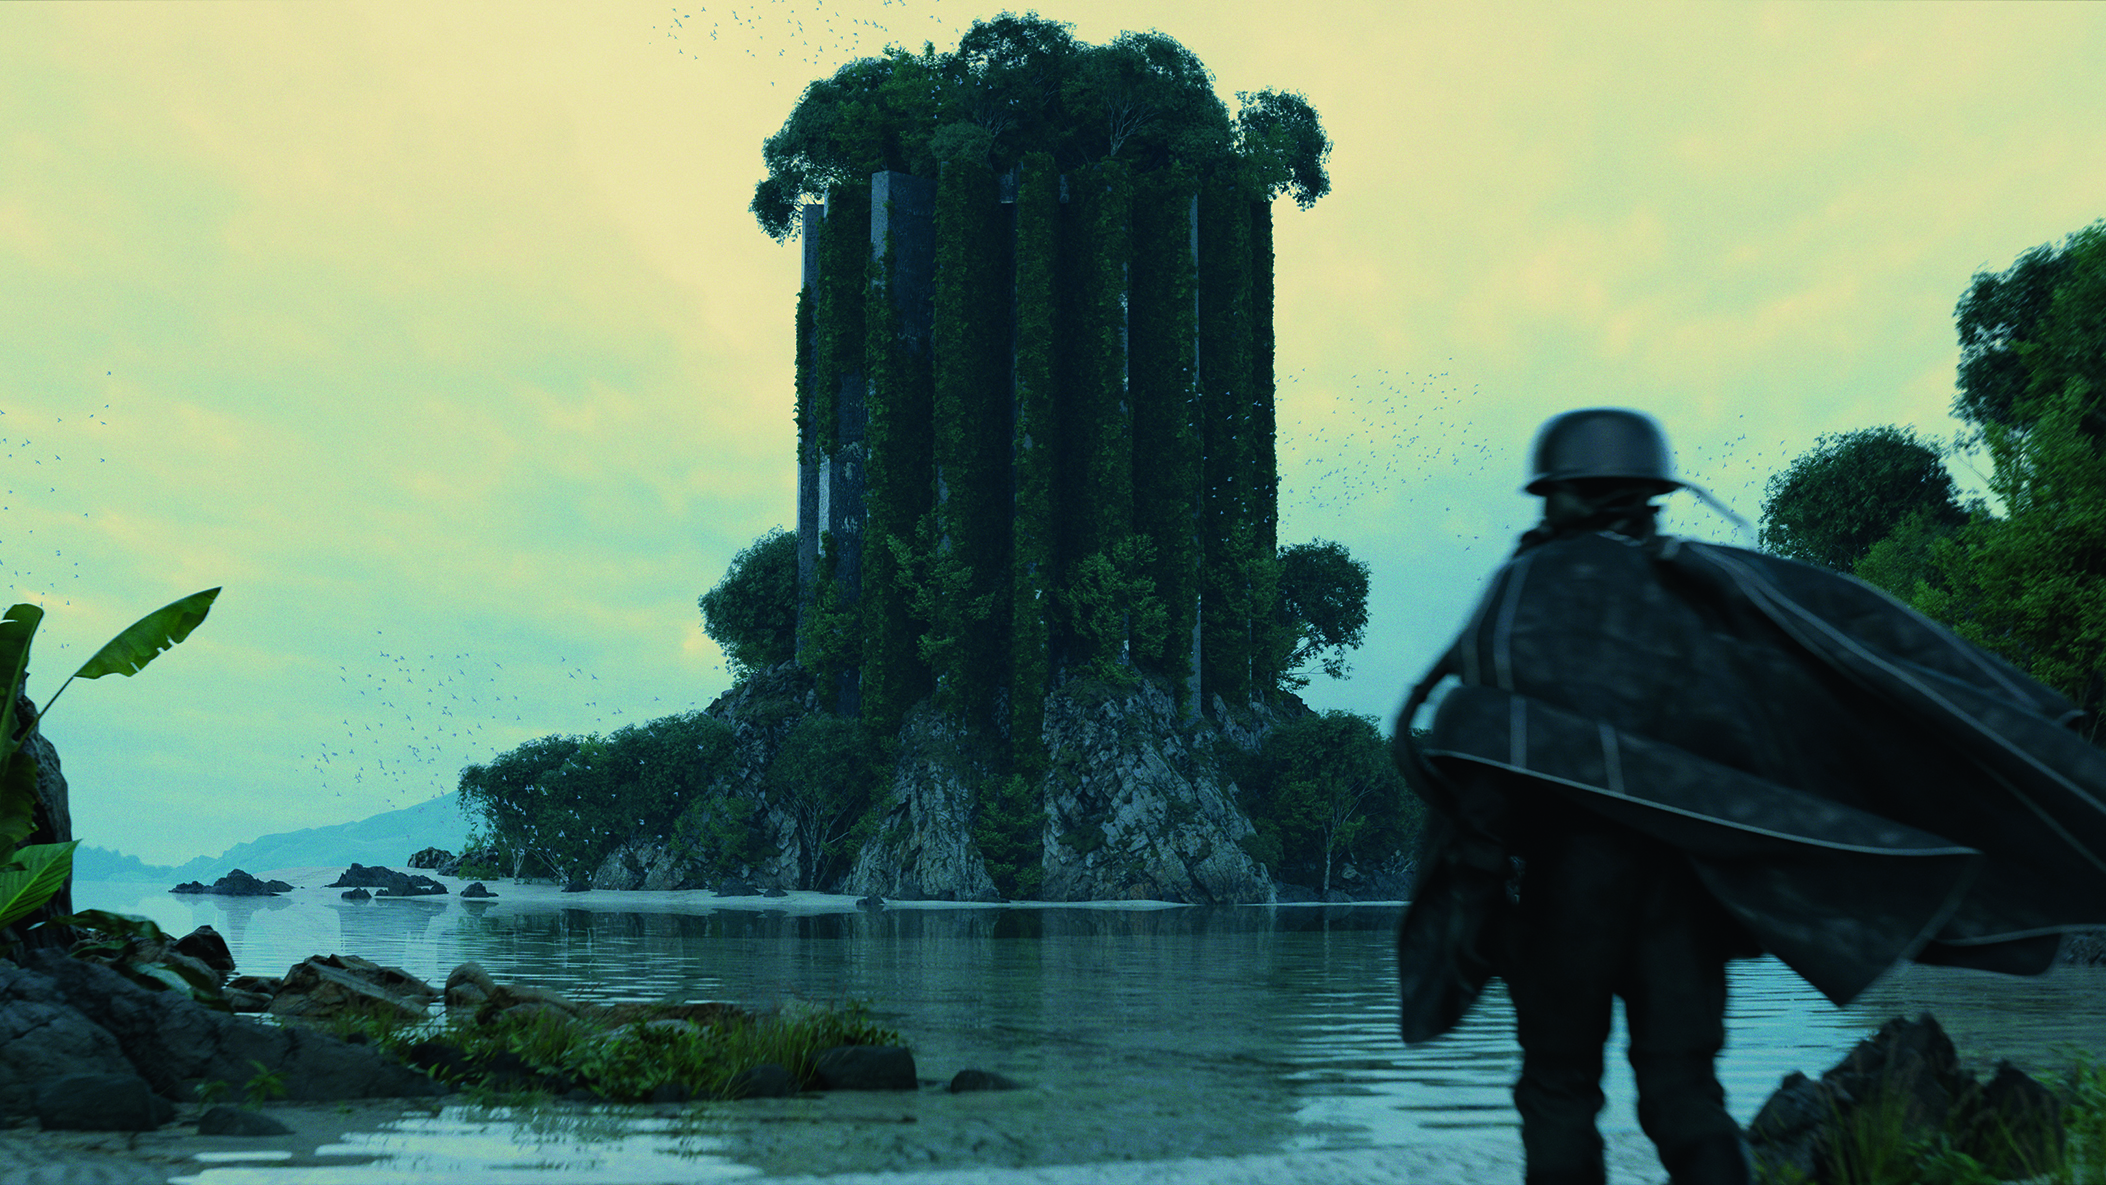
An easy way to give a sense of realism to your artworks is to add depth of field. There are a few settings I like to use to get a particular look with my images.
A) Configure the Camera
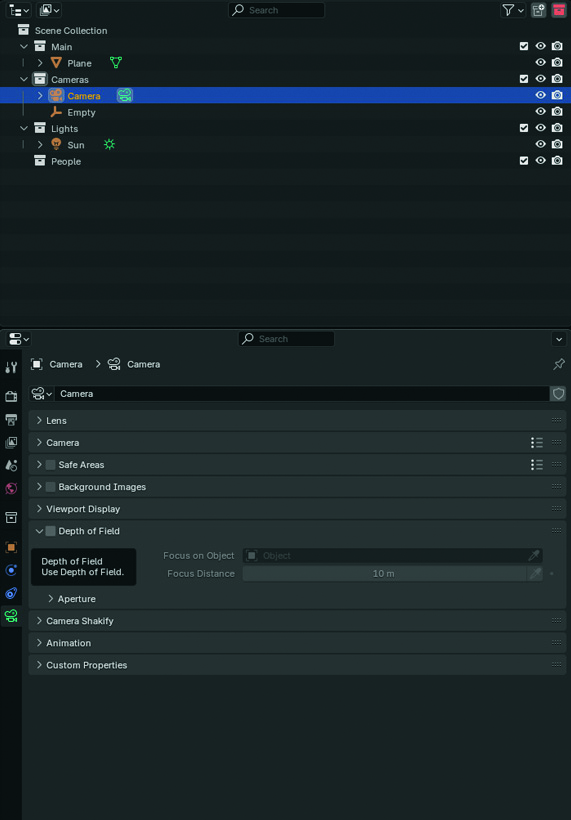
First, select your Camera and go into the Object Data Properties, accessed from the Properties panel. Scroll down and click Depth of Field to turn it on. You’ll now see a few settings that you can play around with.
B ) Assign the focal point
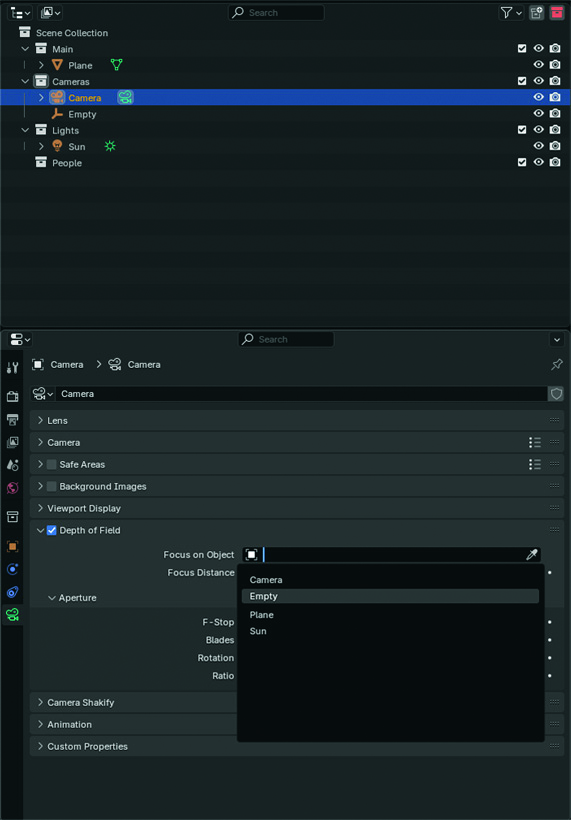
Second, bring an Empty into the scene and add it as the Focus Object for my Camera. Now I can easily move around my point of focus by using the Empty. You can use the Eyedropper or simply use the Search tab on the ‘Focus on Object’ setting.
C) Create a cinematic effect
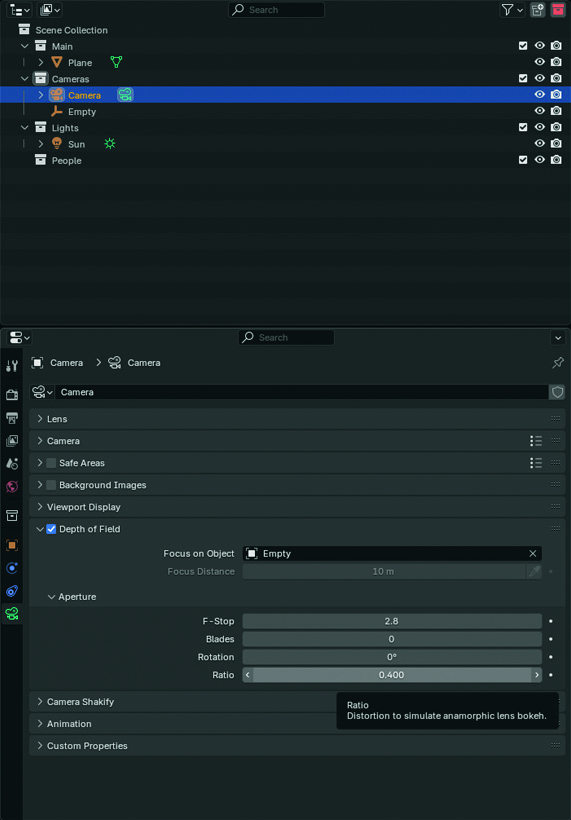
Lastly, under the Aperture settings, I like to keep my F-Stop between 2.8-4 and the Ratio to 0.400. This gives the blur a subtle motion effect and makes the image look slightly more cinematic, as if it were a still captured from a scene in a movie.
10. File management
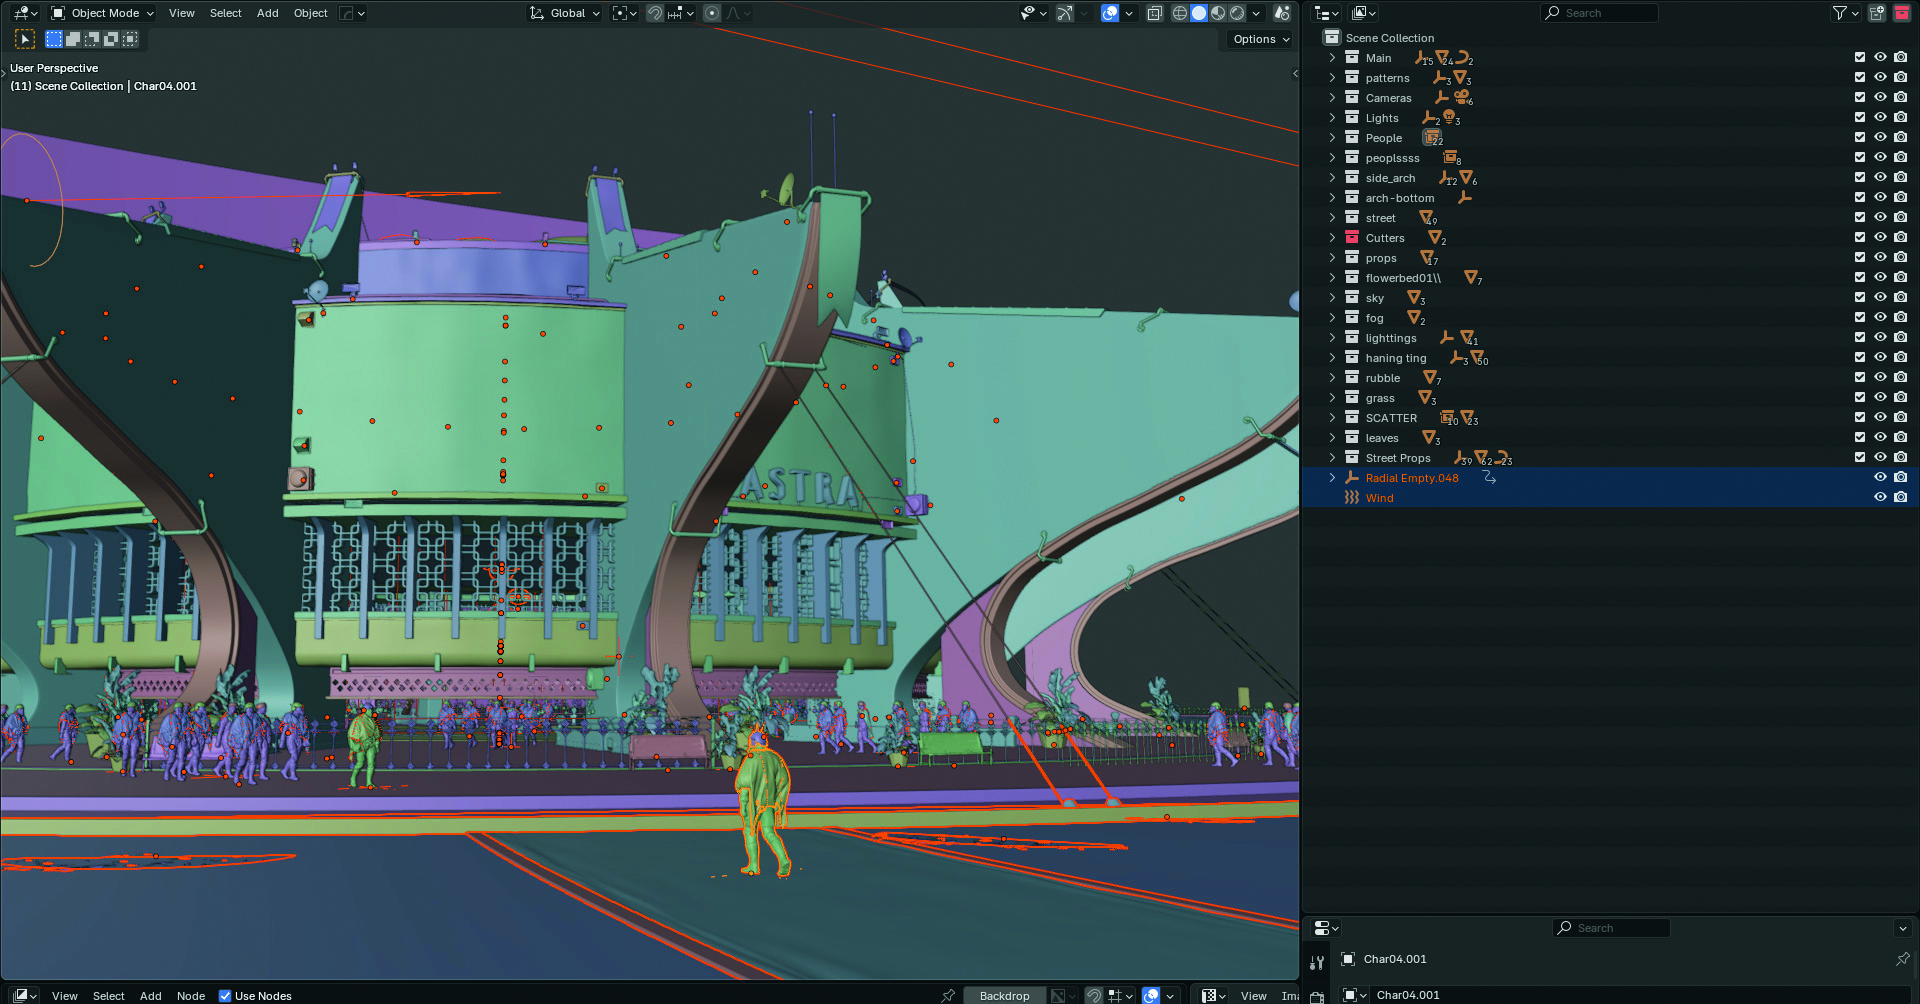
A large 3D environment project can have hundreds if not thousands of objects and it’s important to keep your files well managed. I’m very particular about sorting my objects into proper Collections, which makes them easier to find and select.
Developing this habit is important when working in a professional setting, as you’ll often be sharing your files with co-workers and clients for them to work on. Select your objects and press ‘M’ to add them to a new or existing Collection of your choice.
11. Collection instances
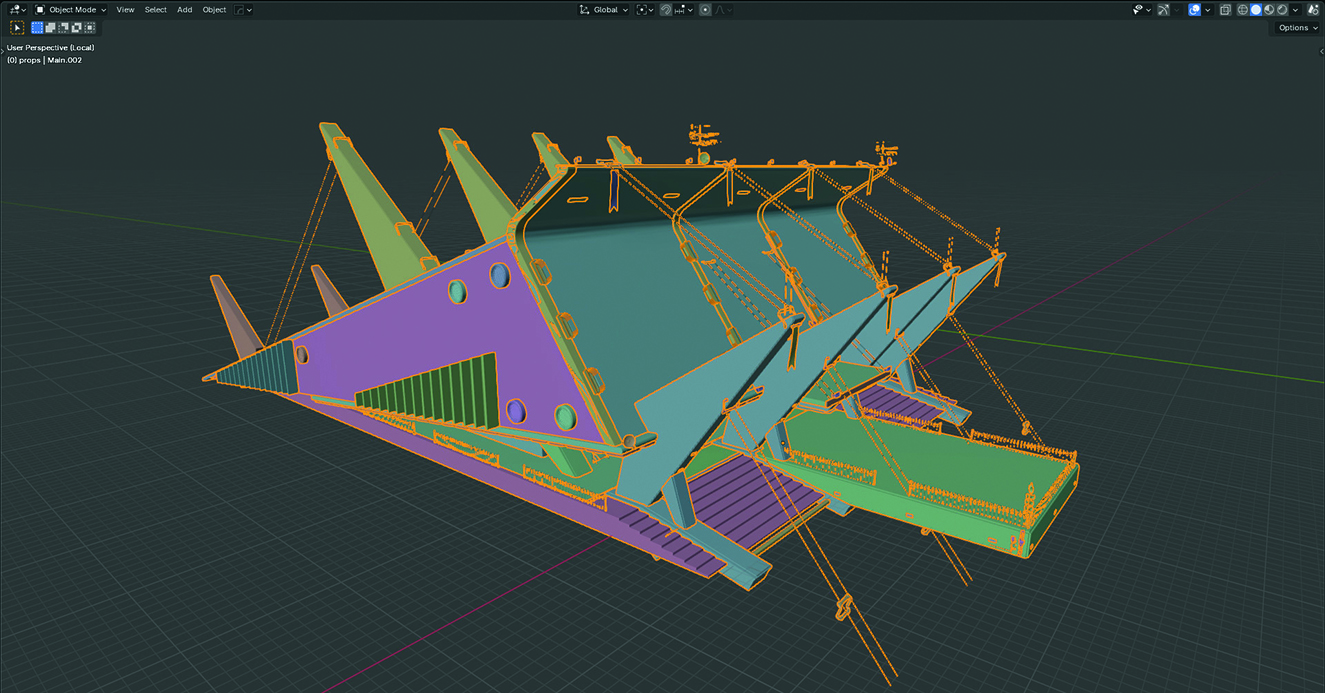
Instancing a Collection is a great way to multiply large groups of Objects without having to increase my polycount and be able to keep my workflow as non-destructible as possible.
When I’m designing a large structure, such as a building that would be the focus of my scene, I’ll make sure to keep all the Objects in a Collection and have an instance of the Collection as my focal point. This means that I can design my structure ‘off camera’ and am able to move around my Instance without having to select every Object each time.
12. Checking your values
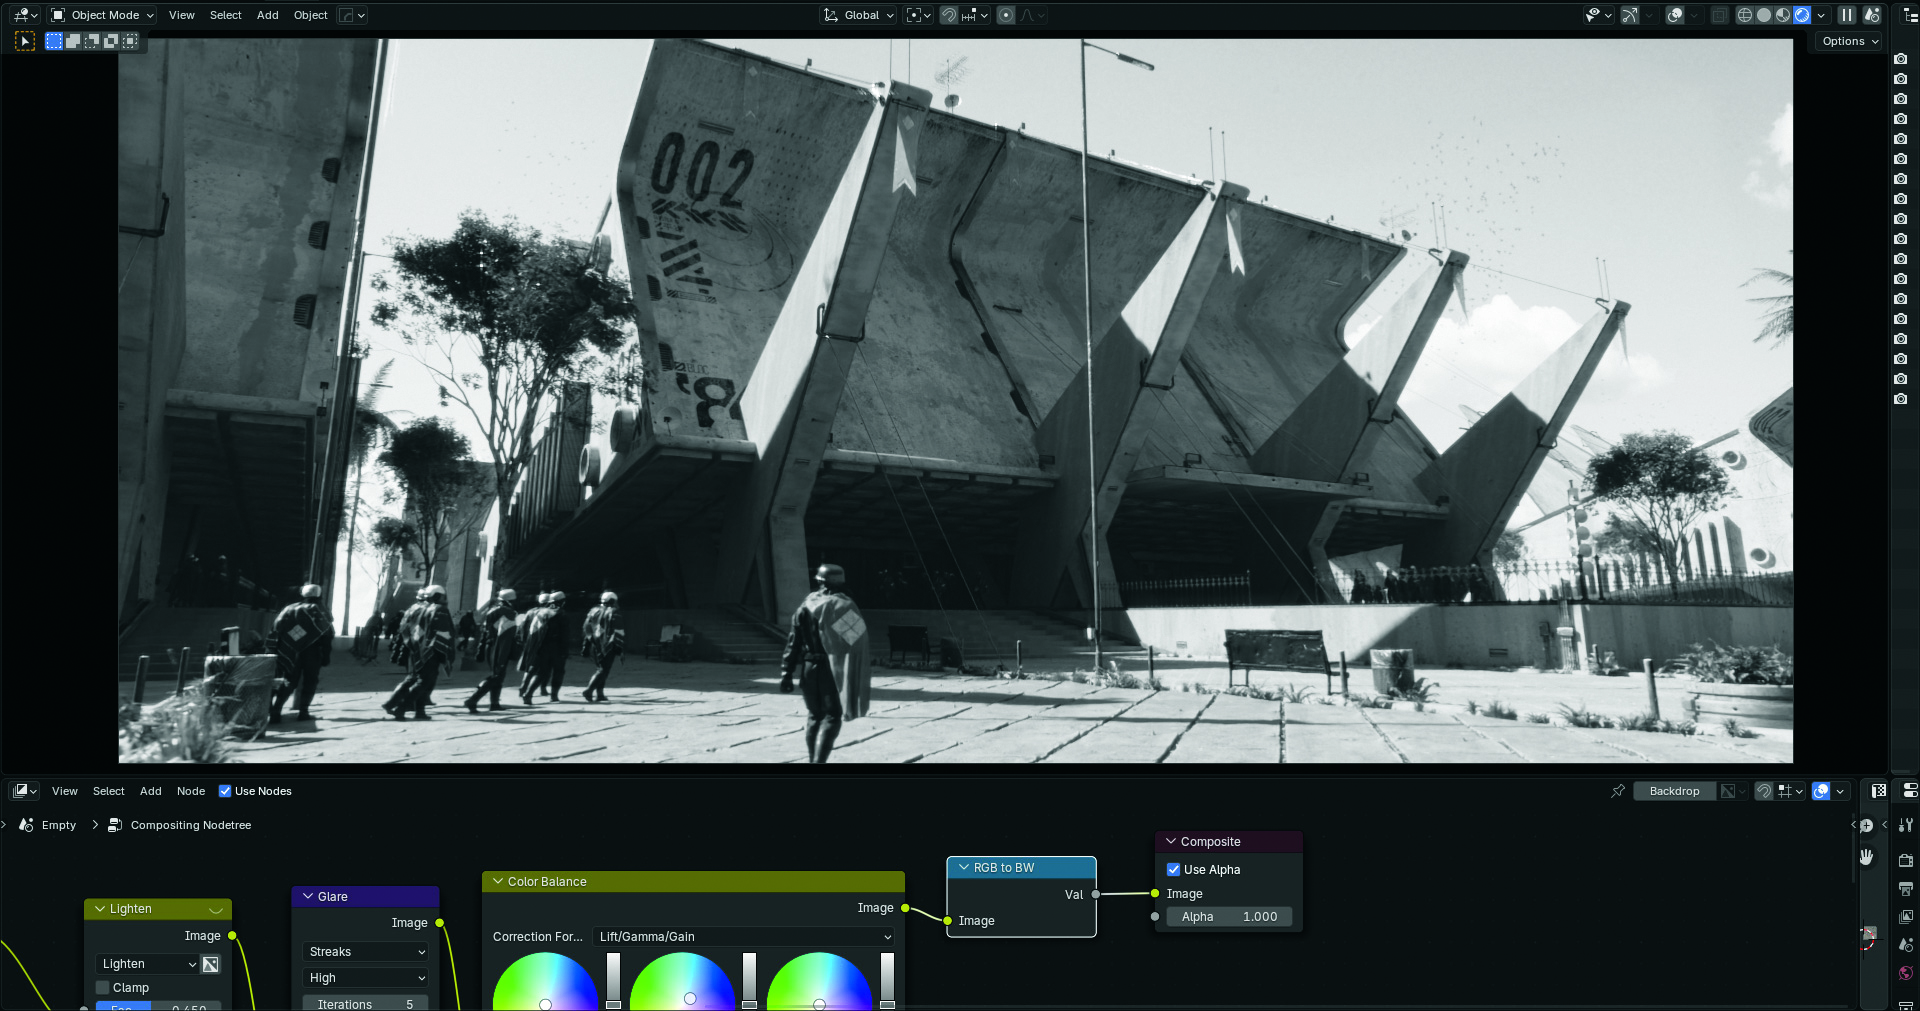
Having a strong value structure can make or break an artwork. It’s important for me to keep checking my values to make sure my image is readable.
An easy way to do this in Blender is to add an ‘RGB to BW’ Node in my Compositor and plug it into the Composite node. This way I can check my values while working on my scene without having to switch programs.
Make sure to turn on the ‘Use Nodes’ option in your Compositor and set the Compositor option to ‘Always’ under the Viewport Shading option menu.
13. Optimise the scene by reducing polycount and texture resolution
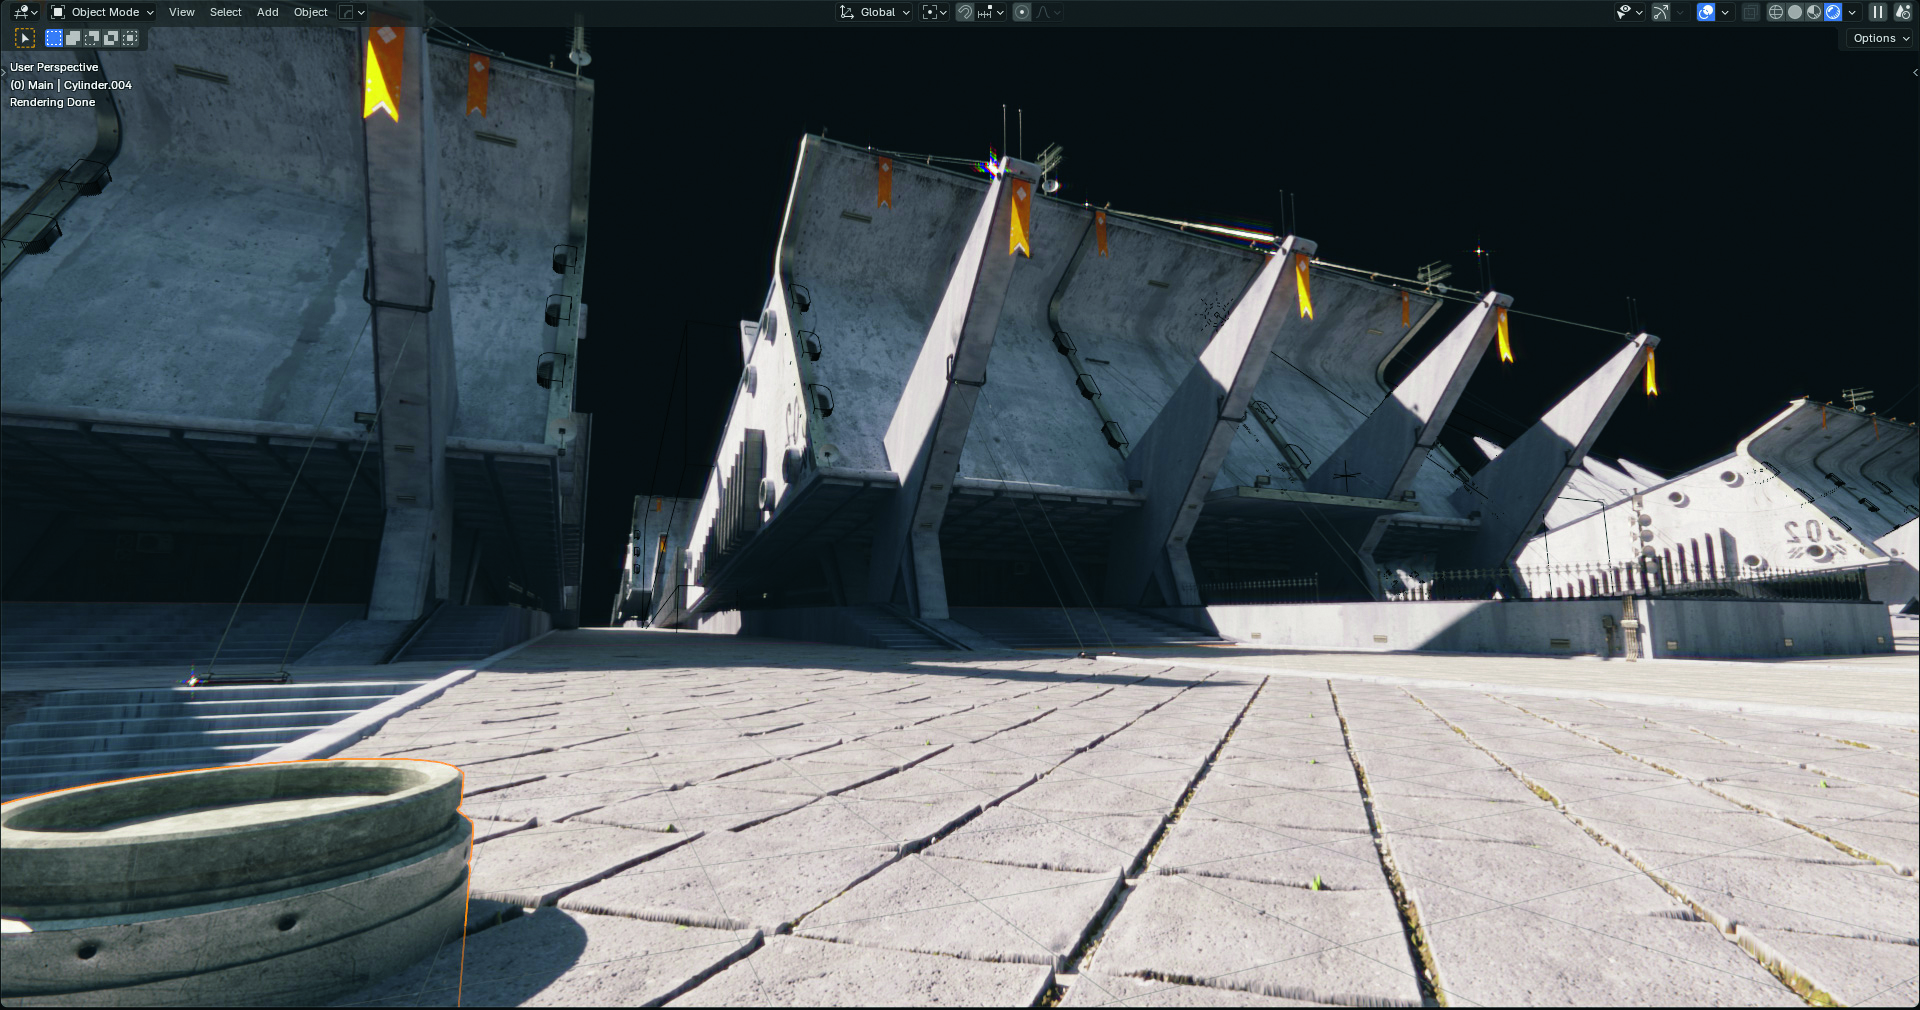
Keeping my 3D scene as light as possible is important for me to be able to explore different compositions. Furthermore, being able to move objects around and iterate is vital for personal and professional projects.
Apart from keeping unnecessary polycount at a minimum, managing my texture resolution helps keep my scenes as light as possible. Using lower-resolution textures for objects far away from the camera is a useful trick. Generally, I don’t find the need to use textures above 4K, and even 1K on the lower end.
14. Asset browser

Having a well-organised Asset Browser is important for me for working quickly. I’ve amassed a large collection of reusable Assets from working on many professional and personal tasks, both self-made and from online sources, and have made a habit of organising them into my library.
To mark objects as Assets in your Asset Browser, right-click an object in your outliner and click ‘Mark an Asset’. Go to Edit>Preferences>File Paths and under ‘Asset Libraries’ you can add the path to your file with your marked Assets.
15. Establish lighting
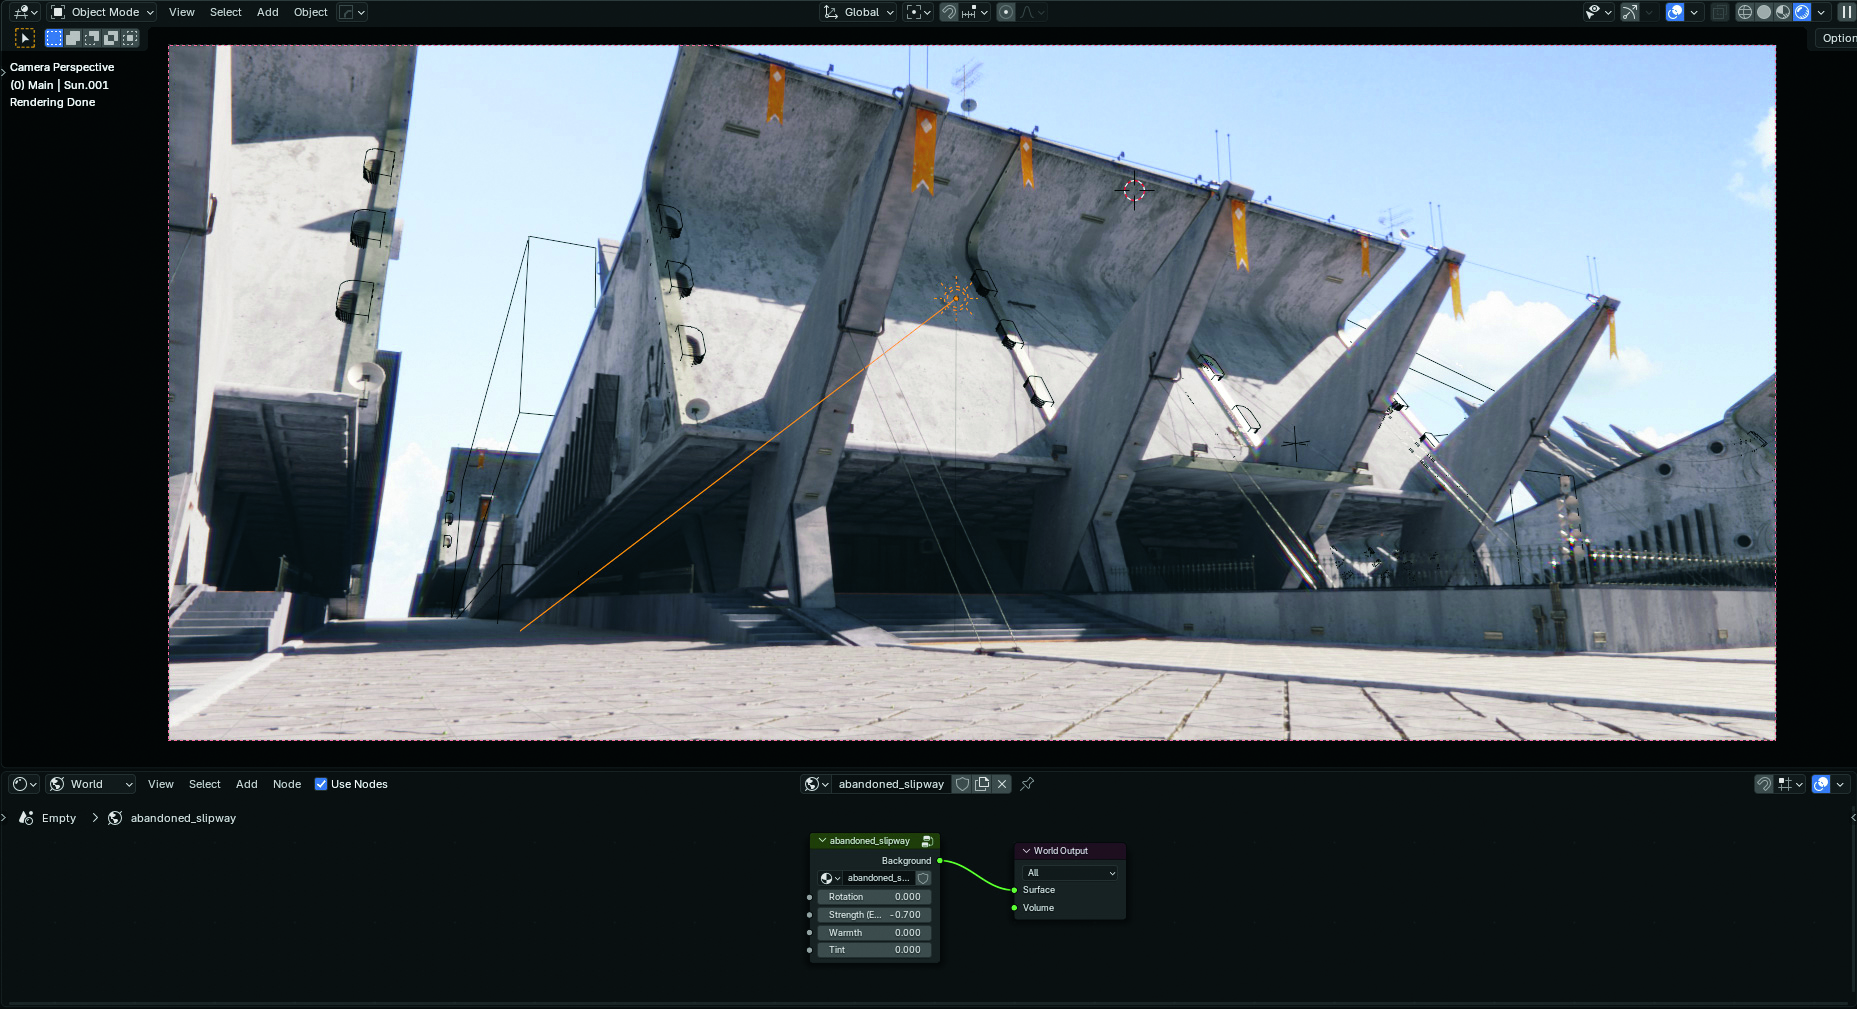
My lighting setup is a mixture of a few different things working together. I prefer to use an HDRI without direct sunlight, usually just so I get the ambient information from the sky colour.
If I want to light my scene directly, I’ll use the Sun light. It gives me more directional control compared to rotating the HDRI. I like using shadows as a compositional tool to create more dynamic light shapes.
I’ll use a cube to create custom shadows and hide it from my camera so it’s not visible in the final render. Finally, I’ll import images of skies to use for my background, because it gives me greater control over how my sky looks compared to the default background from HDRIs.
Need to upgrade your setup to get more power for 3D work? See our guide to the best laptops for 3D modelling.
This article originally appeared in ImagineFX. Subscribe to ImagineFX to never miss an issue. Print and digital subscriptions are available.
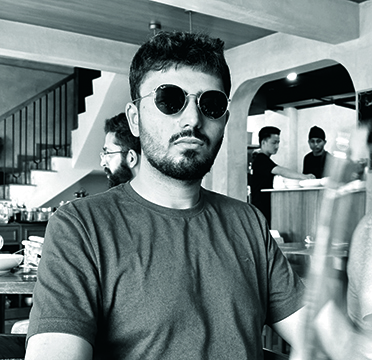
Rahul’s is a digital artist based in India. His speciality is environment concepts for video games. Projects that he's worked on include Off the Grid by Gunzilla Games.
You must confirm your public display name before commenting
Please logout and then login again, you will then be prompted to enter your display name.
