How to make video game concept art using Blender
Virtuos and Tencent Games artist ZiYuan Wang shows his creative process for creating an environment concept.
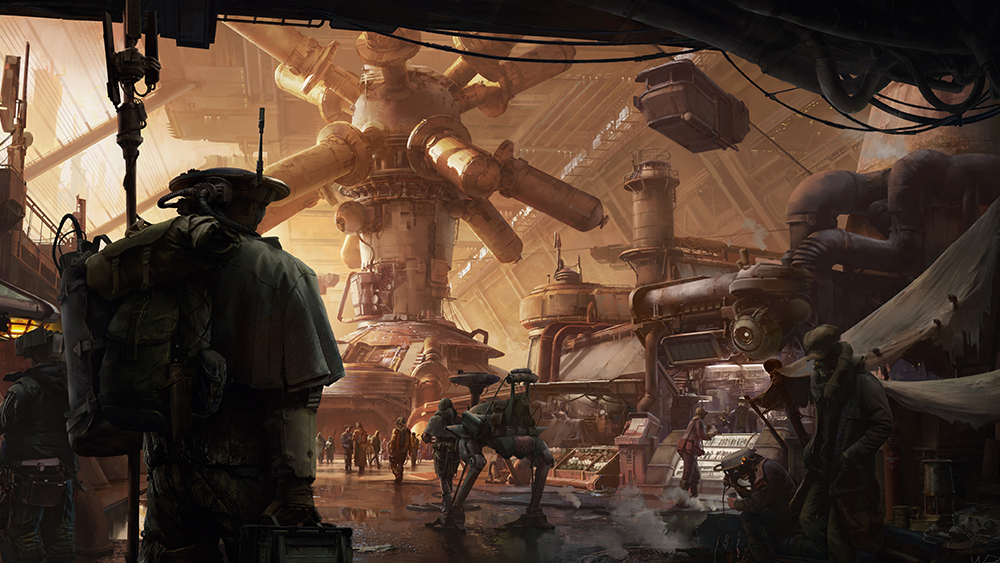
There are many approaches an artist can take when painting concept art for the video game industry, but because it’s artwork that will be used to create a commercial product there are certain aspects that need to be borne in mind. In this workshop, I’m going to show you my process step-by-step as I create an environment concept and break down my approach from a concept designer’s perspective.
This concept art tutorial will be of interest especially for artists who aspire to make video game concept art. The aim is to give you an insight into my thinking and methods as an concept artist and explore my workflow for video game assignments. You’ll see some steps that involve the free, open-source 3D tool Blender, which is widely used to create visuals in the industry (see our guide to the best 3D modelling software).
It will be helpful to have some basic knowledge of Blender because you’ll understand more of my process. However, don’t worry if you’re new to it because this article is going to show you my workflow rather than teach you how to use software. And if you’re keen to learn, you can find plenty of Blender tutorials on the site.
It’s no problem if you’re unfamiliar with or not keen on the sci-fi theme, because I use most of the processes mentioned in this article to tackle other subjects, too. For more inspiration see our features on what is concept art and how to become a concept artist for movies.
How to make concept art for video games
01. Set a design objective
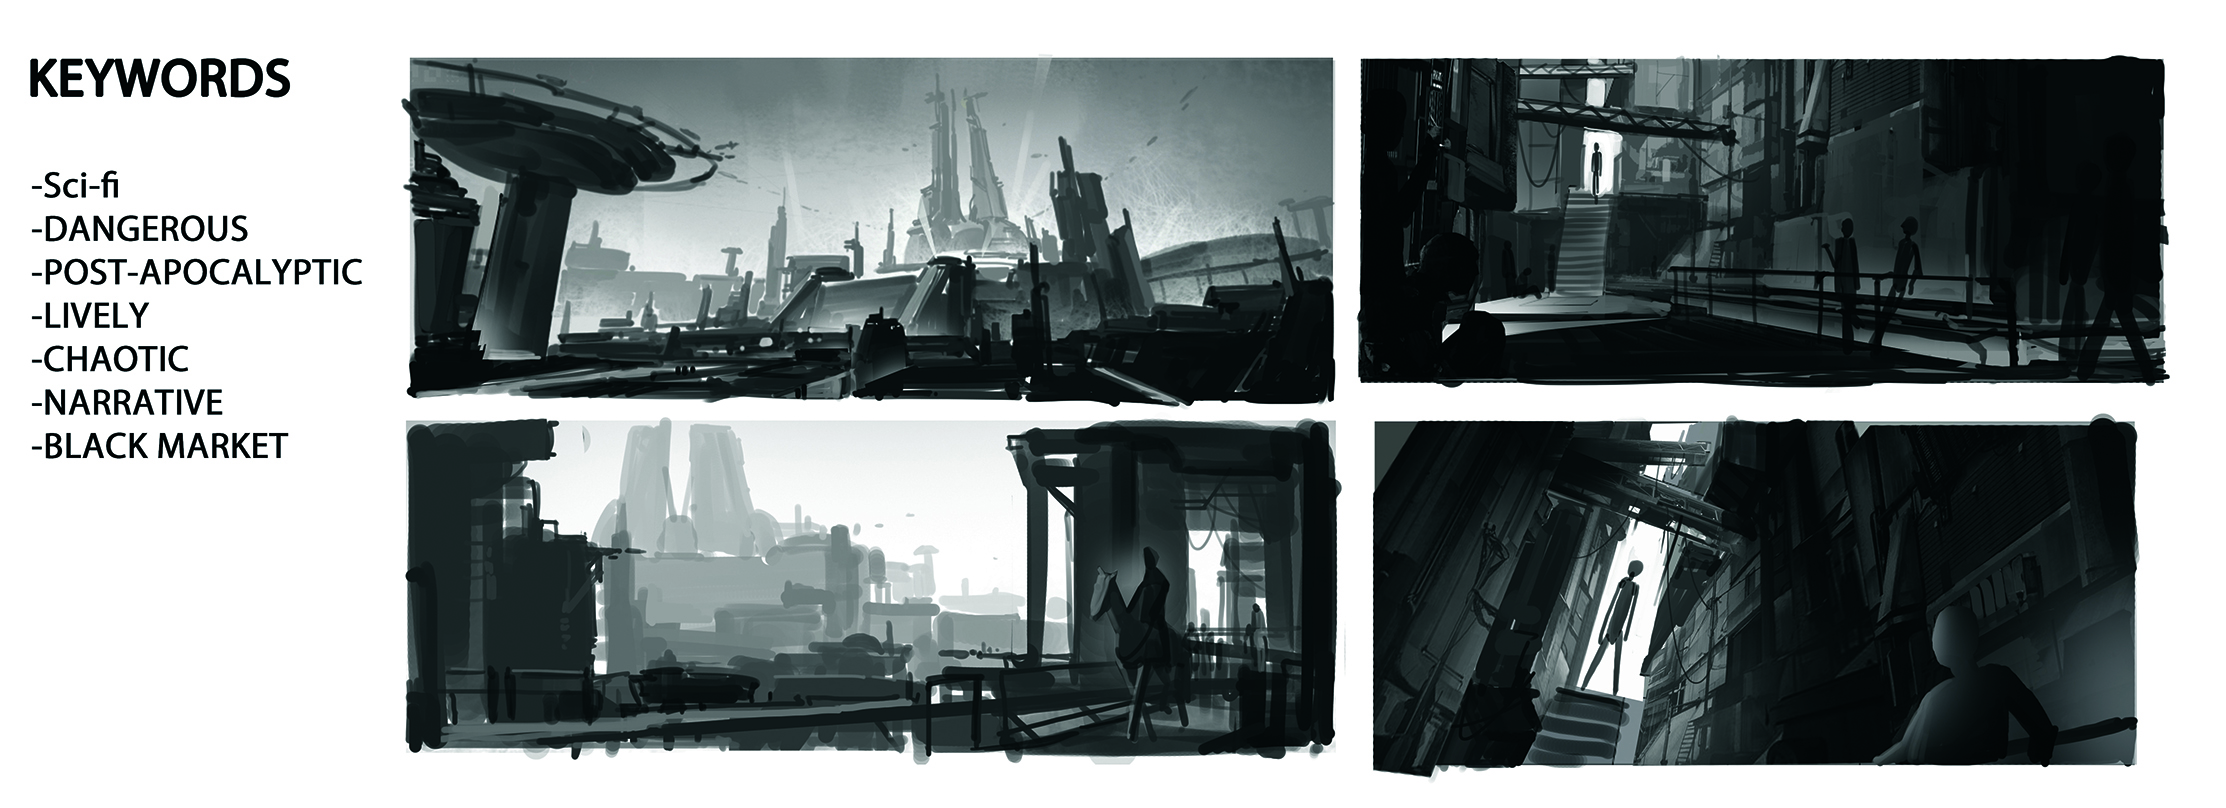
For this workshop I want to depict a market in a post-apocalyptic sci-fi setting. It needs to have a lively atmosphere and a little bit of chaos and danger, too. I’ll always give myself a list of prompts before I start a painting. I believe it’s very useful – especially if you’re self-teaching – because it provides an entry point and you can refer back to the list if you’re unsure where next to take your artwork.
02. Conduct research with purpose
This key step will help you generate a loose image in your head and set the tone of the concept. You’ll find plenty of inspiration using Google Images, Pinterest, YouTube and more, but stay focused and do your research with purpose – otherwise you may get lost in it!
03. Make a reference board
Gather your images to create a reference board, which will be easy to check as your artwork progresses. If you’re going to create a environment concept, the board should include information such as atmosphere, layout, natural environment and cultural elements.
You don’t need to track down every reference at once. Instead, just start sketching when you have some vague ideas, and add to your reference board along the way. I use PureRef to create my reference board.
04. Try different solutions
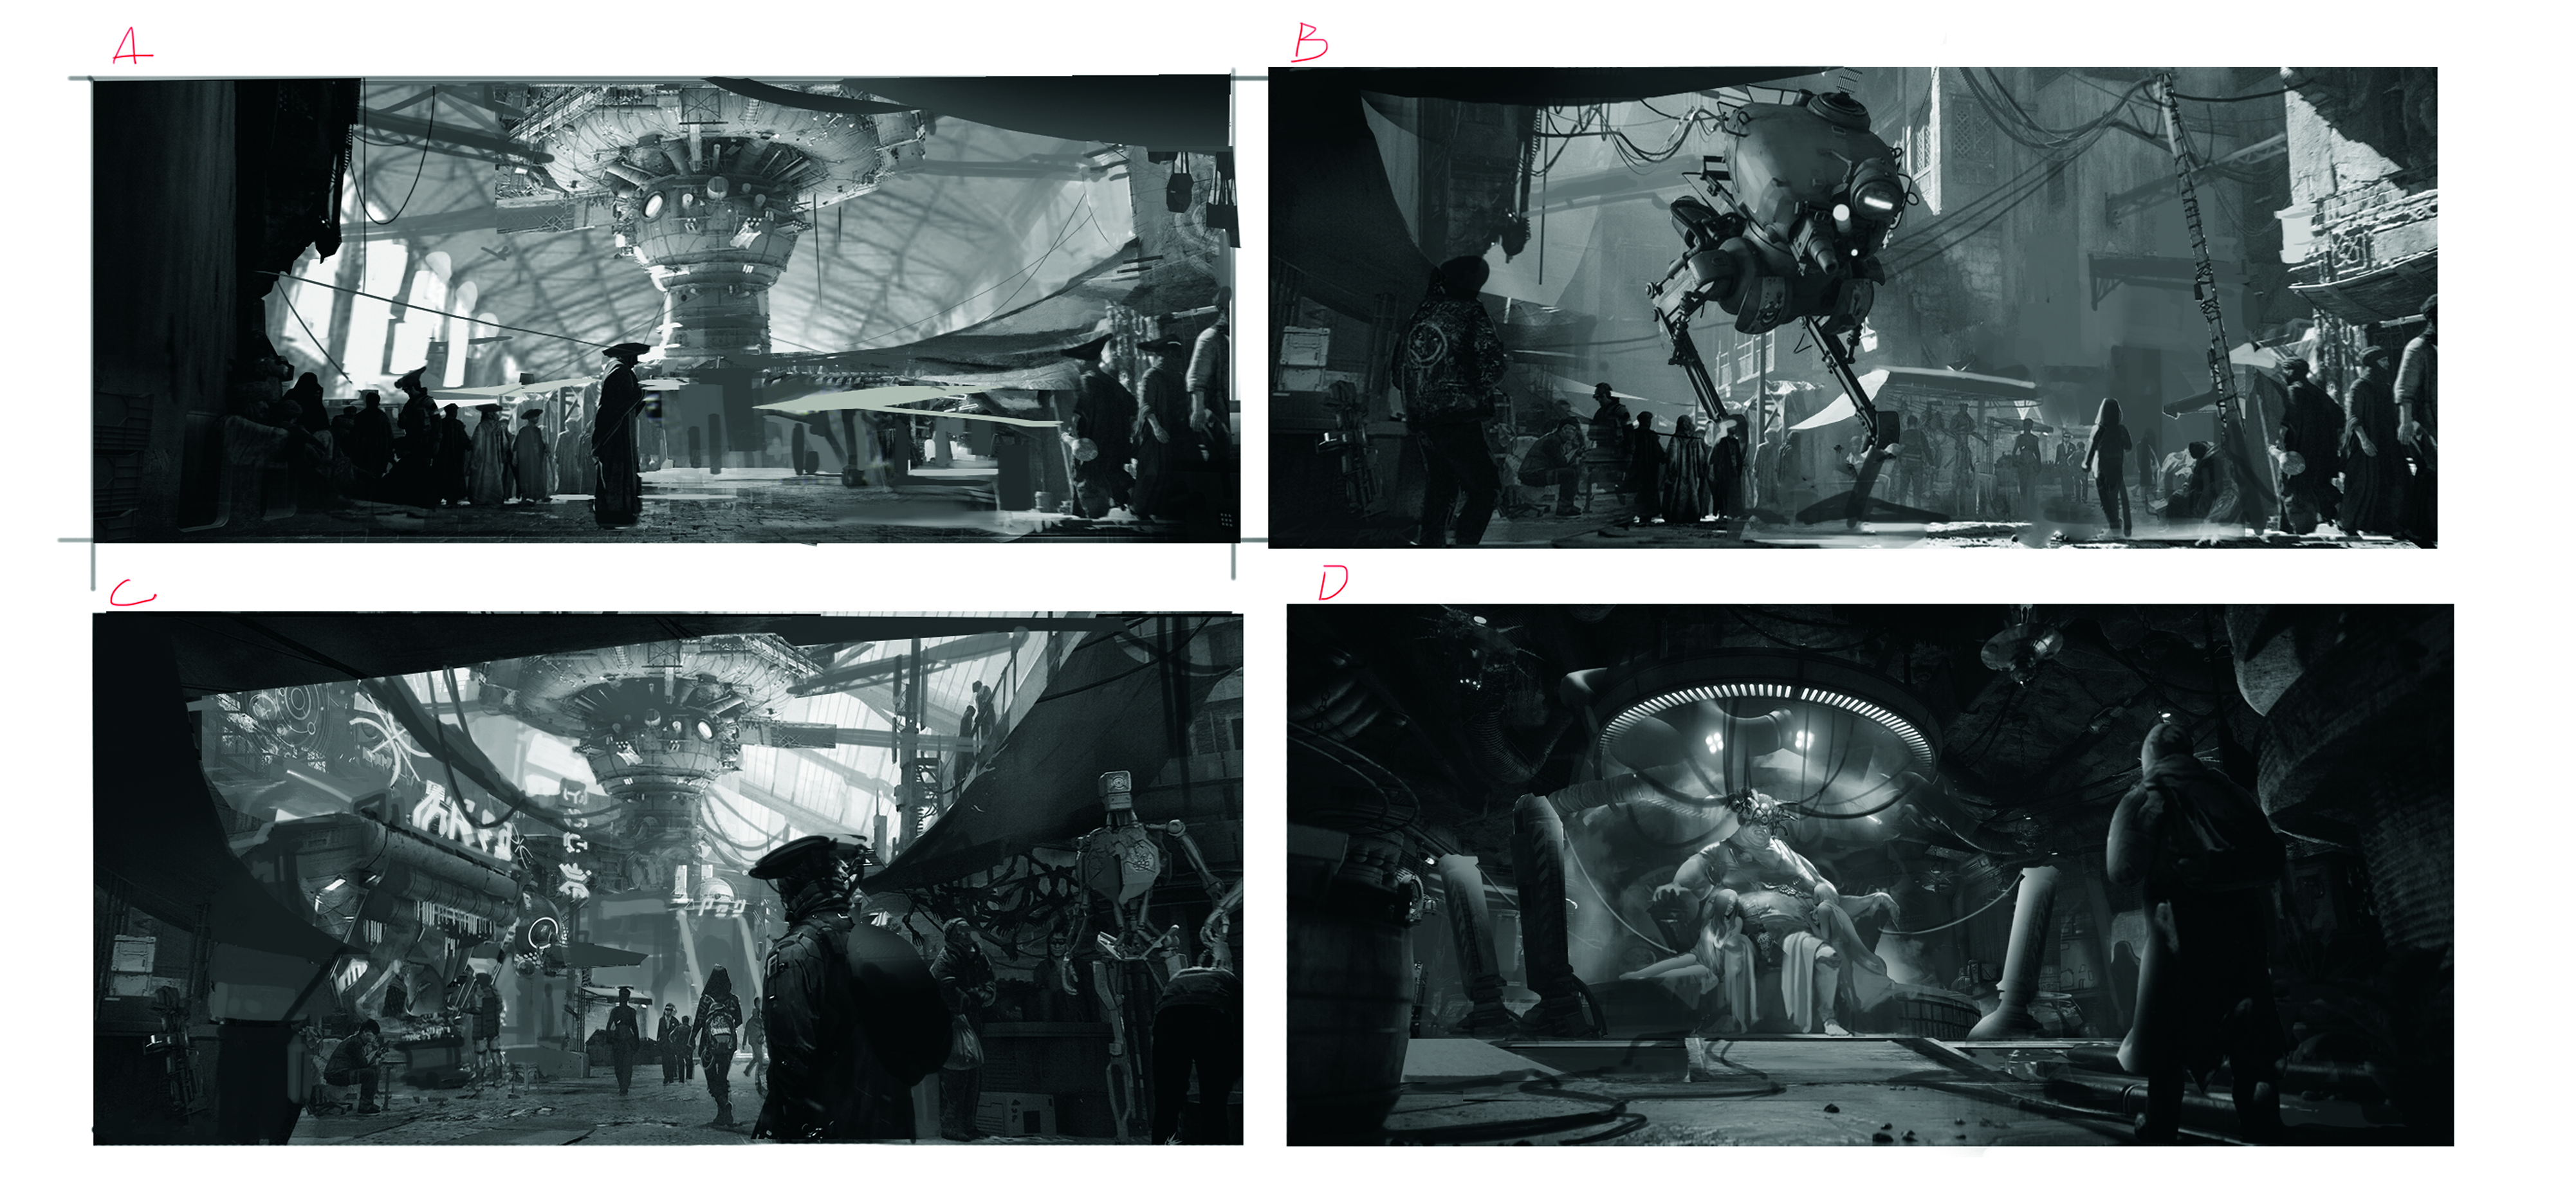
I recommend visualising as many of your ideas as possible in the form of sketches, before deciding on a composition. It’s good design practice and you can figure out what you want to depict during the process, especially if you’re just starting to learn concept art.
Taking this approach will give you the space to refine your design and can even lead to new ideas.
05. Let the design speak to its audience
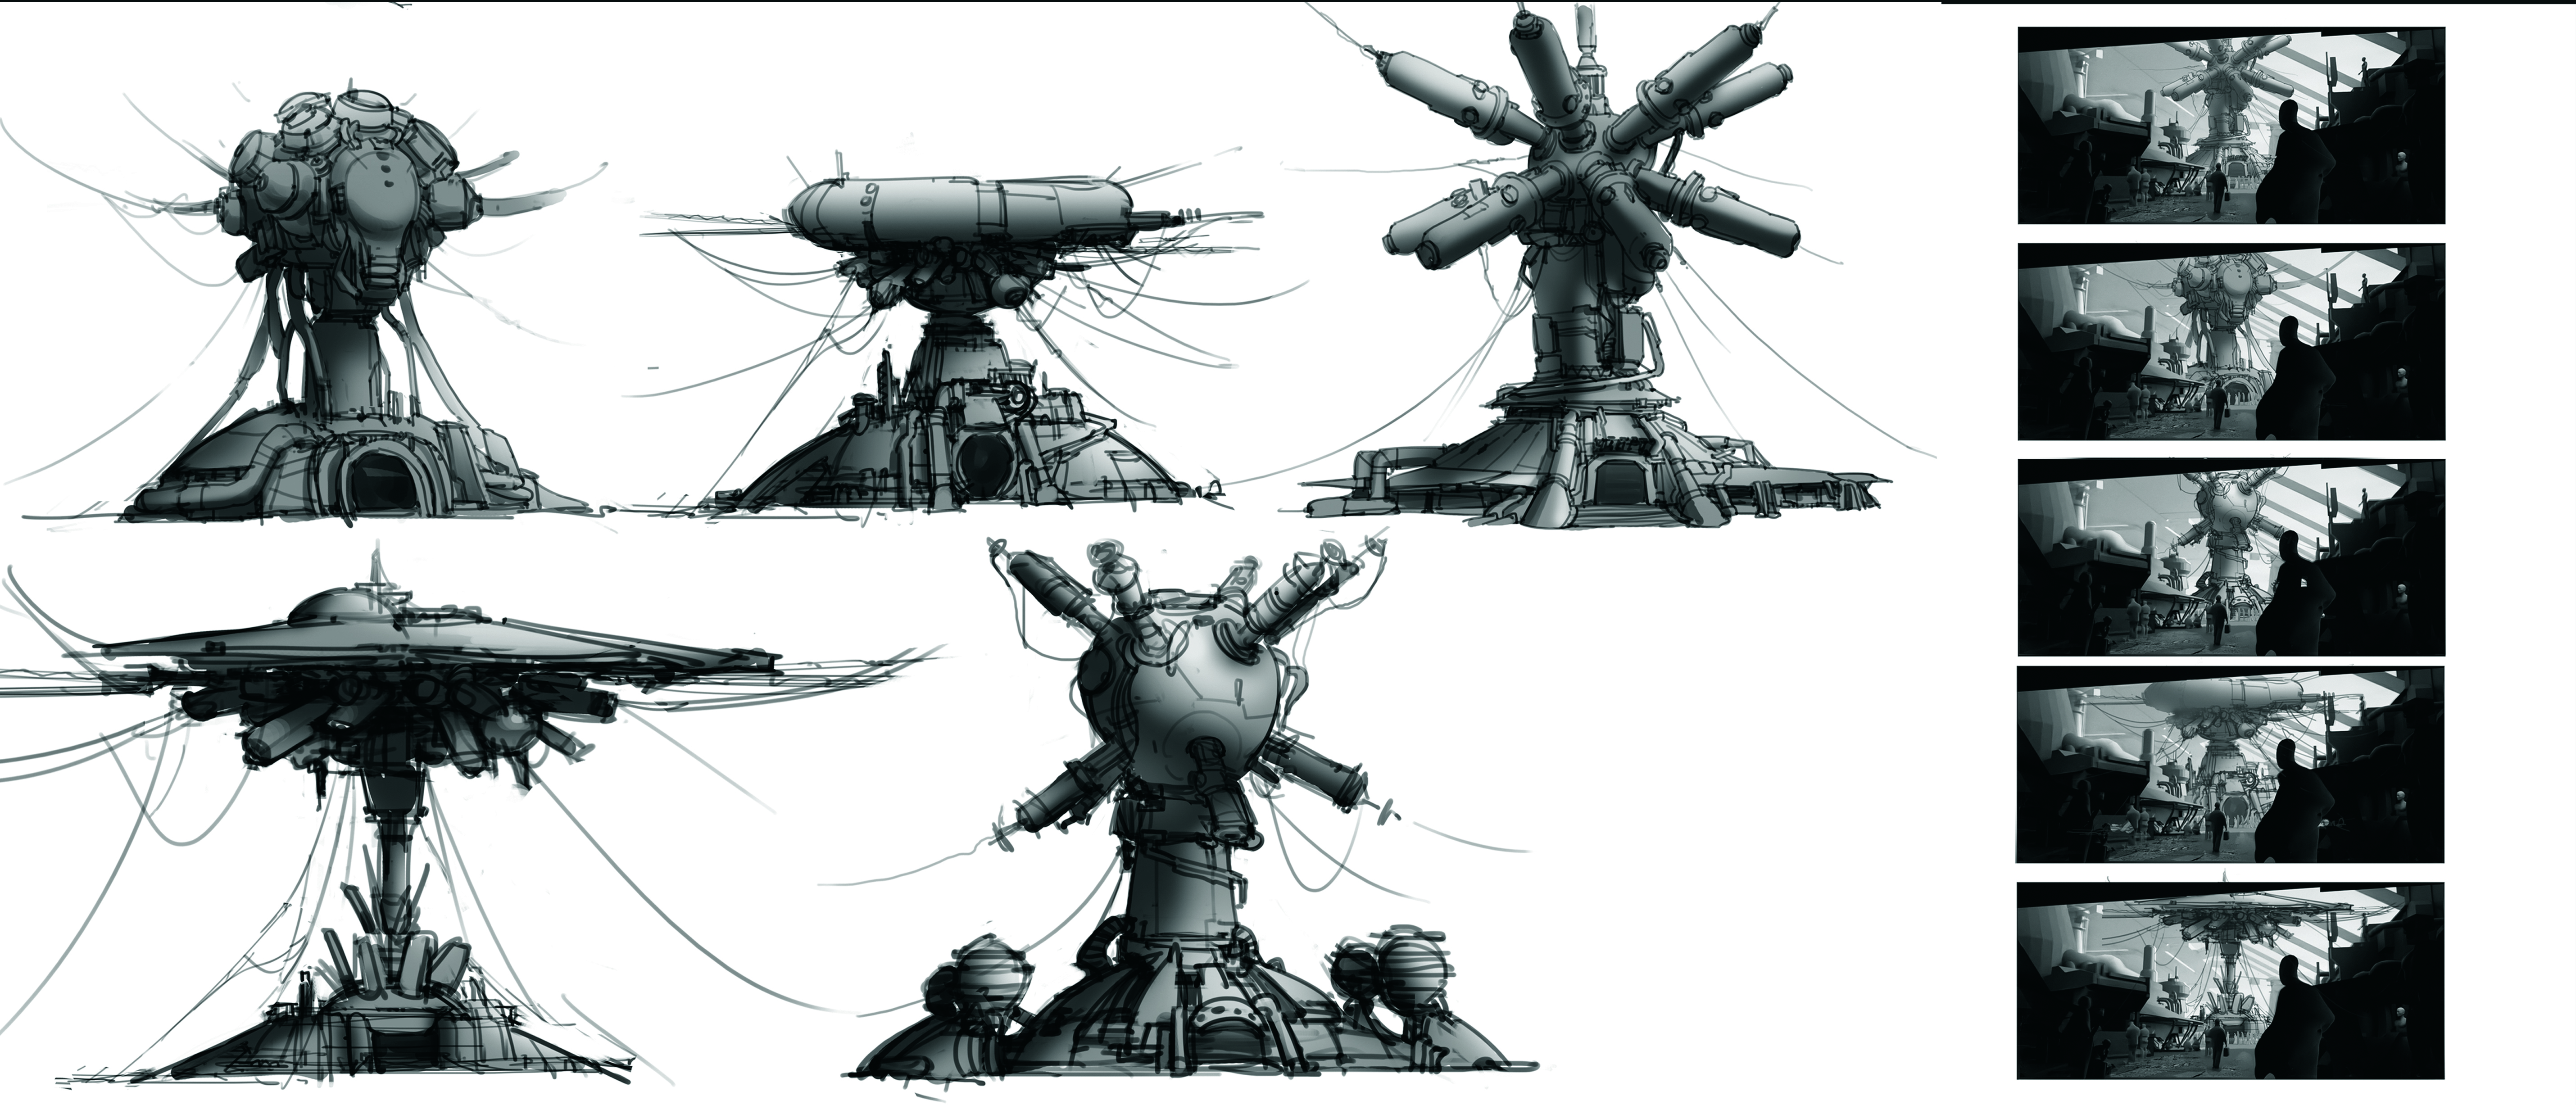
I convey a lot of visual information by designing small elements in my composition. When creating environment concept art, you’ll find that you need many such elements.
They may include props, characters, layout details and so on. If you convey the right amount of authentic visual information through your design then your artwork will succeed in engaging its audience.
06. Check your progress
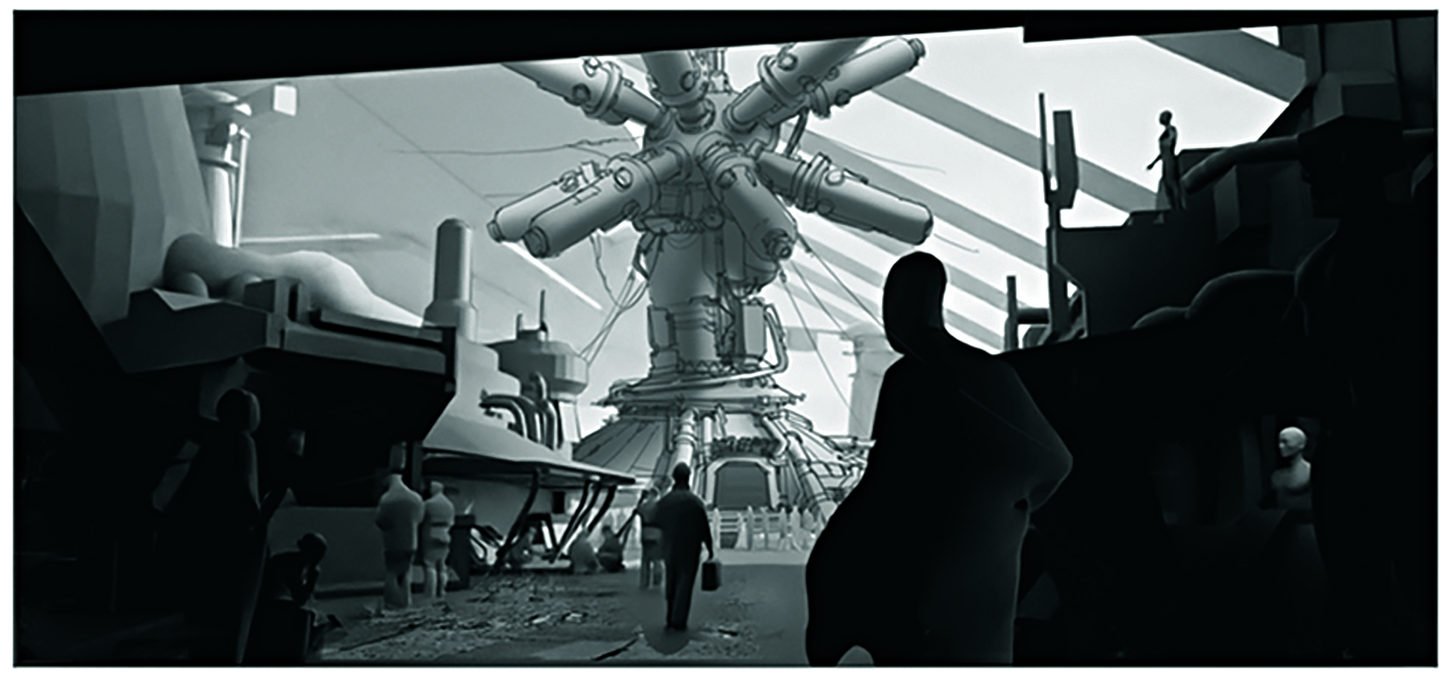
I now have the composition and sketch in place. Before I jump to the next step, I’ll take a few minutes to check my work with a critical eye. Is the atmosphere right? Is this the best camera angle?
Does it look as good as other artworks with similar themes? If it doesn’t, why not? If you find something’s not working, you can fix it before you go too far in the wrong direction.
07. Verify the layout with basic shapes
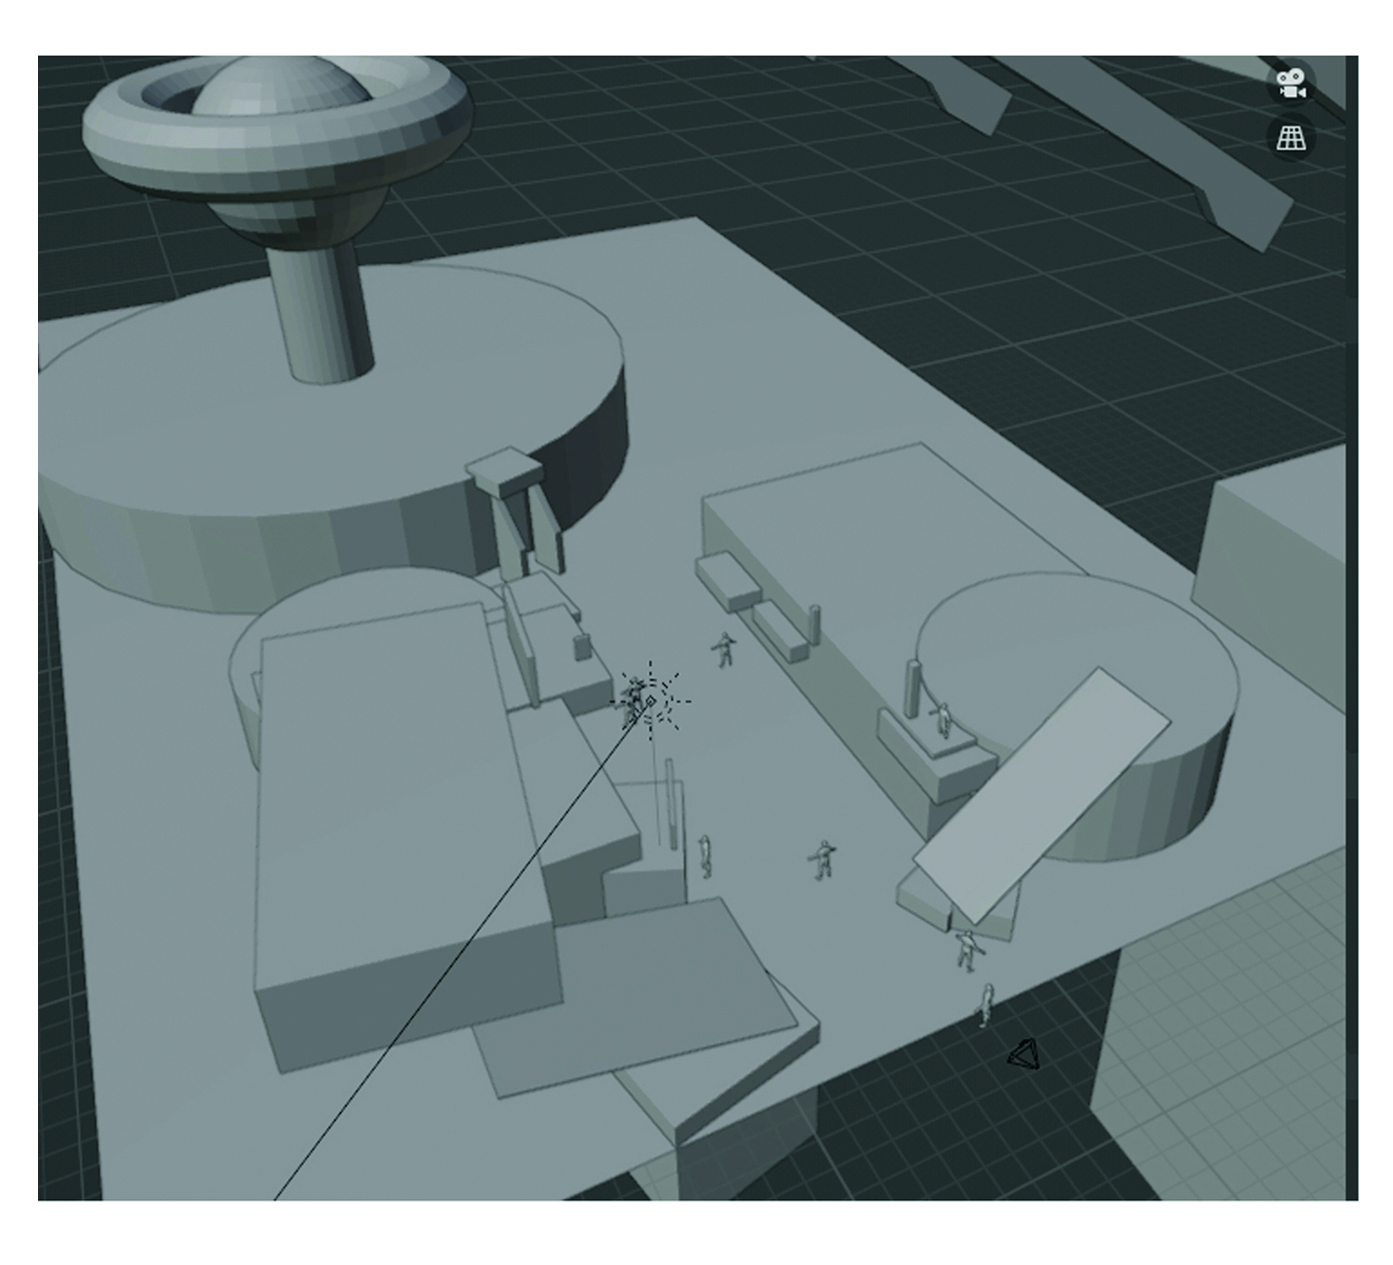
I use simplified shapes to visualise the layout in Blender. It’s a technique used by many video game designers who work on environment layouts and is an efficient way to check for flaws in the scene.
It also enables you to assess the environment from the player’s perspective and helps colleagues from different departments to understand your design if you’re working in a video game company
08. Plan your 3D assets
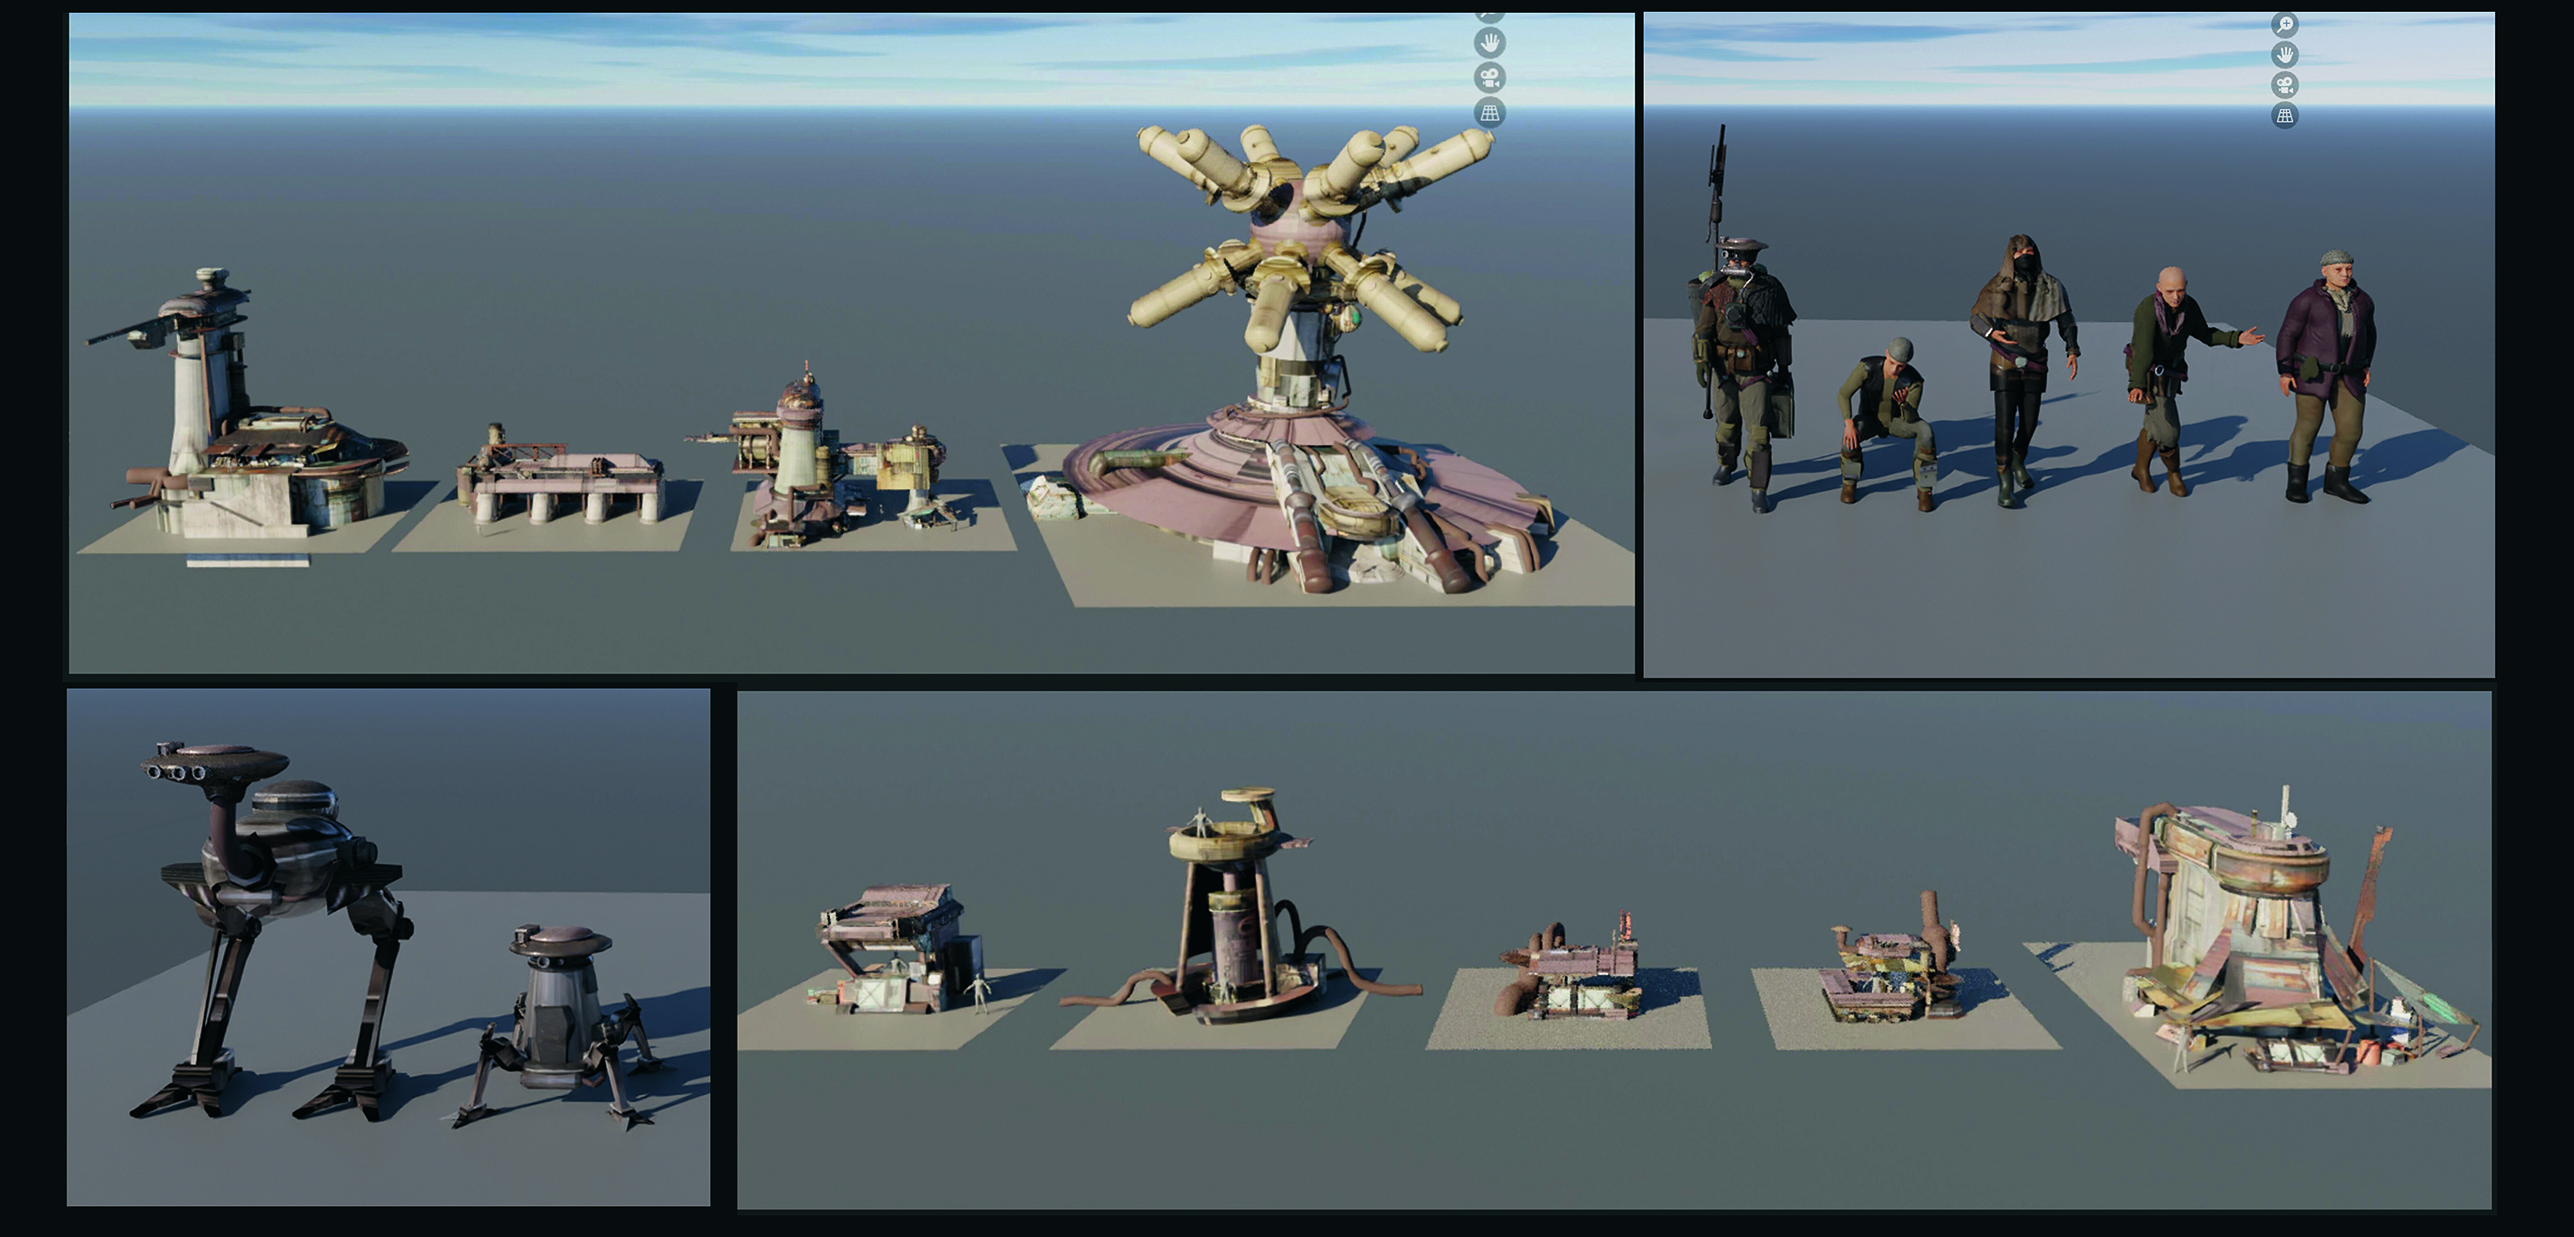
I create 3D assets based on what I’ve designed so far. Note that I wouldn’t recreate everything in my composition as 3D models because that would take too much time – it’s just concept art, after all. Focusing on the main objects of your concept is probably the best approach.
I take these assets to a level of finish based on my experience and requirements; such assets can provide a clear silhouette and basic structural information. If you’re well versed in 3D software and not constrained by time then feel free to make the assets more elaborate
09. Place the assets and light
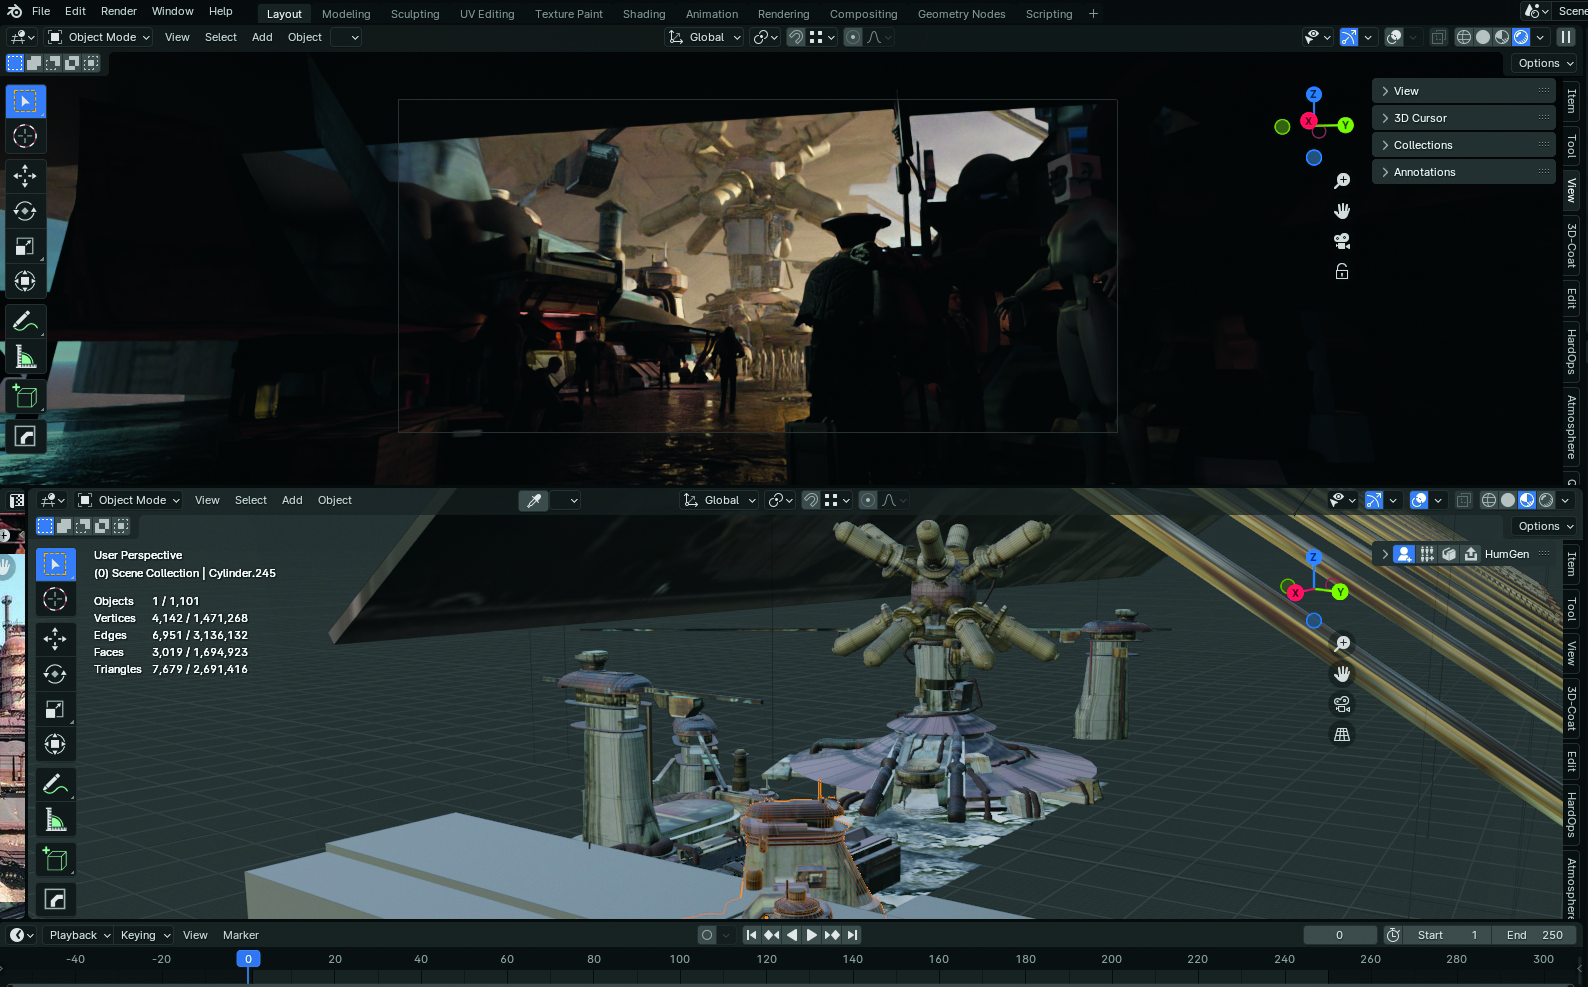
I substitute the simplified shapes from step 7 with the assets I created in the previous step, and use Blender’s default light to illuminate the scene. You may find that the loose composition sketch differs slightly from this tighter, 3D version, but this is acceptable and there may be an advantage in studying both versions for further ideas and possible areas of refinement.
Since this is concept art, the goal here is not total accuracy, but rather an inspiring visual. Now is also a good opportunity to explore different camera angles and lighting schemes, since they are easy to adjust in 3D software.
10. Render out the scene
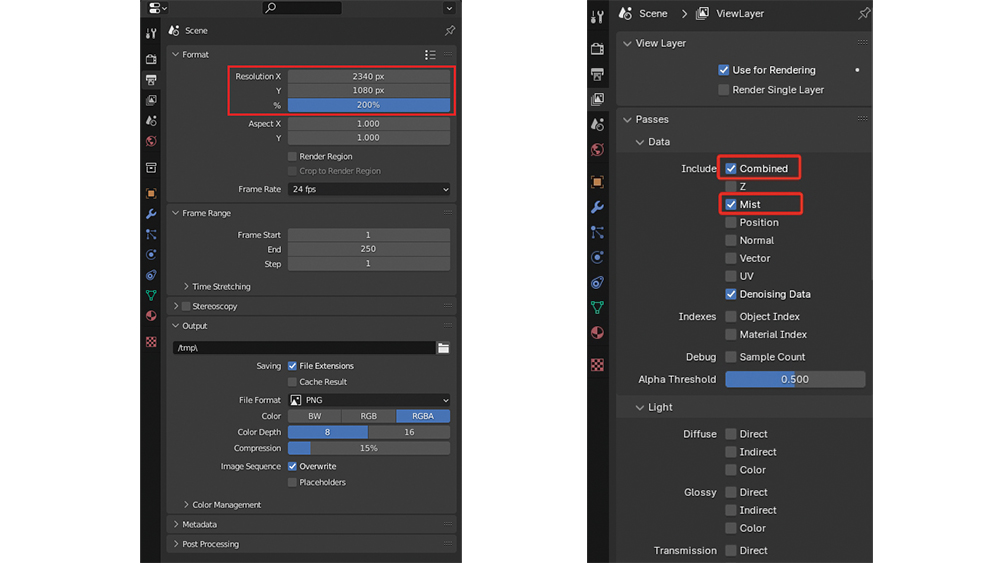
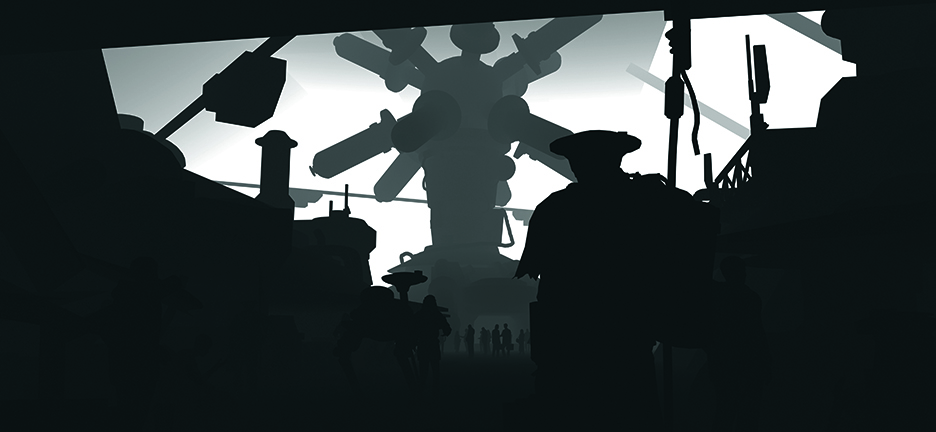
Below you can see my basic rendering settings in Blender. Among them, Z path is a useful layer that you can get by covering a simplified shape in the scene with a specific shader. It could add atmospheric perspective to create depth, and you can change the strength of it – even in Photoshop.
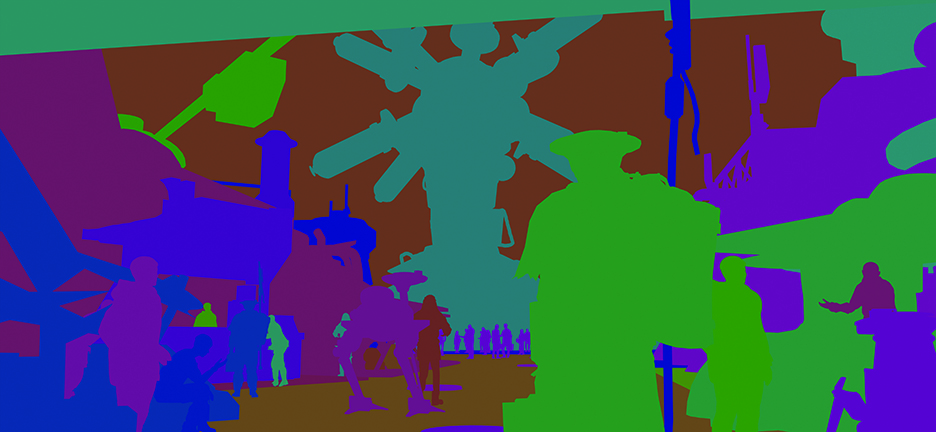
Another tool I recommend is ID path. It differentiates areas by colours so you can easily isolate them with Photoshop’s Selection tool.
11. Build up a rich environment
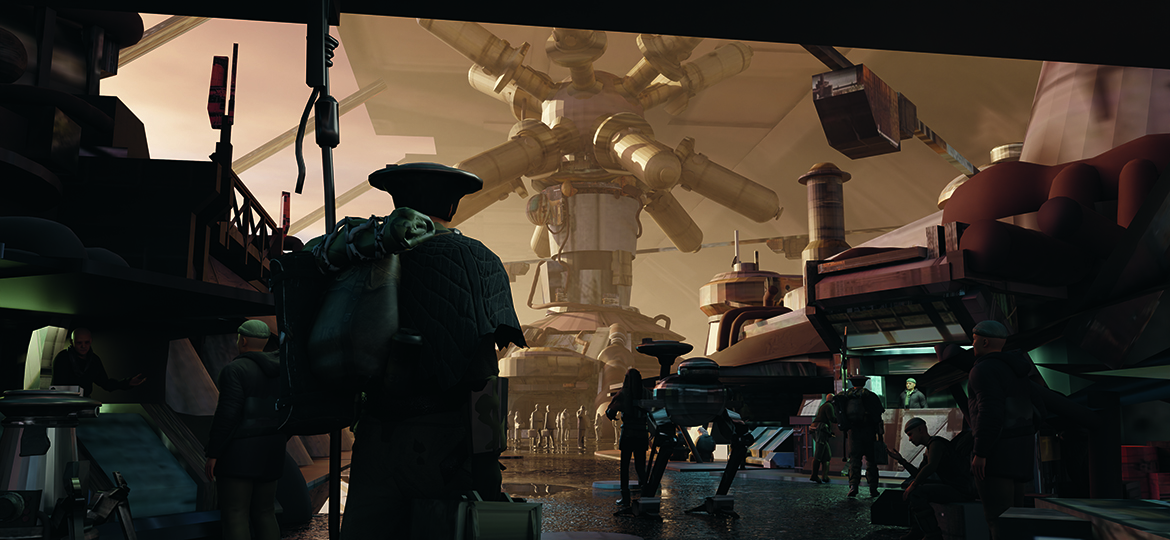
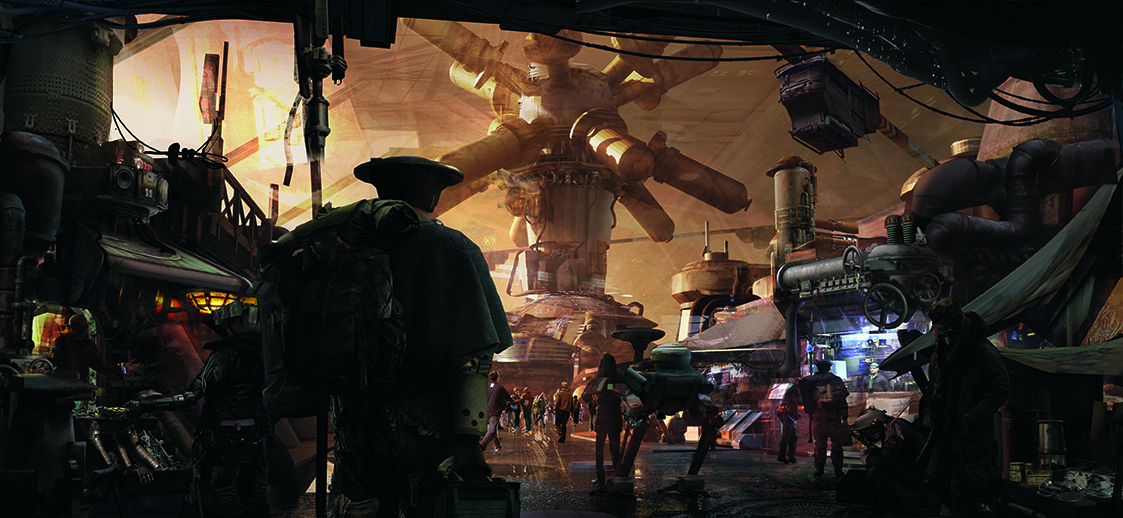
I now have a rough rendering from Blender. It has some basic structures, but not enough. A 3D-rendered composition could omit a lot of detail and visual information, reducing its usefulness as concept art. I fix this through photobashing.
This can quickly provide a lot of information (compare the before image above and the after image below), but it’s fine if you want to use other techniques as long as you achieve the goal of the concept.
12. Adjust the value of layers
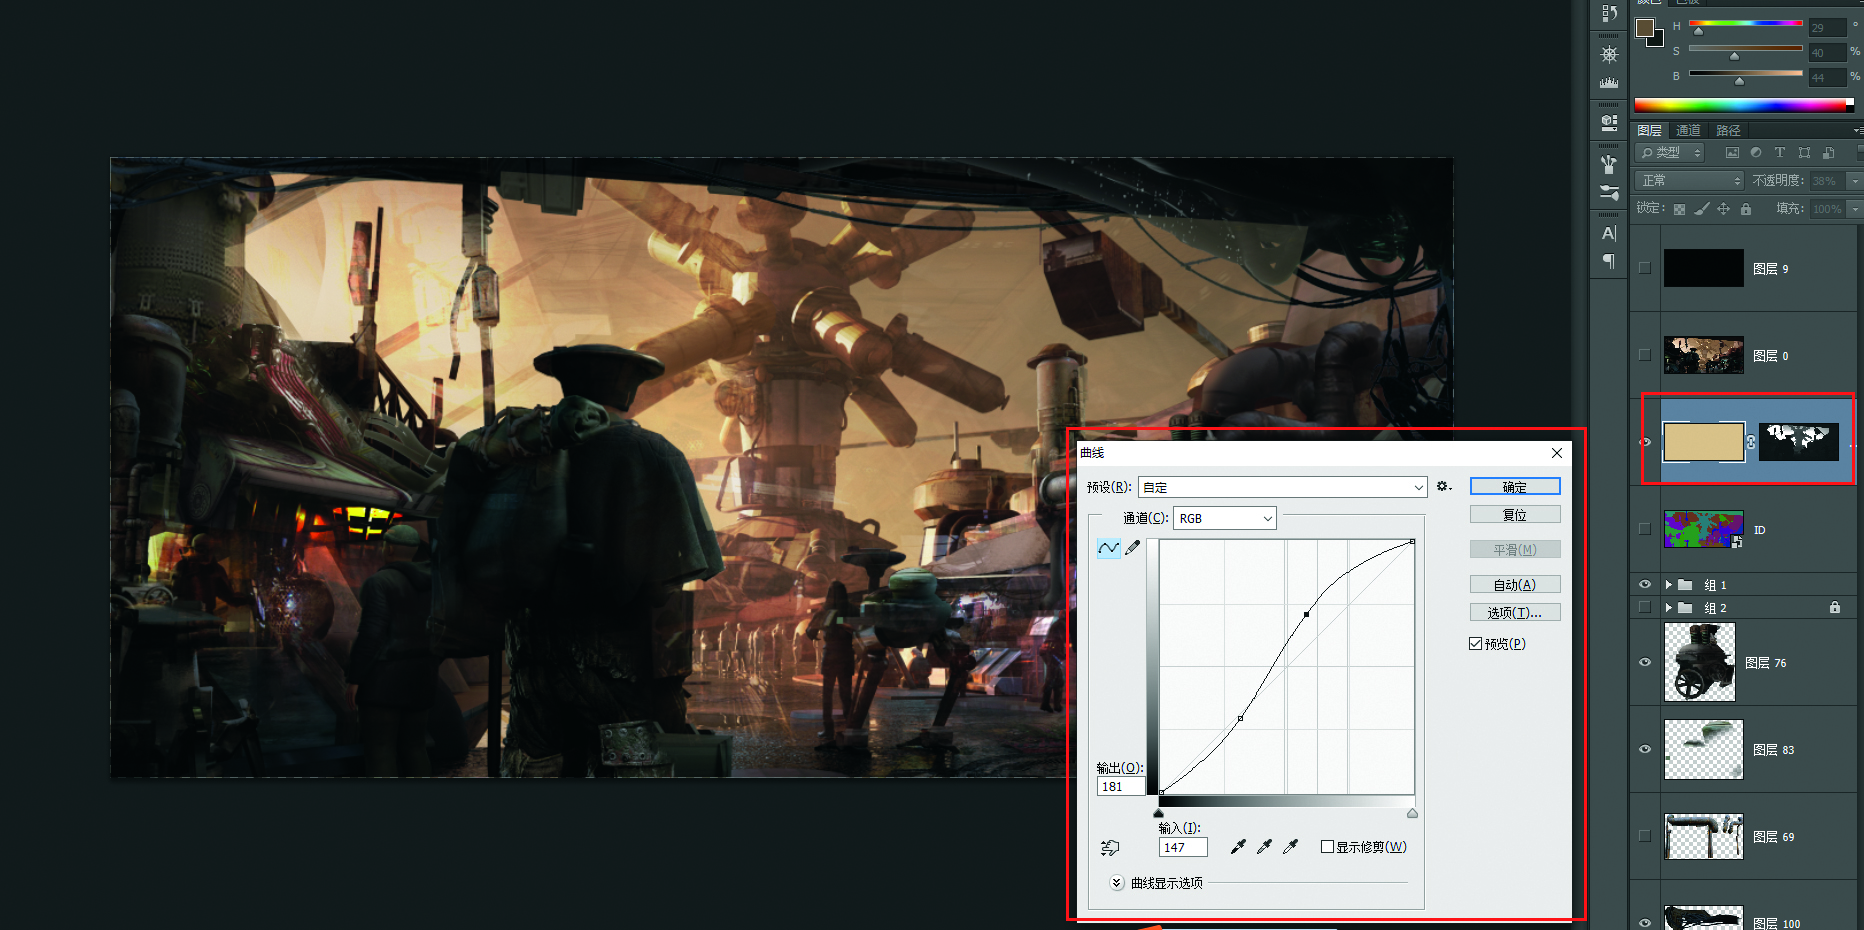
I divide the image into different layers based on its fore-, mid- and background views, and refine the values of them to make them look more natural and readable. I want to avoid some layers visually mixing so that the viewer can’t immediately differentiate between them.
I use Z path as the shade layer for a layer with pure colour (similar to the tone of the concept), put it on the top of all the other layers and then adjust atmospheric perspective by altering the curve of the Z path’s shade layer. Again, it’s not an essential step, but it can save time.
13. Elevate the scene to AAA level
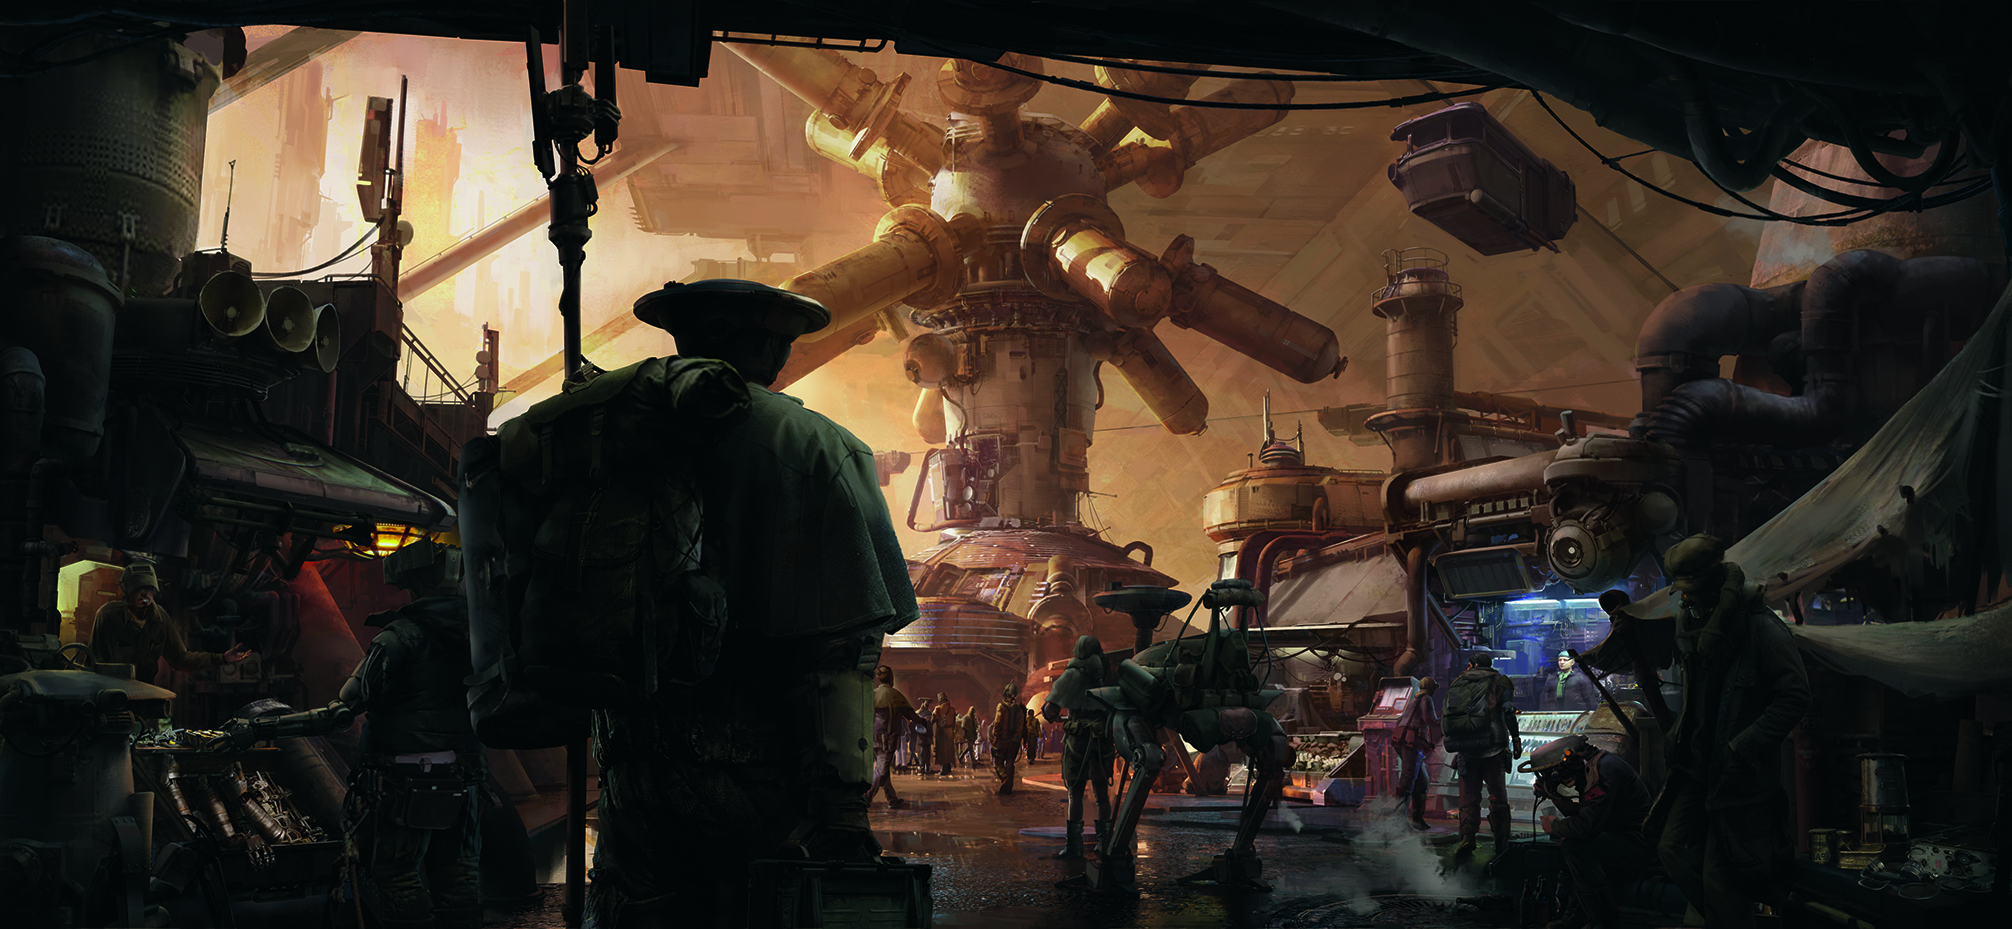
After all those steps, I have a cool-looking artwork that conveys the atmosphere and a huge amount of information. But if I want to push it to a higher level – similar to an image from a AAA video game – there are still some thing I can do. For example, I add some texture to suggest there’s a complex mechanical structure on the ceiling of the market.
I adjust the position of some characters to make the visual rhythm more fluent. I also enhance the reflections in the puddles to make them look more realistic, and add pieces of garbage and rising steam to make the market scene feel more authentic.
14. Presenting the concept
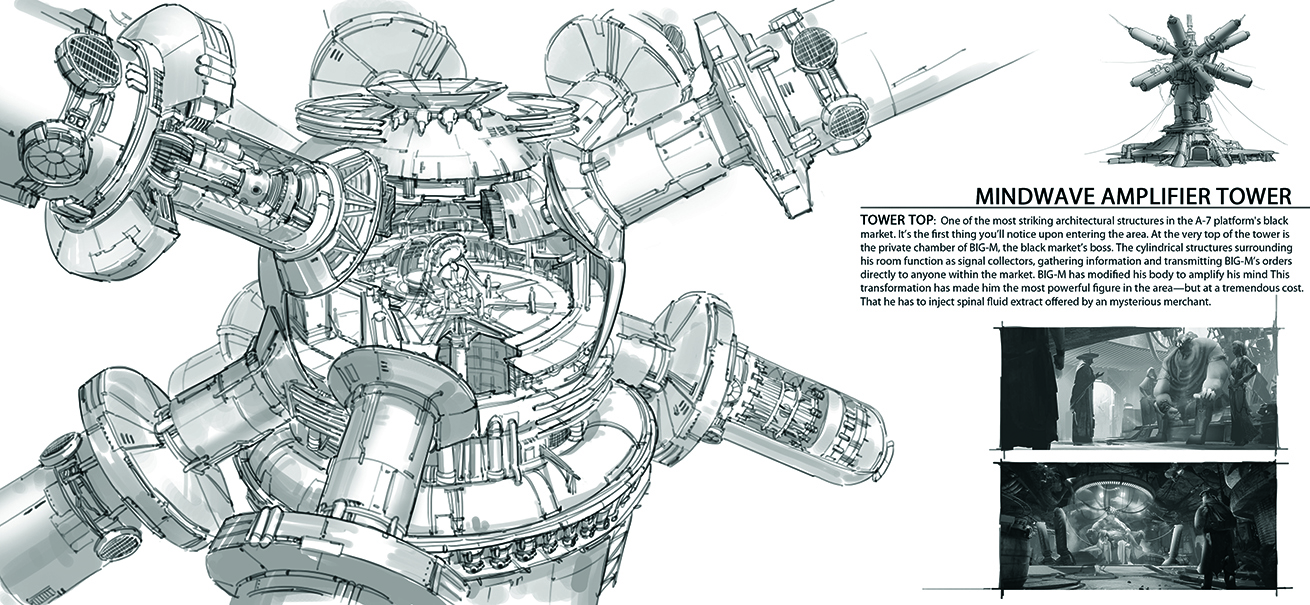
Finally, I’ll present my work to an audience. I prefer to keep the composition clean and tight, to avoid distracting from the most important thing: the concept itself. I put together a design breakdown to show my creative process, which is a good way to review the work to see if anything can be improved.
I also draw some line art to show more details of my design – it’s a great way to explain your work.
For more inspiration, see our other features and tutorials on concept art. For software options, see our guides to the best digital art software and the best 3D modelling software.
This article originally appeared in ImagineFX. Subscribe to ImagineFX to never miss an issue. Print and digital subscriptions available.
Daily design news, reviews, how-tos and more, as picked by the editors.

Based in China, ZiYuan Wang is a freelance concept artist and designer who’s created assets for video game companies including Perfect World Games, Virtuos and Tencent Games.
You must confirm your public display name before commenting
Please logout and then login again, you will then be prompted to enter your display name.
