My essential checklist for engaging character art
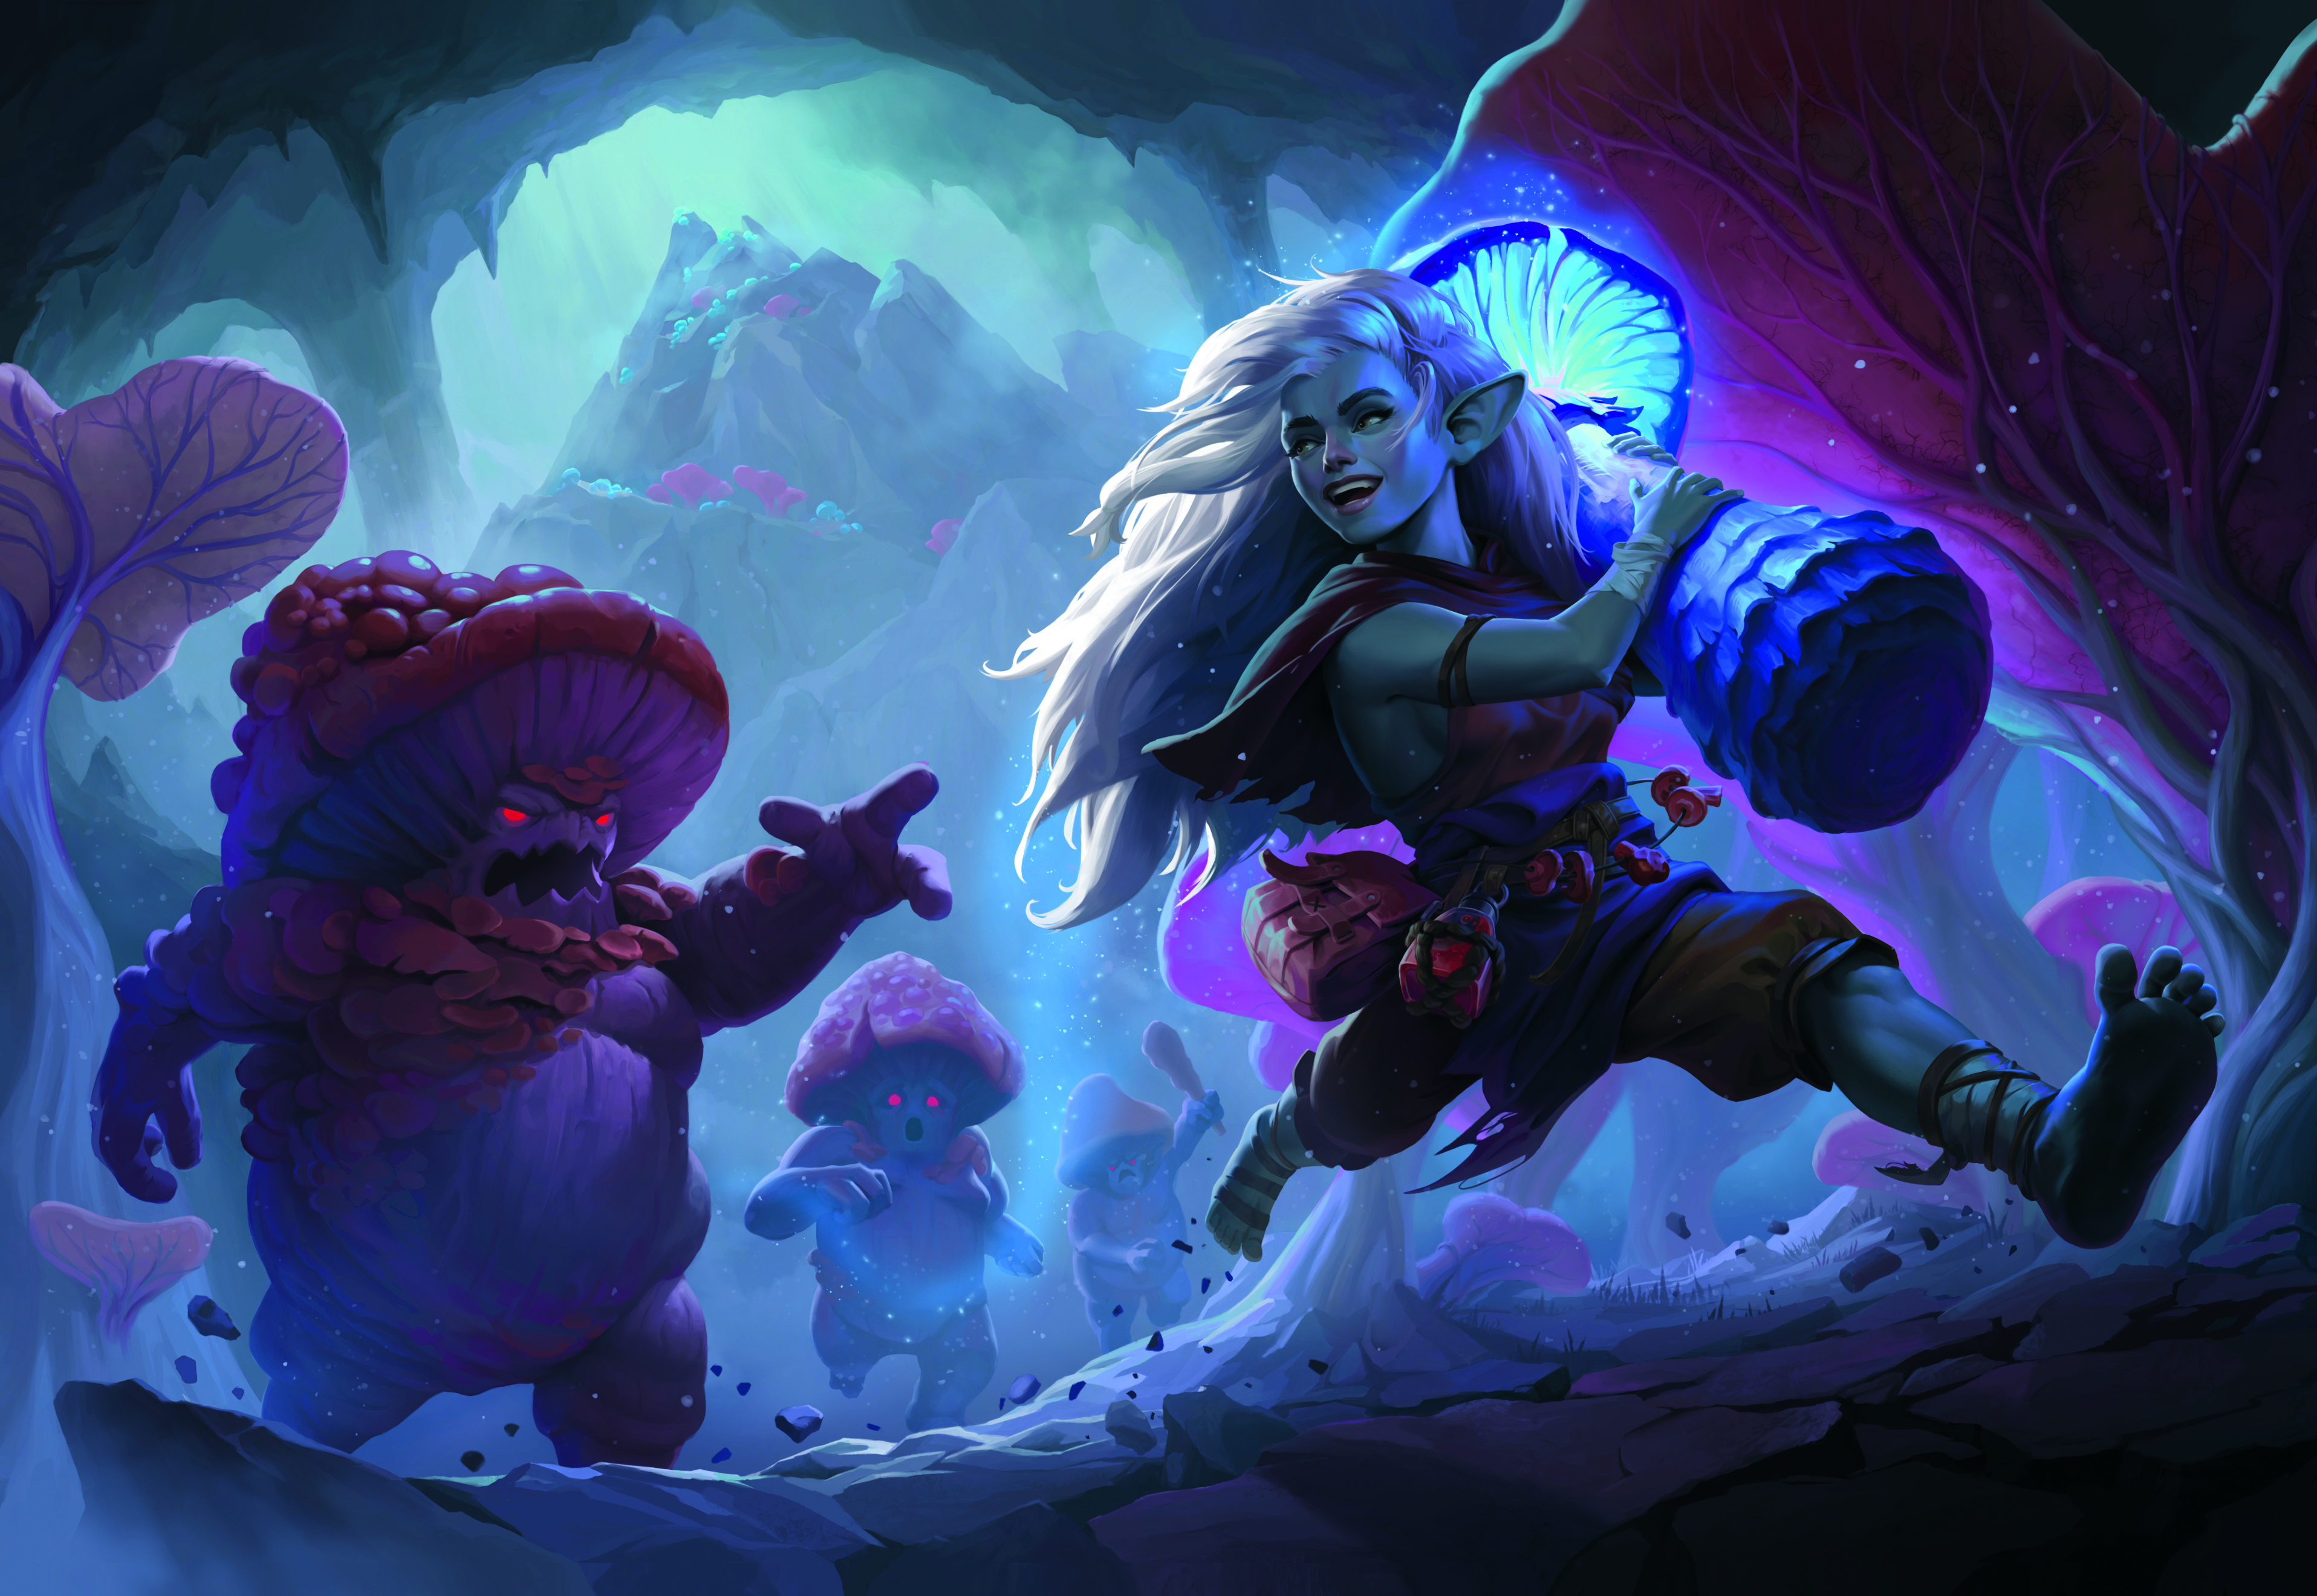
This piece tells the story of Nix, a deep gnome druid of the Circle of Spores. She was originally a Dungeons & Dragons character that my wife played in one of our party campaigns. Nix is a chaotic soul; she’s messy, disorganised, obsessed with mushrooms, and constantly drawn to strange and dangerous places in search of rare fungi. This illustration captures one of those adventurous moments.
I begin by designing the character, experimenting with the outfit and personality cues. Nix usually wears a fully covered outfit, but I imagined her forgetting her cloak in a rush to chase a particularly rare mushroom. Next I dived into research, studying the Underdark and its inhabitants. Myconids, mushroom-like creatures, felt like the perfect addition, both visually and thematically.
From there, I worked through composition, colour palette, lighting, and eventually the final rendering. Though the story may seem simple, narrative illustrations are a multi layered challenge. It’s not just about creating a beautiful image, it’s about telling a story that can be read with just a single glance.
I used to struggle with cluttered compositions, weak focal points and narrative threads while learning. But over time, I developed a checklist that helps me stay on track. Whether you’re a beginner or an experienced artist, it’s easy to get lost in the complexity of narrative artworks. You can follow my steps below.
For this piece, I used Photoshop, which continues to top our guide to the best digital art software. You might also want one of the best drawing tablets.
01. Write down core elements
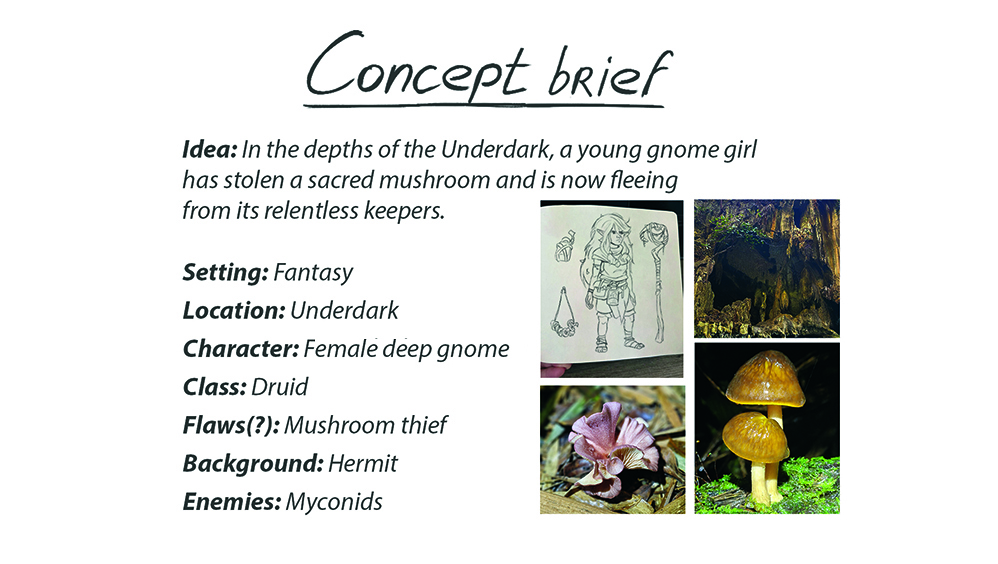
You might think that creating an illustration simply begins with picking up a pencil and drawing. But diving straight into a concept from your imagination, without a written brief, often leads to disappointment.
That’s why I start by outlining the core idea: what’s happening, where and with whom, who the protagonist is, and who or what opposes them. Choosing a clear setting is vital, and the time spent crafting this brief will always pay off later.
Daily design news, reviews, how-tos and more, as picked by the editors.
02. Use references as a starting point

Once you have a structured plan, it’s easier to visualise what you need to draw. I usually spend another hour or two gathering references for key elements of the illustration. This fuels my inspiration and fills gaps in my visual knowledge.
I’d never drawn mushrooms before, especially not giant ones, so studying real-life photos was essential. New creative ideas often surface during this research, enhancing the scene’s richness
03. Make the protagonist feel real
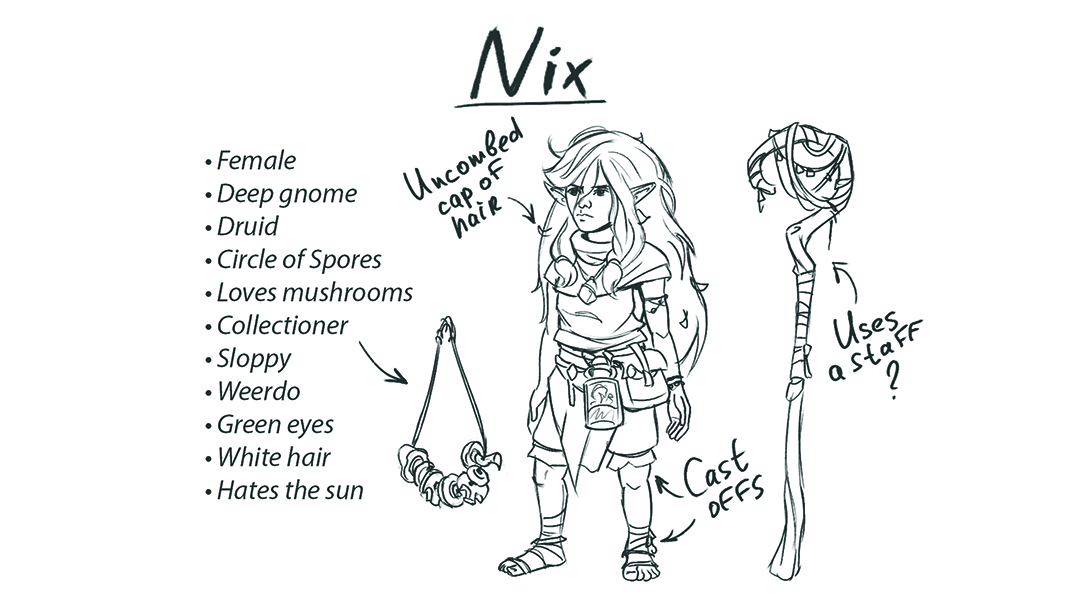
Whether for video games or tabletop RPGs, we need to develop a believable protagonist. I approach character creation like building a party member for an RPG – defining their appearance, world view, habits, history and backstory.
In this case, I already had a developed concept from a Dungeons & Dragons campaign, which made it easier to imagine scenes that were grounded in the character’s nature. Even when creating fan art, the character should be placed in situations that reflect their unique life story.
04. Decide on the tone
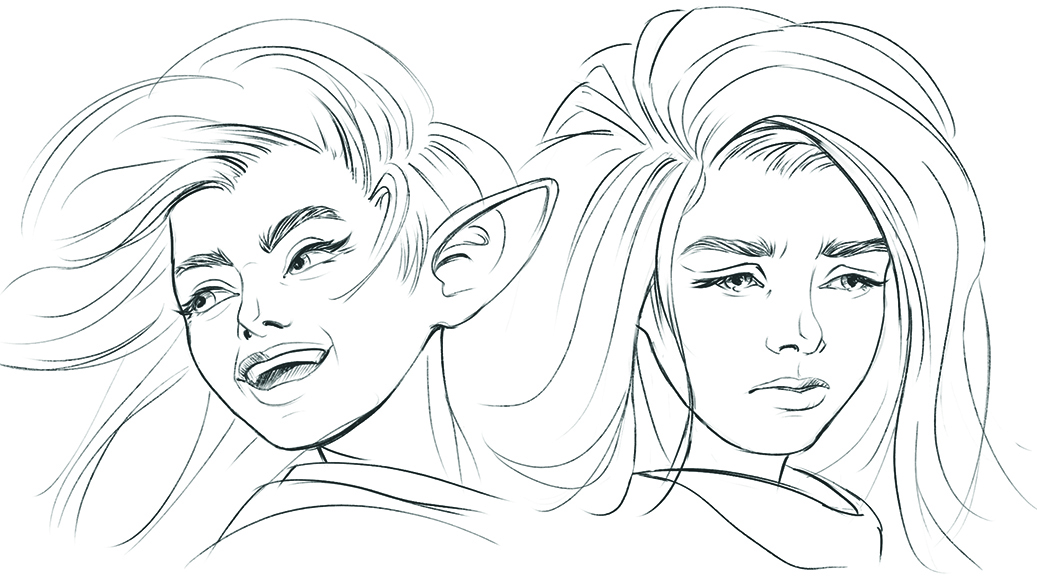
Choosing the genre of the illustration plays a huge role, as the same scenario could be interpreted as comedic or dramatic depending on its visual elements. I usually base this on the personality of the protagonist.
A mischievous gnome thief like Nix would probably find themselves in a comical scenario, whereas a grim dwarven warrior who lost their comrades in battle calls for a tragic tone. Either way, the viewer should be able to feel the vibe of the drawing, whether that’s danger, triumph or the tension of the moment.
05. Develop the characters in detail
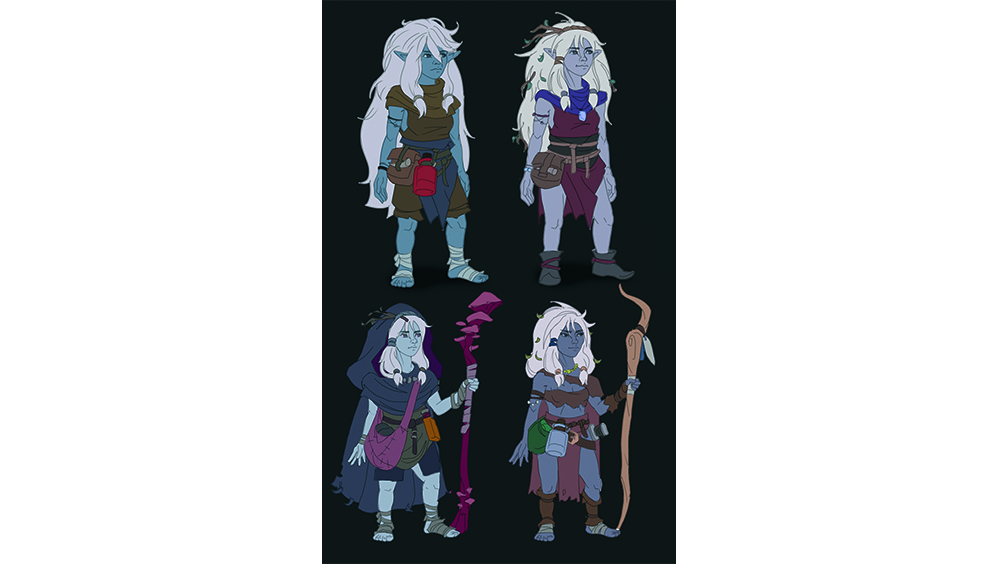
At this point, start visualising your ideas in the form of more detailed concept art. I usually create several full-body sketches of the main character, designing the outfit, proportions, hairstyle and accessories.
Each of these elements affects the final composition; how much space the character occupies, which elements overlap, and what moves with the character. This principle applies to the antagonists in your story as well.
06. Remember the first idea is rarely the best
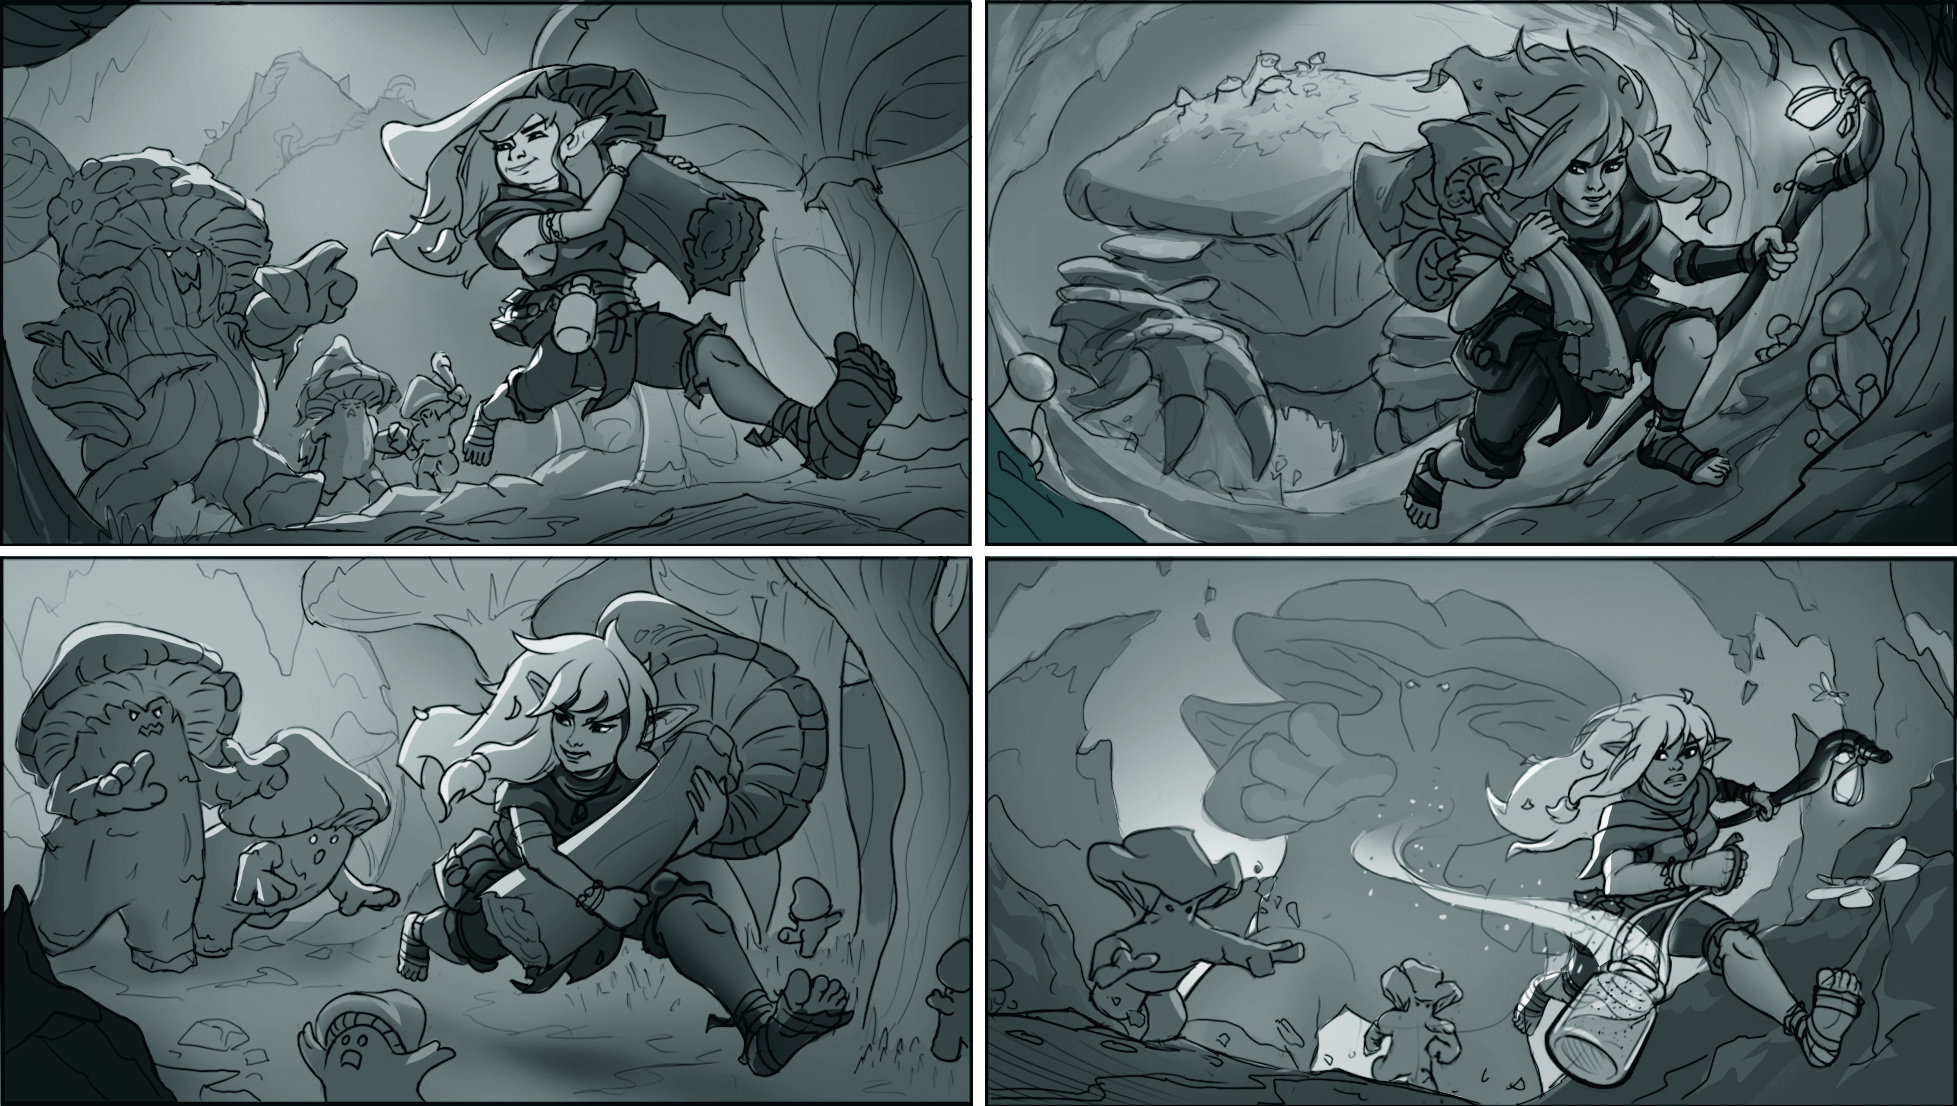
Typically we’ll begin with a rough mental image of how a scene might look, but when transferred to the canvas that vision often doesn’t hold up. That’s why I sketch at least four quick thumbnails of the scene expressing the same concept but varying in background, pose and camera angle.
These variations help identify the version that best tells the story and brings clarity to the final composition.
07. Turn it into a thoughtful sketch
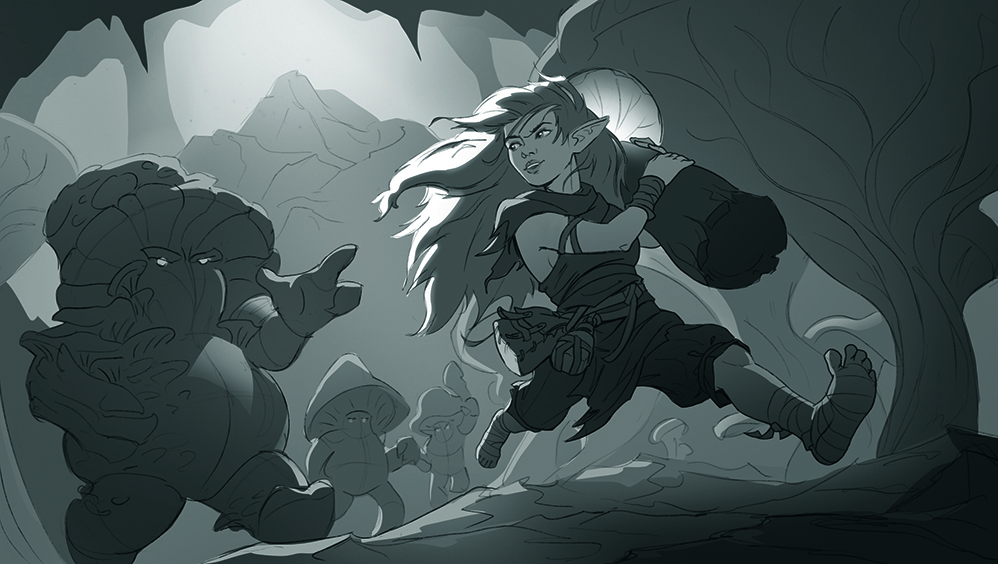
Now we’ll bring our ideas to life on a larger canvas. Sketching should go smoothly as we’ve already planned the character and enemy designs, a rough composition, and the key environmental elements. The environment is a storytelling tool too and viewers should sense where the action takes place.
I added a glowing mountain deep inside a cave where rare mushrooms grow. One has clearly been stolen, and now the protagonist is fleeing through a forest of giant fungi, pursued by its guardians. This environment makes the route clear, adds fantasy scale, and supports the story’s mood.
08. Guide the viewer’s eye with composition
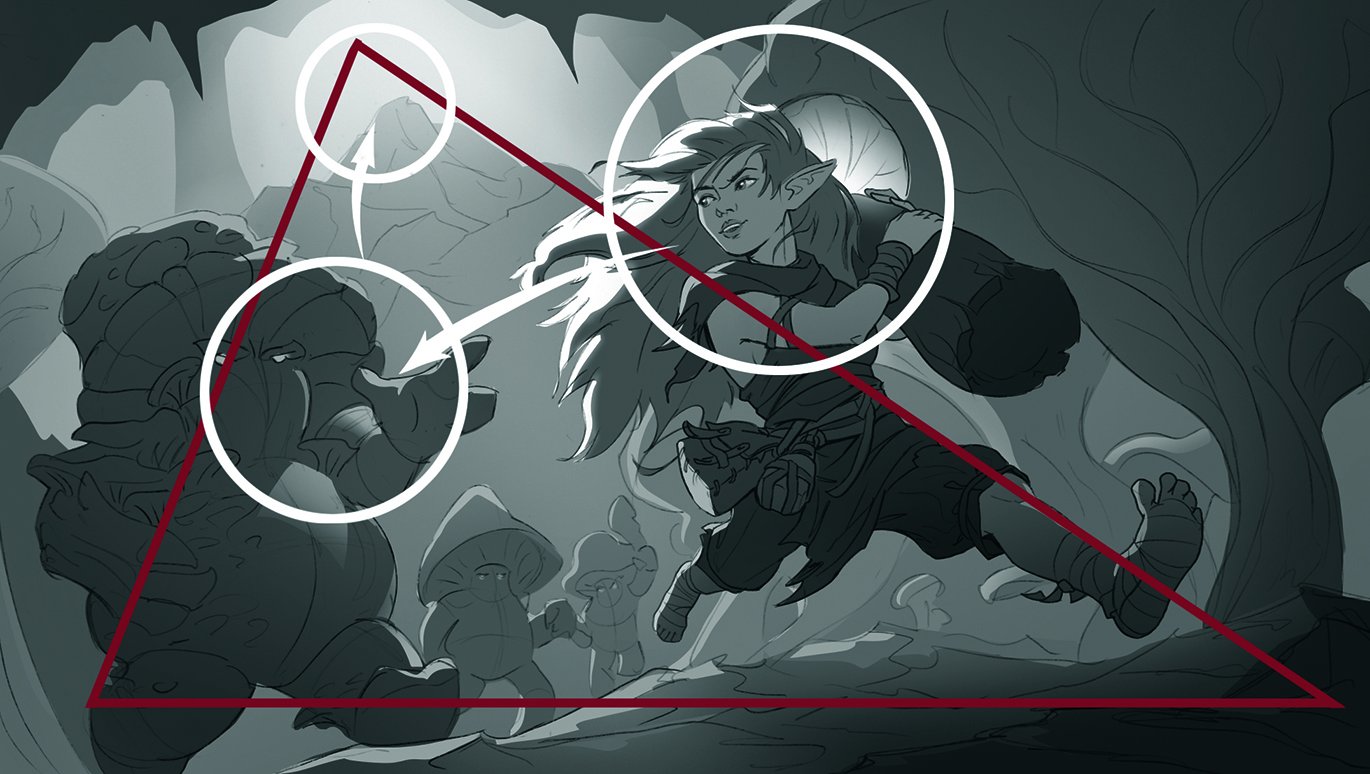
The protagonist is the focal point, so I placed them near the centre and used the brightly coloured mushroom cap to draw attention. I wanted to keep the viewer’s focus within the image, so avoided distractions.
From the protagonist, attention moves to the pursuer and then, using natural visual lines created by shapes along the left edge, the eye travels to the glowing mountain. On the right, curved lines guide the viewer back to the centre for a seamless visual loop.
09. Add depth to draw the viewer in
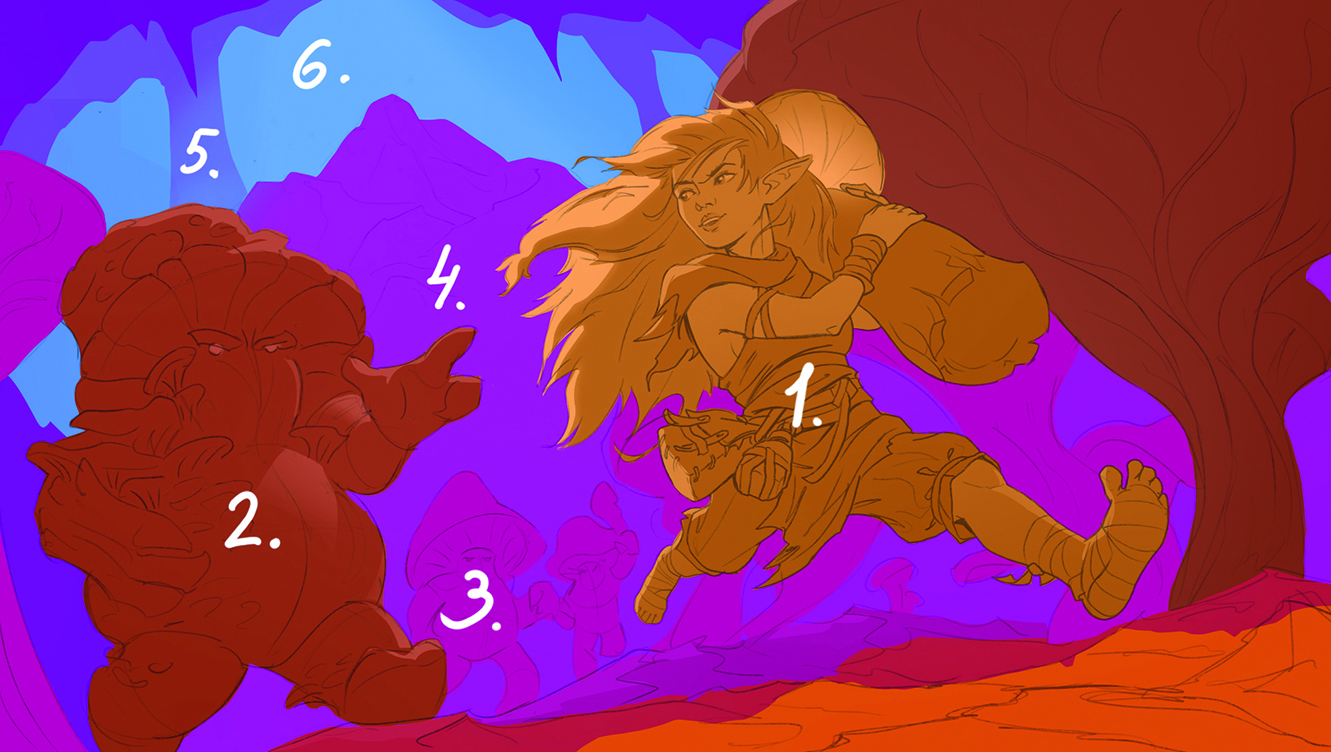
I love using layered compositions to build depth and usually place one or two foreground layers (A, B), a middle layer (C), and two to three background layers fading into the sky or cavern shadows (D, E, F).
Let the viewer’s gaze explore the environment and these layers immerse them in the scene. Start experimenting with this concept during the thumbnail stage, as it’s a great space to push creative boundaries and add atmosphere.
10. Use light and colour to establish mood and atmosphere
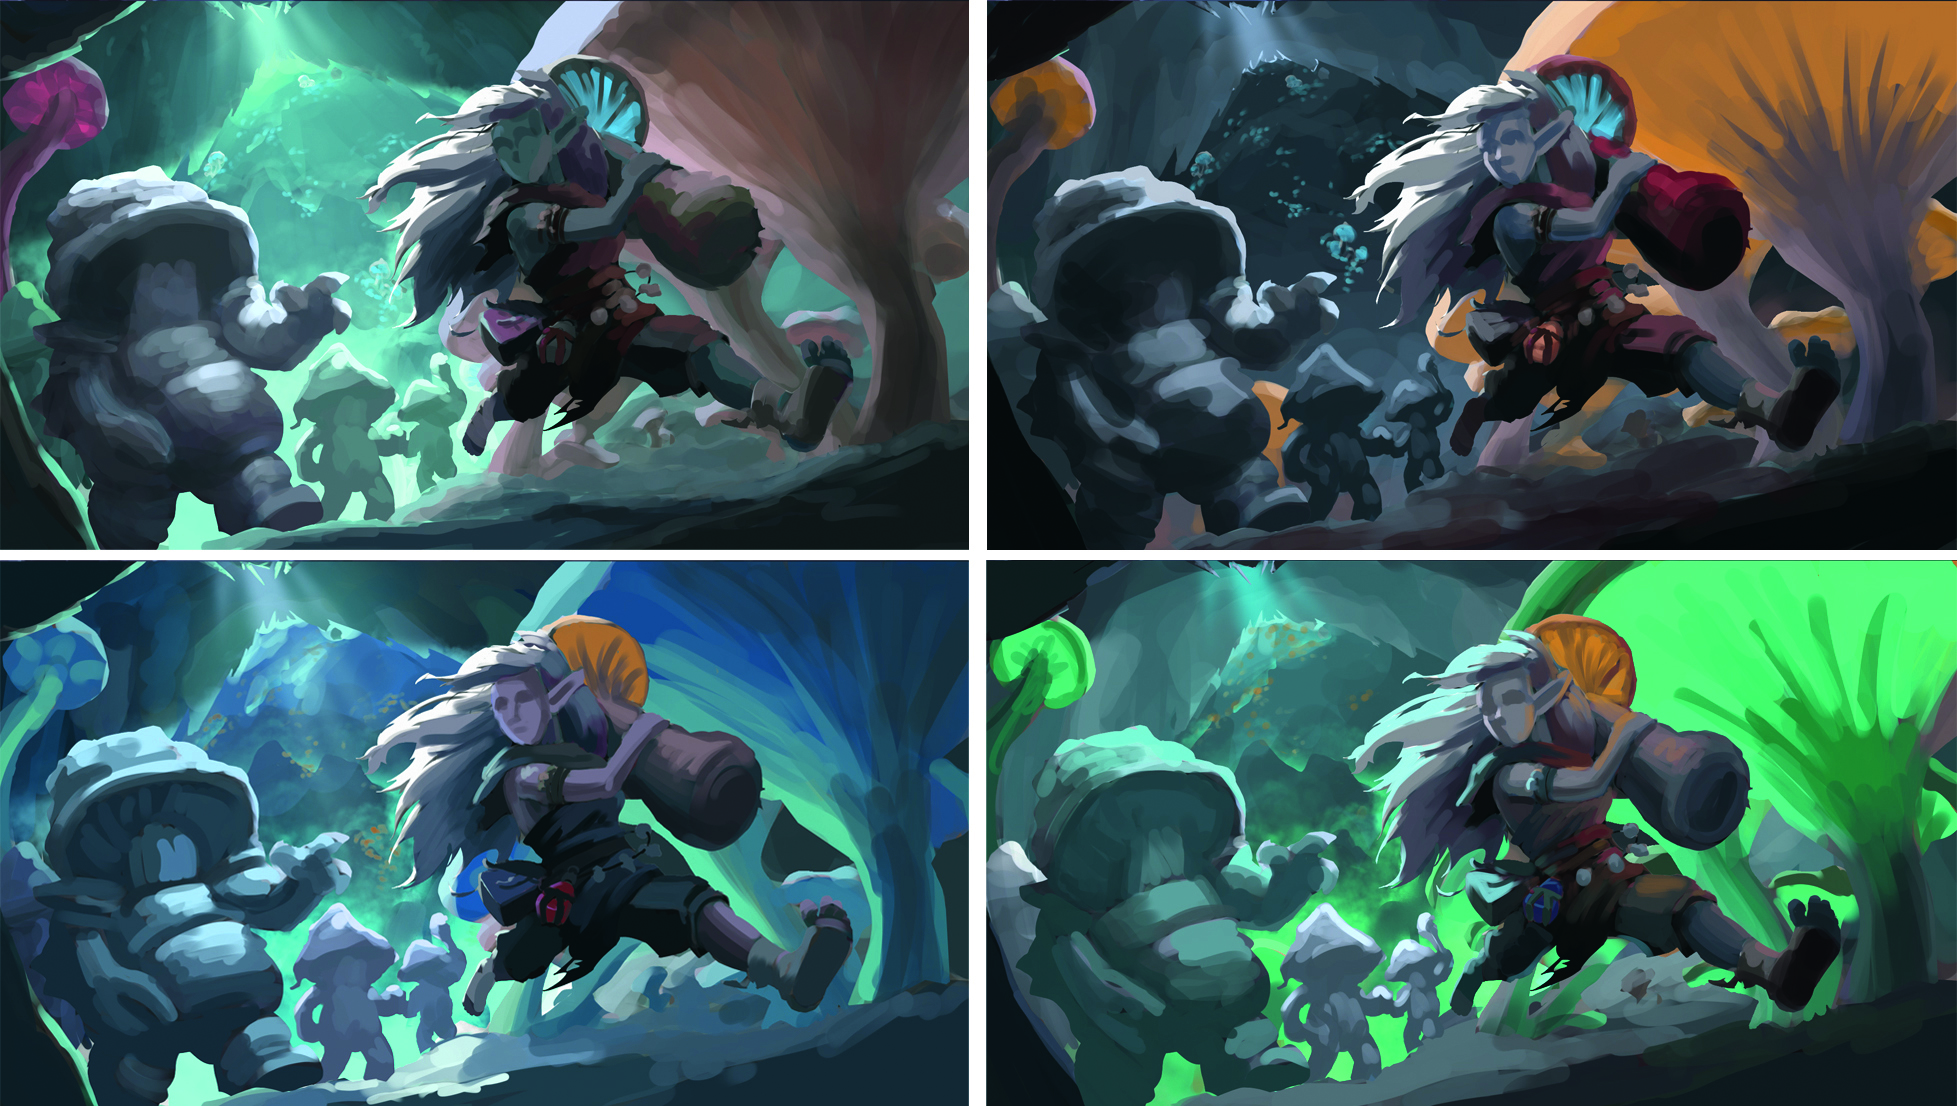
One of my favourite stages is bringing the world to life with light and colour. Sometimes you’ll know exactly which palette you want, but you can test several combinations with colour thumbnails.
Colour is subjective but lighting is strategic, as it guides attention, enhances volume, and defines mood. Use light to sculpt the scene, highlight focal points, and support the emotional tone you want the viewer to experience.
11. Render with purpose and care
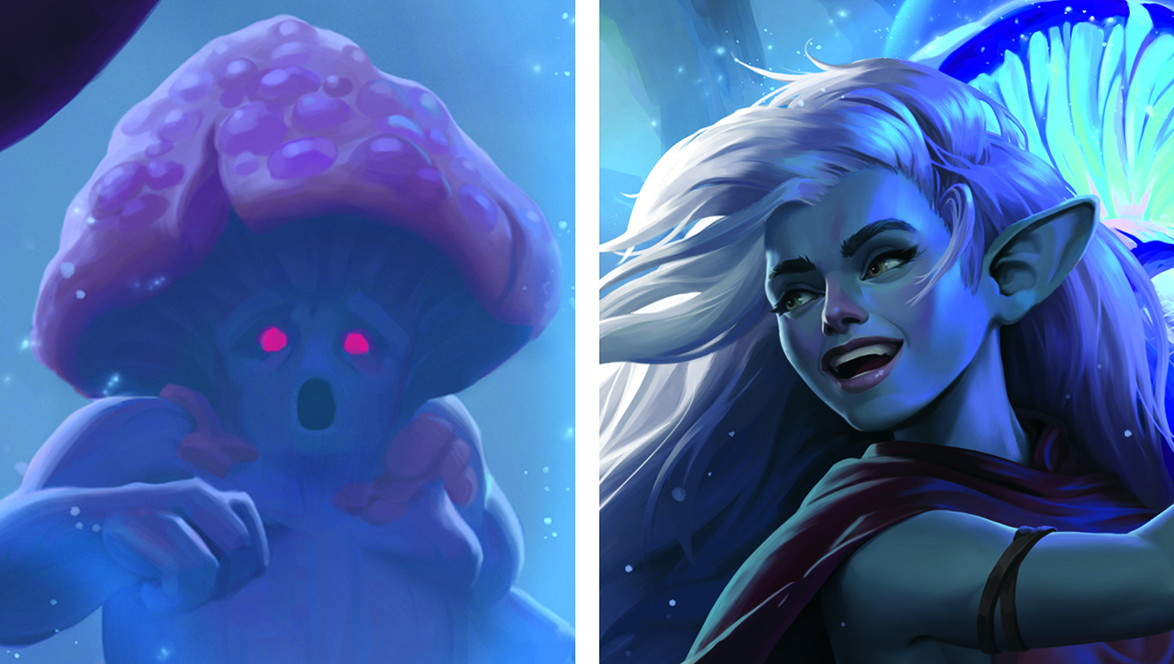
From this point, begin rendering and adding details to the illustration. Strategic detail placement helps to direct the viewer’s focus. The most detailed part of an illustration is typically the character’s face, most often the main focal point. Also carefully render accessories and clothing that express personality or status.
Secondary characters can be drawn with less precision and any background elements are kept more abstract. This way, the viewer knows where to look first while still sensing a fully realised world around the central action.
12. Create a sense of movement
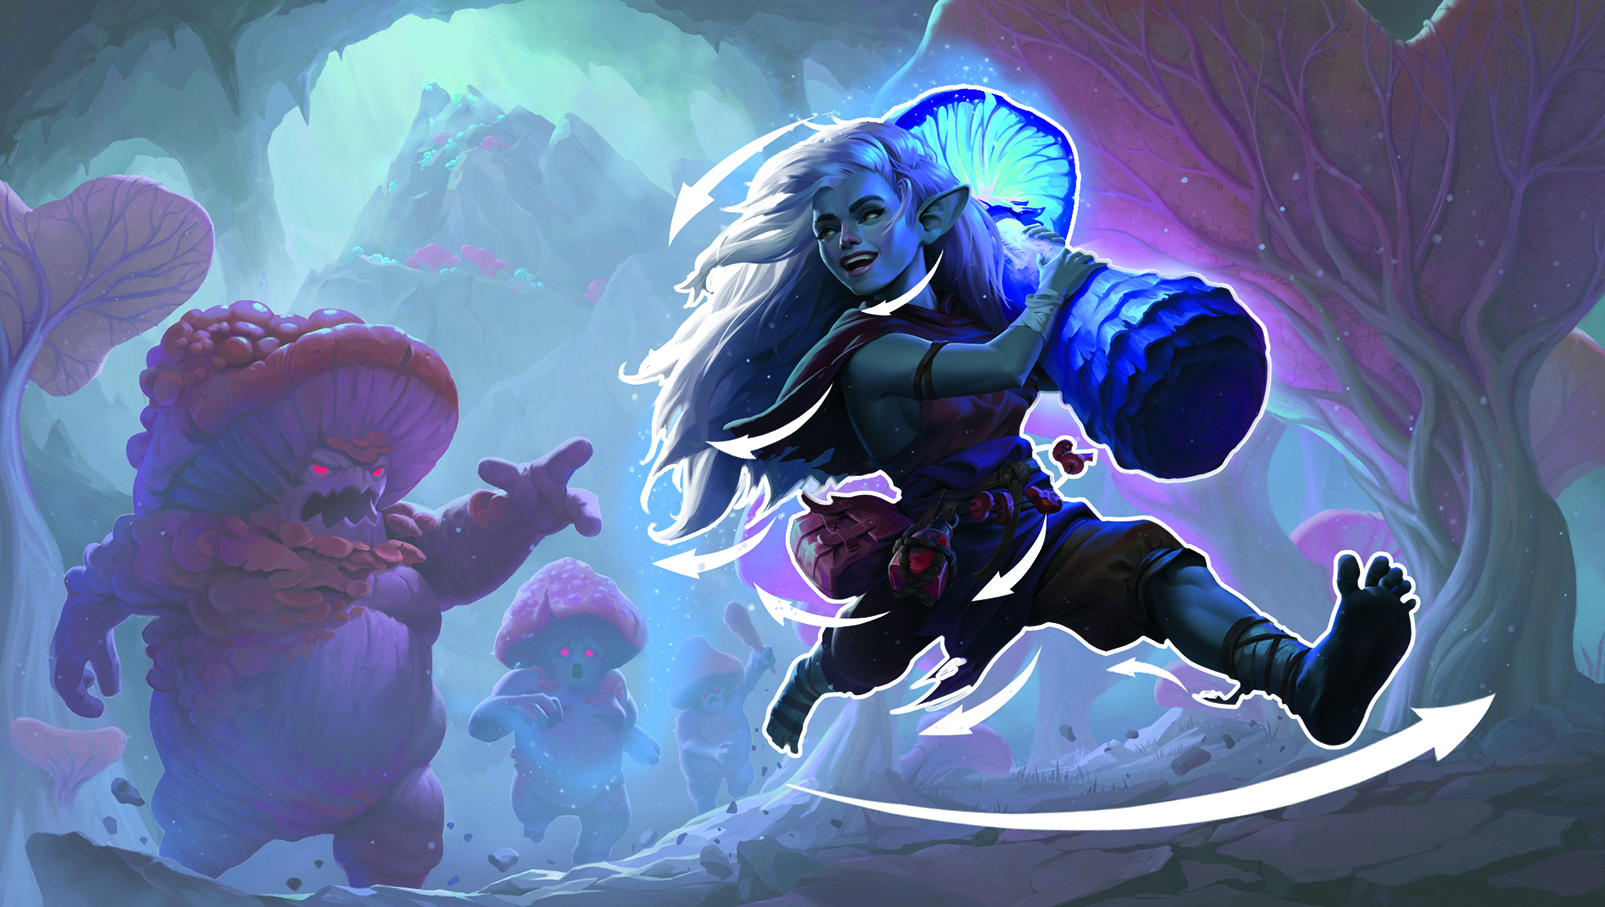
Everything about the character should reinforce movement, so I exaggerated Nix’s running pose to make her motion feel more intense. Her hair and clothes flow, her pouches bounce, and dust and stones scatter underfoot. The more visual elements used to suggest motion, the more dynamic the character appears.
13. Switch focus to the supporting characters
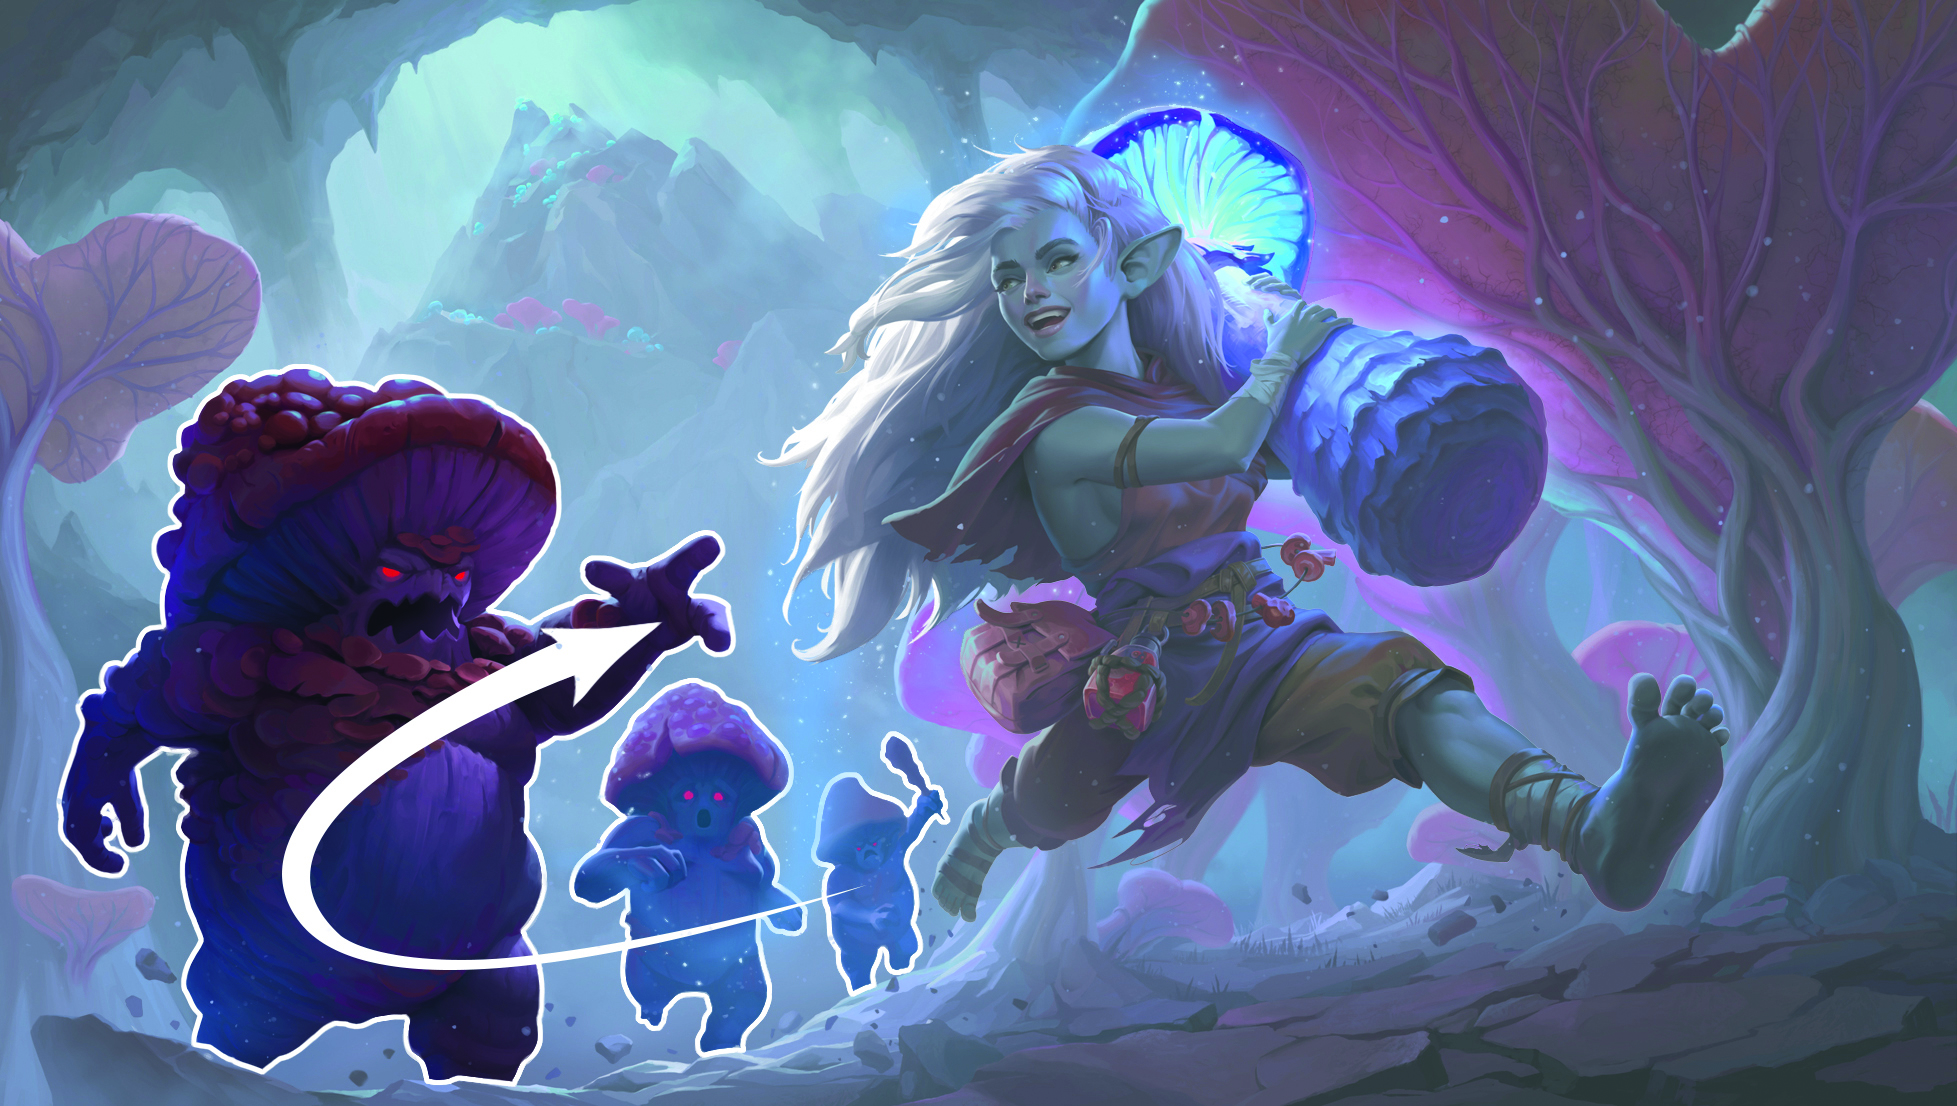
I added three intelligent mushroom creatures, the myconids, as Nix’s pursuers. Each moves in its own unique way despite similar builds. Their staggered positions add variation and emphasise urgency, while they all follow the same direction, which amplifies the chase’s energy.
14. Develop the environment
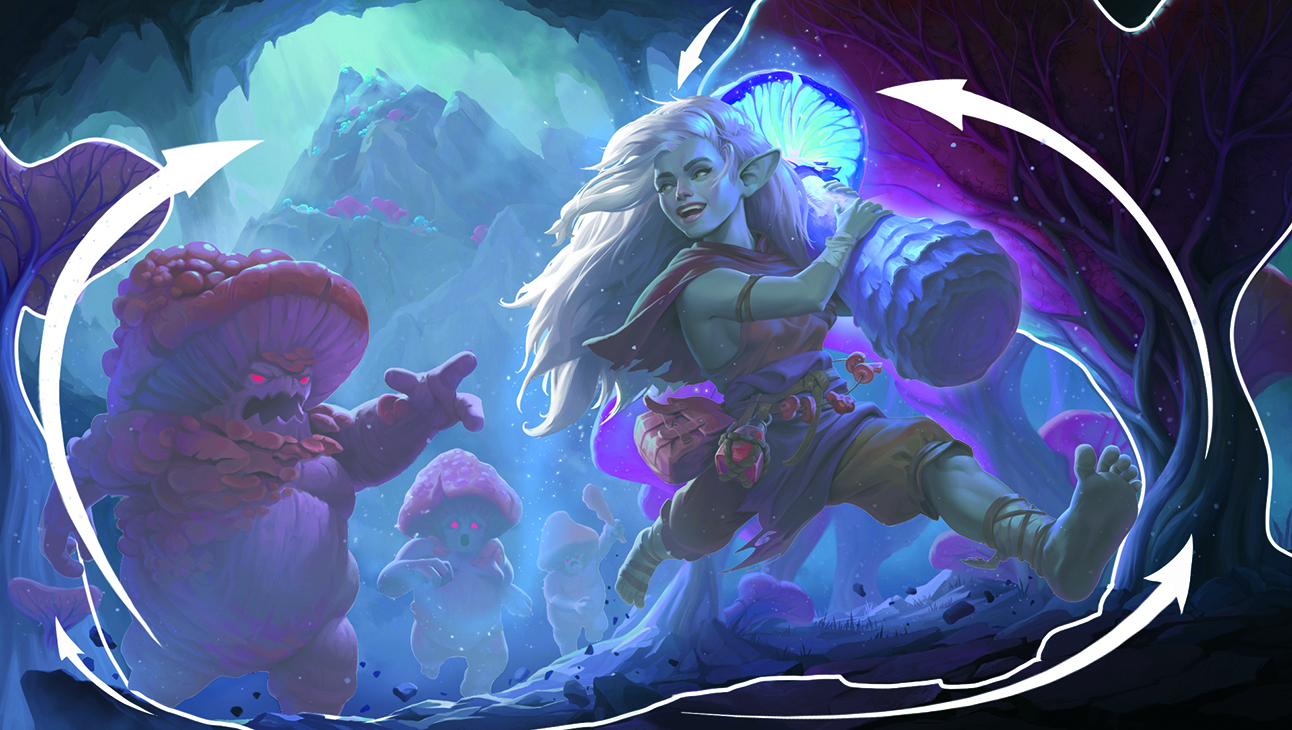
I tilted the camera slightly upward to place the horizon at an angle, which is a common trick to add drama and urgency. Meanwhile, giant mushrooms and stones with flowing lines further enhance the scene’s sense of motion and chaos.
15. Know when to stop

I used to overwork my illustrations, especially at the final stage. I’d zoom in and polish brushstrokes that no one would ever notice. Thankfully, I’ve learned to let go.
Now I check off a personal list: composition, lighting, clarity and narrative. If everything aligns, I call it done and move on. As Jake Parker, the creator of Inktober, wisely says: “Finished, not perfect.
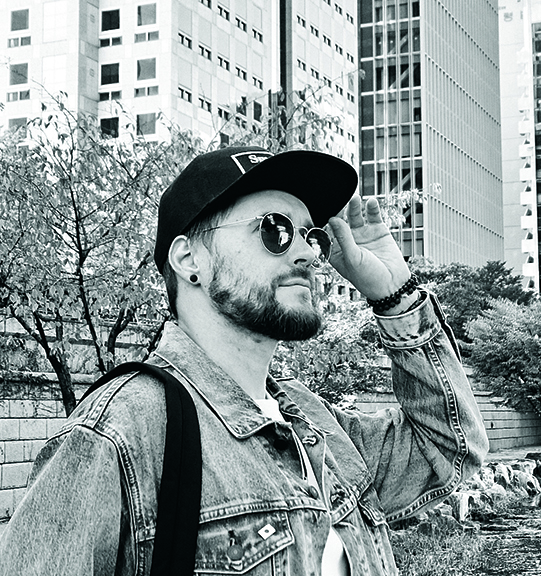
After ending a 12-year marketing career, Max transitioned into game art, where he discovered his true passion and continues to grow as a narrative illustrator.
You must confirm your public display name before commenting
Please logout and then login again, you will then be prompted to enter your display name.
