The best watercolour techniques can help you master the rewarding art of watercolour painting (or aquarelle). Watercolours started being developed thousands of years ago, so many watercolour techniques have been practised over time in this complex, but extremely versatile medium. Below, we round up the ones we find most useful.
Watercolour paints are made up of coloured pigments suspended in a water-soluble vehicle. Combining the reflection of the white paper, and the translucent, delicate paints, creates an enchanting luminosity on the page. But watercolours are not easy to master, so these essential watercolour painting tips are well worth trying in your practice.
For more general tips, see our roundup of painting techniques, and if you're looking to decide what tools to use, see our guide to the best watercolour paper and the best watercolour paints. Meanwhile, read on for some of our favourite watercolour techniques.
Vertex 2024 is our returning live art event being held at London's Business Design Centre on 19 April. Come and learn from professional artists working in film, games and VFX, including speakers from Pixar, nDreams and Maxon. Tickets for Vertex 2024 are on sale now.

18 essential watercolour painting tips and watercolour techniques
01. Use a range of brushes

When it comes to watercolour painting, you will want to have a range of brushes. The brushes you choose will depend on how large, or how small you work. If you most often work on the smaller side of things, then you will probably have to working with brushes ranging in sizes from 000 to six. It's best to have a go with a range of different sizes at first to work out what your favourites are, and which work best for you. Get your hands on a few brushes that are smaller than you'd normally go for too, because they might come in handy down the line when adding details you didn't anticipate.
02. Use good quality paints
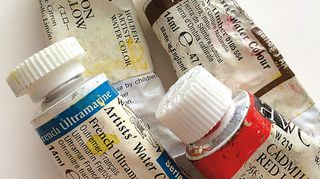
It's good plan to invest in some good quality watercolours as these can really make a difference and take your work to another level. Better quality paints will also tend to last longer and not yellow or degrade as much over time. There are plenty of different high-quality water colour brands, that you can buy from a range of places, whether that be online or in-store.
We can recommend Holbein and Winsor & Newton. It's a good idea to buy a few colours from different brands when you are first starting out, just so you can understand which paints work best for you and get a better understanding of the way watercolours work. You don't have to buy every colour of the rainbow, you can mix to create the colours you want, using even the most limited of palettes.
Get the Creative Bloq Newsletter
Daily design news, reviews, how-tos and more, as picked by the editors.
03. Explore dry versus wet
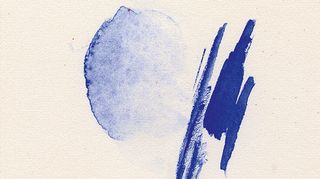
There are two major factors to consider when painting with watercolours: wet and dry. As the name suggests, watercolour is a water-based medium. You can manipulate the darkness and saturation of the pigment depending on how much water you add. There are many ways to paint in watercolour and as you try them, you'll find the ones that work best for you. Working dry to wet can help achieve more control.
04. Work from light to dark
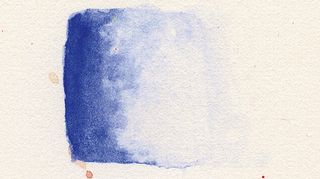
Another one of the key watercolour techniques to remember is working from light to dark. This means that anything you're keeping white or light in your watercolour painting needs to stay that way for the whole duration of the work. Build your values up layer by layer to arrive at the effect you want. This does take a lot of planning but the results will be worth it.
05. Stock up on paper towels
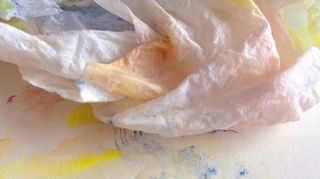
One very important tool to have in your kit for watercolour painting is a paper towel. This almost acts as a kneaded eraser for your watercolours. Laying down a wash of colour and then lifting parts of it up is a great way to add layers of detail gradually. Paper towels are also very useful for correcting mistakes or redirecting the paint.
06. Splatter your watercolours
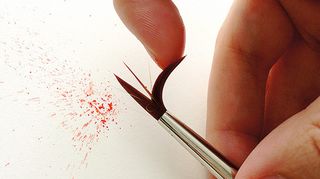
One handy trick to add some energy to your watercolour painting is to use a splatter watercolour technique. This can help suggest water spray or floating dust. Hold your paintbrush between your thumb and middle fingers. Using your index finger, pull back on the bristles and let them snap forward. This method is a bit unpredictable, but it can yield some very fun results, so it's well worth experimenting with.
07. Bleed colours into one another
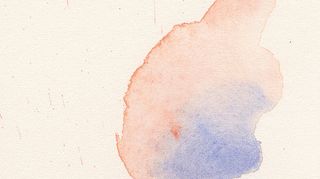
A good way to bleed colours into one another is through the 'blooming' watercolour technique. Add a good amount of water to the pigment in your brush and apply it to the paper. When the stroke is still wet, add in another colour with the same amount of water. You can manipulate the colours to where they need to be at this point. Allow this to dry and you'll notice that there are subtle gradients throughout the stroke. Also see our guide to the wet-in-wet watercolour technique.
08. Get the textures right
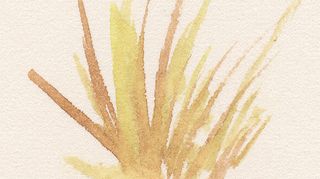
You'll notice that working in watercolours on a rougher paper does have its advantages. One of the obvious ones is that you don't have to work to hard to achieve a nice texture. That said, it's important to try to depict objects and materials with their textures included. This means using lights and darks as well as wets and drys.
09. Pull in colour
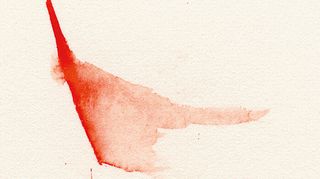
When you apply a dry, more saturated stroke in watercolour painting, you can pull from that stroke with just water. This watercolour technique is a great way to show form and indicate a light source or edge. Apply a stroke using very little water and more pigment. Before the stroke is dry, take a moderately wet brush and pull the colour out from the darker stroke. You can pull the colour quite far depending on how dry that initial stroke is.
10. Layer your colours

Because watercolour is a thin medium, you'll need to build up colour gradually. This is another advantage to the medium as you can do some colour mixing right on the paper. Take one colour and lay it down. Allow it to dry and then revisit with another shade. You'll notice where they overlap, the pigment mixes and you're left with a different colour. This is great for building up flesh tones.
11. Try scumbling

Scumbling is a watercolour painting technique that's also used by many oil painters to create soft hues of layered pigment and light. You essentially layer the colour in soft, indirect layers to create the hue and look you're after. Simply lay in semi-wet strokes of paint in watercolour. As you apply more colour, be careful to keep adding water so the colours blend and stay soft. It can be easy to overwork this, producing a muddy look, so less is more.
12. Lift the colour
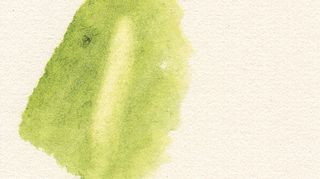
Sometimes you'll need to 'erase' your watercolour. While you can't return the paper to 100 per cent white, you can lift away colour to correct a mistake or adjust the lighting in a piece. Work with an already dry swatch of watercolour and using clear water, paint in the shape you'd like to lift out. Let it set for a just a minute then dab away the water with a paper towel. You'll see the colour lift out in the shape you painted in.
13. Use salt to create texture
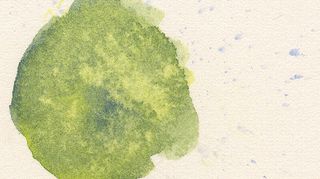
Watercolour painting technique is all about layering and texture. Salt can provide an interesting texture with little effort as the salt crystals absorb the water, leaving a unique pattern in the pigment. This watercolour technique is useful for adding texture to natural surfaces like rocks or tree bark. Start by laying down a swatch of watercolour, and then, while the paint is still wet, sprinkle over salt. Let it sit until it's mostly dry and then simply wipe or blow away the salt.
14. Apply paint using a sponge
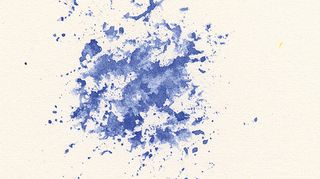
Another useful household item you can use in a watercolour technique is a sponge. Simply mix your pigment in a small dish or tray, dip the sponge into the paint and blot onto your paper. You can alter the wetness of your paint and achieve different effects – a drier look would be suited for plant life or scaly skin, while a wet application might be more suited for waterscapes or clouds.
15. Explore negative painting
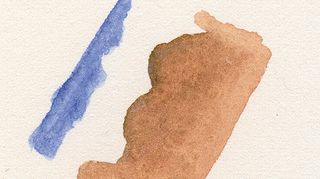
Watercolour painting requires planning. Think about where you'd like your whites and lights to go before you apply paint. It's vital to keep control of your brush as you paint in the edge of where you'd like your negative space to begin. Load it with semi-wet pigment and paint along the edge of where you'd like your negative space to begin. Then pull the colour away from the edge of the stroke to fill in where you'd like pigment. For more tips, take a look at our guide to negative painting in watercolour.
16. Use tape to add clean edges
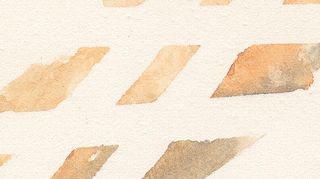
You can use tape to mask off areas you'd like to keep clean and white. This watercolour technique is useful for hard edges involving machinery or architecture. Just lay down the tape where you'd like the paper to stay white. Use a tape that won't rip your paper, such as drafting tape or painters' tape. Paint over and around the tape. Once your paint is dry, remove the tape slowly and you should have a straight, clean line.
17. Use a 2H pencil for your underdrawings
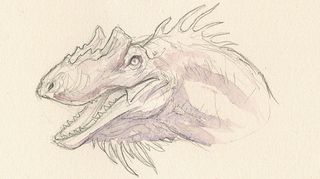
In the image above, a pencil with a 2H lead has been used to ensure the guide drawing will withstand the water from painting. You can then go in and lay in some light paint strokes with a medium-sized brush. If the paint is very watery it won't stain the paper right away.
18. Save your darkest darks for fine detail
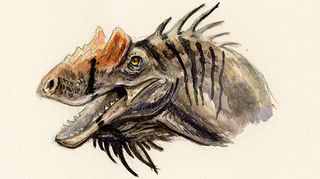
Resist the temptation to use your darkest darks until you reach the end of your painting. Because watercolour painting is a transparent medium, you'll need to make sure you keep your lights light, and save the darks and details until the end.
This article originally appeared in ImagineFX bookazine How to Paint & Draw.
Subscribe to ImagineFX here. For more tips, see our roundup of essential oil painting techniques and tips, expert sketching tips and pro pencil drawing techniques.
