10 expert tips for charcoal drawing
Discover how to improve your charcoal drawing.
Charcoal drawing is a deeply satisfying medium. It could be because they're so quick to complete, with immediate results, or that the final look is so impressive. Either way, people love charcoals. Even the great Michelangelo created a collection of charcoal drawings.
But there are certain charcoal drawing techniques you need to know before embarking on your first masterpiece. This guide takes you through some key charcoal drawing tips and tricks to help you to begin successfully. Watch the video below, and then follow the steps to success.
For more help with your creations, see our tutorials on how to draw, or investigate various art techniques. And for more kit, see our pick of the best sketchbooks around.
You can use any type of charcoal to try out these techniques. Just ask at your local art store and they will guide you (see point #09 for a little about different types). If this inspires you to educate yourself further, why not head over to our online art courses roundup to discover courses, workshops and more.
All the charcoal drawing techniques you need to know
01. Find the essence
The main thing is to keep the main thing the main thing. Artistically speaking, the main thing is called the essence. It's as important in charcoal drawing as it is in any other medium. When creating a piece, the need to establish what the image is about, and what you want to say with it. Once you settle on the 'main idea' or the essence, everything you do from that point on, every move and every detail you put in or leave out, should work to strengthen that aspect of the piece.
02. Learn the value of value
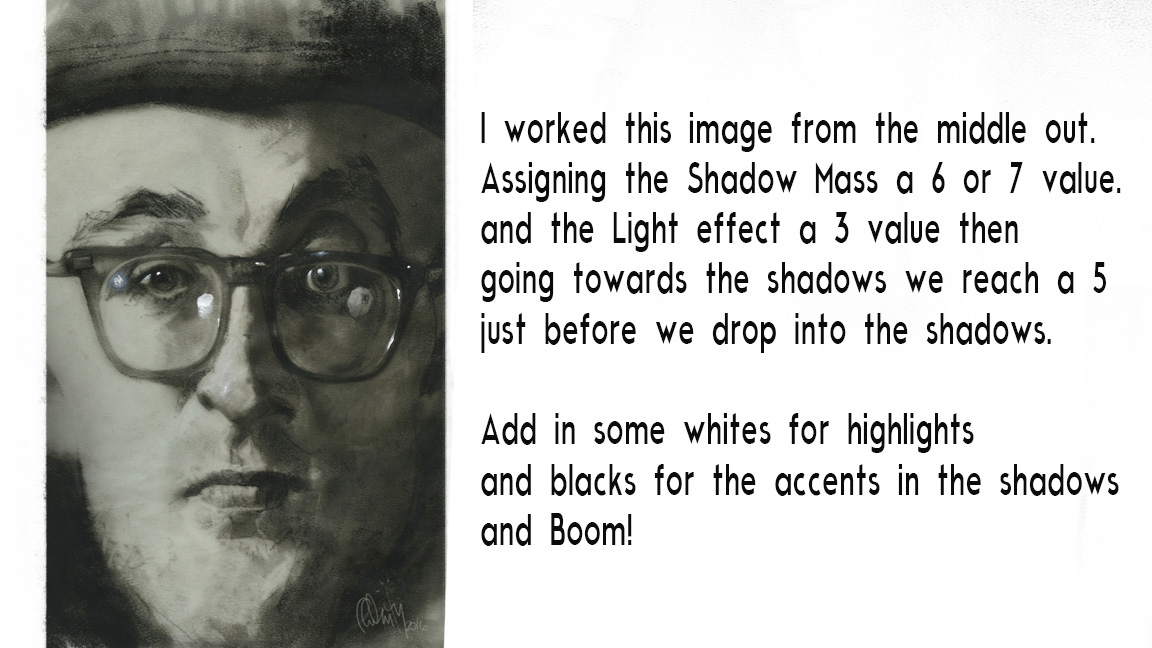
The word 'value' gets thrown around a lot in art, and can seem confusing. What we mean by 'value' is simply a walk from white to black (light to dark), on a range of one to 10. One is the white of the page and 10 is black, so a five, 50 per cent or 'halftone' is a medium grey, halfway between white and black. Every image is composed of values (darks or lights), regardless of colour.
To help you with this, work from the middle out, keeping your darkest dark (the shadows) no darker than a value of six or seven, and your lightest (the light effect or everything in the light) a three or four value. Work your way towards the darks (accents) and your whites (highlights).
Daily design news, reviews, how-tos and more, as picked by the editors.
Think of accents and highlights as twins living in different neighbourhoods. They are not the most important element of your image. They serve the whole.
03. Use the hierarchy of value
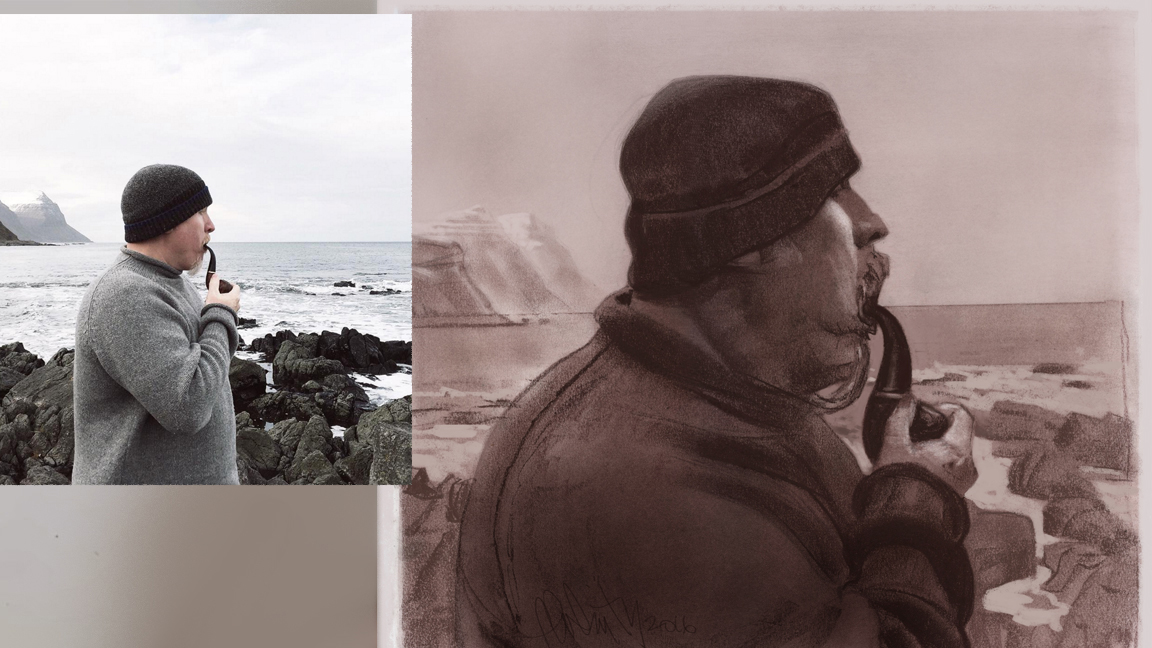
It’s safe to say that a successful image is one that quickly reads well and has power to touch you emotionally. Using value or tone and assigning different areas of your charcoal drawing to lesser or darker tones can be a very helpful tool.
In the image above, based on a photograph by Josiah Bice, the darkest values are used on the subject. Notice the lightest value on his cheek and the darkest value reserved for the mass of his body.
Using a hierarchy of value allows you to direct the viewer to what you want them to see first. In this case, it’s Steve smoking his pipe. Everything else becomes less important. He is the essence of the image.
04. Squint
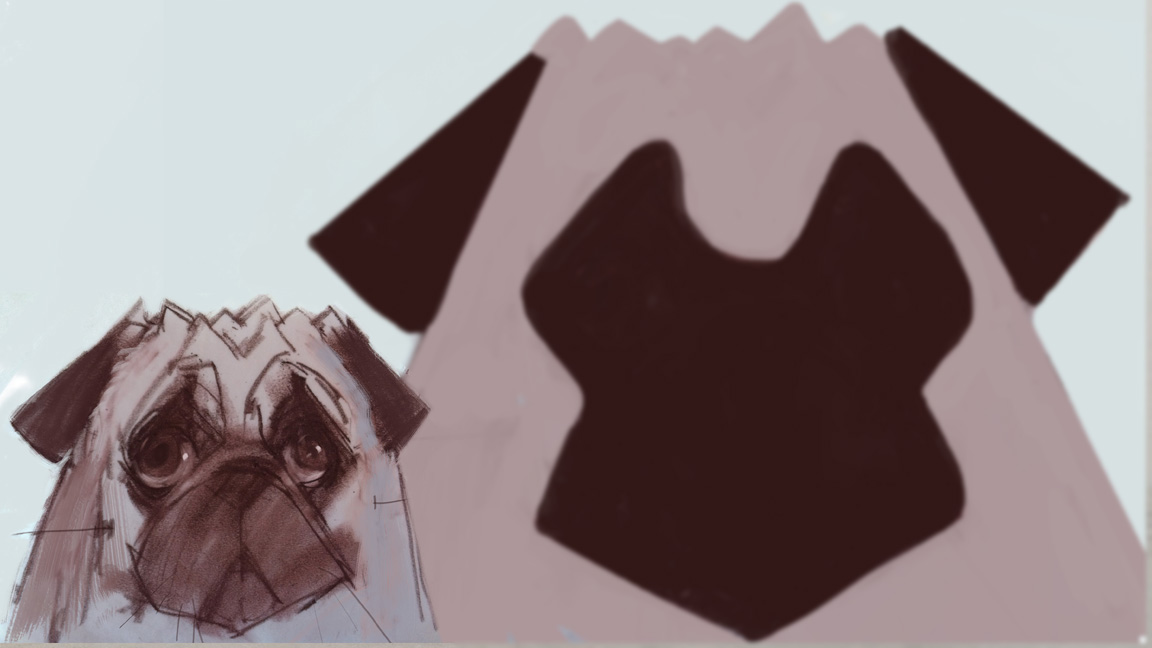
Sometimes 20/20 vision is not helpful. When we observe whatever we are drawing there is a ton of information going in through the eye gate. And an image filled with needless details cripples the effect of a piece. The goal is to edit and simplify.
Squinting our eyes just a bit (or maybe taking your glasses off) will blur the image's values and help us see a more simplified version of what we are looking at overall. Squinting also helps us see simple shapes very clearly. Nailing those simple shapes helps with the overall essence of the piece.
05. Explore thick and thin lines
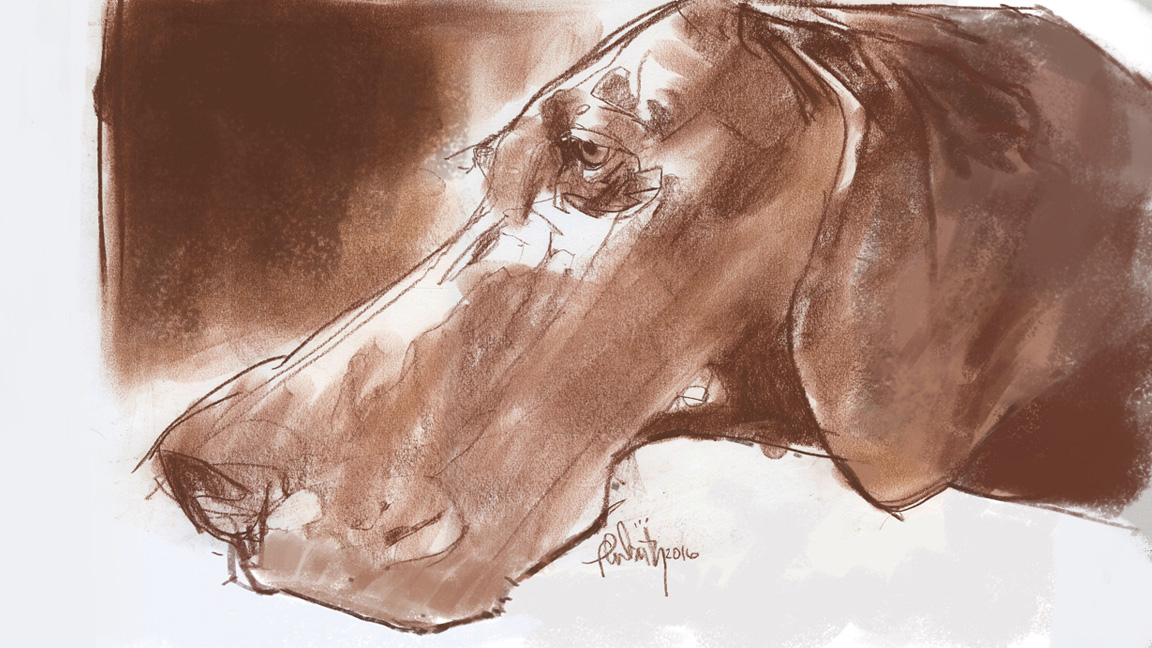
Using thick and thin lines is an interesting idea, and it’s funny how many artists miss this very helpful technique in their work. In a charcoal drawing, if every line has the same width or is drawn using the same exact pressure, it ends up looking like a colouring book drawing and can come across as very monotonous and boring. Using thick and thin lines in your drawing can make it so much livelier.
So how do you use this technique, and what do you need to know? The rule of thumb is that lines on top of things are thinner since light is hitting them and lines underneath objects can be thicker since there are usually shadows sitting there. That’s it. Simple, right? Check out the various dancing lines and thickness on the dog drawing above. Now you know.
06. Use an eraser
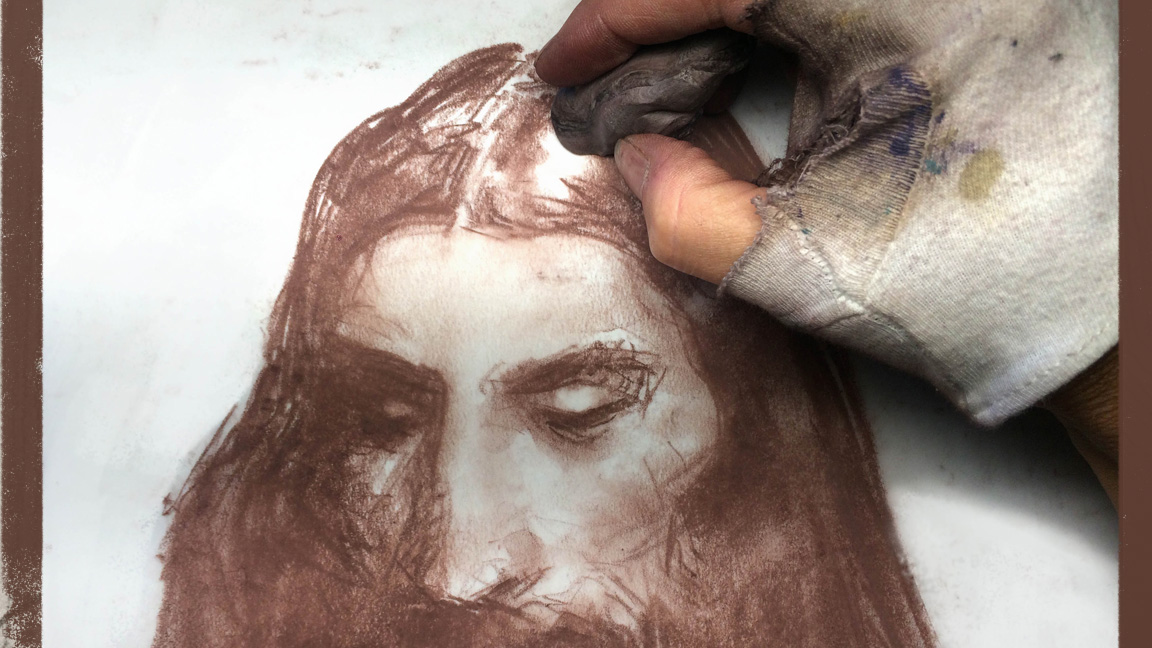
The cool thing about charcoal is that it’s easy to control. You can move it around easily. Once you apply charcoal you can remove it or erase it where it's not needed. In the picture above, the erased part marks out where the light is hitting the model's head.
07. Kit yourself out with a few tools
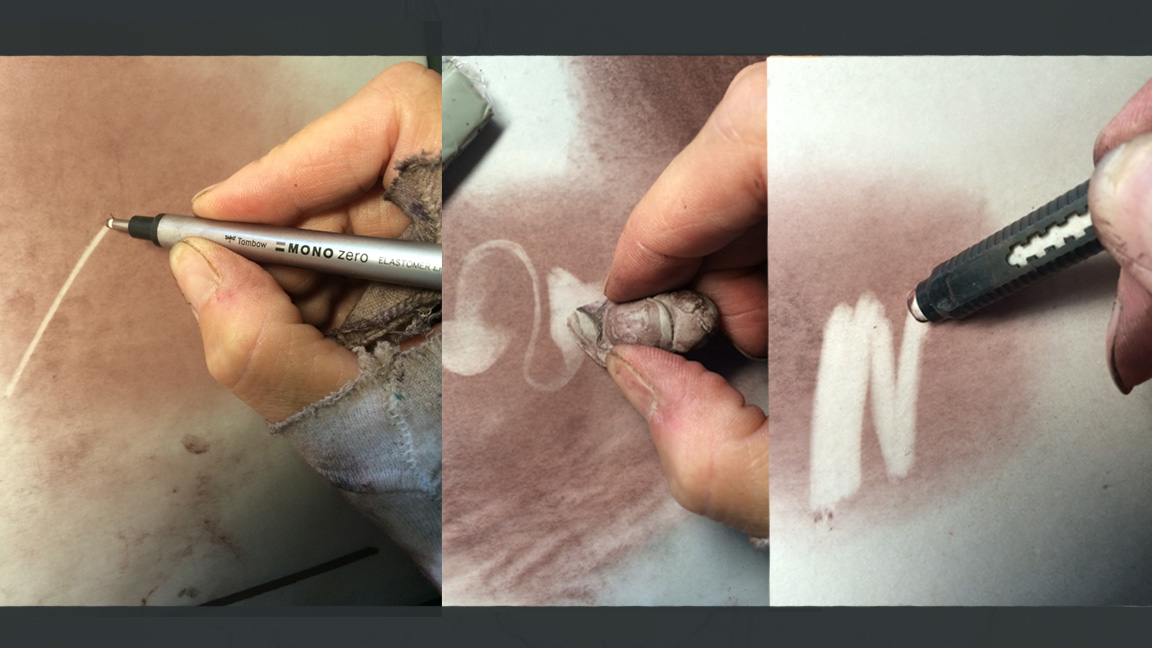
Traditional artists have plenty of tools of the trade to choose from, and the tools for creating charcoal drawings are particularly cool. The image above shows some great ones: a really small fine-line eraser, a kneaded eraser that you can bend and squash, and a hardcore eraser pen for those tough, heavy lifting erasing jobs.
Using charcoal or pastels requires us to 'move' or apply the medium, and there are many ways to accomplish this. Your finger is the most obvious, yet can be streaky or too small. A Webril Wipe is a great tool for making a large mass of charcoal in one stroke.
08. Wear a glove
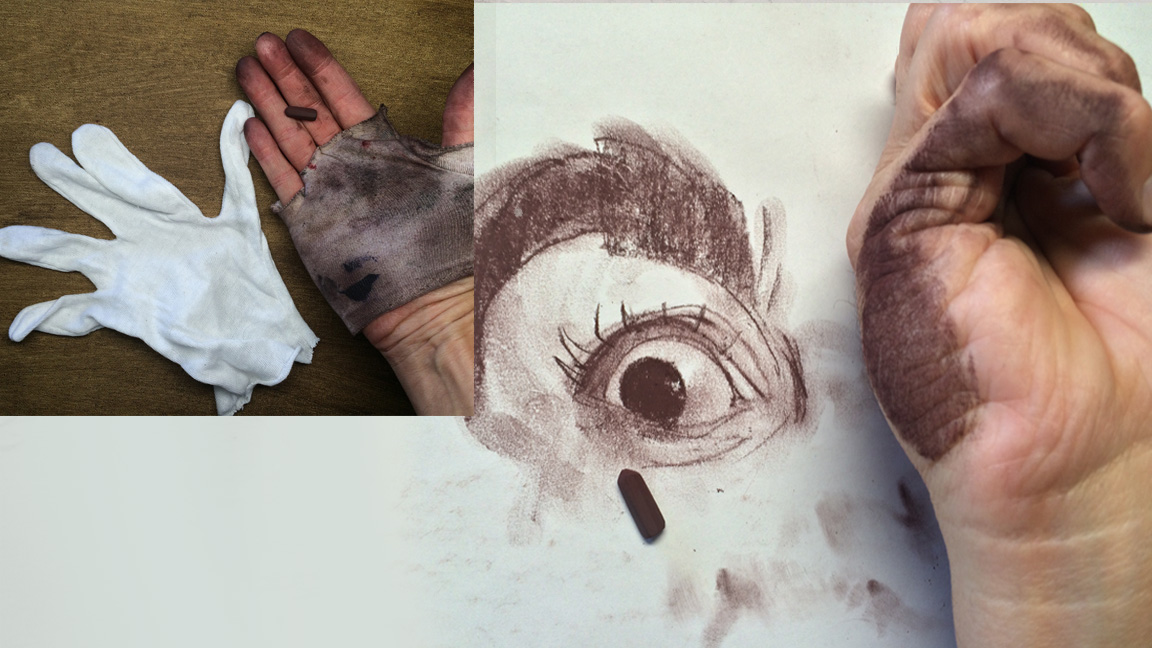
Did you know that your hand has oils on the surface that can damage the purity of your paper or stock and fight against you? The oils on your hand can even attach to your paper and repel your medium. To solve this problem, wear a glove or place another piece of paper under your hand to protect your artwork.
09. Try charcoal pencils
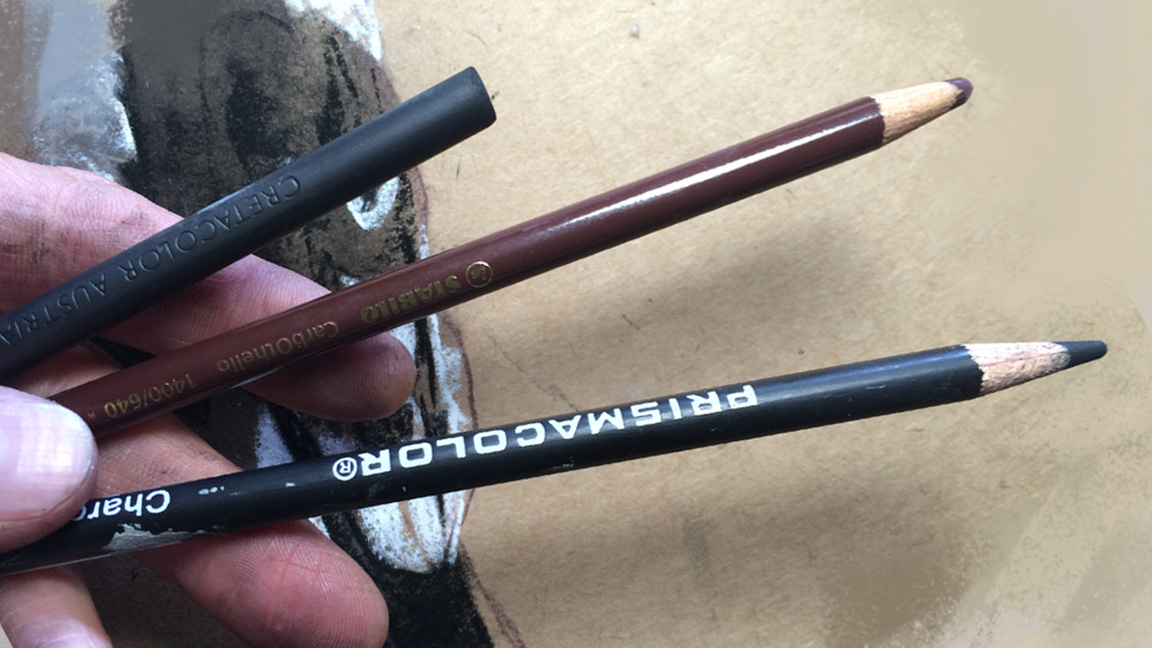
Charcoals come in many forms, from pencils to thick sticks to chunks, and the specific medium you decide to use is up to you. In the above photo are three good examples of charcoal pencils. Know that they can be messy, so after using them, it's worth spraying your charcoal drawing with a workable fixative to control them.
10. Press on
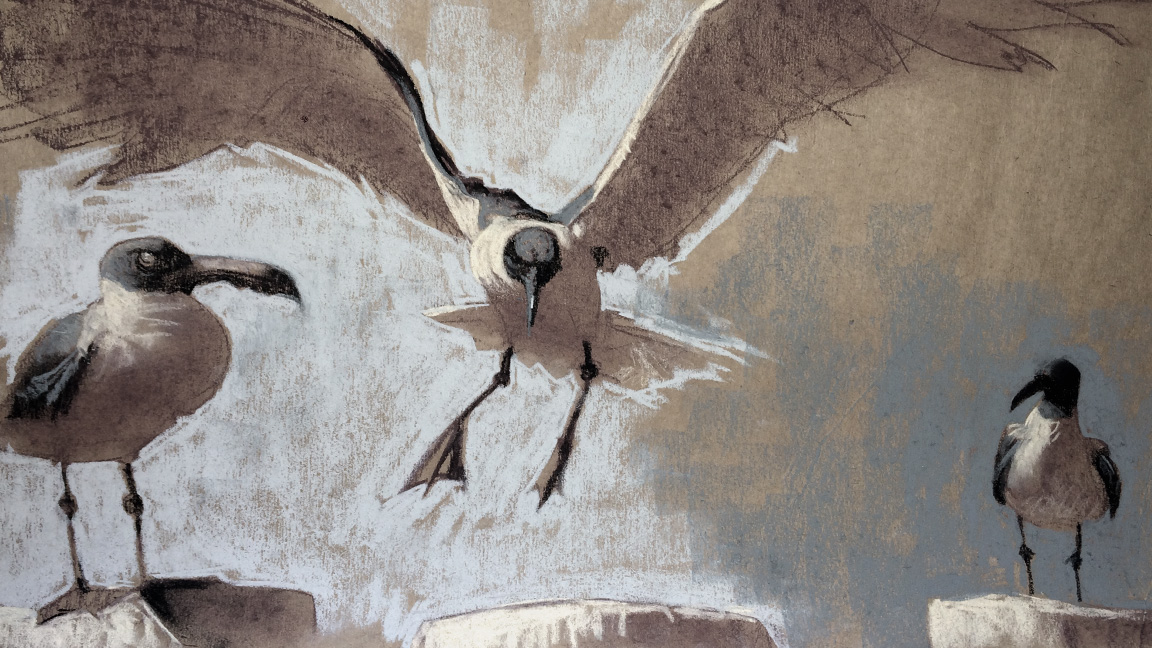
Remember that drawing is difficult and at times frustrating. Stick at it. Creating art is extremely hard to pull off and it can take time to feel happy about your progress.
Learning and growing is a community project. Reach out and network with a few artists you admire. Be humble and teachable and ask them for insights about your work. Ask 'What are my weaknesses?' and 'Where should I start or what should I focus on?' Ask them to be honest. Those are good questions and a great place to start.
The good thing is that everyone has been down in the dumps at some point. Even to experienced artists still have really discouraging days full of doubt, and others where they can fly! So press on, open your wings, jump and catch the wind.
Related articles:
- Essential art supplies for painting: All you need to start creating art
- Must-know painting techniques for artists
- Best art easels: Find the perfect easel for your art
