How to use Control Points in Photoshop
The Nik Collection plugin dedicated to selective adjustments is a great way to learn techniques that apply across the board.

Sign up to Creative Bloq's daily newsletter, which brings you the latest news and inspiration from the worlds of art, design and technology.
You are now subscribed
Your newsletter sign-up was successful
Want to add more newsletters?

Five times a week
CreativeBloq
Sign up to Creative Bloq's daily newsletter, which brings you the latest news and inspiration from the worlds of art, design and technology.

Once a week
By Design
Sign up to Creative Bloq's daily newsletter, which brings you the latest news and inspiration from the worlds of art, design and technology.

Once a week
State of the Art
Sign up to Creative Bloq's daily newsletter, which brings you the latest news and inspiration from the worlds of art, design and technology.

Seasonal (around events)
Brand Impact Awards
Sign up to Creative Bloq's daily newsletter, which brings you the latest news and inspiration from the worlds of art, design and technology.
All of the Photoshop plugins in the Nik Collection feature Control Points in one form or another. These let you selectively adjust areas. Most Photoshop users will be familiar with making selections or using masks to isolate areas for selective adjustments, but Control Points are different. You simply click on a point, adjust the circular area to fit over whatever you want to target, and the software will work out what you want to adjust by seeking out similar tones. It’s both clever and easy!
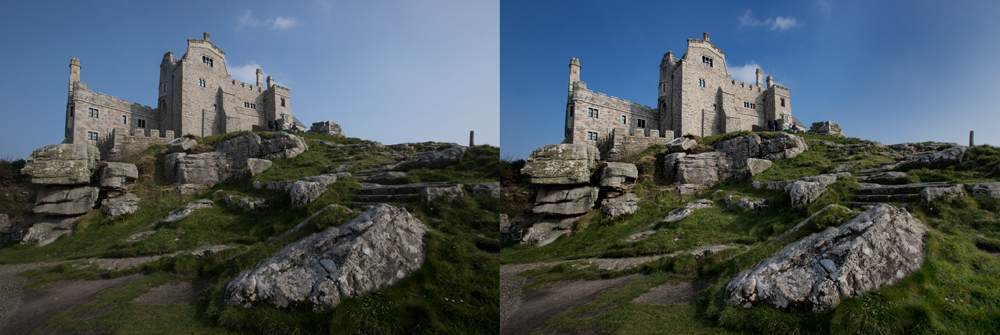
Although all the plugins in the collection feature Control Points, Viveza is the one that’s almost completely dedicated to them. It’s a good substitute for Adjustment Layers, and useful when you don’t want to spend time painstakingly making masks. A few clicks can define an area like the foreground here for quick adjustments.
In the three steps below I'll show you how to get to grips with Control Points.
01. Make a control point

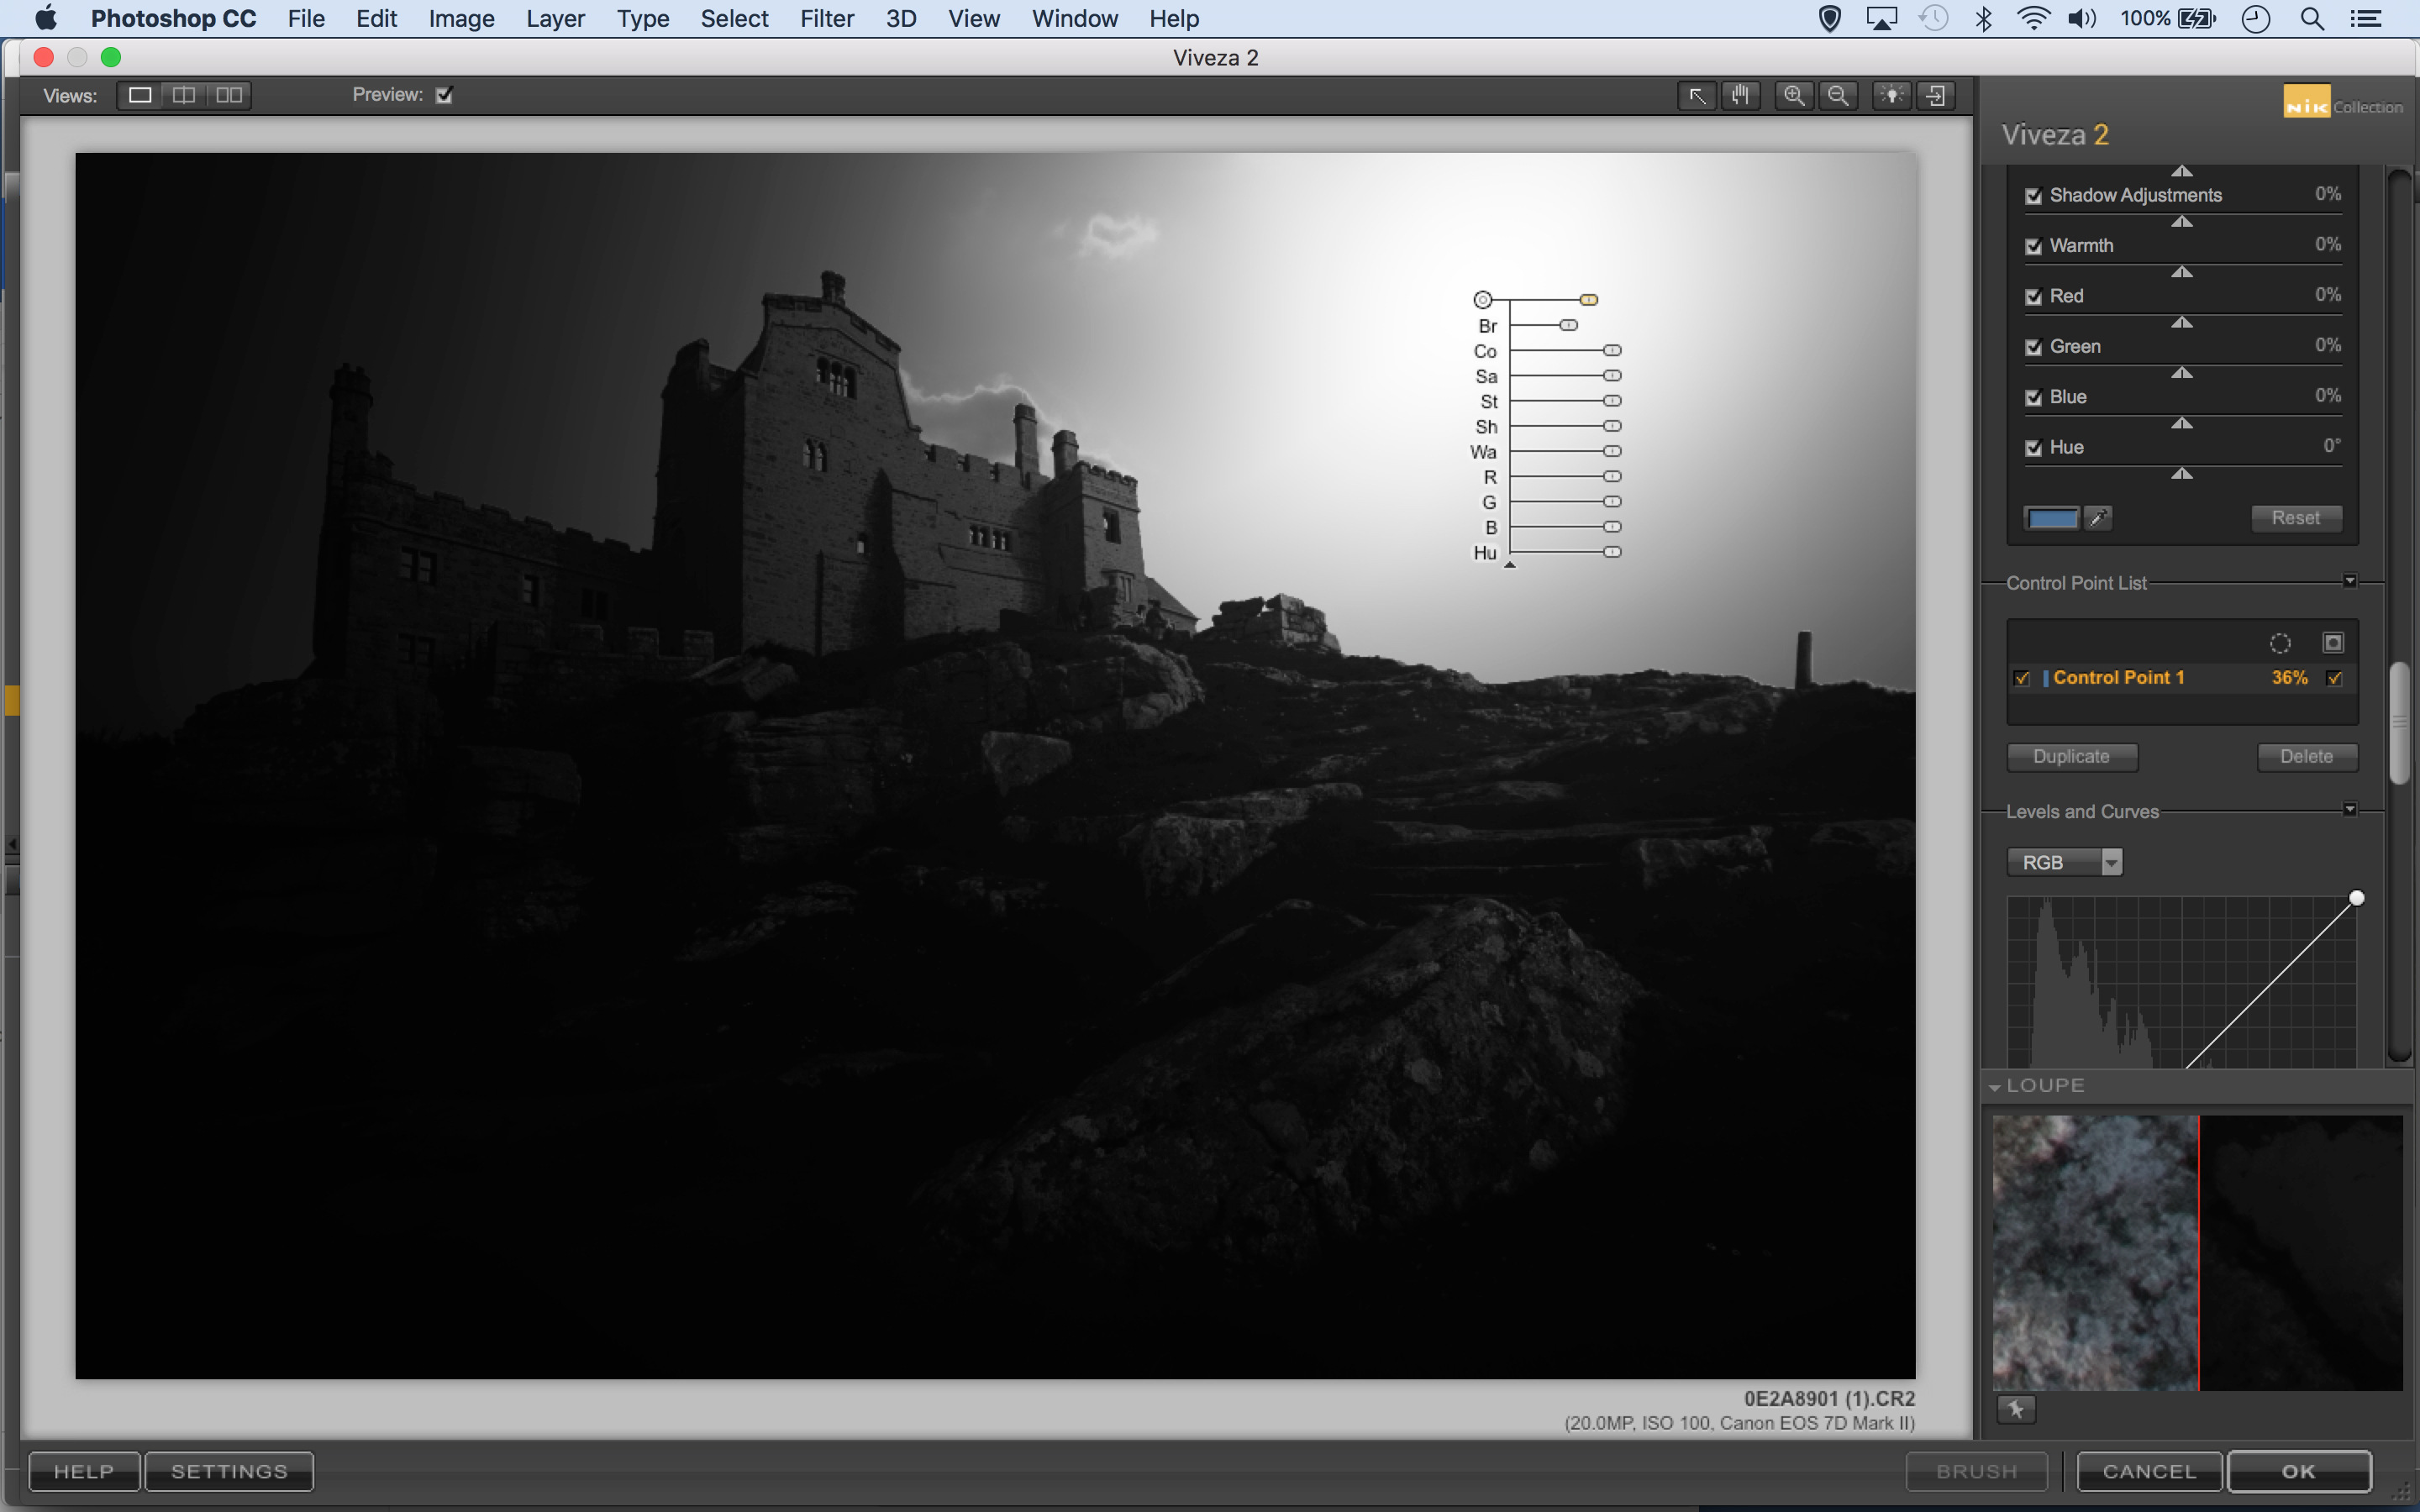
Right-click the layer and choose Convert To Smart Object. Go to Filter > Nik Collection > Viveza. Click Add Control Point then click the sky. Use the top slider connected to the Control Point to resize the area. To see what is affected (in white), click the square icon in Control Point List.
02. Alter the tones

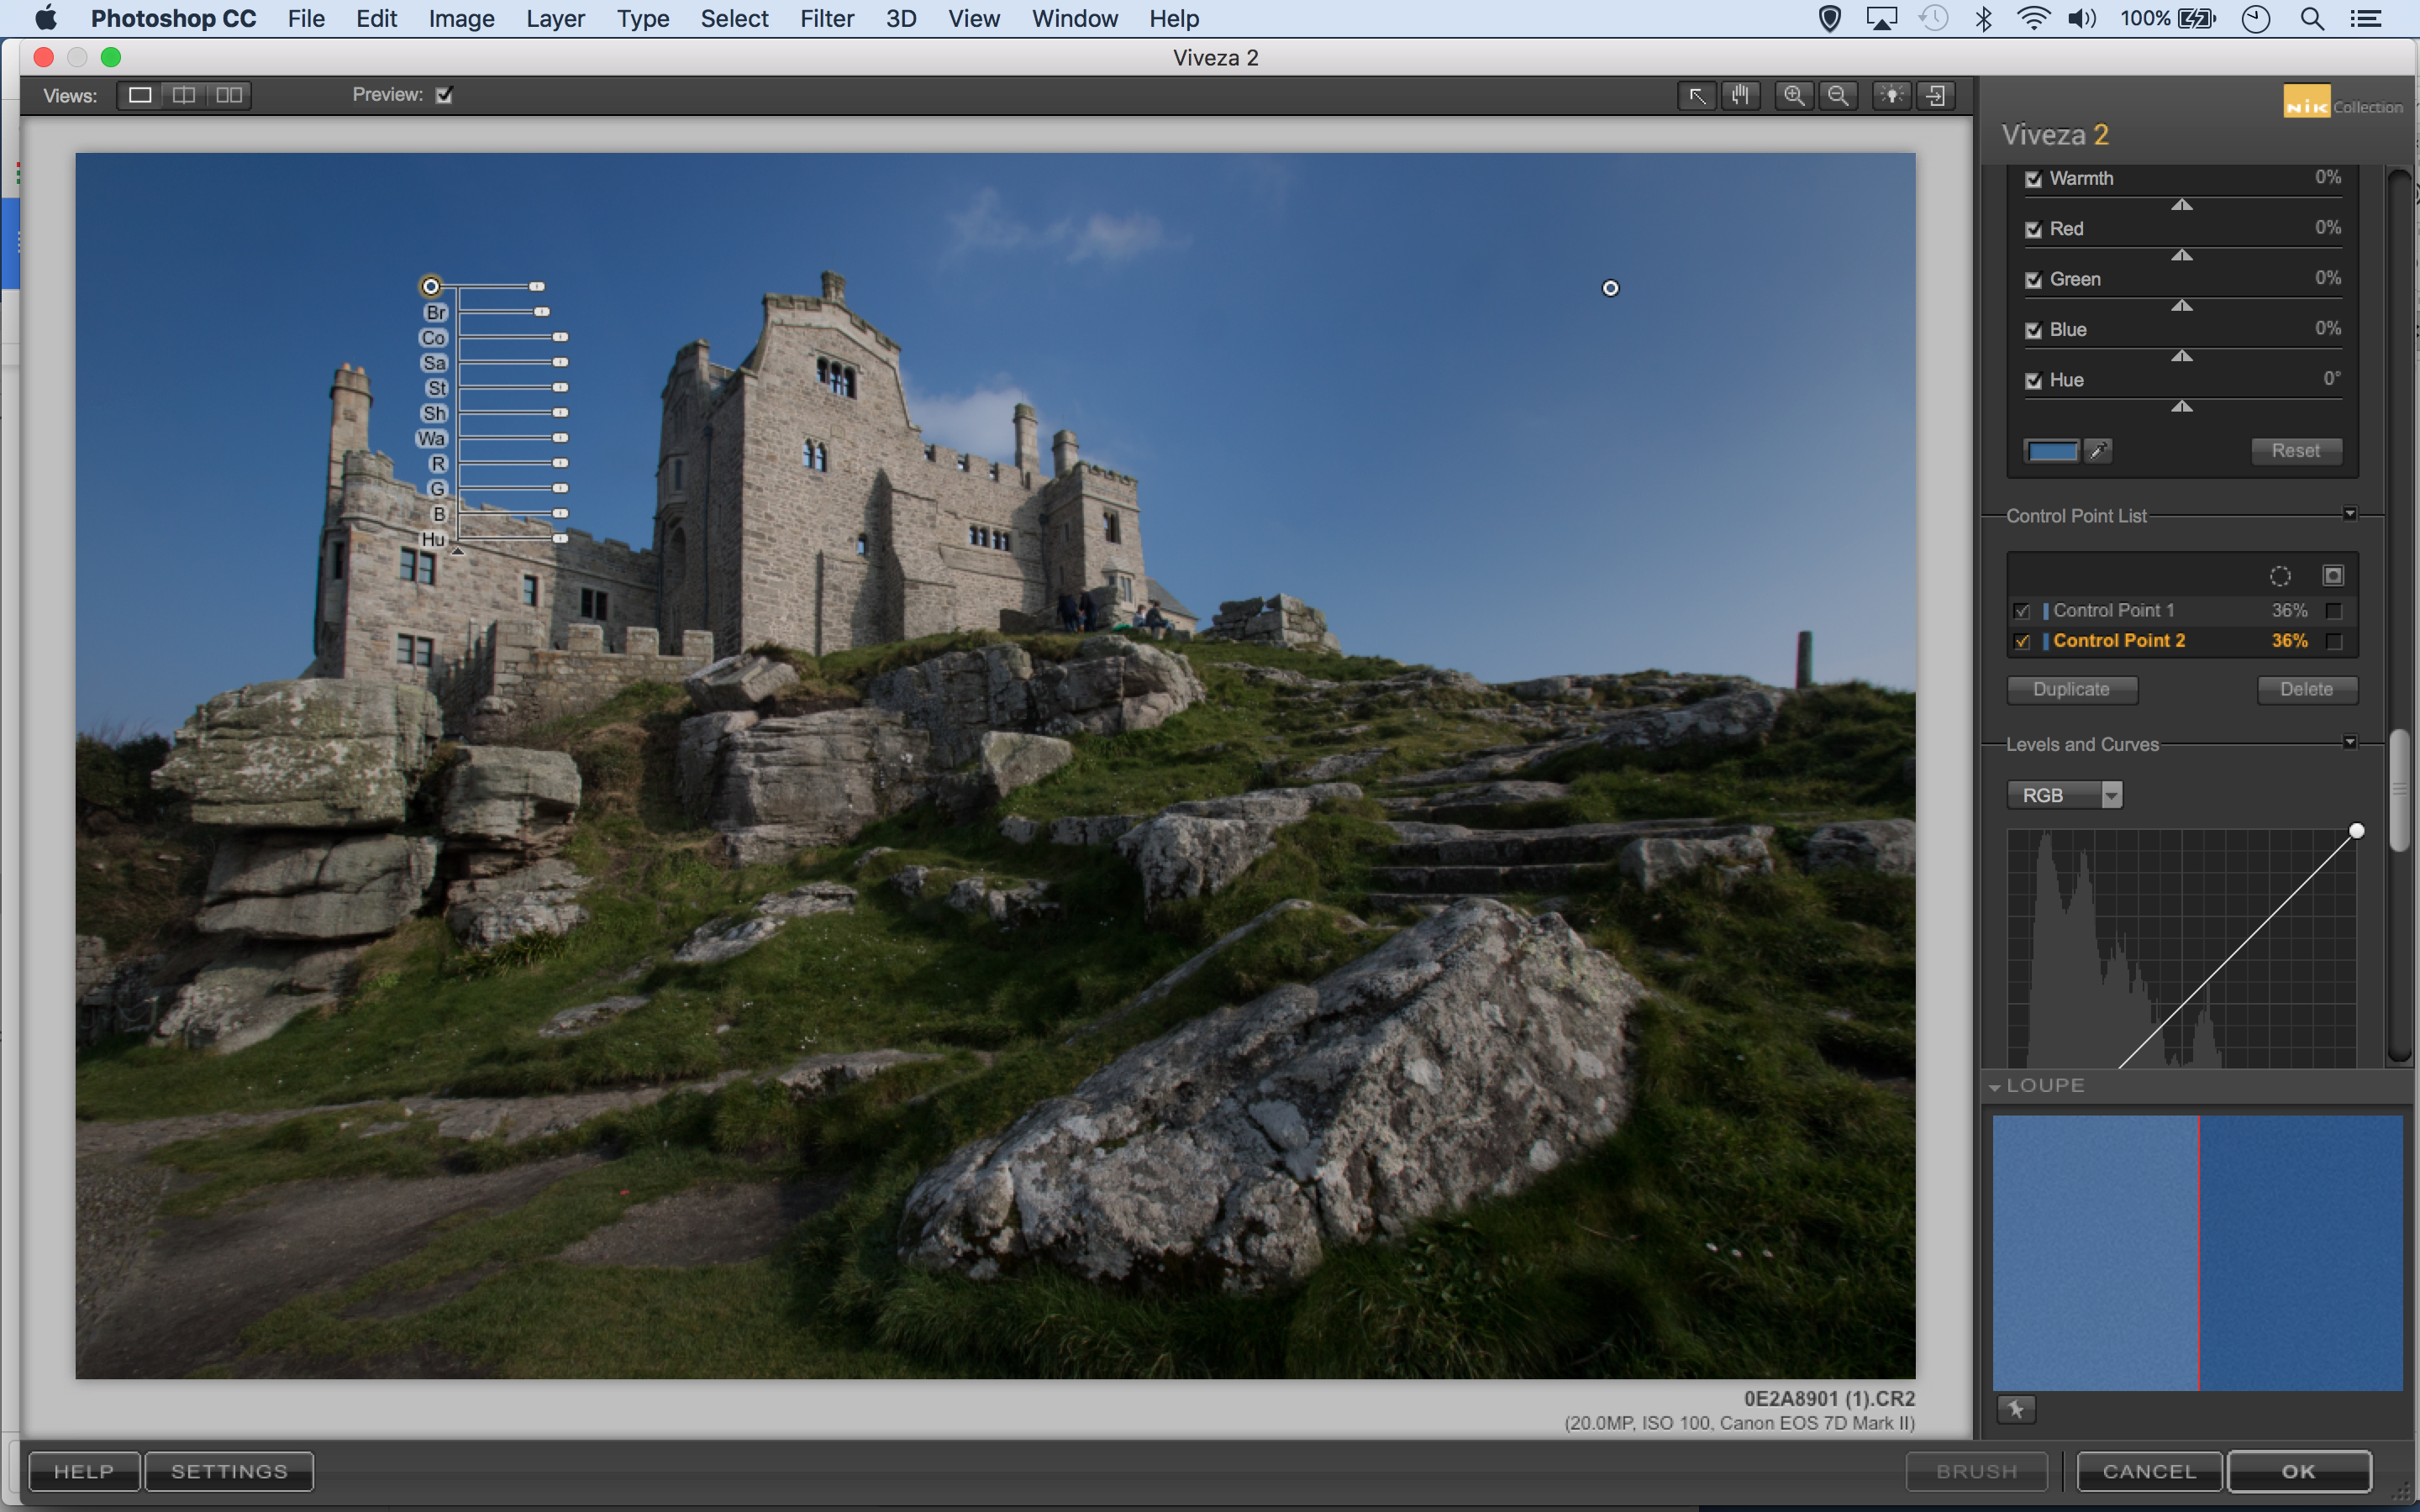
Use the set of sliders hovering over the photo to adjust the effect inside the area affected by the Control Point. Here we’ve used it to darken down the blue sky. Next click Add Control Point again and make a second point over the other half of the sky. Adjust the brightness to darken it too.
03. Duplicate and group

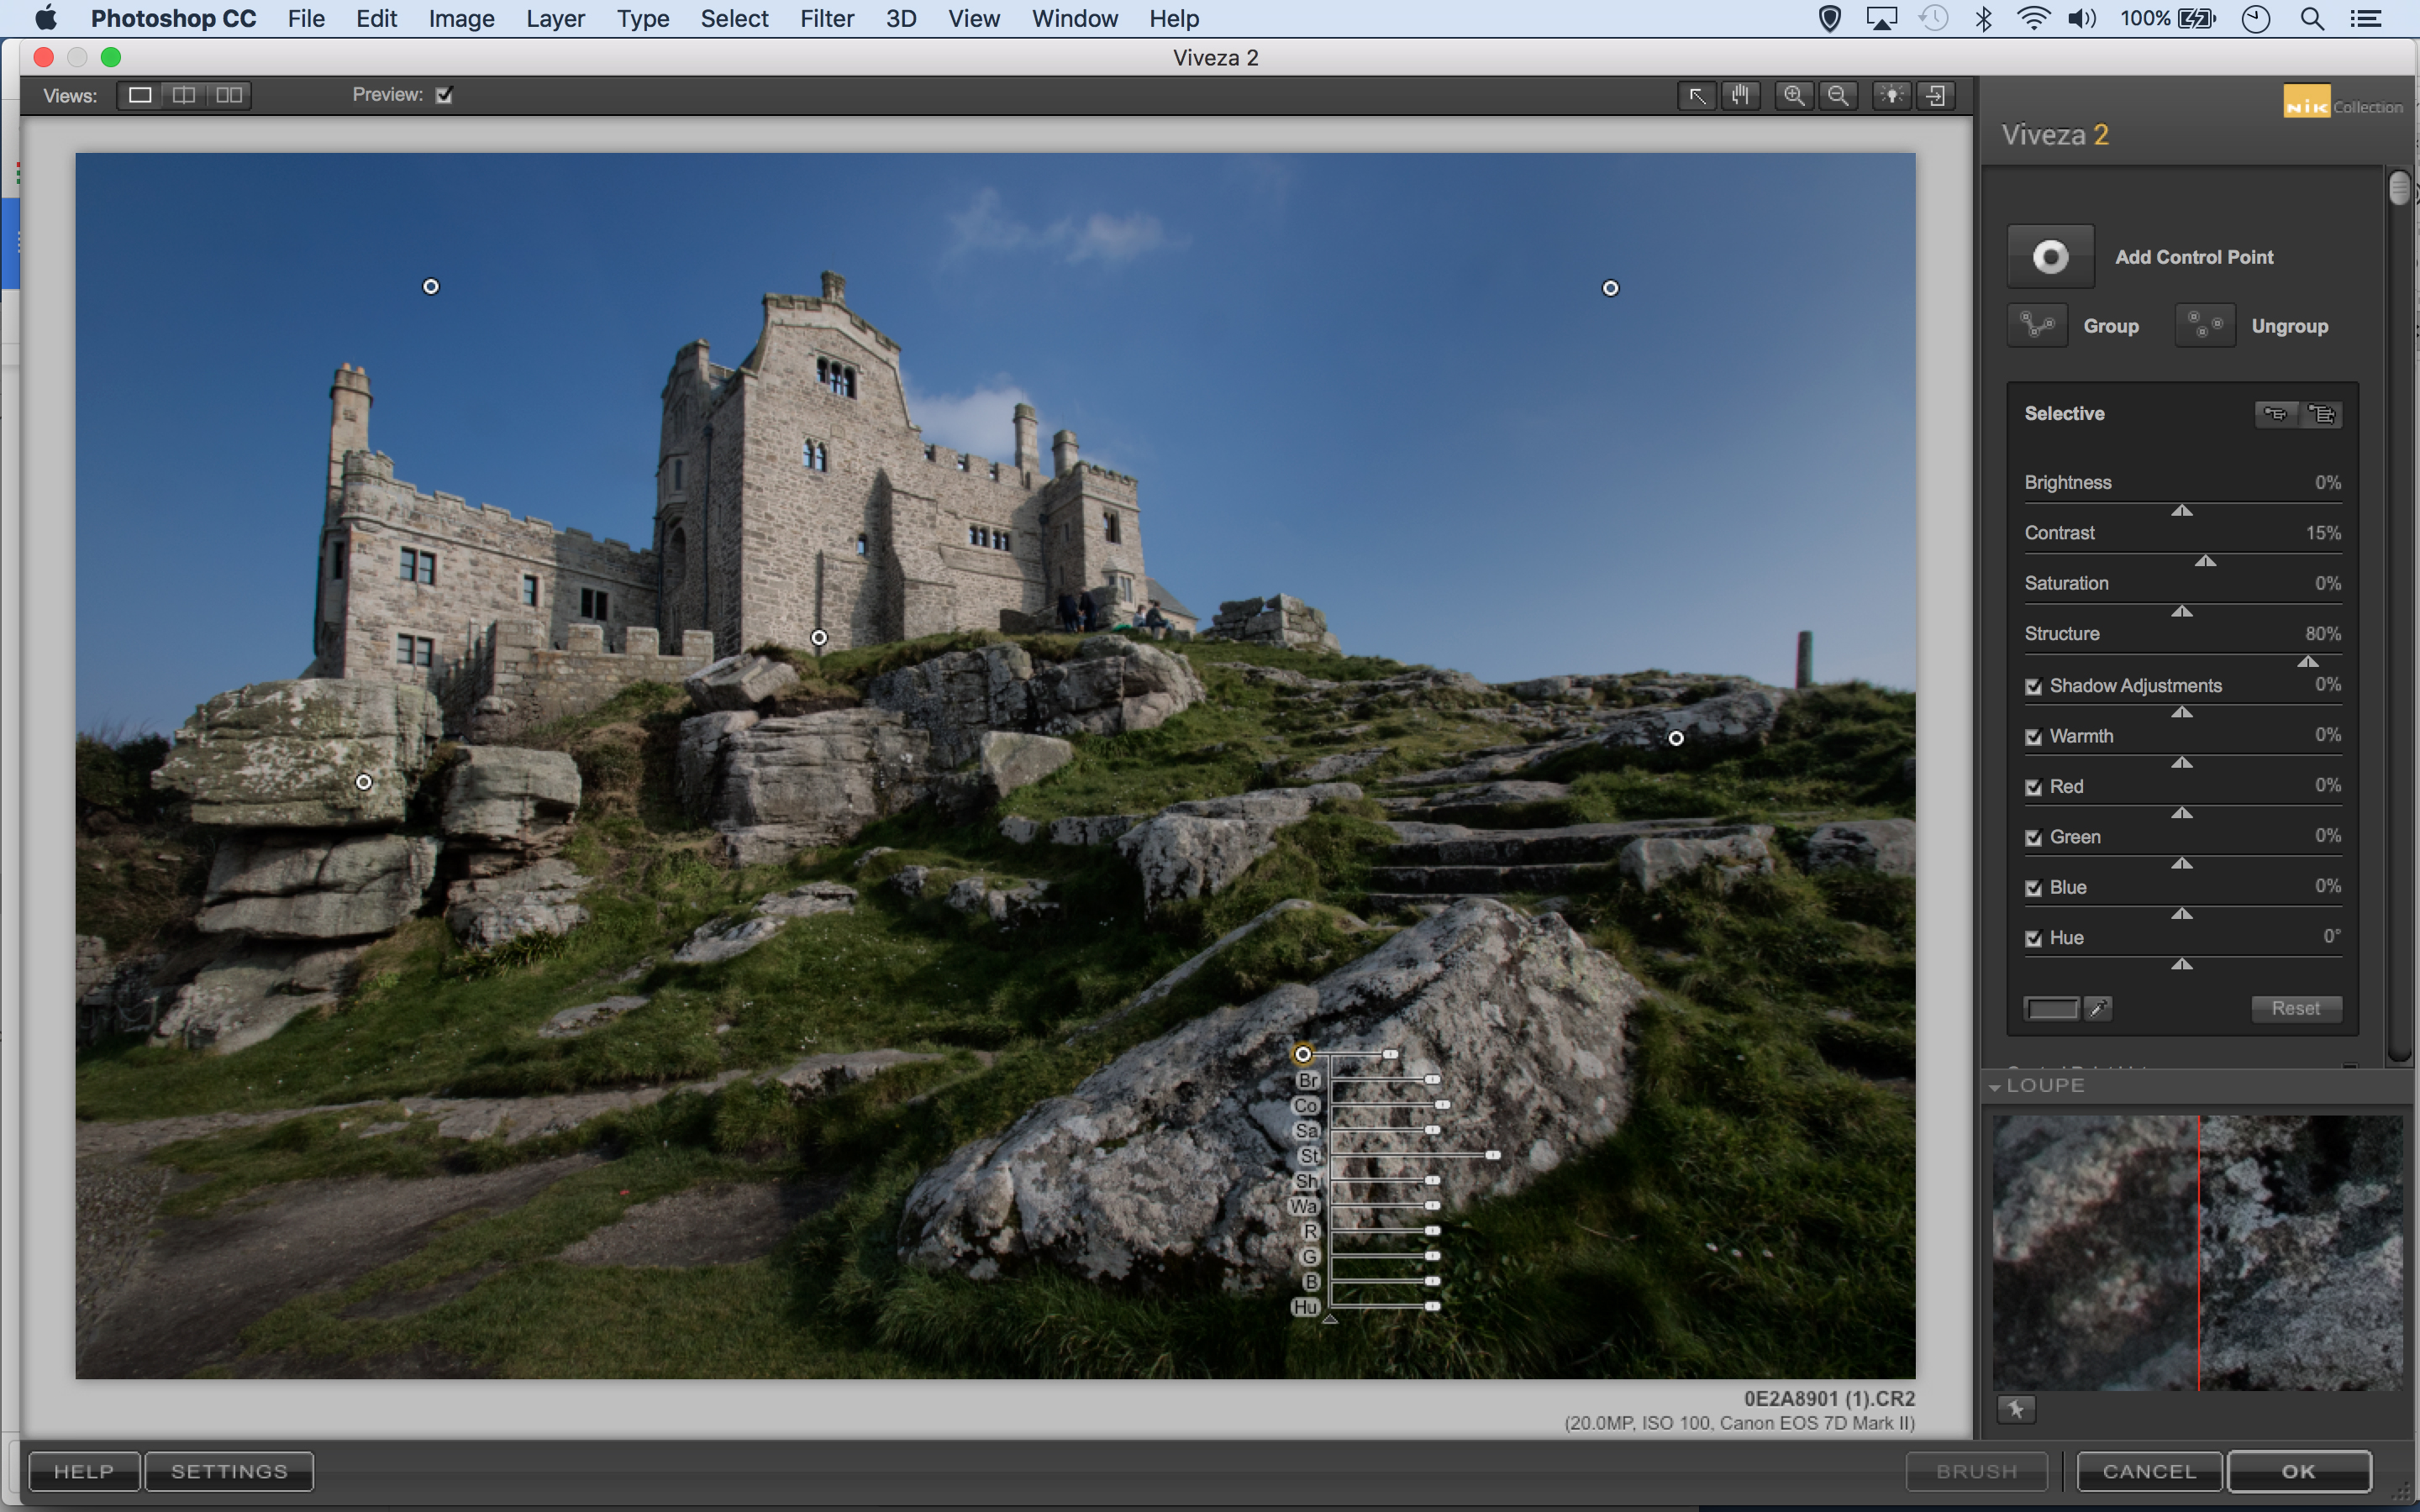
Add another point over the rock in the foreground and lift the structure to pull out more texture. Alt-drag the point to copy the adjustment over to another rock nearby. If you want to adjust several points as one, Shift-click to highlight them then click the Group button.
This article originally appeared in Practical Photoshop magazine; subscribe here.
Sign up to Creative Bloq's daily newsletter, which brings you the latest news and inspiration from the worlds of art, design and technology.
Related articles:

James Paterson is an expert in all aspects of the photographic process, from capture to post-processing. He has contributed to numerous photography publications, including Digital Camera, Amateur Photographer, PhotoPlus and NPhoto, and his work has also appeared in Computer Arts magazine as well as several books. He is the editor of Practical Photoshop magazine, and has a well-deserved reputation as an authority on all things Photoshop-related.
