These surprising art tricks will help you paint a beautiful samurai geisha
How to craft a stunning character in watercolour using unusual techniques.
Sign up to Creative Bloq's daily newsletter, which brings you the latest news and inspiration from the worlds of art, design and technology.
You are now subscribed
Your newsletter sign-up was successful
Want to add more newsletters?
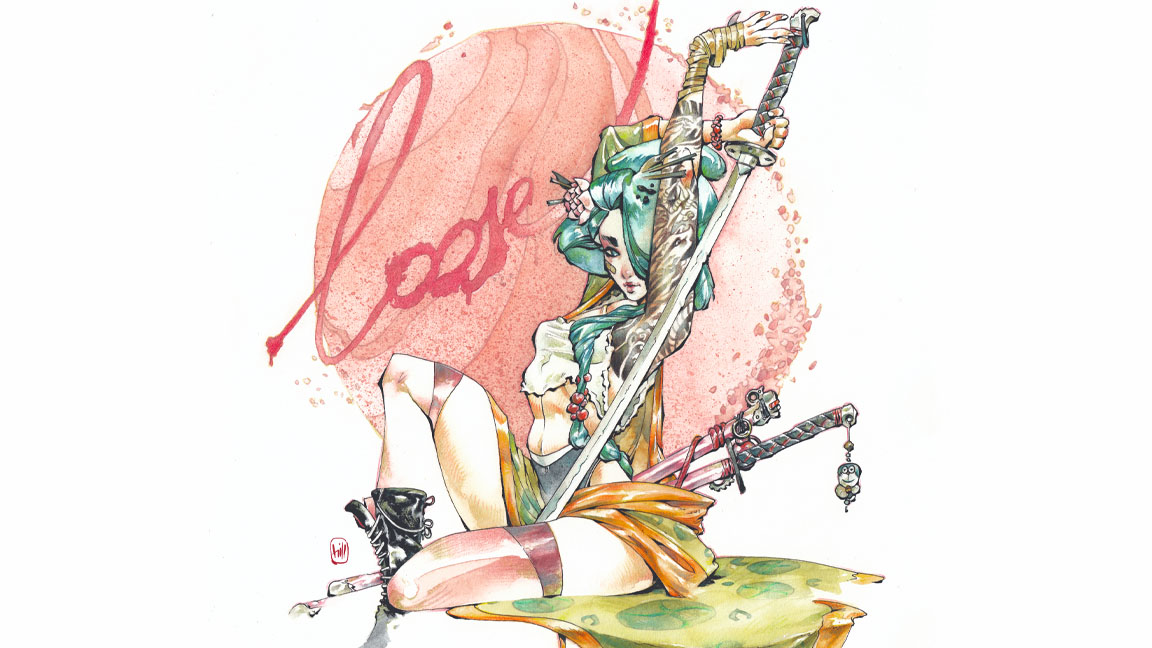
Watercolours are a beautiful medium and create such stunning, delicate art. Here I’ll work on a geisha character, while also giving her my own personal touch. I imagined a strong, self-confident woman wielding a katana, and I enjoy merging the traditional geisha figure with all the samurai symbolism to create a brand new combination.
I usually work traditionally, with watercolour my speciality. I usually combine it with other traditional techniques such as ink, the best coloured pencils, the best markers, and so on. The fusion of these techniques in a single illustration provides the tones and textures I find attractive for telling the stories I want in an image. I also use digital retouching tools in my work as a cover illustrator. They offer a final step that’s essential for the narrative of each illustration.
Read our guide to the 18 essential watercolour techniques for more advice, but in this tutorial, I’ll show you how I typically work through a simple illustration. We’ll go step-by-step through each phase of creation, from the initial sketch through to making the final touches.
Article continues belowSomething important to keep in mind is the choice of materials, in my case, 100% cotton paper to maintain moisture for longer, and a satin grain so the flow of the line isn’t hindered by the grain of the paper.
The colours can be of higher or lower quality, but what’s most important is that I feel comfortable with them, so I always look for resistant, fluid colours that mix well. The brushes are no less important; I like to use brushes that have a great colour-loading capacity. These are often those with natural hair, though there are synthetic alternatives that will get you good results.
During this painting, I’ll use two cans of water. One of them is for rinsing the brush and the other to load it with clean water. On top of that, I’ll also have a palette of colours for mixing, coloured pencils, and ink markers. (Scroll down to the bottom for the final artwork.)
01. Sketching your ideas
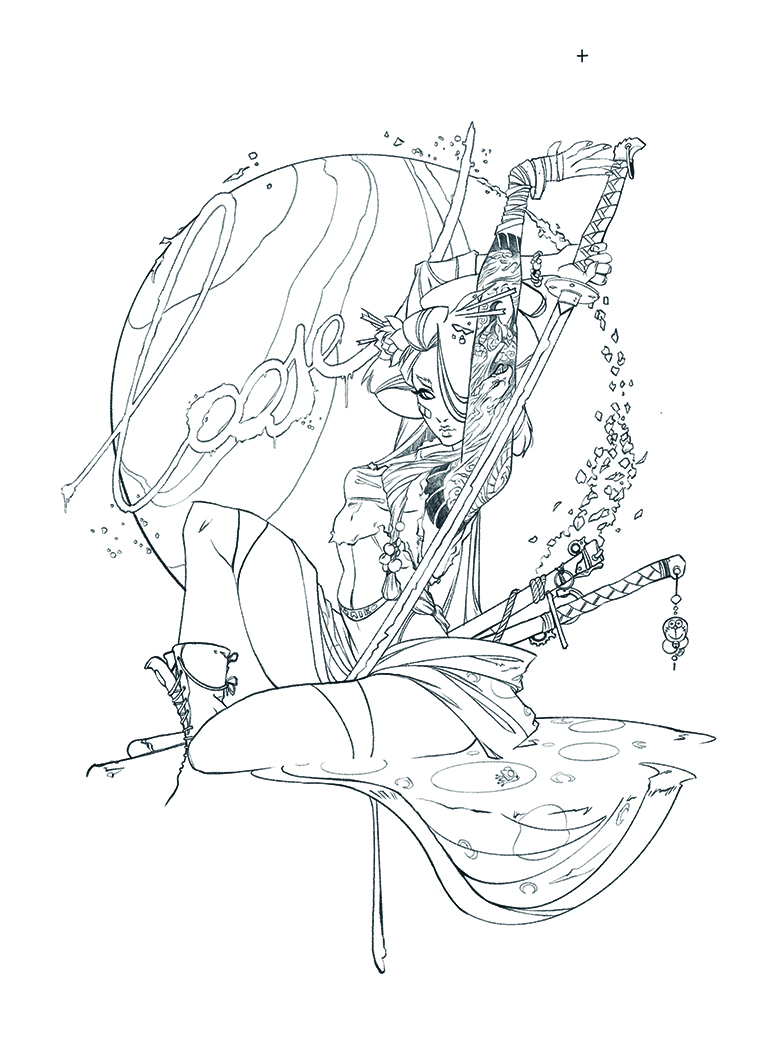
When I started working on this idea, I made it easier on myself by using Procreate. When you have several sketches, put them next to each other to see how they work, and then clean up the lines on the final sketch you choose. (Read our list of Procteate tutorials for more advice.)
02. Transfer with a light table
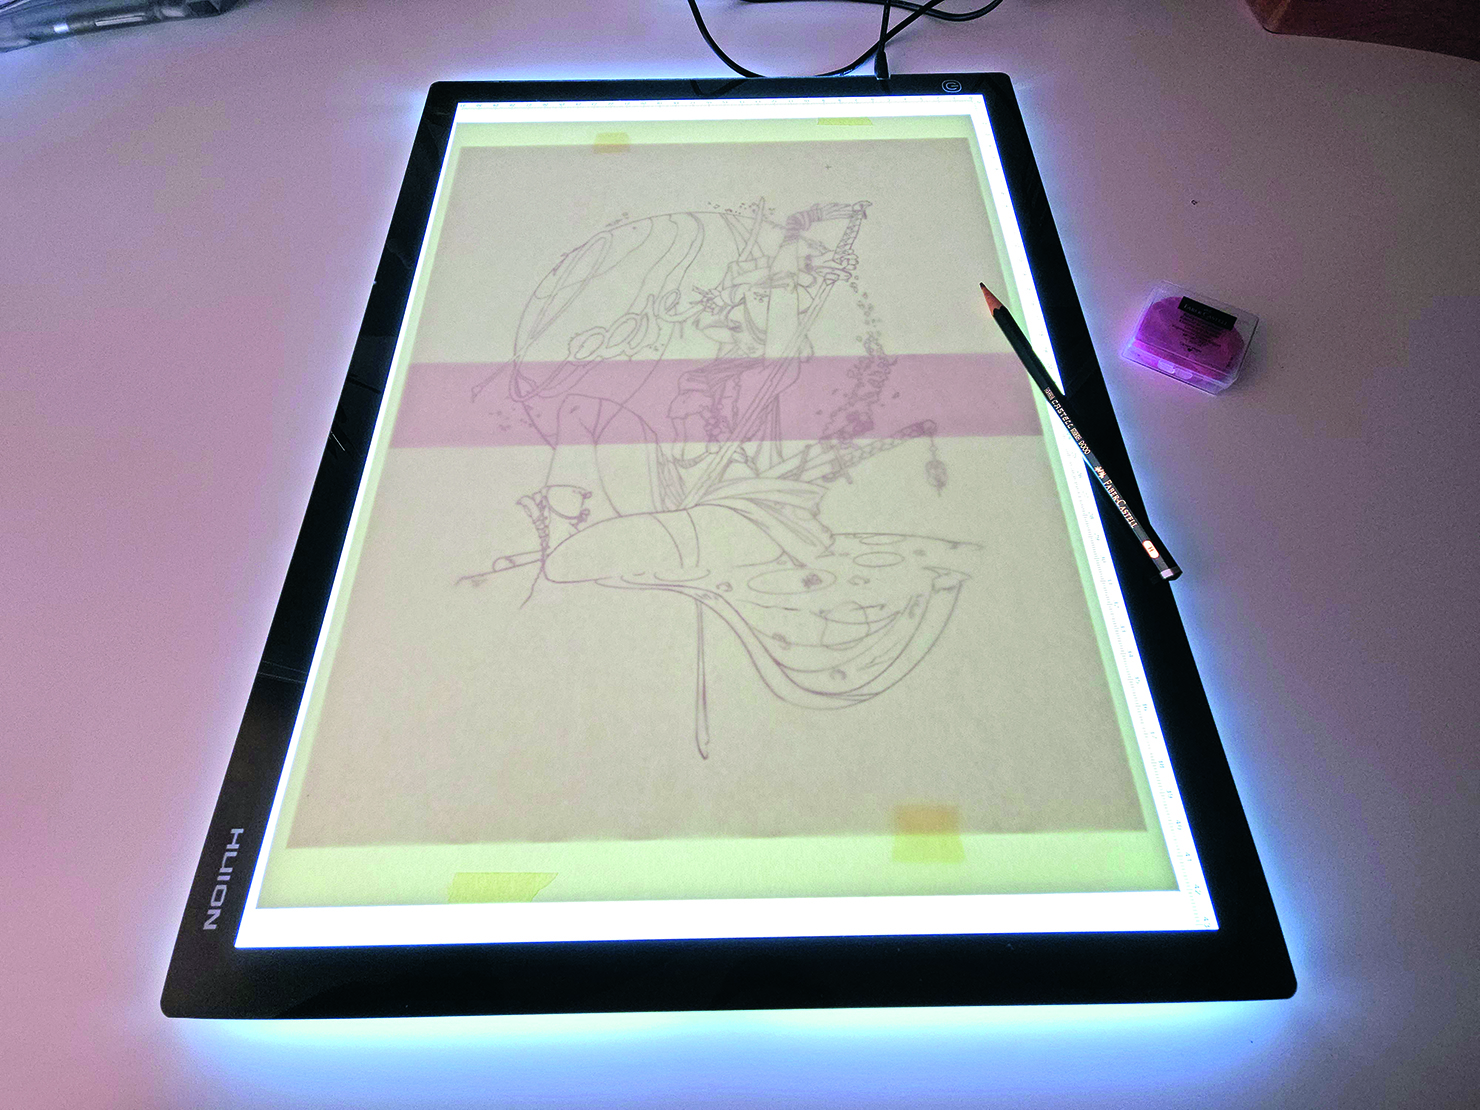
Once the sketch is printed out on paper, place it on a light table and trace the entire drawing, line by line, onto watercolour paper. To do this, I like to use a blunt, medium-hard graphite pencil. (Read our list of the best lightbox for tracing.)
03. Drawing ink lines
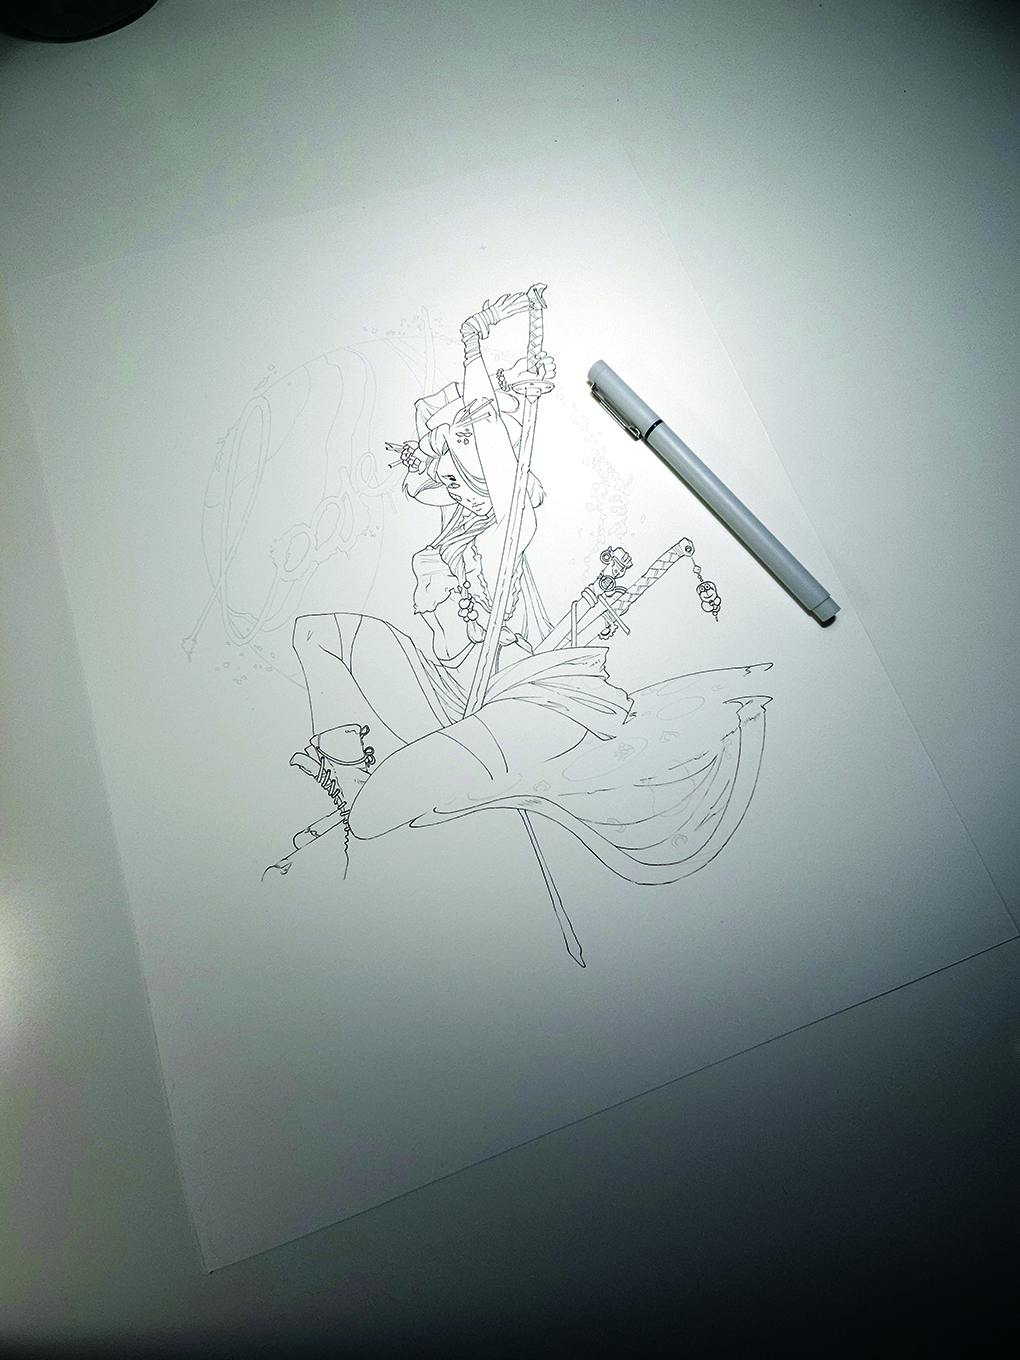
On top of the pencil lines, start to ink them in with a calibrated marker. Before you use a pen, make sure it’s waterproof so you avoid any problems working with watercolours further down the line.
04. Fixing the paper onto a backing
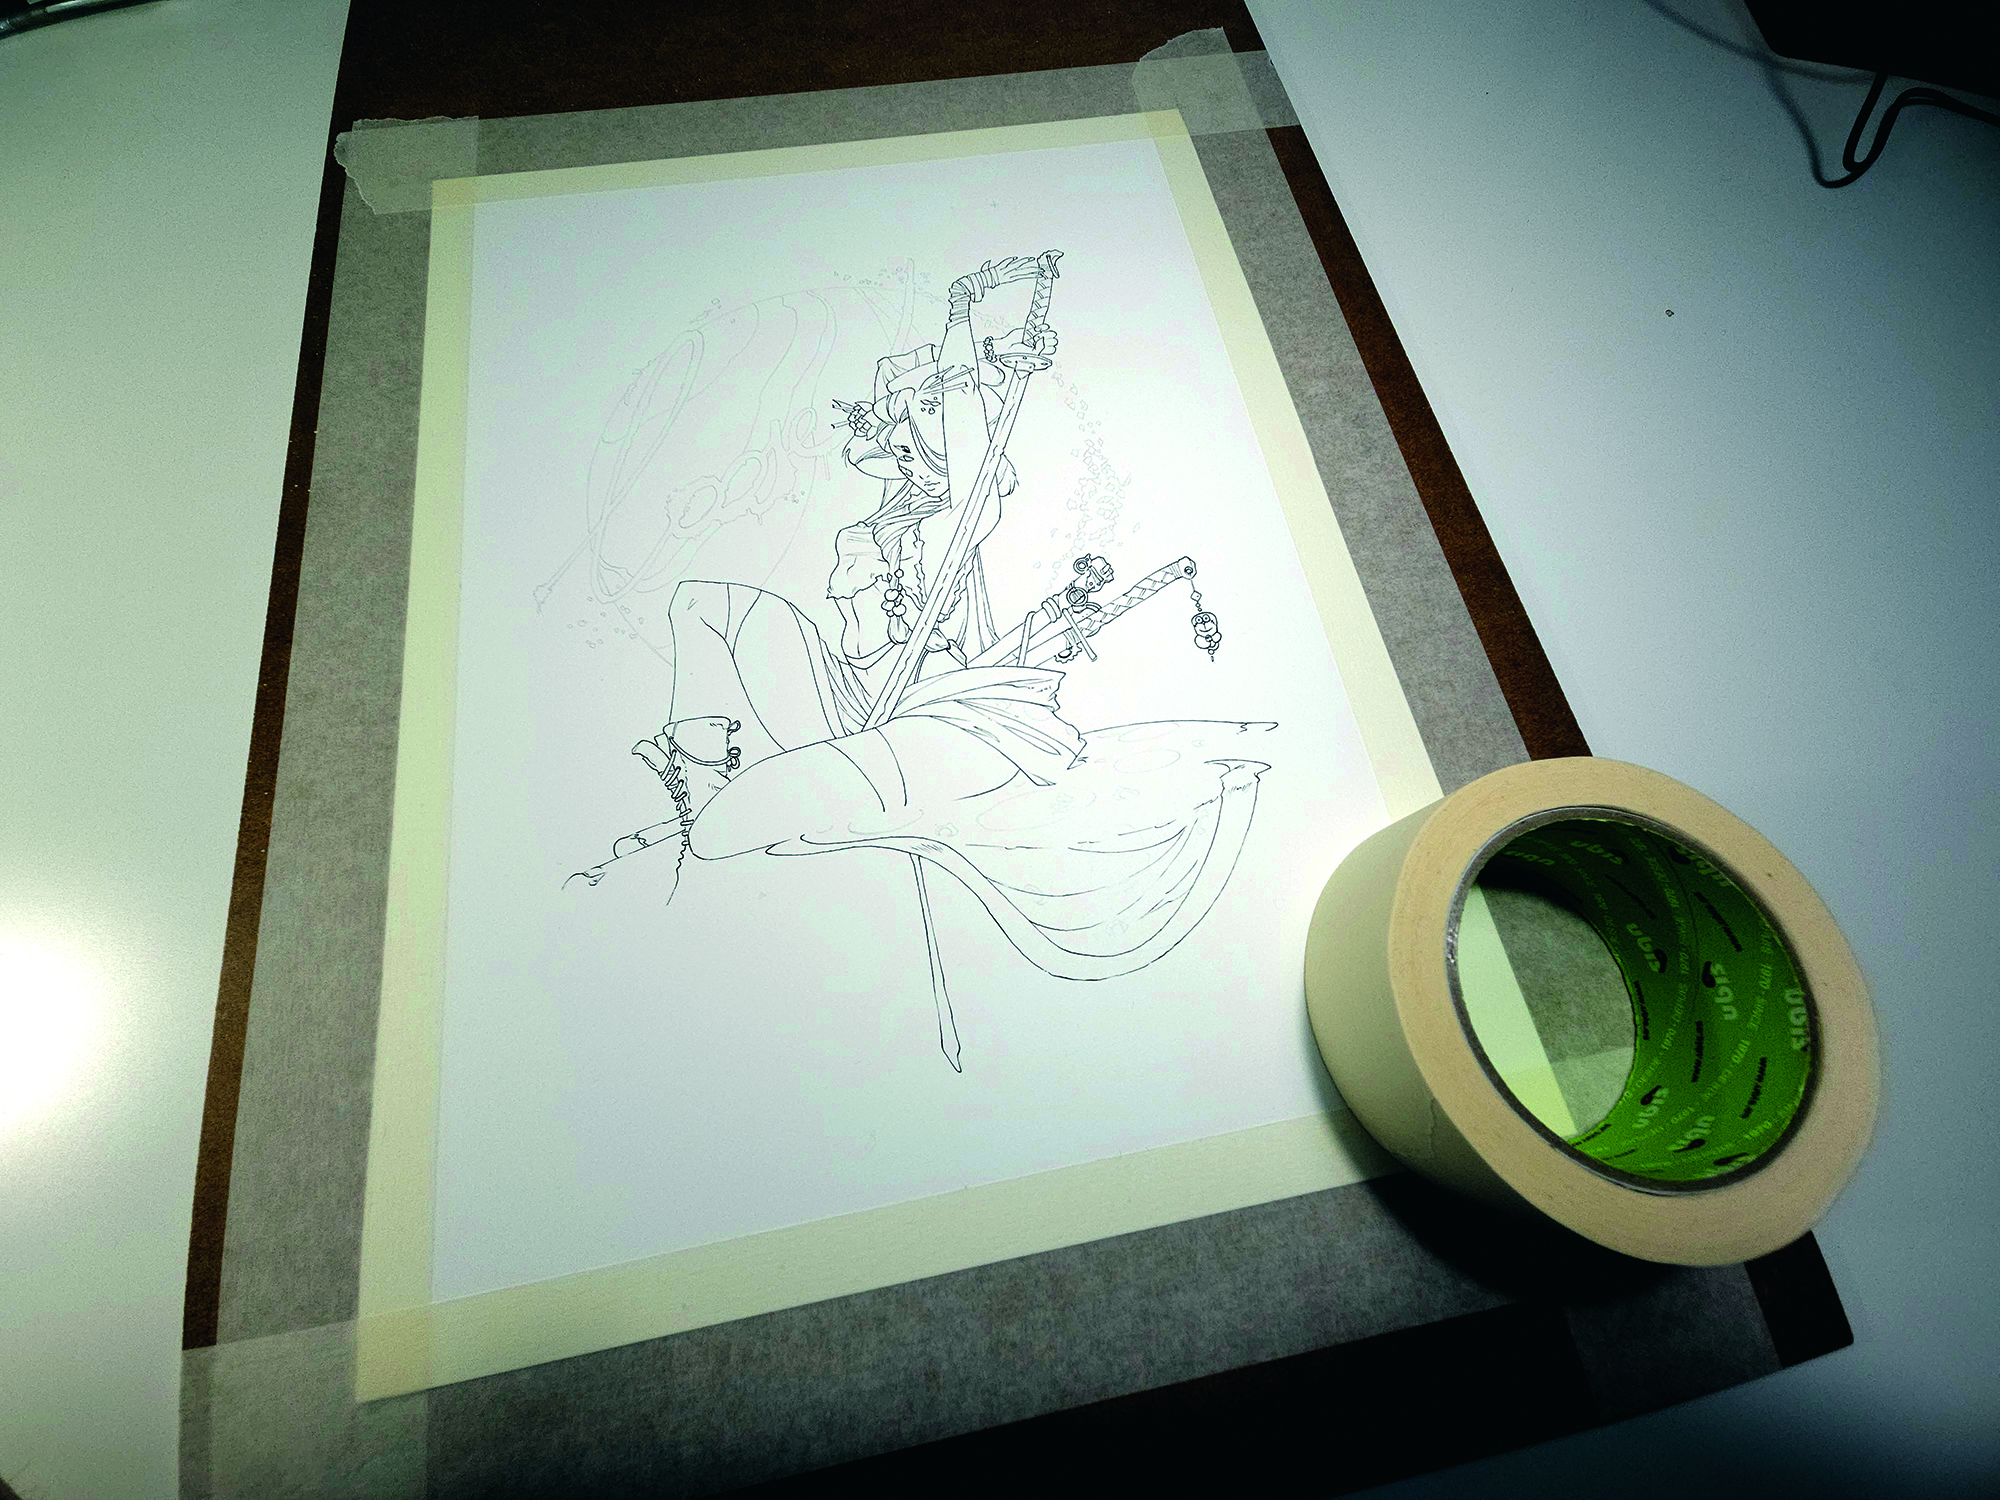
When working with wet techniques, I place the paper on a rigid support such as a wooden board. This provides a flat drawing surface, the possibility of moving the support, and prevents the paper from wrinkling or warping.
05. Preparing your paint and paper
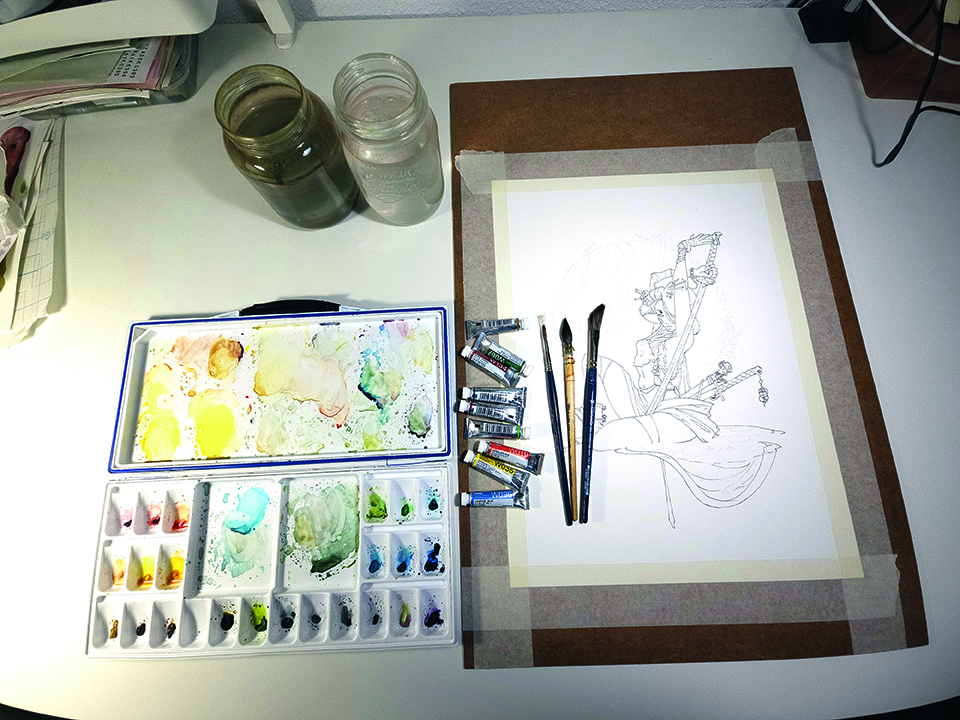
Time to get your colours ready on a palette and make the necessary pre-mixes to speed up the working process. Before starting, moisten the surface of the drawing with water so the colour expands. You’ll also want to avoid flooding the paper.
06. Colouring the clothes and body first
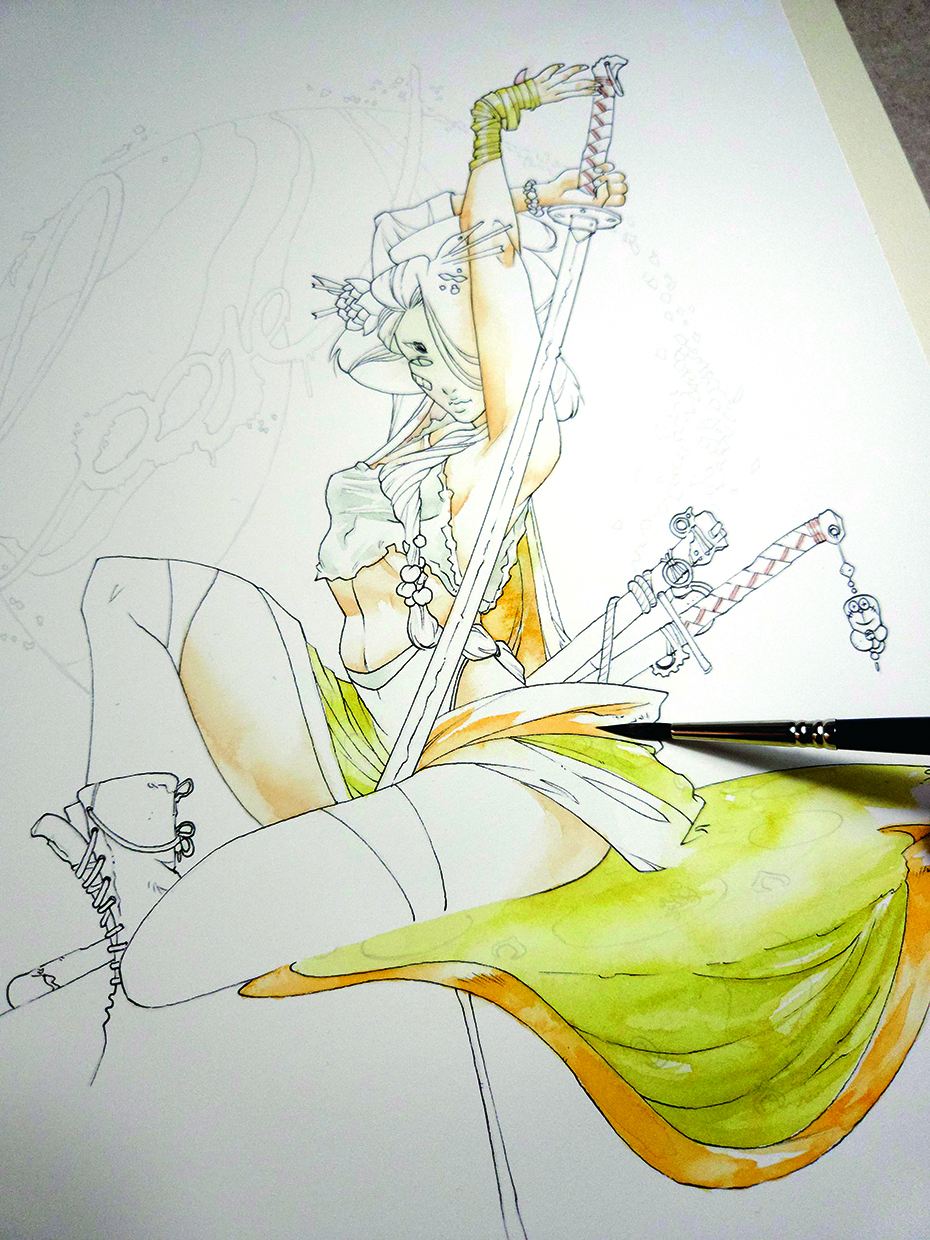
Once the mixture is done, I’d advise testing it out on a piece of paper to ensure it’s what you want. Now you can begin to apply it, with the help of a thick brush for larger surfaces and a fine brush for smaller areas.
07. Moving on to ornaments and hair
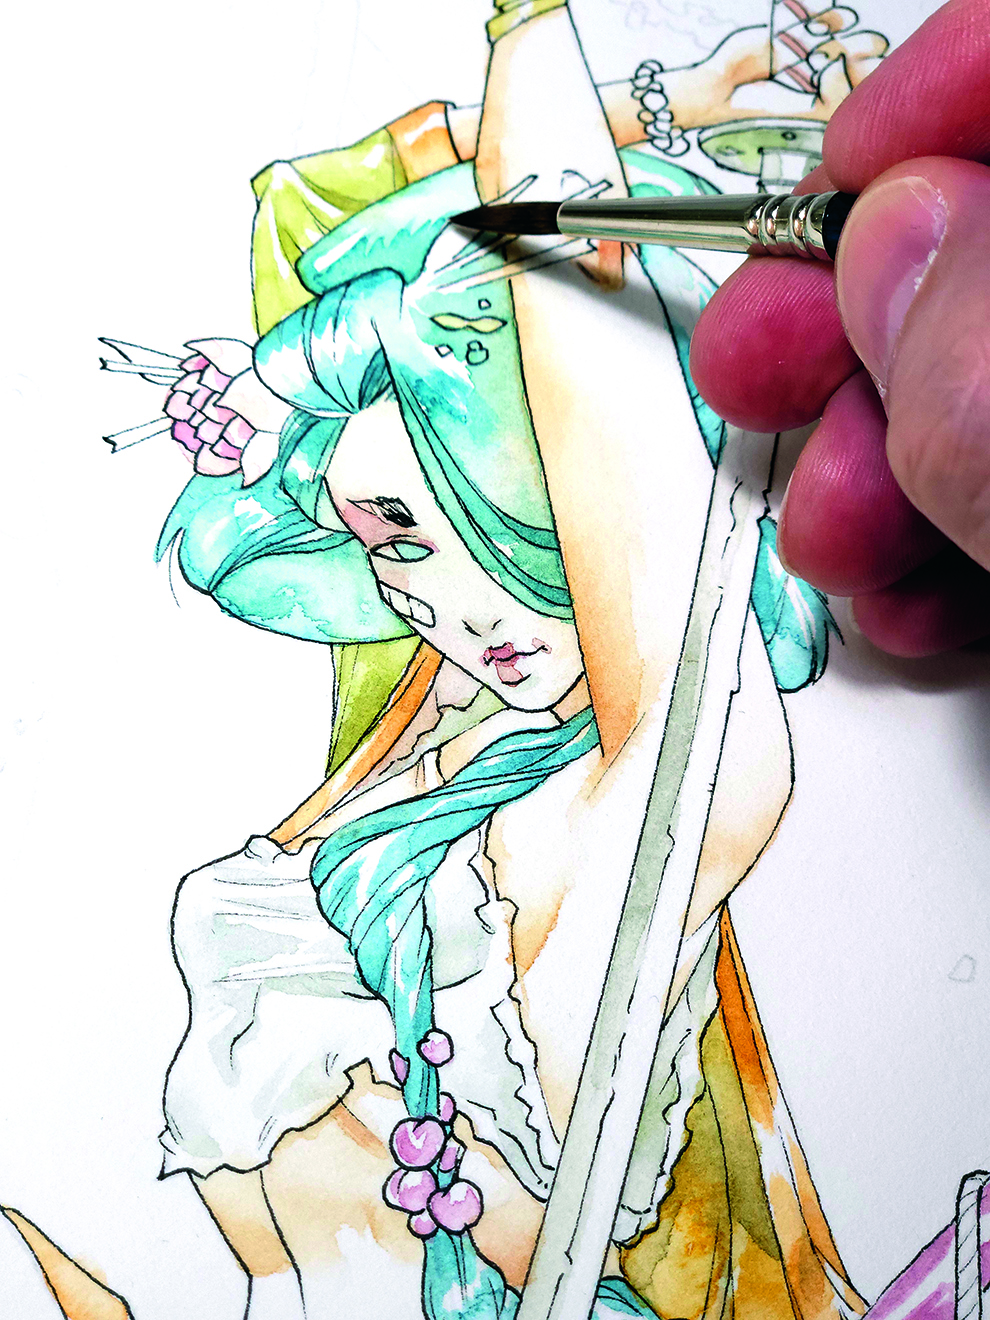
When the paper is almost completely dry, start putting down the colour on the rest of the details and the hair. This way we get more detailed traces and prevent the lines from melting away completely.
08. Adding the background
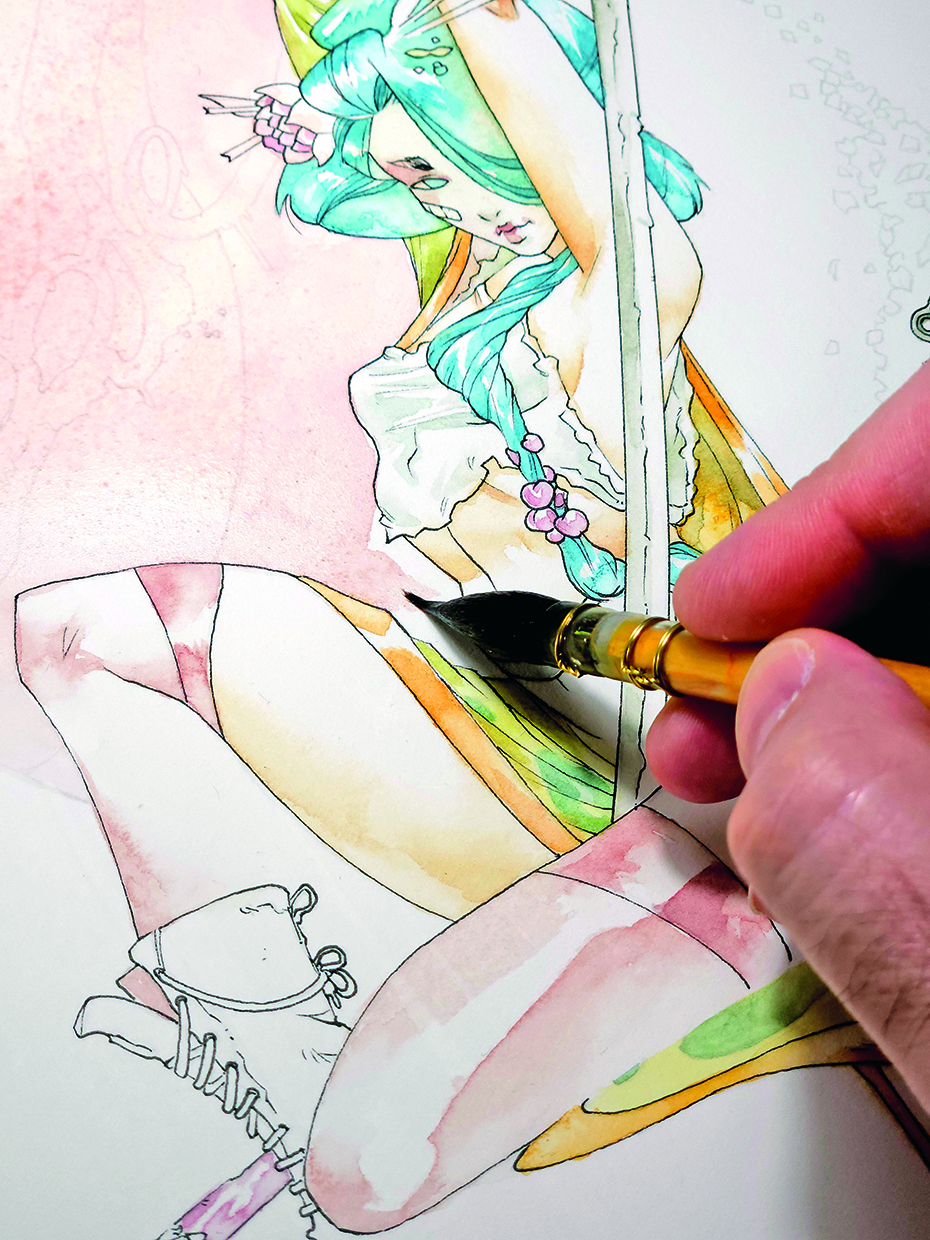
Moisten the drawing area with a flat brush, and add a layer of colour using a large brush. Remove pigment with kitchen roll before taking a wet brush and throwing drops of water onto the colour before it dries.
09. Creating detail, contrast and texture
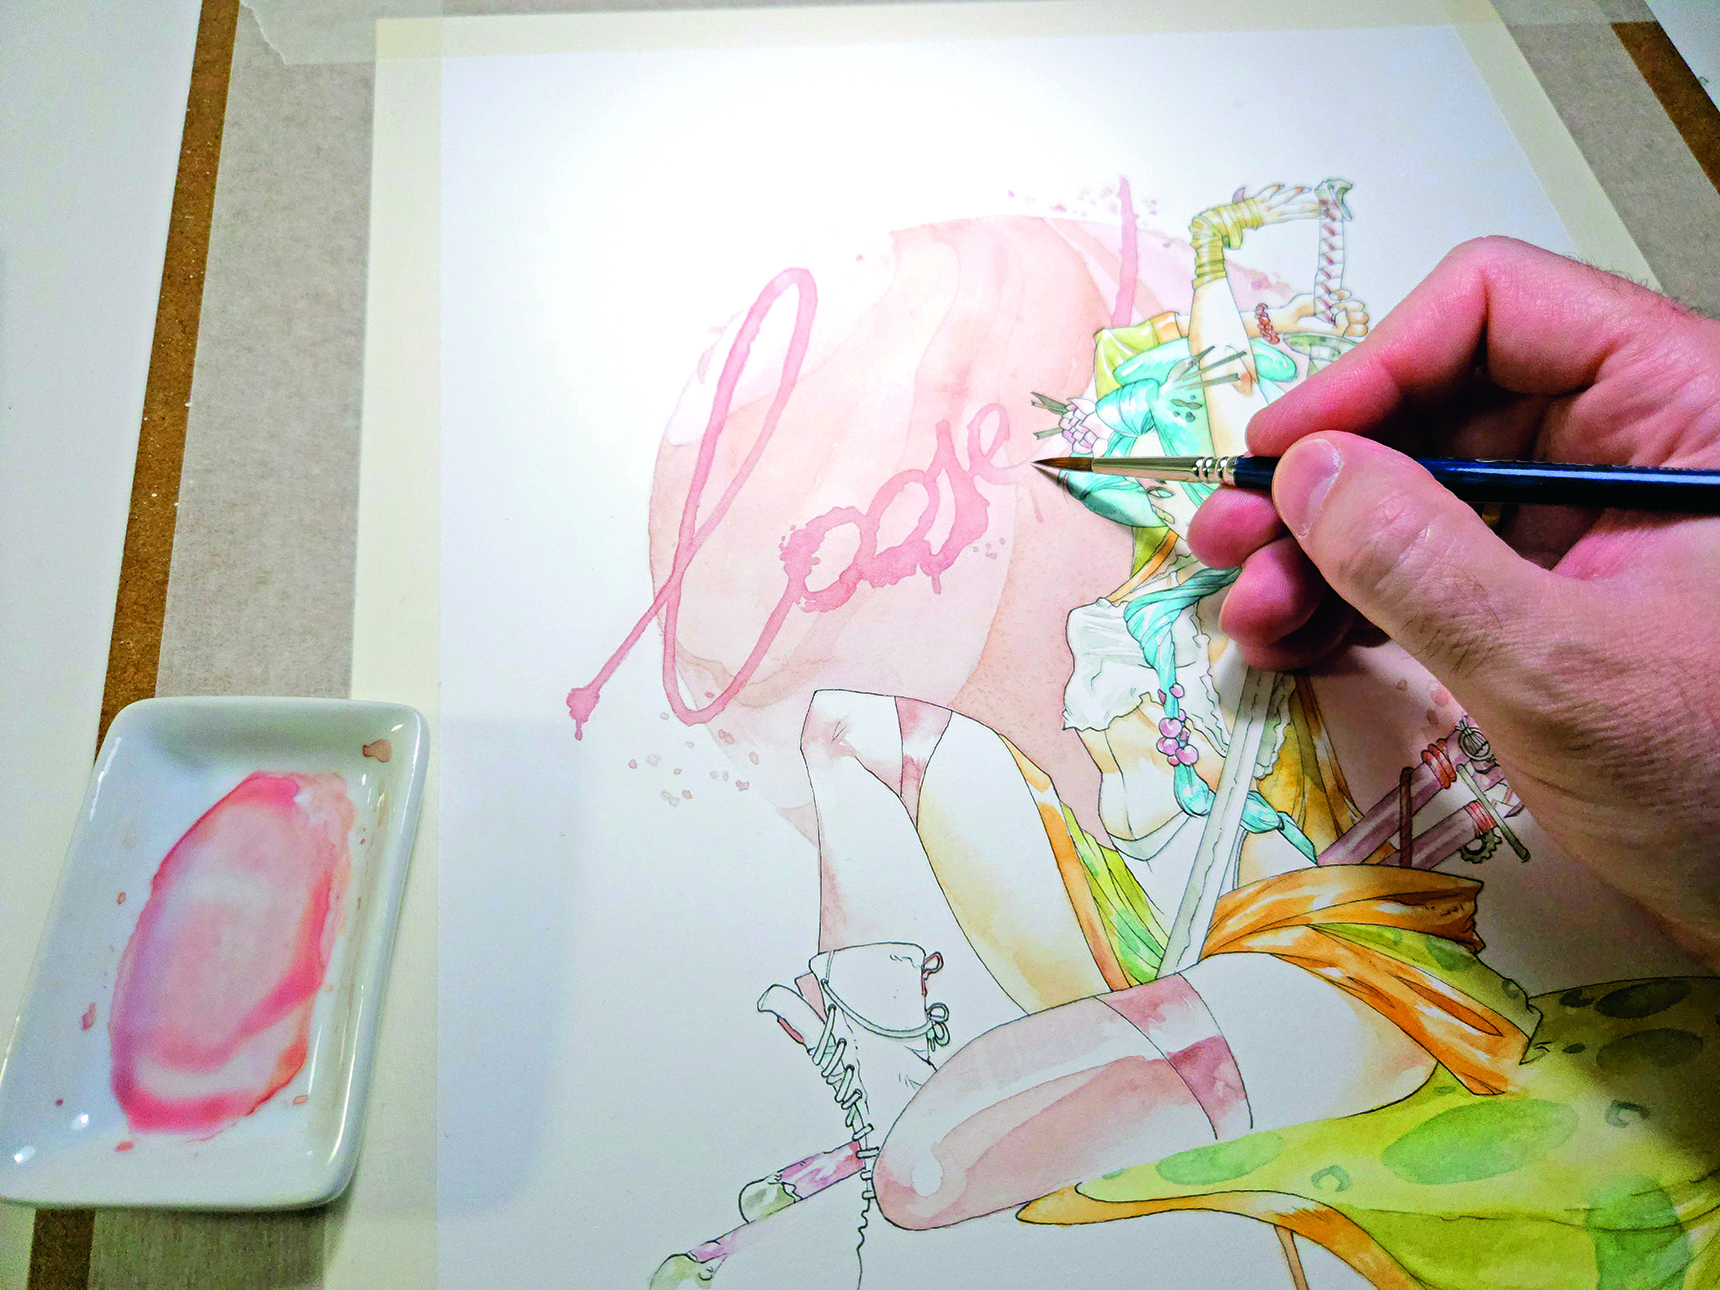
It’s time to make some contrast and detail in the areas that look too light by choosing stronger tones and applying layers of colour with a thin brush. I also use a homemade brush to create textures in some areas of the drawing.
10. Protecting your work with a mask
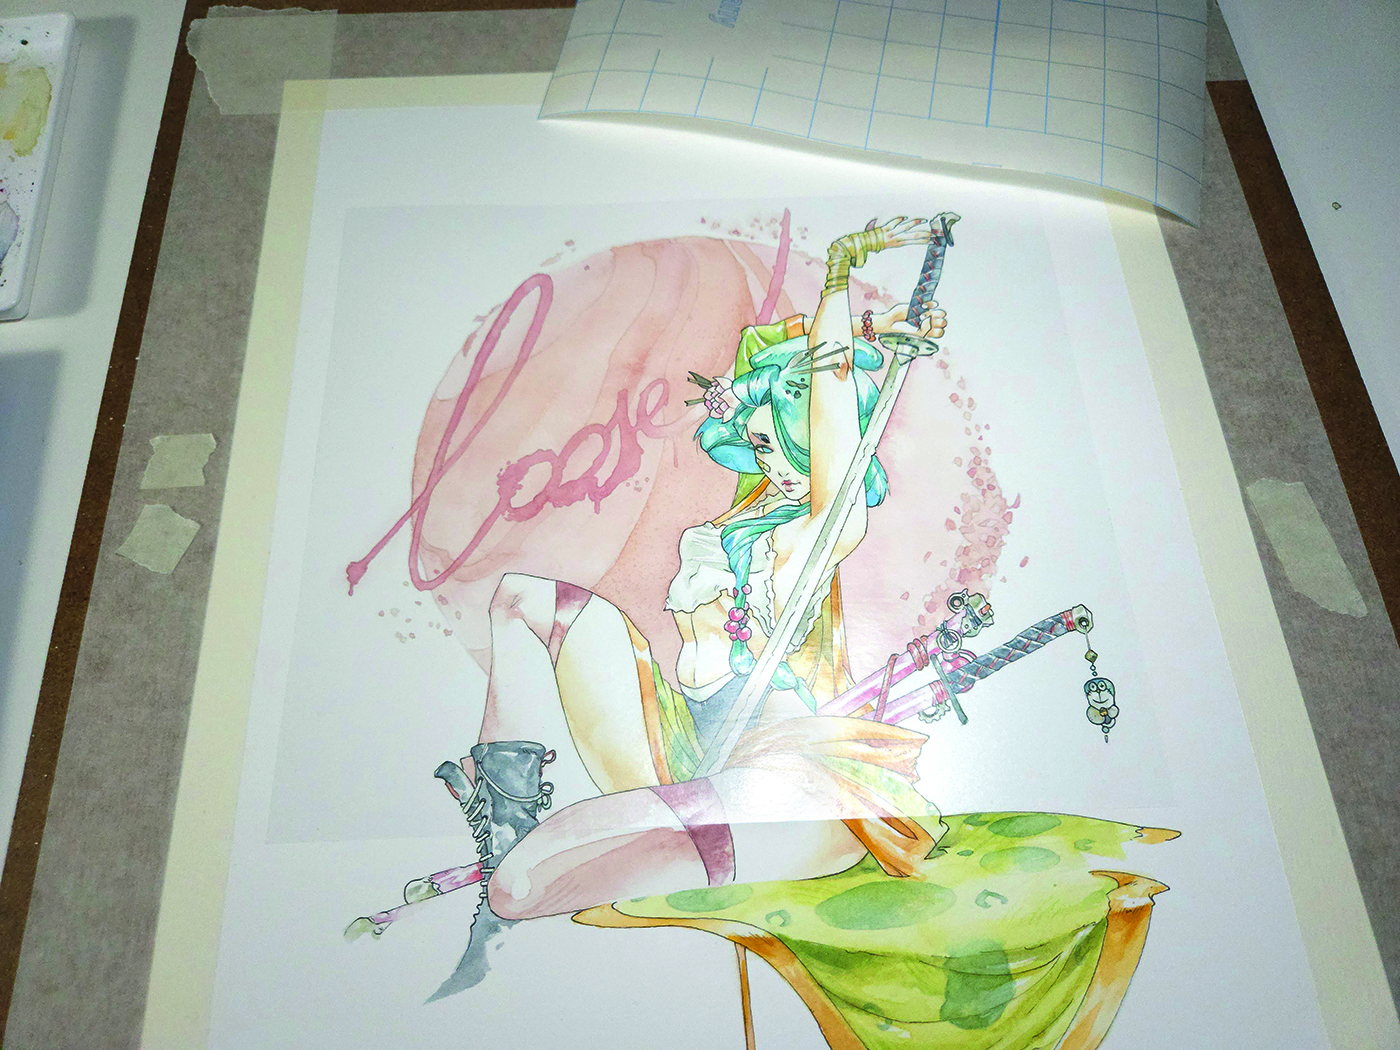
To work on some areas without the colour affecting the rest of the drawing, use a transparent adhesive film for masking. Cut a sheet of film to the approximate size that you’re going to cover.
11. Cutting the mask
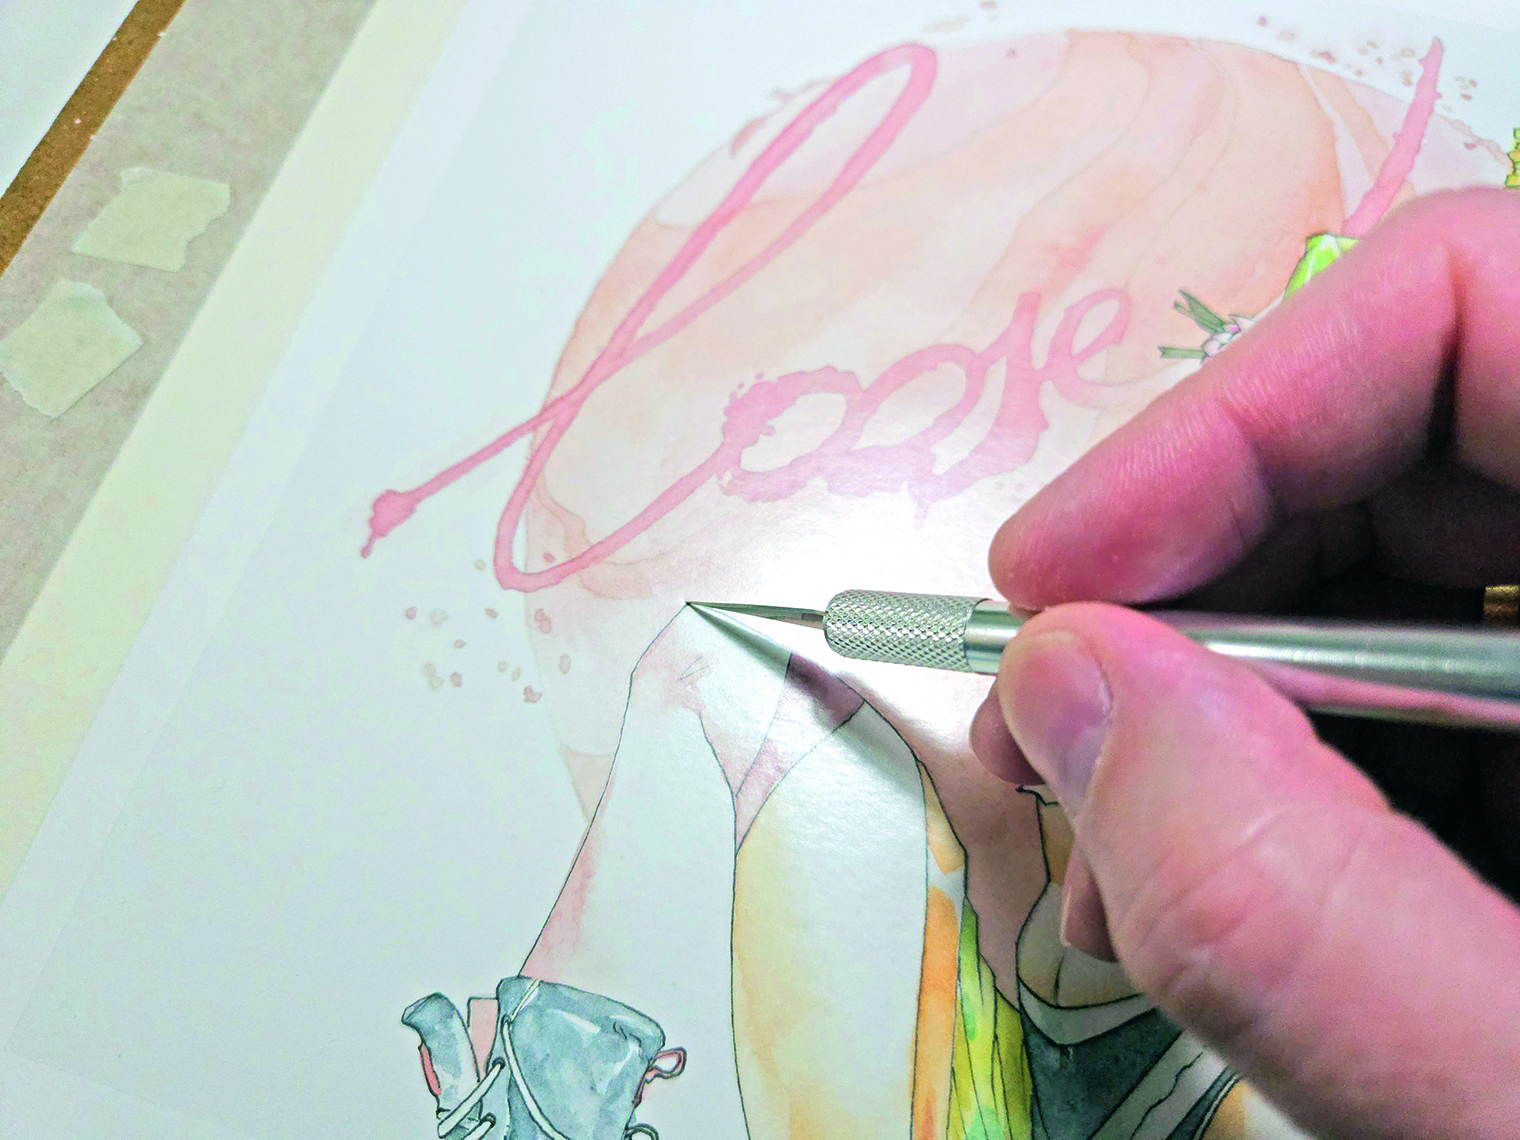
I use a scalpel to very carefully cut the masking film and uncover areas I want to be exposed in the drawing, then remove the excess film. I have to be mindful of the pressure I’m cutting with to protect the art.
12. Making paint splashes
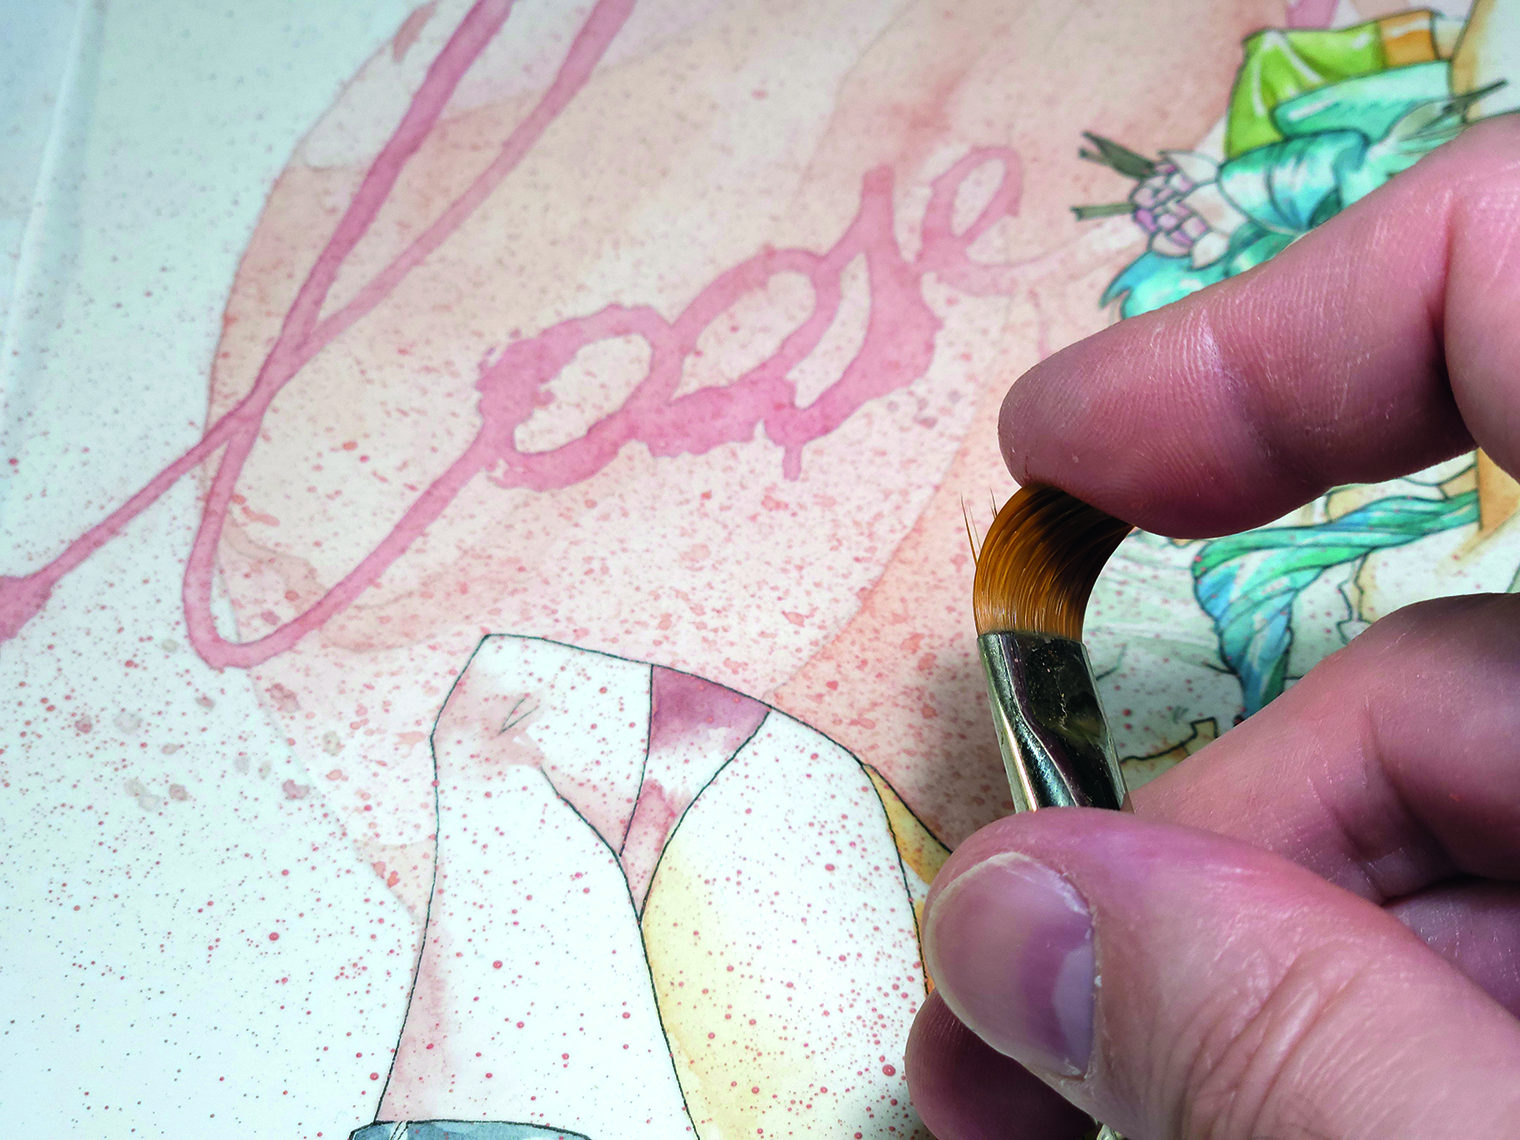
Also cover parts of the drawing with recycled paper to prevent any staining and mix the colours with a flat brush. Next, gently tap or flick the brush with a finger to create small drops of paint over your artwork.
13. Removing the mask
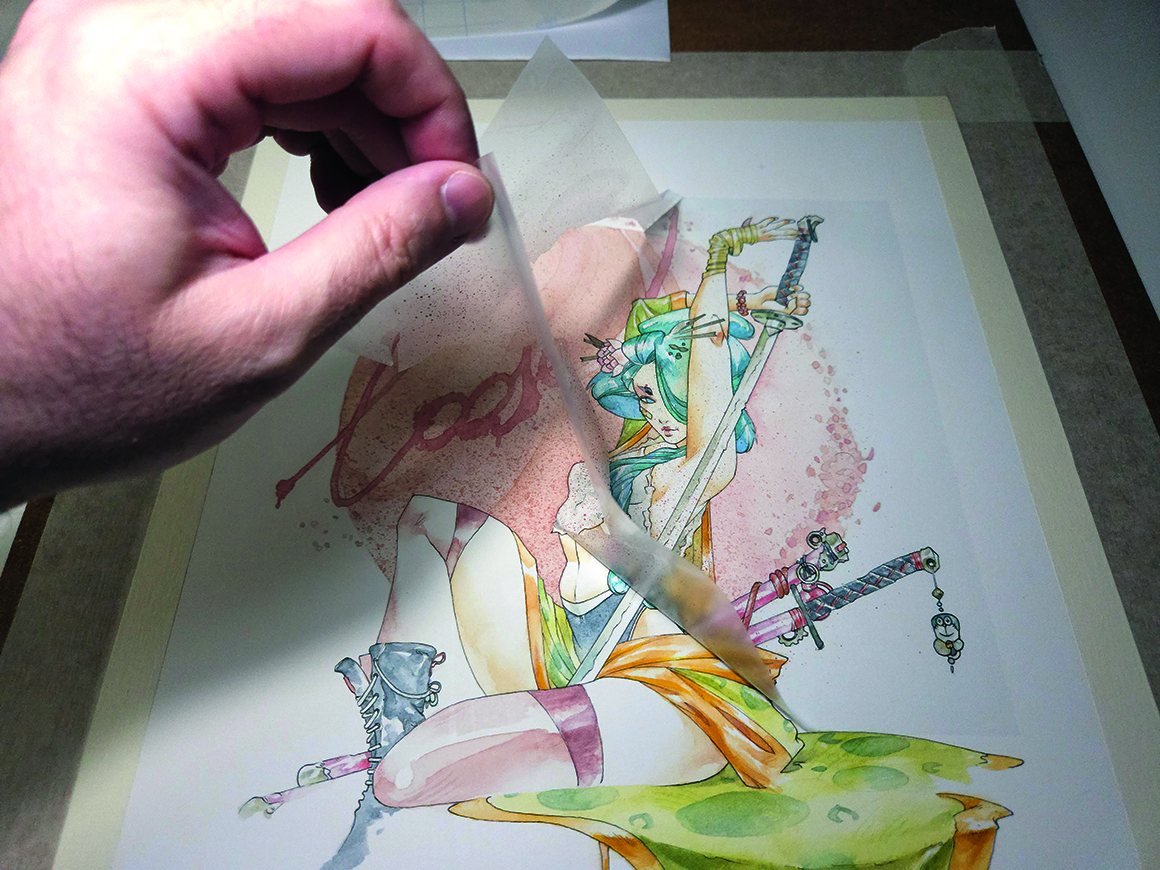
Once the watercolour has dried, the next step is to remove the masking film. Take care that the drawing isn’t damaged by any of the parts. To do this, I use the scalpel and remove the mask extremely carefully.
14. Tracing fine details
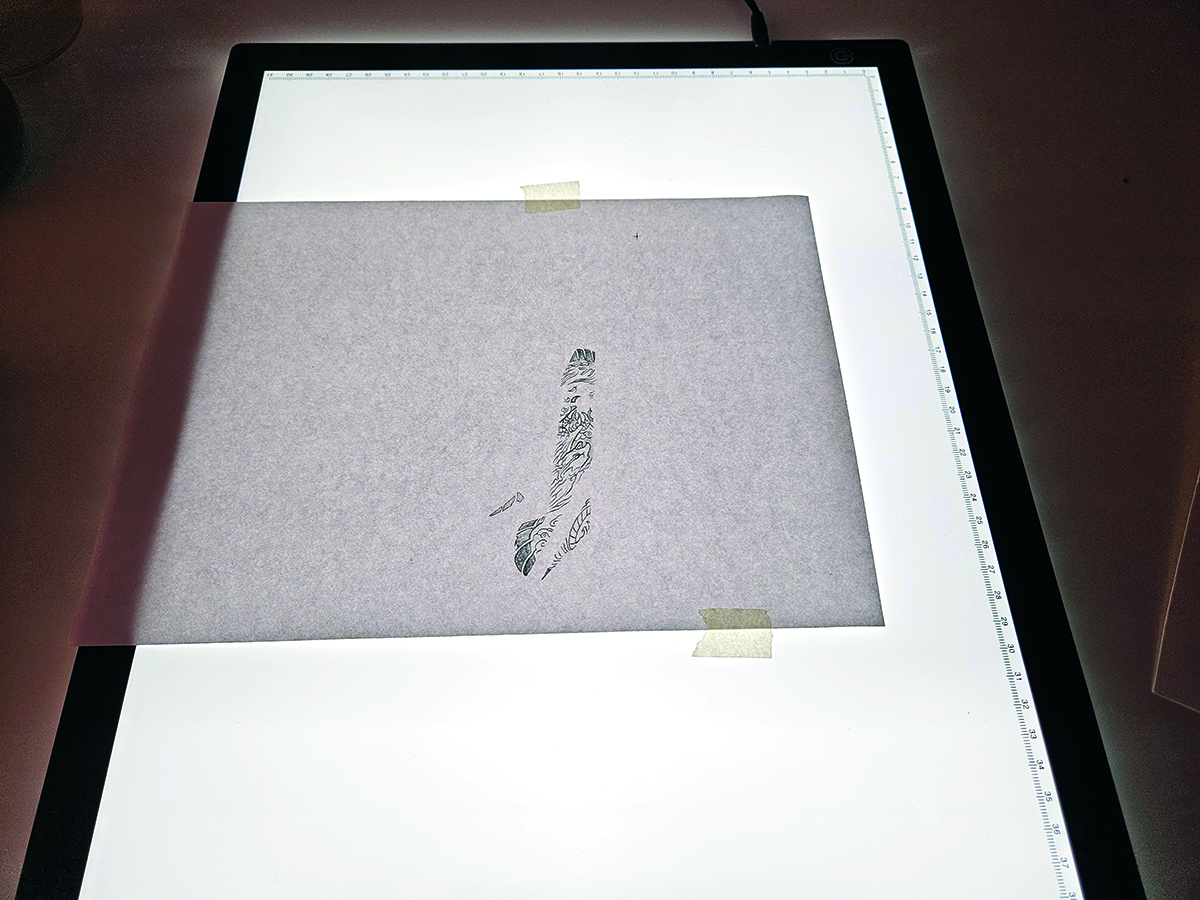
Wait until the paper is completely dry. Remove the drawing from the wooden stand and then trace the outline of fine patterns, such as this tattoo. I use a registration mark on the paper so everything aligns.
15. Colouring the small elements
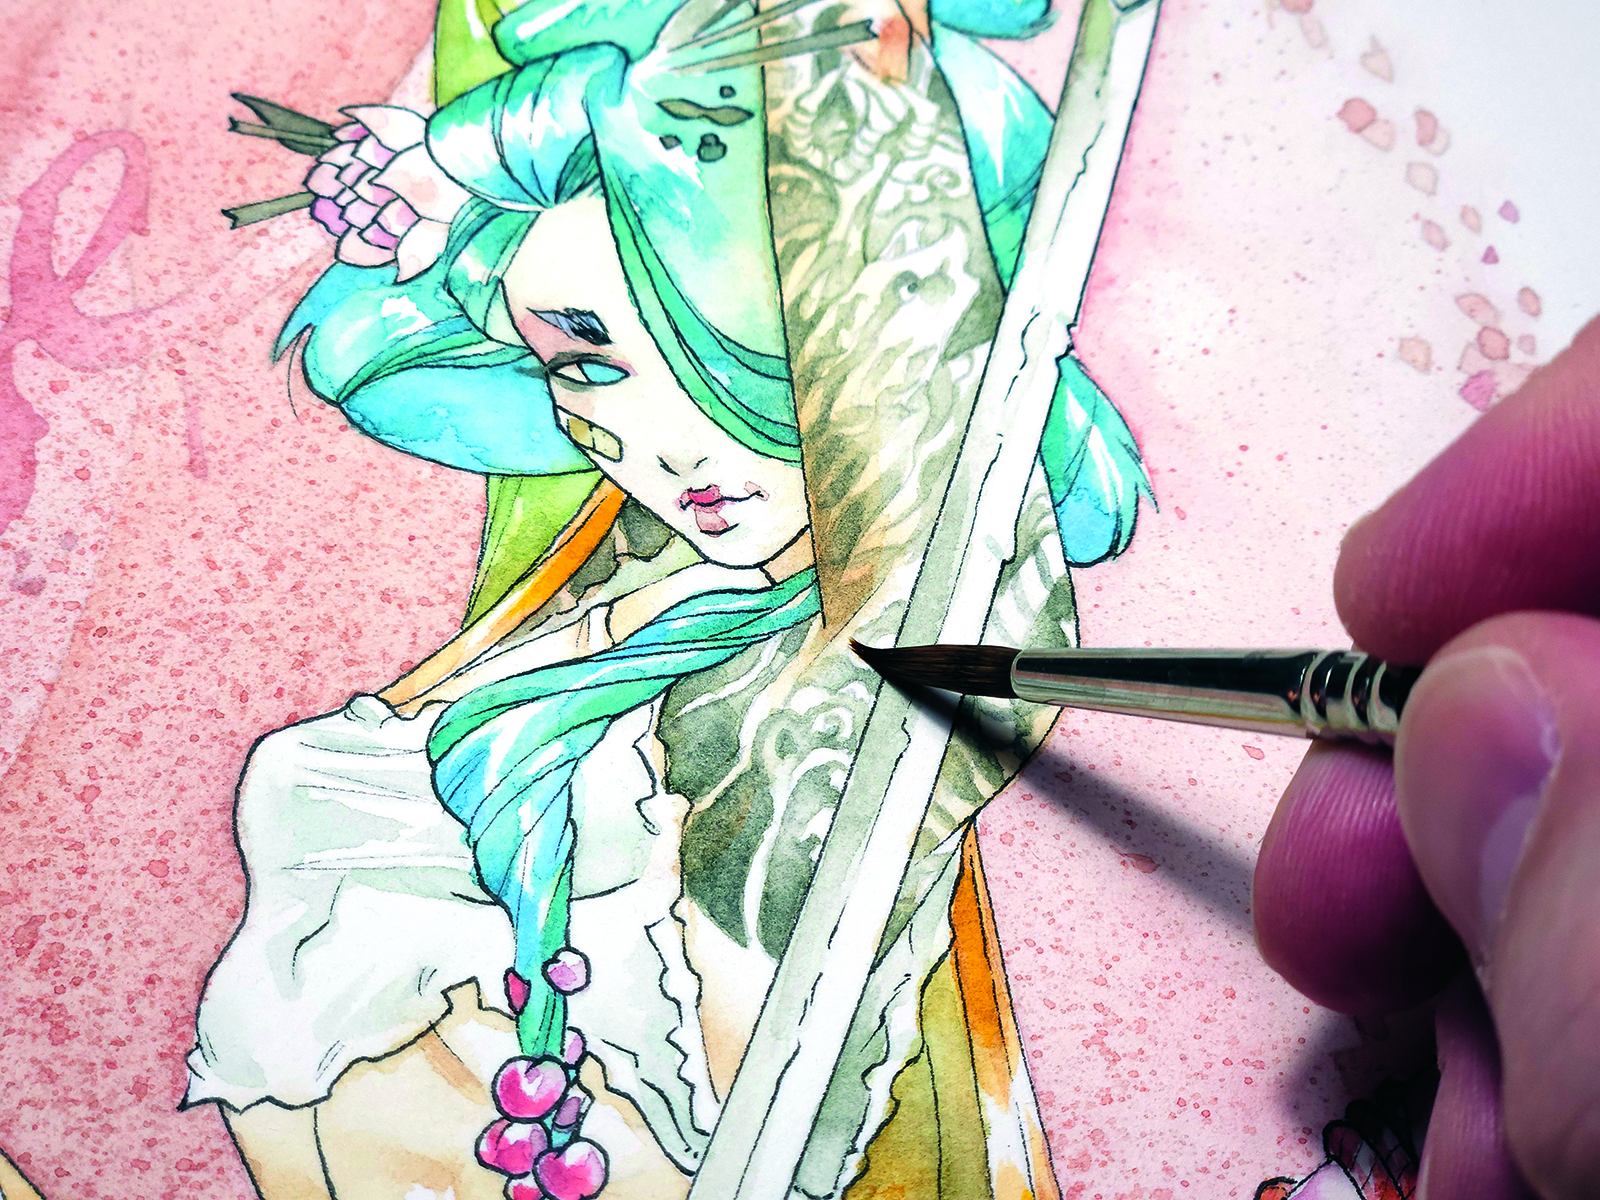
Carefully fix the watercolour paper to the wooden support with masking tape, making sure that it’s completely taut and wrinkle-free. With the watercolour, outline and fill in each of the parts until it’s complete.
16. Inking the lines
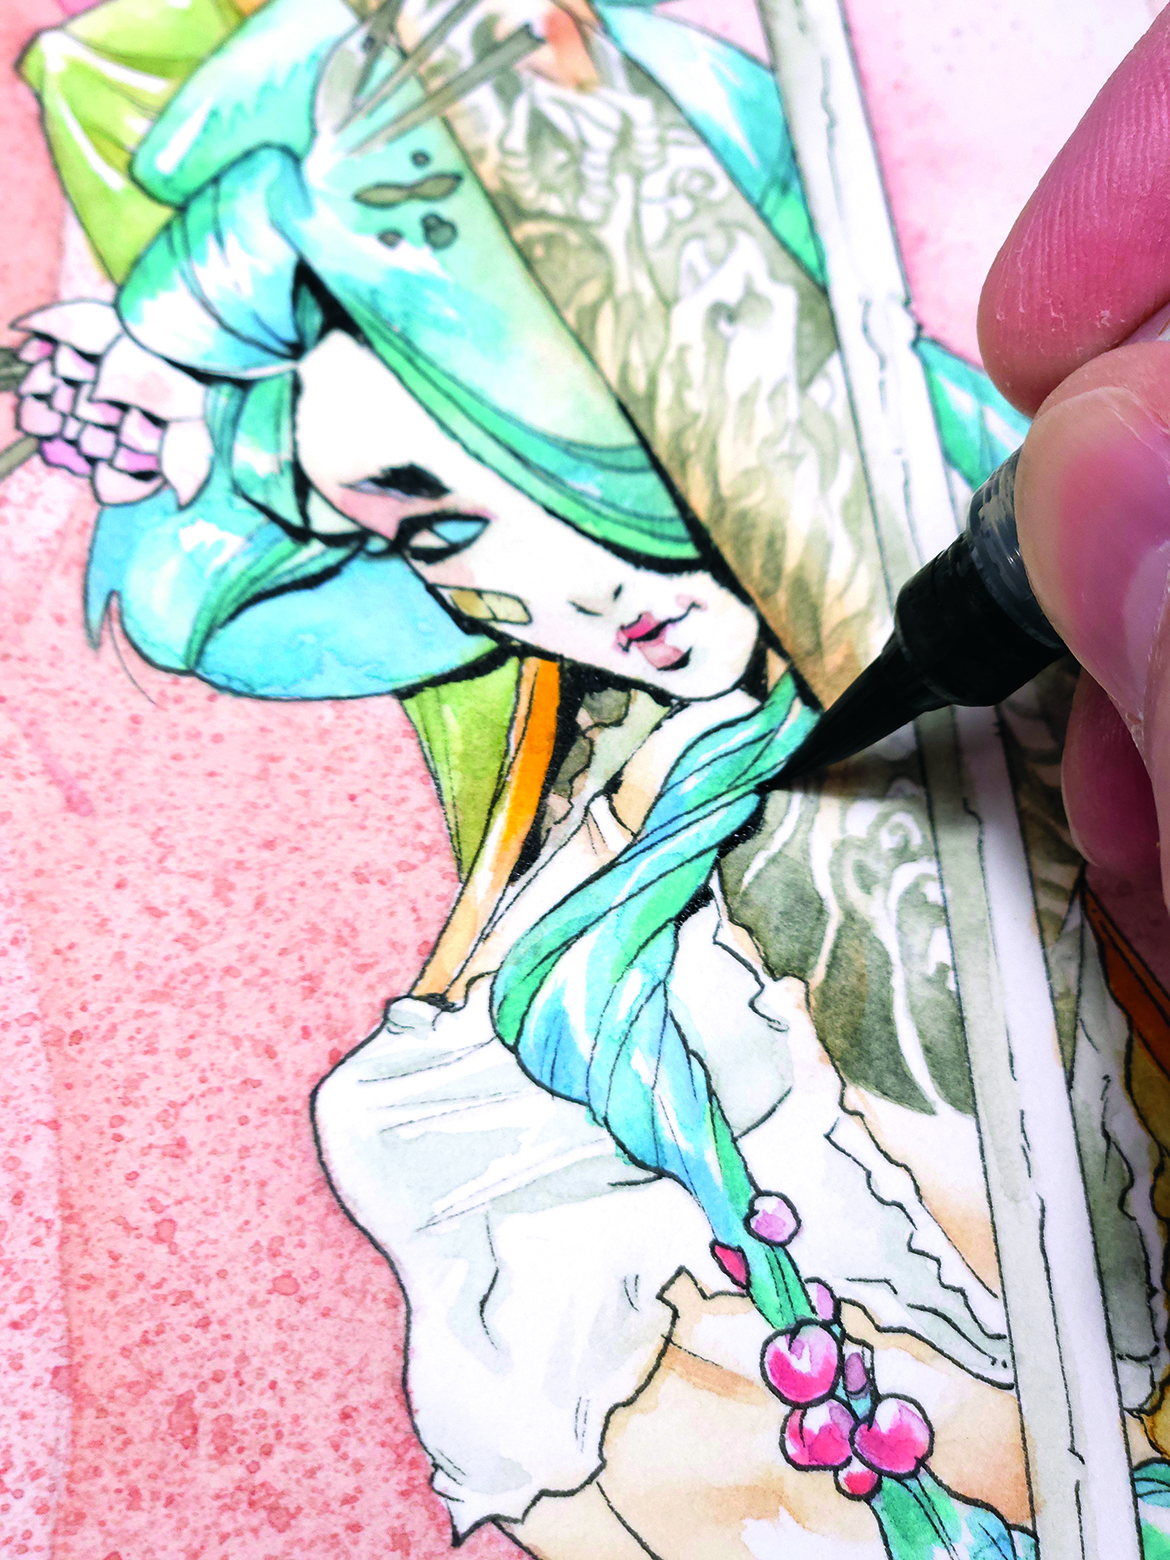
With the help of a black ink brush marker, reinforce the lines of the drawing to help bring out the illustration. This prevents the image from being completely flat and adds a level of dynamism.
17. Giving it volume
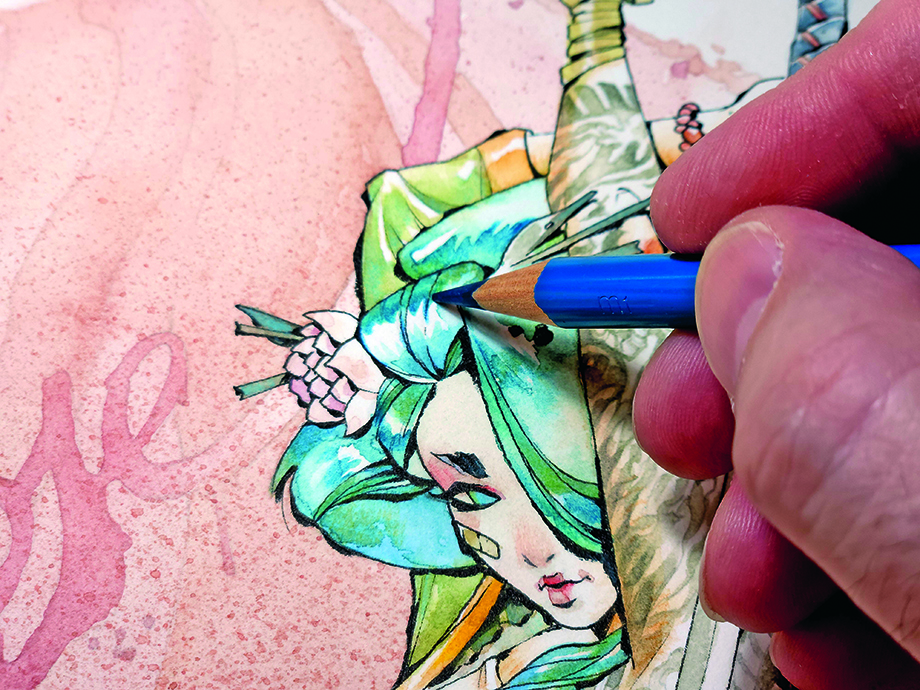
By choosing tones that contrast with the base colours of the drawing, we can define and reinforce each individual part. Gently add several layers of colour so that the tones begin to appear little by little.
18. Wrapping up
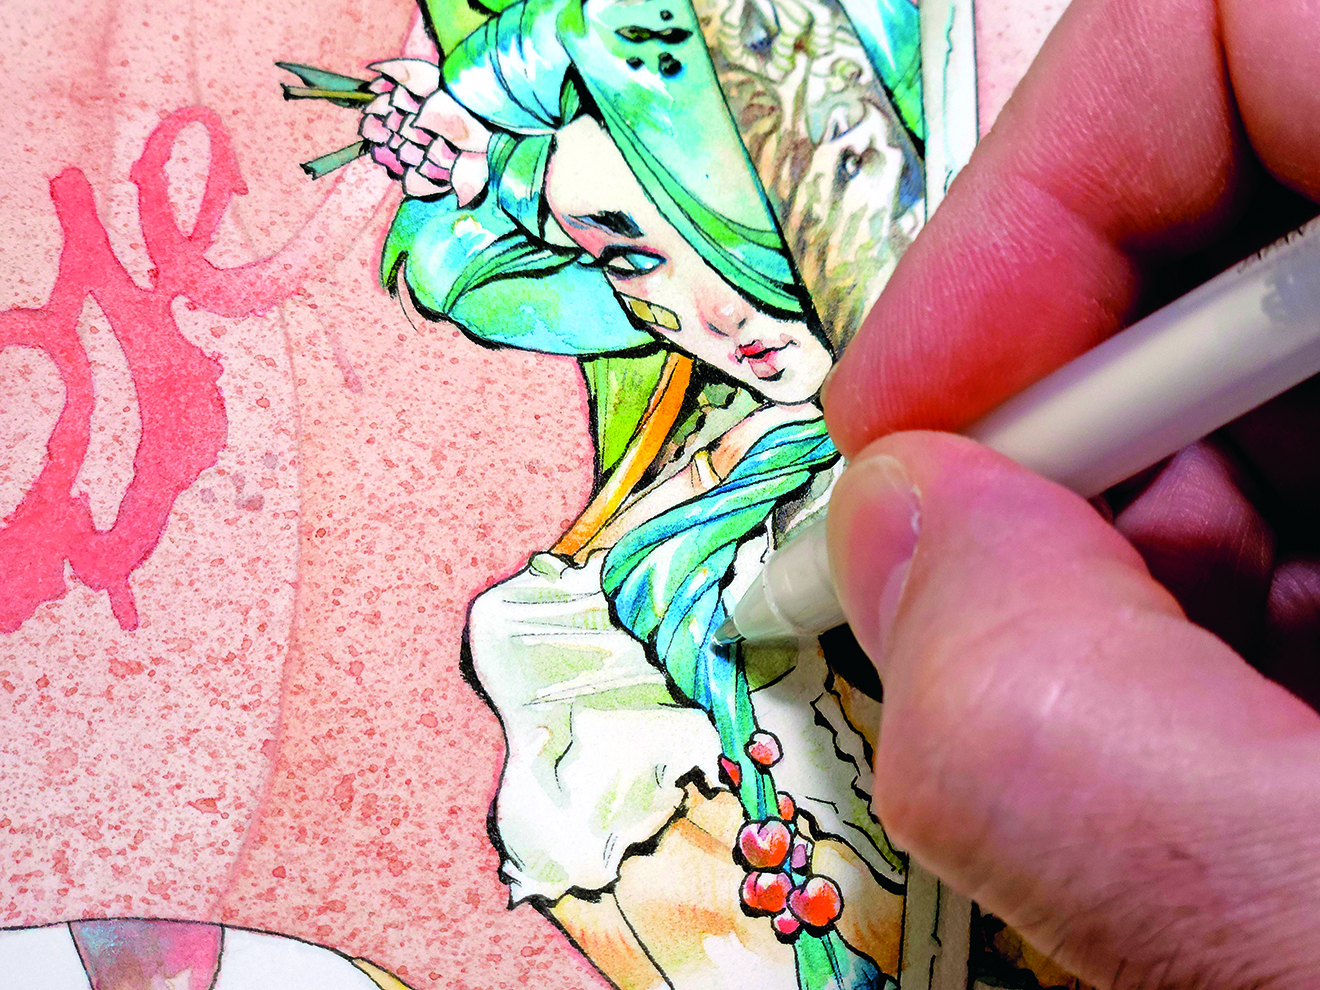
When you’ve finished with all the details and given the colour more volume in pencil, move on to using a white ink pen to mark all the highlights and reflections, and gradually finish up with the small details.
Final image
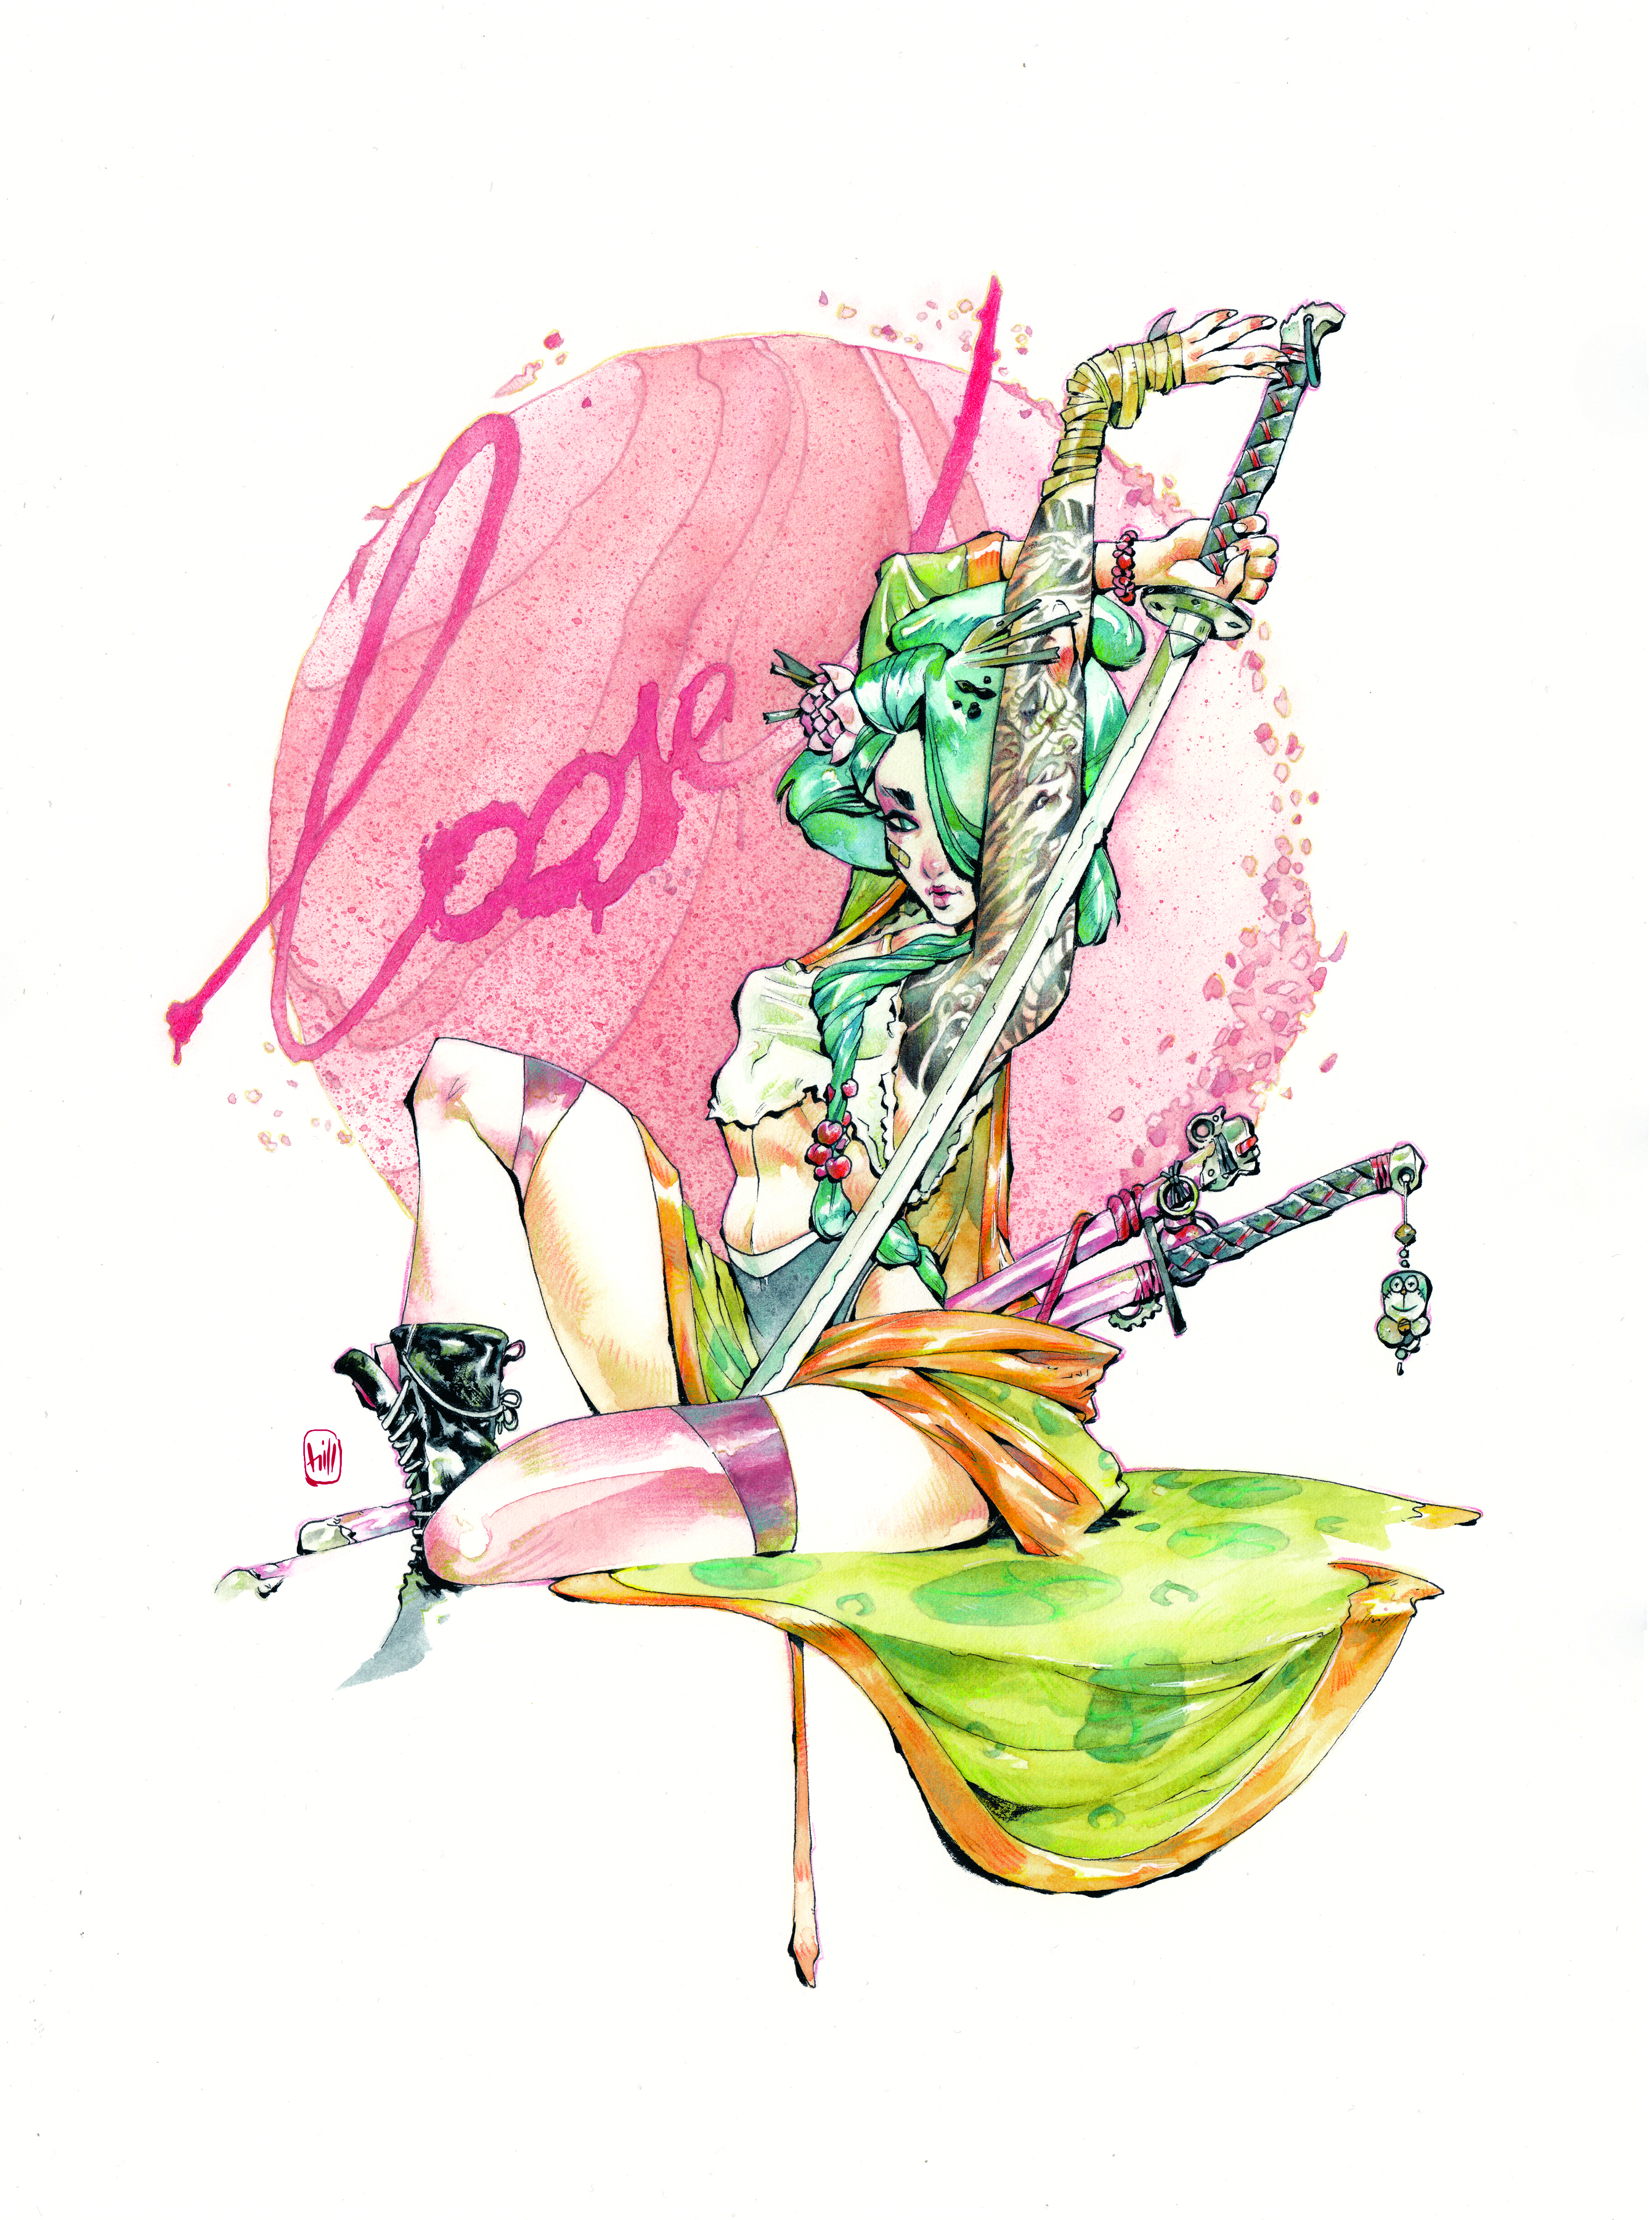
This content originally appeared in ImagineFX magazine, the world's leading digital art and fantasy art magazine. ImagineFX is on sale in the UK, Europe, United States, Canada, Australia and more. Limited numbers of ImagineFX print editions are available for delivery from our online store (the shipping costs are included in all prices).
Sign up to Creative Bloq's daily newsletter, which brings you the latest news and inspiration from the worlds of art, design and technology.
Chuma Hill is an artist based in Madrid. He has been an illustrator for over 25 years and is currently working on covers for US publishers.
You must confirm your public display name before commenting
Please logout and then login again, you will then be prompted to enter your display name.
