How to paint realistic still life paintings
Damien Mammoliti shares 12 steps to creating beautiful digital still life paintings.
Daily design news, reviews, how-tos and more, as picked by the editors.
You are now subscribed
Your newsletter sign-up was successful
Want to add more newsletters?

Five times a week
CreativeBloq
Your daily dose of creative inspiration: unmissable art, design and tech news, reviews, expert commentary and buying advice.

Once a week
By Design
The design newsletter from Creative Bloq, bringing you the latest news and inspiration from the worlds of graphic design, branding, typography and more.

Once a week
State of the Art
Our digital art newsletter is your go-to source for the latest news, trends, and inspiration from the worlds of art, illustration, 3D modelling, game design, animation, and beyond.

Seasonal (around events)
Brand Impact Awards
Make an impression. Sign up to learn more about this prestigious award scheme, which celebrates the best of branding.
Nearly every art student groans at the mention of still life painting. It’s often seen as a tedious exercise reserved for hyperrealists – or for those who’ve supposedly run out of ideas. But that’s a myth worth challenging. In this workshop, I’ll help you rethink what still life painting can offer, especially in the digital age.
Still life isn’t just about bowls of fruit or dusty vases – it’s a powerful way to sharpen your observational skills, deepen your understanding of form, texture, and light, and ultimately boost your ability to bring imaginative ideas to life with greater precision. Whether you’re rendering futuristic landscapes or stylised character designs, being able to accurately depict materials like glass, metal, and fabric will elevate your work.
In the spirit of teaching you how to draw, we’ll start with tips on setting up a compelling composition using simple, everyday objects. I’ll guide you through lighting your scene to create depth and mood. From there, we’ll take the setup into a modern digital painting workflow – using Photoshop. With today’s styluses and high-resolution drawing tablets like the iPad Pro or Wacom Cintiq, translating your observational skills into polished digital art has never been more seamless.
Still life is about more than just the objects in front of you – composition and lighting do the heavy lifting, accounting for about 70 per cent of the impact. The rest is observation and execution. And when working digitally, you can fully focus on refining your technique without worrying about drying paint or wasted materials.
So sit back, embrace the stillness, and rediscover the beauty of the inanimate object – it might just change the way you see everything else.
01. Set up the composition
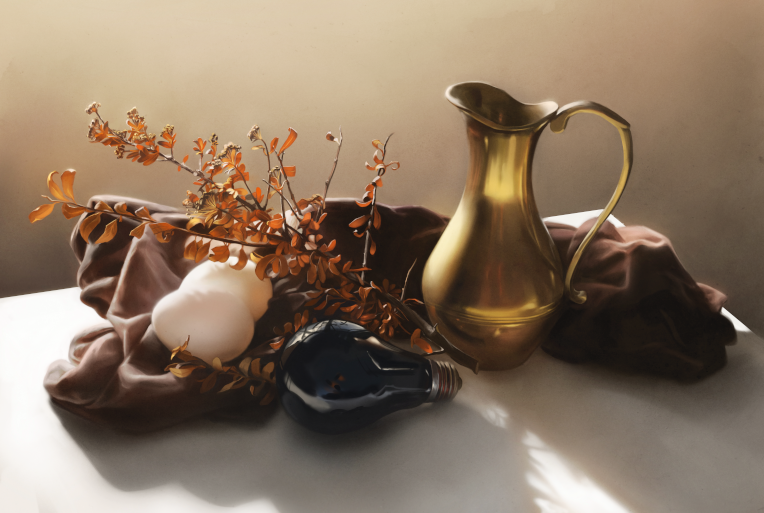
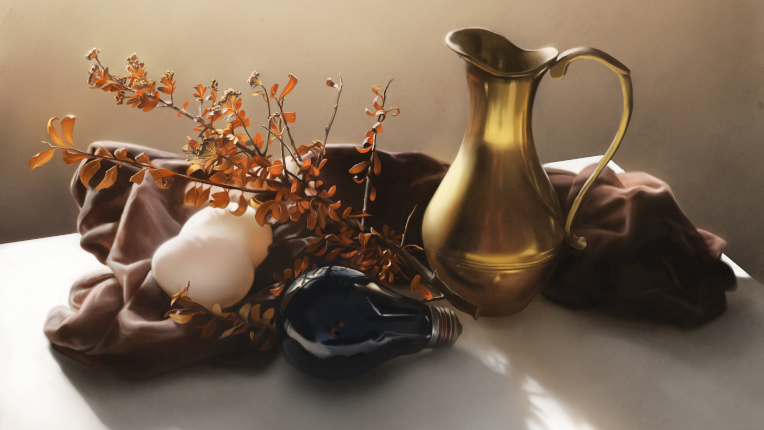
When setting up the composition for my still life, I choose landscape orientation. This offers me a wider display of my other subject matters, such as the black light bulb and copper pitcher. I deliberately choose a wide selection of different types of materials to give the painting variety and texture. I also balance the composition by placing the brighter objects further apart from each other, while the dark bulb lays in shadow in the middle and doesn’t distract.
02. Choose the star of the show

Part of my composition process is finding the ‘star’ or the main subject for my still life painting. Here, my main star is the obviously tall and bright pitcher, as it is the only object with such an array of shapes and curves, and is the brightest colour on the palette (yellow). All of the other objects in this composition are going to accentuate and complement my pitcher in one way or another, either by their texture contrast or simply through colour play.
When setting up my composition on the table, I move it at an odd angle to the sun coming in from the window. I purposely use sunlight as it offers me the greatest contrast at certain times of the day (sunrise or sunset), and will also give richer, truer colours. I have aimed the light through the leaves of the dry branch and eggs to offer not only a more interesting shadow, but also brilliant orange and red colours which will accentuate the image.
03. Plot your points
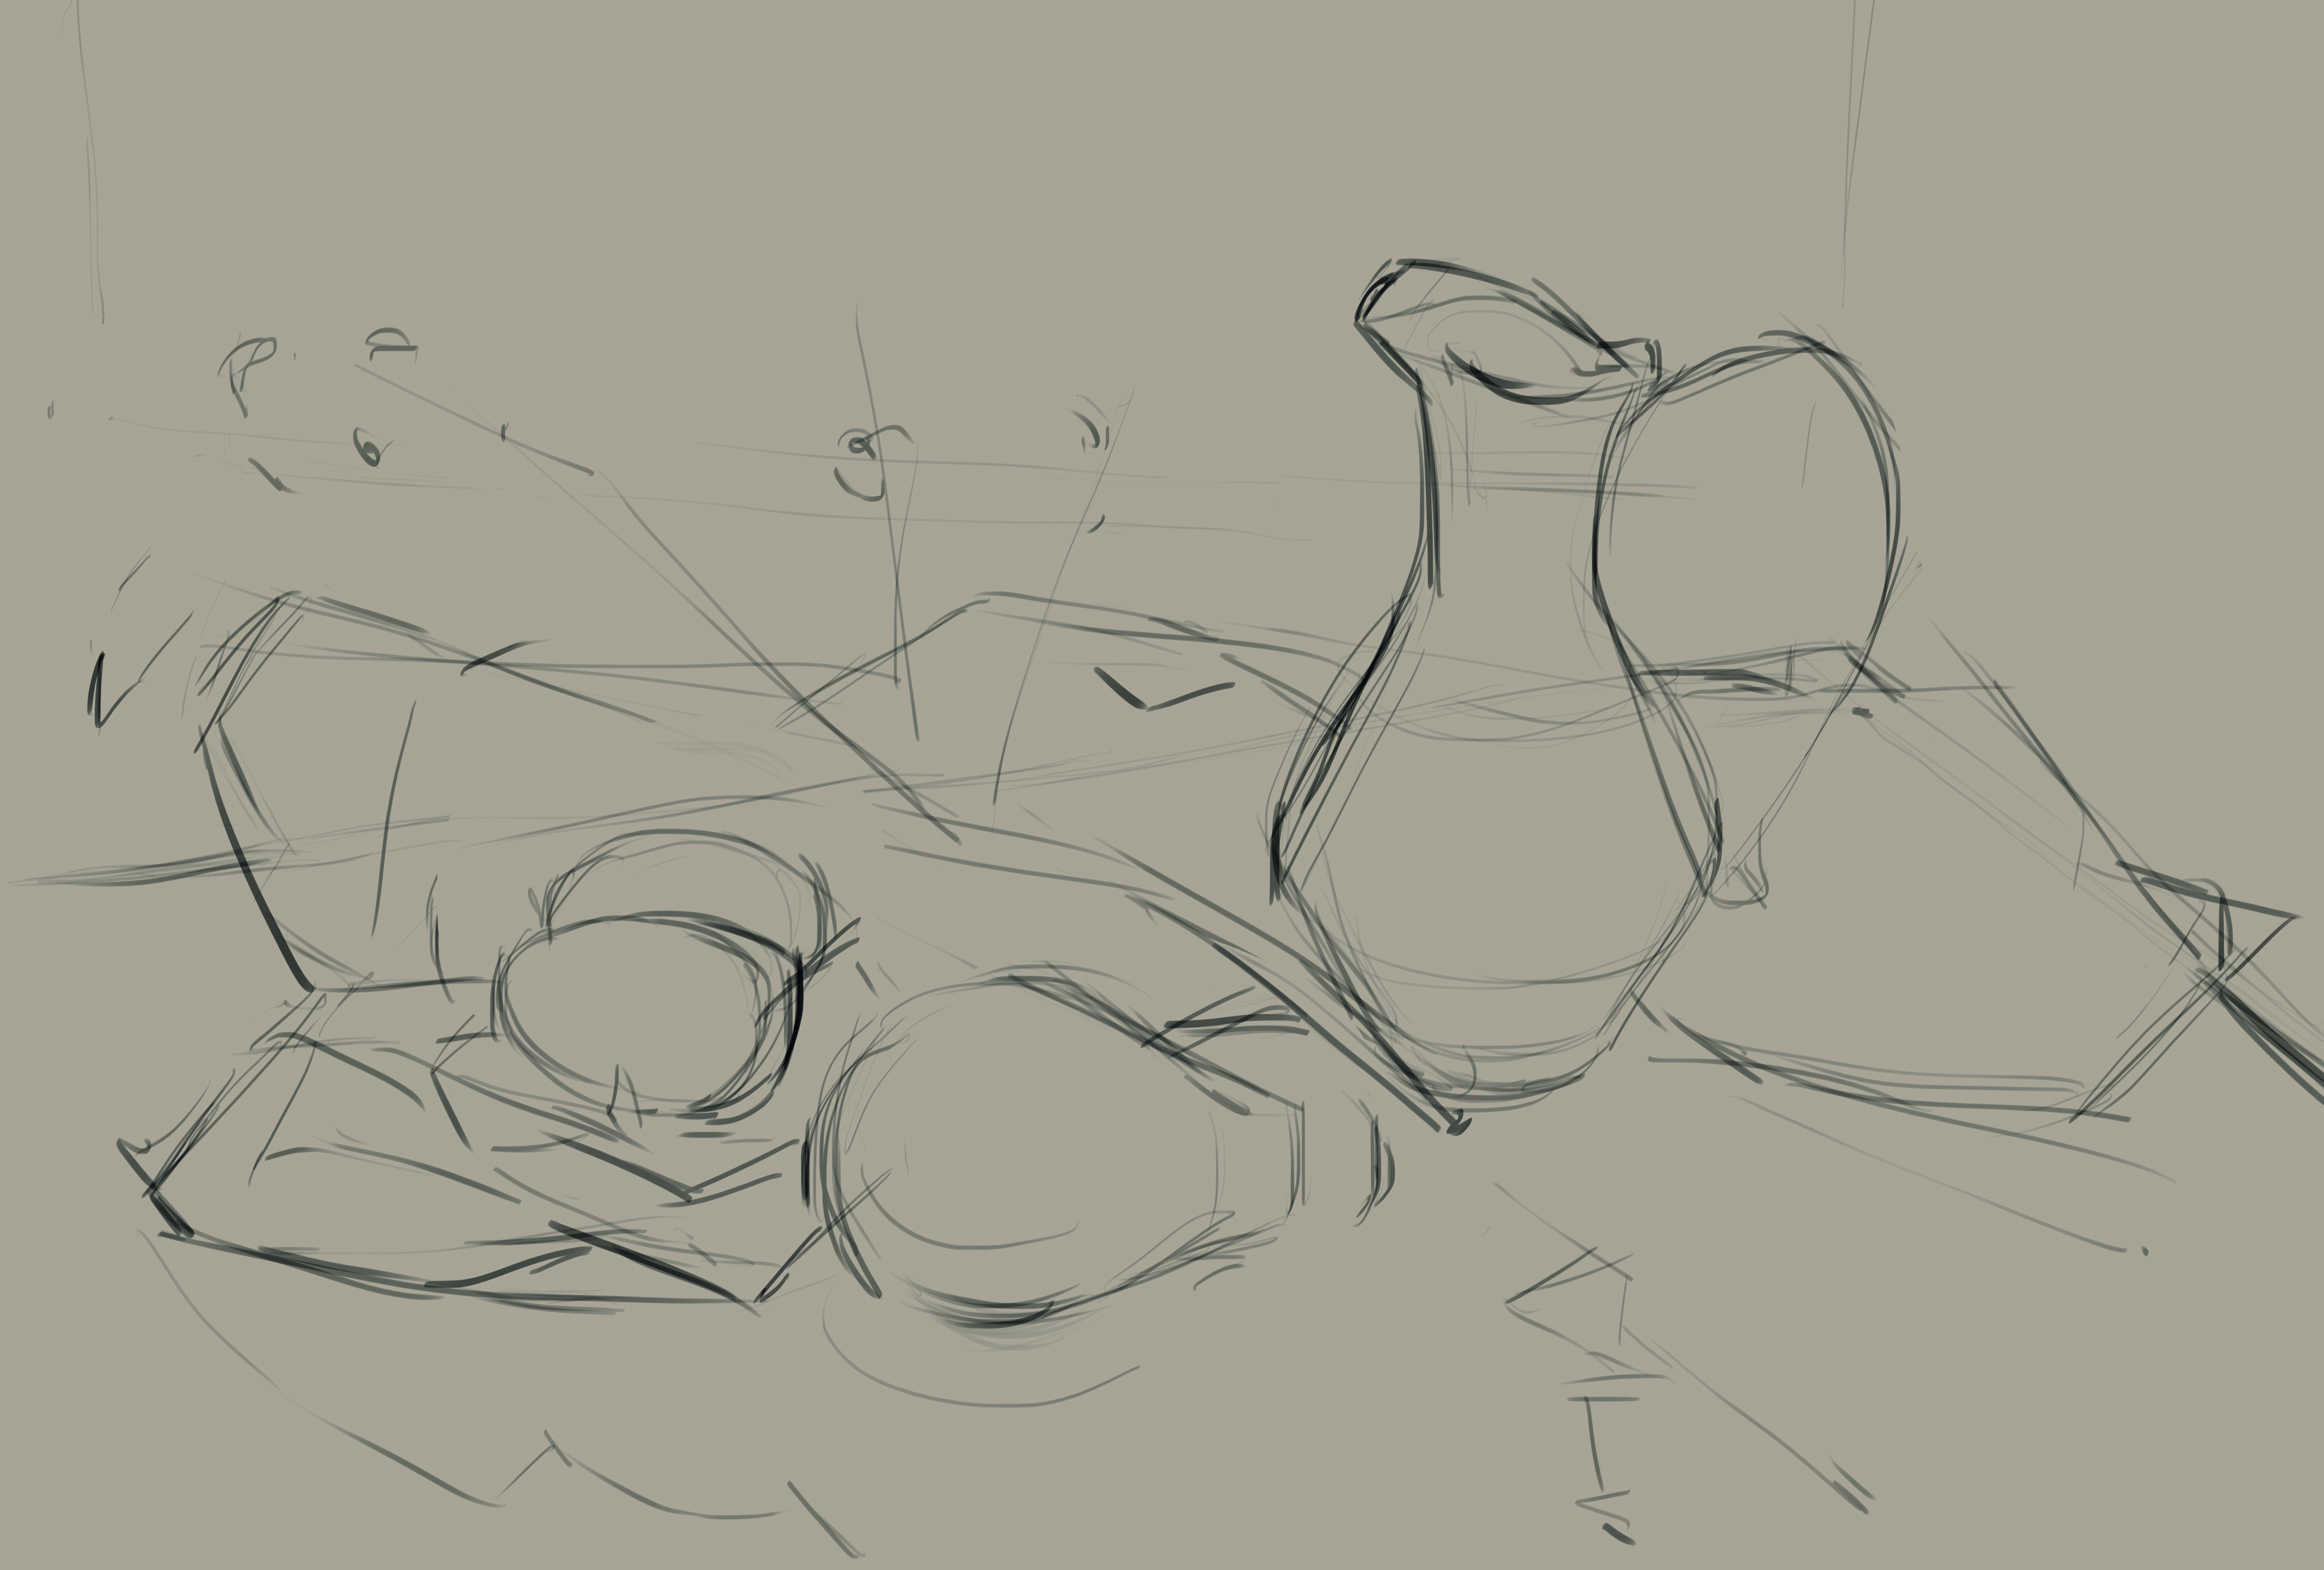
Now that I have photographed my image, I have taken my reference with me to my computer and started a new canvas in Photoshop. I try and keep the aspect ratio of the painting and reference about the same, so that I know how my proportions will lay out. I set up ‘plot points’ where I believe objects will be placed. Doing this helps my eventual sketch to be much more accurate when I get there.
04. Sketch it out
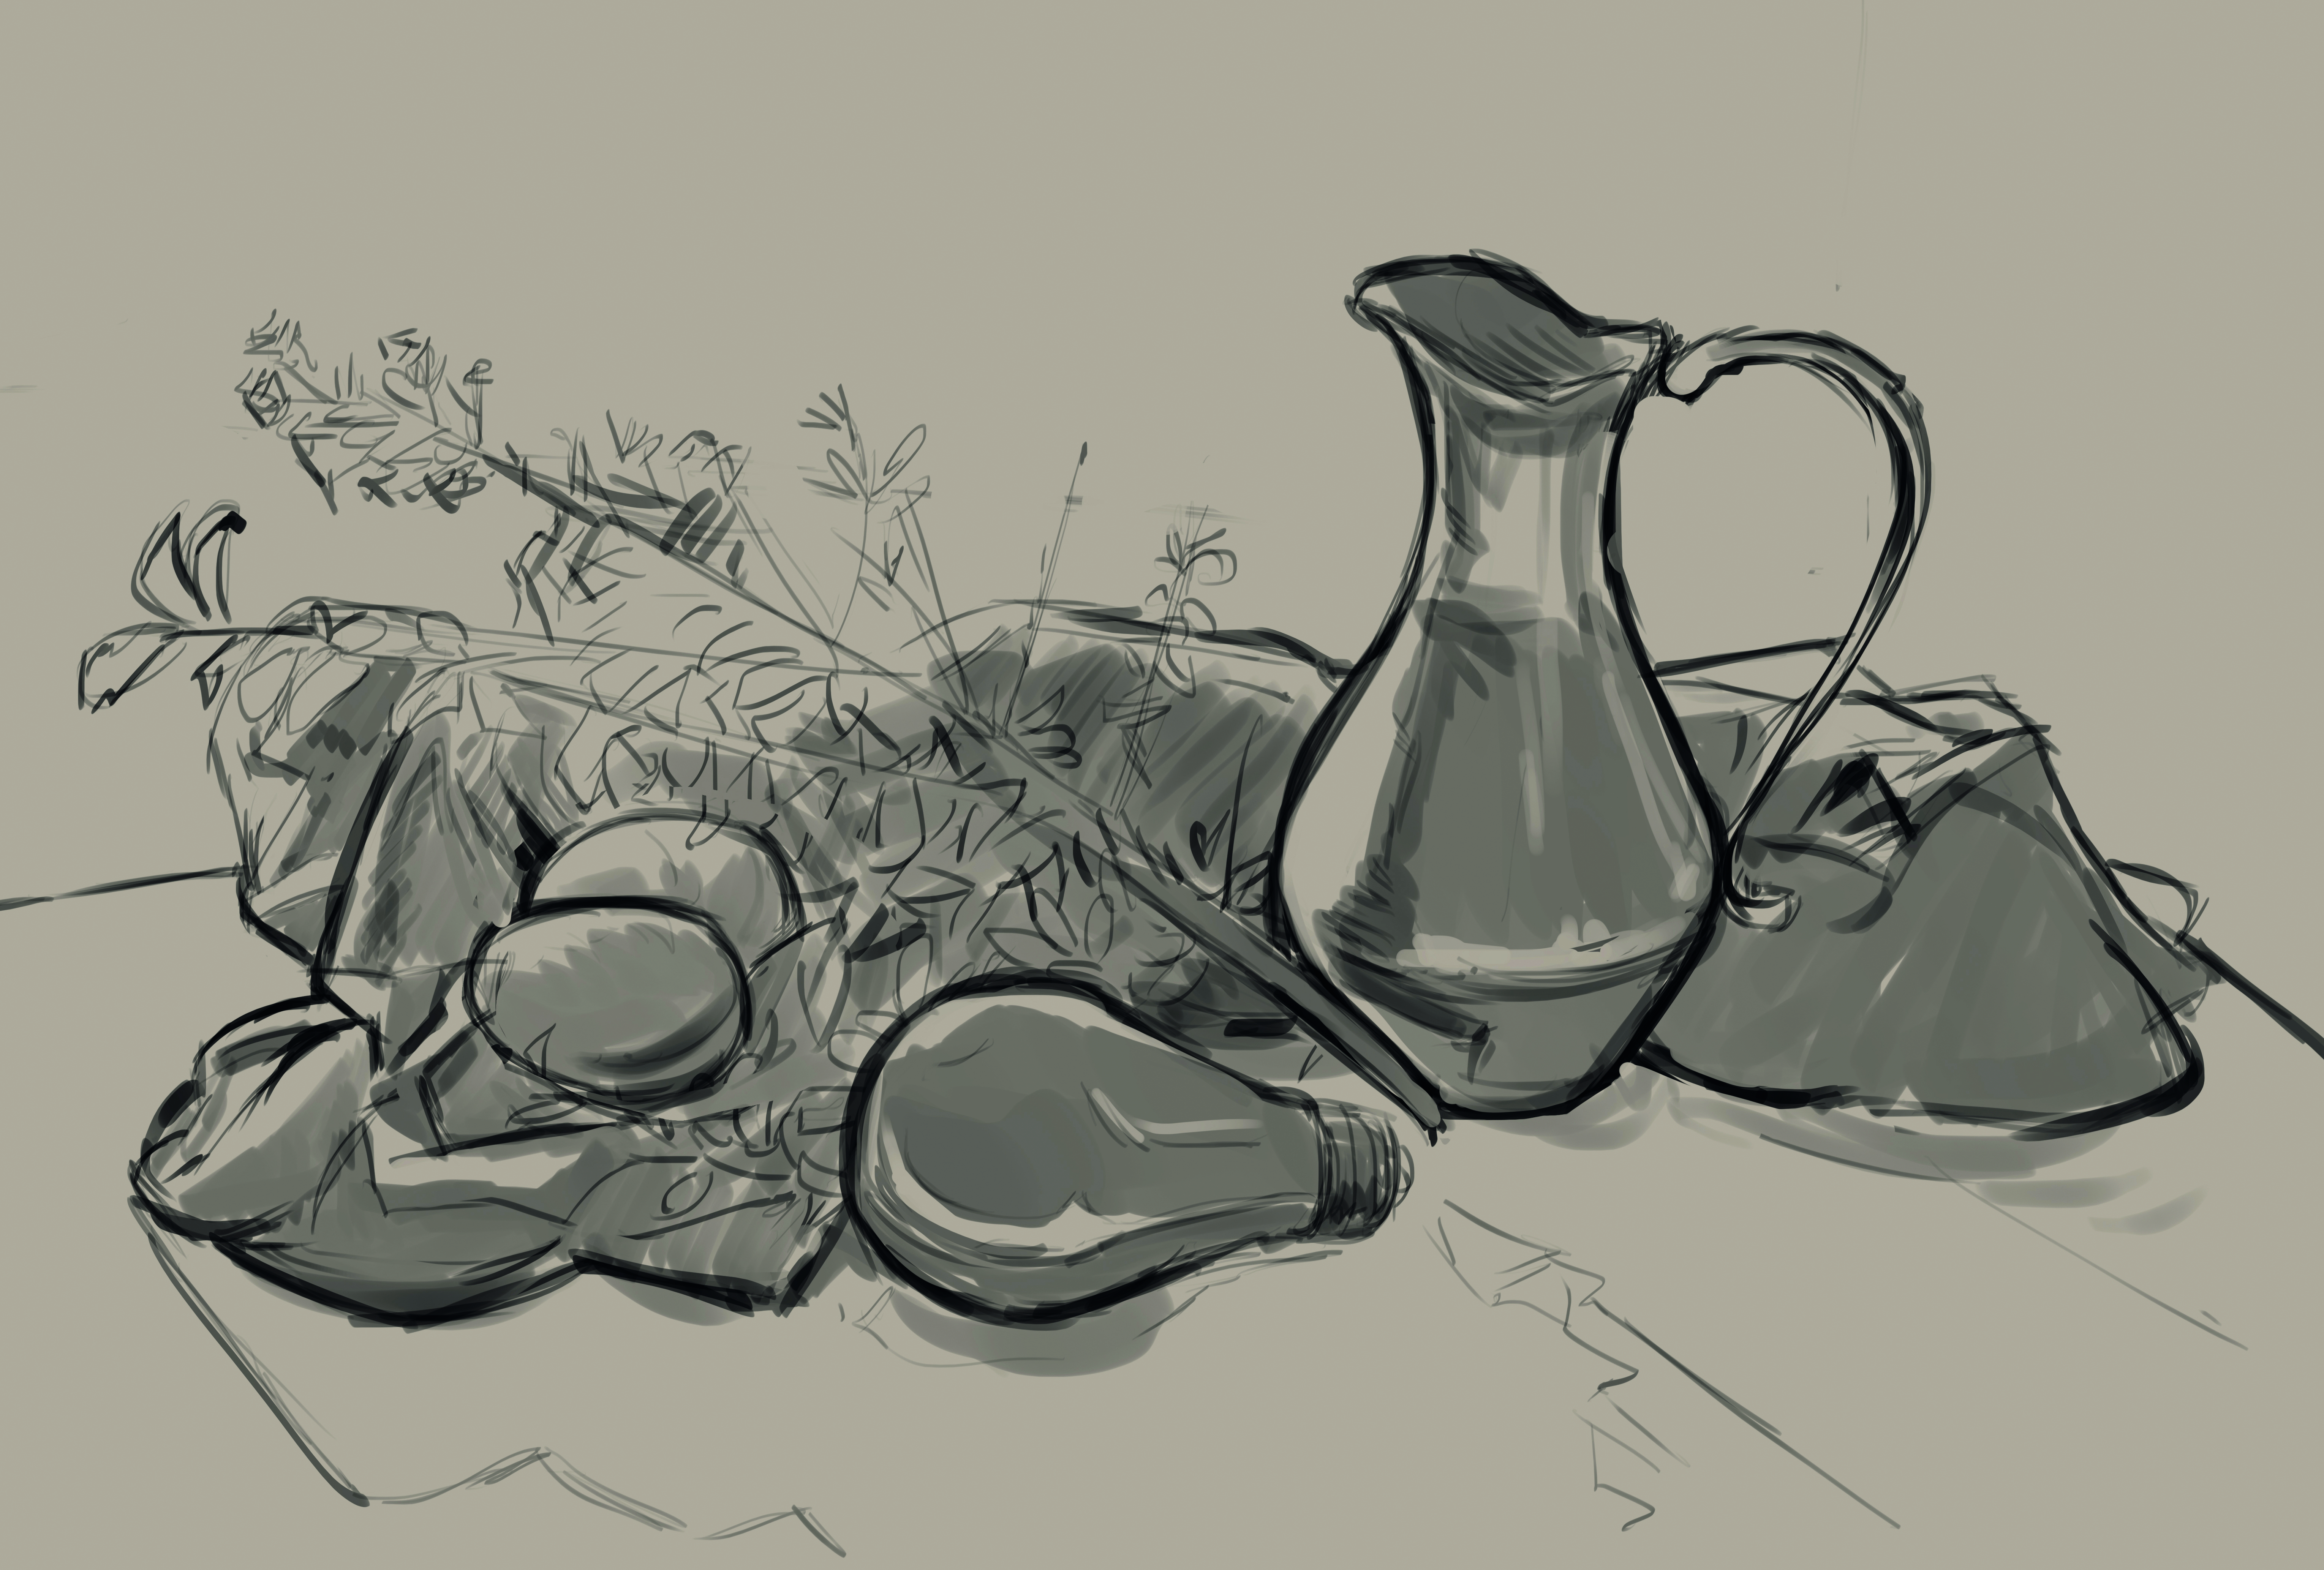
At this stage I have already begun to put in some basic values and give myself a greater understanding of where the lights and darks will be in my painting. Using the plot points from my previous step, I can refine and place the objects in their proper spots, making sure to measure with my eye where the edges, lines, and important landmarks will be. I pay close attention to negative and positive shapes, for greater accuracy.
Negative and positive shapes are essential to laying out my sketch, and play a very important role in the overall success of my painting. Negative shapes are the shapes I look for between objects, like the handle of the pitcher, and what shape that produces, rather than the handle itself. Double-checking these shapes is one of the most important steps of the entire painting. It is crucial for me to get it right.
05. Colour it, roughly
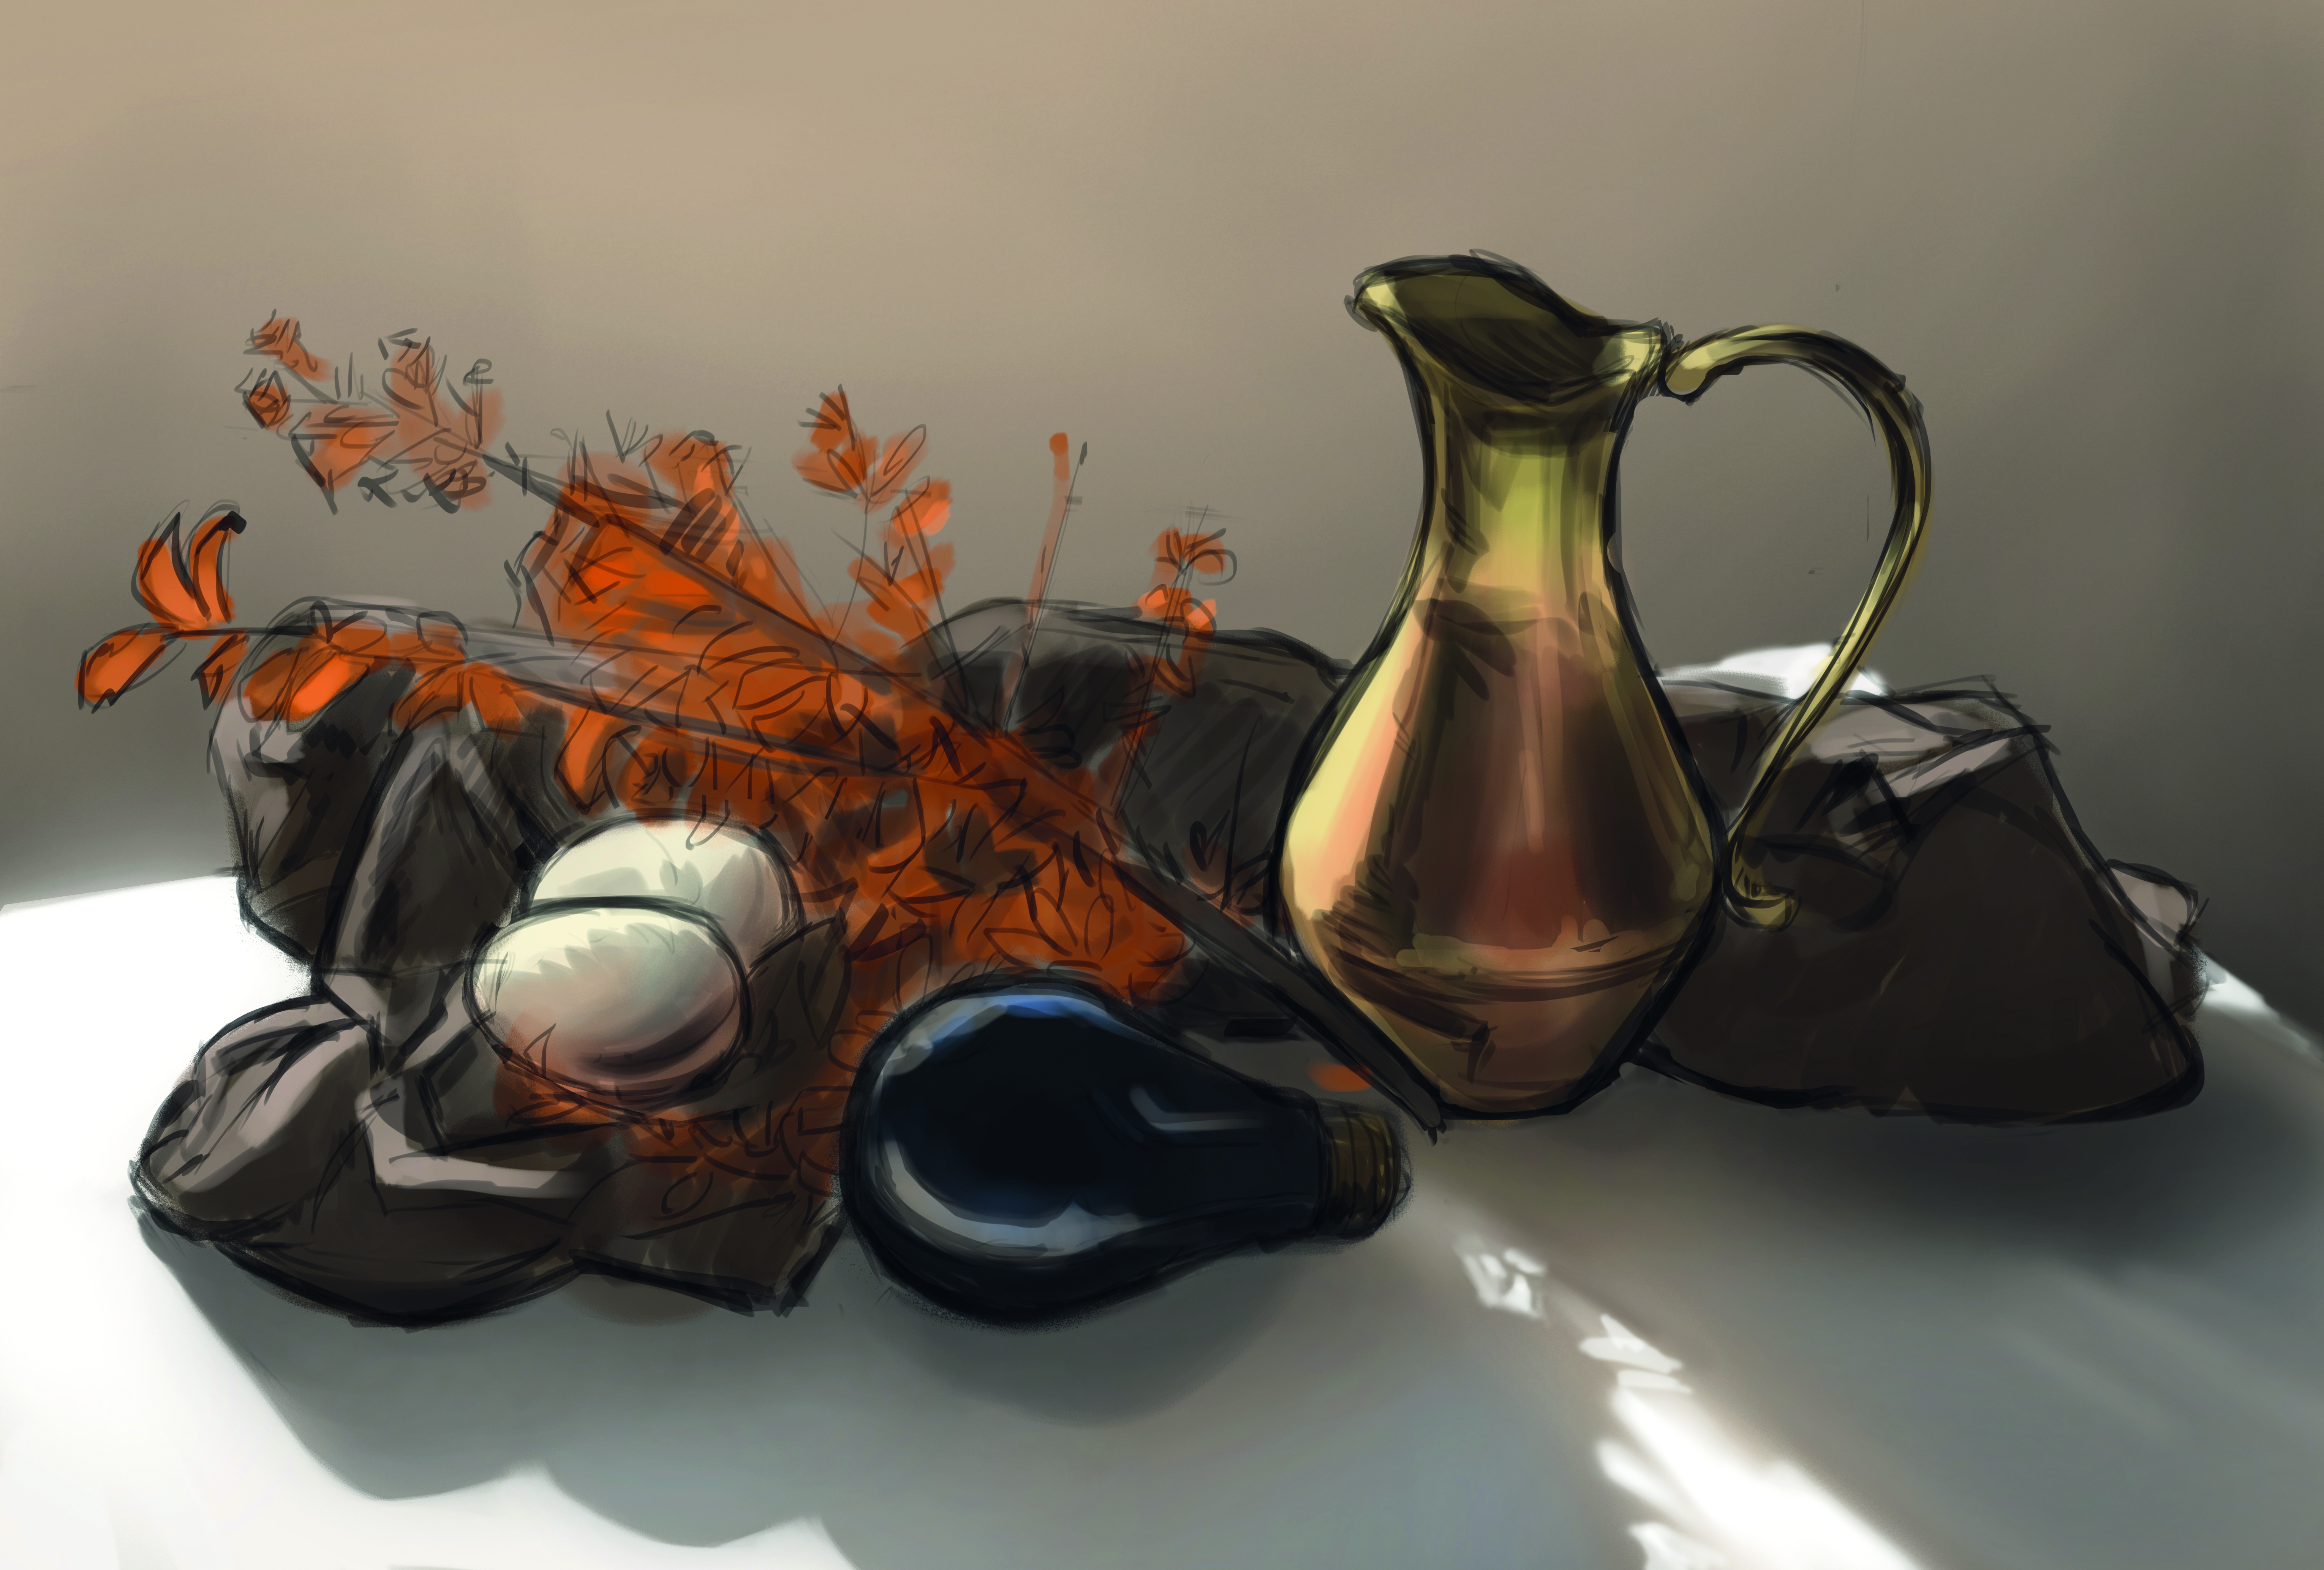
This is the part of the painting where I start to breathe life into it. My main focus is to grab all the mid-tone colours and their respective values, and place them into the image for an overall look at it. Here, I really start to refine the values of the image, paying close attention to the chroma of the mid-tones, like the brightness of the orange leaves, versus the dim and dark cloth.
This step begins my approach to removing the crutch of my sketch, and venturing further into the colouring process. My goal here is to nearly remove all of the line edges from my sketch by painting over them (yet preserving them on another layer), so that my understanding of the forms of the subjects and their surroundings can be gathered with greater potential. I begin understanding the reflections, but do not concern myself with detail.
06. Take time to reflect
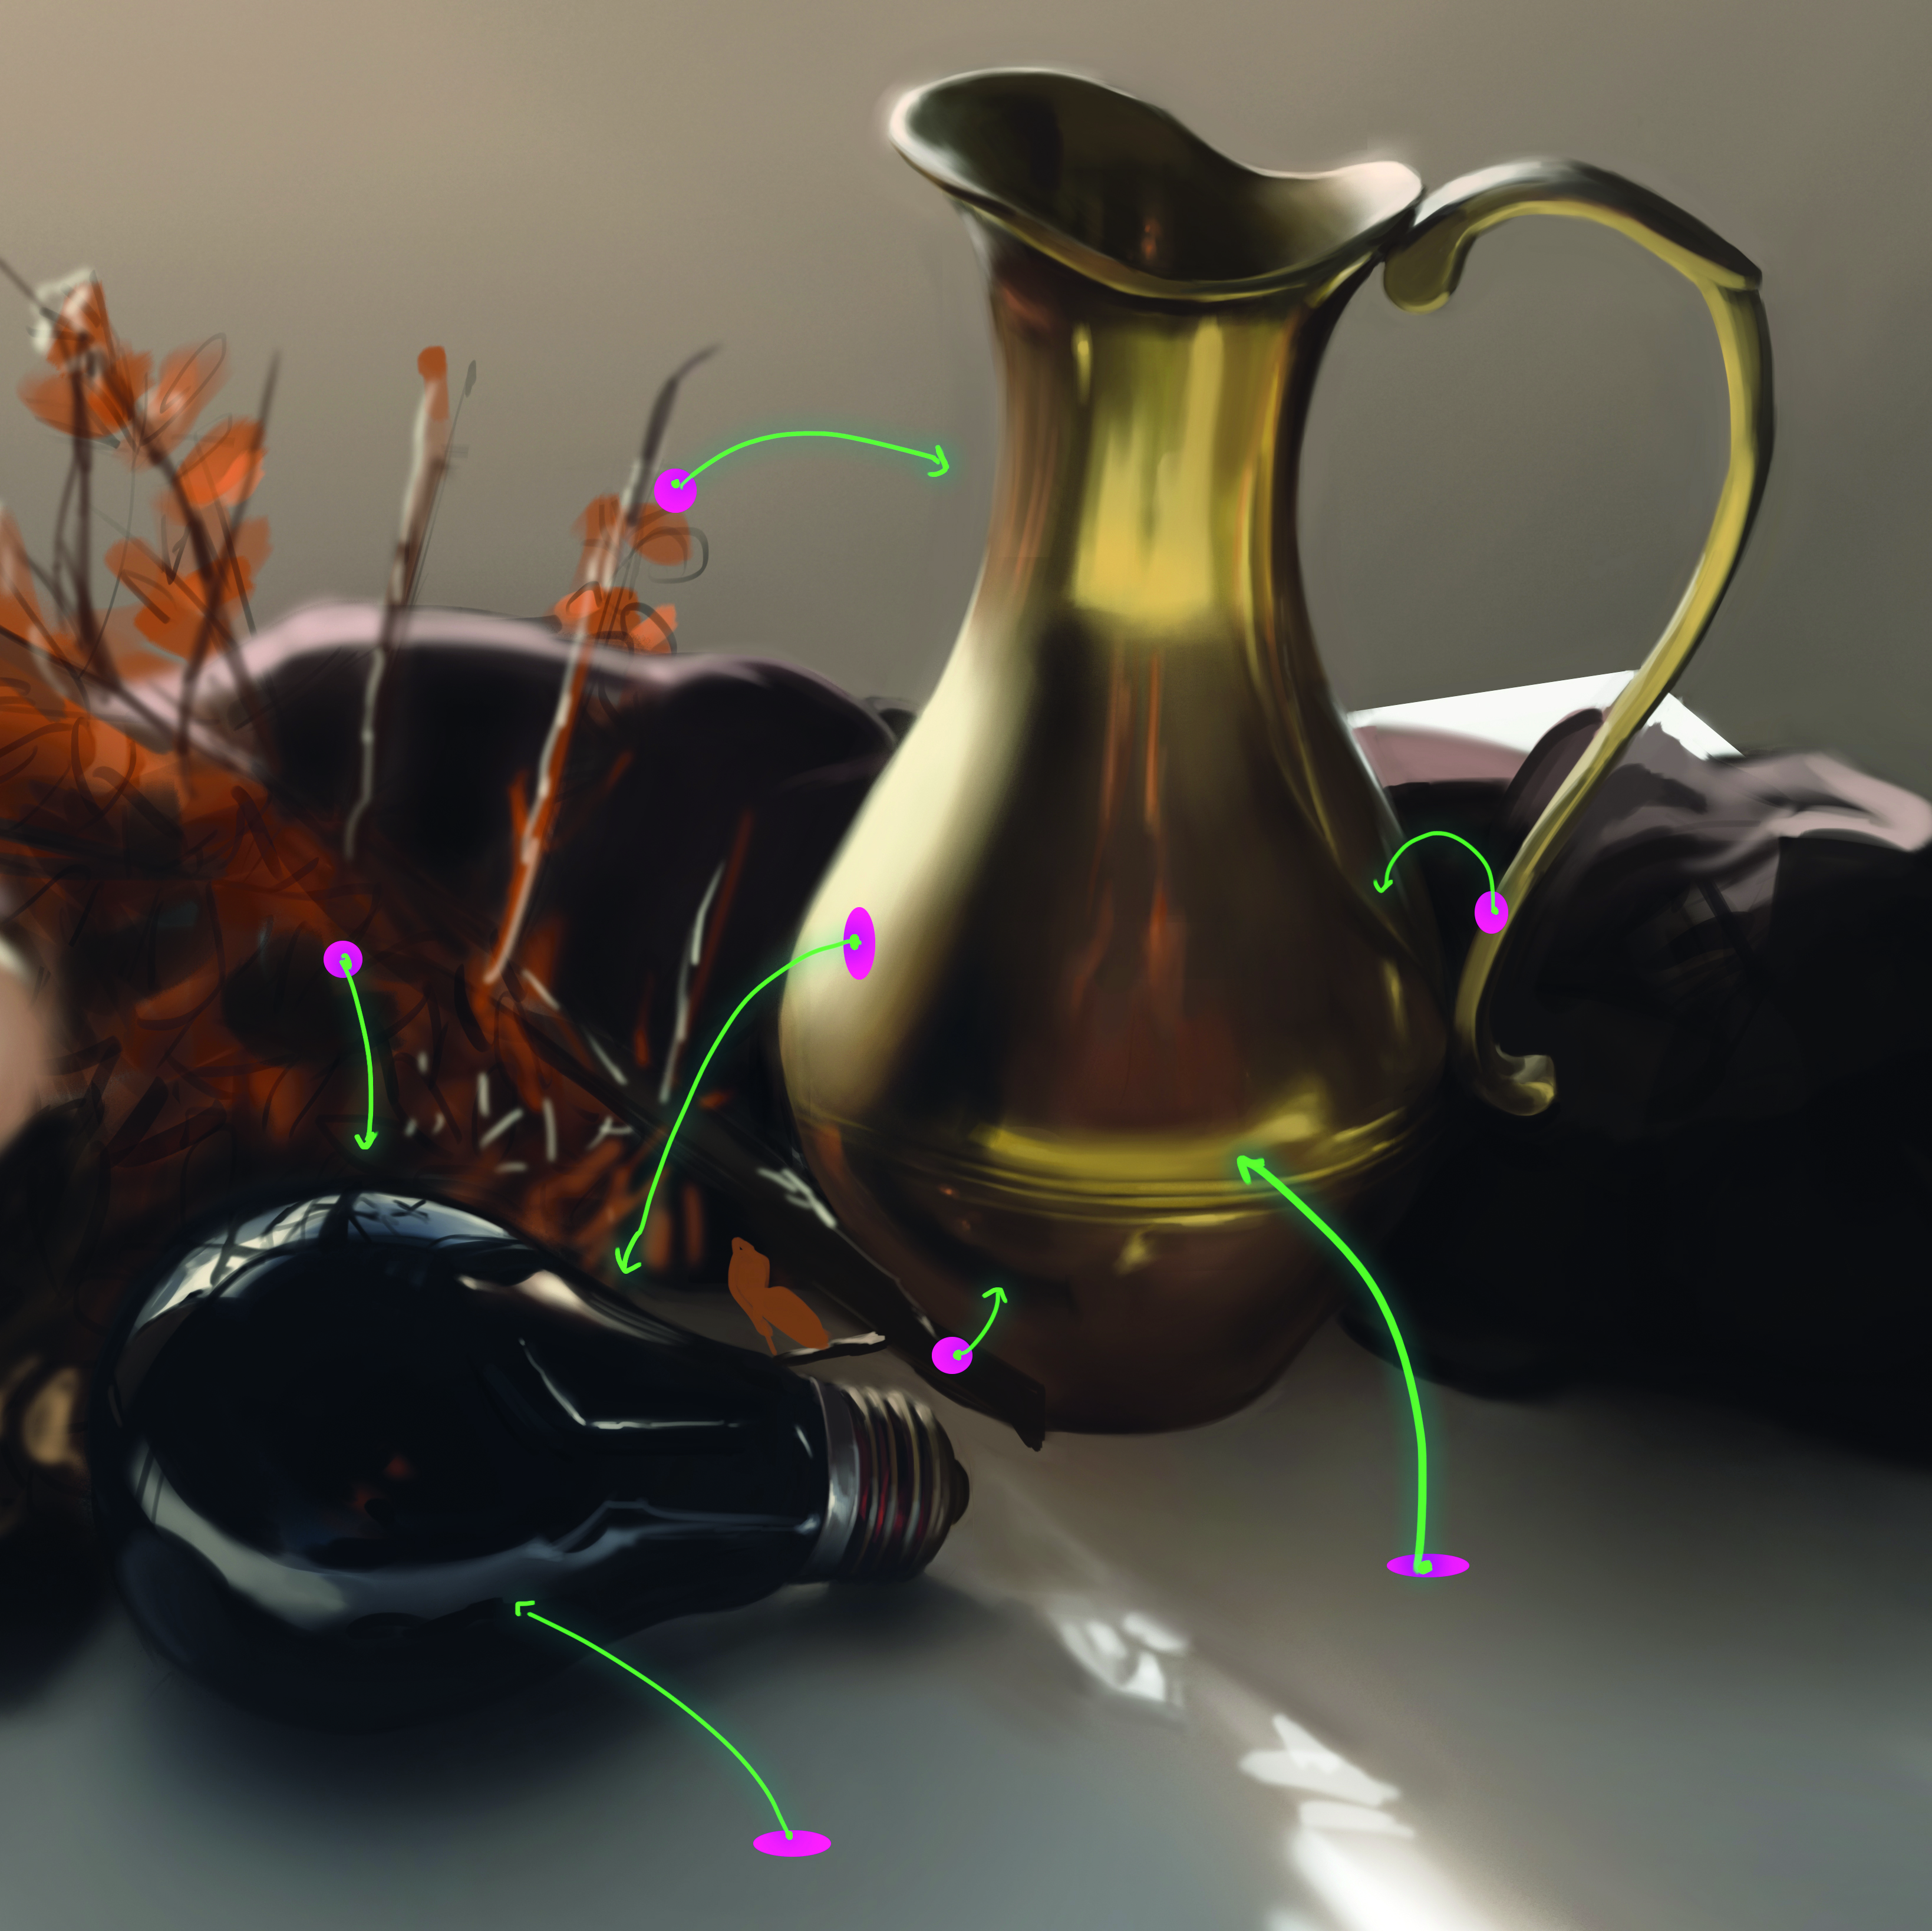
During my painting process, I pay close attention to my subjects, especially the ones that reflect their surroundings. Here, my pitcher and bulb are reflecting all sorts of objects surrounding them, sometimes even disappearing at those edges because of how little of their own material shows through. In the bulb I can even see myself, taking a photo of the composition. In a more distant fashion, the red in the pitcher is also a reflection of me, adding colour.
07. Work on the softer side
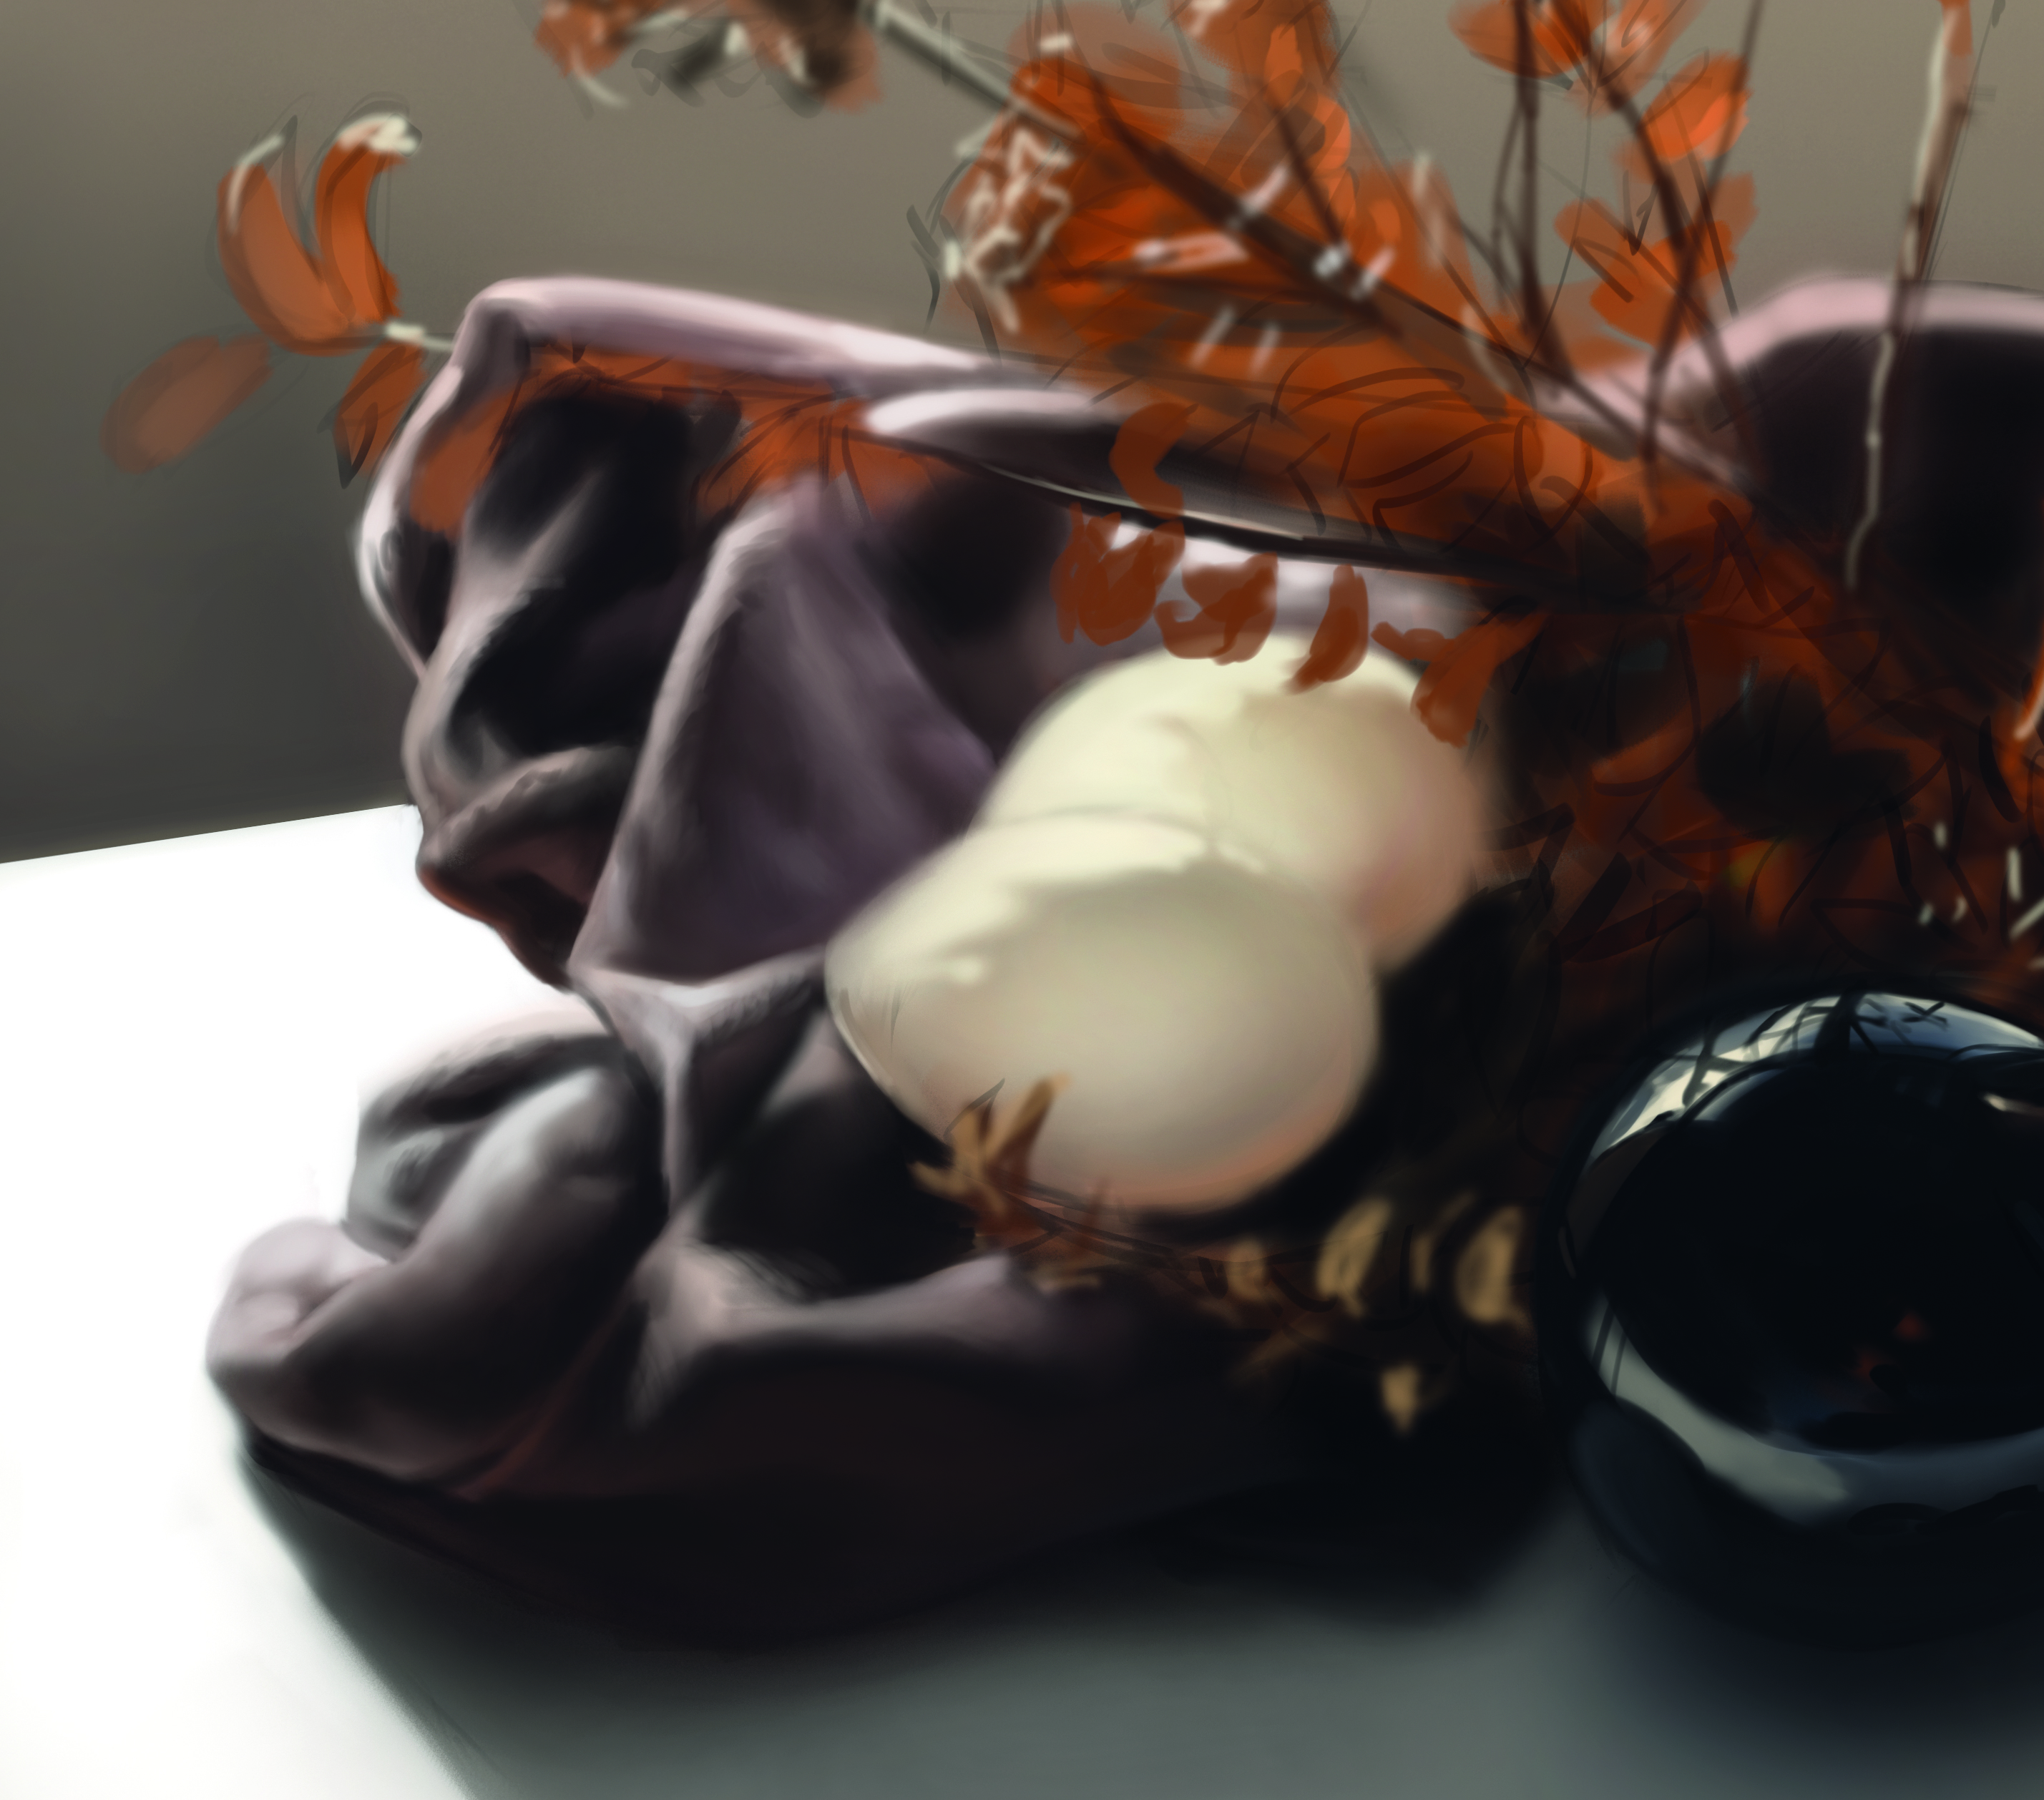
On the completely opposite spectrum of my harder, shinier objects, is the cloth. It poses a more complex subject to paint, as the folds try and confuse me. I take my time in understanding where the folds are going in order to portray them correctly, letting the light guide my eye over each fold and where it disappears. Part of the difficulty comes from accurately representing the buoyancy of the cloth, making sure the weight of the eggs shows.
08. Complete the eggs
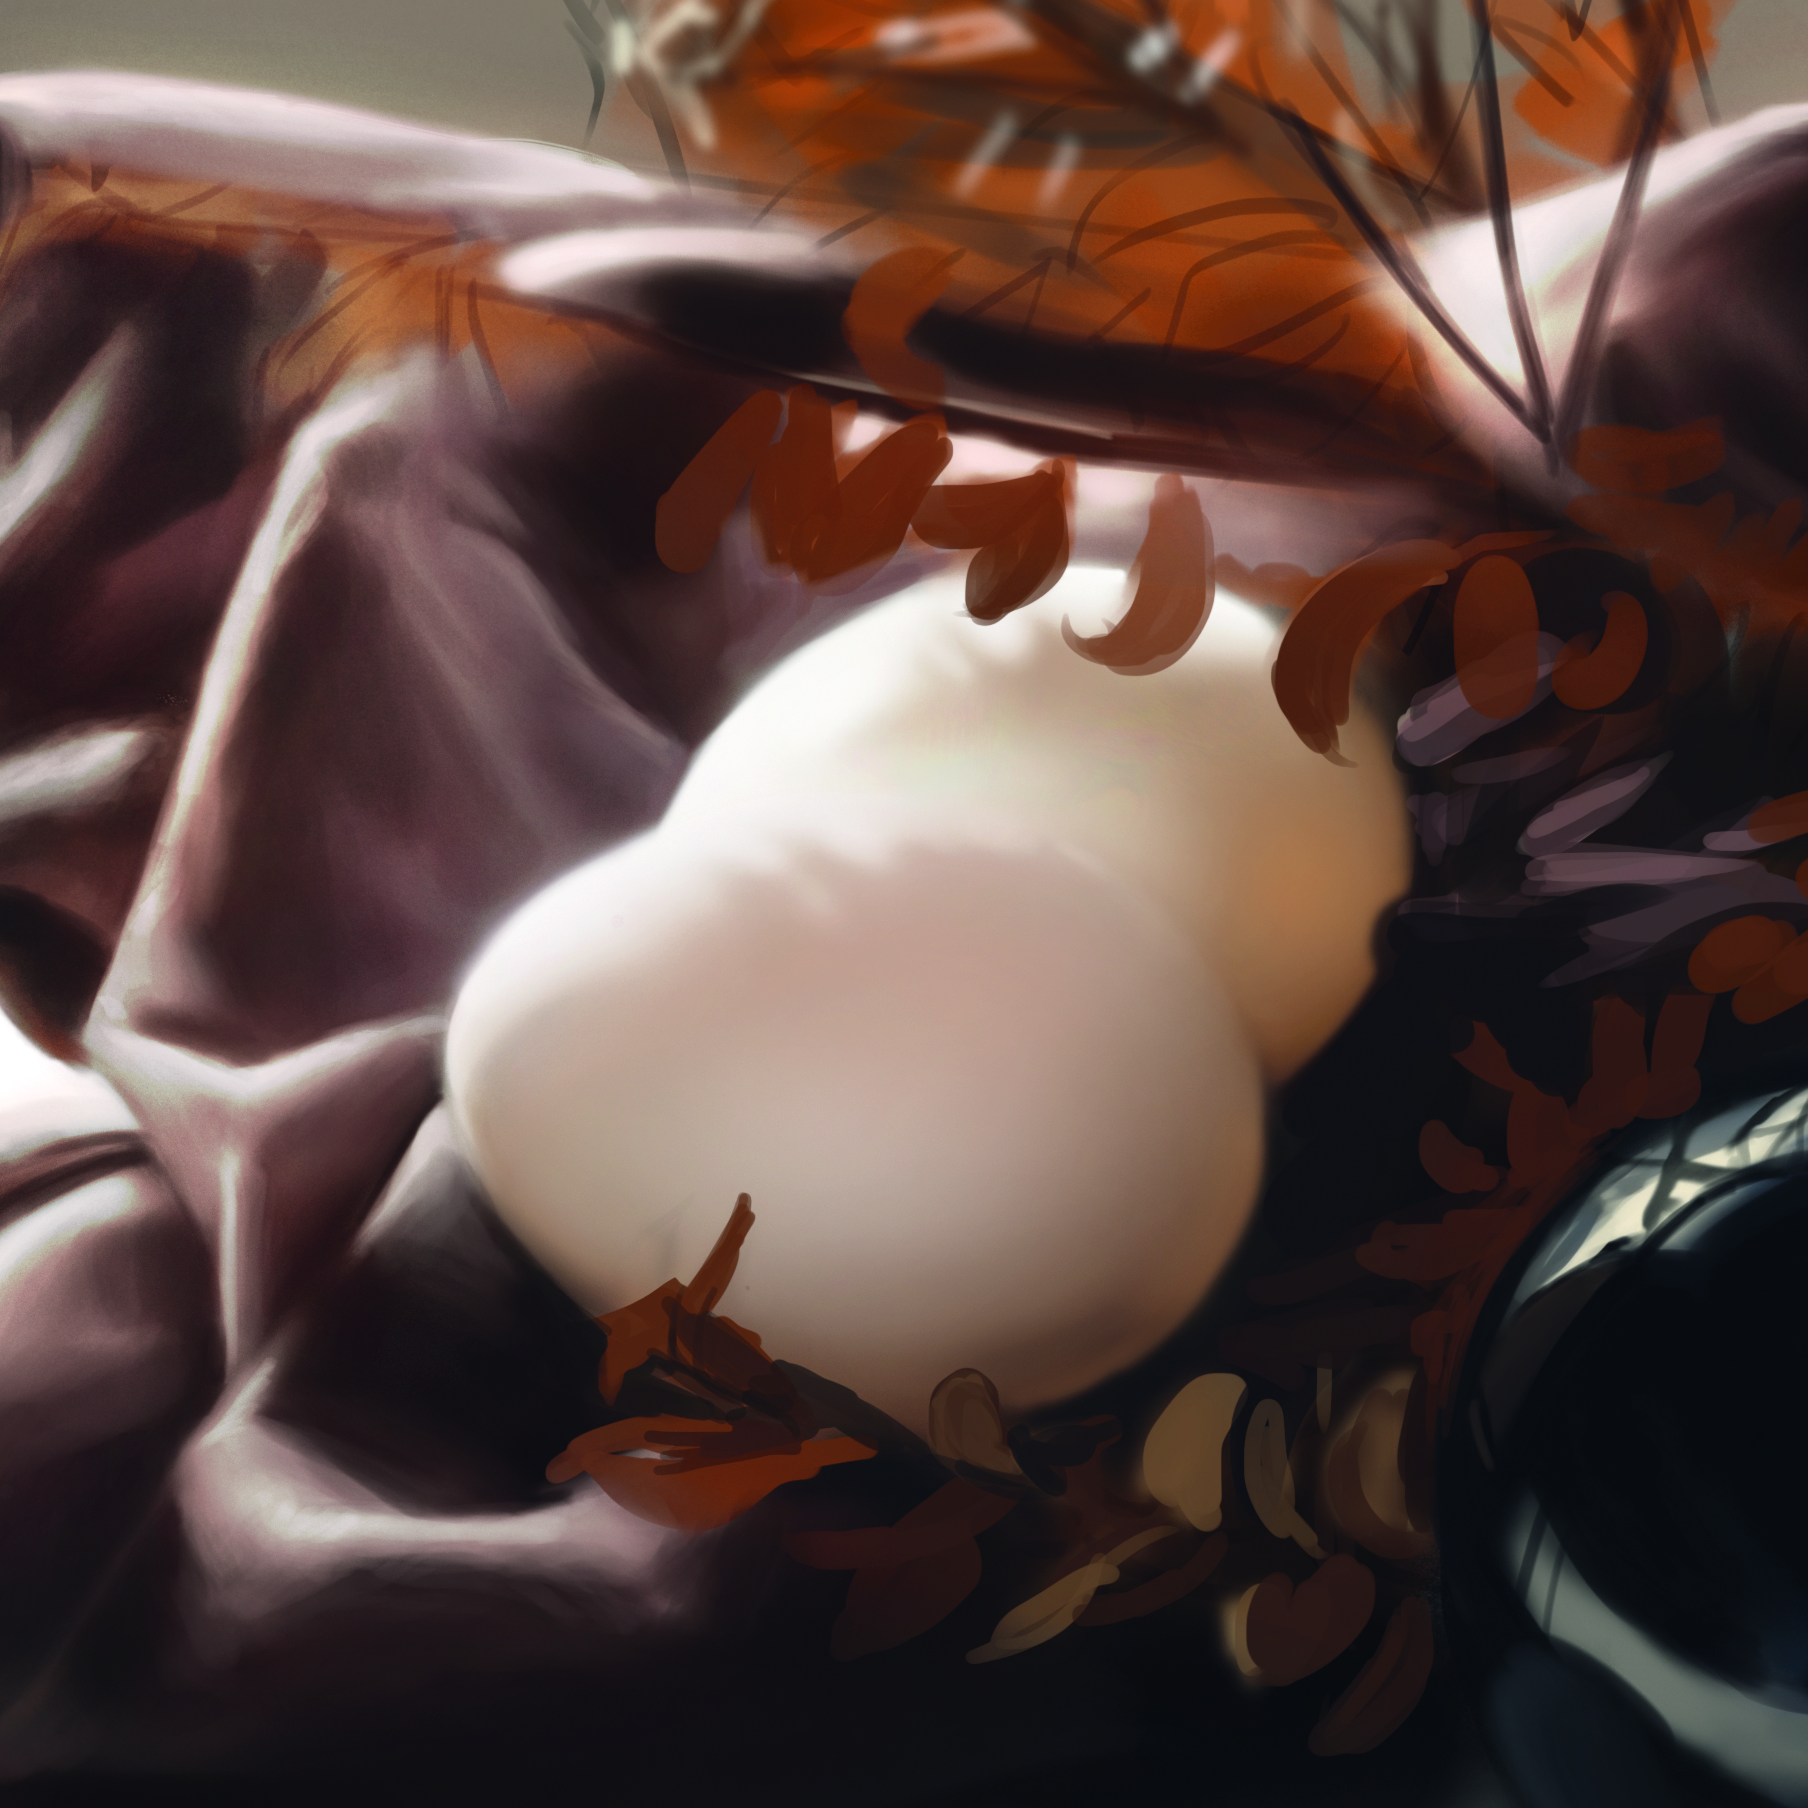
The purpose of the eggs in this composition is for great light play. I set up my light and twig to give the eggs a very particular shadow on their side, while the sun coming through the shell gives them lively colour. The hardest part of painting these is making sure to keep their shape hard, without losing the soft glow of the light play. I purposely use as soft a brush as I can for an even gradation.
09. Lose your edge
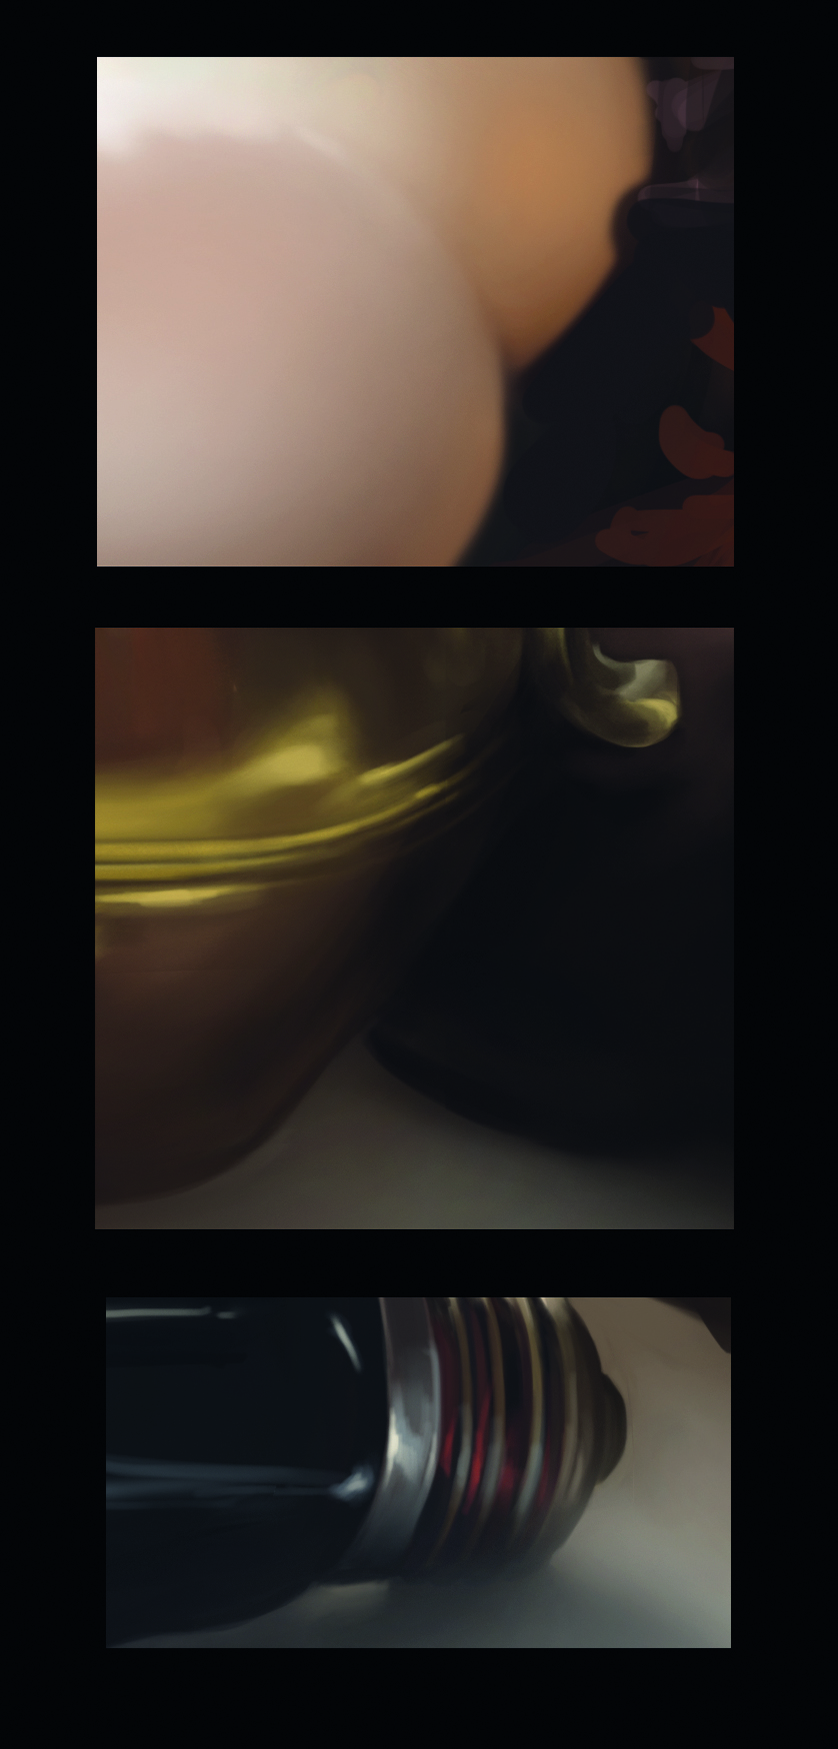
Part of my painting process involves looking for the lost and found edges in the composition. In doing so, I can play with the more painterly look of the piece, and lose a bit of detail to help the focus of the more obvious parts of the painting. Losing the edge of the eggs, pitcher, and bulb will accentuate their other obvious traits, like curves, shadow, or colour contrast.
10. Texturise
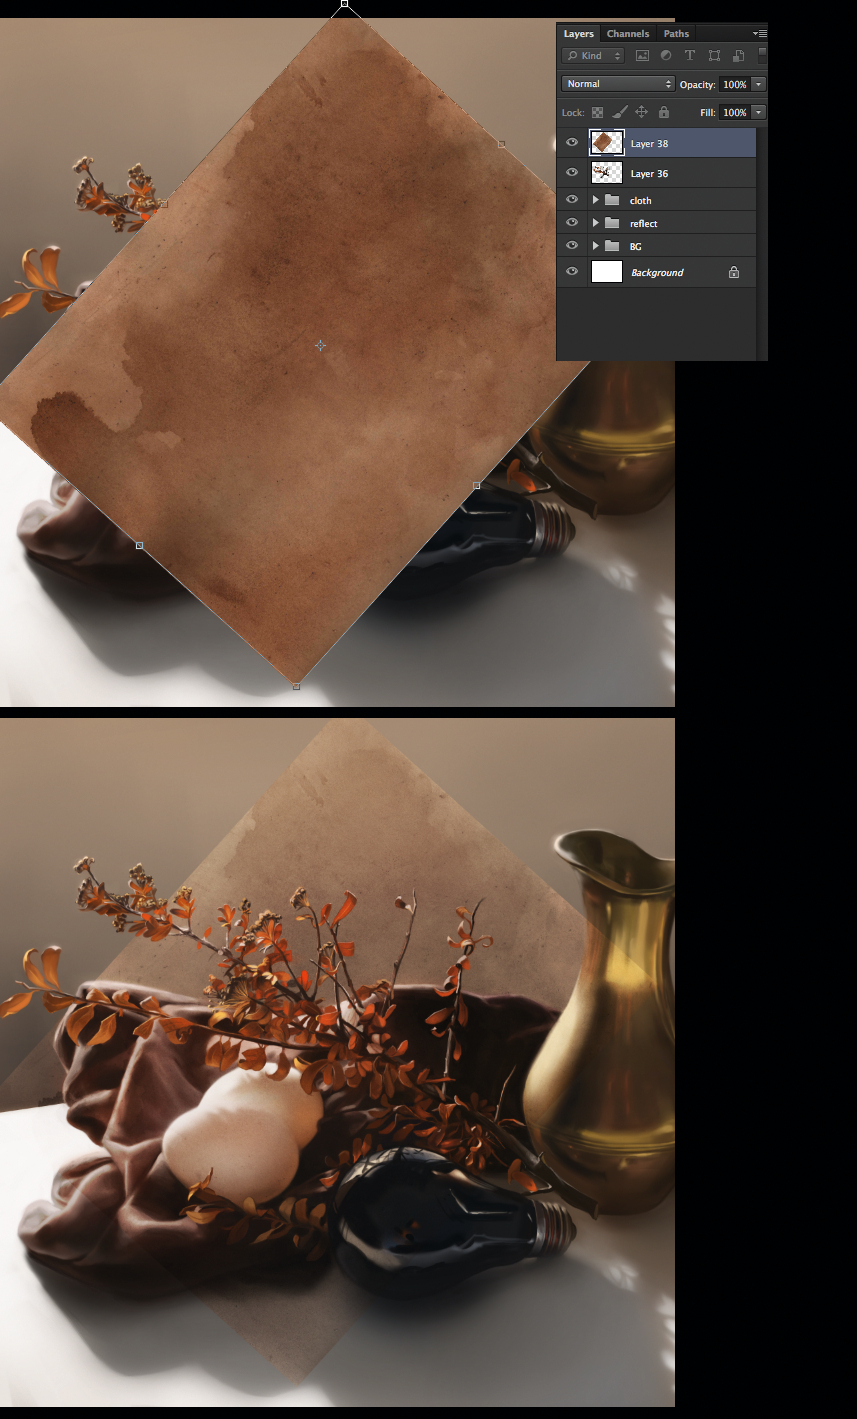
Now that my painting is nearly finished, I can play with some special effects to help it look less like a smooth digital painting, and closer to a photo. Using some textures found on the web, I overlay these straight onto the canvas, touching up parts or colours I don’t like, for an overall feel.
11. Add special effects
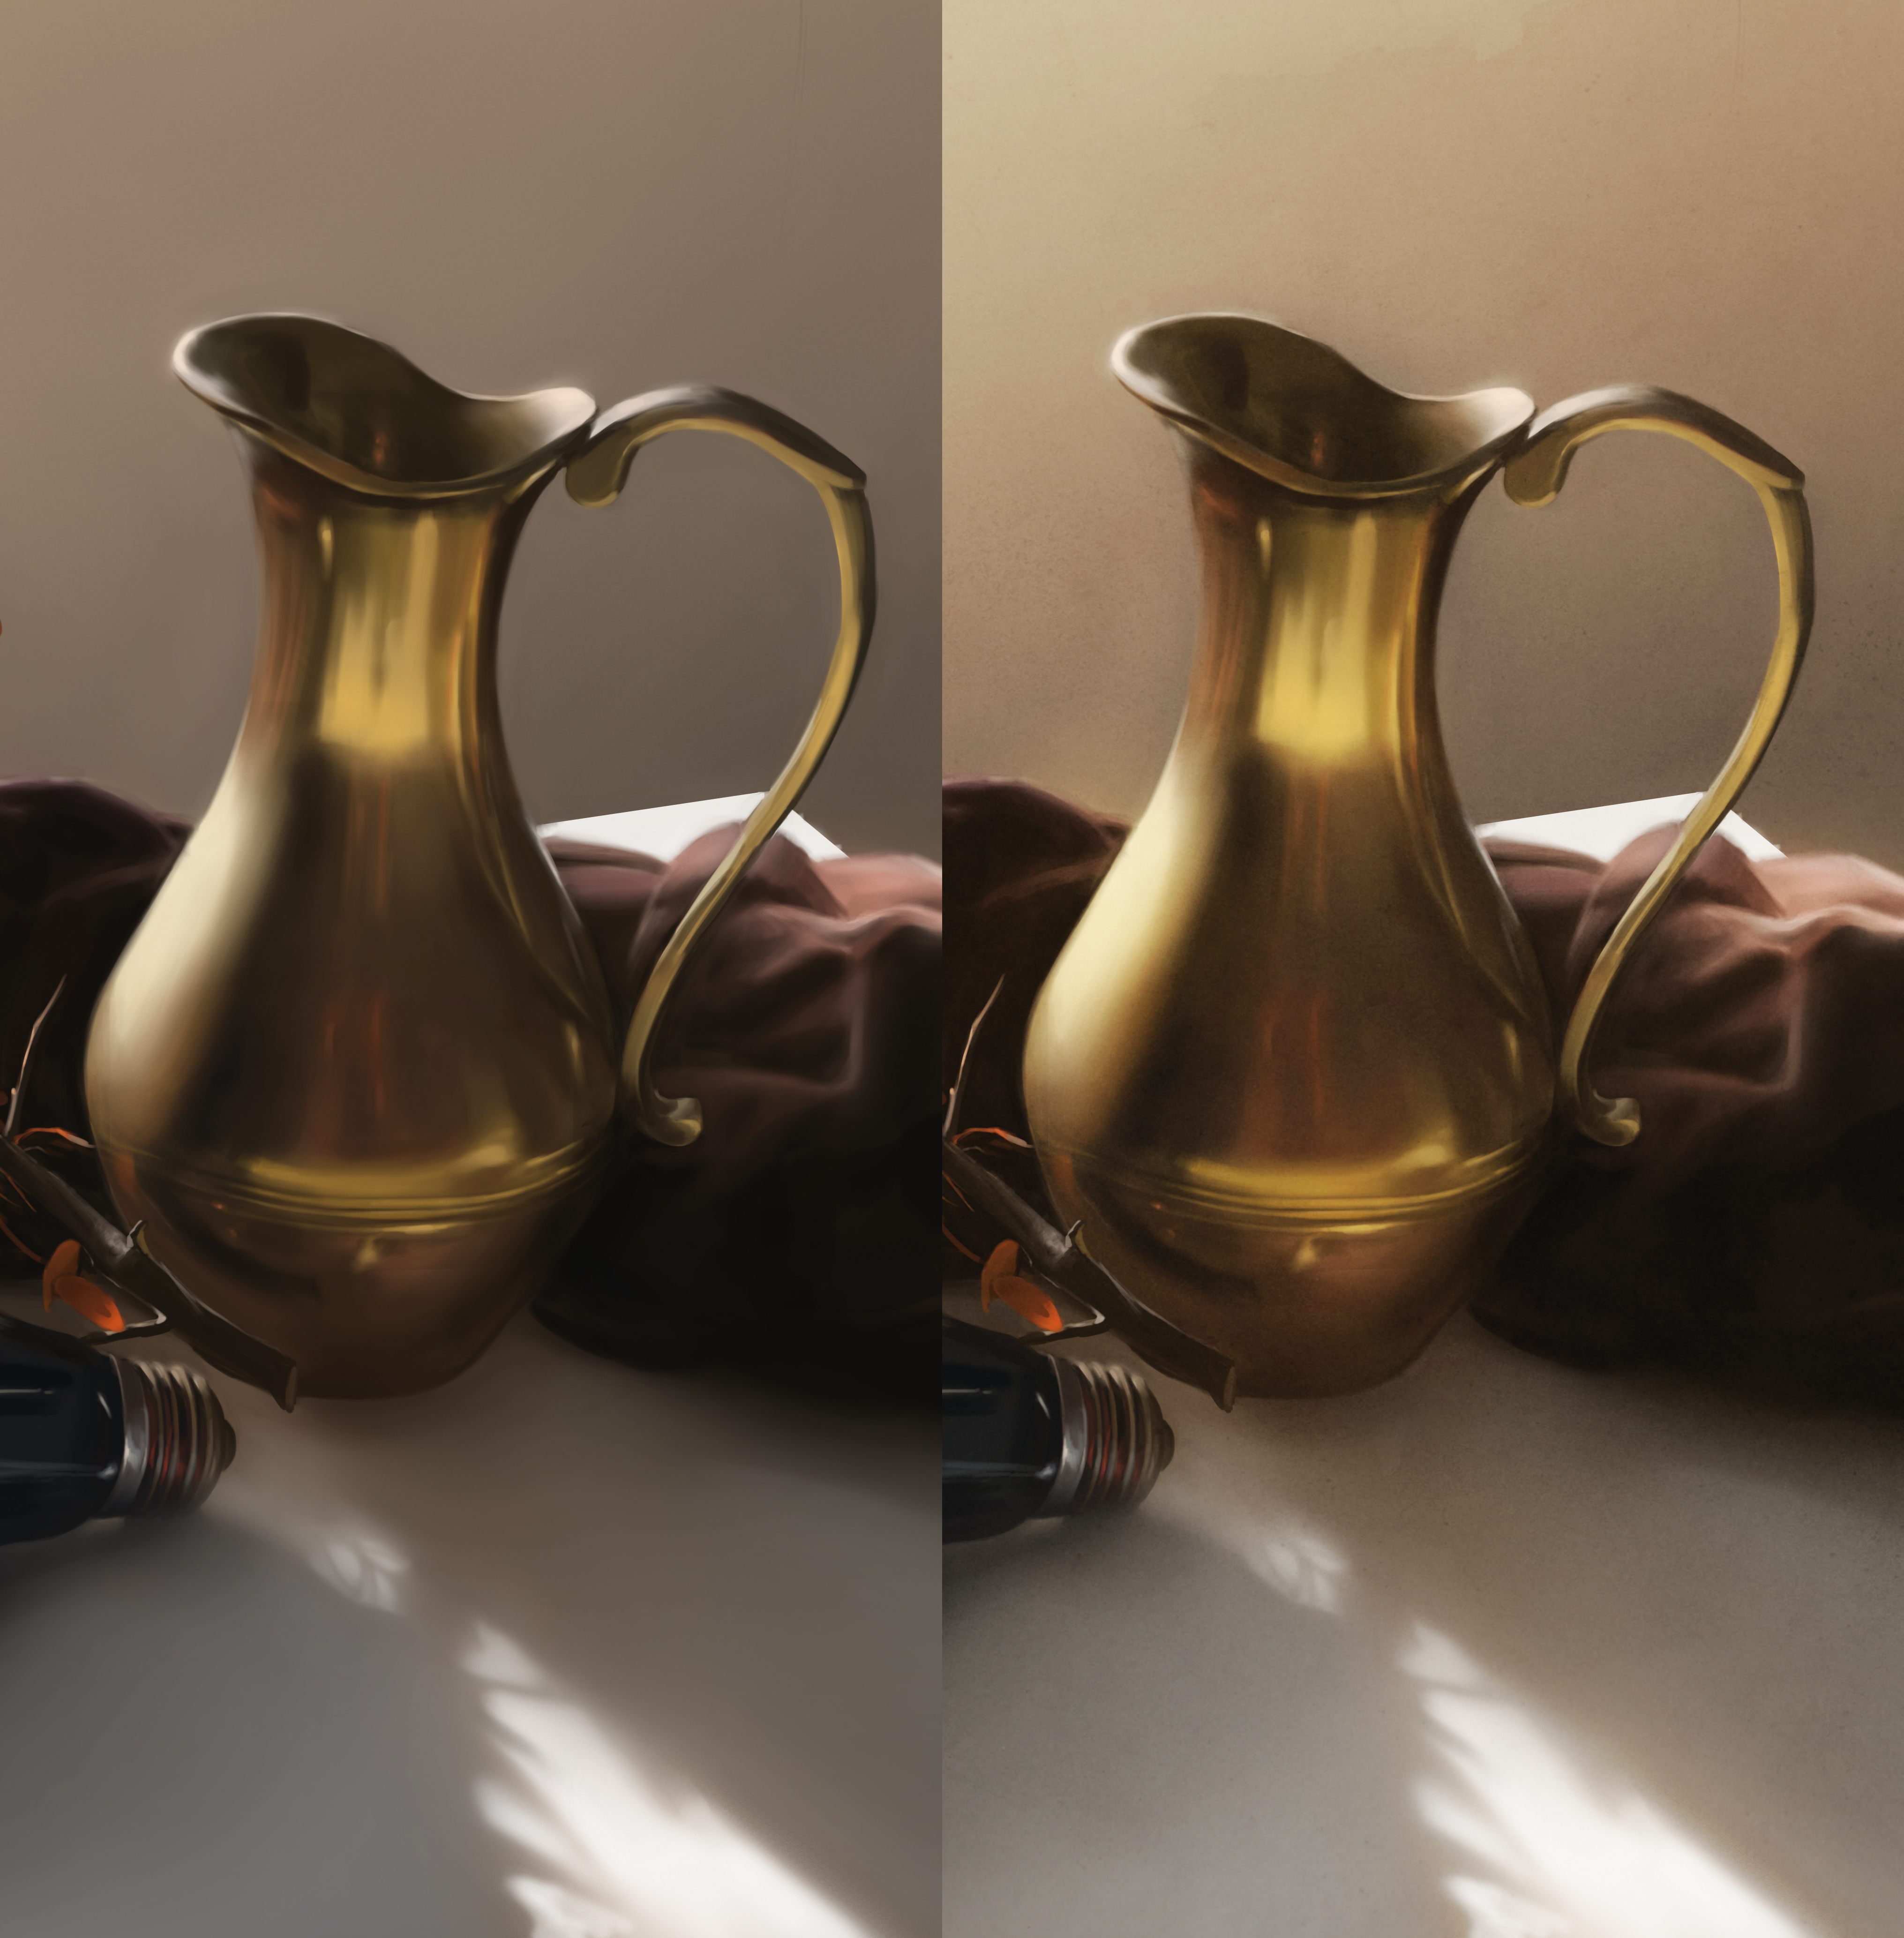
On an Overlay layer, I select some of the brightest chroma in the image and start to use the Gradient tool to give things like the pitcher a shinier, more dramatic look. I also use the Gradient/ Overlay layer to help push the FX of the light source from the left.
12. Save final image
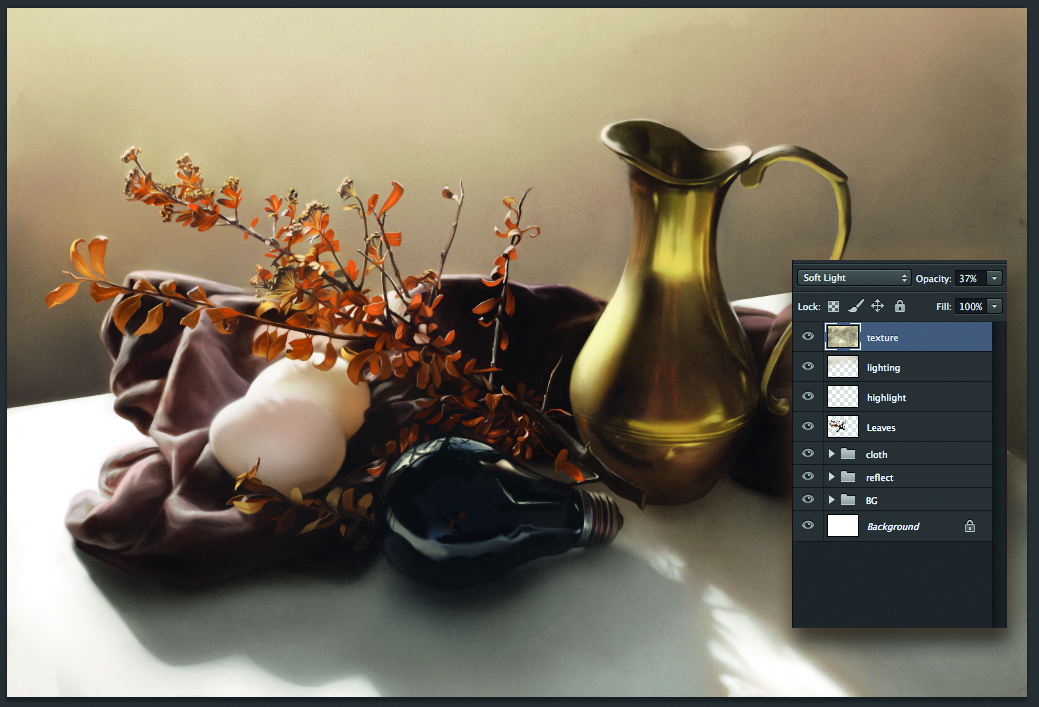
My last touches for my painting are with adjustments to odd shapes by using the Liquify tool, or putting in some more effects of light through the cast shadow and leaves. Overall, I flip the image multiple times (even upside-down), and might even do a quick hue/saturation grey test to make sure things are as accurate as possible to my reference. Once I’m happy with the final image, I can save it out and call it a day!
This article was originally published in ImagineFX, the world's leading digital art magazine. Subscribe to ImagineFX.
Daily design news, reviews, how-tos and more, as picked by the editors.
Damien Mammoliti currently works in the gaming industry, and has shipped four games. He can be seen in many RPG book publications. boneandbrush.com
You must confirm your public display name before commenting
Please logout and then login again, you will then be prompted to enter your display name.
