Photoshop anatomy: the Refine Edge box tool explained
Learn how to use the Refine Edge box perfectly every time with this functional rundown.

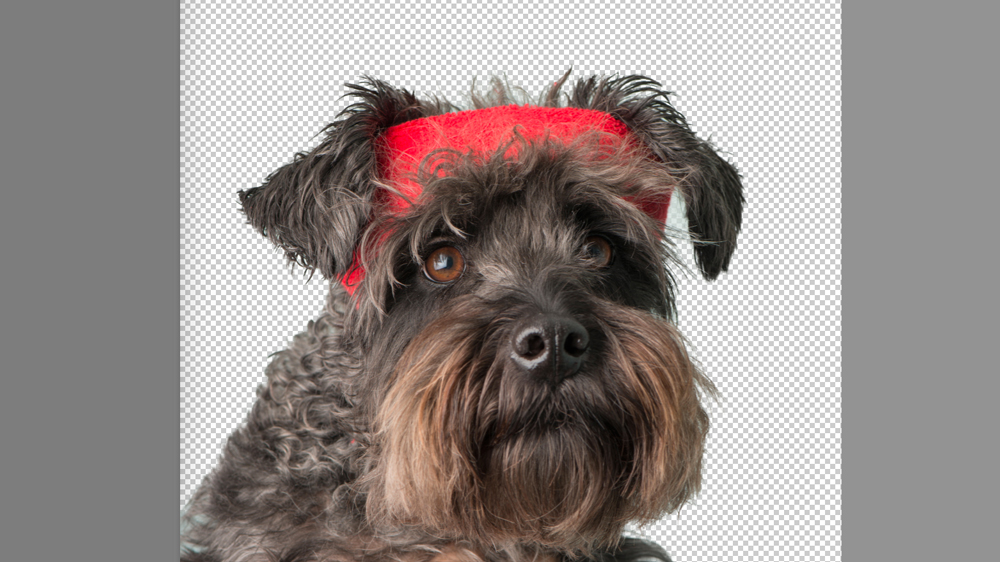
If you've ever tried to change the background of a person with frizzy hair or a horizon dotted with bushy foliage, you'll know just how intensely time consuming and nigh-on impossible this can be. Luckily the Photoshop CC Refine Edge box tool is here to make your life easier. To explain this crucial tool, we're going to quickly run through its seven main features.

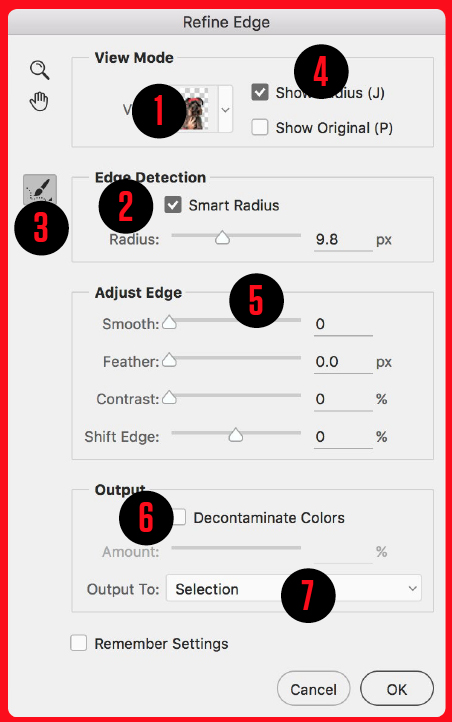
01. View mode
Start by choosing a view that shows the best contrast between subject and background. You can press F to cycle between them all, or J to toggle the Radius View on or off.
02. Edge detection
The Radius slider lets you expand the area of refinement along the edge in which the command will include or exclude pixels. Checking Smart Radius will make the radius contract or expand along the edge, depending on the object. For a quick, precise selection check Smart Radius then increase Radius until the edge improves.
03. Refine radius tool
This brush-based tool lets you hand-paint a radius, ideal for increasing the area of refinement to cover tricky areas with lots of gaps in-between, like hair or fur. Hold Alt if you need to erase parts of the radius.
04. Show radius
Check Show Radius for a useful view that shows exactly which areas of the edge are being refined by the command. You can then paint with the Refine Radius Tool to expand the area.
Make the radius wider in problem areas to direct the command’s attention there, and narrow it along simpler parts of the edge until you’re happy.
05. Adjust edge
These four sliders allow you to make basic changes to the selection. Smooth will take the edge off jagged parts of the selection for a curvier finish. Feather will soften the edge. Contrast will add definition and create a harder edge. Shift Edge allows you to push the edge inwards or outwards.
Daily design news, reviews, how-tos and more, as picked by the editors.
06. Decontaminate colours
If colours from the original background are showing in the fringes, try checking Decontaminate Colours. This fills the fringe area with colour sampled from nearby pixels. As it’s a nonreversible process, the tool sets the output to New Layer with Layer Mask.
07. Output
You can leave this as Selection to use a ‘marching ants’ selection. But we often set this to Layer Mask, which converts the selection to a mask (hiding everything else on the layer); New Layer, which copies it to a new layer; or New Layer with Layer Mask, which does both.
This article was originally published in Practical Photoshop; subscribe here.
Related articles:

James Paterson is an expert in all aspects of the photographic process, from capture to post-processing. He has contributed to numerous photography publications, including Digital Camera, Amateur Photographer, PhotoPlus and NPhoto, and his work has also appeared in Computer Arts magazine as well as several books. He is the editor of Practical Photoshop magazine, and has a well-deserved reputation as an authority on all things Photoshop-related.
