Build a custom HTML5 video player
Media players that are built in to browsers vary in design. Ian Devlin explains how to use HTML5's media API to build a custom player with a UI that stays consistent no matter what browser you use.
- Knowledge needed: Intermediate HTML, intermediate JavaScript, intermediate CSS
- Requires: Text editor, HTML5-enabled browser
- Project time: 2-3 hours
Download the source files for this HTML5 tutorial
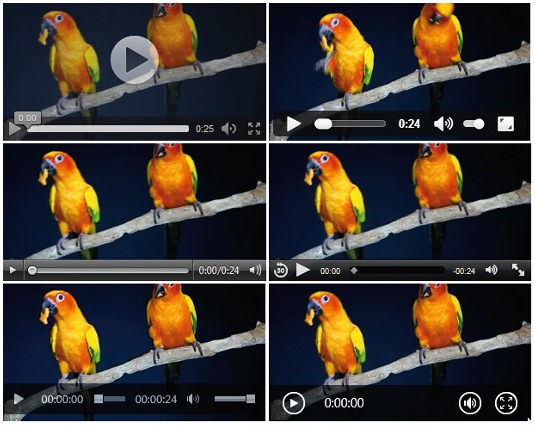
It's common knowledge that with HTML5 websites you can play audio and video files directly in the browser without the need for third-party plug-ins, via the <audio> and <video> elements. But since the specification doesn't define how the controls for audio and video files should look, each browser vendor has designed its own interface for its player, which of course provides a different user experience for each browser.
But if you want to provide a consistent interface to your media files, you can build your own player, via a combination of HTML, CSS and the HTML5 media API. If you aren't familiar with the API, I've included an introduction to some of the relevant features in the accompanying download for this tutorial.
Building the media player
To begin, all you need is your favourite HTML editor (I use Notepad++). If you wanted, you could sit down and design the player beforehand – but since I'm no designer, I won't be doing that.

First of all, we need a simple HTML page template to contain our player:
<!DOCTYPE html>
<html lang='en'>
   <head>
      <meta charset='utf-8' />
      <title>Sample HTML5 Media Player</title>
      <link href='media-player.css' rel='stylesheet' />
      <script src='media-player.js'></script>
   </head>
   <body>
      <div id='media-player'>
         <video id='media-video' controls>
            <source src='parrots.mp4' type='video/mp4'>
            <source src='parrots.webm' type='video/webm'>
         </video>
         <div id='media-controls'></div>
      </div>
   </body>
</html>
As you can see, we're including a CSS file, which will contain the styling for our media player, and a JavaScript file, which will include the code controlling the player. I won't be going into the CSS for the player in this article.
There is also a video element, defined via two initial source elements: the test video is in MP4 and WebM formats. Notice we have set the controls attribute for the video element, even though we want to define our own control set. It's better to switch off the controls via JavaScript in case the user has JavaScript disabled. The div with the id of 'media-controls' will contain exactly what it says. But first of all we need to initialise our player, which we do via JavaScript.
Daily design news, reviews, how-tos and more, as picked by the editors.
Initialisation
Moving to our JavaScript file, we’ll define a function called initialiseMediaPlayer() which we need to call when the document is loaded. To do this we add a listener for the DOMContentLoaded event:
document.addEventListener("DOMContentLoaded", function() { initialiseMediaPlayer(); }, false);In addition, we define a global variable to store a handle to our media player:
var mediaPlayer;Our initialiseMediaPlayer() function will simply obtain a handle to our media player, and then hide the controls as mentioned earlier:
function initialiseMediaPlayer() {
   mediaPlayer = document.getElementById('media-video');
   mediaPlayer.controls = false;
}
As you can see, we're using the Boolean controls attribute from the media API to hide the browser's default media player control set.
Adding the buttons
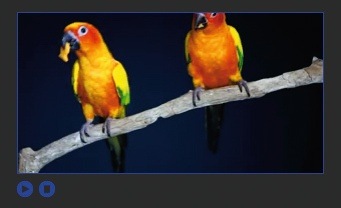
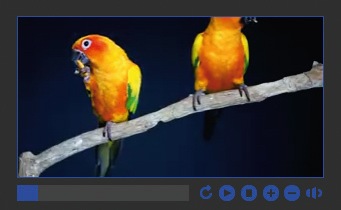
Now we're going to start adding buttons: most importantly, the play button. Since many media players use one button to alternate between play and pause functionality, we'll do the same. To define the button, add this code:
<div id='media-controls'>
   <button id='play-pause-button' class='play' title='play'
onclick='togglePlayPause();'>Play</button>
</div>
This defines a play/pause button with appropriate attributes. When it is clicked, a JavaScript function called togglePlayPause() will be called. The CSS play class defines the button as a play button with an appropriate image.
Naturally, this button won't do much until we write the togglePlayPause() function to switch the button between play and pause modes. The function itself is fairly straightforward, so we'll dive straight in and then have a closer look at it:
function togglePlayPause() {
   var btn = document.getElementById('play-pause-button');
   if (mediaPlayer.paused || mediaPlayer.ended) {
      btn.title = 'pause';
      btn.innerHTML = 'pause';
      btn.className = 'pause';
      mediaPlayer.play();
   }
   else {
      btn.title = 'play';
      btn.innerHTML = 'play';
      btn.className = 'play';
      mediaPlayer.pause();
   }
}
First, we obtain a handle to our play/pause button for use throughout the function. Then we check the media player's paused and ended attributes to see if the media has been paused or it has ended. If so, we need to play the media and display the button as a pause button, so we change its title, HTML text and class name, then call the play() method on our media player.
If the media player has not been paused or ended, we can assume that the media is playing, so we need to pause it, then set the button to be a play button. This time, we call the pause() method to pause the media itself.
Since we're going to want to change the title, innerHTML and className values of various buttons throughout the code, it makes sense to define a function that does that for us: changeButtonType(). We will use it from now on:
function changeButtonType(btn, value) {
   btn.title = value;
   btn.innerHTML = value;
   btn.className = value;
}
Another useful feature is a stop button:
<button id='stop-button' class='stop' title='stop' onclick='stopPlayer();'>Stop</button>The media API doesn't provide a specific stop method, because there's no real difference between pausing and stopping a video or audio file. Instead, our stopPlayer() function will simply pause the media and also reset the currentTime attribute to 0, which effectively moves the media back to the start position:
function stopPlayer() {
   mediaPlayer.pause();
   mediaPlayer.currentTime = 0;
}
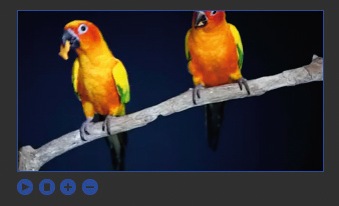
Next, we'll add separate buttons for increasing and decreasing volume:
<button id='volume-inc-button' class='volume-plus' title='increase volume'
onclick='changeVolume("+");'>Increase volume</button>
<button id='volume-dec-button' class='volume-minus' title='decrease volume'
onclick='changeVolume("-");'>Decrease volume</button>
</div>
When each button is clicked, we call the changeVolume() function with a parameter that indicates the direction (we use a plus and minus sign here):
function changeVolume(direction) {
   if (direction === '+') mediaPlayer.volume += mediaPlayer.volume == 1 ? 0 : 0.1;
   else mediaPlayer.volume -= (mediaPlayer.volume == 0 ? 0 : 0.1);
   mediaPlayer.volume = parseFloat(mediaPlayer.volume).toFixed(1);
}
This function checks the parameter and modifies the value of the media player's volume attribute. The attribute has a range between 0 and 1, so increments or decrements are made in steps of 0.1, checking for adherence to min and max values. We use parseFloat() and toFixed() to set the value to one decimal place.
In addition, we should add a mute button:
<button id='mute-button' class='mute' title='mute'
onclick='toggleMute();'>Mute</button>
And also a toggleMute() function:
function toggleMute() {
   var btn = document.getElementById('mute-button');
   if (mediaPlayer.muted) {
      changeButtonType(btn, 'mute');
      mediaPlayer.muted = false;
   }
   else {
      changeButtonType(btn, 'unmute');
      mediaPlayer.muted = true;
   }
}
This function is similar to togglePlayPause() in that we check one of the media player's attributes, in this case muted. If it is set, the button needs to become a mute button and the media player unmuted; if not, the button needs to become an unmute button and the media player muted.
Finally, we'll add a replay button to replay the media file currently loaded. We'll make this button the first one in the control set:
<button id='replay-button' class='replay' title='replay' onclick='replayMedia();'>Replay</button>The JavaScript for replayMedia() is quite straightforward:
function replayMedia() {
   resetPlayer();
   mediaPlayer.play();
}
All we need to do is reset the player and then call the play() method on our player. Our resetPlayer() method looks like this:
function resetPlayer() {
   mediaPlayer.currentTime = 0;
   changeButtonType(playPauseBtn, 'play');
}
This function resets the media's play position via the currentTime attribute and ensures that the play/pause button is set to play. We'll add to this function later.
Adding a progress bar
Media players usually provide a progress bar that indicates how much of the video has been played. For this, we're going to take advantage of the HTML5 progress element, which is supported in the latest versions of all browsers (including IE10 and Safari 6): it's a perfect candidate to display this information.
<progress id='progress-bar' min='0' max='100' value='0'>0% played</progress>To track the video as it's playing and update the progress bar, we listen out for the timeupdate event, which is raised as the media is playing. Every time this event is raised, we can update our progress bar. So within our initialiseMediaPlayer() function we need to wait and act on this event:
mediaPlayer.addEventListener('timeupdate', updateProgressBar, false);Now when the timeupdate event is raised, the updateProgressBar() function will be called, which we define as follows:
function updateProgressBar() {
   var progressBar = document.getElementById('progress-bar');
   var percentage = Math.floor((100 / mediaPlayer.duration) *
   mediaPlayer.currentTime);
   progressBar.value = percentage;
   progressBar.innerHTML = percentage + '% played';
}
Here, we get a handle to the progress bar, work out how much of the media has played using the duration and currentTime attributes, and set the progress bar value to that amount. We also update the element's HTML text for browsers that don't support the progress element.
We must also reset the progress bar in resetPlayer(), which becomes:
function resetPlayer() {
   progressBar.value = 0;
   mediaPlayer.currentTime = 0;
   changeButtonType(playPauseBtn, 'play');
}
Our player now successfully displays the progress of the media as it is played.
More on events
Although we have disabled the browser's default control set, it is still possible for a user to access the defaults: in Firefox, by right-clicking on our media player, for example. If a user controls the media this way, some of the controls within our control set will go out of sync.
We can fix this small issue by listening out for the events that are raised by the browser when a user interacts with the media player in this way, and acting accordingly.

For the play and pause buttons, all we need to do is listen for the play and pause events and change the text of the buttons as necessary:
mediaPlayer.addEventListener('play', function() {
   var btn = document.getElementById('play-pause-button');
   changeButtonType(btn, 'pause');
}, false);
mediaPlayer.addEventListener('pause', function() {
   var btn = document.getElementById('play-pause-button');
   changeButtonType(btn, play);
}, false);
Similarly, for the mute button, we need to wait for the volumechange event – which is raised when either the player's mute or volume values change – and update the mute button's text:
mediaPlayer.addEventListener('volumechange', function(e) {
   var btn = document.getElementById('mute-button');
   if (mediaPlayer.muted) changeButtonType(btn, 'unmute');
   else changeButtonType(btn, 'mute');
}, false);
Now our custom controls will remain in sync if a user chooses to use the browser's default control set rather than our lovely custom-built ones.
Implementing a playlist
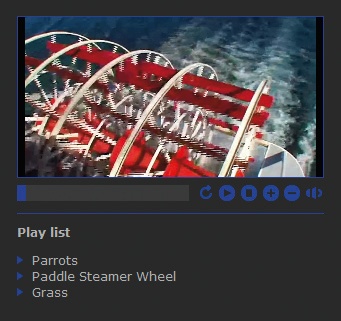
To complete our media player, we'll add a playlist. To start, we need an actual list of items that we want to add to our playlist:
<div id='media-play-list'>
<h2>Play list</h2>
<ul id='play-list'>
<li>
<span class='play-item' onclick='loadVideo("parrots.webm", "parrots.
mp4");'>Parrots</span>
</li>
<li>
<span class='play-item' onclick='loadVideo("paddle-wheel.webm",
"paddle-wheel.mp4");'>Paddle Steamer Wheel</span>
</li>
<li>
<span class='play-item' onclick='loadVideo("grass.webm", "grass.
mp4");'>Grass</span>
</li>
</ul>
</div>
As with our initial video elements, we provide our video files in both MP4 and WebM formats. When a user clicks on an item, these are passed to a loadVideo() function, which of course we must define:
function loadVideo() {
   for (var i = 0; i < arguments.length; i++) {
      var file = arguments[i].split('.');
      var ext = file[file.length - 1];
      if (canPlayVideo(ext)) {
         resetMediaPlayer();
         mediaPlayer.src = arguments[i];
         mediaPlayer.load();
         break;
      }
   }
}
First, we retrieve the function's variable arguments (we may have only provided one video source file, or perhaps more than two). For each video file, we obtain the file's extension. We need to check if the browser can actually play this type of file, so we define another function, canPlayVideo(), which will do just that:
function canPlayVideo(ext) {
   var ableToPlay = mediaPlayer.canPlayType('video/' + ext);
   if (ableToPlay == '') return false;
   else return true;
}
This function simply calls the canPlayType() method of the media API. You can find more information about this in the supporting download for the tutorial. If an empty string is returned, we assume that the browser cannot play this file; otherwise, we assume it can. If the canPlayVideo() function informs us that this particular video file can indeed be played, we need to reset the media player, which we do via the resetPlayer() function we added earlier.
Finally, we need to load the new video file into the player by setting its src, then calling the load() method on the player itself. The new video is now ready to play. You can see a demo of the end result here.
Summary
This tutorial has only covered the basics of what you can do with the media API and how you can use it to provide a custom control set for a HTML5 media player. While we have concentrated on video, the code above can be very easily adapted to support HTML5 audio instead of or as well as video.
We could also have added extra controls, such as timed displays for the media, buttons for skipping to the beginning and end of the media, or the ability to skip forward and back within the media via the progress bar. Why not explore the online documentation for the API and see if you can add these features to the player yourself?
Words: Ian Devlin
Liked this? Read these!
- Take a look at these amazing examples of HTML5
- Choose a website builder - we round up the best HTML5 tools
- Discover brilliant WordPress tutorials for designers
Getting to grips with HTML5? Tell us about it in the comments!

The Creative Bloq team is made up of a group of art and design enthusiasts, and has changed and evolved since Creative Bloq began back in 2012. The current website team consists of eight full-time members of staff: Editor Georgia Coggan, Deputy Editor Rosie Hilder, Ecommerce Editor Beren Neale, Senior News Editor Daniel Piper, Editor, Digital Art and 3D Ian Dean, Tech Reviews Editor Erlingur Einarsson, Ecommerce Writer Beth Nicholls and Staff Writer Natalie Fear, as well as a roster of freelancers from around the world. The ImagineFX magazine team also pitch in, ensuring that content from leading digital art publication ImagineFX is represented on Creative Bloq.
