How to build a game with Three.js
With its rendering power, Tony Parisi says you should consider WebGL tools for building your next game. He demonstrates how to put together a simple game.
With its awesome 3D rendering power, WebGL is worth considering to build your next game. This article explores what it takes to put together a simple game using free and open source tools for WebGL. This is by no means a complete look at WebGL game development, but it should get you thinking about how to do this on your own.
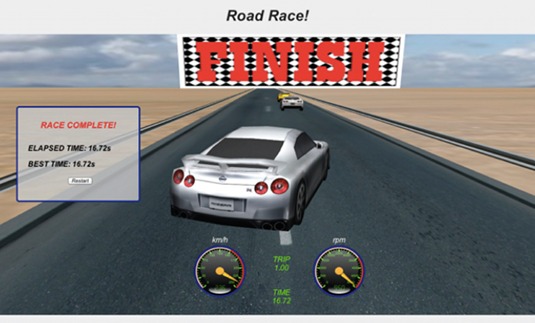
We'll take a tour of a one-level car-racing game. The rules are simple: get to the finish line as fast as you can and don't crash. Let's look at how it's done.
- Download all the files you'll need for this tutorial
Choosing a development framework
Anyone who's looked into developing a 3D application with WebGL knows that it can get complex pretty quickly. WebGL is a powerful API, providing JavaScript developers with direct access to the graphics processing unit (GPU). But this power comes at the cost of a low-level programming model. Instead of drawing shape primitives (eg rectangles and circles) with associated visual attributes like colours and gradients, you're manipulating buckets of 3D vertex data, setting render states and writing little snippets of shader code in a C-like programming language called OpenGL ES Shading Language (GLSL ES). It's hardly a recipe for practical web development - so that's why most programmers use one or more frameworks, toolkits and libraries to make their lives easier.
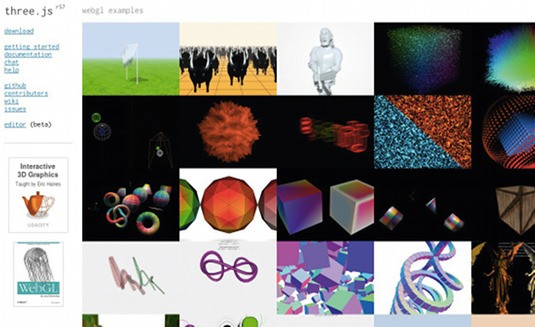
While there are several open source WebGL libraries out there, the most popular by far is Three.js. Three.js represents 3D graphics in an intuitive way, it's easy to use, has good performance and is well maintained. Likely many of the more famous WebGL demos you have seen were built using Three.js. It's a great place to start for creating simple games.
Three.js has a job to do: draw your 3D objects faithfully with high performance. It does that job well and doesn't stray far beyond its mission. For most applications, you need to add layers of code on top in order to connect Three.js to the canvas element on your web page, add DOM event handlers, dispatch events to your own objects and so on. If you have a look at the myriad samples that come with the Three.js source, you'll see that they pretty much all duplicate the same one hundred or so lines of code to do those things … and not in a particularly object-oriented fashion. If you're like me, the first thing you'll do before writing your game is to package all of that stuff into reusable classes. I've done exactly that in my library Sim.js, a simple simulation framework intended for WebGL development.
Beyond all the code that glues together Three.js with the web page, the main job of Sim.js is to implement a run loop. The run loop is called continually every time the game is ready to render the elements on the page again. During the run loop, your game will update all its objects and re-render the scene to reflect these changes, which, for example, drives animations and responds to user interaction.
Sim.App.prototype.run = function()
{
  this.update();
  this.renderer.render( this.scene, this.camera );
  var that = this;
  requestAnimationFrame(function() { that.run(); });
}
The key to the run loop is a relatively new browser feature called requestAnimationFrame(). Using this function, your code registers a callback to be called each time the browser is ready to draw the page. Where possible, your applications should use requestAnimationFrame() instead of the more traditional setTimeout(). It's been designed with rendering in mind, because the browser knows that all callbacks registered with this function are intended to be used for drawing and it can batch all the calls together with updates for the other visual elements on the page.
Daily design news, reviews, how-tos and more, as picked by the editors.
The Sim.js run loop calls the application's update() method, which the developer overrides to implement the specifics of the game. After we do the update, we render the scene. Our renderer object is a Three.js class called THREE.WebGLRenderer. We pass its render method a scene, representing the 3D objects we wish to draw, and a camera, which defines the point of view from which the scene is drawn. After we render, we register our run method to be called again next time requestAnimationFrame() is ready to draw.
With this basic framing in place, we have the skeleton for putting together our game, and the event pump that will bring it to life. Let's draw something.
Drawing graphics
Three.js provides us with high-level 3D graphics constructs, including the ability to render primitive shapes with shading and lighting attributes, to organise our scene into a hierarchy of objects, and to specify a camera point of view for rendering the scene. Our simple game uses all of these graphical elements.
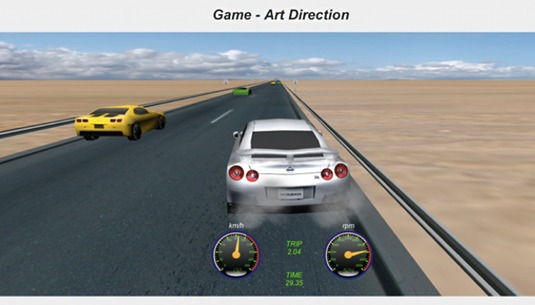
I built an art direction study during pre-production of the game. The idea of this study is to ensure that the visual elements match into a coherent style of art direction. I used bitmap images for the ground, sky and guardrails, which are created using simple planar shapes.
Here is a snippet of code used to create the game environment, implemented in a JavaScript class called Environment. The createGround() method creates the Three.js object, representing the sandy desert floor and adding it to the 3D scene:
Environment.prototype.createGround = function()
{
  var texture = null;
  // Sand texture
  if (this.textureGround)
  {
    texture =
THREE.ImageUtils.loadTexture('../images/Sand_002.jpg');
texture.wrapS = texture.wrapT = THREE.RepeatWrapping;
texture.repeat.set(10, 10);
  }
  else
  {
    texture = null;
  }

  var ground = new THREE.Mesh( new THREE.PlaneGeometry( Environment.GROUND_WIDTH,
    Environment.GROUND_LENGTH ),
    new THREE.MeshBasicMaterial(
    { color: this.textureGround ? 0xffffff : 0xaaaaaa, ambient: 0x333333, map:texture }
    )
  );
  ground.rotation.x = -Math.PI/2;
  ground.position.y = -.02 + Environment.GROUND_Y;
  this.app.scene.add( ground );
  this.ground = ground;
}
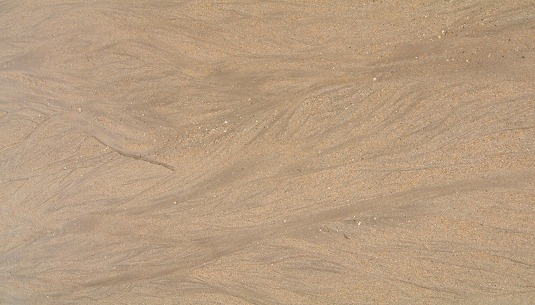
Before creating the ground, we create a texture (also known as a texture map) to be applied to it. Textures are bitmaps that are used to shade the surface of a 3D object. We do that by calling THREE.ImageUtils.loadTexture(), passing it a URL to a valid HTML image file (in PNG or JPEG format, for instance). We also set a few parameters in order to tell Three.js how to 'wrap' the texture around the object. We want the image to be repeated multiple times across the face of the geometry.
Next, we create the geometry. Three.js has a primitive shape type called THREE.PlaneGeometry, which represents a 2D rectangle in 3D space. For the geometry to be rendered, it needs to have a material, which is an object that defines surface properties such as colour and the aforementioned texture map. In this case, the material is of type THREE.MeshBasicMaterial, which renders surface properties without any lighting, using only the supplied colours and textures. We pass the previously created texture as the map parameter for the material. In order for the geometry to be placed in the scene, we need to put it together with the material into a Three.js object called a mesh, which is a type of THREE.Mesh.
Before we add our newly created mesh to the scene, we're going to do one more thing. By default, THREE.PlaneGeometry is drawn facing out of the screen toward the viewer, ie in the xy plane at z=0. We need to rotate that away from the viewer by 90 degrees by setting its rotation.x property to negative 90 degrees. In Three.js (and WebGL) degrees are specified in radians. We also want to nudge the ground down a little bit below the paved road, so we offset position.y by just a little in the negative direction.
Finally, we're ready to add the mesh as a child of our top-level scene by calling the add() method of application's scene object (this.app.scene.add()). In a similar fashion, the game creates the paved road, guardrails, sky background and finish line sign using simple planes and basic materials with textures.
Importing models from 3D packages
Now, our racing game would be pretty boring if the graphics consisted only of texture-mapped 2D planes. We need nice-looking cars and decorative elements such as road signs to add realism.
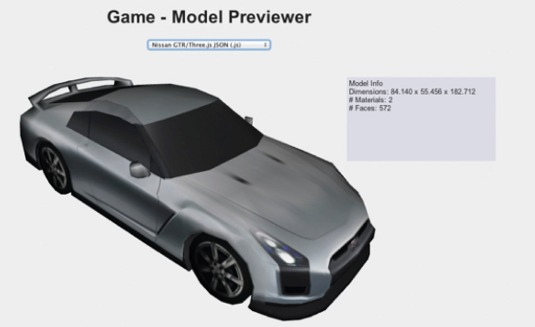
I'm not a professional 3D modeler, so I went online to see if I could find decent and affordable models to use. I'm a member of TurboSquid, a service that allows upload and download of 3D models created in a variety of professional packages. Some models on TurboSquid are free while others are relatively inexpensive. I was able to find a good model for the 'main character' car, a Nissan GTR. I also found a couple of other car types and a really great model of a route sign for California's historic Highway 66.
For this project, we use models stored in the popular Wavefront OBJ format (.obj file extension). Three.js comes with a command-line tool for converting OBJ files, written in Python. I converted each file from OBJ to the Three.js format using a command line like the following:
python <path-to-three.js>/utils/exporters/convert_obj_three.py -i <input-file>.
obj -o <output-file>.js
Once the models have been converted, we can load them into the game using THREE.JSONLoader:
var that = this;
  var loader = new THREE.JSONLoader();
  loader.load( url, function( data ) {
that.handleLoaded(data) } );
THREE.JSONLoader will call our callback function, handleLoaded(), once the JSON file has been downloaded and the 3D data parsed. handleLoaded() adds the newly loaded 3D model (returned in data) to the scene.
Animating the scene
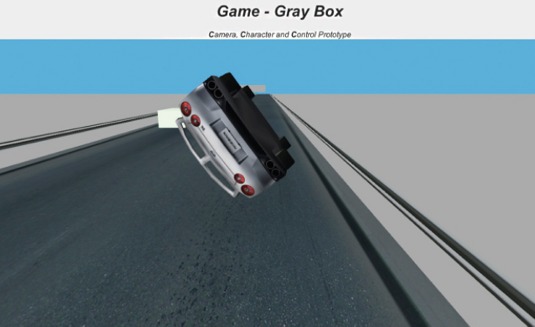
In order for our game to have life, we need to be able to animate objects in the scene. The car should bounce off the guardrail if it gets too close, and crash if it hits another car. We also want to animate a few of the elements in the environment: a slowly moving sky in the background and a fast-moving road to create the illusion of speed.
Let's take a look at how to animate the car crash behaviour. We're going to use the most basic style of animation, known as key frame animation or key framing. Key framing uses an array of keys — animation time values between zero (start of the animation) and one (end of the animation) — and values to animate, such as the object's positions and rotations. With key framing, values are only supplied at the key points, not at every frame of the animation. Values in between are calculated, or interpolated, as a linear function of the delta between any key and the subsequent key.
Three.js has key frame animation classes included with the library, but I found them a bit hard to use for simple animation tasks. I wrote my own little key frame utility.
Here is the animation code from the game's Car class.
Car.prototype.createCrashAnimation = function()
{
    this.crashAnimator = new Sim.KeyFrameAnimator;
    this.crashAnimator.init({
      interps:
        [
      { keys:Car.crashPositionKeys, values:Car.crashPositionValues,
      target:this.mesh.position },
      { keys:Car.crashRotationKeys, values:Car.crashRotationValues,
      target:this.mesh.rotation }
        ],
      loop: false,
      duration:Car.crash_animation_time
      });
      this.addChild(this.crashAnimator);
      this.crashAnimator.subscribe("complete", this, this.onCrashAnimation
      Complete);
}
Car.prototype.animateCrash = function(on)
{
      if (on)
      {
        this.crashAnimator.start();
      }
      else
      {
        this.crashAnimator.stop();
      }
}
Car.crashPositionKeys = [0, .25, .75, 1];
Car.crashPositionValues = [ { x : -1, y: 0, z : 0},
        { x: 0, y: 1, z: -1},
        { x: 1, y: 0, z: -5},
        { x : -1, y: 0, z : -2}
        ];
Car.crashRotationKeys = [0, .25, .5, .75, 1];
Car.crashRotationValues = [ { z: 0, y: 0 },
          { z: Math.PI, y: 0},
          { z: Math.PI * 2, y: 0},
          { z: Math.PI * 2, y: Math.PI},
          { z: Math.PI * 2, y: Math.PI * 2},
          ];
Car.crash_animation_time = 2000;
First, createCrashAnimation() sets up the key frame using a helper class Sim. KeyFrameAnimator by initialising interpolation keys and values for the car's position and rotation (the crashPositionKeys, crashPositionValues, crashRotationKeys and crashRotationValues properties). Each render cycle, Sim. KeyFrameAnimator updates the target object's position and rotation values, resulting in the car spinning and moving through space (the net effect being that the car tumbles through space). The animation happens over two seconds, as specified in the crash_animation_time property used in the duration parameter. The animation triggers when the game engine detects a collision between the player car and non-player car, calling Car.animateCrash().
We use a different technique to animate the moving sky and road. Ultimately, animation simply means changing the values of an object over time. Key framing is one way to do that. Another way is to simply update property values each update cycle. Each Sim.js object can have an update() method that's called every time through the application's run loop. Returning to the Environment class, we see that its update() method is used to animate the moving sky and road:
Environment.prototype.update = function()
{
  if (this.textureSky)
  {
    this.sky.material.map.offset.x += 0.00005;
  }

  if (this.app.running)
  {
    var now = Date.now();
    var deltat = now - this.curTime;
    this.curTime = now;
    dist = -deltat / 1000 * this.app.player.speed;
    this.road.material.map.offset.y += (dist * Environment.ANIMATE_
    ROAD_FACTOR);
  }

  Sim.Object.prototype.update.call(this);
}
The trick here is to continually update the offset property of the texture map. Three.js uses the offset to place the texture map on the surface of the object. Non-zero offsets in x and y moves the texture, so animating this property over time "scrolls" it left/right and up/down, respectively.
Adding behaviours and interaction
Now that we have a full scene, a decent-looking car to drive and some animated scenery to keep it interesting, it's time to write the game engine and controls. The engine is quite simple: it tests for collisions and end conditions. First, the collision test:
RacingGame.prototype.testCollision = function()
{
  var playerpos = this.player.object3D.position;
  if (playerpos.x > (Environment.ROAD_WIDTH / 2 - (Car.CAR_
  WIDTH/2)))
  {
  this.player.bounce();
  this.player.object3D.position.x -= 1;
  }

  if (playerpos.x < -(Environment.ROAD_WIDTH / 2 - (Car.CAR_WIDTH/2)))
  {
    this.player.bounce();
    this.player.object3D.position.x += 1;
  }
  var i, len = this.cars.length;
  for (i = 0; i < len; i++)
  {
    var carpos = this.cars[i].object3D.position;
    var dist = playerpos.distanceTo(carpos);
    if (dist < RacingGame.COLLIDE_RADIUS)
    {
      this.crash(this.cars[i]);
      break;
    }
  }
}
For speed, the engine uses a simple 2D calculation to test for collision with either of the guardrails. We check the x-axis (horizontal) position of the car against the edges of the road. Testing for collision with another car is more involved, so we need to know if the player car is within a certain distance. The Three.js Vector3 object provides a distanceTo() method that calculates it for us.
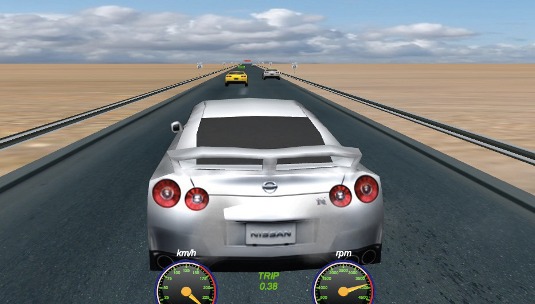
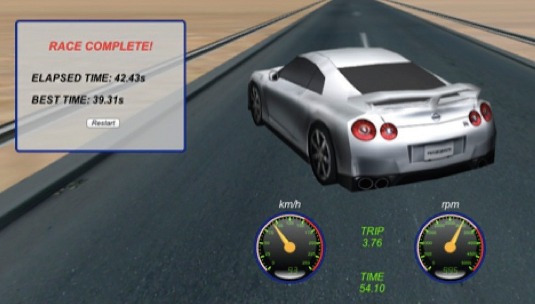
If a collision is detected, we trigger the appropriate response: a bounce off the guardrail, or finishing the game with a crash. Now, we test for end conditions. We've either already crashed the player car with another car, or we got to the finish line and won. See methods crash() and finishGame() below:
RacingGame.prototype.crash = function(car)
{
  this.player.crash();
  car.crash();
  this.running = false;
  this.state = RacingGame.STATE_CRASHED;
  this.showResults();
}

RacingGame.prototype.finishGame = function()
{
  this.running = false;
  this.player.stop();
  var i, len = this.cars.length;
  for (i = 0; i < len; i++)
  {
    this.cars[i].stop();
  }
  this.state = RacingGame.STATE_COMPLETE;
  this.showResults();
}
Updating the camera
Something we touched on briefly earlier, but haven't yet covered in detail is the camera. Three.js provides us with camera objects that define points of view within the 3D scene. In this game, we are using a third person point of view, that is, the camera is always looking over the 'shoulder' of our 'character', which in this case is the car. As the car moves in response to the keyboard, we need to maintain the camera view relative to it. Our player object's updateCamera() method takes care of this:
Player.prototype.updateCamera = function()
{
  var camerapos = new THREE.Vector3(Player.CAMERA_OFFSET_X,
    Player.CAMERA_OFFSET_Y, Player.CAMERA_OFFSET_Z);
  camerapos.addSelf(this.object3D.position);
  this.camera.position.copy(camerapos);
this.camera.lookAt(this.object3D.position);
Just like a graphical object in the scene, the Three.js camera has position and rotation properties that can be manipulated. In updateCamera(), we create a new THREE.Vector3 object initialised with an offset value. We then add that value to the player car's position and copy the sum into the camera's own position property, moving the camera to that new position. But we're not done. We want to make sure the camera is looking in the right place. We call a special method of the camera object, lookAt(), that turns the camera to face the object's position. As a result, the camera is always at a fixed distance and orientation relative to the player car.
Just the beginning
In building this simple game, we've only scratched the surface of game development with WebGL. Still, we covered several essential topics: the run loop; drawing graphics with Three.js; importing models from 3D packages; animating the scene with simple key frames and procedural texture updates; and creating behaviours and interactions including collisions and camera movement. These topics represent the tip of a very big iceberg. I strongly encourage you to explore what lies beneath. Happy coding!
Words: Tony Parisi
This article originally appeared in net magazine issue 241.
Liked this? Read these!
- How to create an app: try these great tutorials
- Discover what's next for Augmented Reality
- Check out these excellent JavaScript examples
Got a question? Ask away in the comments!

The Creative Bloq team is made up of a group of art and design enthusiasts, and has changed and evolved since Creative Bloq began back in 2012. The current website team consists of eight full-time members of staff: Editor Georgia Coggan, Deputy Editor Rosie Hilder, Ecommerce Editor Beren Neale, Senior News Editor Daniel Piper, Editor, Digital Art and 3D Ian Dean, Tech Reviews Editor Erlingur Einarsson, Ecommerce Writer Beth Nicholls and Staff Writer Natalie Fear, as well as a roster of freelancers from around the world. The ImagineFX magazine team also pitch in, ensuring that content from leading digital art publication ImagineFX is represented on Creative Bloq.
