Smartphone photography has transformed recently because of leaps forward in technology. To make sure you make the most of all phone photography can be, it's crucial you utilise the settings on your phone correctly. In this post, we lay out six tips to enable you to harness the power within your smartphone and elevate your photos.
Though smartphones may never rival a dedicated DSLR or mirrorless camera such as those used by serious photographers, they can still capture some impressive images (our best camera phones list has those that take the best snaps). You can even buy some pretty good detachable lenses and filters, which complement the phone optics. Or for times when you need something more heavy-duty, we've also found the best cameras for creatives. For more tips, see our photography cheat sheet, or if you have an iPhone Pro, see our guide to the best iPhone Pro camera tips.
- Store your snaps with one of the best cloud storage solutions
Routinely, smartphone photography takes place in less than ideal lighting conditions, and users rarely stray from the automatic exposure and focusing the device is preset with. This means that phone photography is, more often than not, lacklustre – leaving users frustrated and confused. Simply taking a few steps to learn about your tech and keeping one eye on the lighting can avoid some of the common problems associated with smartphone photography.
Read on for some advice that you can use every time you pull the phone from your pocket, wherever you are, to make the most of that sophisticated computer-powered camera you almost always carry with you.
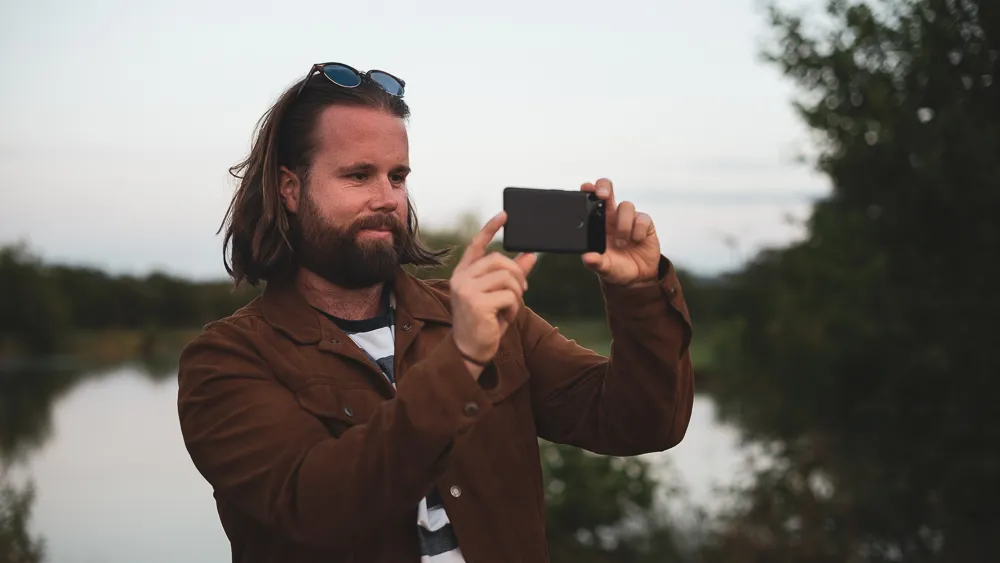
01. Take portraits in shade

The best way to immediately improve your portraits and selfies is to move into shade. Stand under the shadow of a tree or building and notice the soft, diffused light that wraps around the face. This is the quality of light that you should seek most often to complement features.
If outside, shoot towards open shade by placing your subject at the very edge of the shaded area. If posing inside, place the window to one side of you as you shoot the subject. This will provide similarly diffused light as open shade, but with more directionality. Look for a triangle of light on the subject’s cheek that’s farthest away from the window – this is called Rembrandt lighting, named after the painterly master himself.
02. Tap to meter

Smartphones struggle to expose dark, dimly-lit subjects against bright backgrounds (think shaded landscapes in midday sun). There’s no smartphone hardware out there (yet) that can cope with such a wide dynamic range, so you must tell the device where to meter the light from in order to get a clear shot.
It can be useful to manually override the automatic exposure settings by tapping on the dark subject to expose the shadows. By telling the device where to meter from, you can make the image brighter and thereby regain detail in the darker areas of the frame.
The reverse is true for shooting subjects brighter than their surroundings. When faced with bright scenes, the device can overexpose the image, producing clipping in the highlights – this means the camera reads the area as completely white, and you'll be unable to restore detail during the editing process. If you want to capture detail in the brightest sections of your scene, tap on the bright section to deliberately underexpose your photograph.
You may even want to switch on HDR mode to stop the bright sky from clipping and bleaching out. If you're going to do this, hold the camera still during exposure or it can all get a bit blurry.
03. Know your camera shortcut

The ability to react to a fleeting moment is half the battle when it comes to snapping a great shot. To take photos quickly you should learn your smartphone’s shortcut for accessing the camera.
For some Android phones, such as the Google Pixel 3, this means double-tapping the power button, whereas iPhones might be a quick swipe-up from the corner of the screen or hard press of the camera icon. If you’re shooting with an iPhone X, swipe down the Control Centre, then press and hold the camera icon to display multiple camera options such as Take Selfie or Record Video.
Whatever smartphone you have, make sure you know how to get your camera up quickly, so you can capture the moment.
04. Use portrait mode

Smartphones have wide-angle lenses that inherently produce a long depth of field – meaning the images are mostly going to be pin-sharp from foreground to background. This might be good for a huge vista, but it's not so good for isolating your subjects against the background, and can produce unflattering portraits of even the most photogenic of us.
Shooting on a wide aperture, a longer focal length lens (such as an 85mm f/1.4) provides a flattering shallow depth of field. Since in-built smartphone lenses don’t do this naturally, the phone’s software works hard to apply a filter to mimic this. This filter is normally called Portrait mode.
Engage this mode and you can expect to generate an effect where the environment behind your subject is nicely blurred. But beware busy and cluttered backgrounds, as the filter (try as it might) sometimes can’t keep up. Although named Portrait mode, this function works well on any subject that benefits from a touch of isolation from the background.
05. Shoot in Raw

A Raw file is a compressed lossless image file format that saves much more image data than a typical lossy JPEG. More data equals more editing flexibility. That means it’s far easier to adjust exposure levels, check white balance and manipulate colours when editing in apps like Snapseed, VCSO and Halide (take a look at our guide to the best photo editing apps).
However, that comes at the cost of a bigger file, which if you’re tight for space on your handset, you might want to avoid for everyday use. Engage Raw shooting mode when you’re aiming for better quality editing controls or if you want to print your photos from that once-in-a-lifetime holiday.
For photo editing in double-quick time, explore our roundup of the best free Photoshop actions.
06. Clean the lens

It might sound obvious, but when was the last time you turned your phone over and gave the lens a good clean? A simple wipe with your top will do at a pinch when you’re out and about, but it’s good to use lens cleaning fluid or glasses wipes every so often to lift residual dirt and debris. Natural oils from your hands build up on the lens during use, so they attract dirt and debris. This combination of dirt and oil can produce unsightly flaring, and at worst make your photos appear soft. Give the lens a good clean every few weeks to eliminate flare, improve contrast, and take sharper shots.
Read more:
- Portrait photography: How to take perfect portraits
- Street photography: Expert tips
- Best camera for beginners: Start your photography journey out with the right kit

