mO2 plugin: What it is and how to use it
Use the mO2 plugin to enjoy realtime rendering inside Final Cut Pro and Apple Motion.

mO2 is a real-time rendering system from Polish outfit, MotionVFX, that brings broadcast quality 3D animation directly within Final Cut Pro X and Apple Motion. It’s very much like Element3D for Adobe After Effects, but leverages the power of Apple’s Metal graphics system and is Mac only.
The plugin is ideal if you need a fast turnaround for titles, stings, lower thirds, advertisements, logos, product shots or even a quick previz for a larger project. It outputs at broadcast quality, and can easily be incorporated with other elements, either as a separate composite or as a layer within the same project.
mO2 comes bundled with a huge range of objects, materials, templates and behaviours to get you started, but you can also extrude text and SVG files, and import your own model files. Unlike Element 3D – which has received little love over the last few of years – mO2 is continually supported with new templates and model packs, including several that are free. (If you need some 3D inspiration, see our roundup of the best 3D art, or check out our post on the best 3D modelling software.)
Article continues belowWhat is mO2?
mO2 is a plugin that integrates seamlessly inside Final Cut Pro X and Motion. It’s installed using MotionVFX’s dedicated mInstaller system, and is found under the Generators menu in both apps.
You simply add it to a project, at which point it creates an empty scene with a default light, camera and backdrop, ready for you to add your own text, logo or objects. It acts just like a mini 3D app, enabling you to move and rotate scene elements, change the lighting, add materials and tweak the overall look. It works in real-time, negating the need for lengthy renders – in most cases it’ll export to a movie file in a few seconds.
The plugin supports shadows, planar reflections, motion blur, depth of field, ambient occlusion, and has a host of post-processing effects such as bloom, lens dirt, chromatic aberration and vignetting. mO2 materials are based on PBR (physically based rendering), so with the right roughness/metallic texture maps, the results look suitably authentic. It also does transparent refractive materials too, for realistic glass and liquids.
The most recent updates added alpha channel support and an opacity blend mode, enabling you to comp mO2 objects on top of background footage and add video elements within the scene. And because mO2 resides as a layer in FCP and Motion, you can always apply other effects on top, right inside the host app.
Sign up to Creative Bloq's daily newsletter, which brings you the latest news and inspiration from the worlds of art, design and technology.
Elements within mO2 can be animated using keyframes and behaviours, and it also has Instancers to duplicate your objects, creating complex sequences of swirling, spinning, scaling items.
Why creatives need mO2

Everyone is after 3D content these days, but not everyone has the time or inclination to learn a 3D app like Maya, 3ds Max or Cinema 4D (though see our Maya tutorials if you want to give it a go). You may only need the occasional 3D logo, for compositing with other elements, while for some work – like product shots and packaging – a dedicated 3D app is complete overkill.
While mO2 isn’t the complete solution to every 3D project, it only costs £155, and with Final Cut Pro X at £299 and Motion at a meagre £49, it’s a very affordable way of adding 3D to your pipeline.
If you’ve moved away from After Effects due to Adobe’s Creative Cloud subscription system, mO2 will ably replace Element 3D for your realtime 3D needs. Also, if your studio uses Cinema 4D for motion graphics, the plugin will happily load native C4D scene files, complete with keyframed animations, basic materials and MoGraph cloner objects, providing a fast route for final output.
However there are some serious caveats: object deformations aren’t supported, so you’re limited to choreographing solid models, rather than things that stretch, squeeze and bend (although you can add some rudimentary deformation effects with MotionVFX’s other plugin, mPuppet). But that’s not to sell the plugin short: a quick look at the examples on the mO2 webpage shows just the kind of final quality you can expect – and it’s pretty damn good.
How to use mO2
01. Get setup with mO2

We’re using Motion, but FCPX is an almost identical process. With a new project open, you add mO2 from the Generators menu, or open an mO2 template from the Project Browser.
Click the Inspector tab to see mO2’s menu, and change the Transform icon to Adjust Item – this brings up the UI, with navigation tools, camera menu, post processes and so on. There’s no direct camera movement in the main canvas, so you have to use the pan, rotate and dolly tools – if you hold Shift, these operate with greater emphasis.
To add an object, click on the Add icon, which enables you to load an object from the library, add some 3D text, extrude an SVG file or create an Instancer, light, null or camera. To add your own model, go Model > Import Model and select an OBJ, FBX, 3DS, glTF or C4D file. This is then stored in mO2’s own library until you delete it.
All being well the model will be centred in the canvas, although you may have to switch cameras depending on how the imported scene was set up. You can interact directly with models, either by clicking on them in the viewport, or selecting them in the mO2 Inspector menu. A 3D gizmo lets you move, scale and rotate them (the rotate function is activated by clicking the tiny circles to bring up the P, B and B orbits), all of which can be keyframed.
02. Make adjustments in mO2


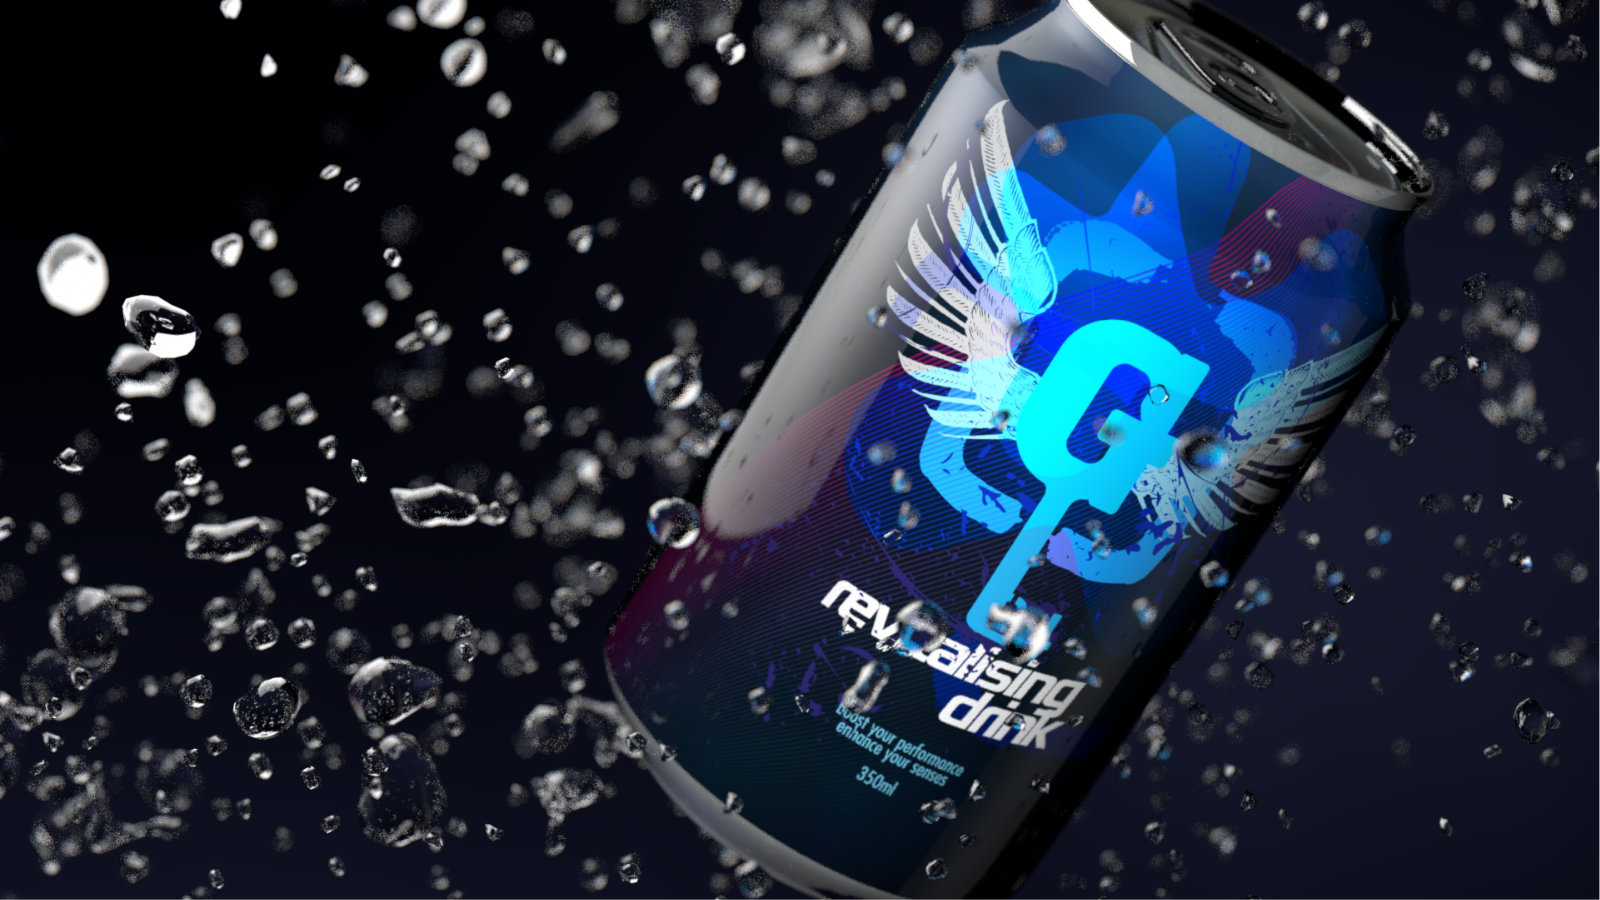
For this example, we chose the Soda Can project bundled in Cinema 4D’s Content Browser. It features a detailed can model, with water droplets and depth of field, and a single frame at 1920x1080 takes over 90 seconds to render (see image above)
After some minor tweaks to the can model, we opened the scene in mO2, and made adjustments to try and match the C4D version. Things like white panels for reflections don’t work, so we added lights, and the can needed re-texturing, which was a relatively simple task of applying the texture map using Cylindrical mapping. We then added the built-in Aluminium material to the top and bottom, and toned down the Roughness a bit.
To change the look of the scene (especially the metal and water droplets), you can switch to a different Environment, under Scene Settings. This alters the ambient lighting and reflections.
It’s then just a matter of turning on depth of field and tweaking the render settings to suit. We added a simple camera move (the C4D project is static) and to preview this you either hit Play (Space bar) which plays back as fast as your GPU can handle it, or do a RAM preview (cmd + R), for a full-res, full-speed playback.
To export as a movie, you go File > Share > Export Movie – a process which on our machine took about three seconds for 120 frames at 1920 x 1080. With render time frankly a non-issue, you can expend more effort on tweaking the look of the scene, adding additional animation and changing the lighting, backdrop gradient, post-process effects and so on. Every single tweak is shown in realtime, so experimenting is completely risk-free and painless.
03. Make final tweaks

To finish off the scene, it’s a simple matter of adding another Group (Motion’s equivalent of After Effects comps), and applying effects, like light glints, colour LUTs, additional elements… whatever you need.
mO2 isn’t a magic bullet: it still takes a bit of time and patience to set up scenes and get them looking how you like. But once you get used to its way of working, the sheer speed of achieving a good-looking end result becomes very addictive!
Read more:

Steve has been interested in CG for many years. He was a regular contributor to 3D World and edited the magazine for two years, and has worked for other magazines including Edge, T3, Official UK PlayStation magazine, Laptop magazine and Windows Visa: The Official Magazine. For Creative Bloq, he mainly contributes tutorials and reviews creative kit.
