How to create an animated web banner in Photoshop
We demonstrate how to quickly create an animated web banner.
Sign up to Creative Bloq's daily newsletter, which brings you the latest news and inspiration from the worlds of art, design and technology.
You are now subscribed
Your newsletter sign-up was successful
Want to add more newsletters?
Creating web banners isn’t the most glamorous of jobs in the world but it is something that every designer will be required to do at some point in their career, probably many times over. Although there are no hard and fast rules when it comes to creating web banners, it goes without saying that the type must be big and the message punchy.
As we’re animating this as well, I’d suggest no more than three slides or animated elements as people will simply not watch it. Flashing elements can also help to grab the attention of the viewer.

Over the next few steps I’ll demonstrate how to setup and create a simple animated web banner that once mastered will be a breeze to apply to any new job in the future.
Article continues below01. Setup your document
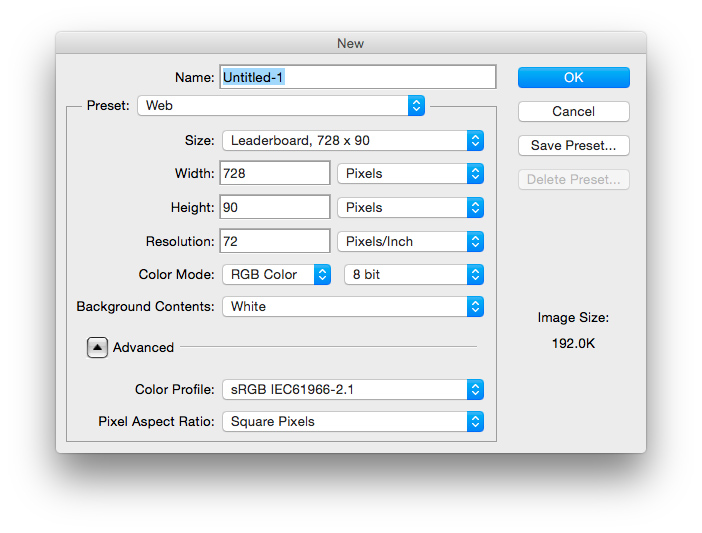
Launch Photoshop, navigate to file > new and select Web from the Preset drop-down menu. From the size drop-down select leaderboard or if your dimensions vary then choose custom and manually enter the pixel dimensions.
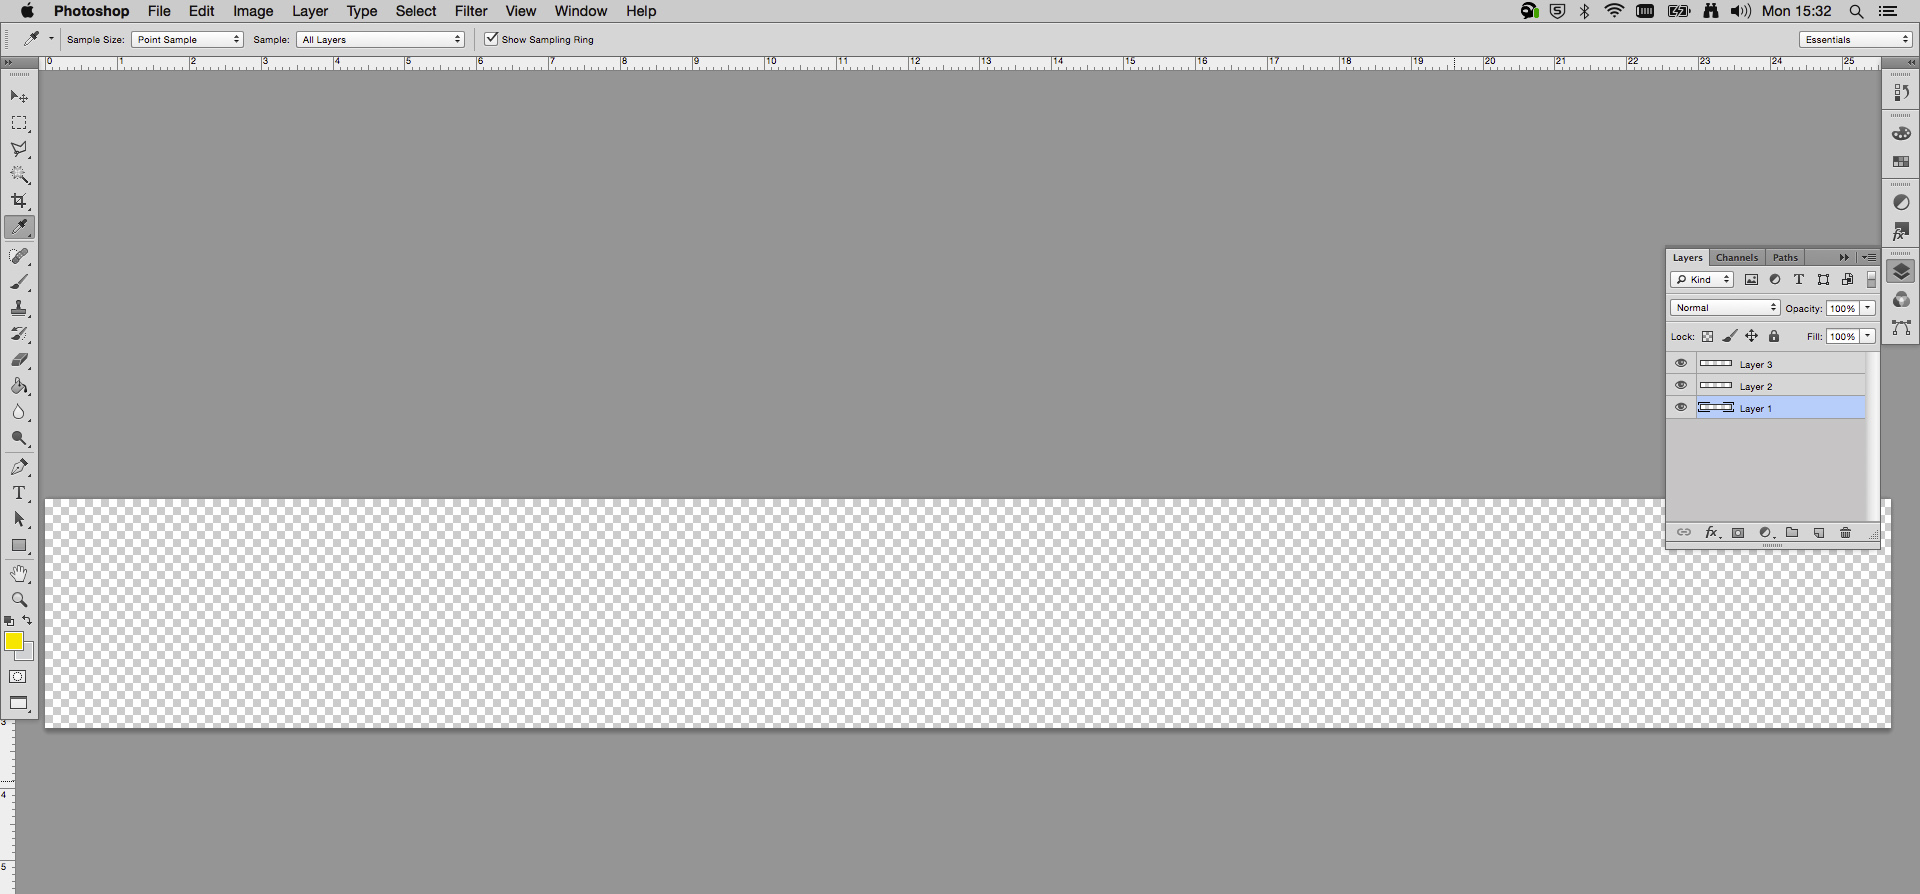
With snap to document bounds selected from the view menu, drag guides to snap to all bounds of the document.
02. Adding graphic elements
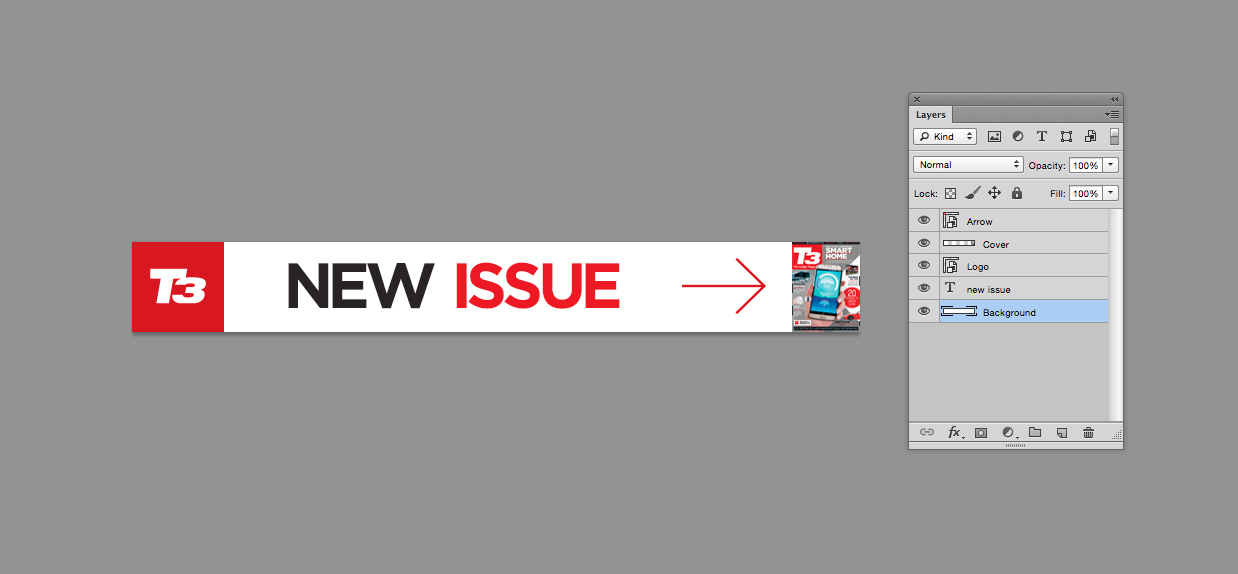
Now to place our essential design elements. In the above example I pasted in the T3 square logo and as I’d created the guides could re-size it and make it snap to the document bounds easily. Paste in an arrow graphic that we’ll use later and using the type tool set your message for the first slide. Paste in any images that you need and then make sure that you name up all your layers appropriately.
03. Creating the secondary slides
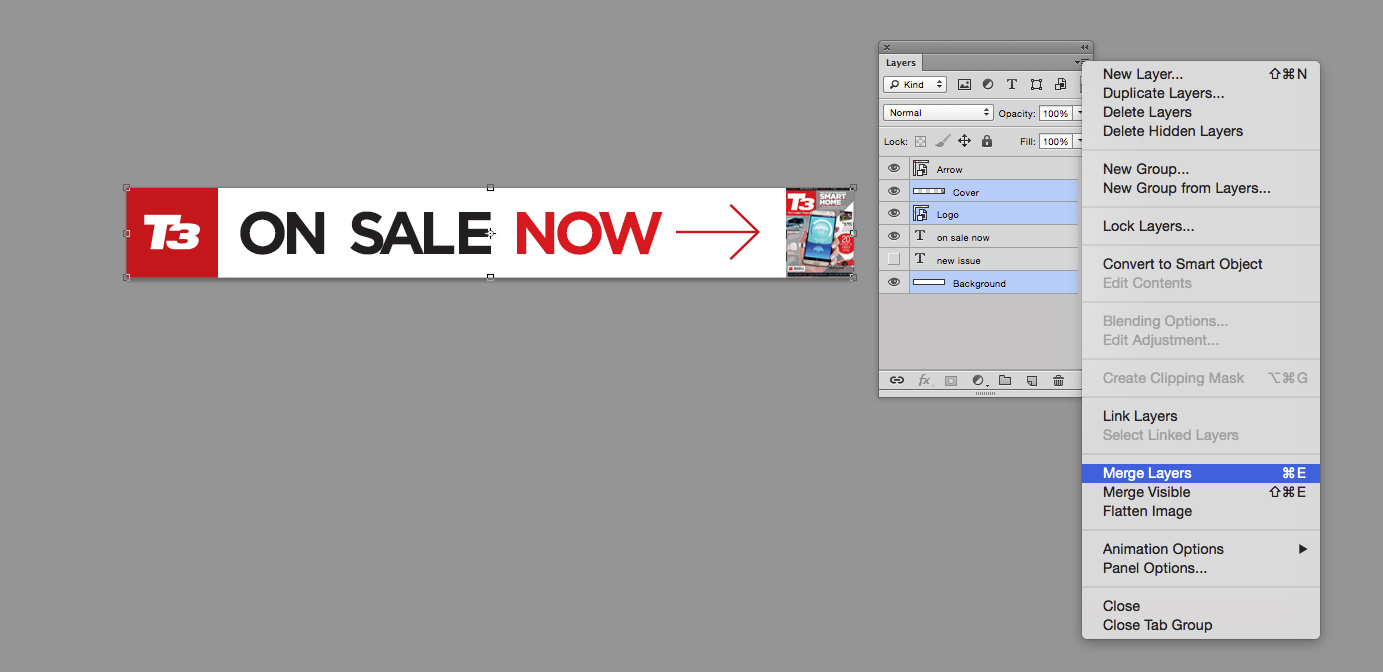
Now simply duplicate your type layer, turn off the type layer beneath and type in the next stage of the message, in this case “ON SALE NOW”. Once you’re happy that you have all the elements in place, merge down as many of the layers as possible. As the background, the logo and the cover image will remain static we can merge this down leaving us with four layers, the background, the type layers and the arrow layer.
Sign up to Creative Bloq's daily newsletter, which brings you the latest news and inspiration from the worlds of art, design and technology.
04. Create the frame animation

Now simply click on the timeline tab at the bottom of the window or navigate to window > Timeline. Click on the small arrow in the middle of the window and select “Create frame animation” and then click the button. Now turn off all the layers apart from the background layer and the first message layer. Apply a one second delay to the frame from the drop down menu on the small animation frame. Now simply click hit the “duplicate selected frames” button in the timeline but turn off the first message and turn on the second message. Repeat this process for all of the layers, finishing with the arrow layer.
05. Make the arrow flash and adjust timings
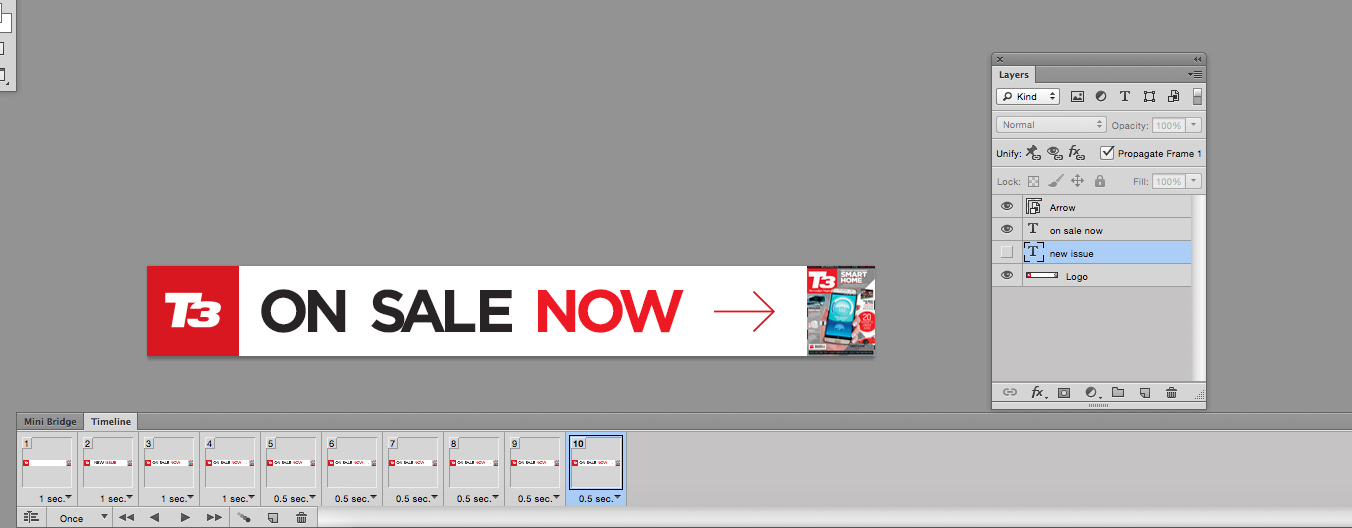
To make the arrow flash simply hit “Duplicate selected frames” from the timeline and turn the arrow off. Adjust the time to 0.5 seconds and repeat the process turning the arrow on and off in the layers panel so that it appears as if it’s flashing. Finally you may want to adjust some of the timings until you’re completely happy. People have very short attention spans so there’s no point in being slow with the frame rate, but they do still need to be able to read it.
06. Save for web and devices
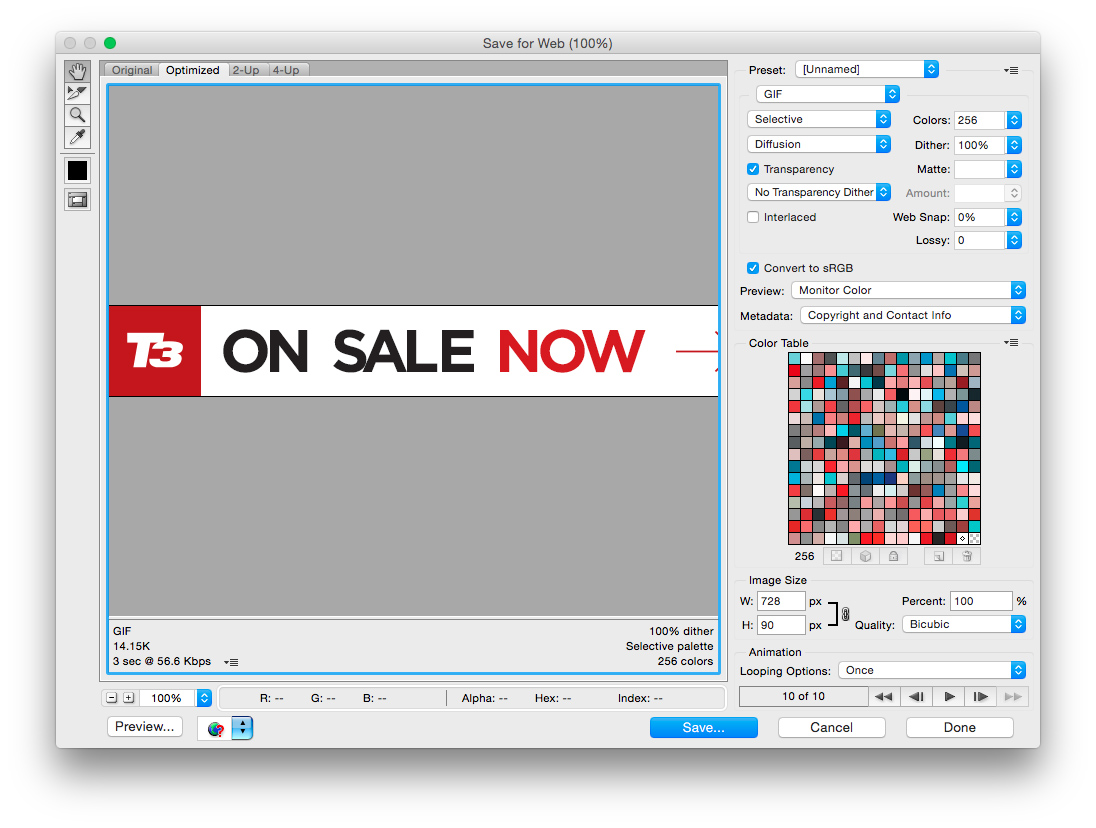
Finally navigate to “Save for web” and select GIF from the drop-down menu. You can also reduce the quality slightly here in order to get the file size down. Once you’re satisfied save out the gif and then simply drag it into a web browser to test it out.
Luke is a creative director, visual designer and digital artist, who works at THG Studios in Manchester as creative director of beauty. He previously worked for Future Publishing, where he was art editor of leading magazines such as Guitarist, T3 and Computer Arts.
