Create a repeating pattern in Photoshop
Discover how to create a simple black and yellow 'warning' pattern that can fill an area as big or small as you like.
Sign up to Creative Bloq's daily newsletter, which brings you the latest news and inspiration from the worlds of art, design and technology.
You are now subscribed
Your newsletter sign-up was successful
Want to add more newsletters?
You can create all manner of images and effects in Photoshop CC, and there are plenty of Photoshop tutorials, like this one, to help you do just that.
Here we'll show you how to create a single tile for a repeating pattern, then you can fill as big or as small an area as you like with it...
- Download the example PSD here.
01. Create a document for the tile
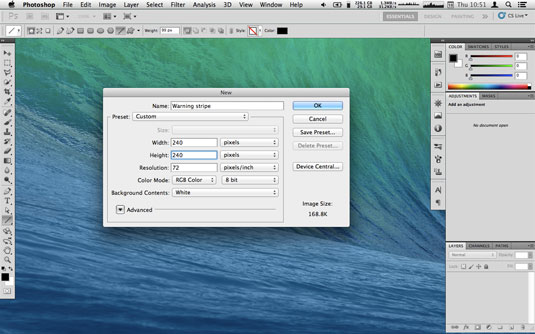
Pick how thick you want each stripe to be; the only rule is that whatever you number you pick has to be divisible by three. Now you need to do some maths.
Article continues belowOn a calculator, divide 8 by 3 (you should get 2.66666667), then multiply this by whatever number you've picked for the thickness of the stripe and create a Photoshop document with this figure as the dimension of each edge.
So for a 90px stripe, you'd create a document 240x240px. (Bonus tip: you can do maths in a Mac's Spotlight search field. Click the magnifying glass in the menu bar and then enter, in this example, '90*(8/3)' and you'll get the answer 240.)
02. Draw the first stripe
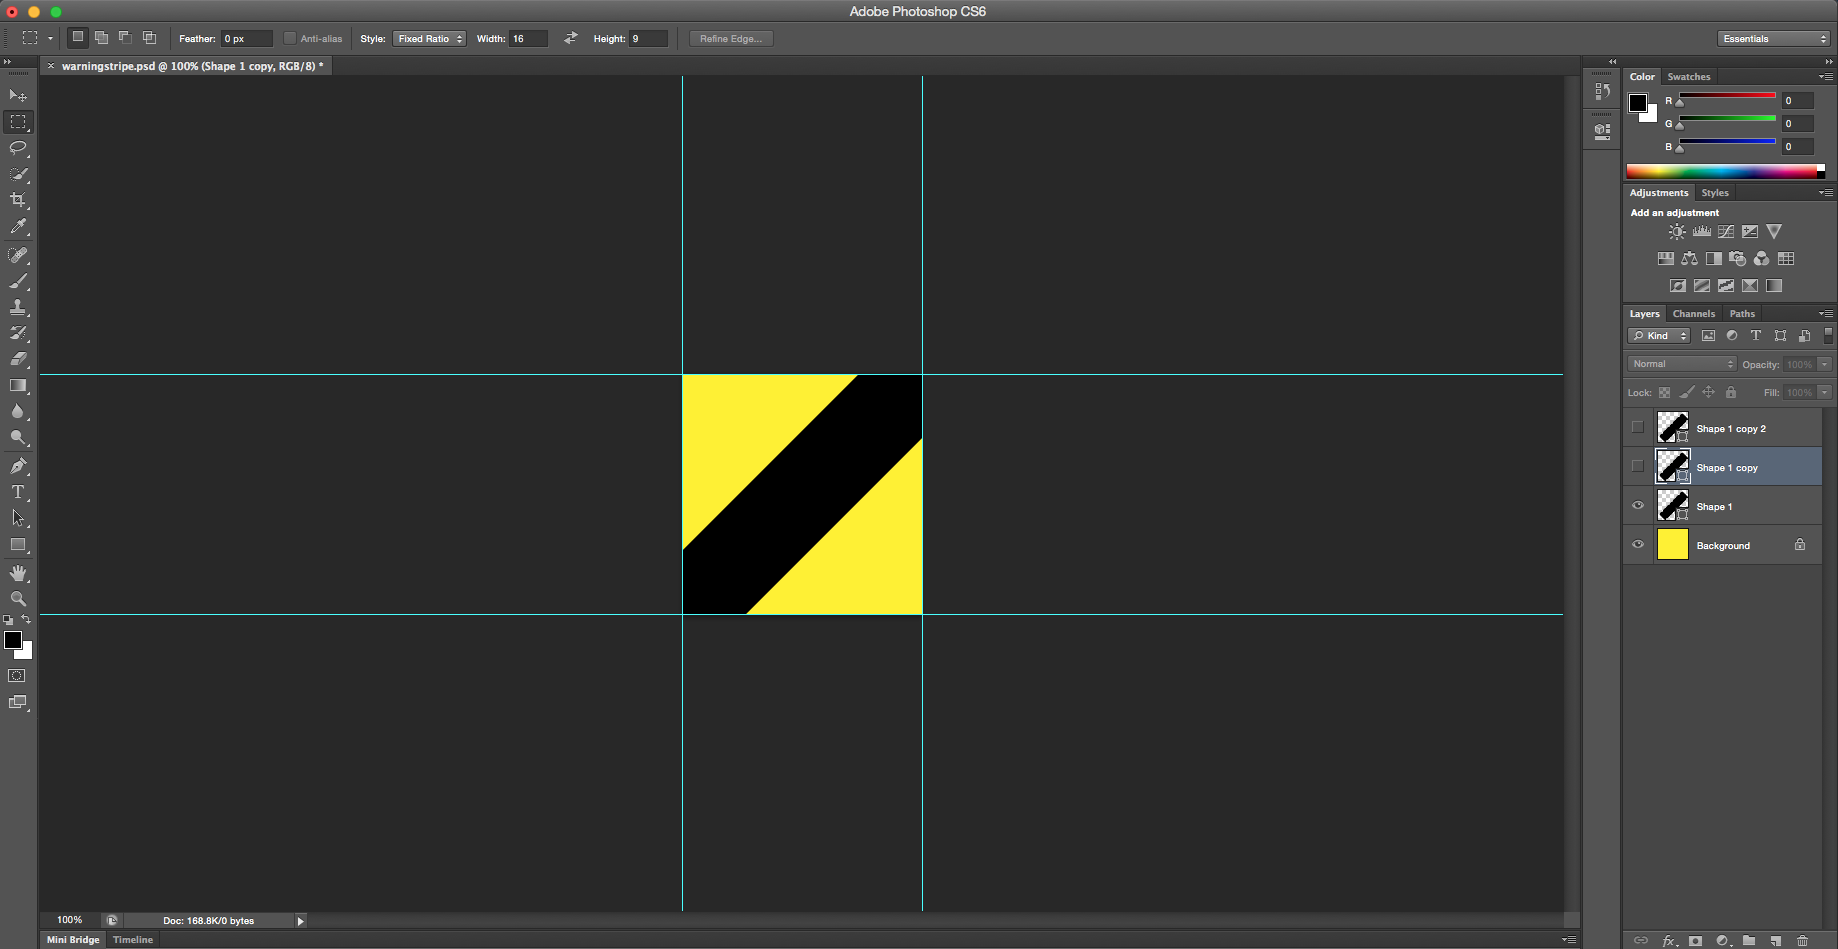
Drag a guide from the ruler (cmd+R if it's not showing) and let it snap to each edge of the document (check your options in View > Snap To if they don't click to edges as if magnetically).
Fill the background with yellow and then select the line tool. Make sure your foreground colour is black, enter the thickness of your stripe into the Weight field at the top of the screen (90px in our example) and draw a line from one corner to the other.
Sign up to Creative Bloq's daily newsletter, which brings you the latest news and inspiration from the worlds of art, design and technology.
03. Create the other stripes
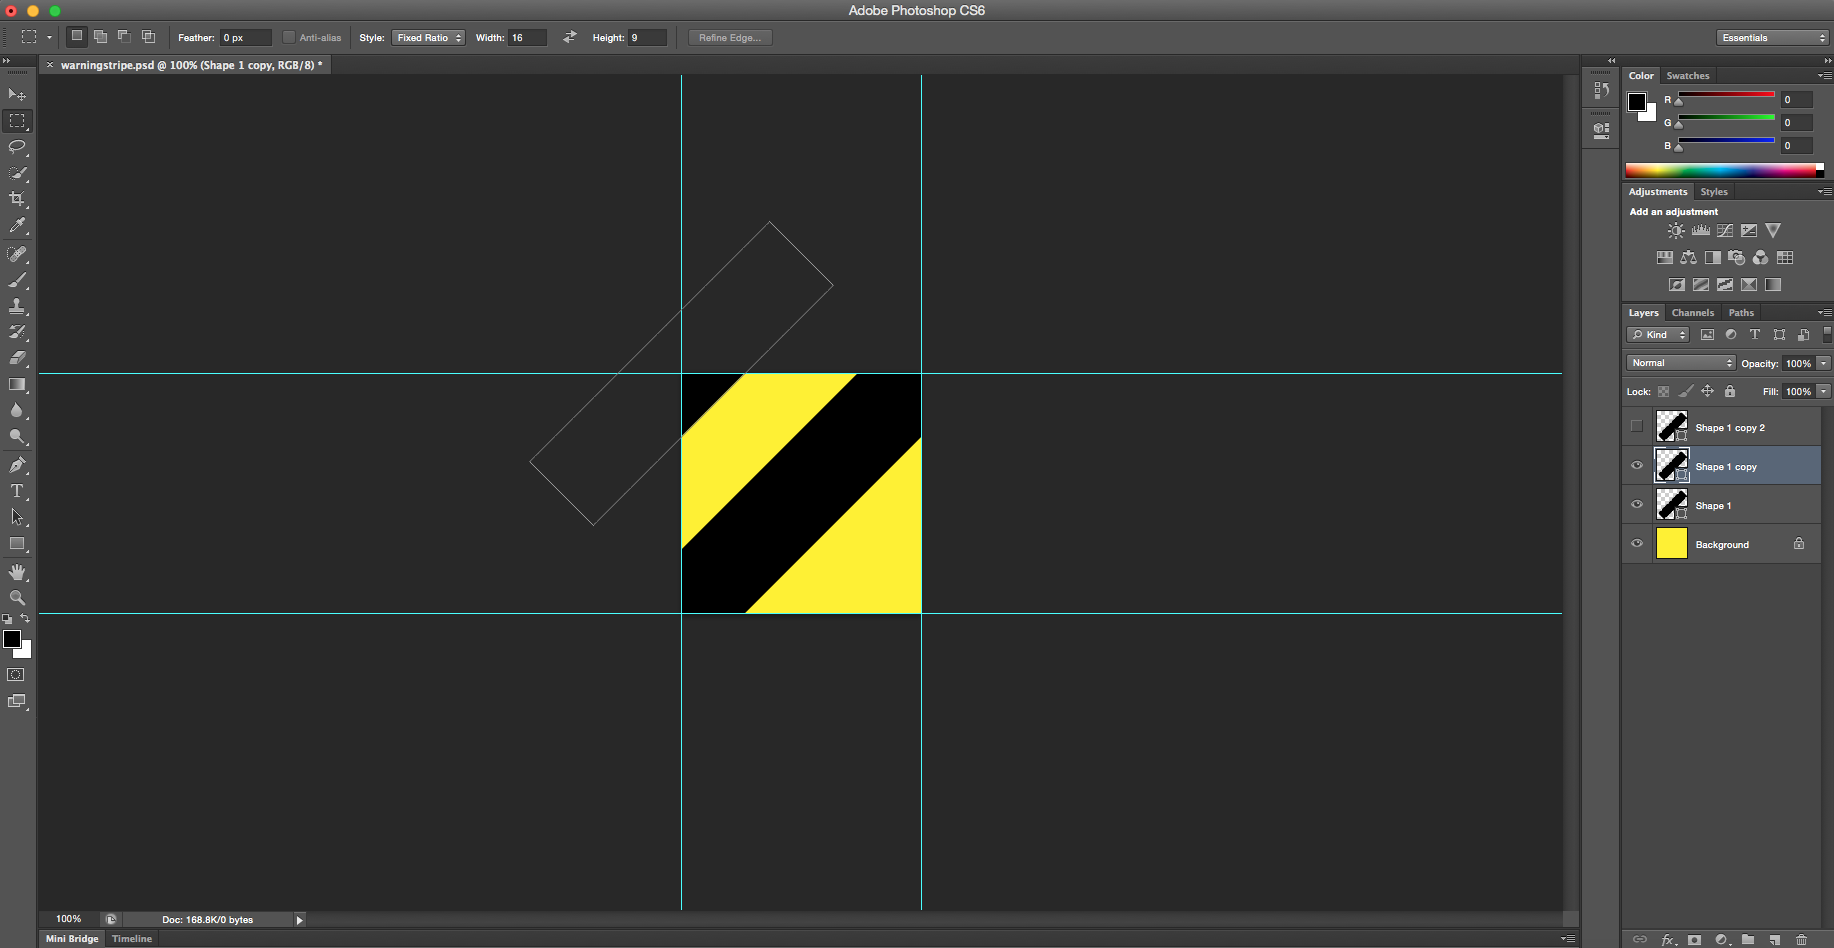
Duplicate your stripe layer (an easy way to do this is to drag it to the new layer icon – a piece of paper with an upturned corner – at the bottom of the layer palette) then hit cmd+T to enter Free Transform mode.
Note that a crosshair icon appears in the middle of the layer; drag the duplicated stripe (not by grabbing the crosshair) so that this crosshair snaps to the top left corner of the document.
Hit Return to confirm the move. Duplicate the stripe again and drag this one to the bottom right in the same way. (Save this now as a .psd if you think you might want to change it later.)
04. Define the stripes as a pattern
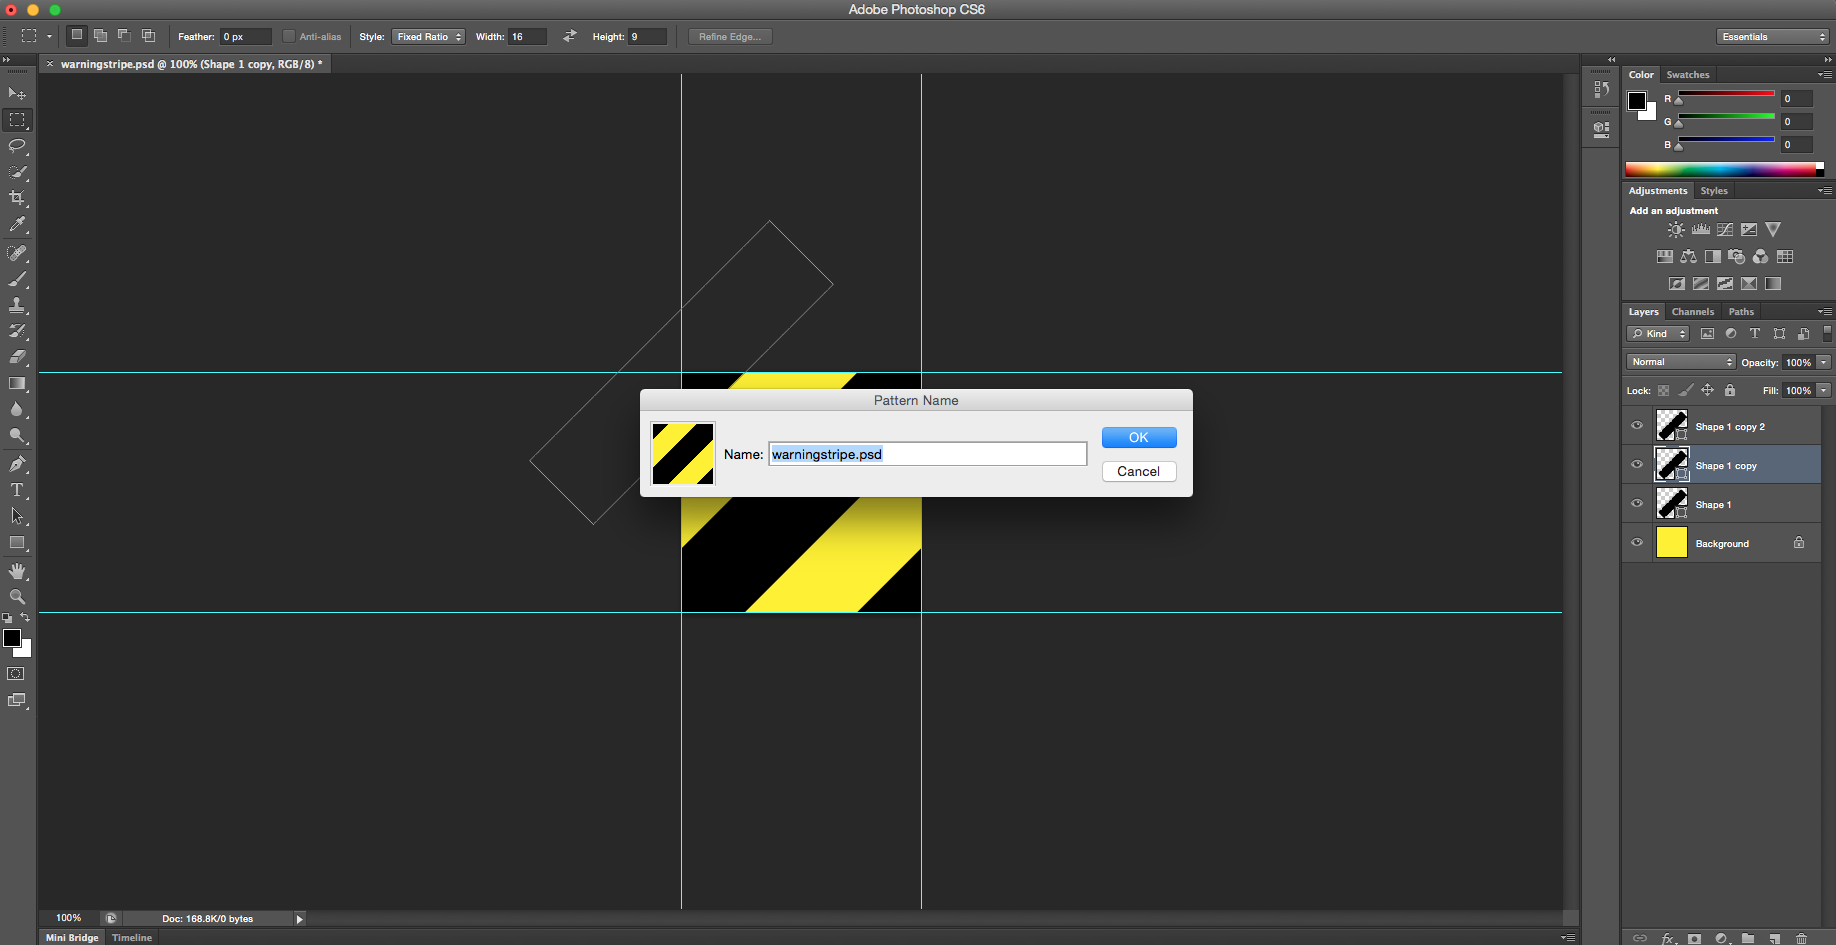
Go to the Edit menu and pick Define Pattern. Give it a name and click OK.
05. Use your stripes
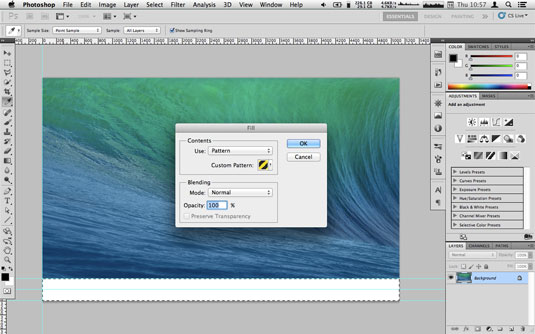
Select an area you want to fill with stripes and then pick Fill... from the Edit menu. From the Use menu, pick Pattern and select the warning stripe pattern you just created. Click OK.
06. Add your own effects
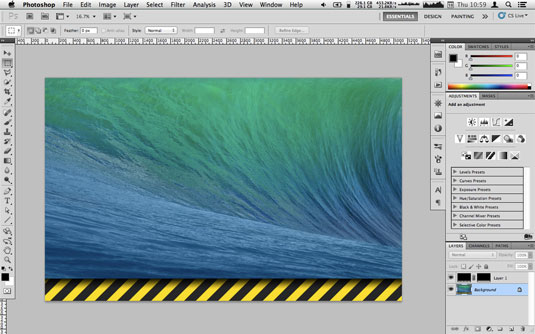
You're done! We've also added a soft gradient on our example. Of course, you can do anything you like to the stripes – distress them, apply bump maps, or anything else!
Like this? Read these:

Christopher has written and edited a range of publications, including Apple-specialist titles MacFormat, Mac|Life and iPad User. His work has also featured in the BBC, Computer Arts, Digital Camera Magazine, PhotoRadar, Practical Photoshop, Macworld and TechRadar. He is currently head of podcasts at DC Thomson and has spoken at various design and tech events.
