Prepare RAW images for print
You've got the photos back from your shoot; now help them really pop with Alan Wardle's advice for image correction using Camera Raw 6.0.
Sign up to Creative Bloq's daily newsletter, which brings you the latest news and inspiration from the worlds of art, design and technology.
You are now subscribed
Your newsletter sign-up was successful
Want to add more newsletters?
One mistake that a lot of designers regularly make is to use images straight off the camera. No matter how good your photographer is, I would always strongly suggest doing your own pre-press work before sending your images to print.
Photographers often do their own colour-correction so that it looks amazing on screen, but they don't necessarily think about what happens after us designers get our hands on it. After all, there's a massive difference between seeing an image on a shiny backlit LED MacBook Pro screen and seeing it printed on the cheap, porous paper that your client is prepared to pay for.
Over the next four pages I'll walk you through how I've worked on one particular photo from a shoot for my streetwear brand AnyForty, enhancing the key details and adding some extra punch before sending the final files to print.
Article continues belowClick here to download the support files (17.8MB)
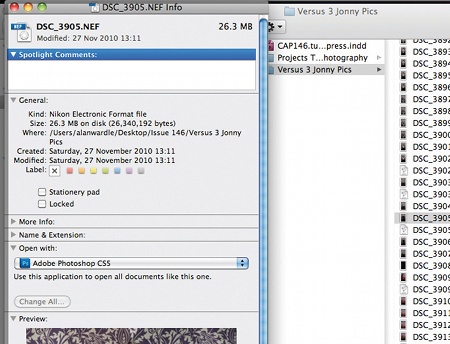
01 The first thing to do is open the file: you'll find mine to work with in the support files. If you're working with a pro photographer who's got good-quality kit (not your mate Dave using his mum's Kodak Quicksnap), you should request the images as RAW files. Jon Ashelford is my photographer. He uses a Nikon D300s camera, and provides the images as NEF files - Nikon's RAW format.
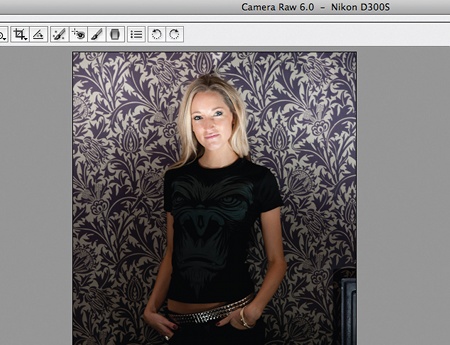
02 Next, drag-and-drop the file onto your Photoshop icon (I'm using CS5 here), to open it in Camera RAW 6.0. This is an amazing set of tools for getting the most out of your photography. We shot this image in the cellar of a bar, but while there is beautiful lighting on the model's face, the T-shirt - the most important element, since we're a streetwear brand - has been lost. With Camera RAW this is easy to fix. Let's go...
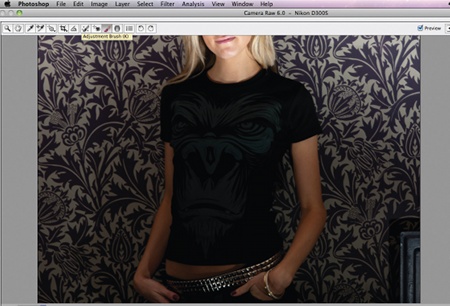
03 As mentioned, you can see the T-shirt graphic has been lost, but this is easy to fix. Select the Adjustment Brush (shortcut K) from the top menu bar: this enables you to paint on an adjustment layer, which you can then edit separately from the rest of the image.
Sign up to Creative Bloq's daily newsletter, which brings you the latest news and inspiration from the worlds of art, design and technology.
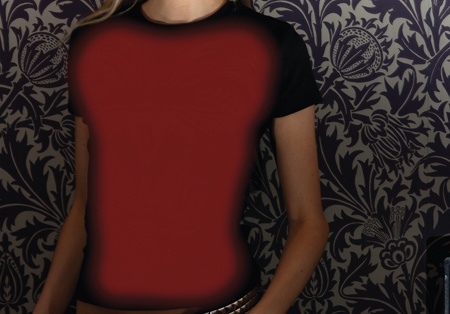
04 Use the brush to paint a mask over the area you want to edit. The great thing about Camera Raw is that you can do really quick masks without the need to be precise or tidy.
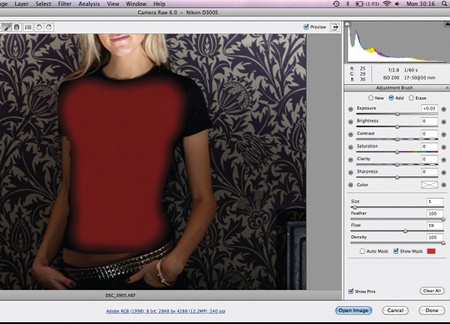
05 Once you've used the Adjustment Brush to mask off the area you want to manipulate, have a good look at the different options on the far right. Here you can edit every aspect of the area that you've masked, without affecting the rest of the file.
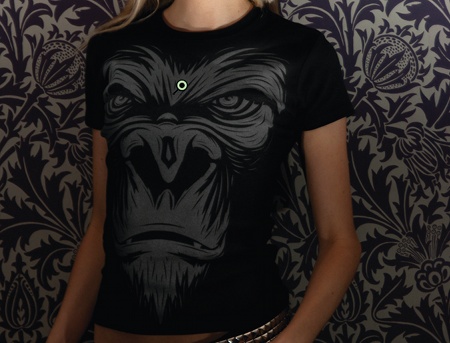
06 I always find the best way to edit an image using these tools is by eye. So turn off the Show Mask option on the bottom of the menu bar, and start moving the sliders around. To get the image to a stage I was happier with, I slid the Exposure, Brightness and Contrast levels right up. I also took all of the colour out of the masked area using the Saturation slider, as I found that the grey of the print had a strange greenish tinge to it.
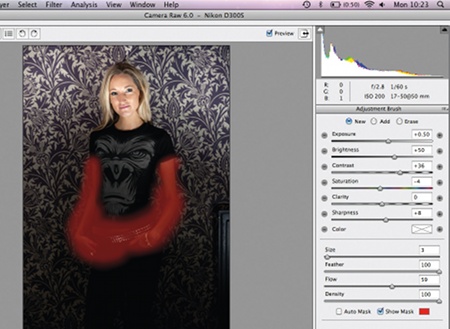
07 Once I was happy with the T-shirt graphic popping out, I set about editing the rest of the image. The bottom of the image blends into darkness, so I wanted to make the model's arms and belt jump out a bit. Go back to the Adjustment Brush, create a new layer and paint away on the new area. Make sure you select a new layer, however, or the previous mask will be edited too.
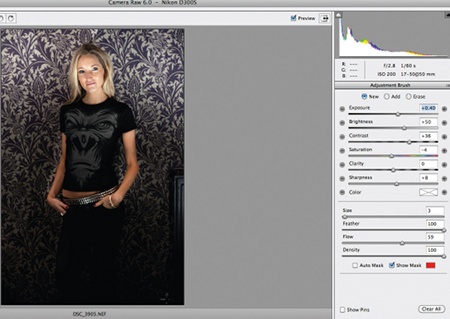
08 You can see that by using the Adjustment Brush I've brightened up the model's arms and belt buckle without having to create any time-consuming paths. This is the joy of using a great camera and some great software: even if an image is a bit dark, the camera has captured all the information and Camera Raw 6.0 can bring it out really easily. There's no excuse for dark images.
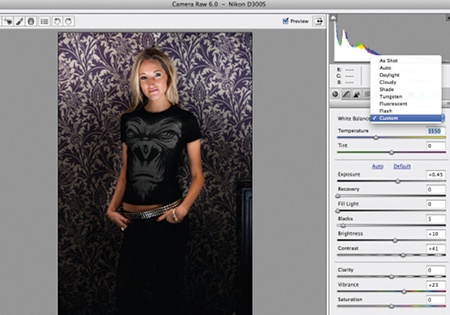
09 After masking a few more areas off (I masked the model's face and brought the exposure and brightness down slightly), it's time to do some final edits in Camera Raw before opening it up in Photoshop and saving it as a TIF file. Here I played around with the white balance; again there are loads of options, so it's a case of trial and error to see what suits your image best. I settled on a custom edit using the sliders on Temperature and Tint to cool the background down slightly.
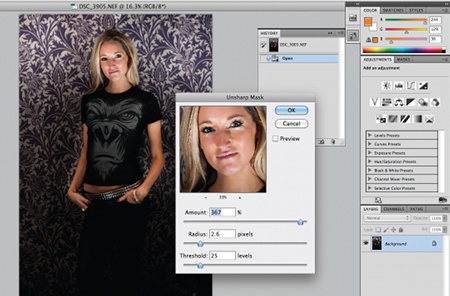
10 Now you're done in Camera Raw, click Open Object to go into Photoshop; I usually do a few more amends here before I'm happy. One thing I absolutely love doing to images that were taken on a great camera is to oversharpen them - it's not to everyone's taste but I think it looks great. Go to Select Filter>Sharpen> Unsharp Mask, and start sliding those bars. I've oversharpened this shot for effect, but I love the way it really pulls out the details in the model's eyelashes and strands of hair.
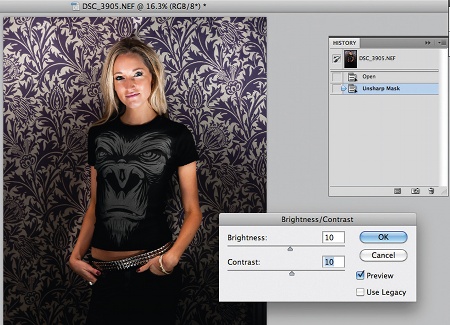
11 I'm also a fan of my images being as bright as possible - once they get onto paper I always prefer vibrant to dark and dull. Hit Images>Adjustments>Brightness/ Contrast and ramp it up a bit, just to be safe.
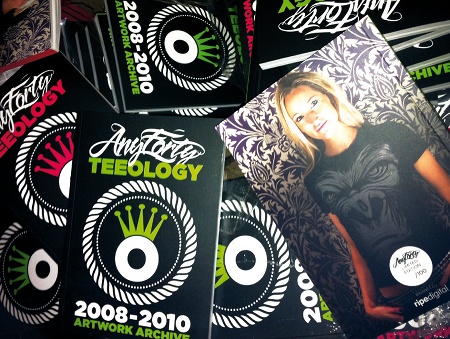
12 Once you're happy with the pre-press work, change the colour profile (Image>Mode>CMYK Color), crop it as necessary, make sure it's 300dpi (Image>Image Size) and save it in TIF format. Now your image is ready for print, there's one last essential: get a high-res CMYK colour proof. If you're happy with it, great, it's off to the printers - if not, go back a few steps and edit the image some more. It's worth it in the end.
Alan Wardle
Former art editor of Computer Arts Projects, Wardle is founder and art director of UK streetwear brand AnyForty and art collective The Print Xyndicate, and works as a designer at Love Creative. www.anyforty.co.uk

The Creative Bloq team is made up of a group of art and design enthusiasts, and has changed and evolved since Creative Bloq began back in 2012. The current website team consists of eight full-time members of staff: Editor Georgia Coggan, Deputy Editor Rosie Hilder, Ecommerce Editor Beren Neale, Senior News Editor Daniel Piper, Editor, Digital Art and 3D Ian Dean, Tech Reviews Editor Erlingur Einarsson, Ecommerce Writer Beth Nicholls and Staff Writer Natalie Fear, as well as a roster of freelancers from around the world. The ImagineFX magazine team also pitch in, ensuring that content from leading digital art publication ImagineFX is represented on Creative Bloq.
