Get more from custom Photoshop brushes
Discover how custom brushes can enhance your workflow and boost creativity.
There are thousands of Photoshop brushes online to help you add beautiful artwork to your creative resumes or other projects. The things that can be done with your brushes inside Photoshop's Natural Brush Media window are almost endless! It's amazing how you can manipulate your brush to create patterns, textures, hair, skin, that painterly feel, happy accidents and so on.
If my work assignment requires a realistic finish, I try to avoid using photo references. That way, I'm free to create and use suitable brushes on the fly. And of course, it's fun using new custom brushes! I've supplied 65 of my own with this workshop, for you to try out.
Download your resources:
Article continues below01. Do some research
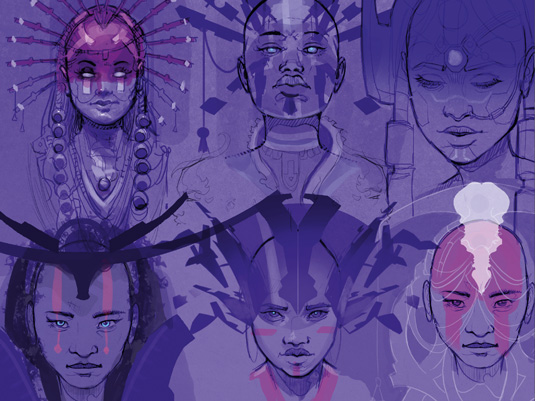
Before I start painting I like to explore and sketch around my subject to get the ideas flowing. Sometimes I do this using pen on paper, sometimes directly in Photoshop CC using a basic hard round brush with both Opacity and Flow set to 80 per cent. I eventually develop a clearer idea of what I want to paint.
02. Create a black and white base
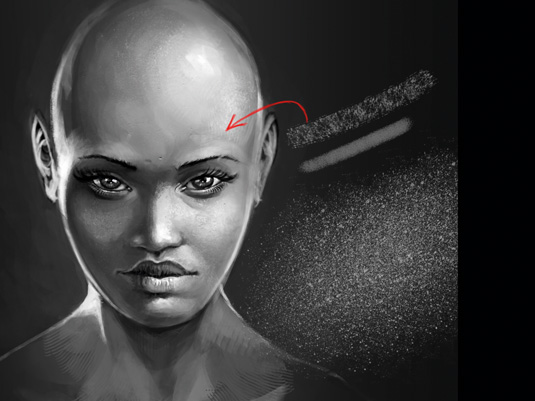
Painting in black and white gives me better control over my values. It also enables me to concentrate on the shapes, light and shadows. For the skin I use my first custom brush: the mighty Spickel brush.
I use it to create skin texture on areas such as the nose, cheeks and chin. I work on a separate layer and use effects such as Drop Shadow or Bevel and Emboss.
03. Introduce colours on different layers
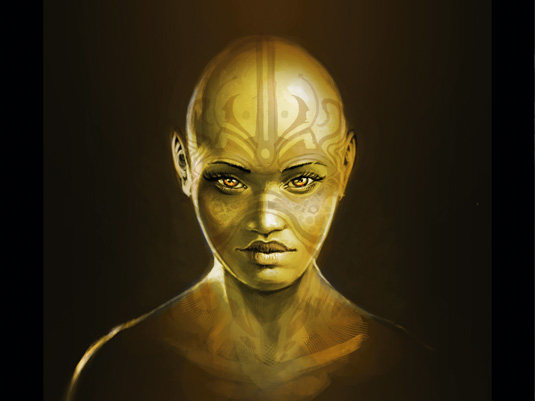
Once I'm happy with my values, I start applying colours on layers set to Overlay, Multiply, Color Dodge, Darken, and so on. I try to vary my colours and pick new ones several times in the Color window. Because my character has yellowish skin, I use greens, browns, oranges, yellows and even some cyan.
Sign up to Creative Bloq's daily newsletter, which brings you the latest news and inspiration from the worlds of art, design and technology.
Then I drop my layers and keep on painting normally. Finally I draw some tattoo-like shapes on one side of her face, before flipping them to the other side. I consider turning these tattoos into custom brushes for later use.
04. Paint with pattern brushes
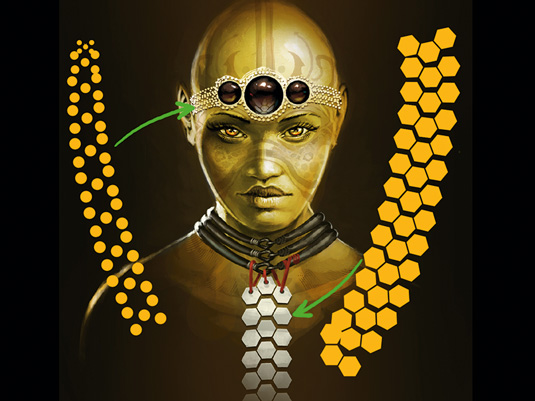
I introduce a few designs using some custom pattern brushes. I create one by taking a graphic, transforming it into a brush and then playing around with the settings within the natural Brush media window (Brush tip shape > Spacing and Shape dynamics > Angle Jitter set to Direction).
Such brushes are ideal for creating clothing patterns, tattoos and scales, for example.
05. Apply the Hexagon brush
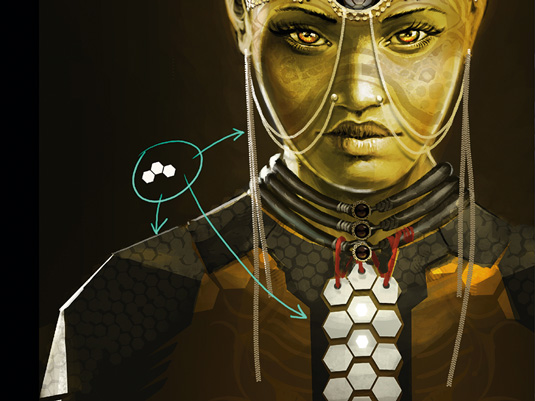
I use my simple custom Hexagon brush in three distinct areas for three different effects. First to create a chest plate, then to make some facial chains and finally to introduce some futuristic-looking texture on her chest and shoulder armour.
Using the brush on different layers enables me to create a mask of my patterns, so I can paint inside them to depict dirt or worn edges.
06. Use what you've already got
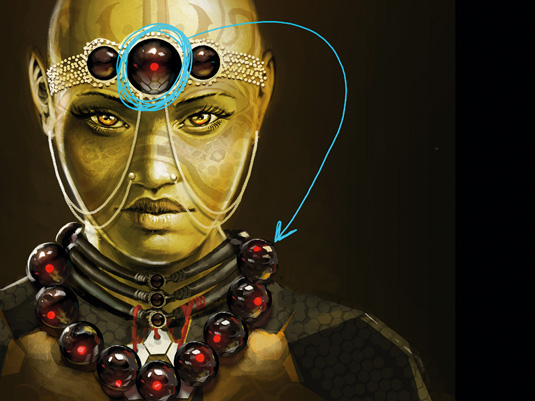
Reusing elements that you've already painted will save you time. Here I take the stone from the figure's forehead to create a flying spy-bot collar (of course!).
I select the stone using the Lasso tool and then copy-paste it on to its own layer using shift+ctrl+C and shift+ctrl+V. I repaint the highlights and shadows by hand to avoid the copy-pasted feel.
07. Build up the collars
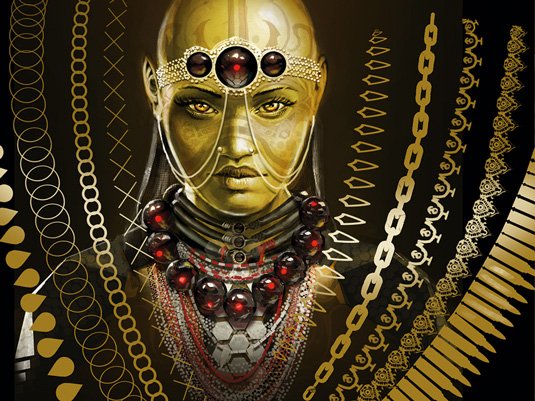
I use several pattern brushes to create the illusion that my character is wearing a lot of collars around her neck. These brushes are so easy to create and will save you a lot of time.
I used them when working on Assassin's Creed 3 and Unity to make most of the patterns on the many costumes, such as the yellow embroidery on Louis XVI's ornate outfit.
08. Try out a Rorschach Techno brush
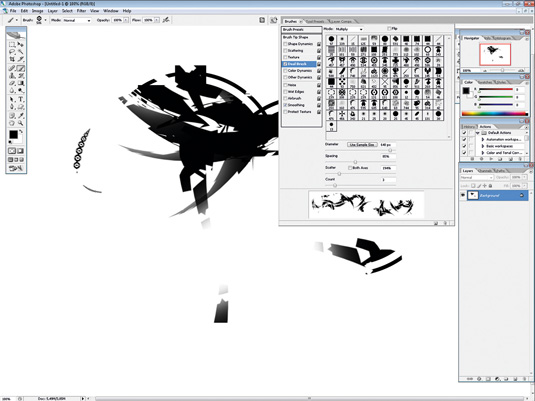
My happy accident Rorschach brushes can be tricky to create and calibrate, but they're just amazingly fun! Create a technical-looking shape and transform it into a brush. Then in the Natural Media brush window put it on Dual Brush with another graphic-shaped brush and play around with the different sliders to get random shapes popping out of your brush.
Next page: More tips for making the best use of custom brushes
