12-step guide on how to add 3D art to a Photoshop image
Get to grips with the Adobe Fuse, and learn how to create your own zombie apocalypse 3D composites in Photoshop.
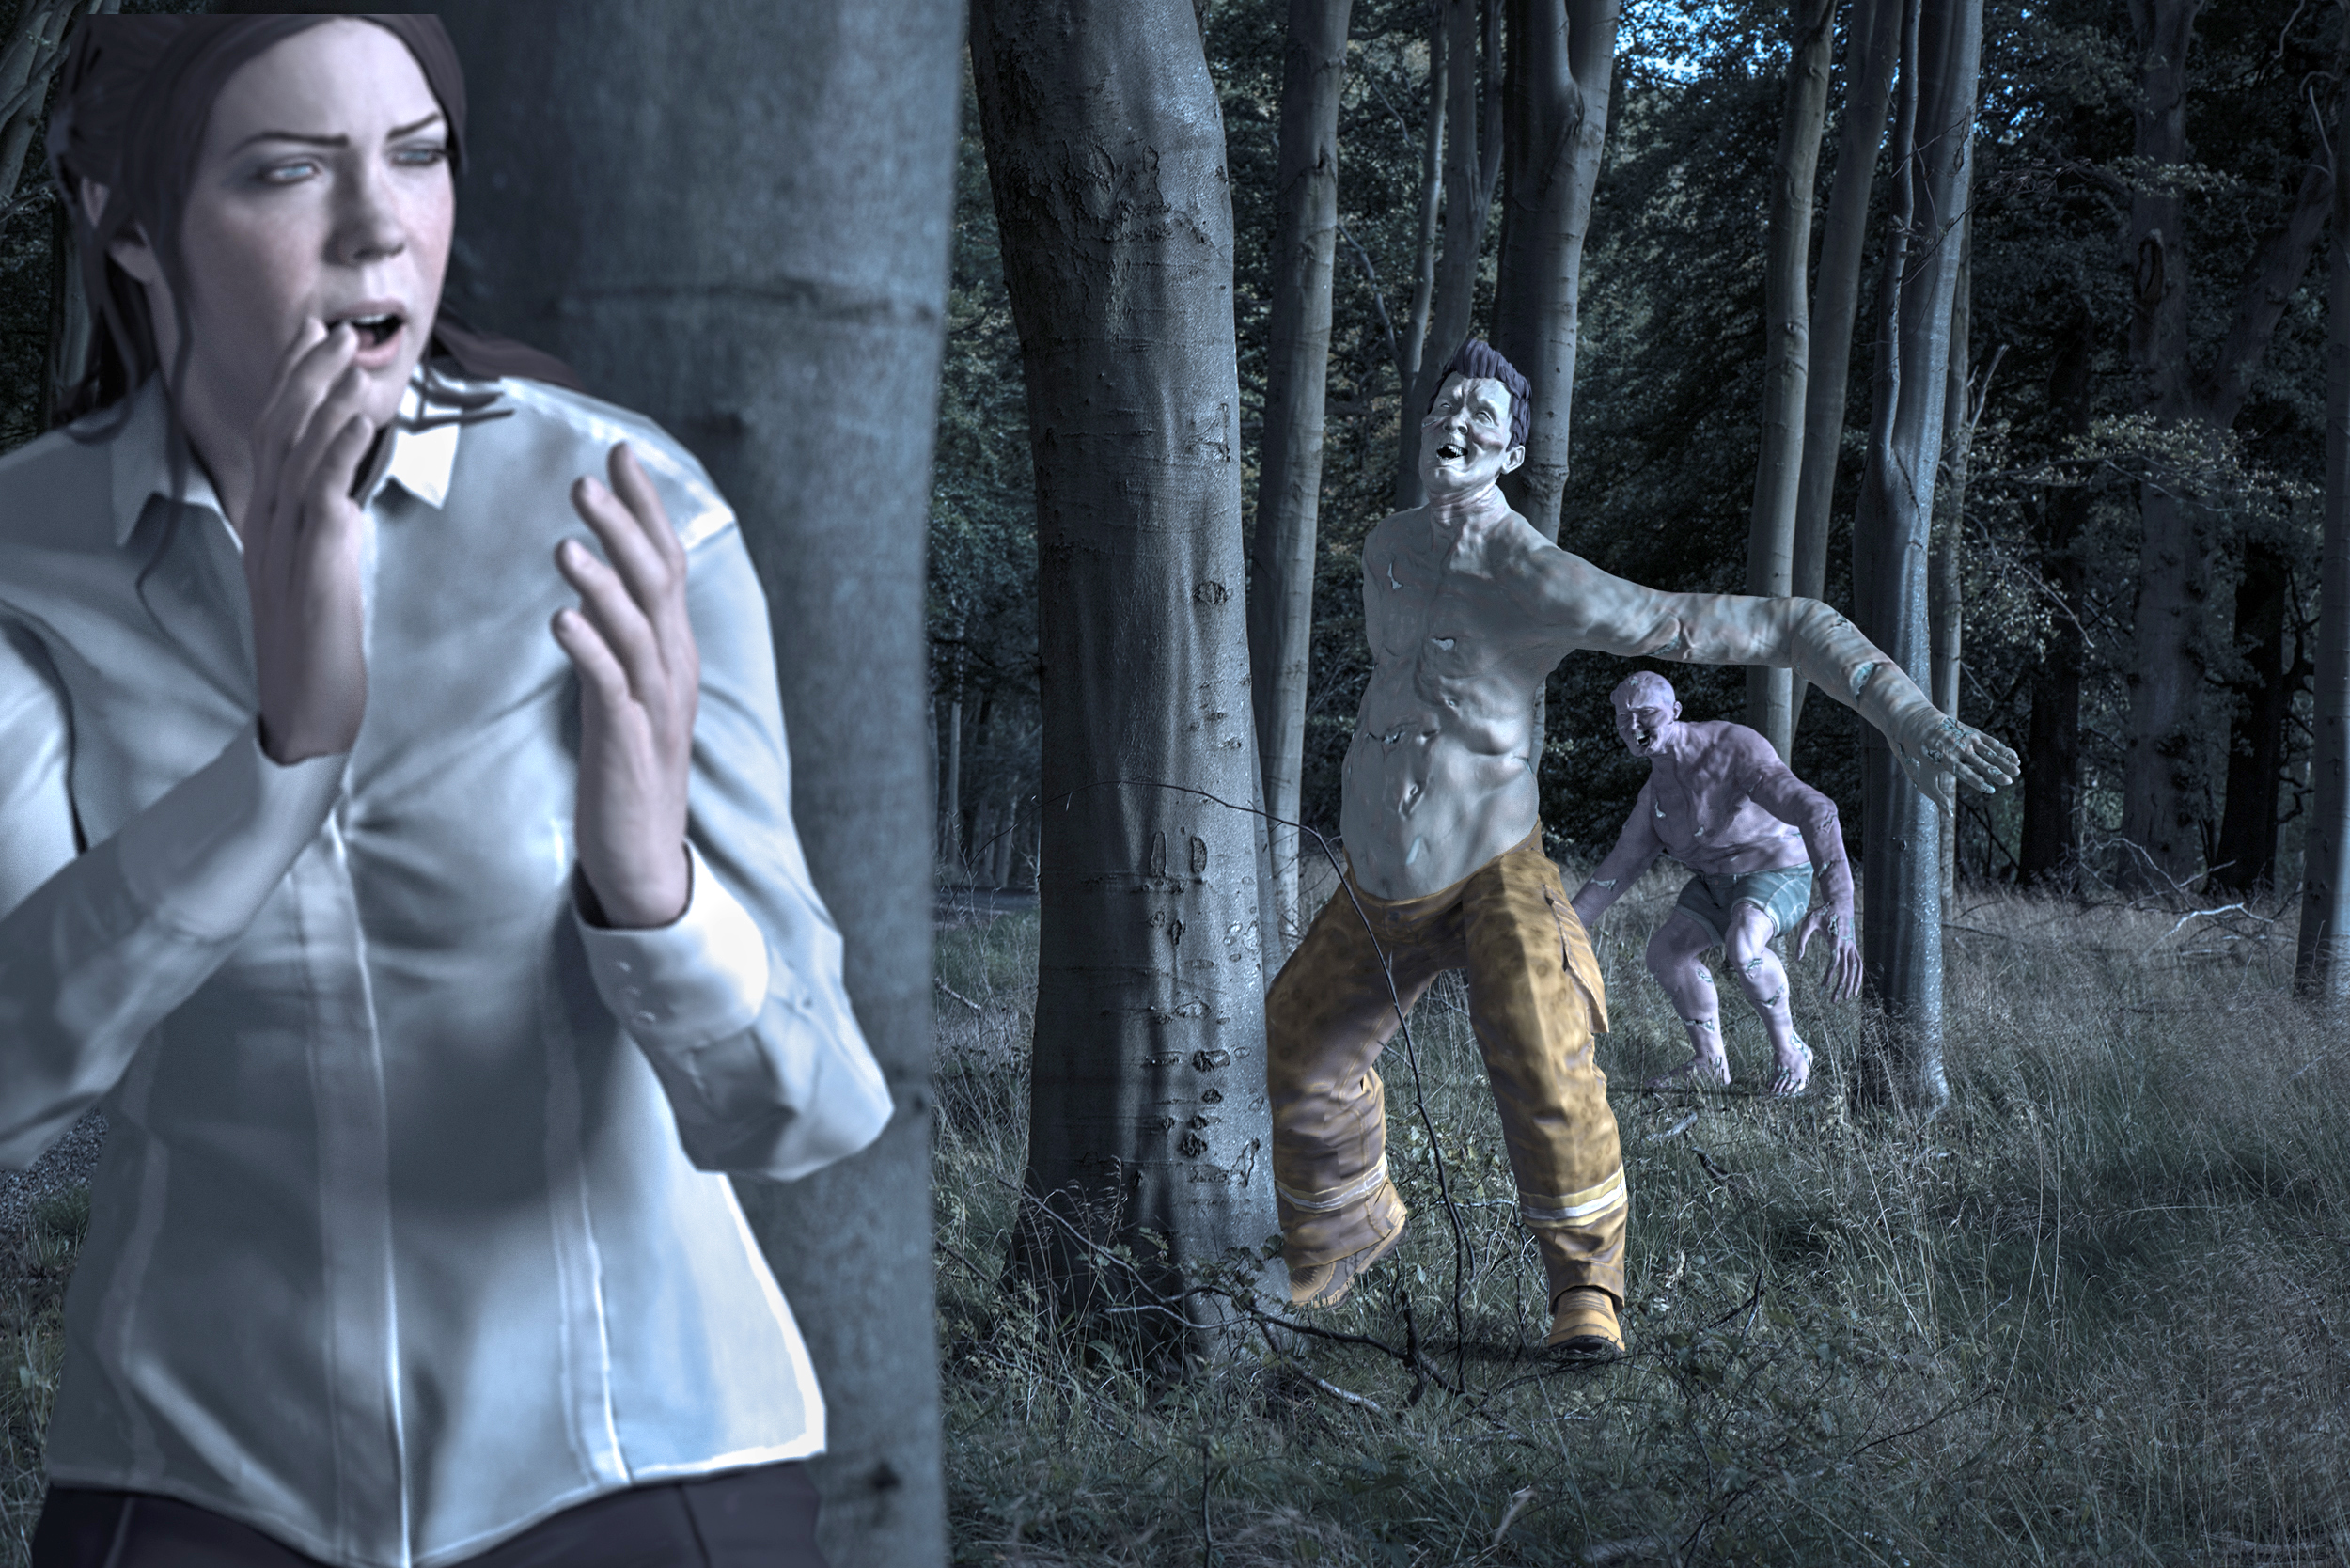
Adobe Fuse offers a simple new way to create and customise 3D characters in a matter of minutes. Once built, your 3D characters can be saved to your Creative Cloud Libraries, then edited, lit and animated in Photoshop CC. And the best part is that none of this requires any advanced knowledge of 3D tools. Here we explain how it works, and show how to combine 3D creations with a 2D image for a dramatic composite.
You can download the project files here.
01. Build a character
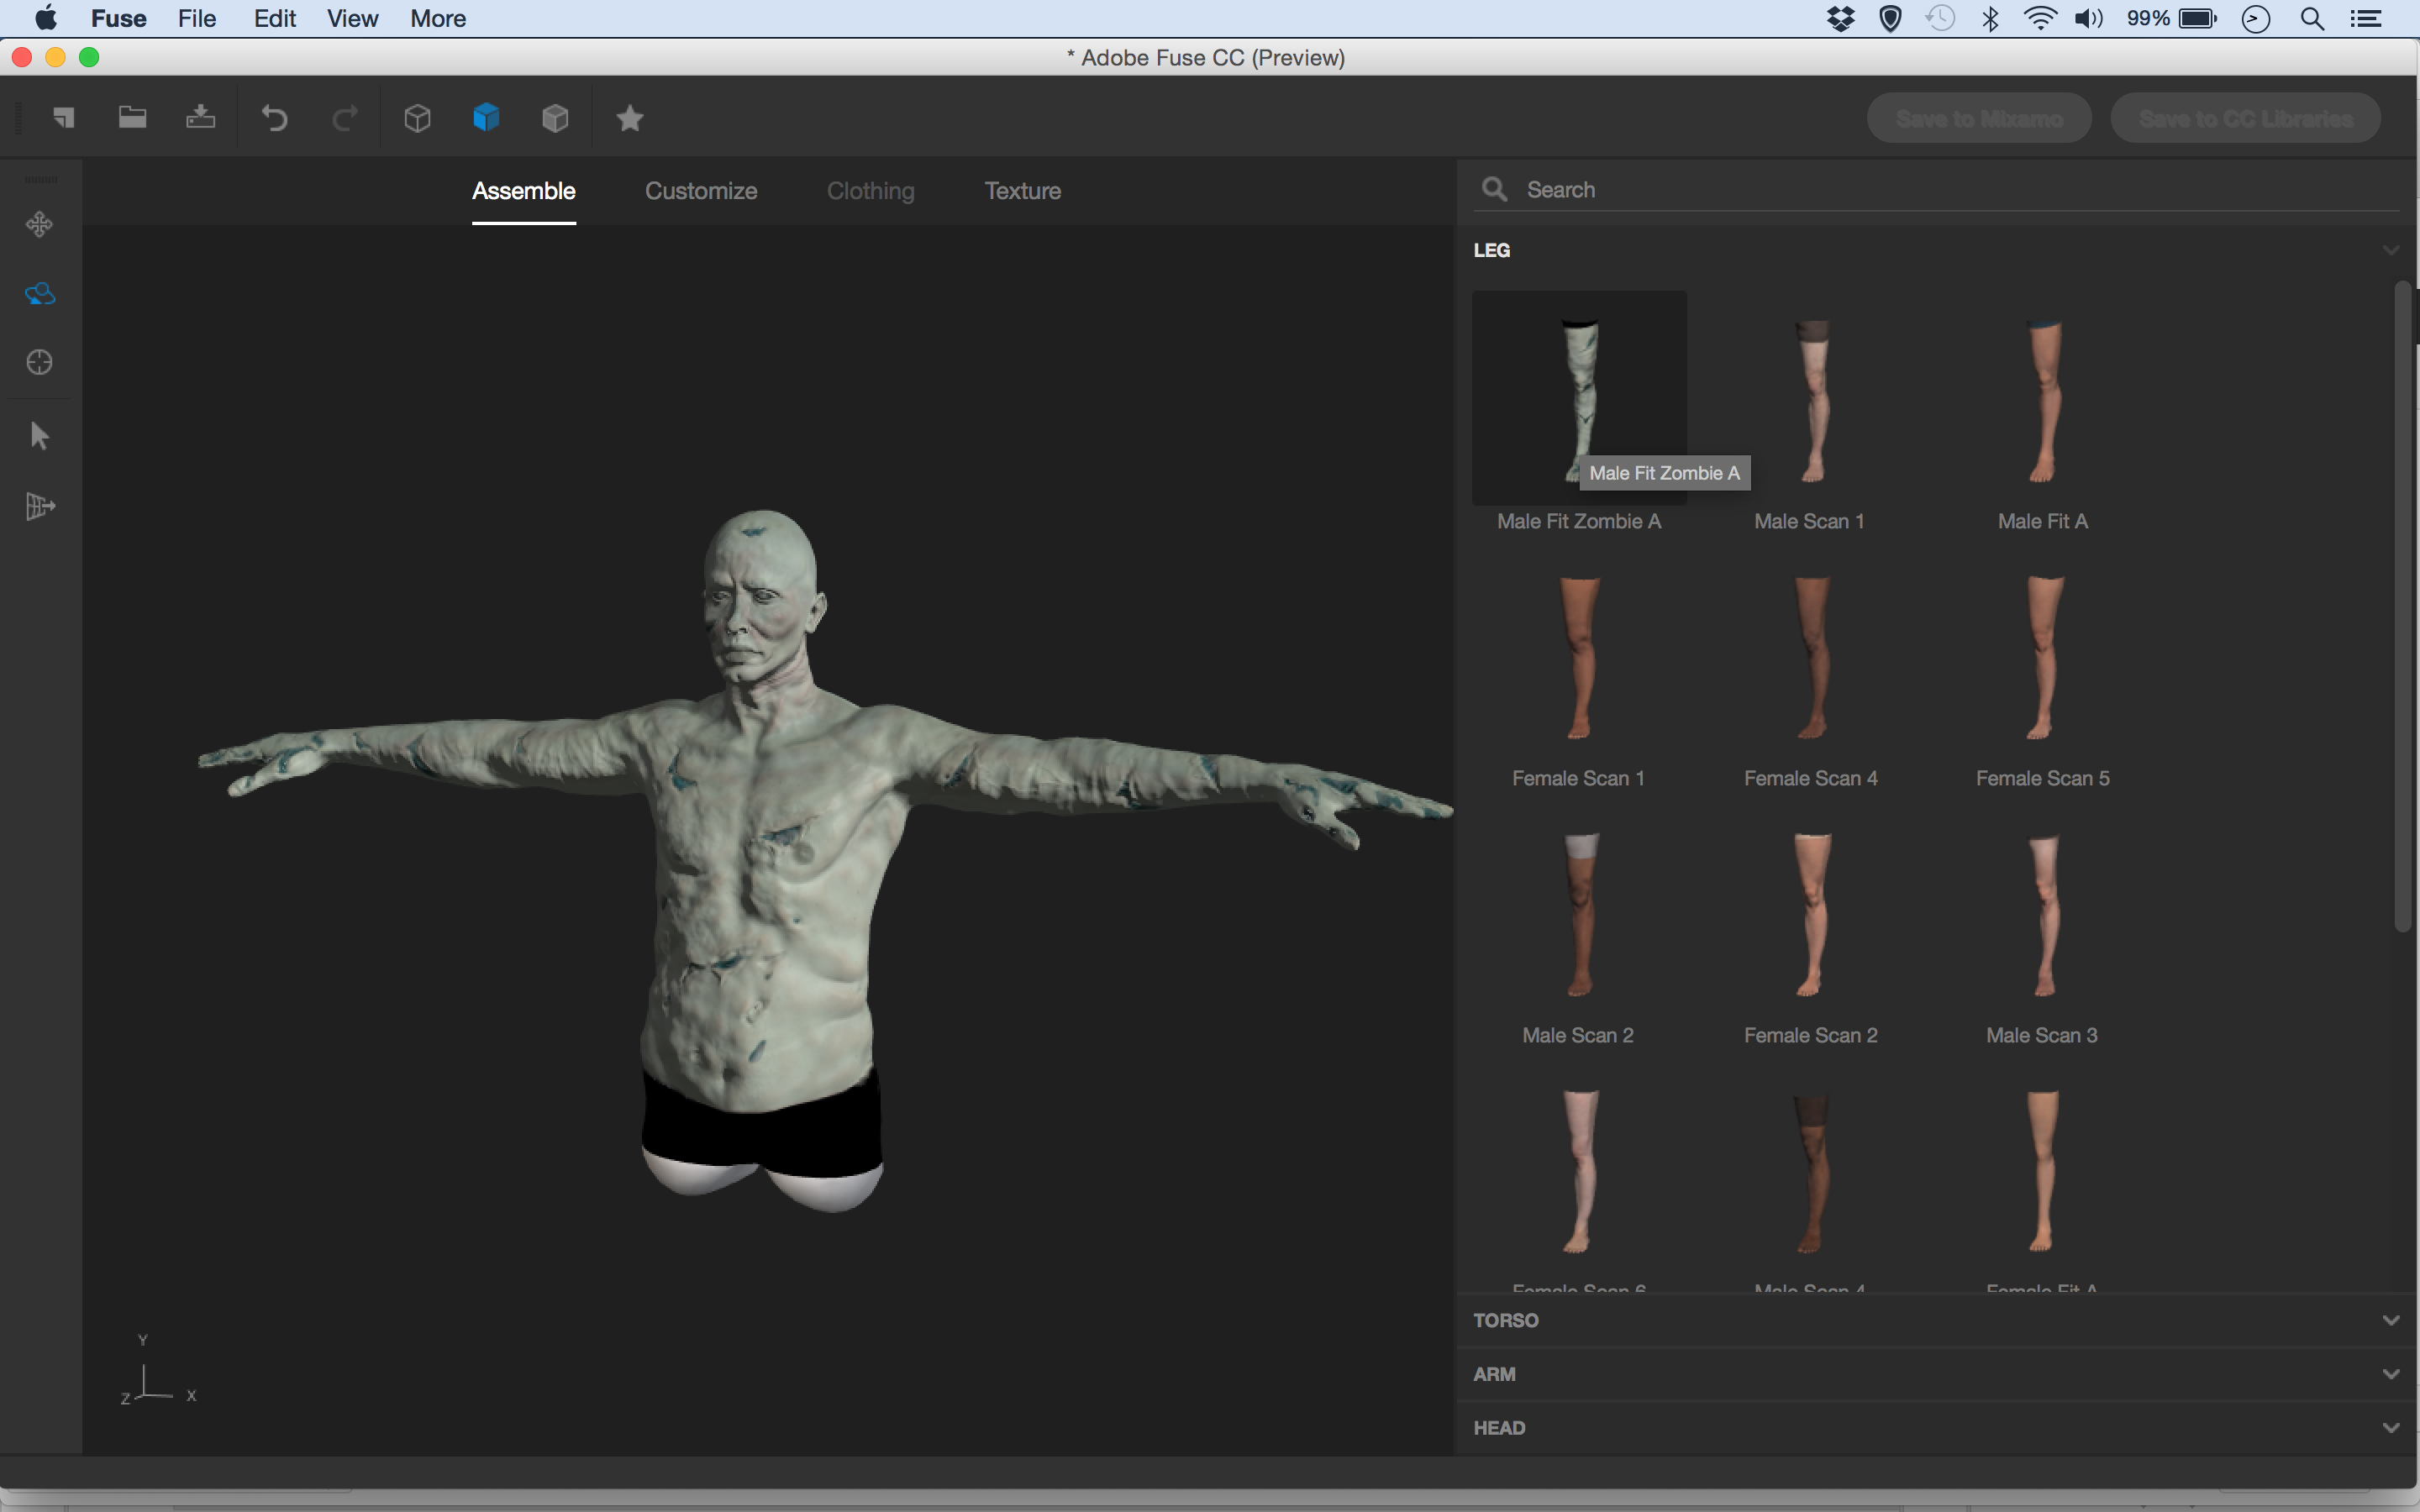
Download Adobe Fuse using your Creative Cloud App. Open the app and start double-clicking on body parts, using the menus on the right to begin building your 3D character. We’ve gone for zombie parts here. Drag within the preview window to move the camera position.
02. Customise the model
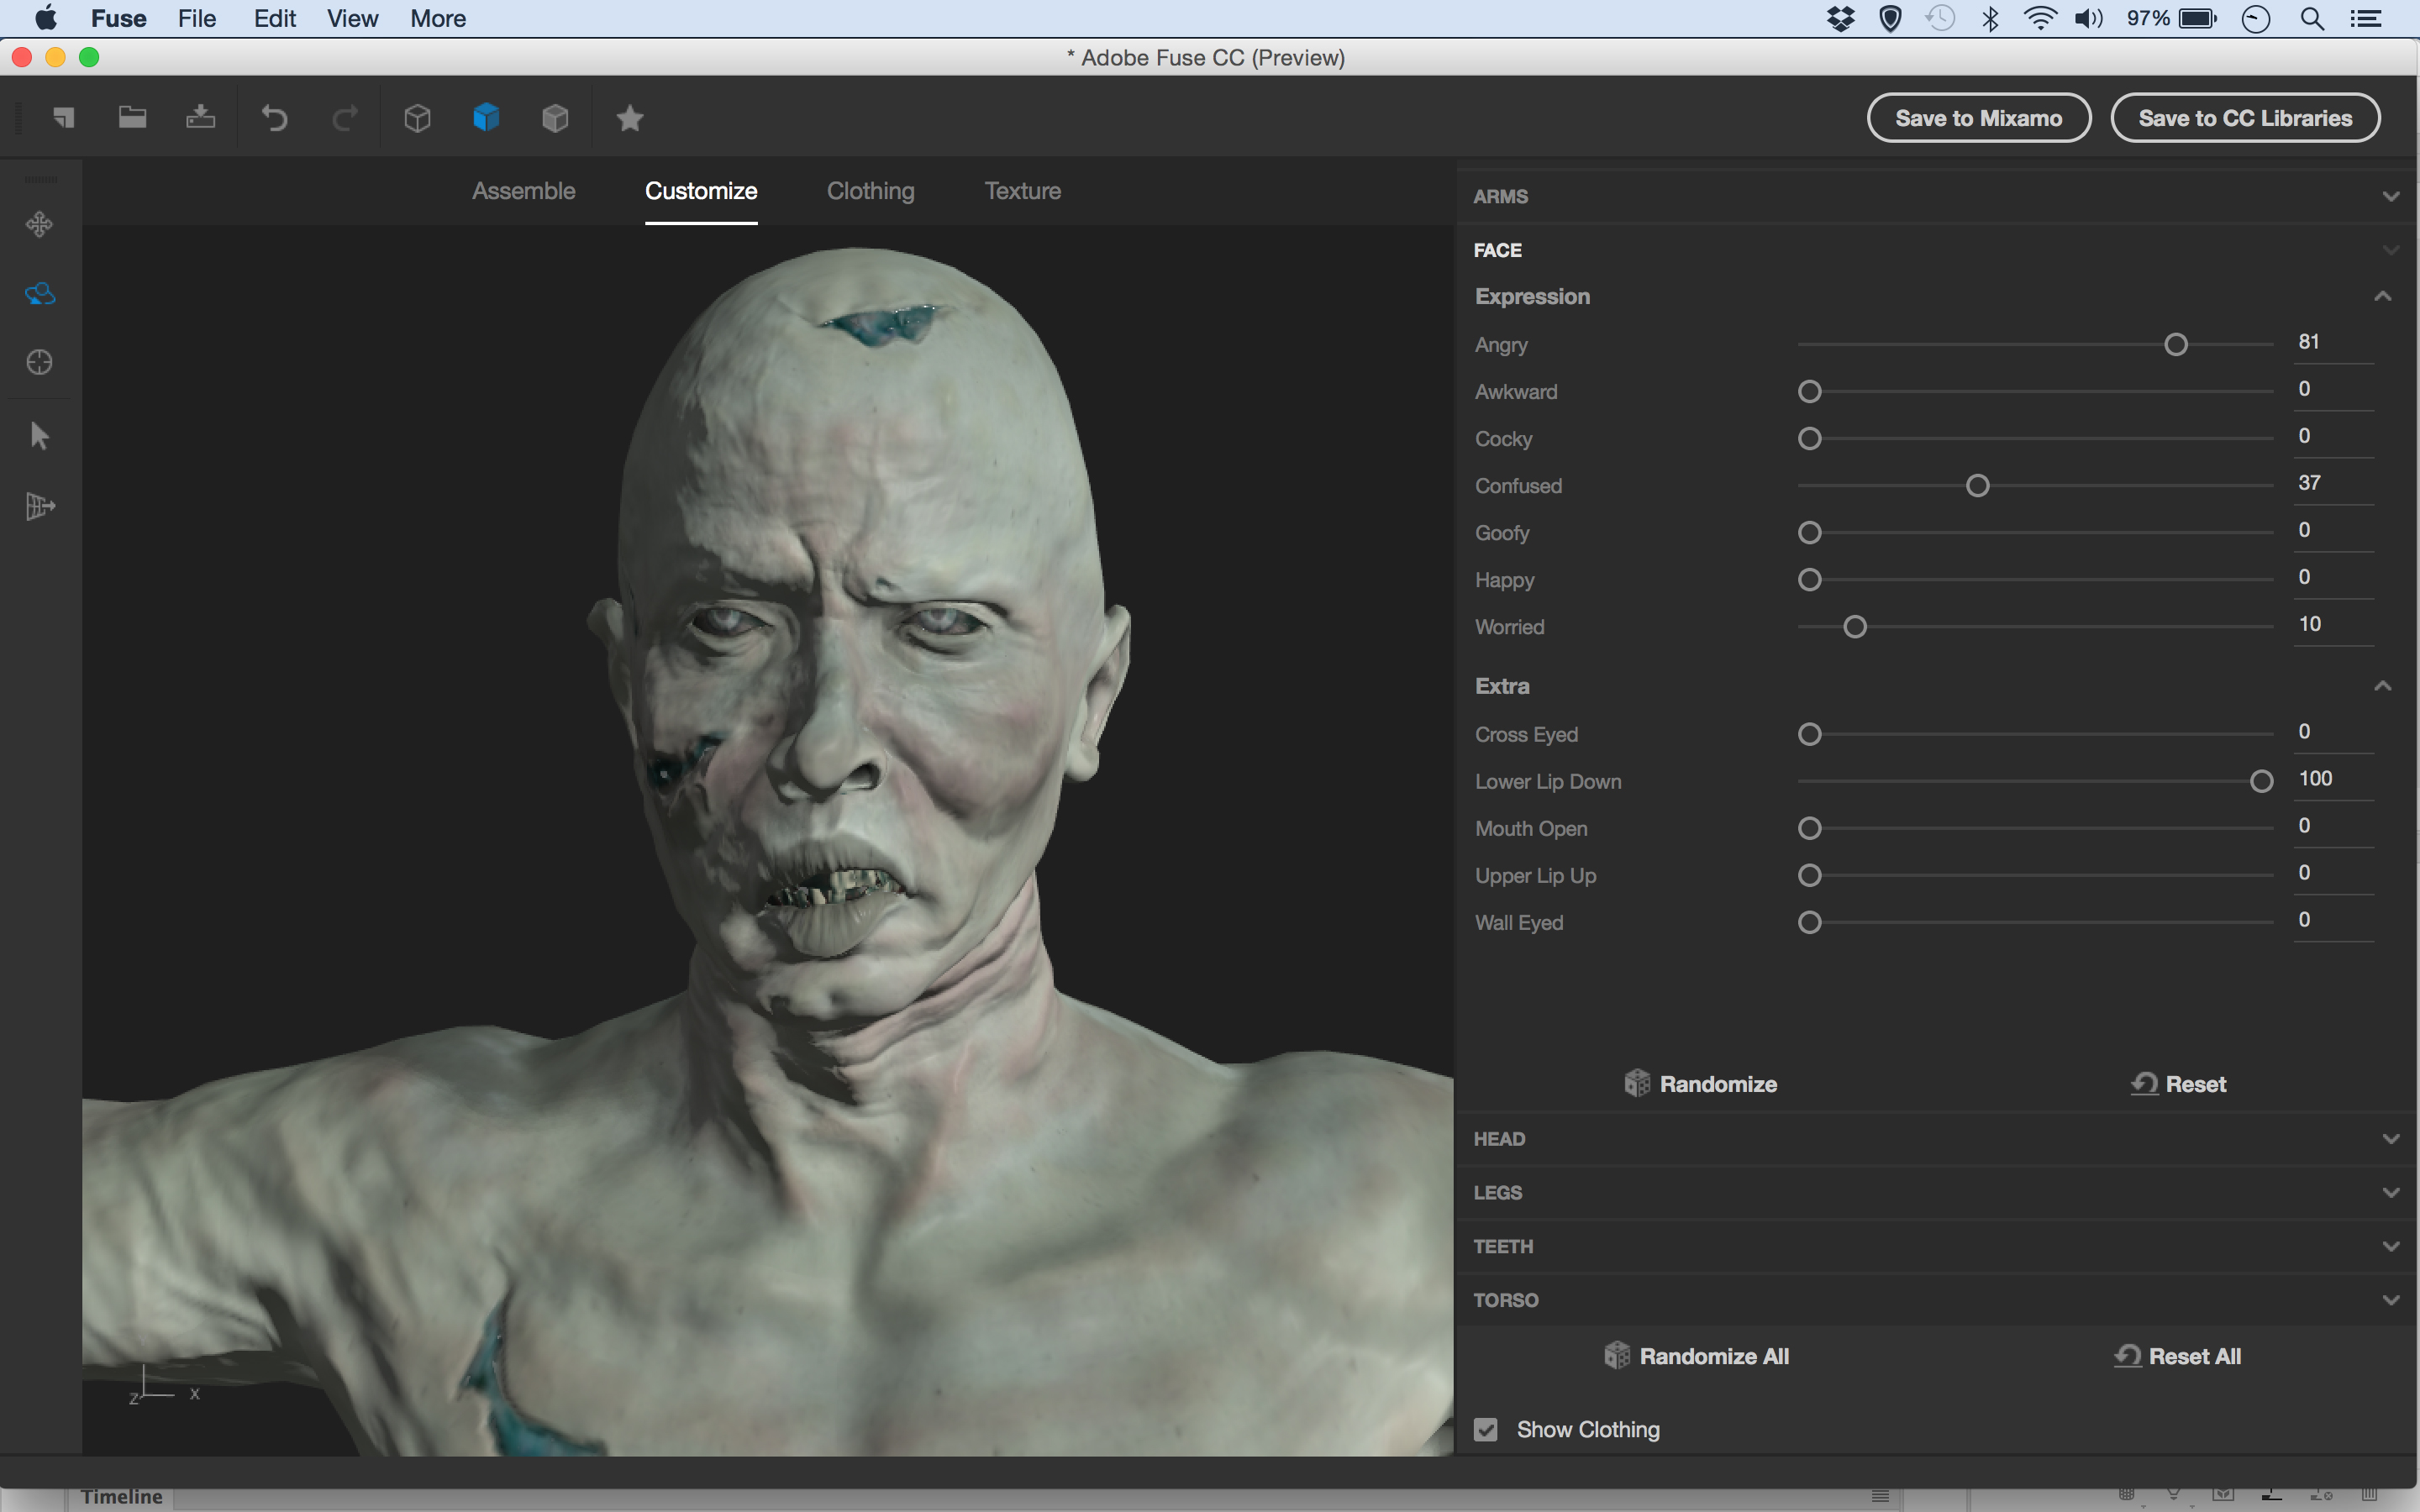
Work through the four tabs at the top to customise the look, create expressions and add clothing to your model. You can click on parts of the body to target and adjust them. You can also use the Modify Tool on the left and drag over body parts to change the shape.
03. Add to an image
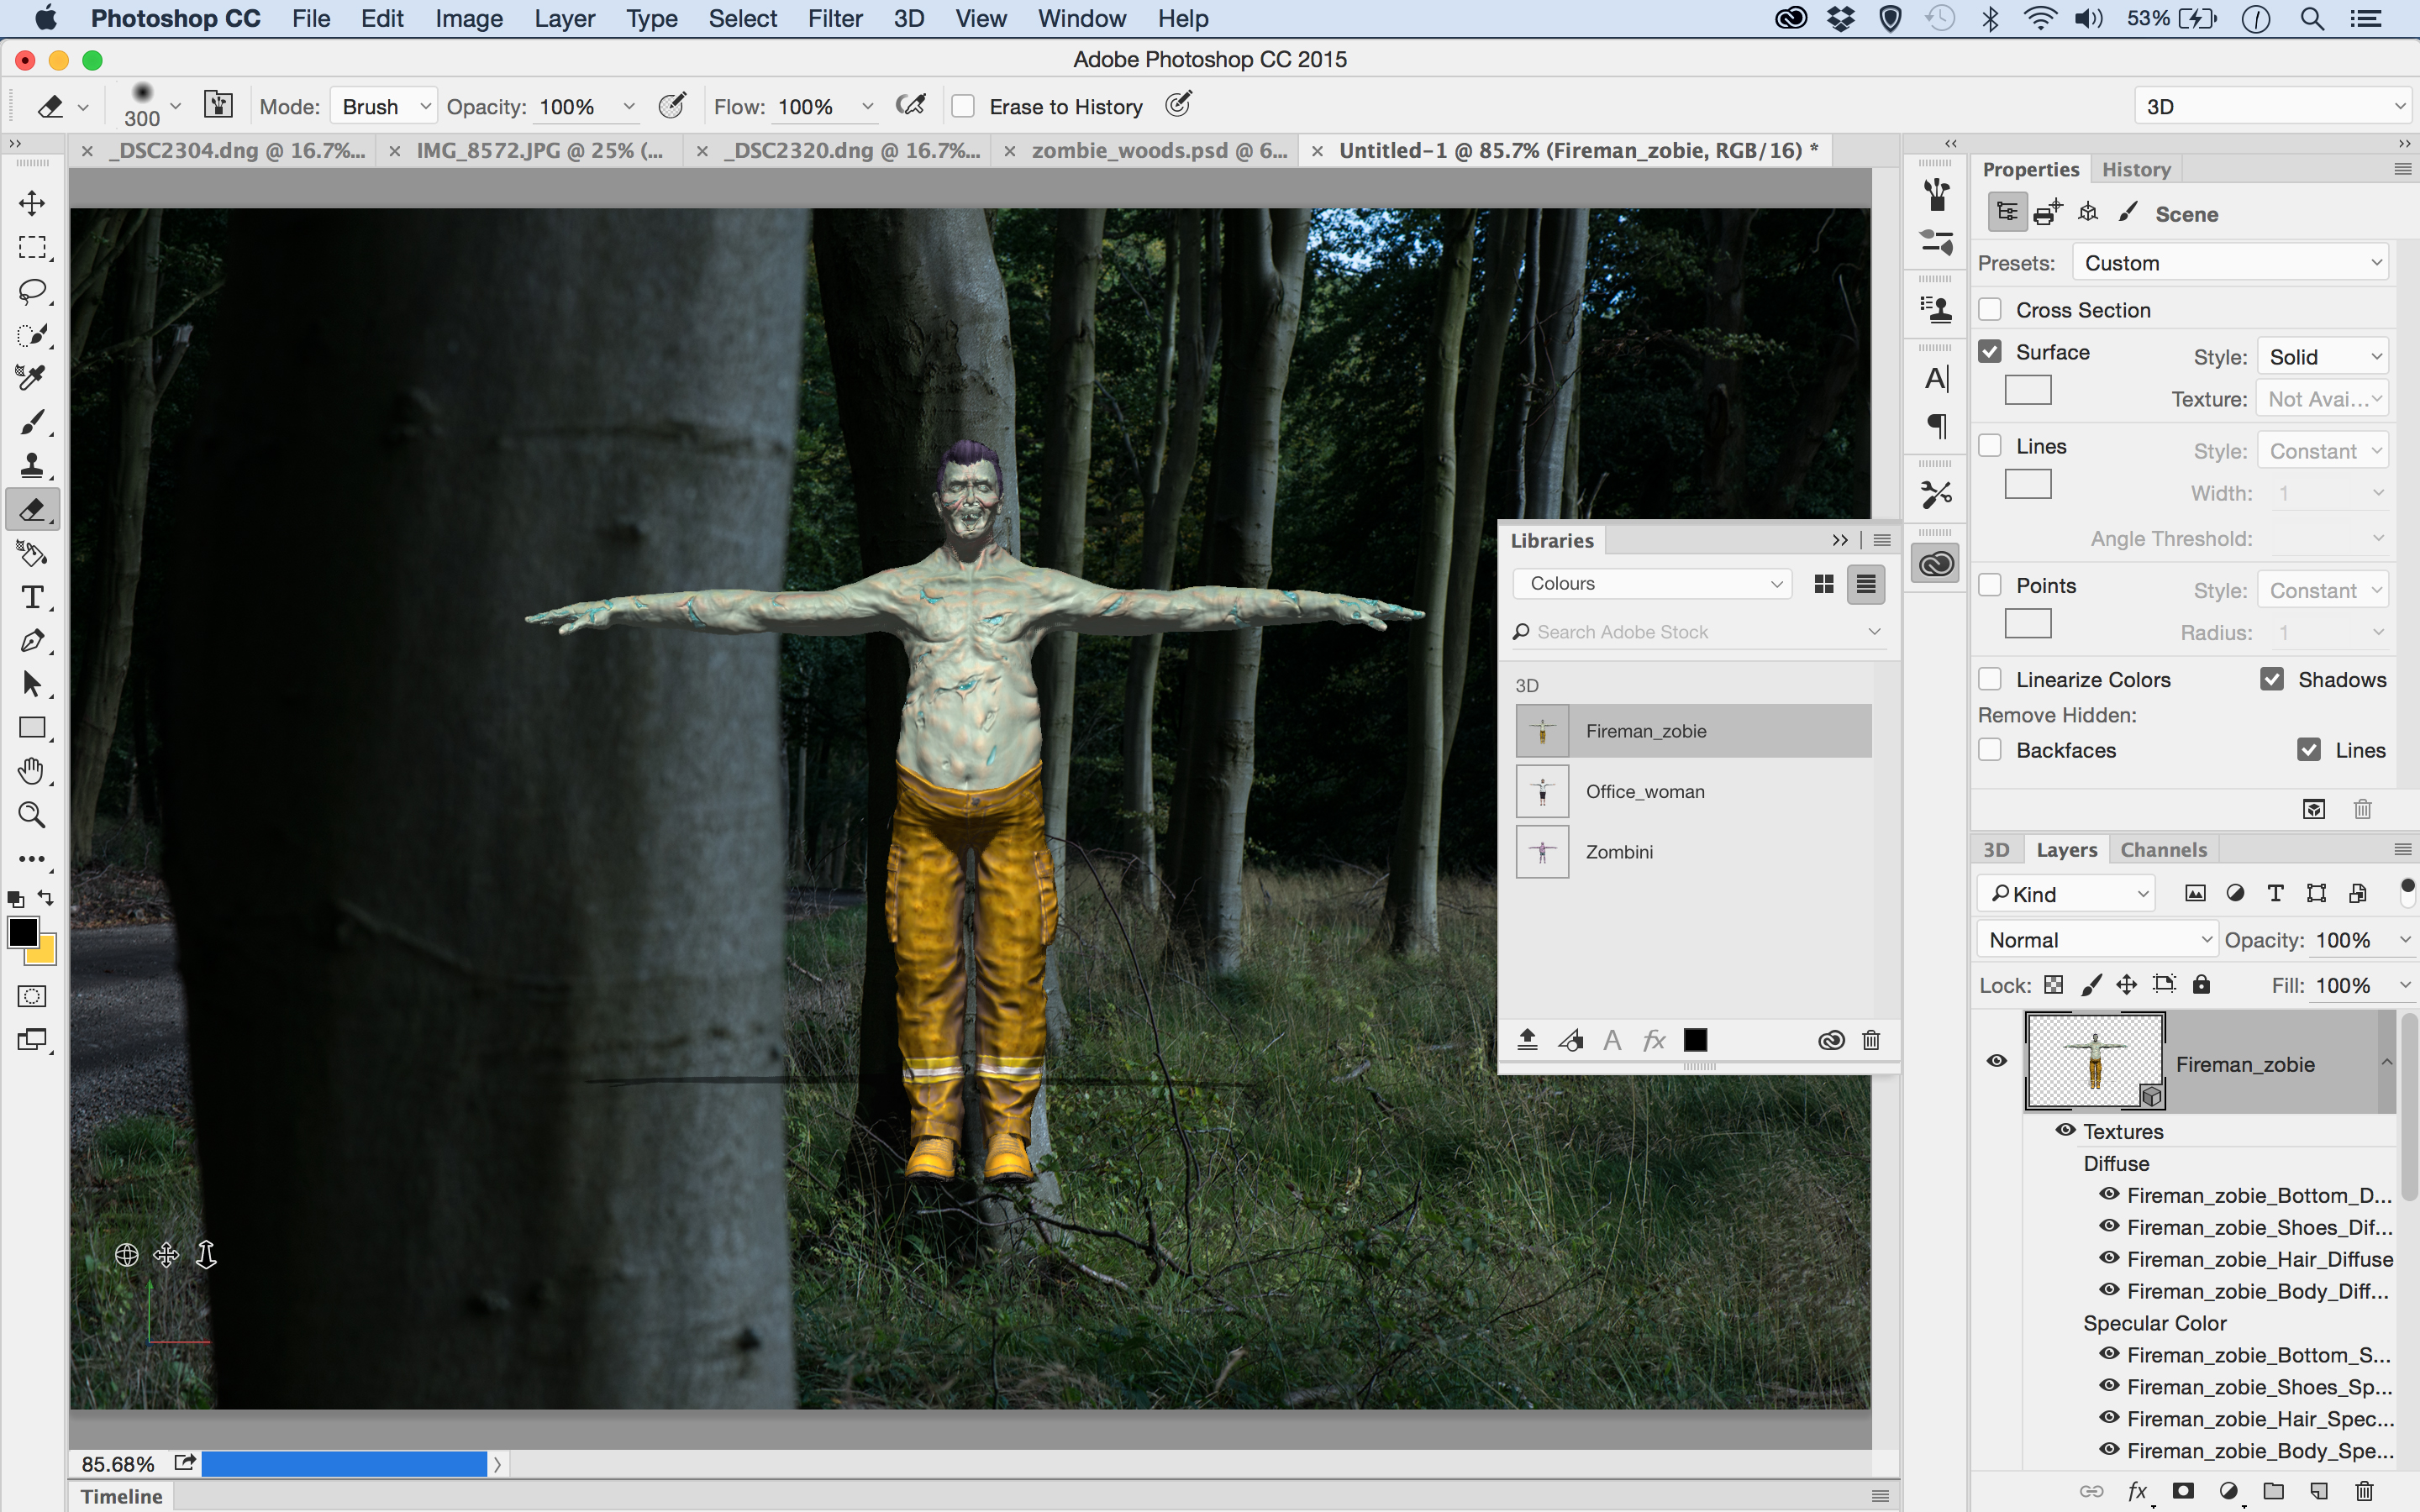
Click the Save to CC Libraries button and save the model. Open a background image in Photoshop, then go to the Libraries Panel. Click the sync icon at the bottom; once done, drag the new 3D model into the image. Go to 3D > Move Object to Ground Plane to make sure it’s grounded.
04. Choose a pose
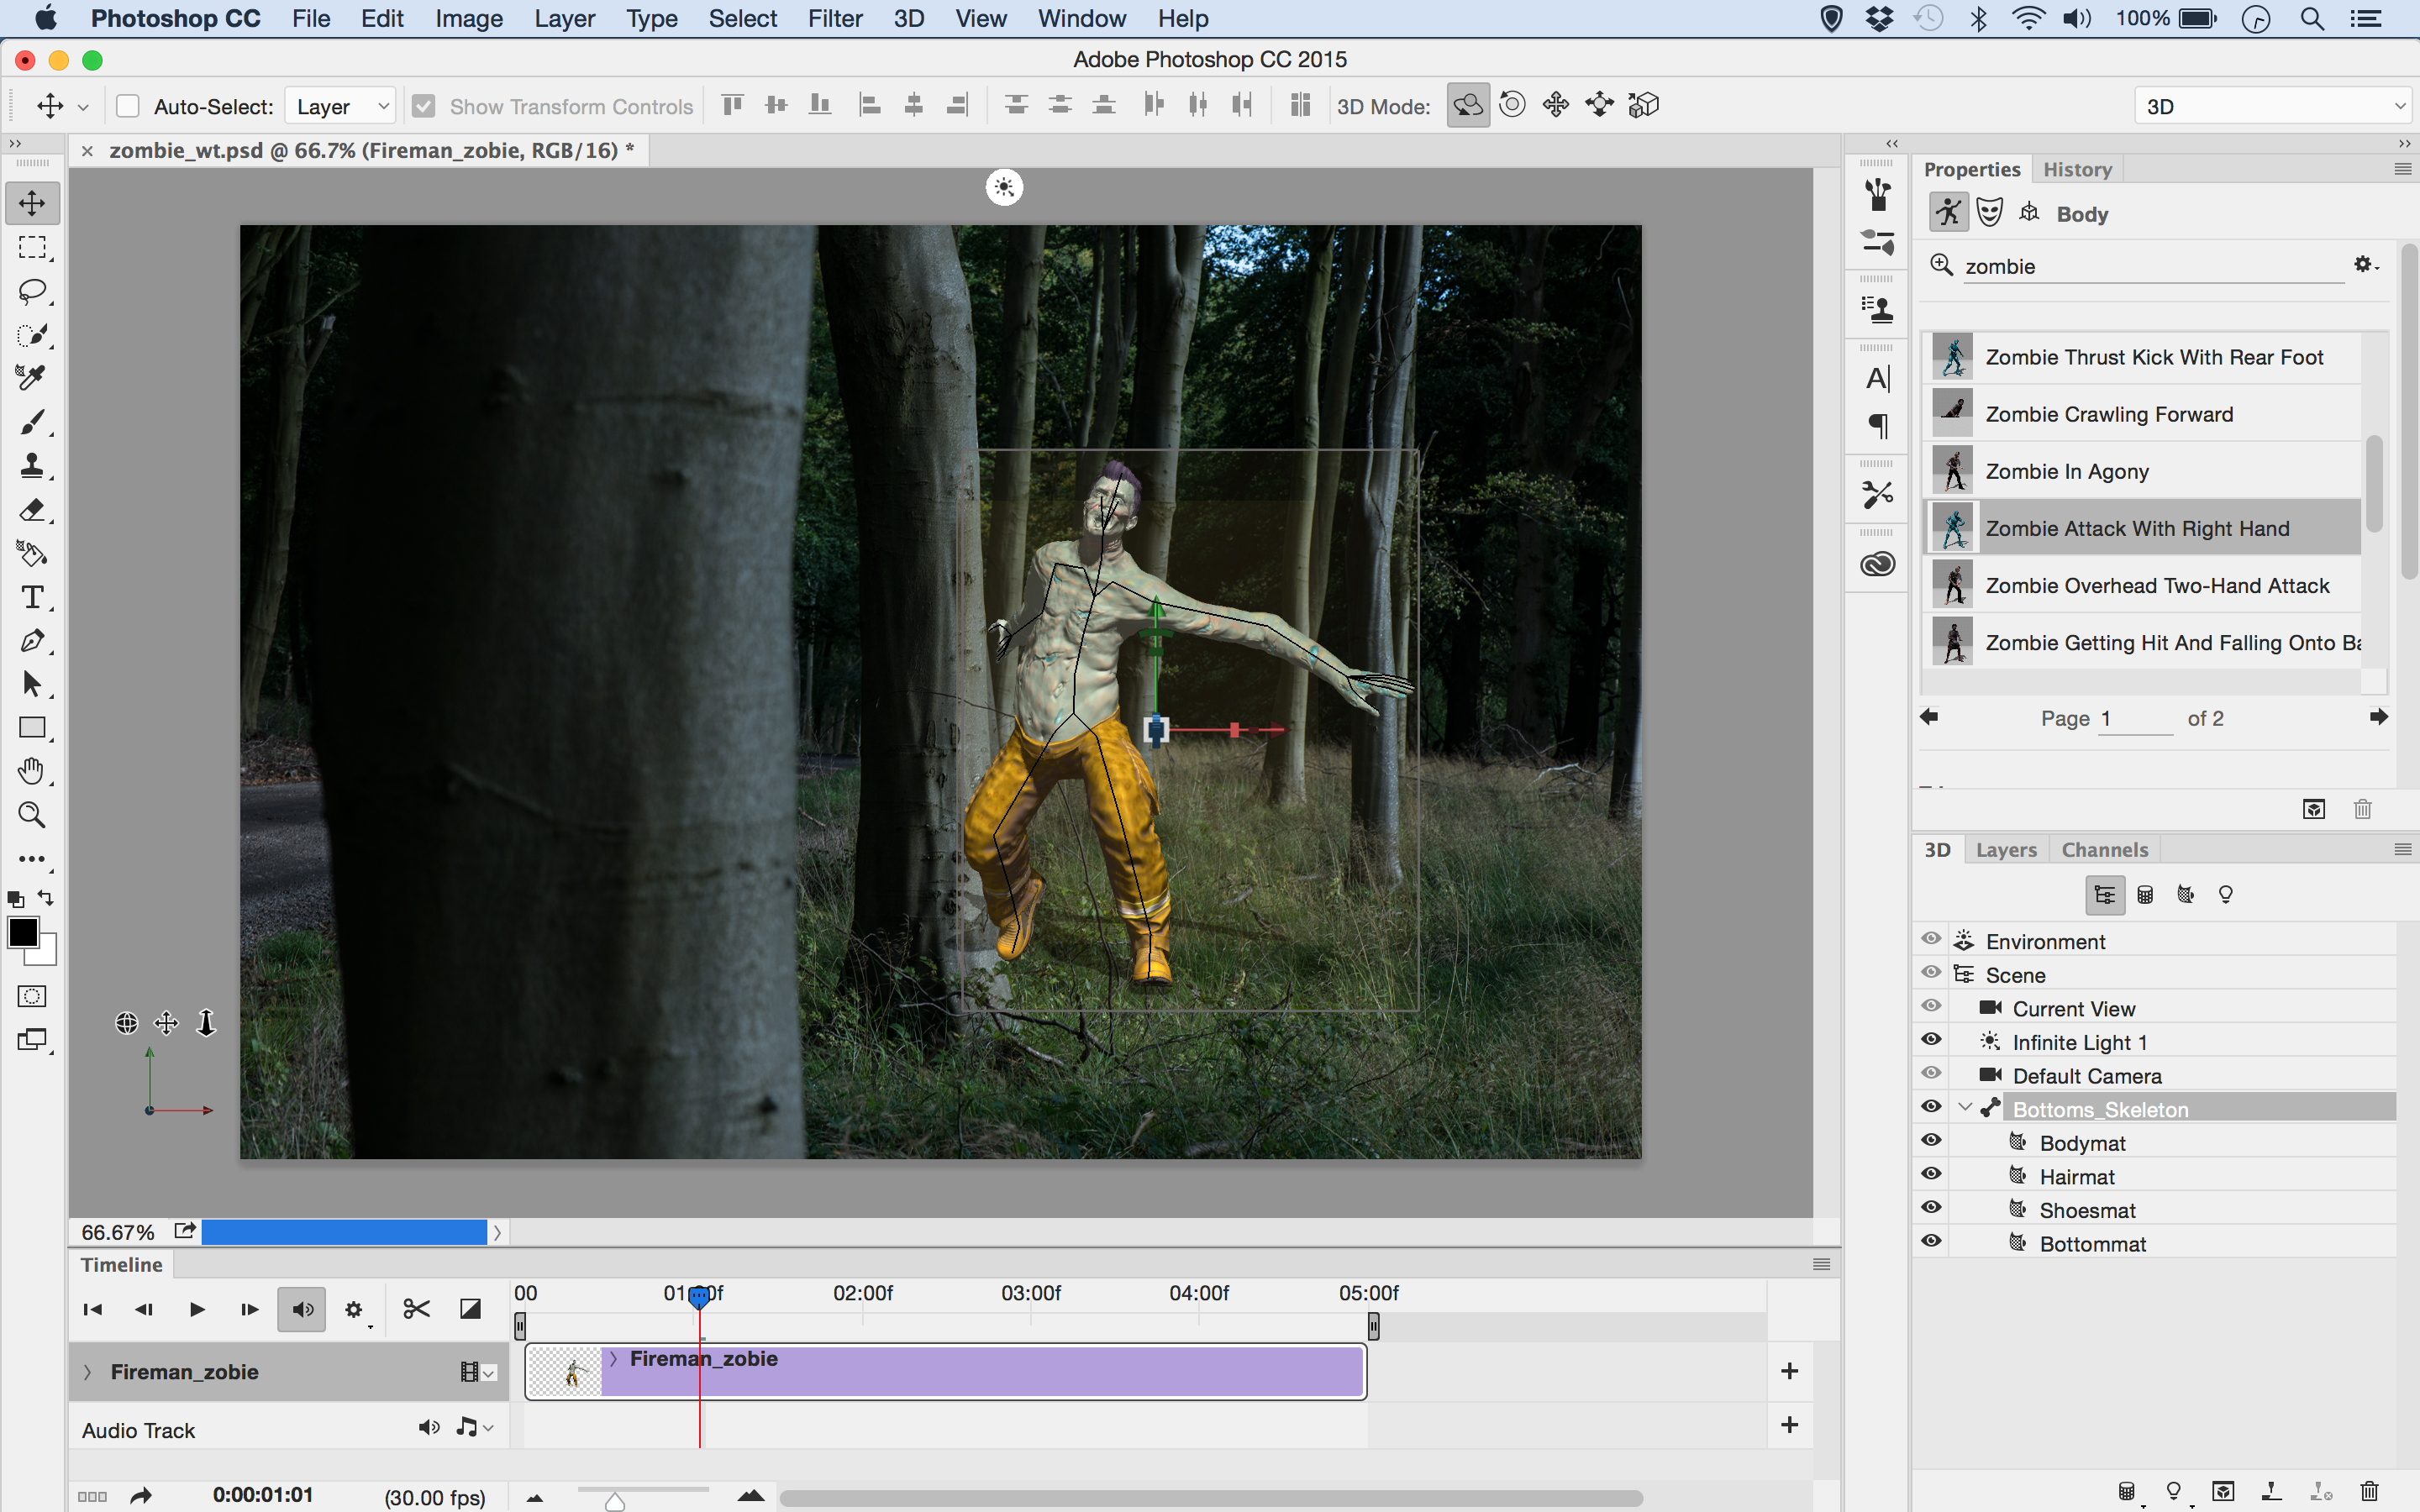
Choose 3D in the workspace options in the top right. Select the character with the Move Tool. In the Properties Panel, click the stick man icon to browse or search for animations. We used ‘Zombie attack with right hand’. Open the Timeline Panel, and move the playhead to choose a body position you like.
05. Match the perspective
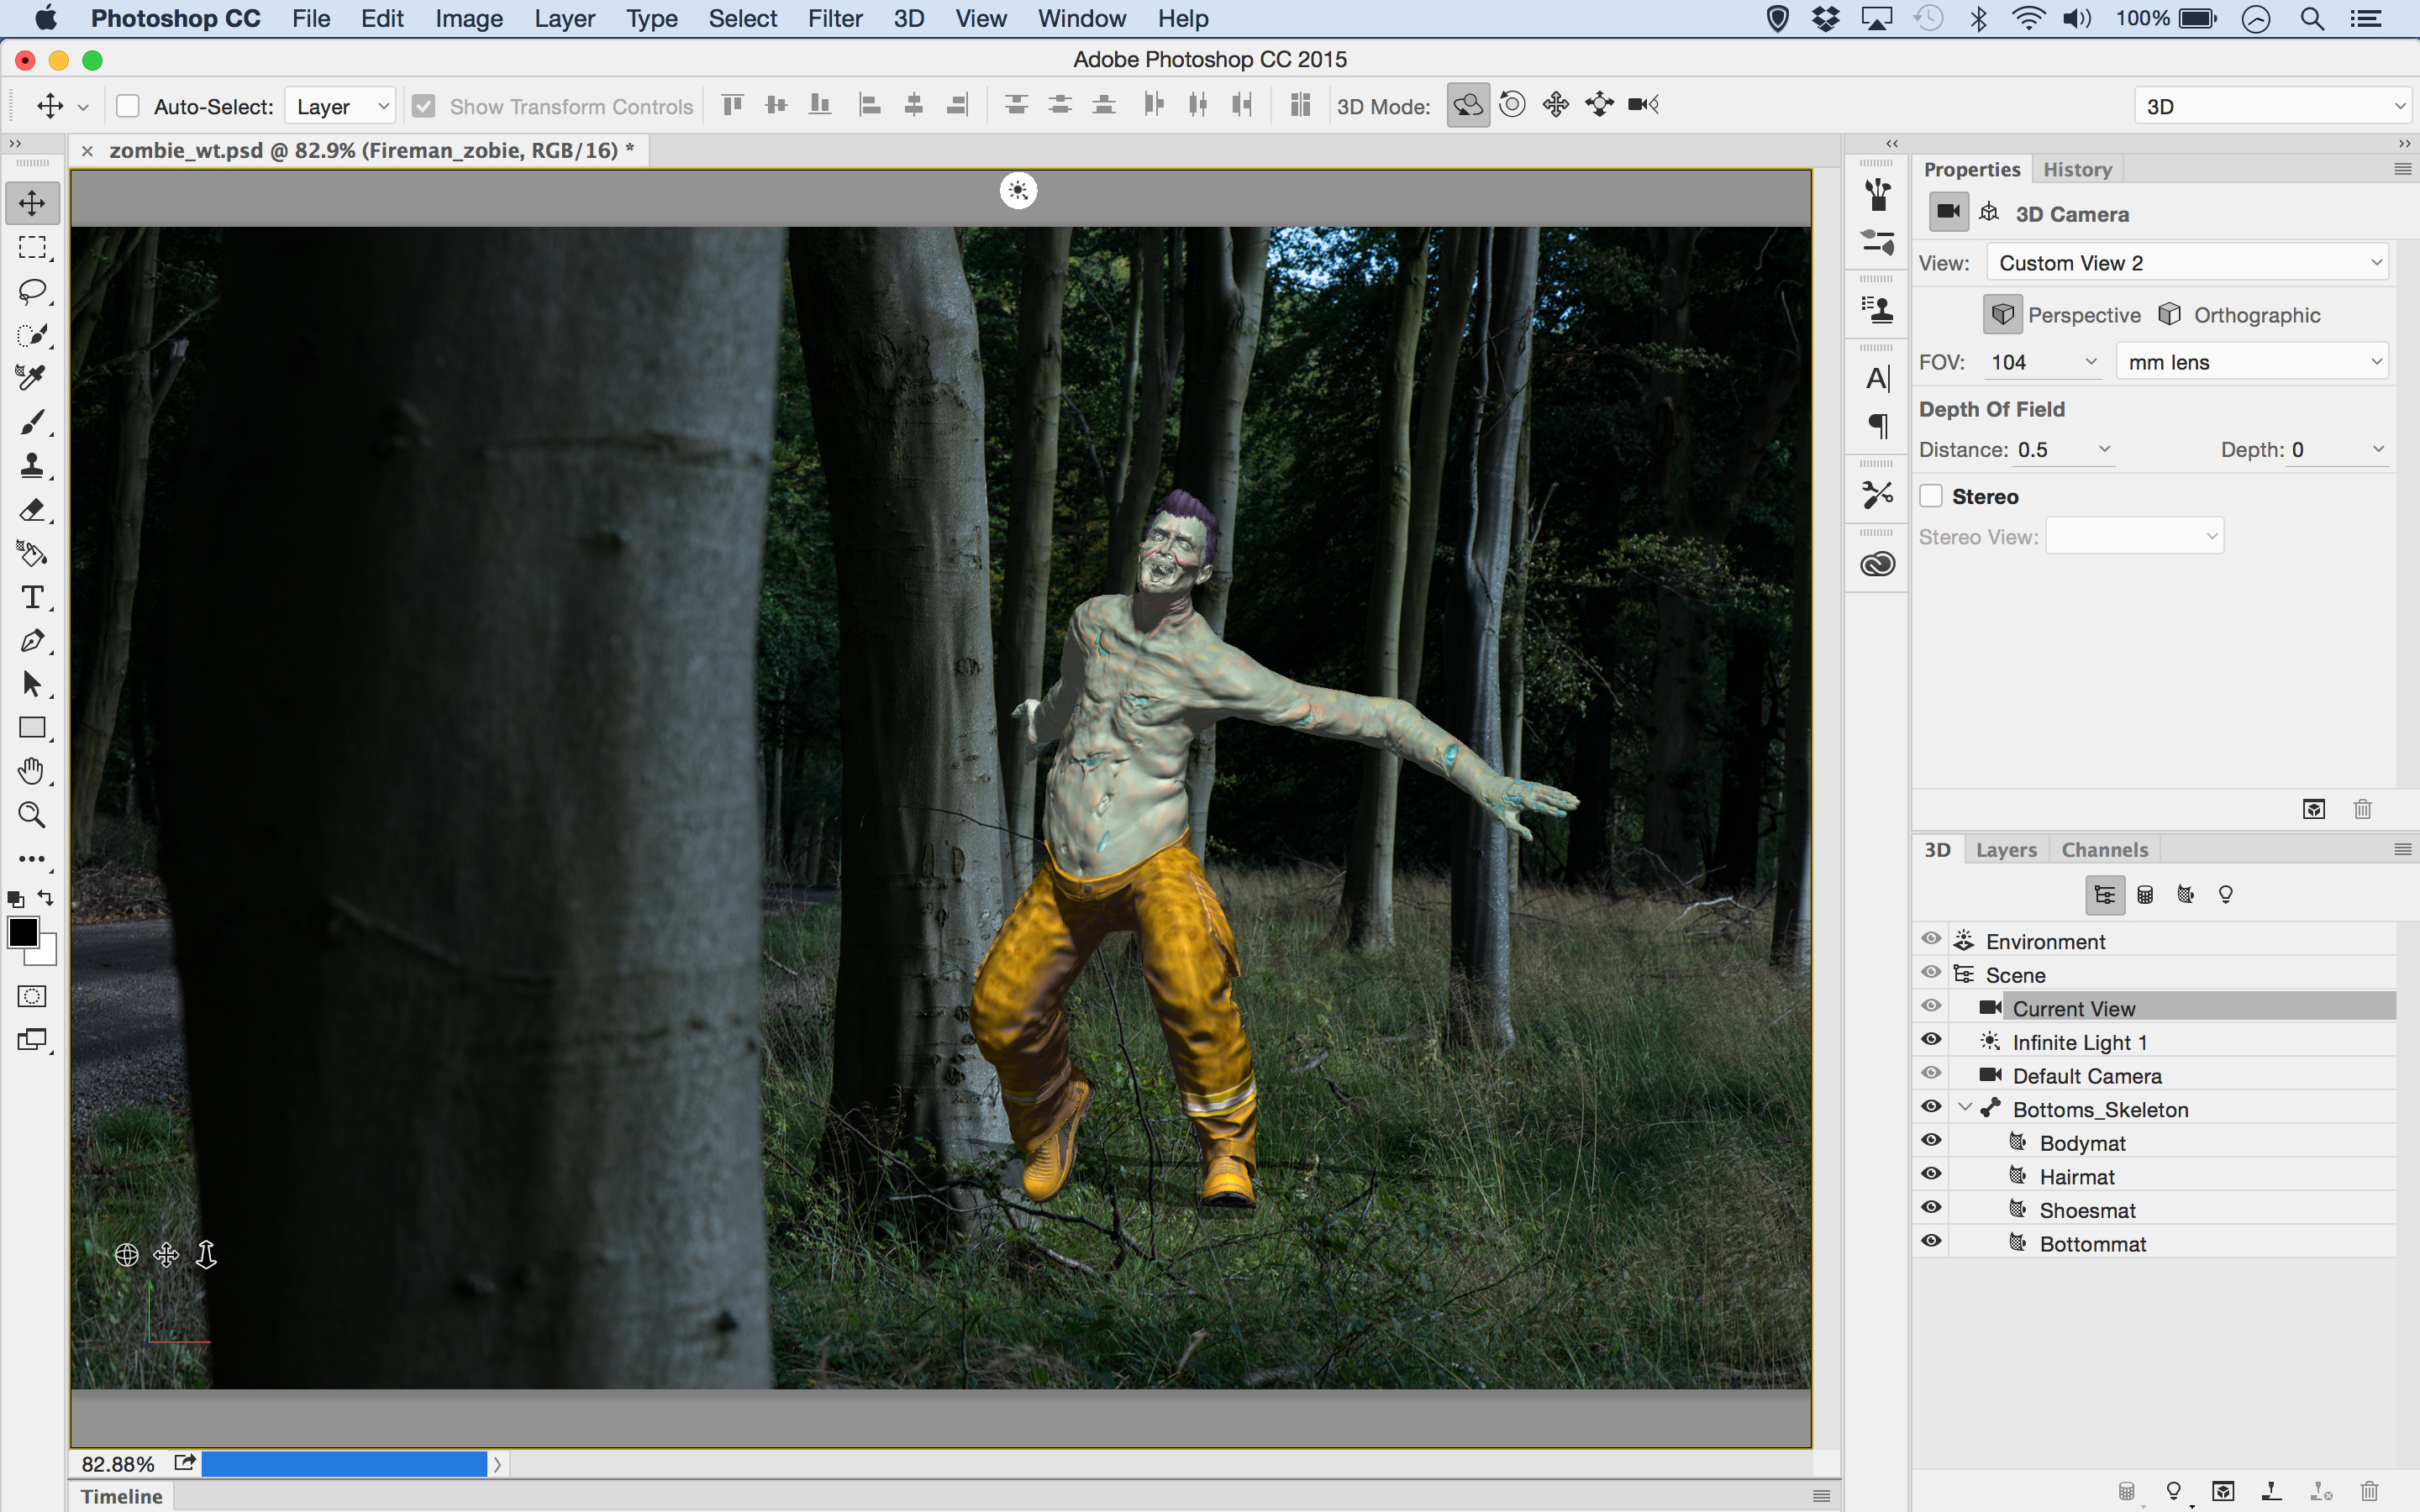
In the 3D Panel, click Current View. In Properties, click FOV and set 105mm (the focal length of the lens used for the background). Click the 3D model then go to Properties’ Coordinates tab. Adjust the first Z column to position the character in the scene.
Daily design news, reviews, how-tos and more, as picked by the editors.
06. Match the lighting
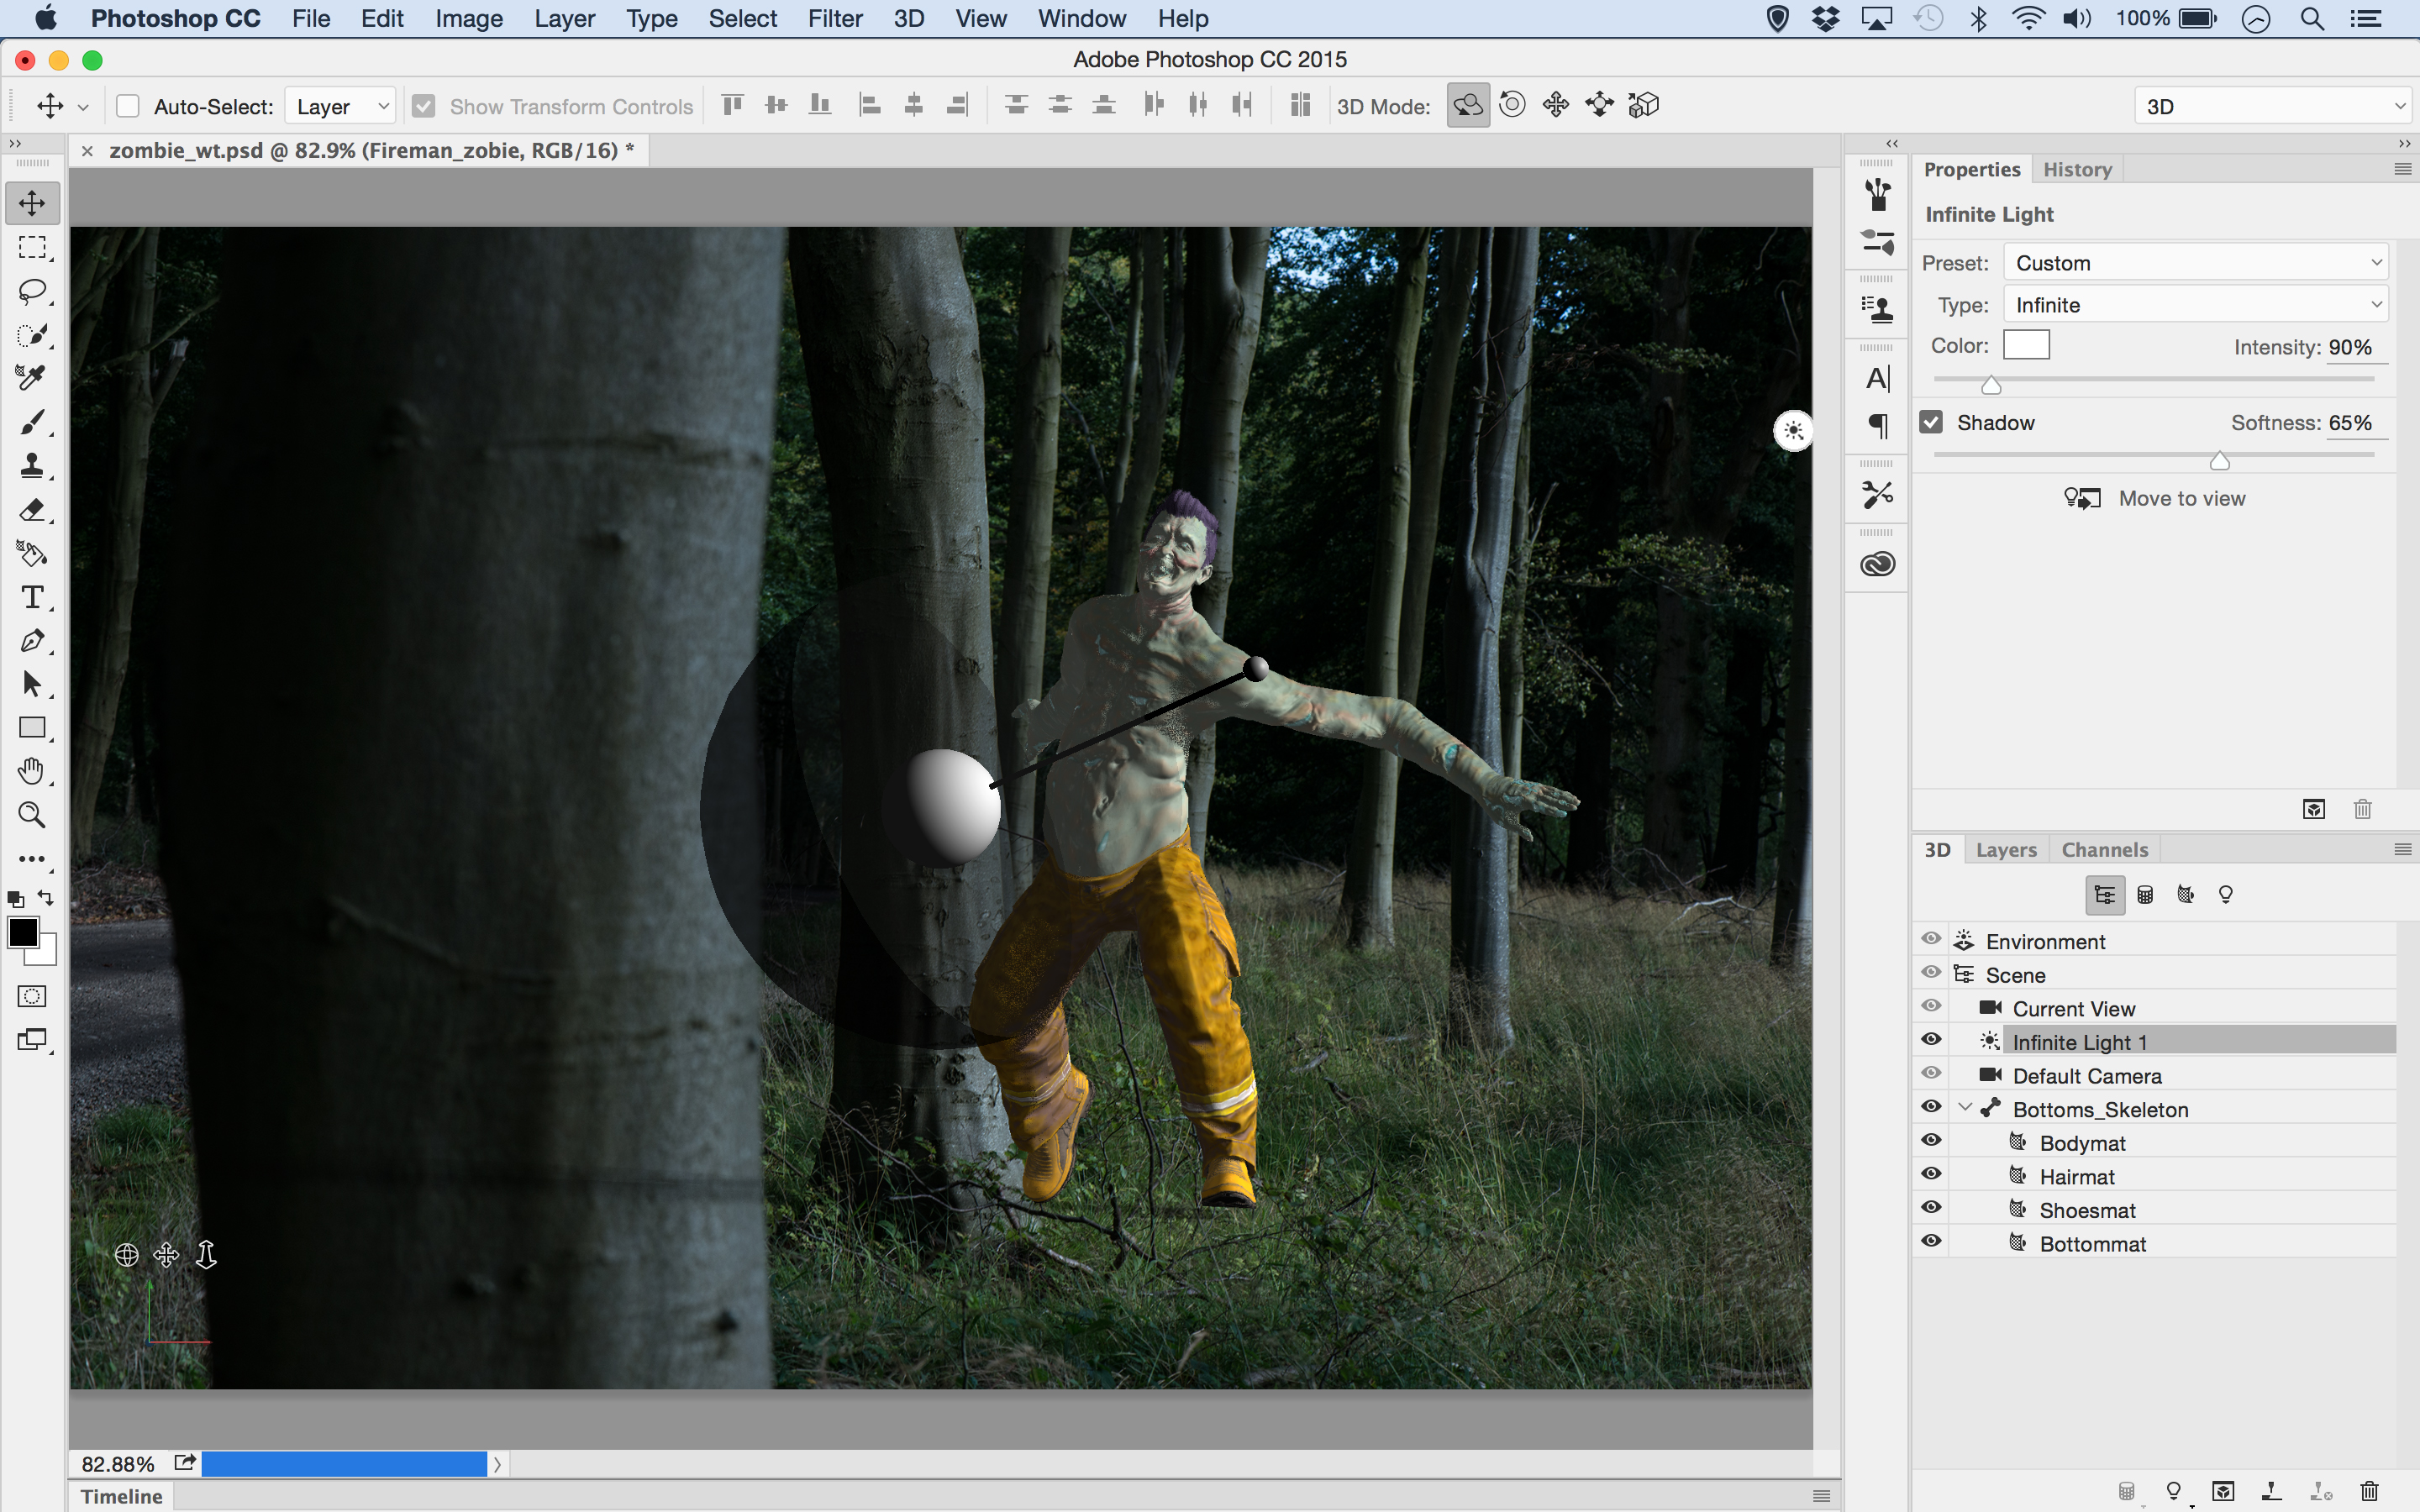
Use the Axis control to fine-tune the position of the figure. In the 3D Panel, click Infinite Light. Use the Move Tool to make the light come from the right, matching the background. In Properties, set Shadow Softness to 65% to soften the light so it looks more natural.
07. Add another 3D character
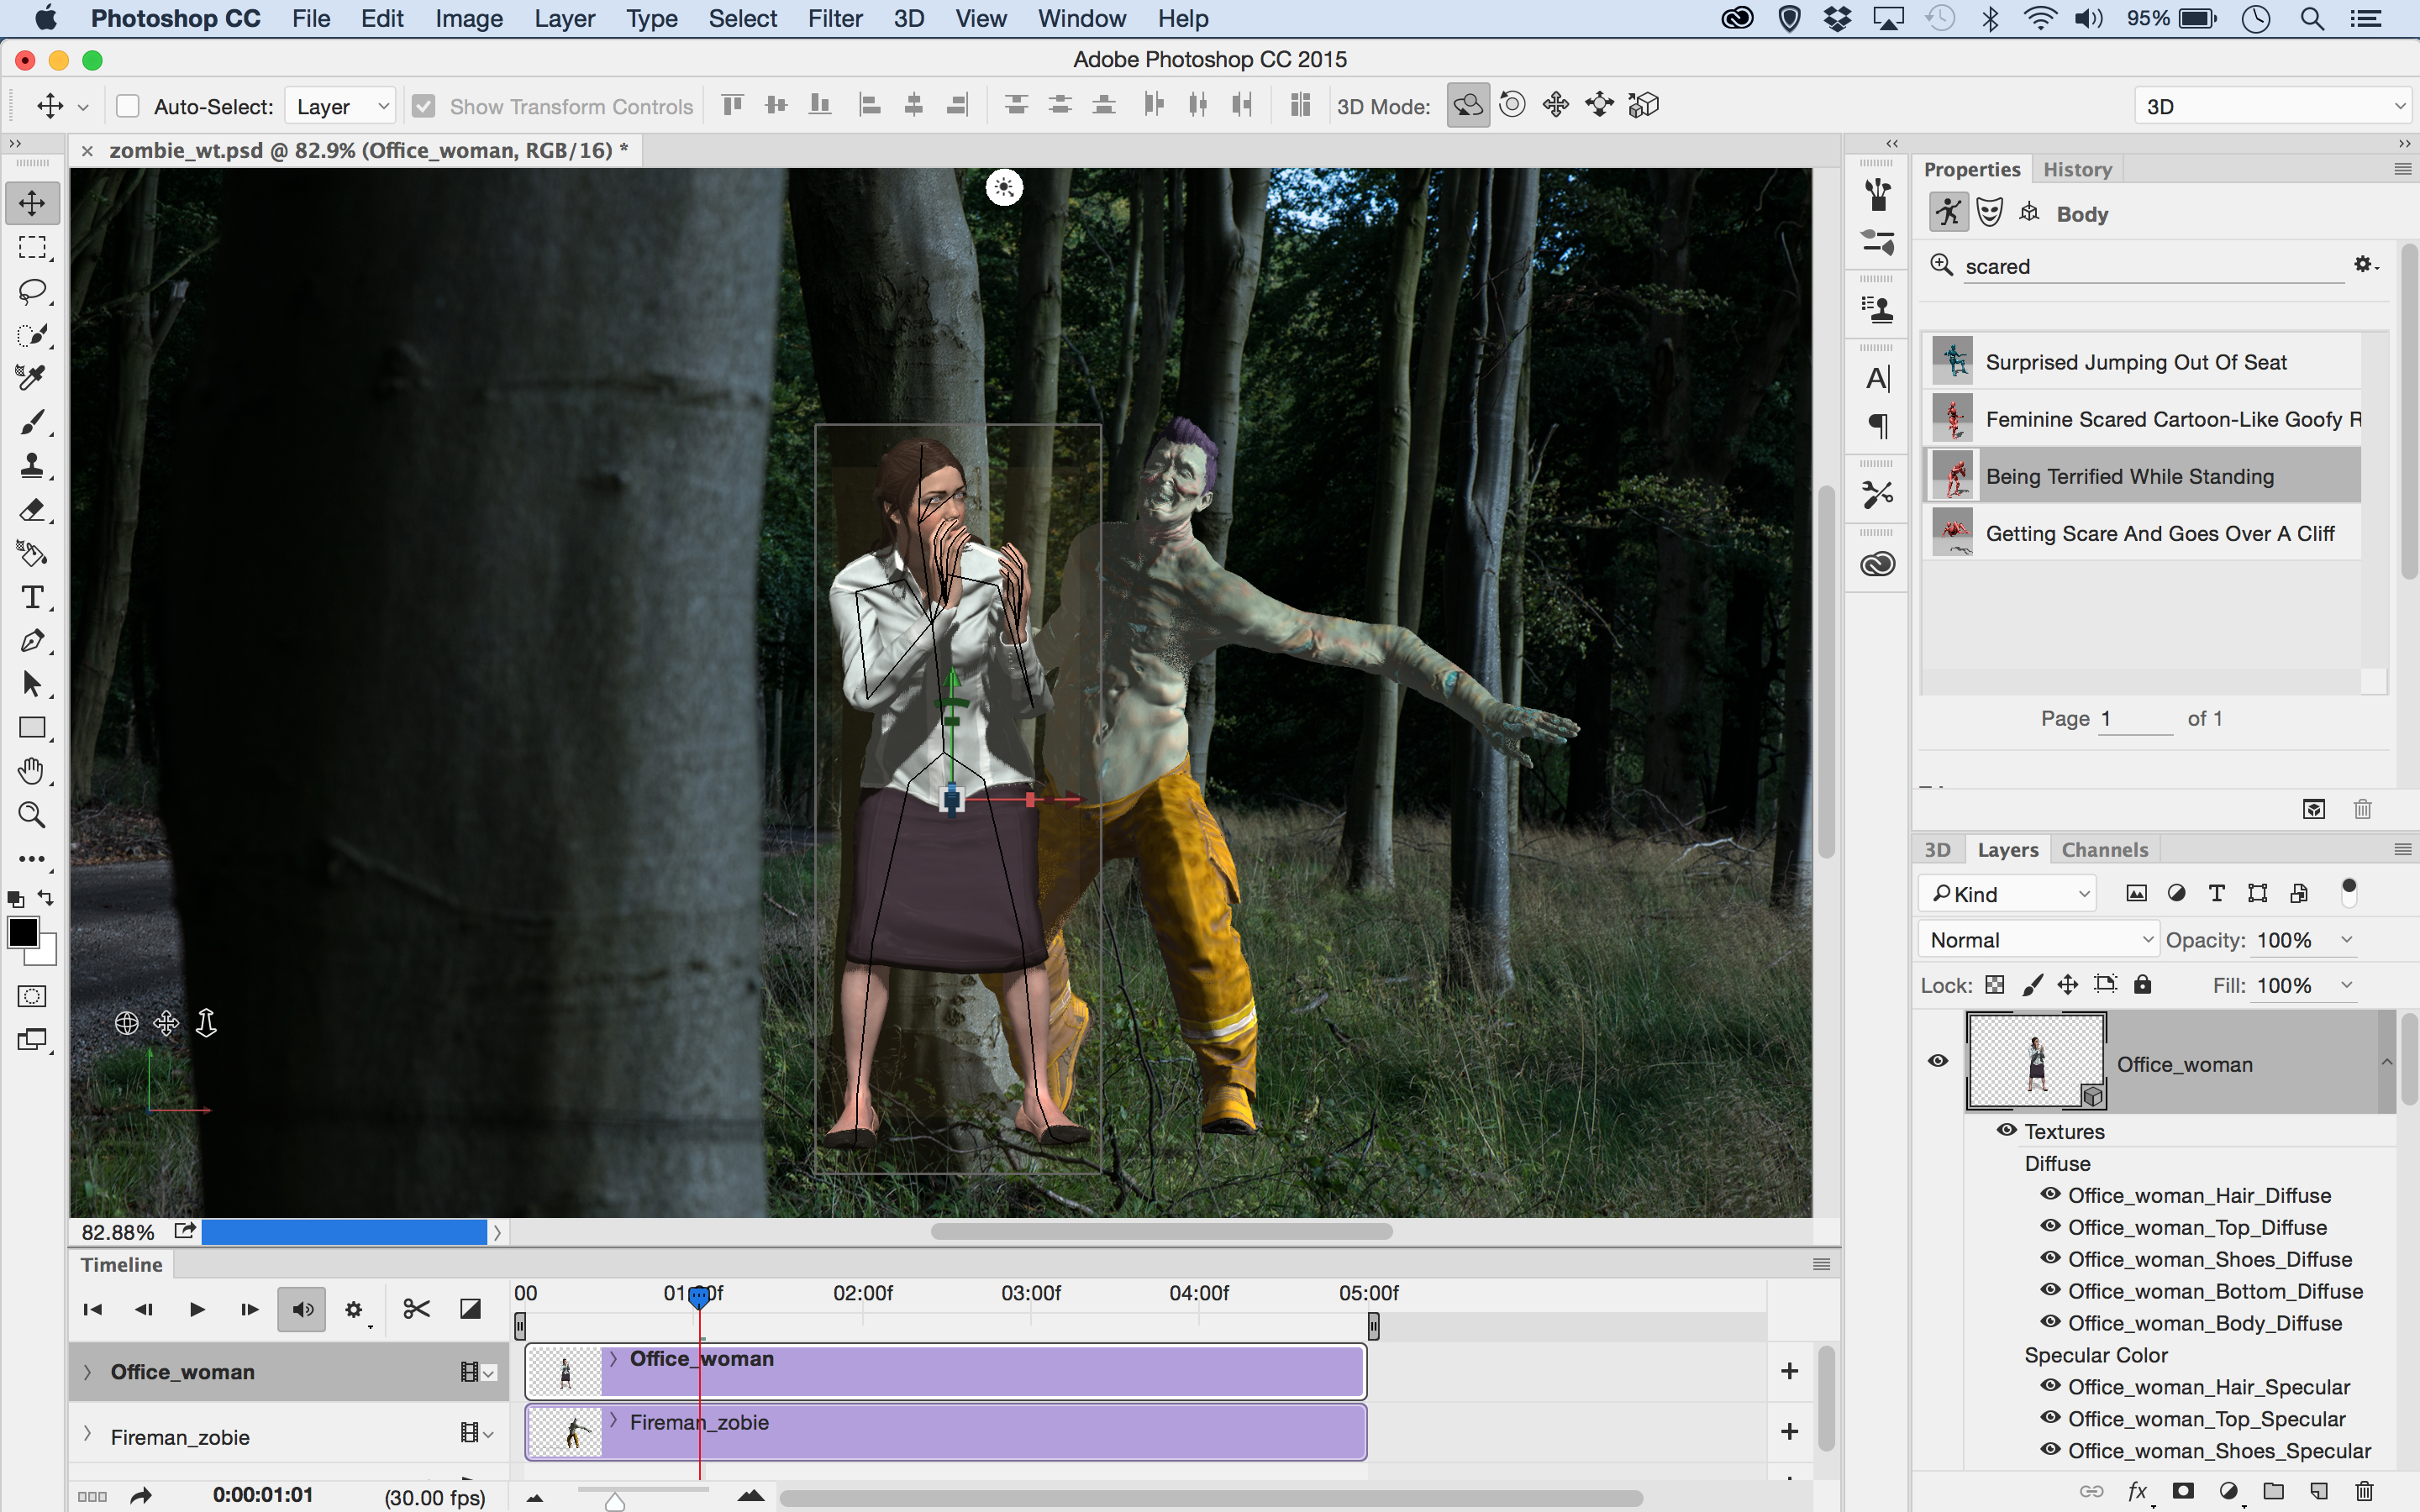
Use Fuse to create more 3D figures and sync them to your libraries. Use the animation presets to choose a pose (like ‘Being terrified while standing’). Instead of moving the playhead (which would change the first figure’s position too), drag the purple block left or right to chose a pose.
08. Merge the shapes
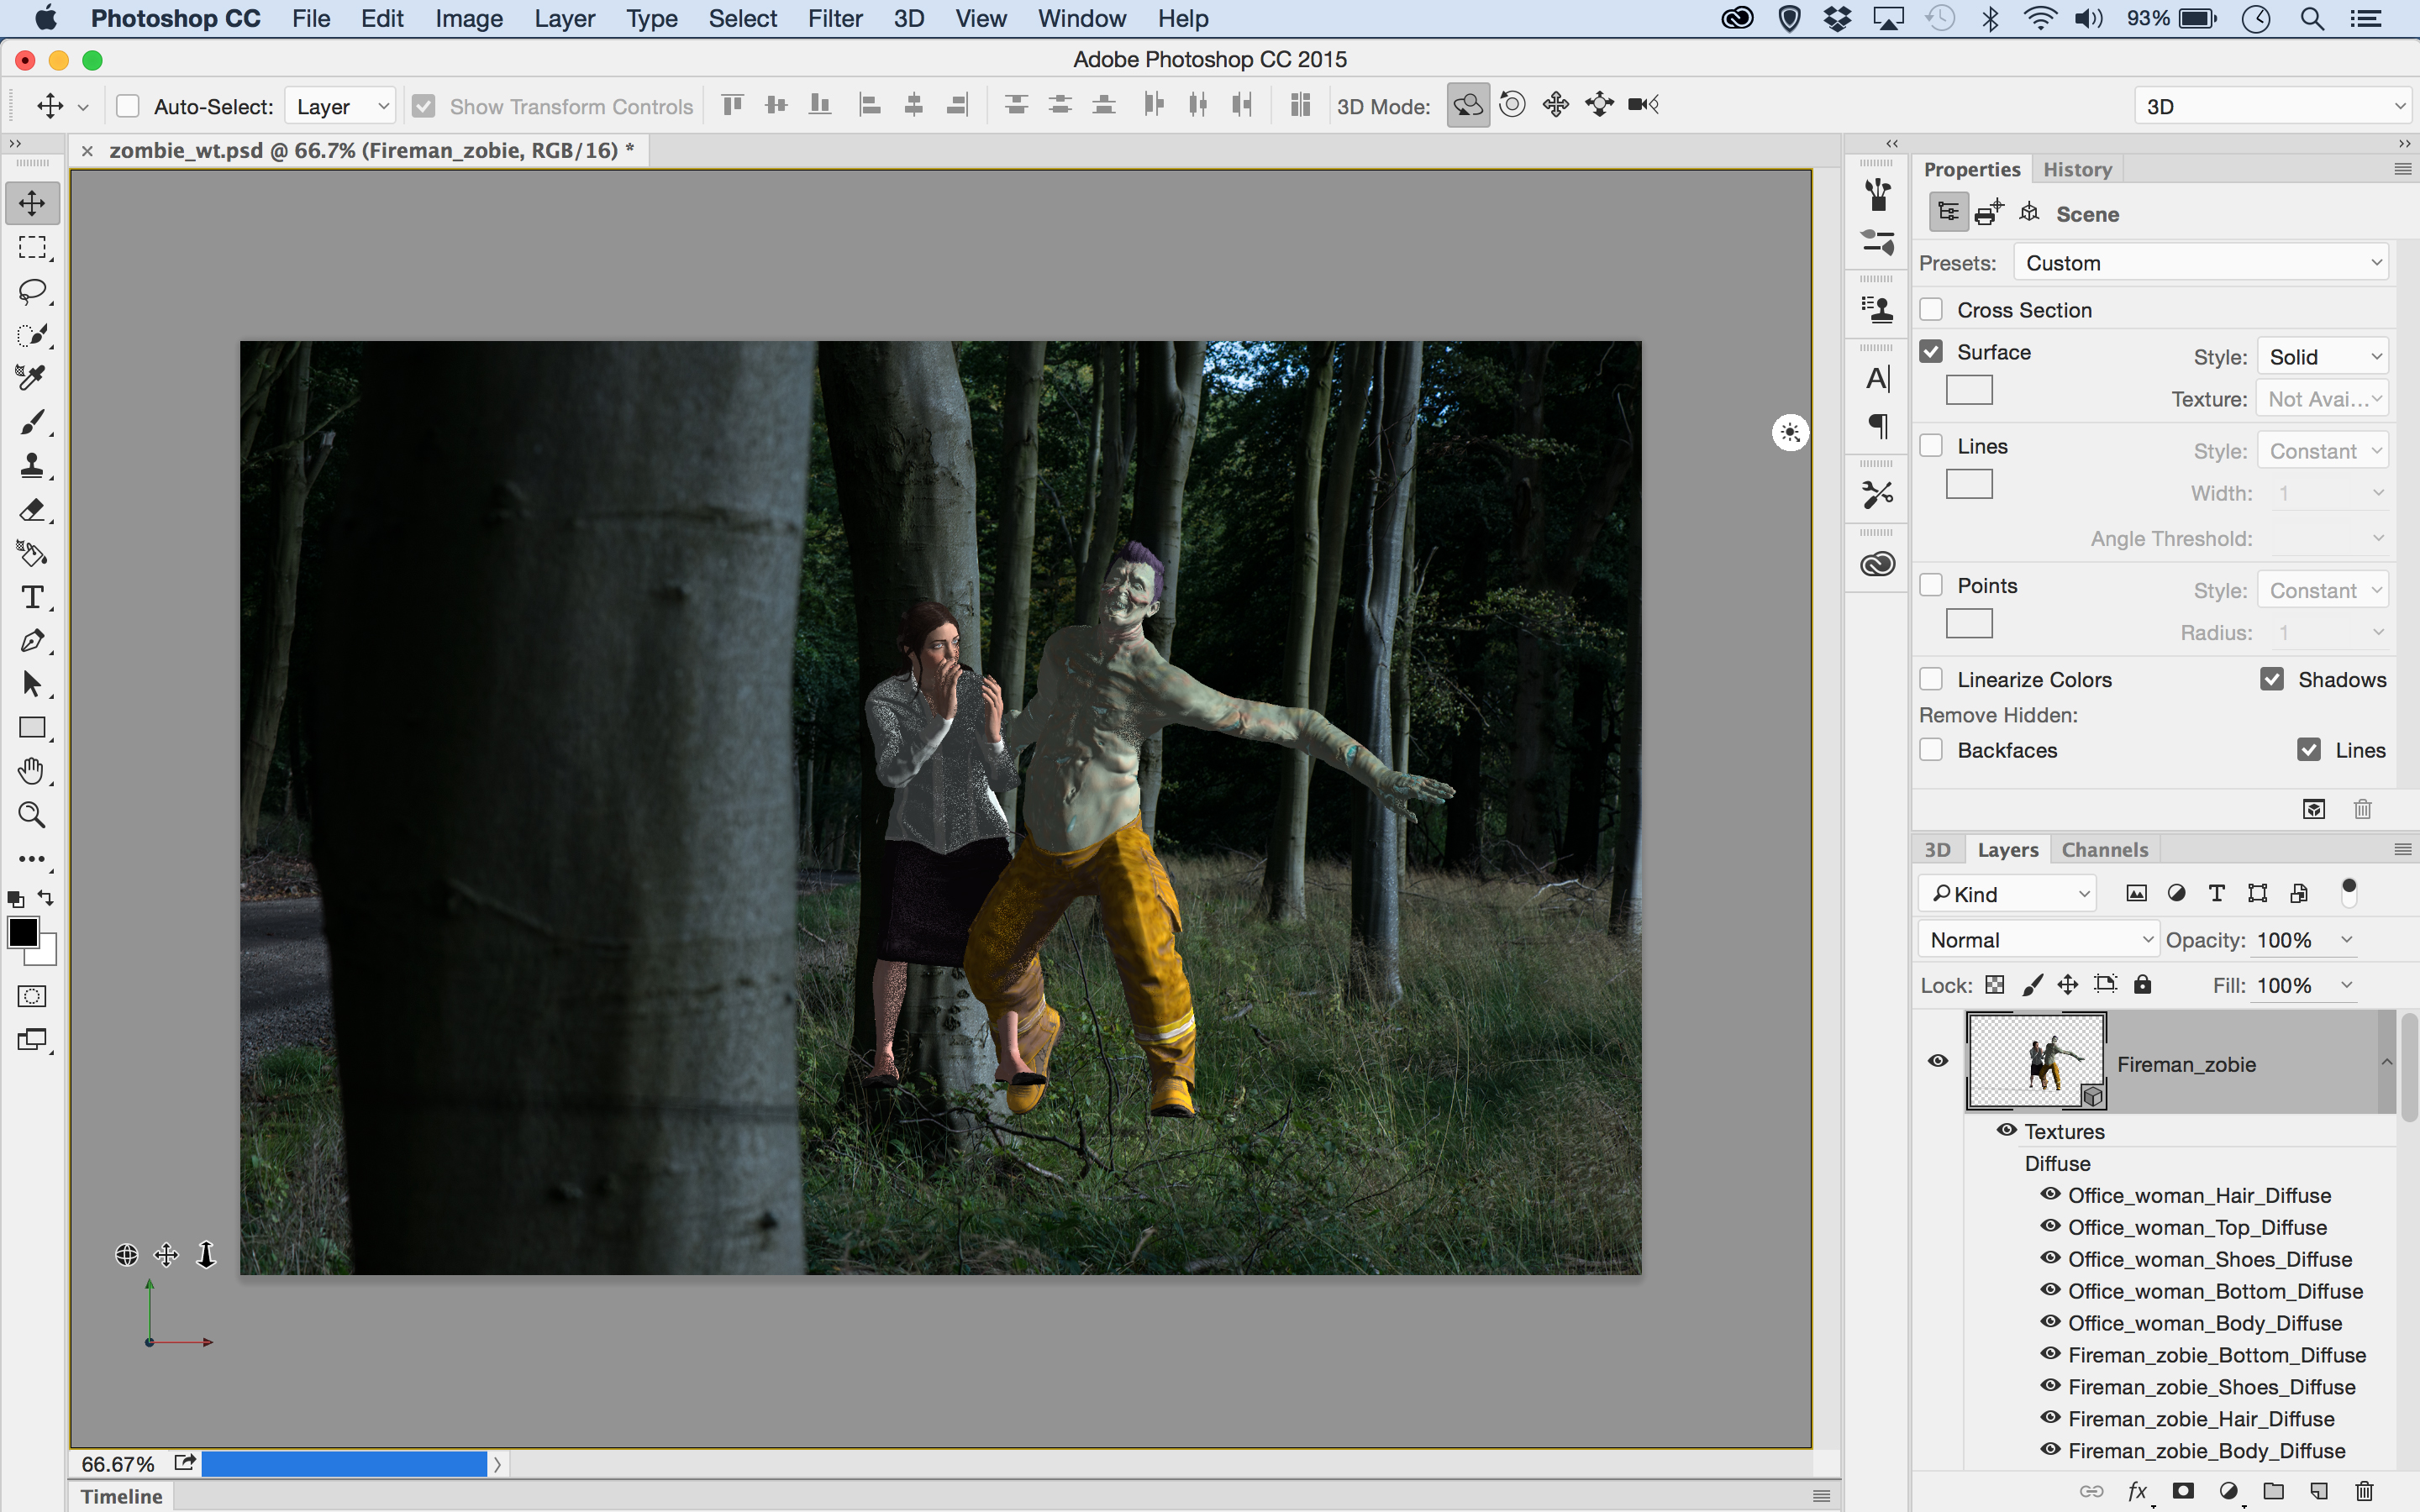
In the Layers Panel, hold Cmd/Ctrl and click the two 3D layers to highlight them, then press Cmd/Ctrl+E to merge. This places both objects in the same scene, so the lighting and perspective match. Each shape remains editable separately via the 3D Panel.
09. Add an expression
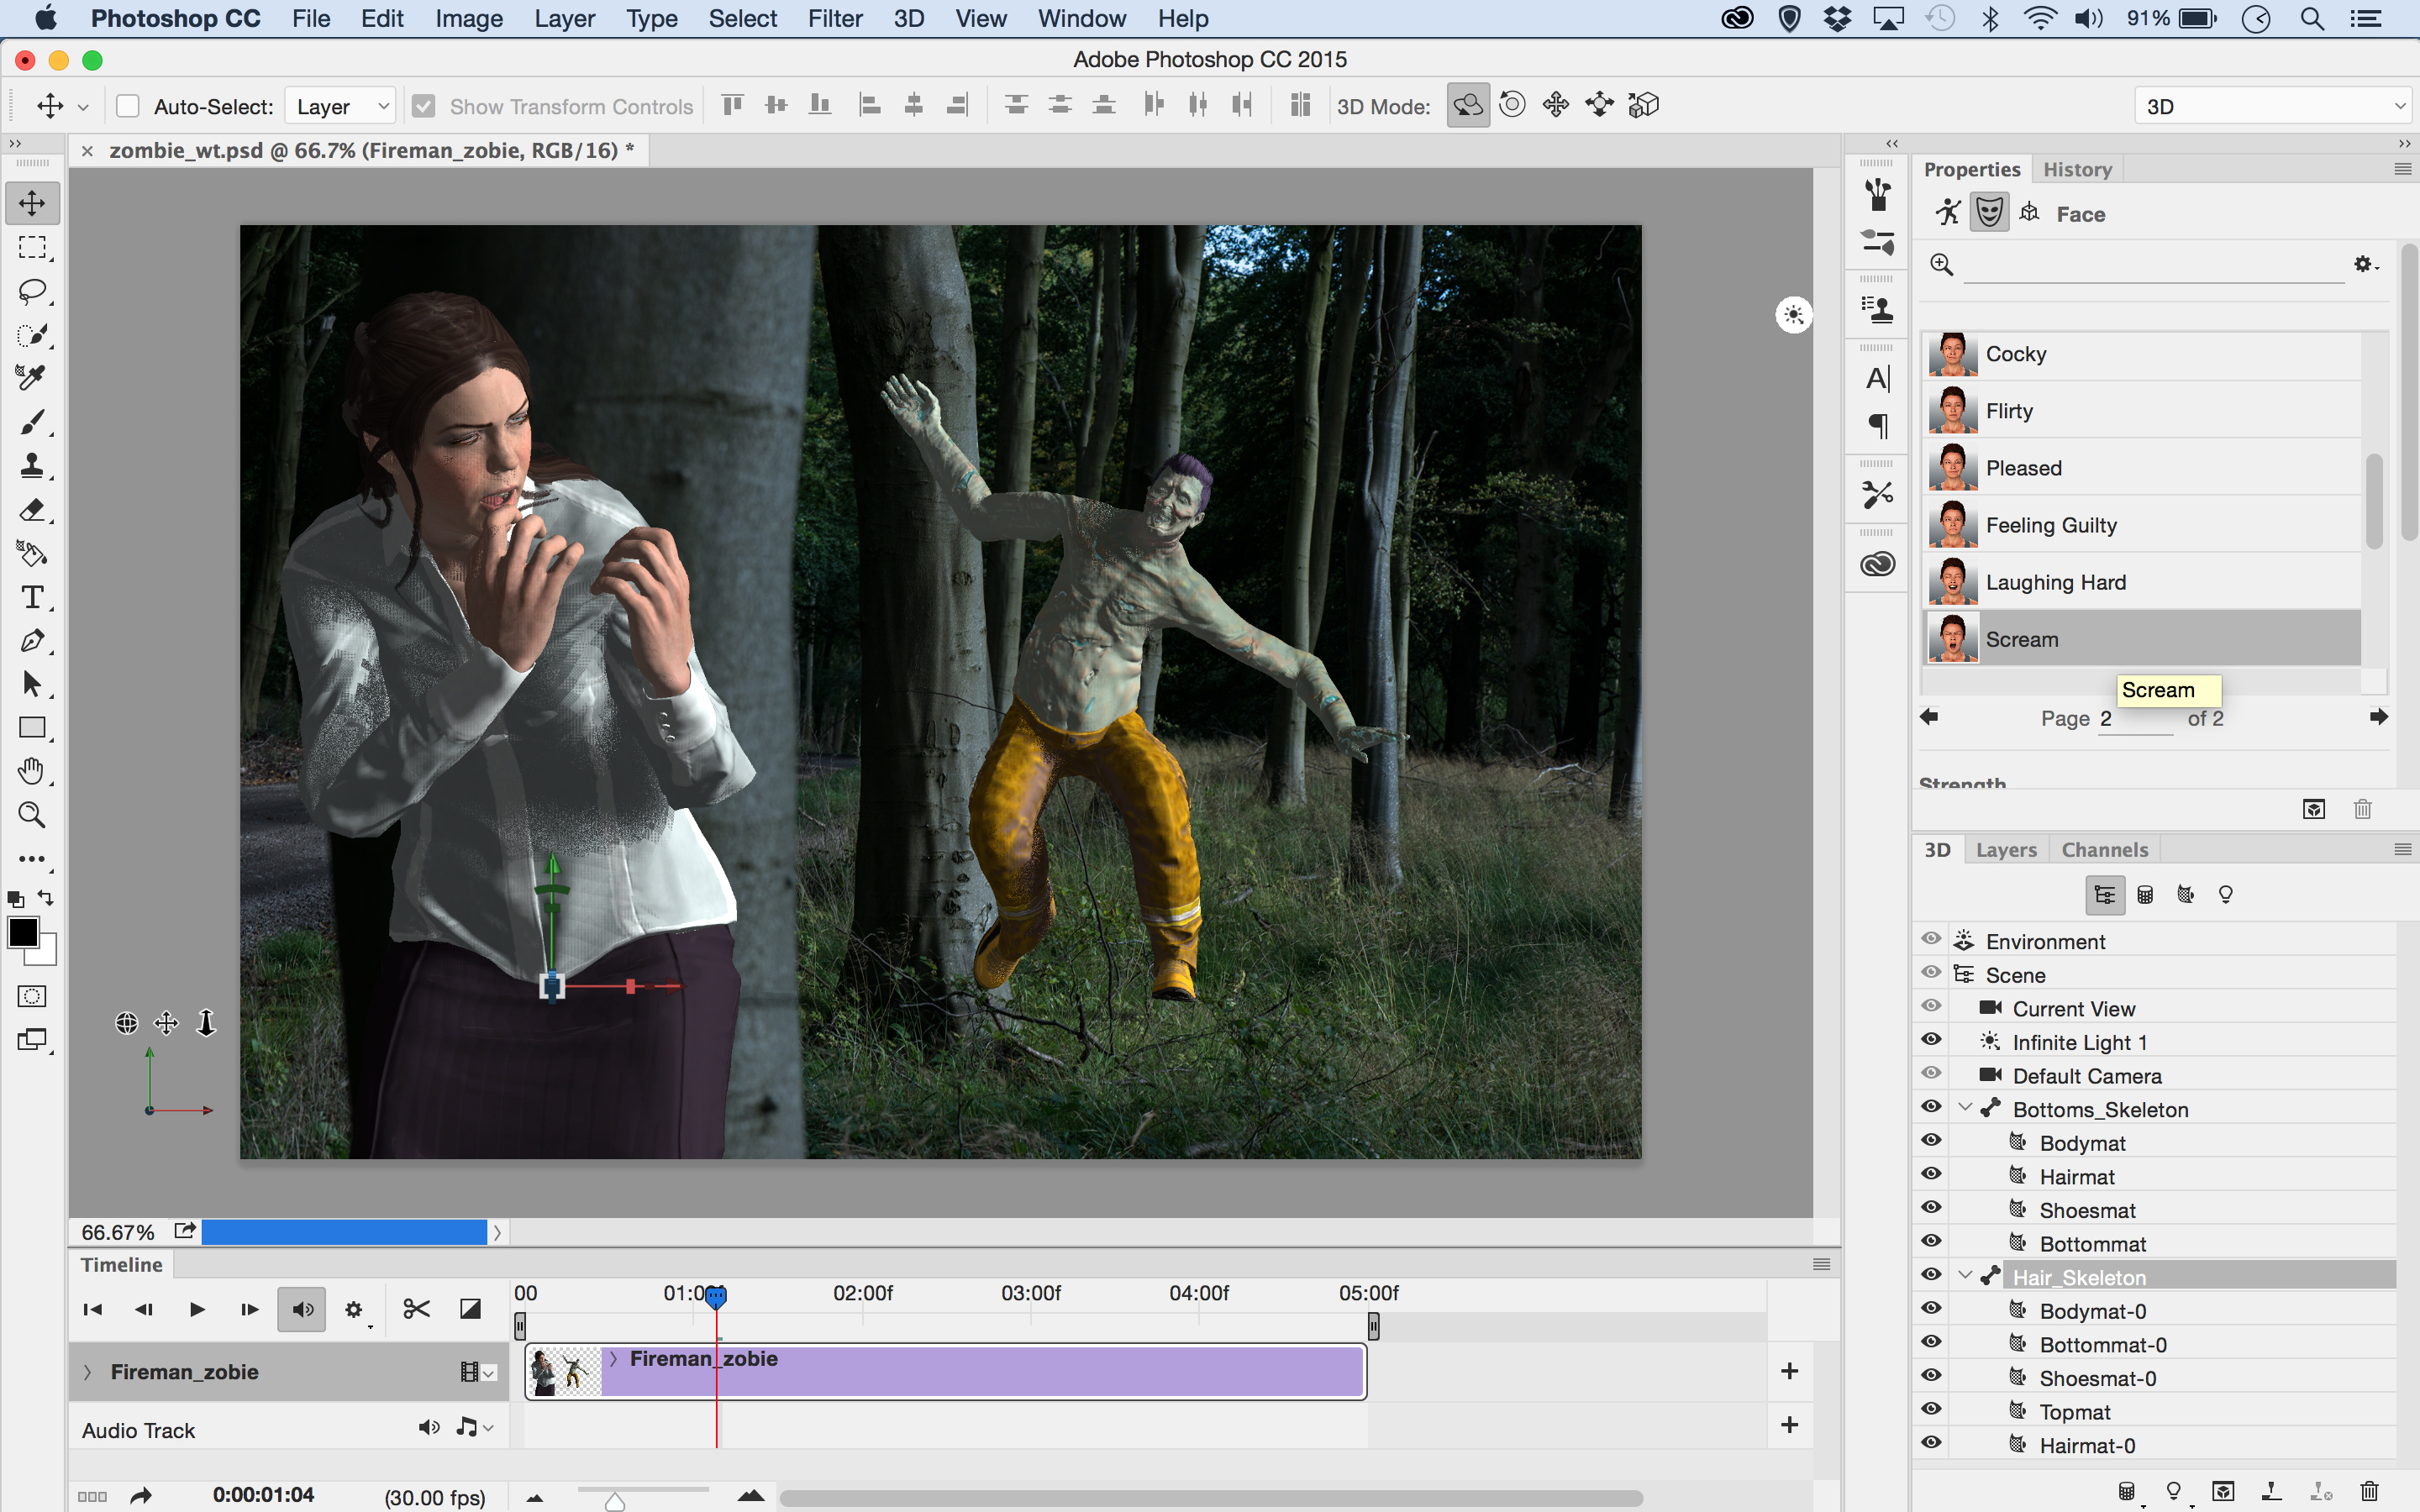
Select the newly added model with the Move Tool. Use the Axis control or the Coordinates tab in the Properties Panel to move it forwards or backwards and left or right in the scene. Next, click the Face tab in the Properties Panel and add a suitable expression, like ‘Scream’ here.
10. Fit the scenery
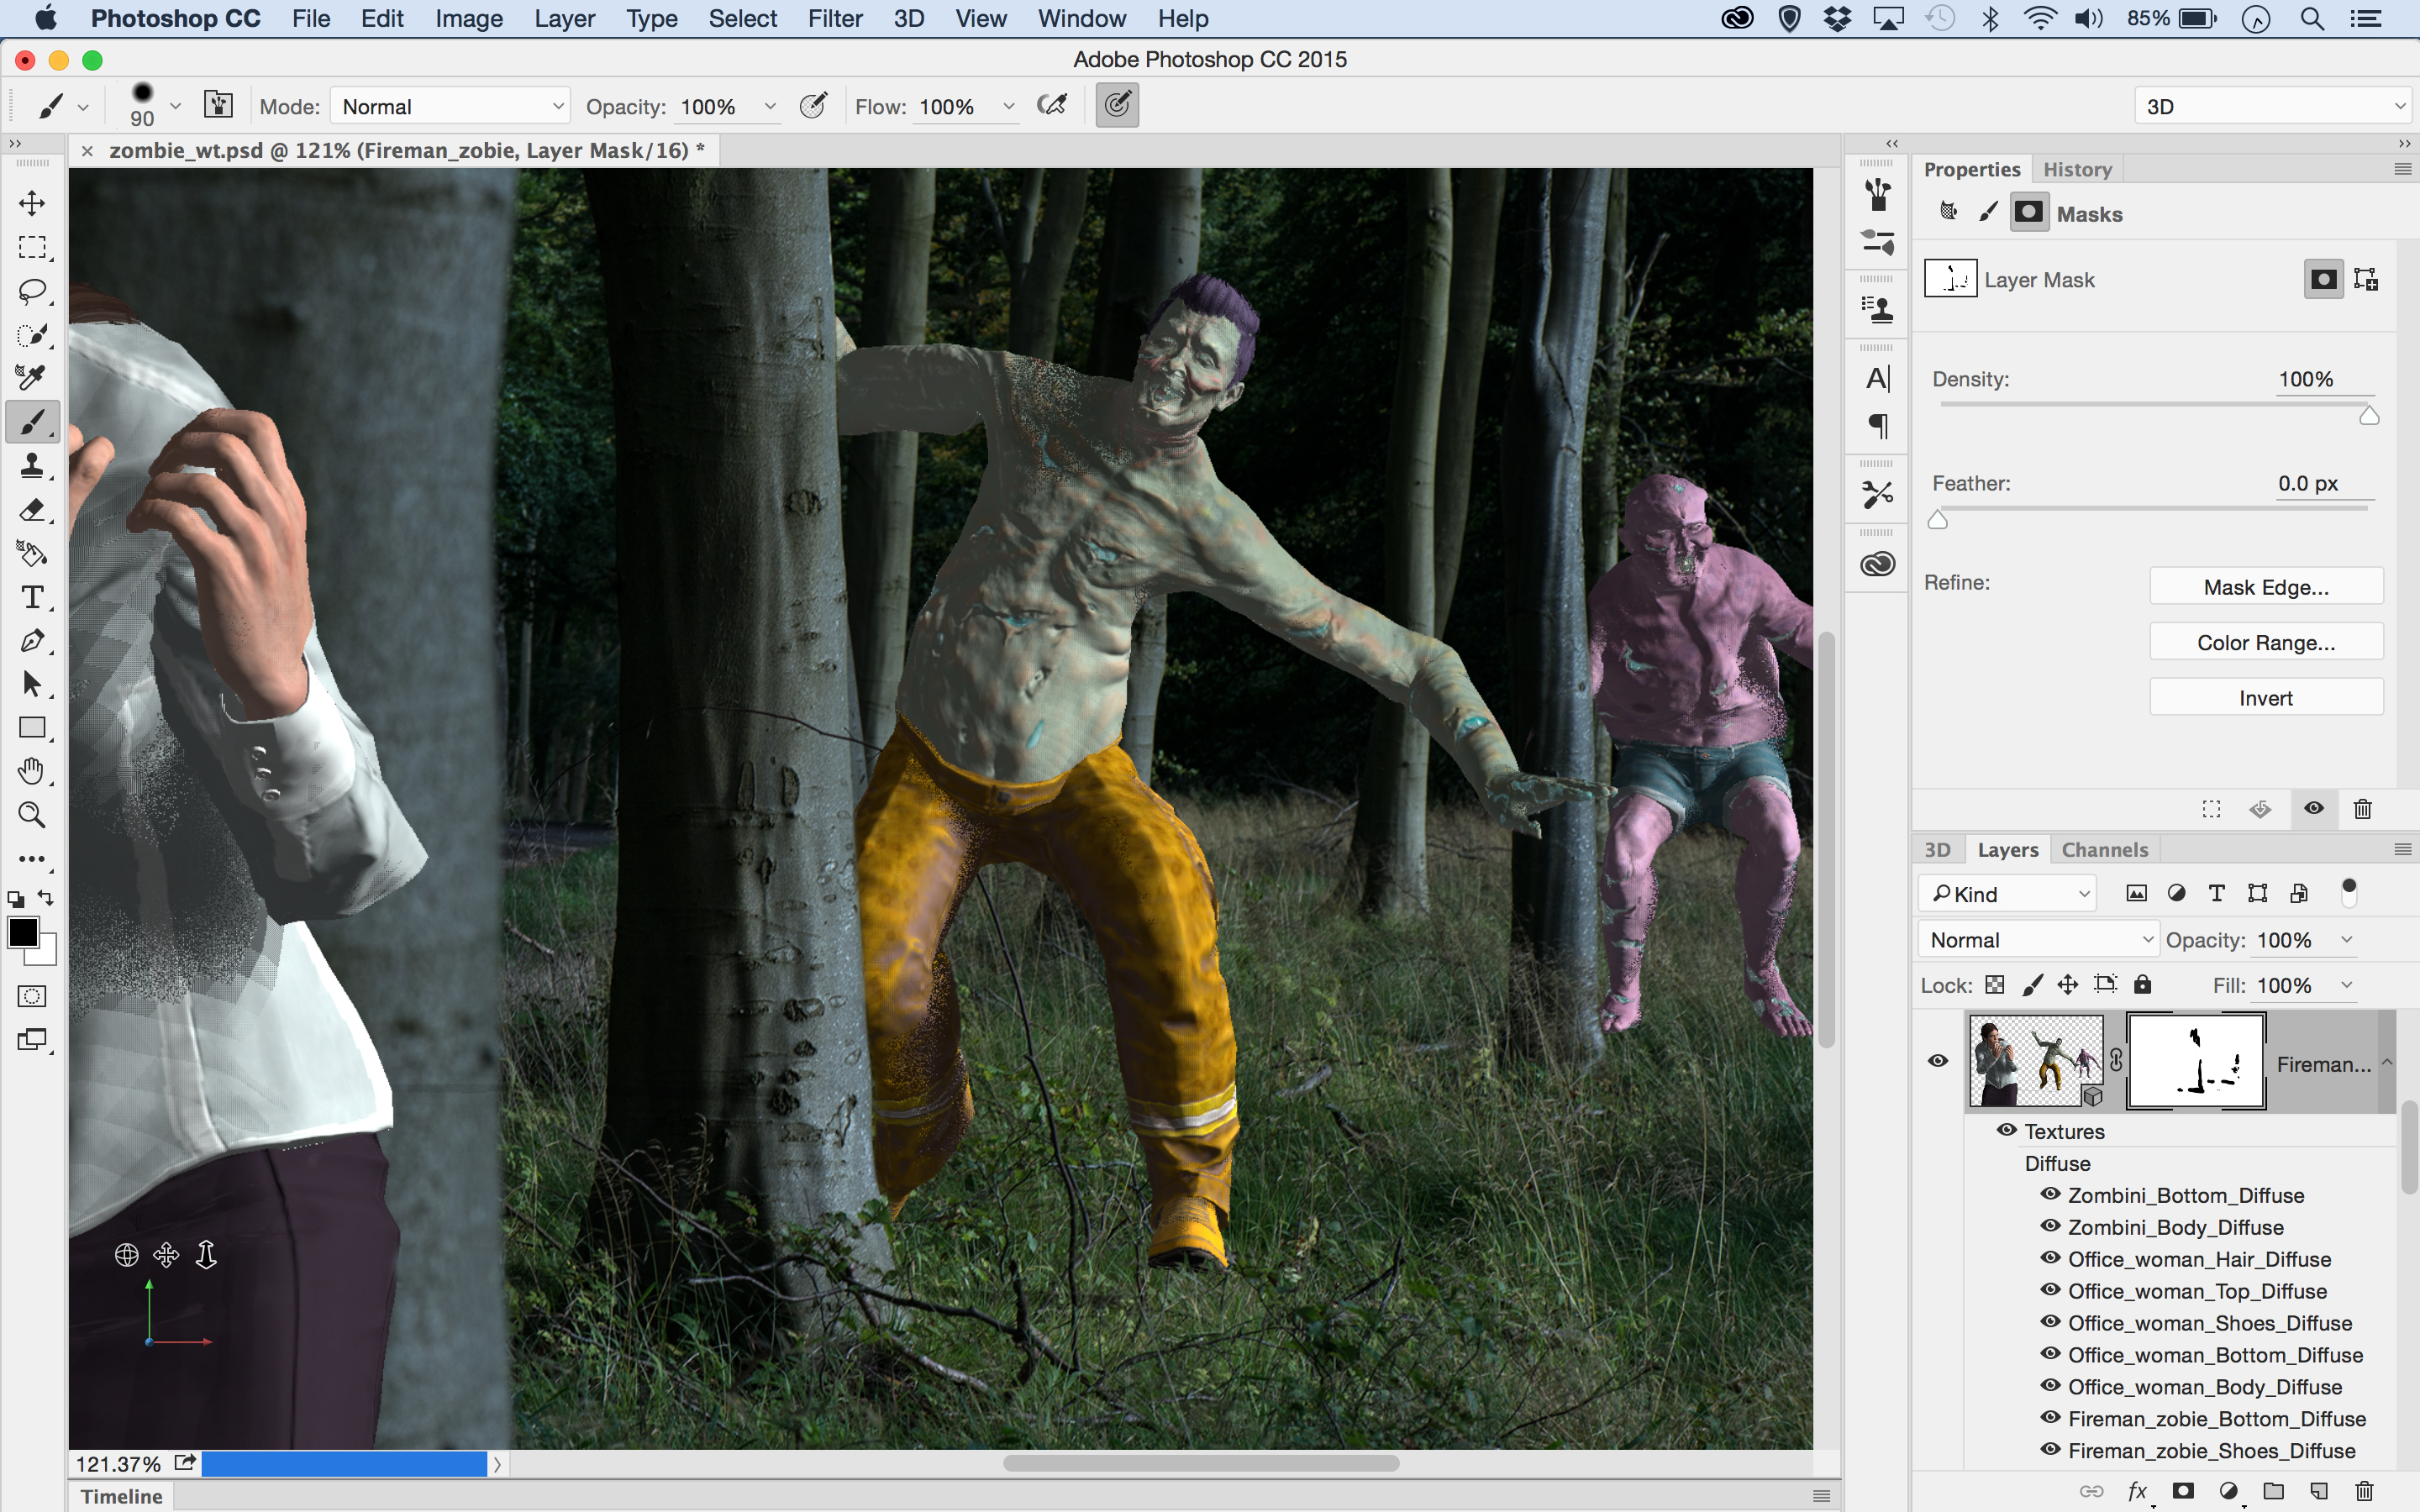
Add any other figures you want. When you’re happy, go to the Layers Panel and click the Add Layer Mask icon, then zoom in close. Paint with a black brush to hide the parts of the figures that would be behind the trees. Paint the bottom of the characters’ feet too, to reveal a few blades of grass.
11. Add depth of field
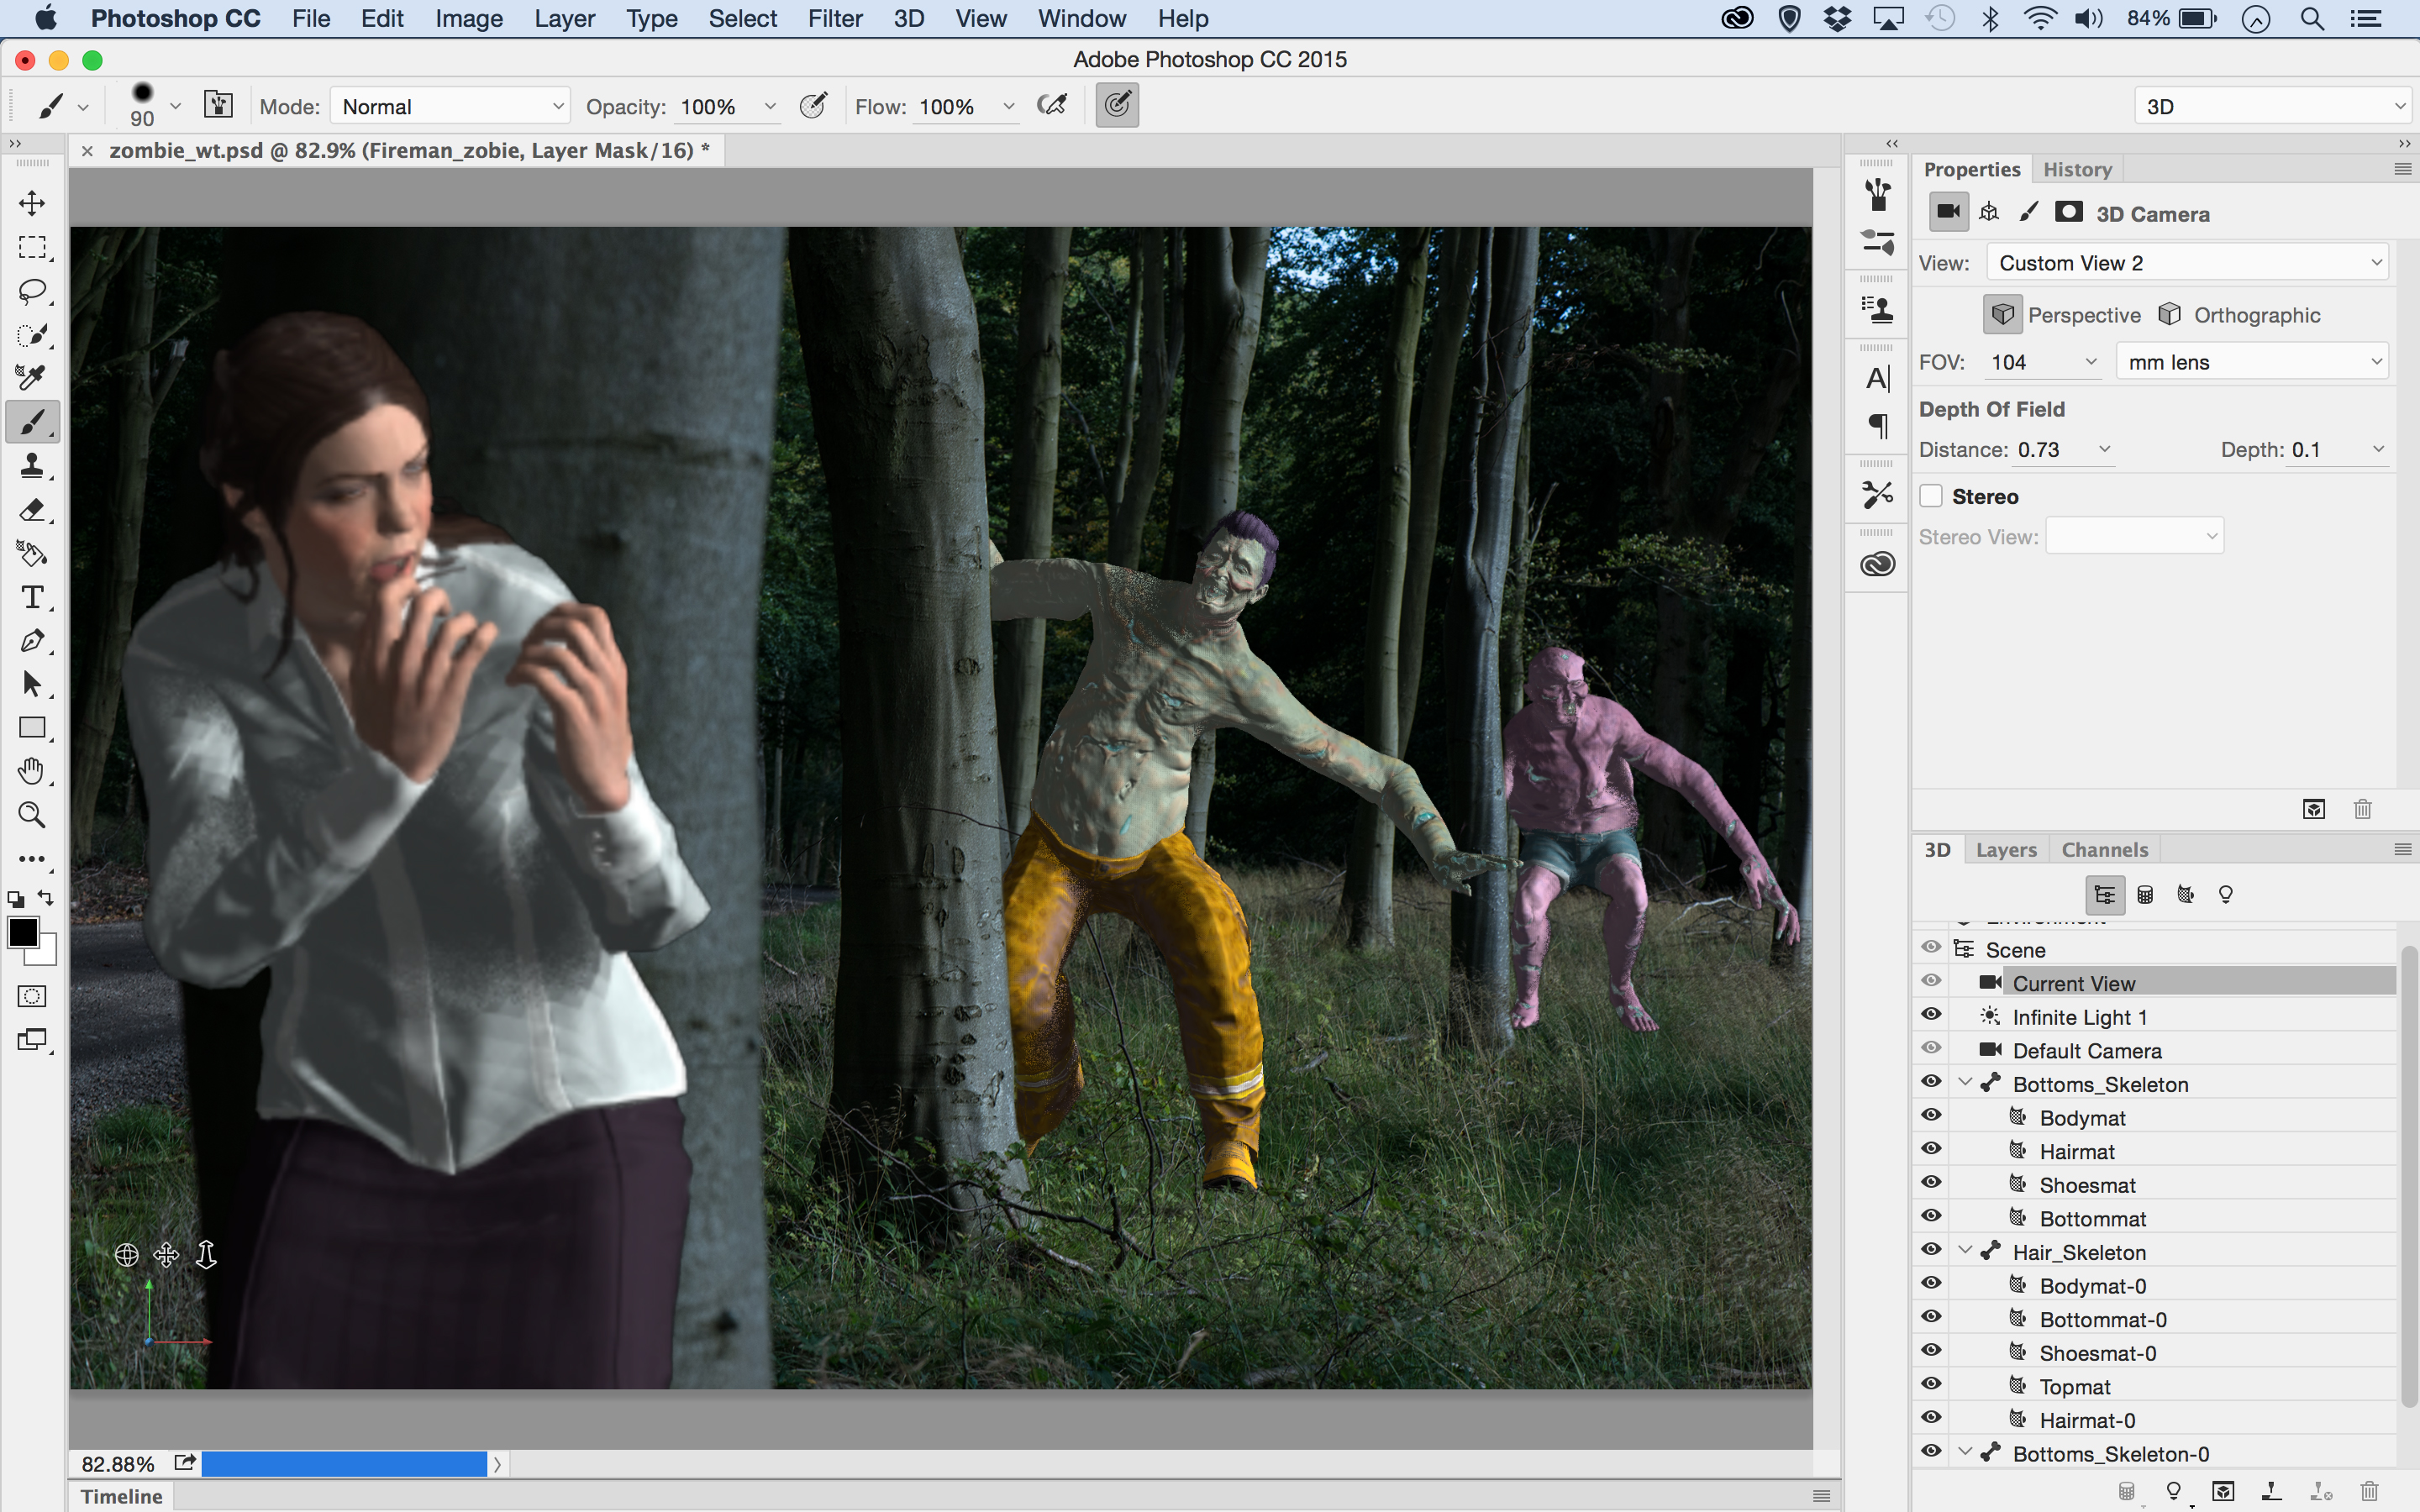
In the 3D Panel, click Current View, then go to Depth of Field. Set Depth to 0.1 to make the focus more shallow, then use Distance to set the sharp point to mid-distance, matching the focus point in the photo and throwing the foreground character out of focus.
12. Cool the tones
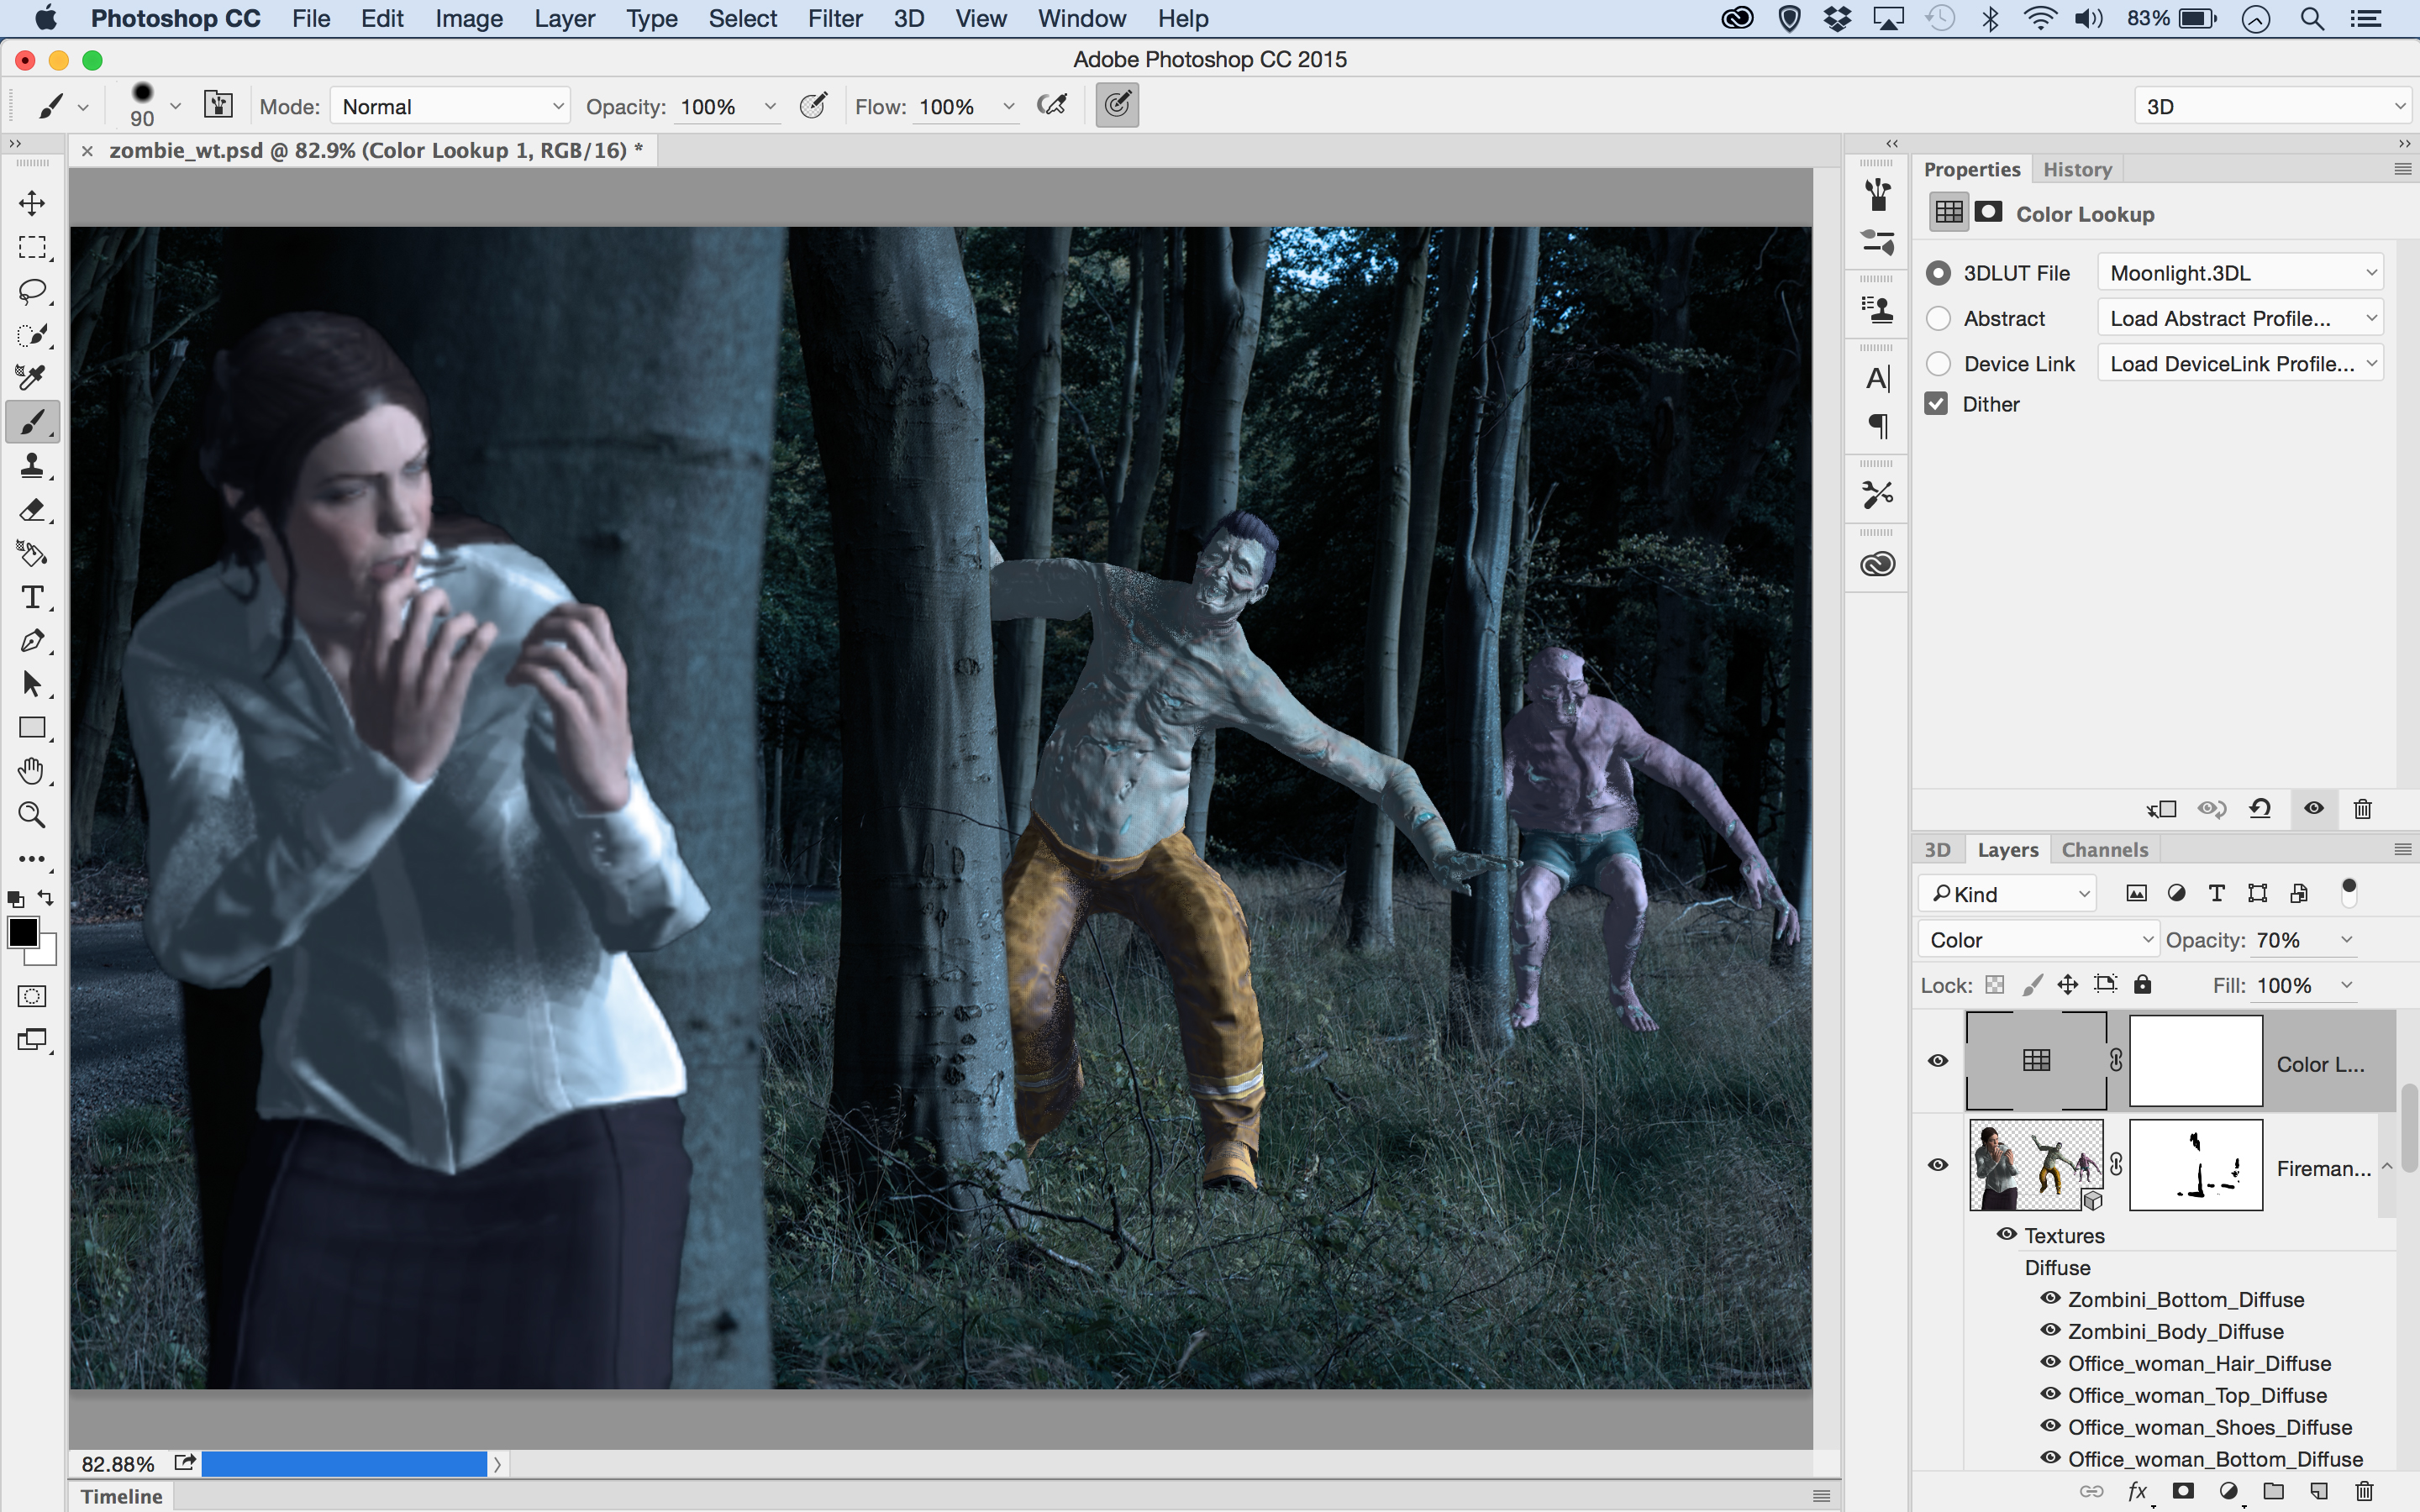
Finally, click the Render button in the 3D Panel. This may take a few hours. Once done, finish by toning the image. Click the Create Adjustment Layer icon in the Layers Panel and choose Color Lookup. Select 3DLUT : Moonlight, then change the Blend Mode to Color and set layer opacity to 70%.
This article originally featured in Practical Photoshop magazine; subscribe here.
Related articles:
James Paterson is an expert in all aspects of the photographic process, from capture to post-processing. He has contributed to numerous photography publications, including Digital Camera, Amateur Photographer, PhotoPlus and NPhoto, and his work has also appeared in Computer Arts magazine as well as several books. He is the editor of Practical Photoshop magazine, and has a well-deserved reputation as an authority on all things Photoshop-related.
