The ultimate guide to image resolution
Get to grips with the thorny topic of image resolution; perfect your pixels and decipher dpi.
‘Image resolution’ is a term that crops up repeatedly in the creative industry, but can often leave people scratching their heads – isn’t dpi a type of policeman? Why is my 300dpi image blurry? Isn’t there a special button to upscale any image?
As with any subject, beginners pick up fragments of information that will help them muddle by and get stuff done. But many projects been negatively impacted by a lack of understanding of image resolution.
Does this sound anything like you? This guide has been written to unravel some of the confusion around the tricky topic of image resolution and help you talk with confidence on the subject. For image resolution done right, see our guide to best print ads.
What are pixels?
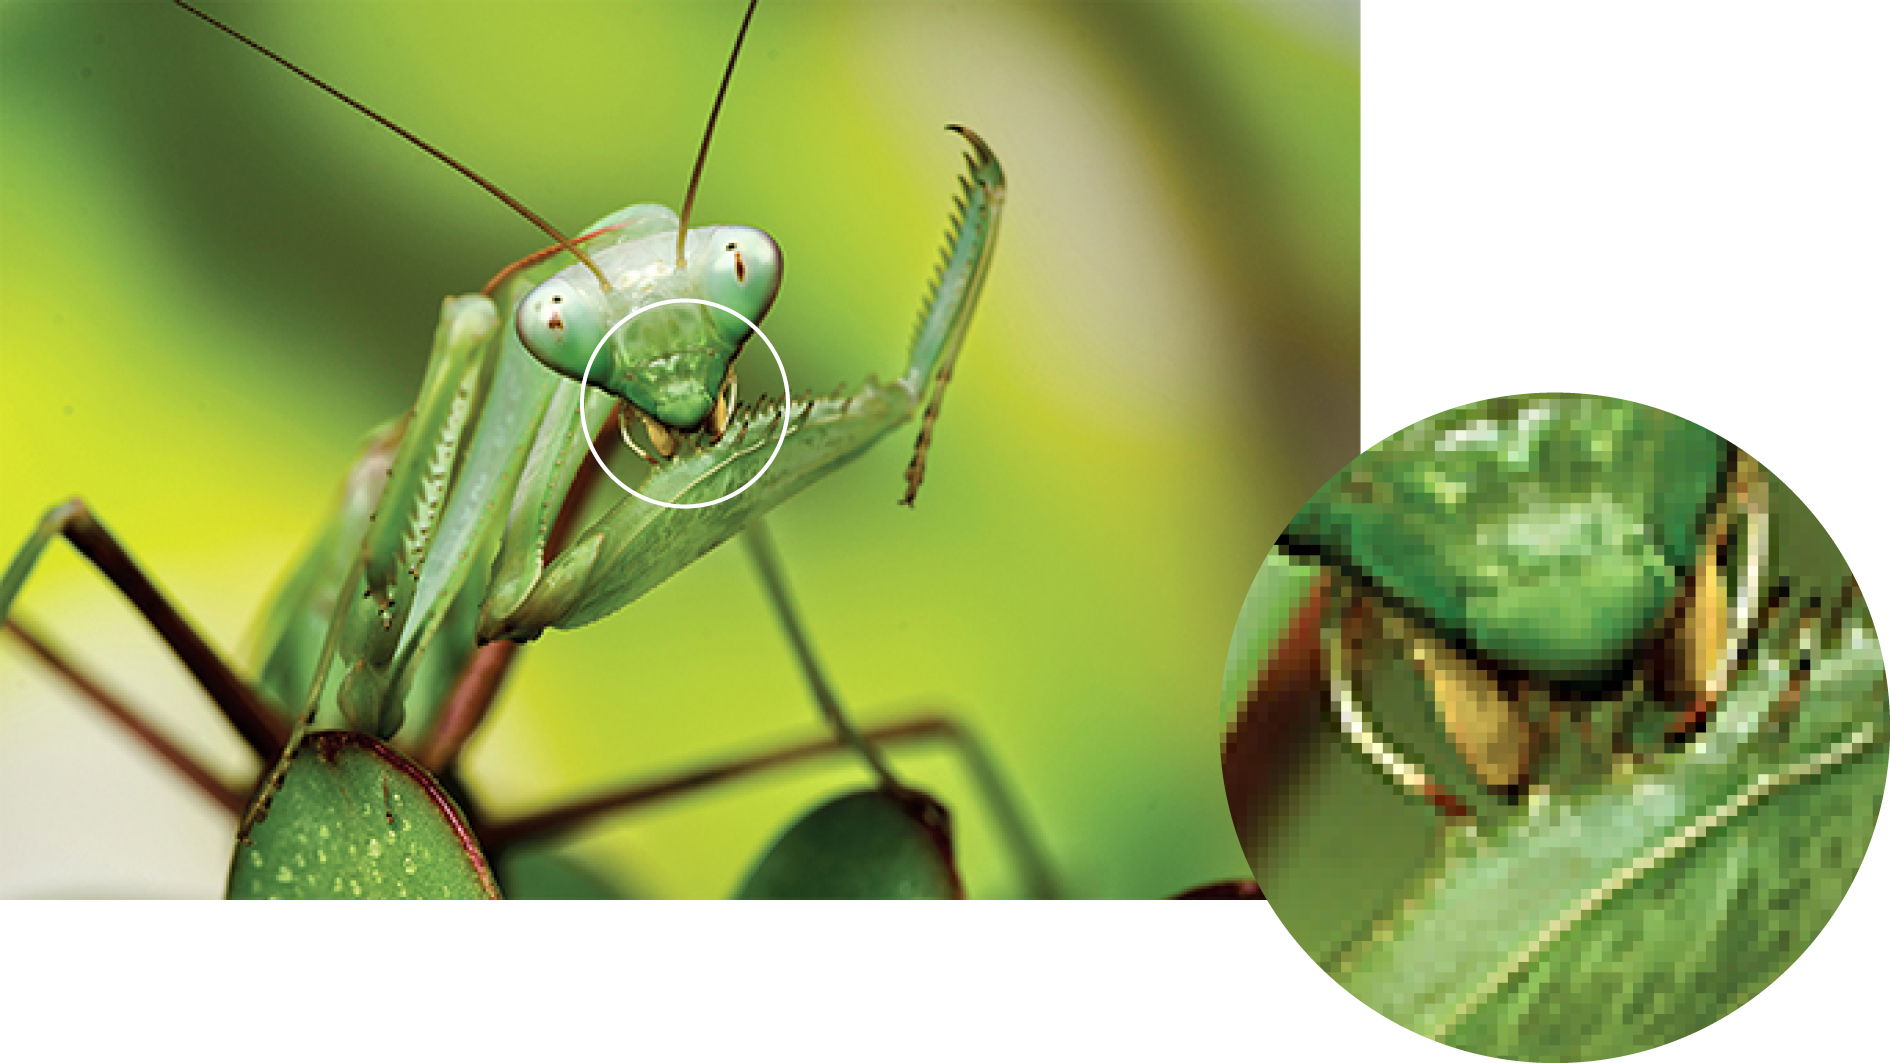
Images can be described as either vector or raster, depending on how they present information.
Raster images, sometimes referred to as bitmap, are pixel-based, which means the image is made up of a grid of tiny colored squares, coming together to form a picture. Each little square is called a ‘pixel’ and you can observe these if you zoom far enough into any raster image. Raster images are used to show complex images that have a range of smooth gradients and undefined edges, such as photographs. Common raster file formats are jpg, png, gif and psd.
Vector graphics are based on mathematical calculations, which allow them to be scaled up and down without any loss of quality. We will not be discussing these, since image resolution is largely irrelevant for them. Read our article on file formats for more information.
What is DPI?
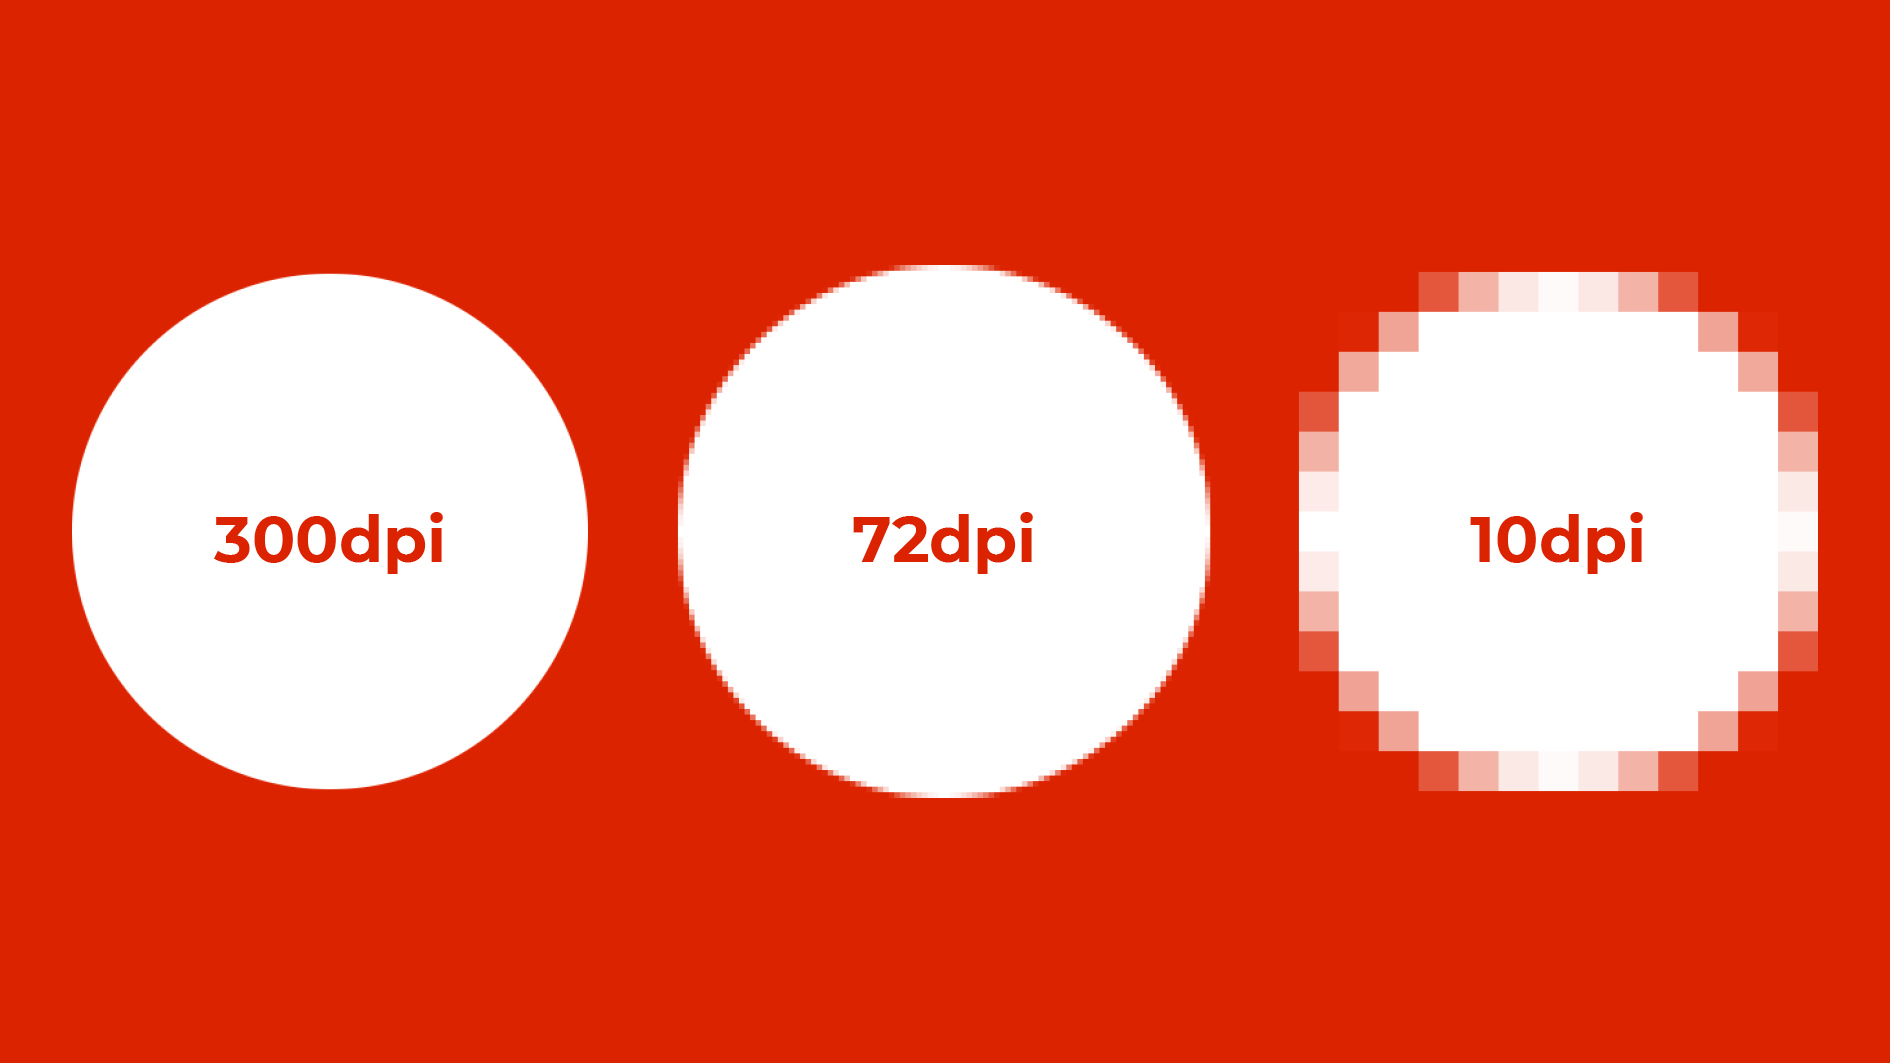
Now you understand what a pixel is, we can move on to the thorny subject of dpi. Dpi stands for 'dots-per-inch' and is used in printing to describe the number of dots laid down on paper per square inch – in an image with a resolution of 10dpi, each square inch will be made up for ten smaller squares called pixels. Confusingly dpi is regularly used as the de facto industry term for anything relating to a certain number of units per inch, so you may also come across ppi (pixels per inch) in digital work, spi (samples per inch) for scanners or lpi (lines per inch) in printing, but these are largely legacy terms and often forgotten. In this article we will use dpi to describe everything from pixels-per-inch to dots-per-inch (in the same way many people use ‘font’ interchangeably with ‘typeface’ – see font vs typeface for the technicalities of that argument).
Daily design news, reviews, how-tos and more, as picked by the editors.
Image size
At this point you maybe be thinking you’ve cracked it, a higher resolution means a sharper image, right? If all images were the same size then this might be true – but they aren’t, they come in all shapes and sizes. The quality of an image all depends on the relationship between pixel density and image size – change one and the other changes with it.
The number of pixels in an image is fixed, unless you go back to the camera and take the photo again on a different setting, so changing the physical size of the image will change the number of pixels-per-inch. Increasing the image size will result in a lower dpi, meaning there are fewer pixels to make up each square inch and the pixels will become larger to fill the space. The resulting image could end up looking blocky and pixellated.
Imagine filling a small box with flaccid balloons, then tipping the same number of balloons into a larger box. The only way to fill the box would be to inflate the balloons, retaining the same number, but increasing their size. In general, you can make an image smaller without encountering any real problems, whereas increasing image size can have disastrous effects on the end result.
Here are two examples to show the result of altering resolution and pixel count:
Example A: Increasing dpi > Lowers physical size
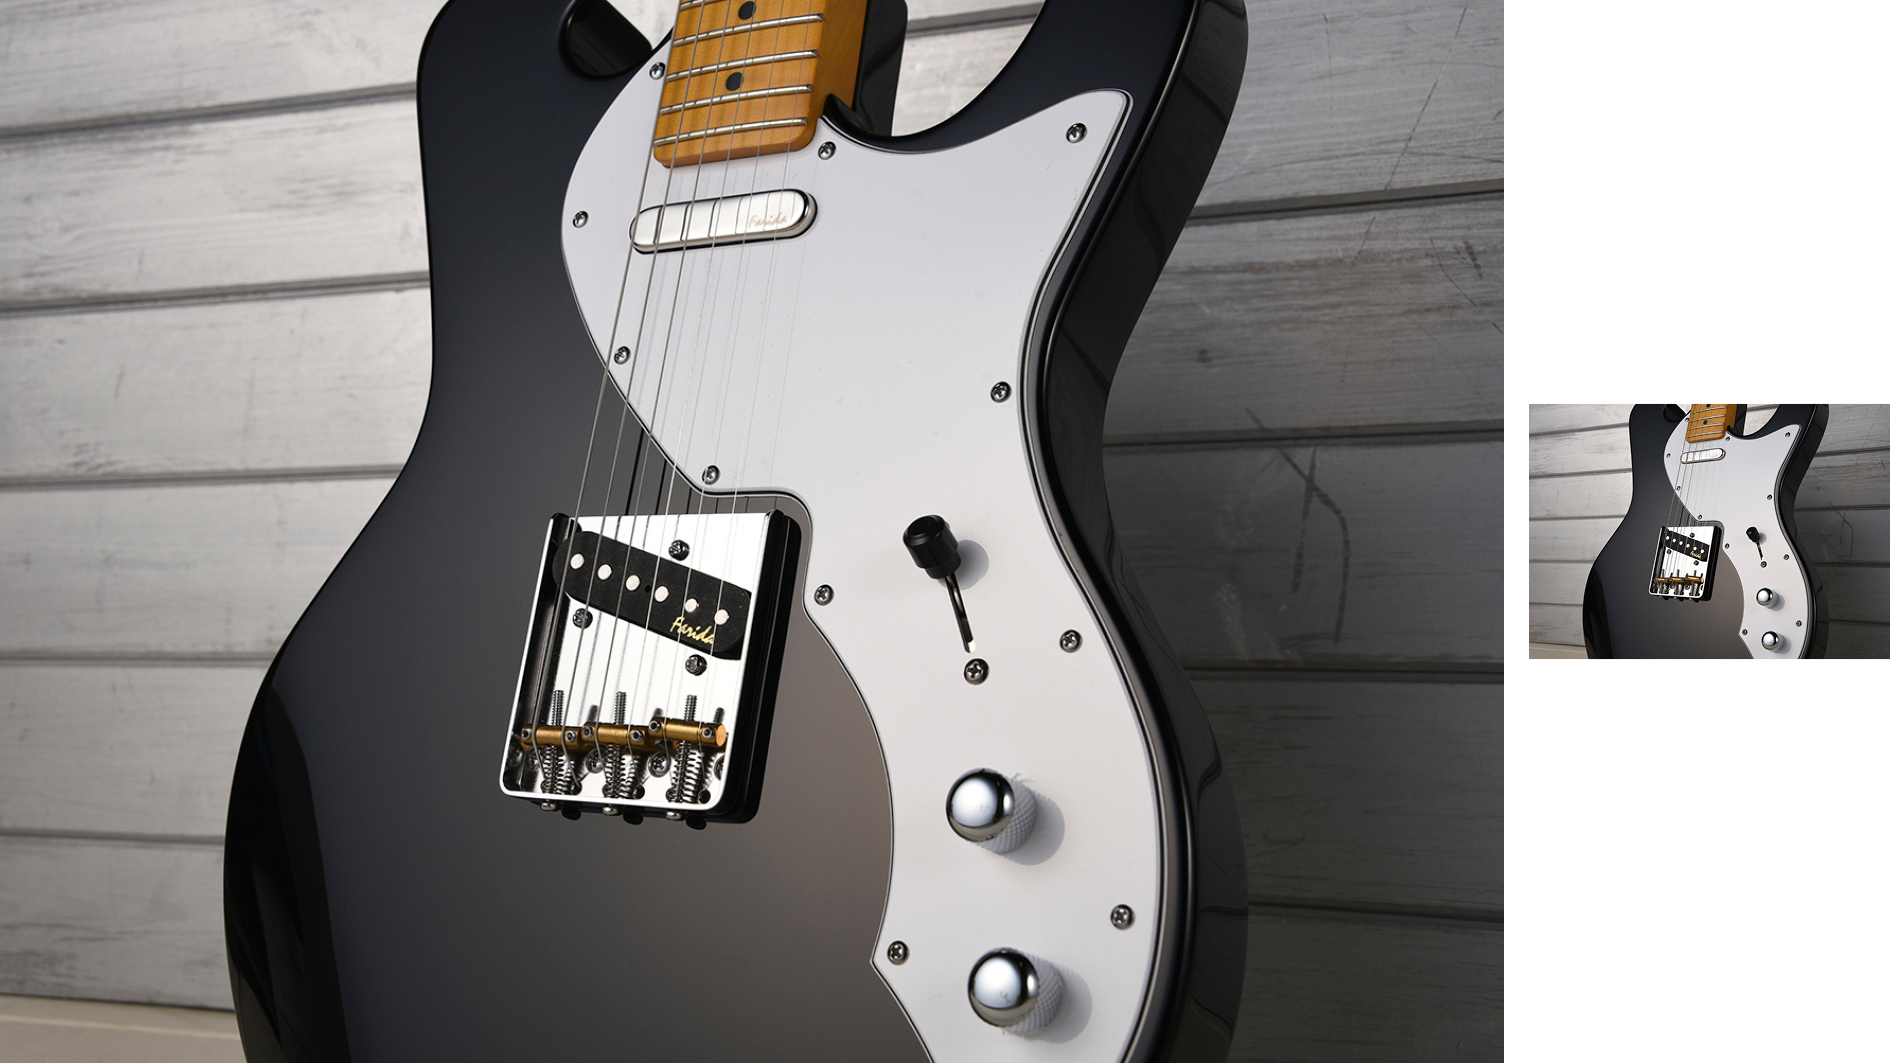
In this situation, both images have the same number of pixels in them, but the image on the right has had the dpi value raised from 72dpi to 300dpi. There are now more pixels to each inch, but because the number of pixels making up the image remains the same, the image is forced to become smaller. The pixels that make up the image are forced to become smaller to fit more of them into an inch.
Example B: Reducing number of pixels > Same physical size.
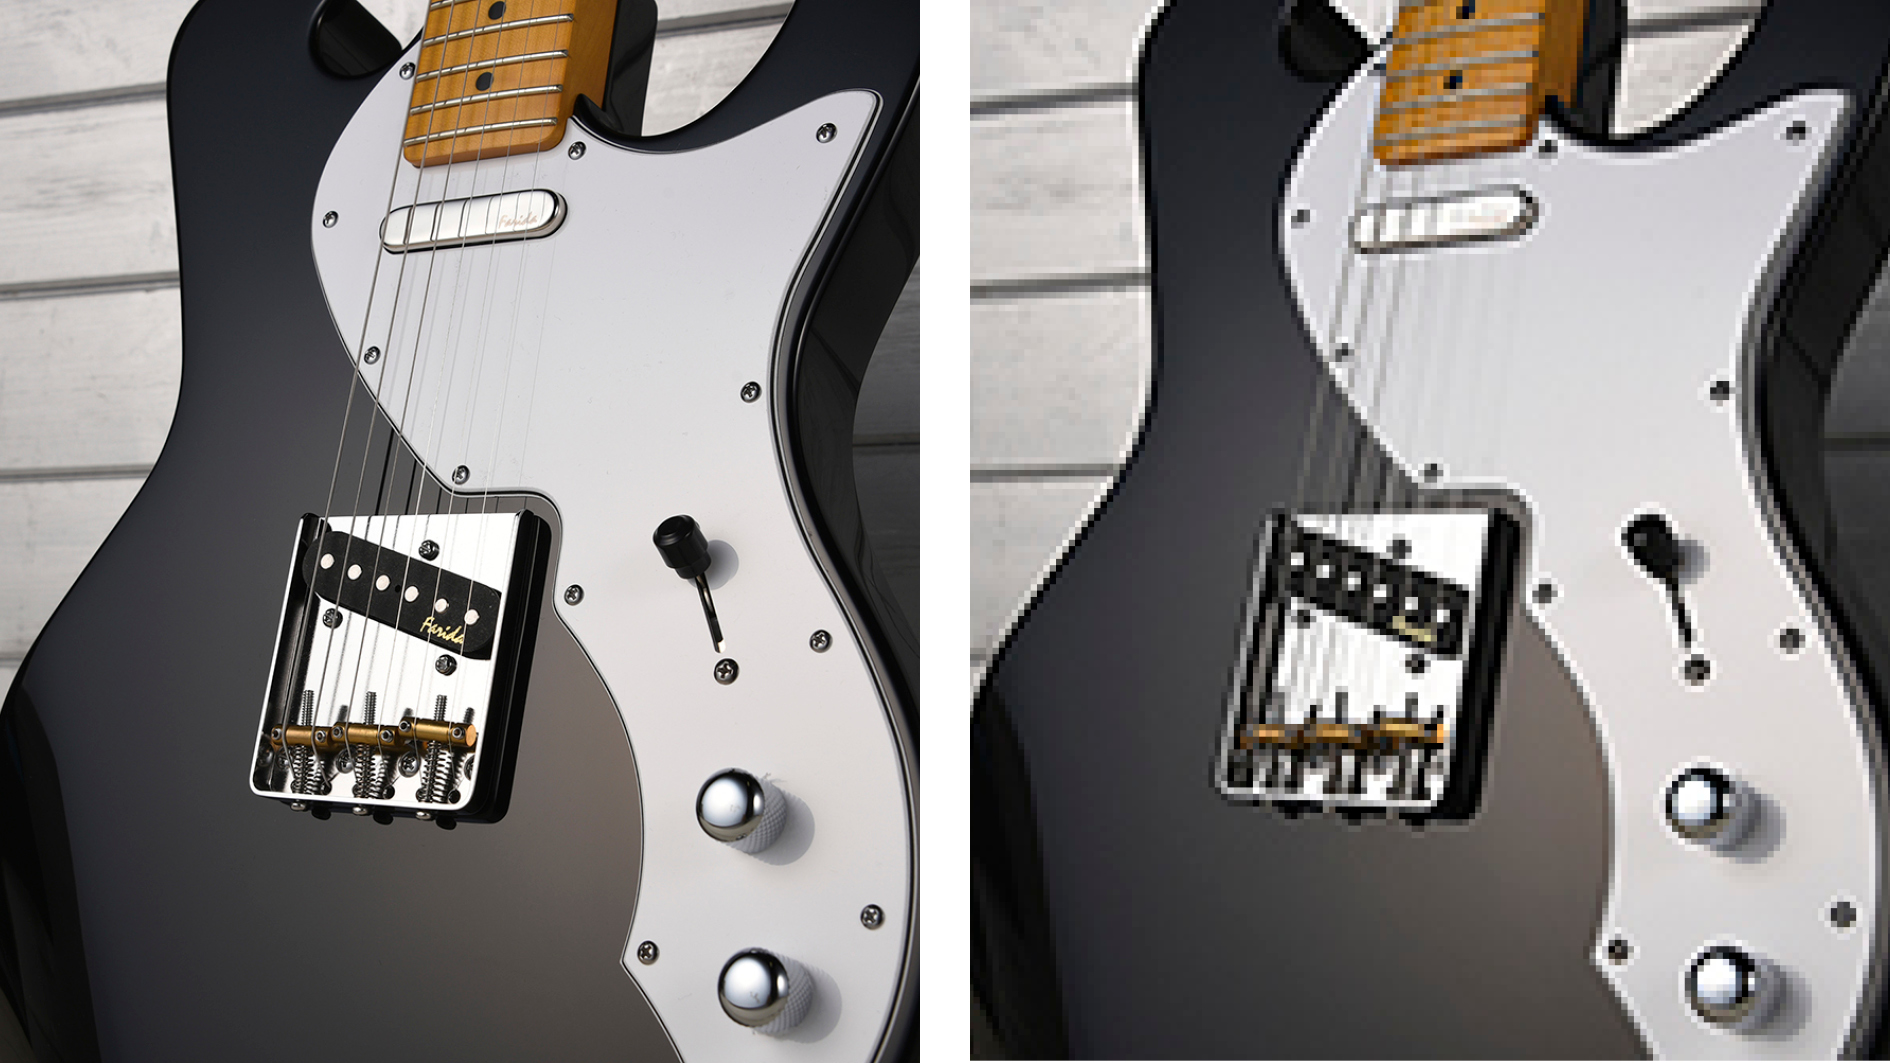
Here the image on the right is the same size as the image on the left, but has had the number of pixels reduced. Because there are fewer pixels to fill the space, each pixel has become bigger and the image has a lower dpi as a result (since there are fewer dots filling each inch). The image becomes blocky and pixellated.
Resampling and Interpolation
In the previous sections, we made the assumption that the number of pixels is fixed and can’t be changed. This isn’t strictly true because extra pixels can be artificially created through a process called ‘interpolation’, where the computer analyses the original pixels and creates new ones based on what it thinks would be there. For example, if you had a blue pixel sitting next to a yellow pixel and wanted to artificially increase the dpi of your image, the computer would use interpolation to add a green pixel in between the two.
Interpolation effectively allows you to increase the size of the image, while retaining the same dpi, thus avoiding any pixellation issues. This may sound like the perfect solution in theory, however it is unreasonable to expect a computer to produce a perfectly accurate estimation of the missing pixels and this process should be used sparingly.
Example C: Higher pixel dimensions (interpolated) > Same physical size > Higher DPI
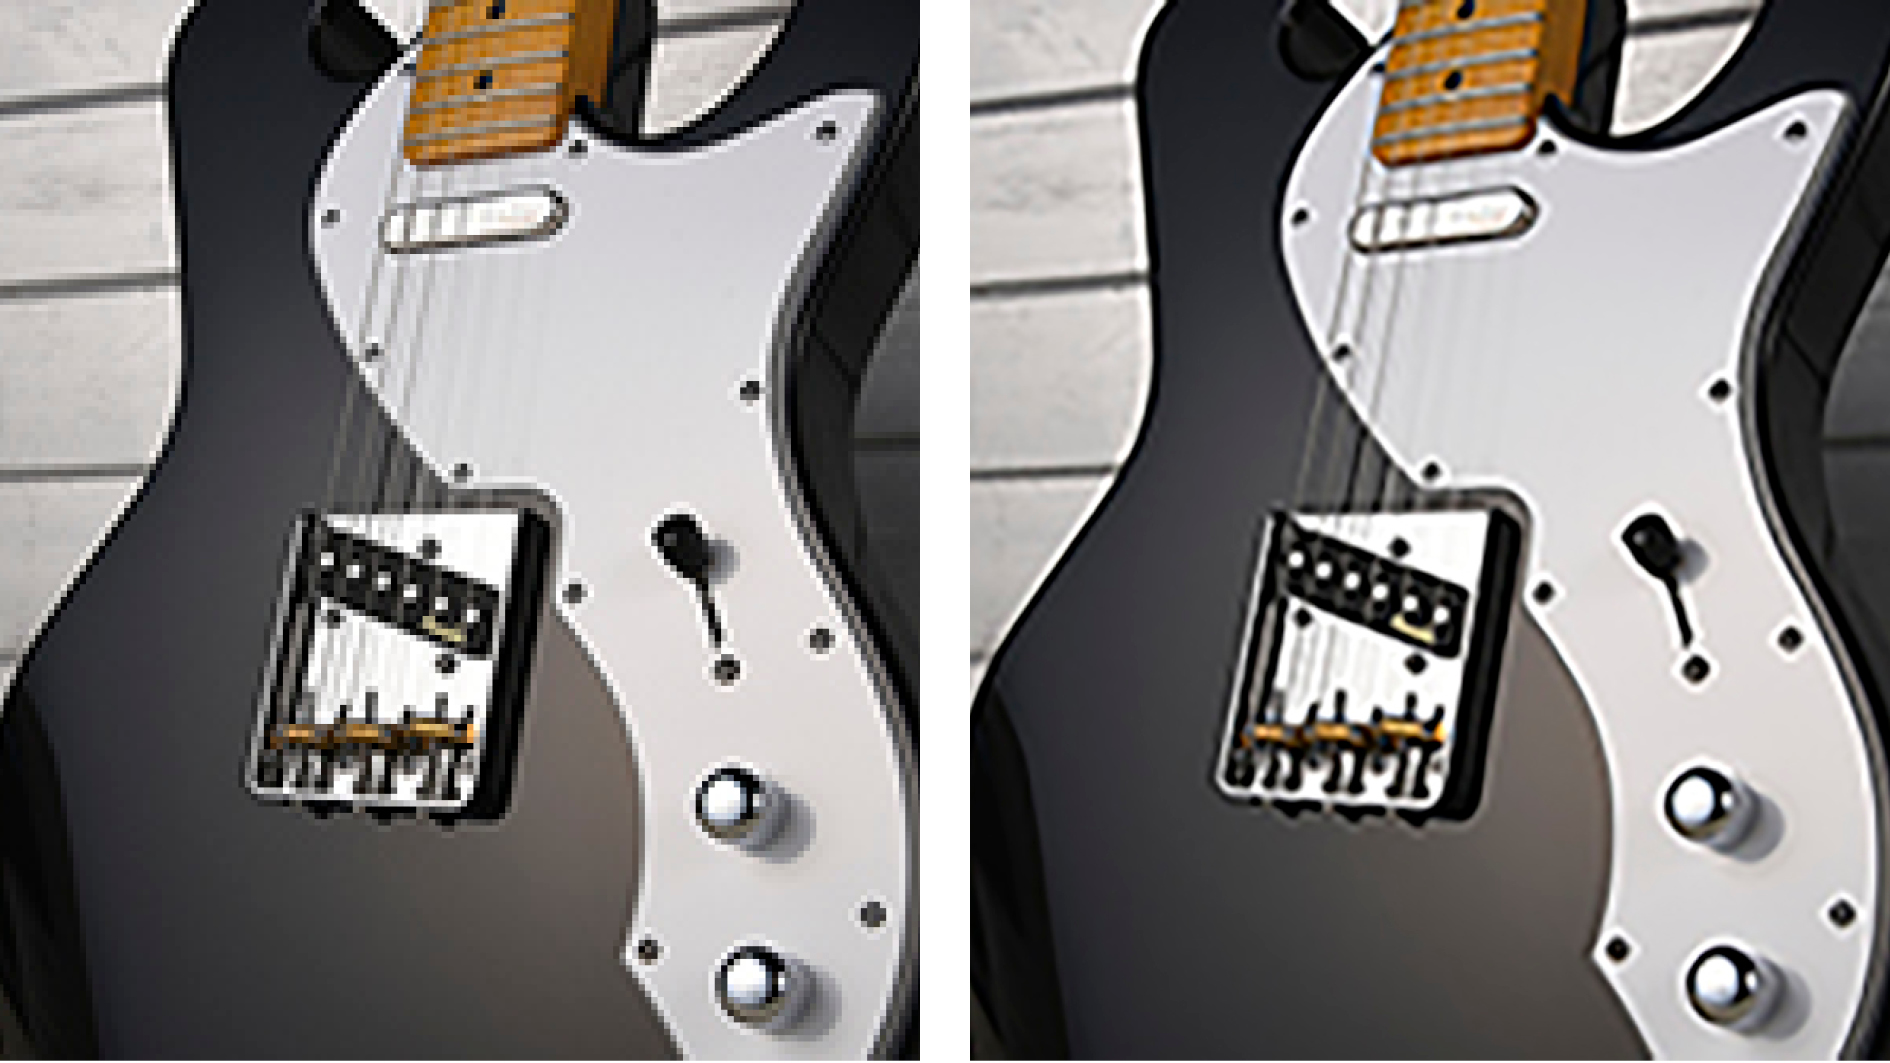
The image on the left has a resolution of 72dpi image, while the the one on the right has been artificially raised to 300dpi using interpolation, using the information from the image on the left. Although it may look better, the fake detail cannot compare with the genuine 300dpi image.
What you can do in Photoshop
In Photoshop, there are two dialog boxes of particular relevance when discussing resolution and image size: Image > Canvas Size and Image > Image Size. Canvas Size is used to change the absolute size of the canvas and doesn’t alter the image (other than to crop it), while the Image Size box is the key to controlling resolution and the image dimensions.
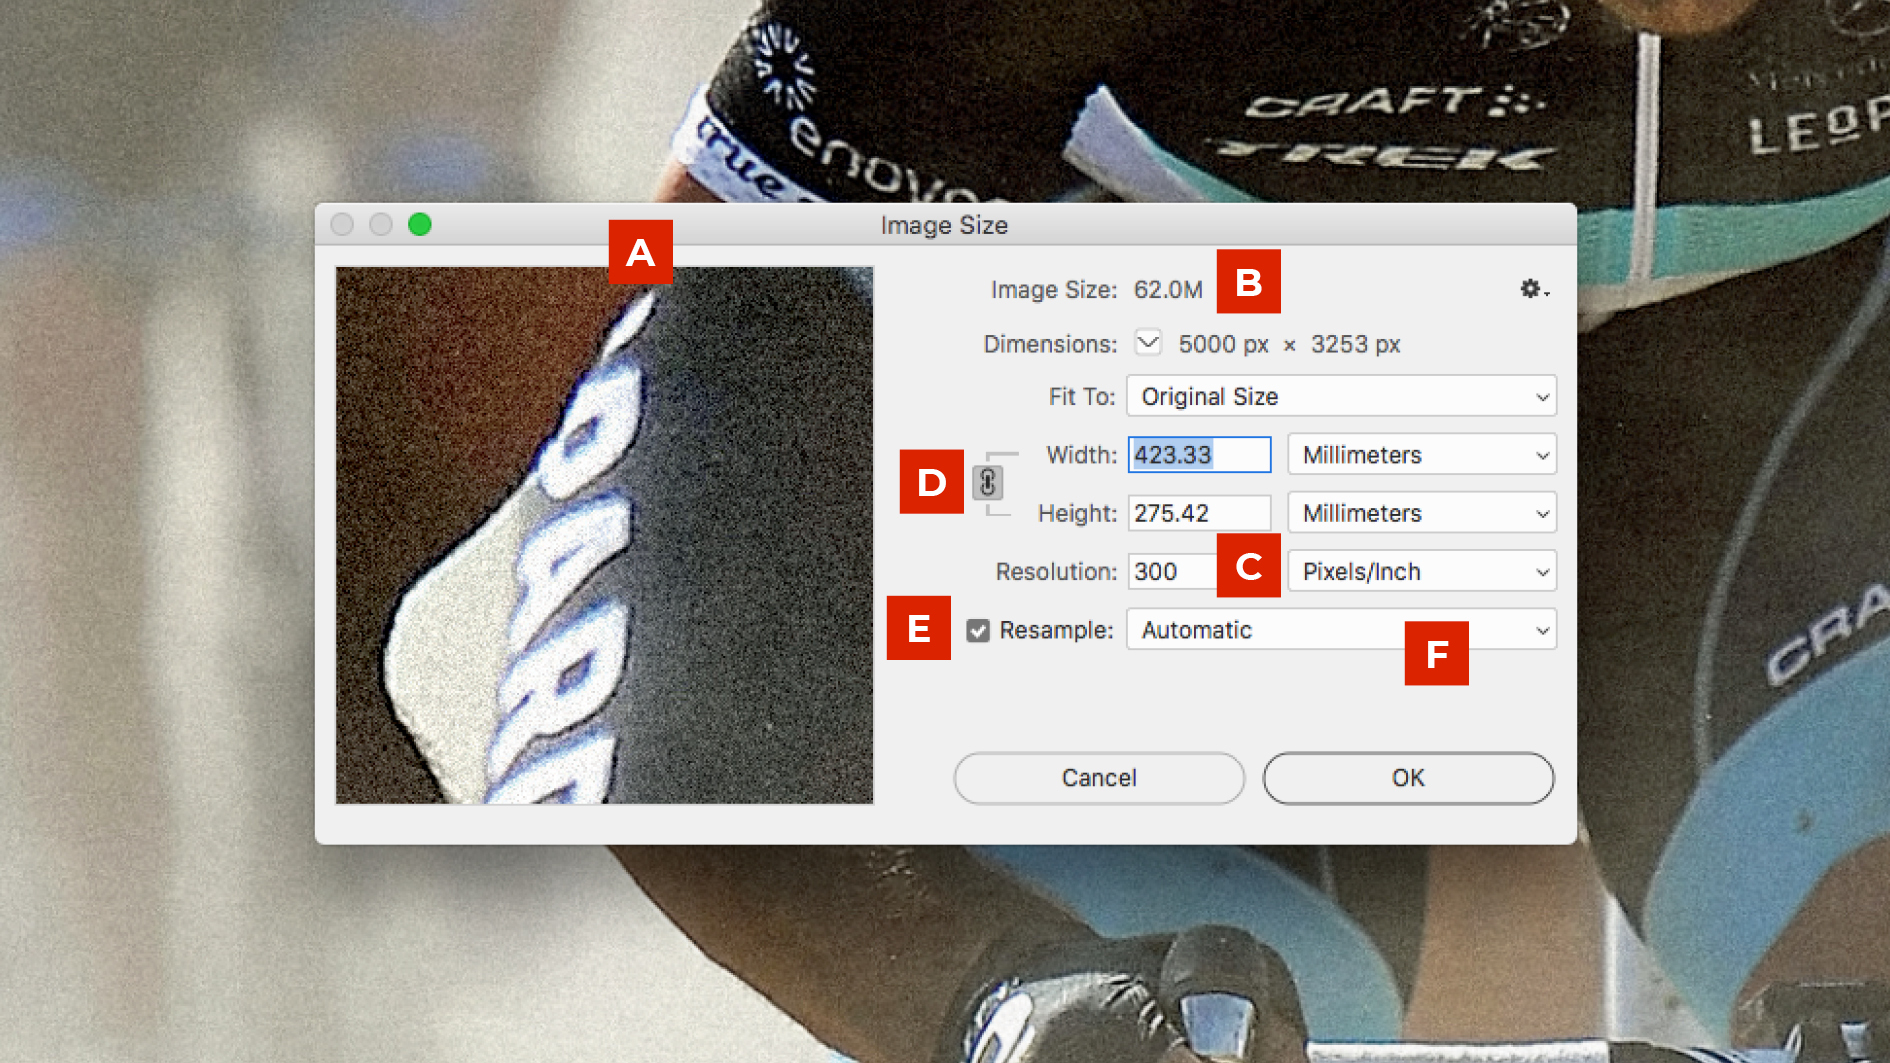
The Image Size box [A] reduces everything we’ve been talking about into three key numbers: Width, Height and Resolution [C]. Each of these options in intrinsically linked, so changing one will change the others proportionally. When you adjust any number, you’re essentially making each individual pixel bigger and smaller. The file size is given at the top [B], which is useful when you're trying to reduce the image under a certain number.
In effect this allows you to set your desired resolution and the software will automatically show you the new width and height at that resolution. This is helpful when you want to work out the maximum size at which you can use an image (you can select which unit of measurement you wish to view the measurements in).
Resampling
Resampling will change the pixel dimensions, using interpolation, by adding or deleting pixels. You can toggle this on and off using the checkbox at the bottom of the Image Size box [E]. With Resampling turned on, you can set a new resolution without the image size changing (or vice-versa) and Photoshop will fill in the missing pixels. Constrain Proportions [D] will mean that the width and height remain at a fixed ratio, removing the risk of squishing or distorting your image.
There are various methods for resampling in the drop-down menu [F], beside the checkbox. If you’re unsure which is correct for you, then Automatic is a good option. Two are clearly marked for reduction and enlargement; Bicubic Sharper and Bicubic Smoother. Nearest Neighbor is the only one not to use interpolation, so should only be used on pixel-perfect images, such as low-res images or pixel art, where you don’t want the detail to get smeary.
Resampling should, as a rule, be avoided where possible, since you can lose clarity and sharpness in the image. You can still use Undo, but it can be useful to keep a copy of the original image, in case you accidentally save a low-res version and lose all that detail.
Print vs digital
When sending a graphic to print, it is recommended to use a resolution of 300dpi, but depending on the quality of the image and the size you’re printing to, you can often get away with using a lower dpi. An A3 photographic image may look fine with a resolution of 150dpi.
When it comes to digital, people are often under the impression that the resolution should be set to 72dpi, but this is only a legacy value and it is image dimensions that are more important, because you are fitting a grid of pixels (your image) into a grid of pixels (the screen). A 500px x 500px image will always be 500px x 500px, no matter what the pixel density is.
Read more:

Matt has worked for various publishing houses and design agencies, covering studio photography, video production, editorial design, branding, illustration and motion graphics. He currently works for Future PLC with brands such as T3, Woman&Home, Marie Claire, Music Week, TechRadar, Golden Joysticks, Cycling Weekly, Brand Impact Awards, Horse&Hound and Tech&Learning. In the past he has designed titles including Mac|Life, IQ, Bow International, Drummer, iDrum, Acoustic, Clay Shooting, Sea Fishing and GunTradeNews. He has experience across the full Adobe Suite and is currently spending a lot of time creating projects in Blender and After Effects.
