Master Photoshop layers: 6 top tips
Sign up to Creative Bloq's daily newsletter, which brings you the latest news and inspiration from the worlds of art, design and technology.
You are now subscribed
Your newsletter sign-up was successful
Want to add more newsletters?
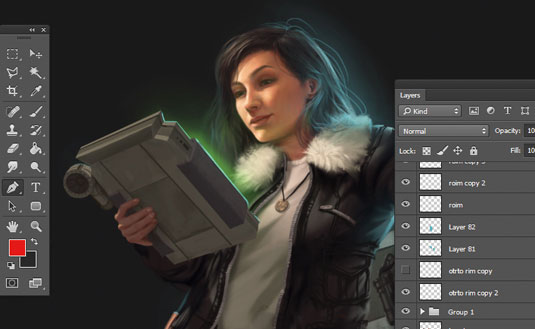
Photoshop is a complex bit of kit, which can take years to learn properly. There are many helpful Photoshop tutorials around to help with this, but where should you start? The language of layers! It can be a difficult thing to master, but having a good understanding of Photoshop layers gives you a solid foundation to build your digital art.
Beginners' tips
Before you get started, it's important to try and avoid these common Photoshop mistakes:
- Don't put every little thing on different layers; it can slow down the process and the program
- Avoid merging everything into one later until you're fairly certain there will be no more revisions. Moving an object or character is a lot easier when it's on its own layer
- Which layer was it that had the magic wing highlights? Was it 406? Or 306 copy12? Seriously, name your files sensibly and avoid interrupting your painting flow
- An extended painting session can slow down Photoshop (it's all down to virtual memory usage). So save your work and restart the program to free up this memory and take a quick screen break
- Working on projects with a high resolution or excessive layers can also slow the program down, which will change the way some tools perform. If you need the tool to run more smoothly, save as a new file and reduce resolution temporarily
Got all that? Good. Now, let's master the language of layers. Right up there with the History function in the most useful features of Photoshop for artists list is the whole concept of layers. In the same way that traditional animators will use several sheets of acetate in a single shot, painting different parts of your picture on different layers means they can be edited separately while still being viewable as a whole.
Article continues below01. Creating layers
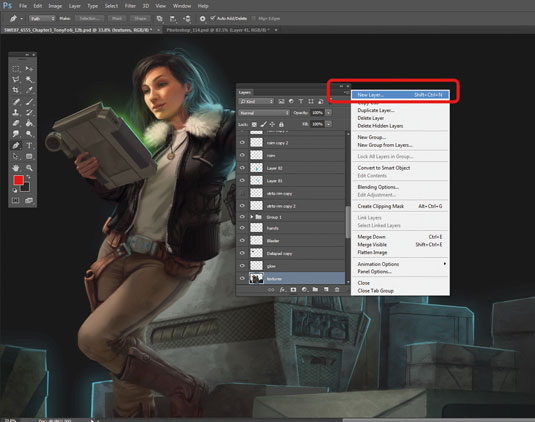
In most default viewing modes, the Layers window will be visible and either attached to the right side of the screen or floating around somewhere. You can use 'Window > Layers' to toggle it on and off. New documents will just have a background layer, but clicking the drop-down menu at the top right will give you a range of options, such as Create, Duplicate and Merge.
02. Locking layers
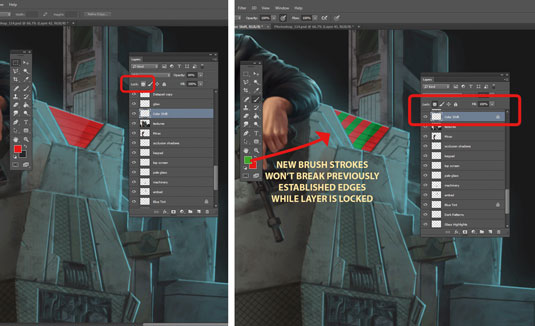
Sometimes when painting, I'll need to add a gradient to an area without changing its edges, and that's when Layer Locking comes in handy. By clicking the small chequerboard icon in the Layers window, any translucent areas will be unaffected by the tools, remaining clear. You can freely brush without changing the all-important silhouette of what you're painting.
03. Grouping
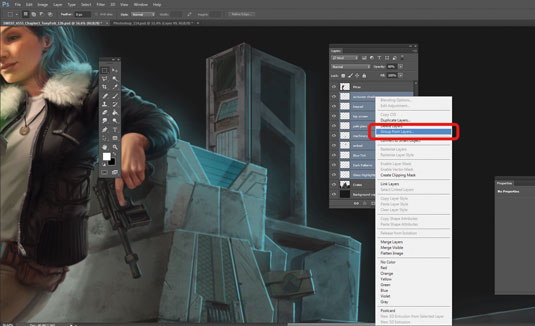
Complex assignments can lead to Photoshop files with over 100 layers, and when that happens you want to stay organised. Holding down cmd enables you to click and highlight multiple layers at once. Then go to New Group From Layers in the drop-down menu.
You're then asked to name the group. Now those layers will move together and be editable as a group by highlighting the group folder instead of the individual layer for whatever painting action you’re using.
Sign up to Creative Bloq's daily newsletter, which brings you the latest news and inspiration from the worlds of art, design and technology.
04. Adjusting the opacity
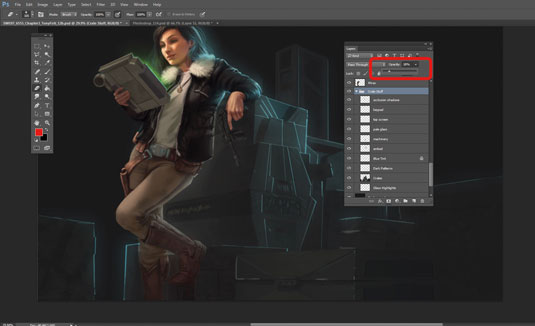
Another useful function of layers is the ability to control their transparency. Up in the right corner of the Layers window is a drop-down slider labelled Opacity, which enables you do just that. This comes in handy for a variety of effects, such as creating sheer clothing, smoke and light beams.
05. Making backup saves
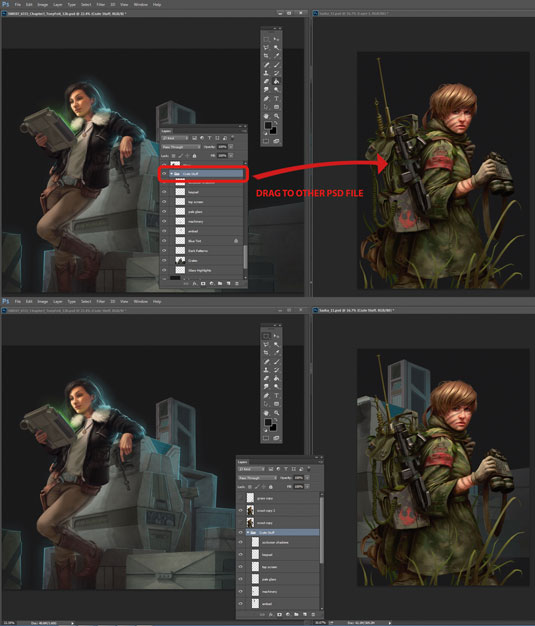
I like to create multiple save files for each image, in case one becomes corrupted or if I make some huge mistake and save before realising it. This way I always have several versions that are, at most, only a few hours less developed than what I was just working on.
When this happens, I'll often open an older save file, delete the offending layer, and drag my replacement from the old file (or a completely different illustration) over into the Layers window in my most recent iteration.
This article originally appeared in ImagineFX magazine issue 114.
Related articles:
- Illustrator tutorials: amazing ideas to try today!
- Automate effects with these amazing Photoshop actions
- Read our guide to choosing the best photo editor
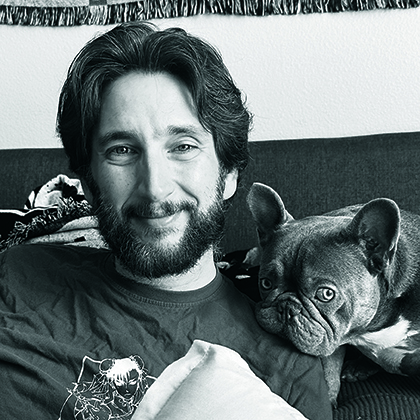
Tony Foti is a US-based illustrator who’s been working on books, magazines, entertainment and games of all kinds for over 15 years.
