Our Verdict
Adobe Premiere Rush has all the most used tools and export settings basic users will need, with a simple, intuitive layout. However, more advanced users will need to look elsewhere.
For
- Simple interface
- Cross-platform support
- Great export options
Against
- Limited editing control
- Subscription-based fee
Why you can trust Creative Bloq
Adobe Premiere Rush is a relative newcomer to the video editing world. Released as Adobe Premiere Rush in 2018, it was previously known as an unreleased program called Project Rush. Adobe has aimed this new cross-platform editing software at YouTubers aiming to up their game, or for those that want to generate content quickly without the extra frills that professional video editing softwares offer.
Premiere Rush gives a tutorial walkthrough when the app is first opened, perfect for the uninitiated. But Rush is quite simple to get to grips with even without that. After a simple media import process users are met with one monitoring panel for viewing the edited media, and a timeline panel beneath in which to edit. The centre panels are flanked with import and basic cutting/splicing tools on the left, and editing tools on the right. For users on the go it can be used on Mac, Windows, iOS, and Android devices that meet the minimum system requirements.
To see how it compares with other video editing options, see our roundups of the best video editing software, or our video editing software for YouTube.
Adobe Premiere Rush: Simple layout
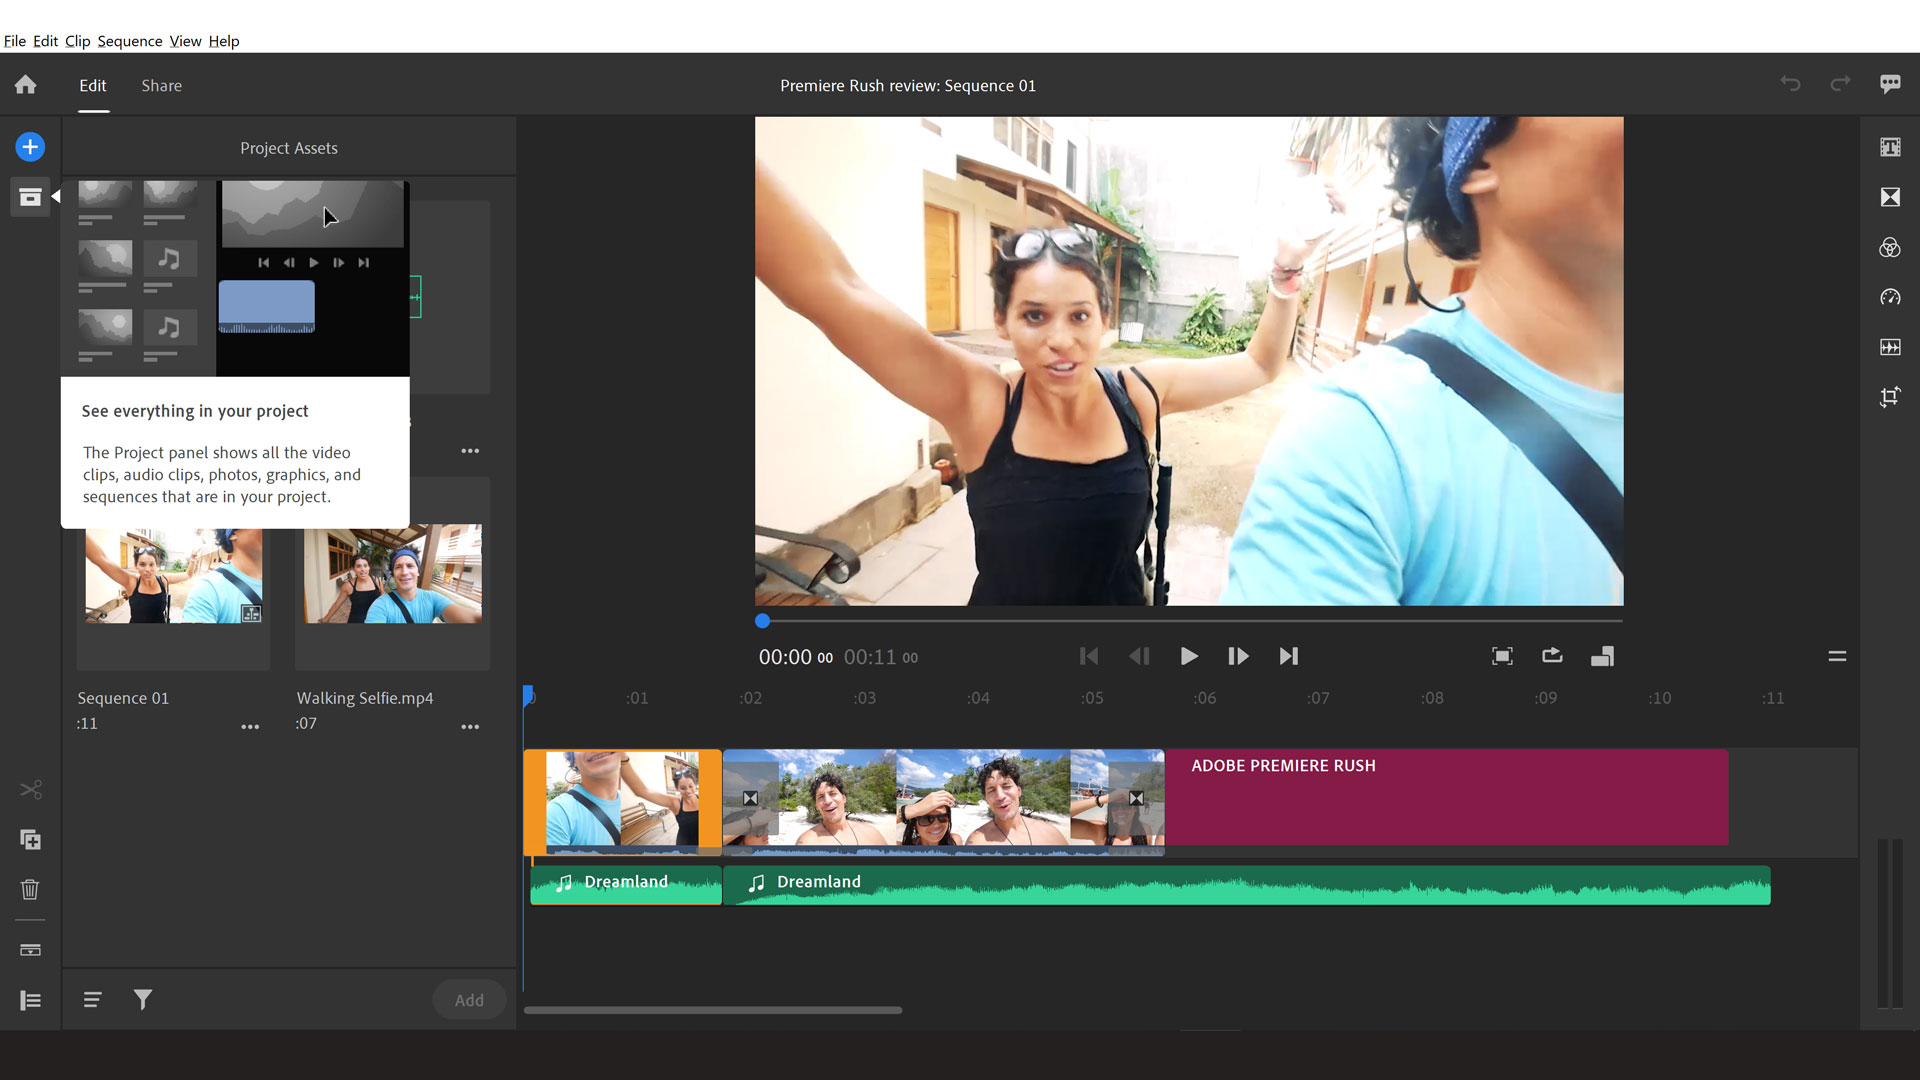
Premiere Rush’s workspace is laid out chronologically, from import, to editing, left-to-right. Click the folder bin icon on the left of the window and it’ll open up the Project panel which houses all the media you’ve imported for your edit. It renders each media file in neat 1:1 squares within the panel and has plenty of negative space to the margin on the left which maintains the decluttered workspace that Adobe is clearly aiming for.
From here you can filter by file type, and sort by name. Select the file you want and click the Add button to add it to the timeline. It’s so intuitive to use that almost anyone could work through it, even without a tutorial to guide. However, we would like to see the addition of an ability to right-click media files (whether audio, video, or titles) in the project panel and open their file directory on the local storage, if only to keep track of where each project is stored, though we understand Adobe’s affinity for storing via the creative cloud.
Adobe Premiere Rush: Basic timeline edit tools
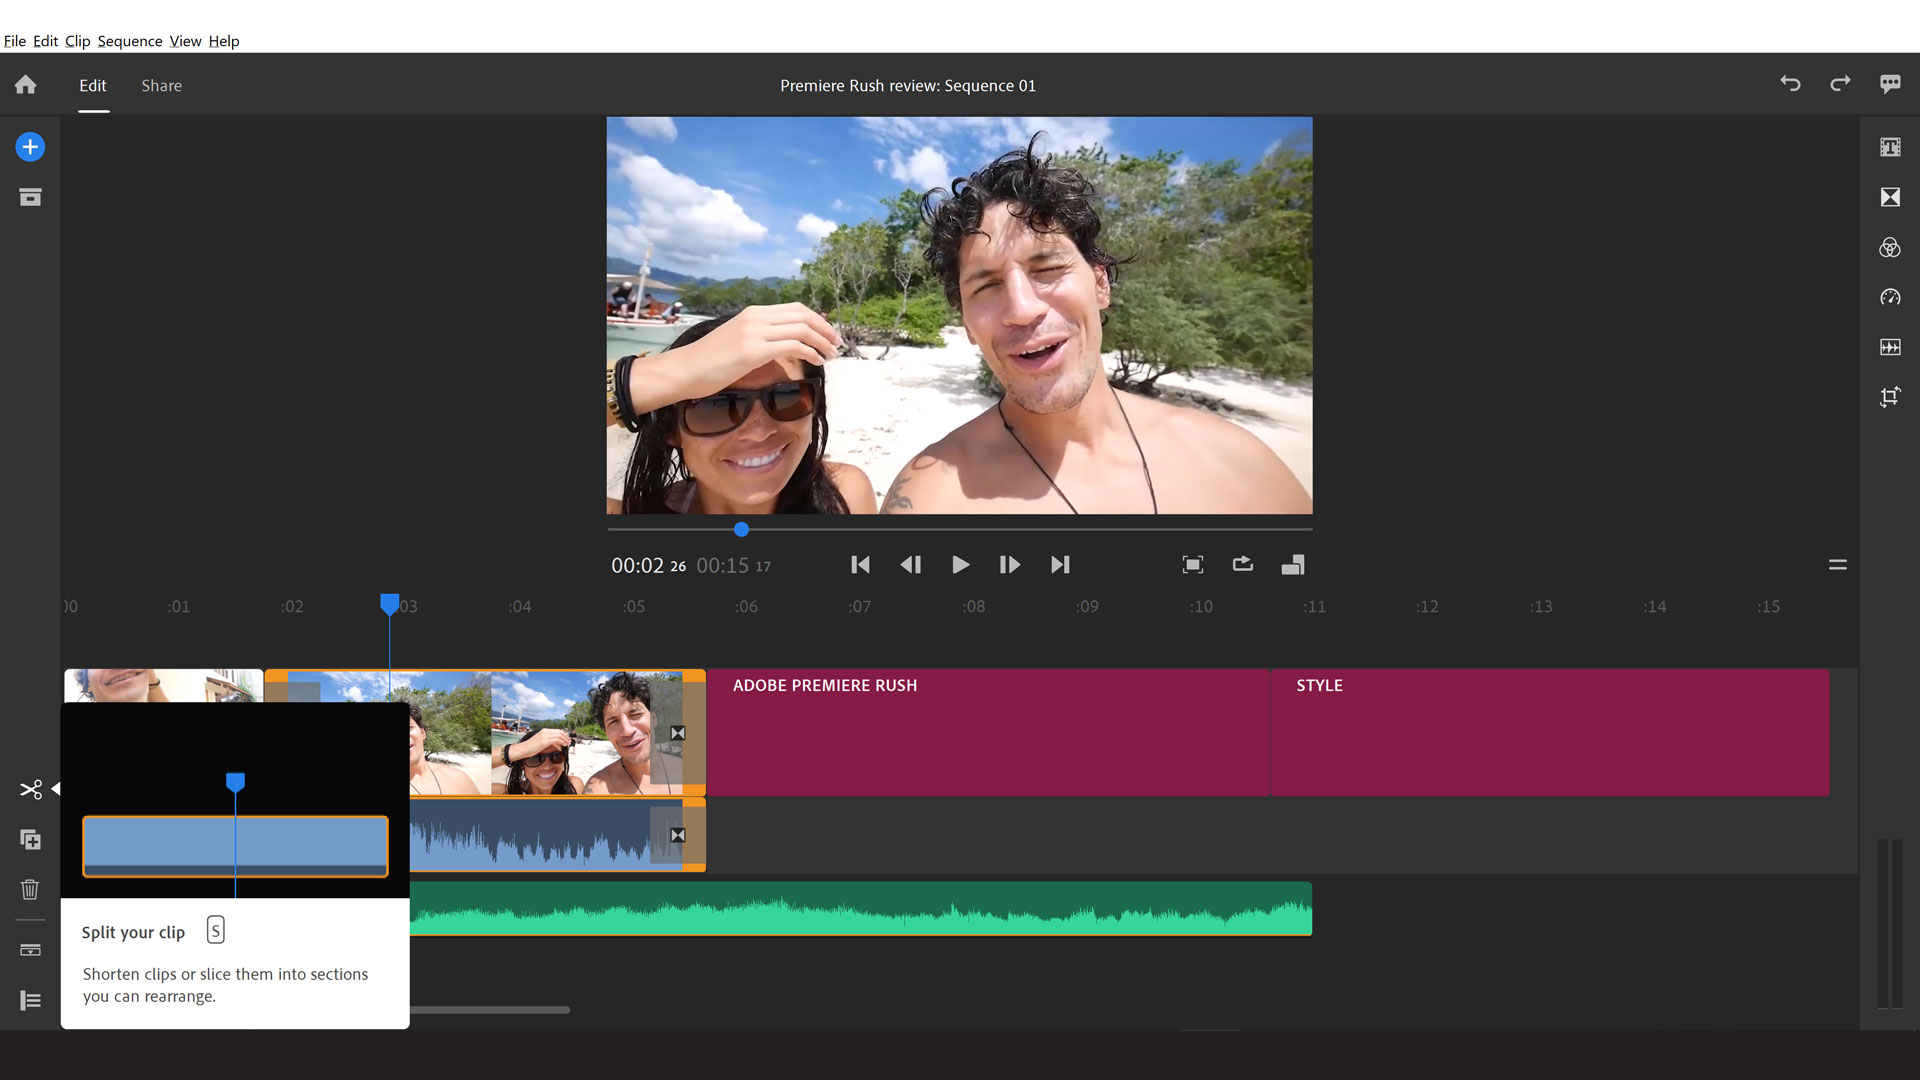
The basic timeline clip edit tools are located bottom-right, which seems odd considering the rest of the editing tools are situated on the right of the window. Either way, from here you can add media to the timeline, split, duplicate and delete clips. You can also control each video and audio track by clicking the Control tracks button which opens a small window to the left side of the timeline with controls for locking, muting, or hiding specific tracks.
On phones, the timeline is only usable in portrait mode. If you turn the phone landscape, you zoom in on the video monitor and can use transform controls on the current clip, but an option to work on the timeline in this view would be useful.
Sign up to Creative Bloq's daily newsletter, which brings you the latest news and inspiration from the worlds of art, design and technology.
Adobe Premiere Rush: Easily edit titles
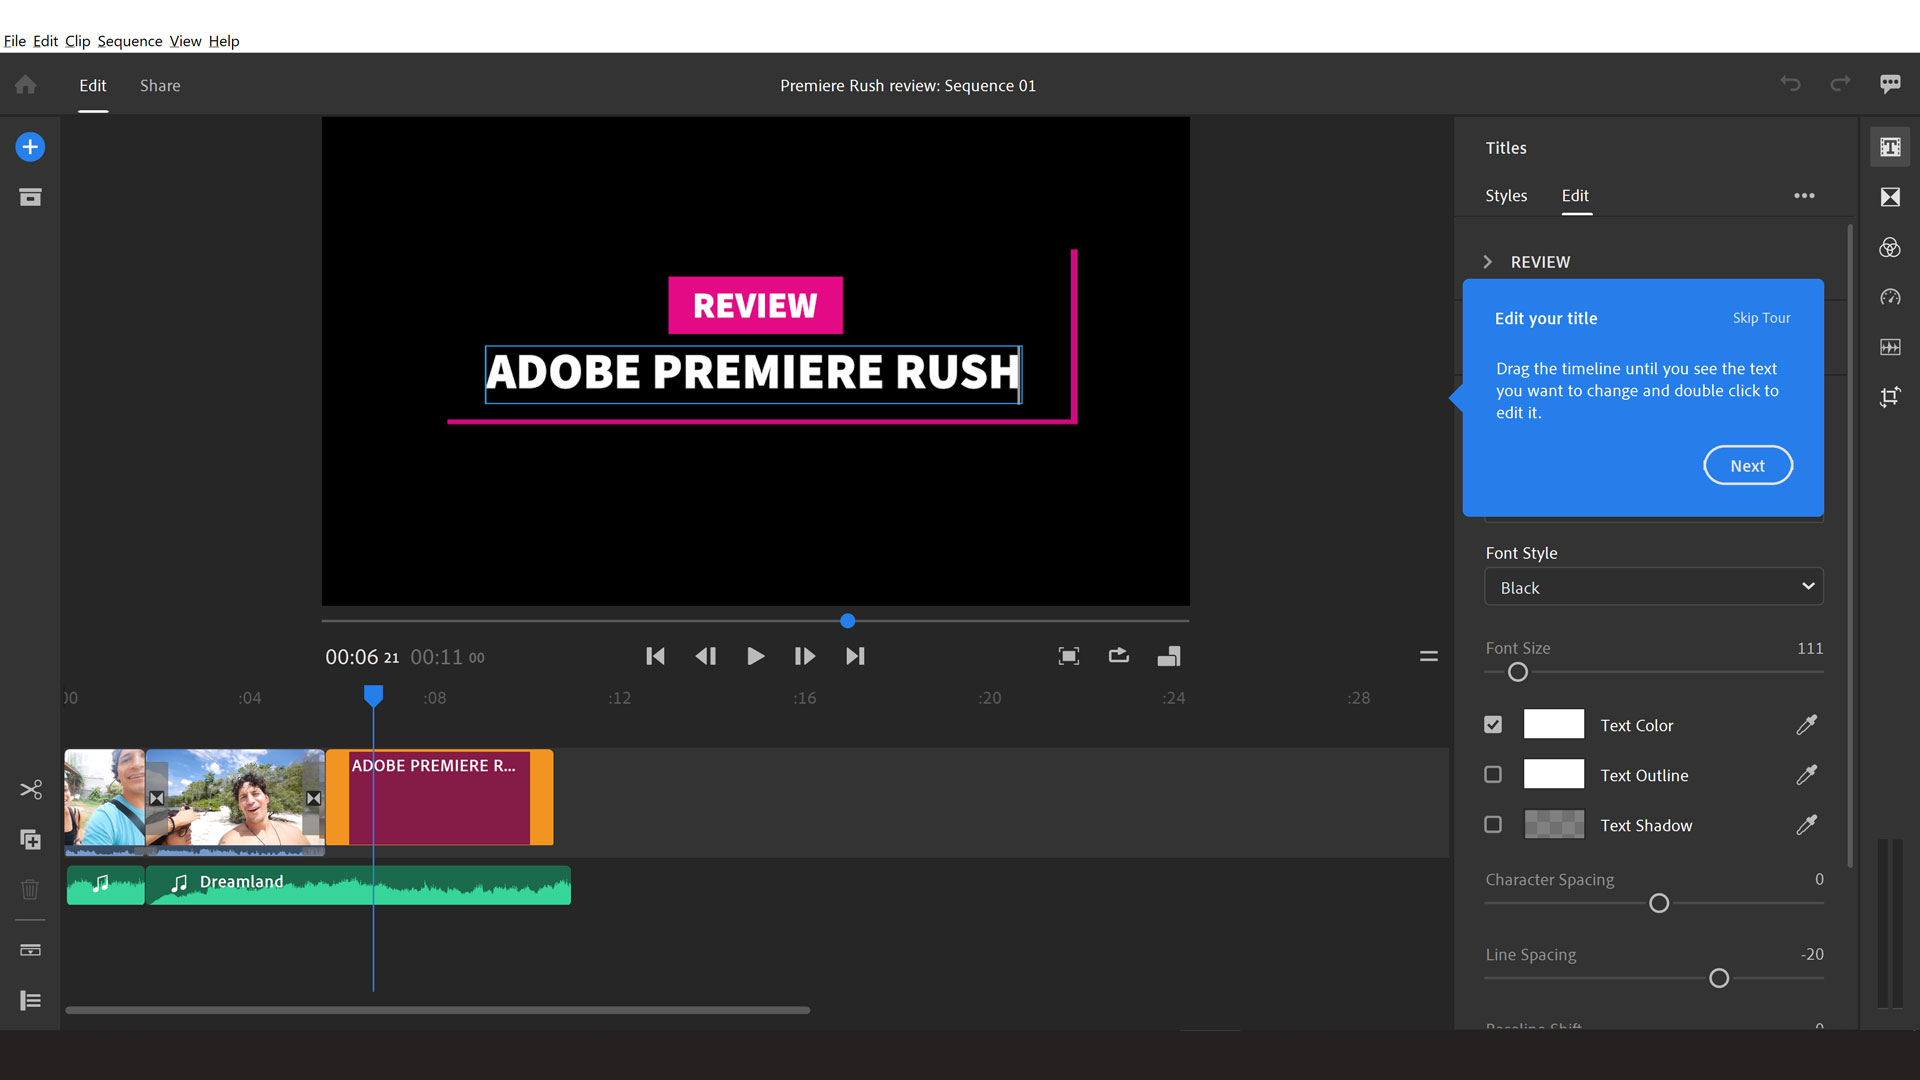
In the edit section of Premiere Rush, (on the right side of the window) you can add titles by either choosing from the pre-installed templates, searching Adobe Stock for more, or by installing your own. It’s simple to use via the drag-and-drop feature, and can be edited quickly by double-clicking on the title in the monitor panel. The edit panel of the titles tool is now pulled up to adjust font, size, colour and other options.
This panel is displayed in layers, with each layer named by the text content (i.e. if you type ‘review’ into the title, it’ll display as that in the edit layer). These layers can be a bit confusing if you’re not used to them, and it’s assumed you’ll know which layer is which due to the naming convention.
Adobe Premiere Rush: Cut back on transitions
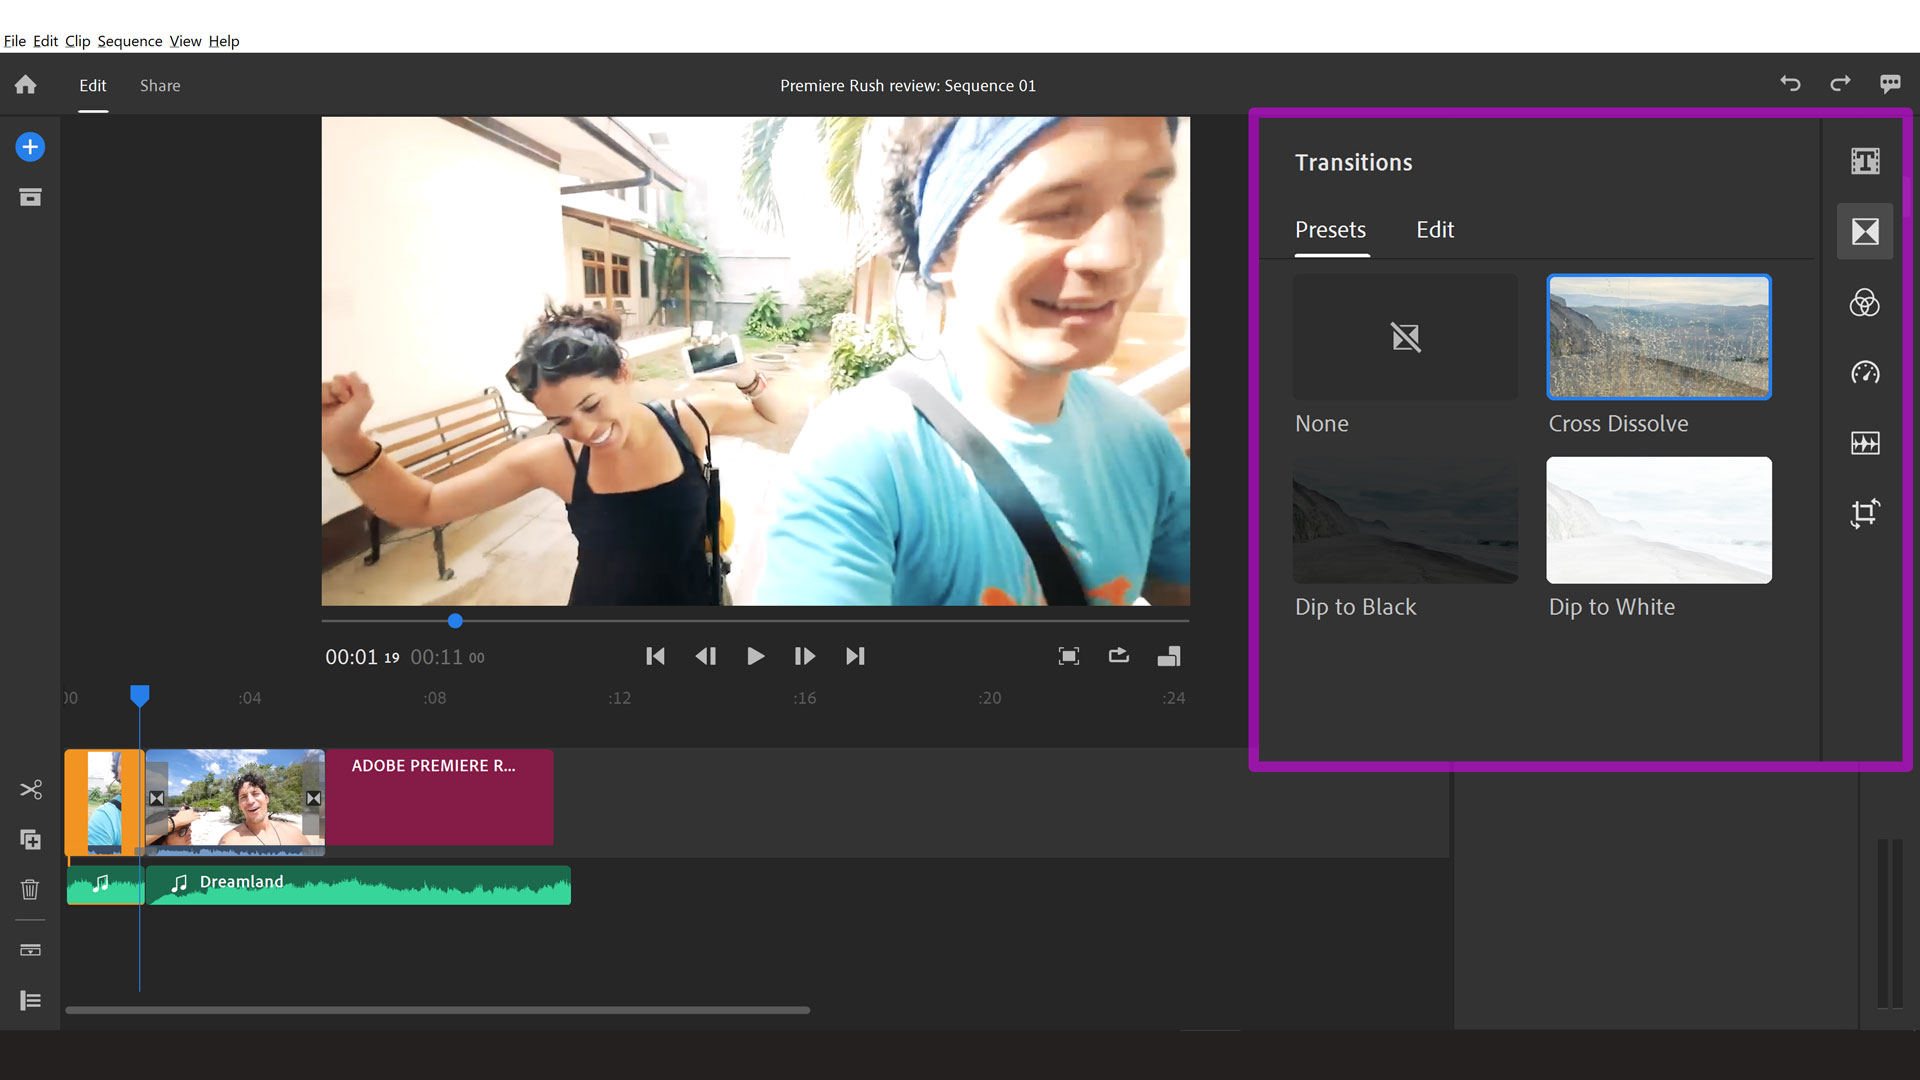
Transitions are short and sweet with four options: None; Cross Dissolve; Dip to Black; and Dip to White. Straight cuts are the most common transitions you’ll want to use between clips, but these three additions are the next commonest used when moving between content on-screen. It seems odd not to have more, with the only customisation in the form of duration under the ‘edit’ column. But we can see how this makes things simpler in terms of layout.
Adobe Premiere Rush: Good colour tool
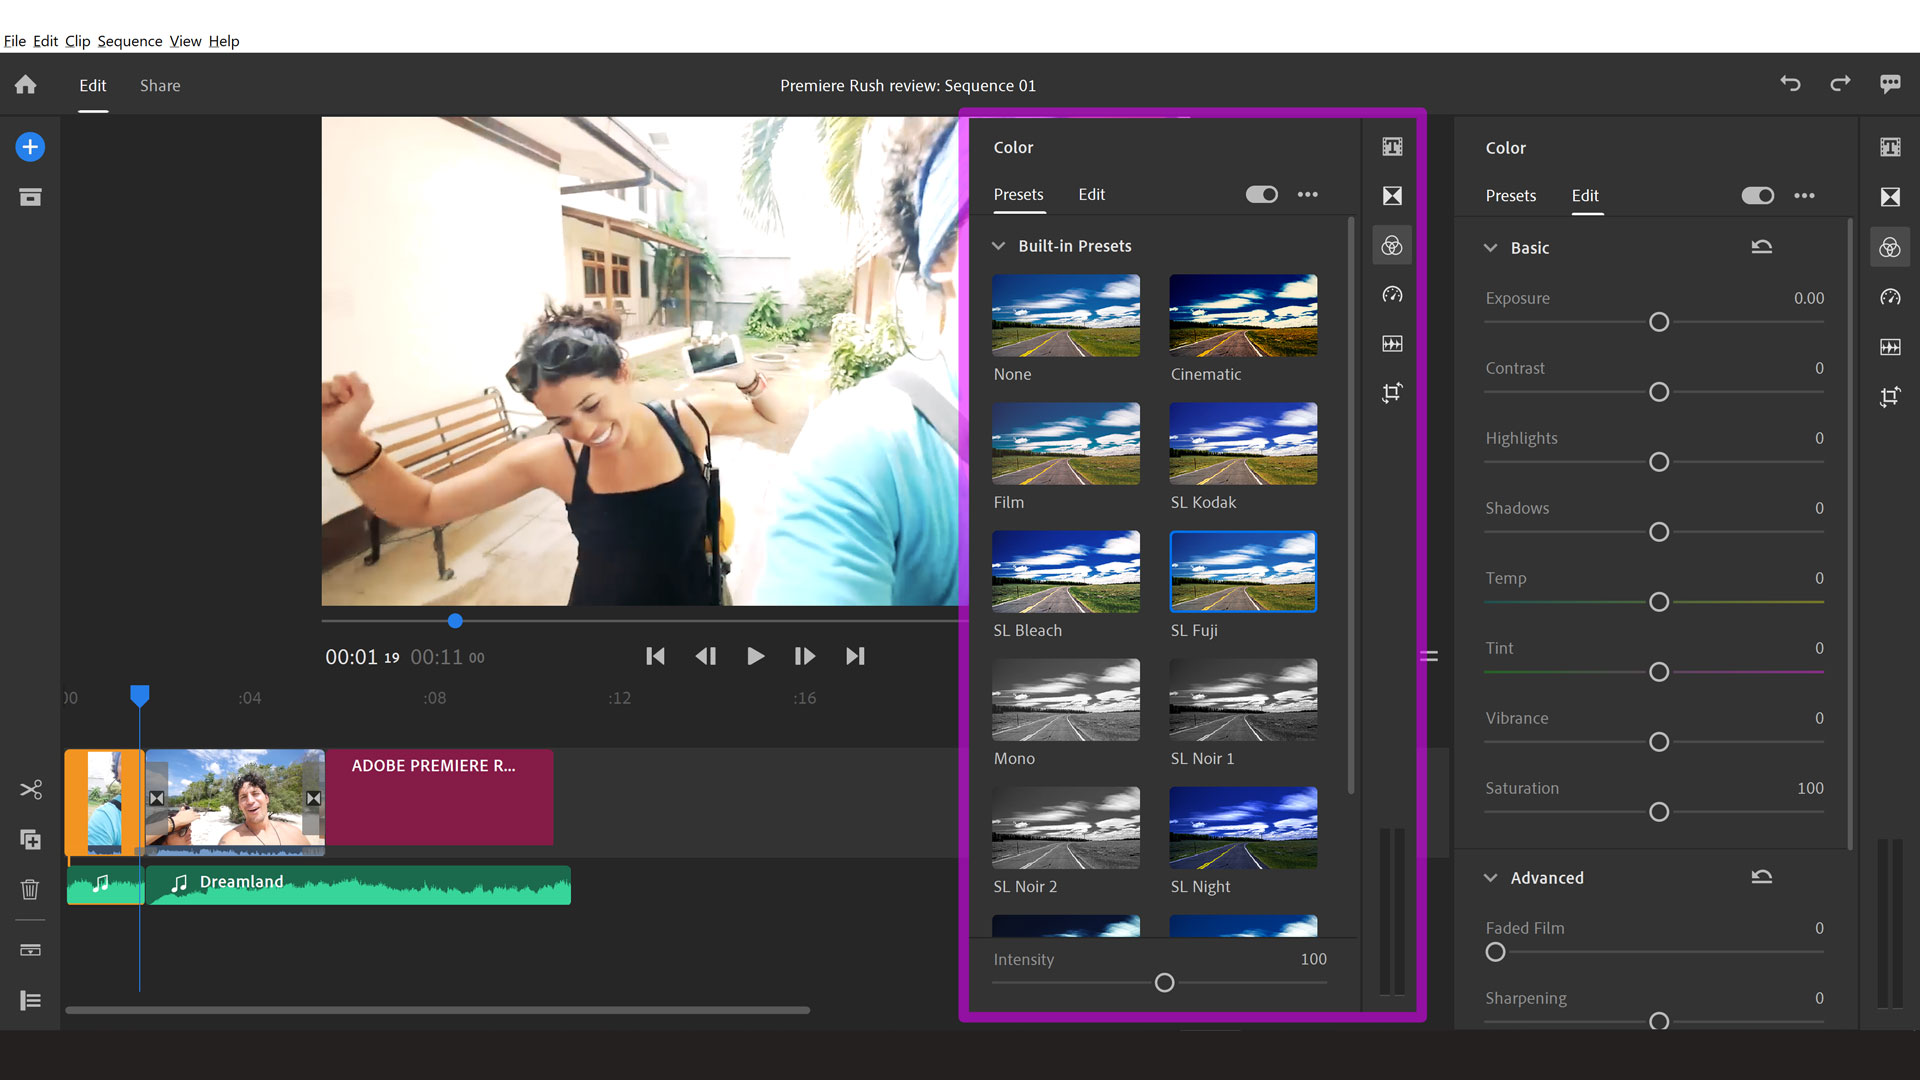
The Color tool initially gives access to preset filters, which is ideal for those that want to stylise quickly. However, there’s a little more advanced colour editing under the ‘Edit’ column with ability to change exposure, contrast, colour temperature, as well as fading, sharpening, and vignettes. This is welcomed for regular users that understand the processing method and want to make bespoke changes to their work – especially for content creators that are cultivating a style and want to homogenise their videos.
Adobe Premiere Rush: Audio features
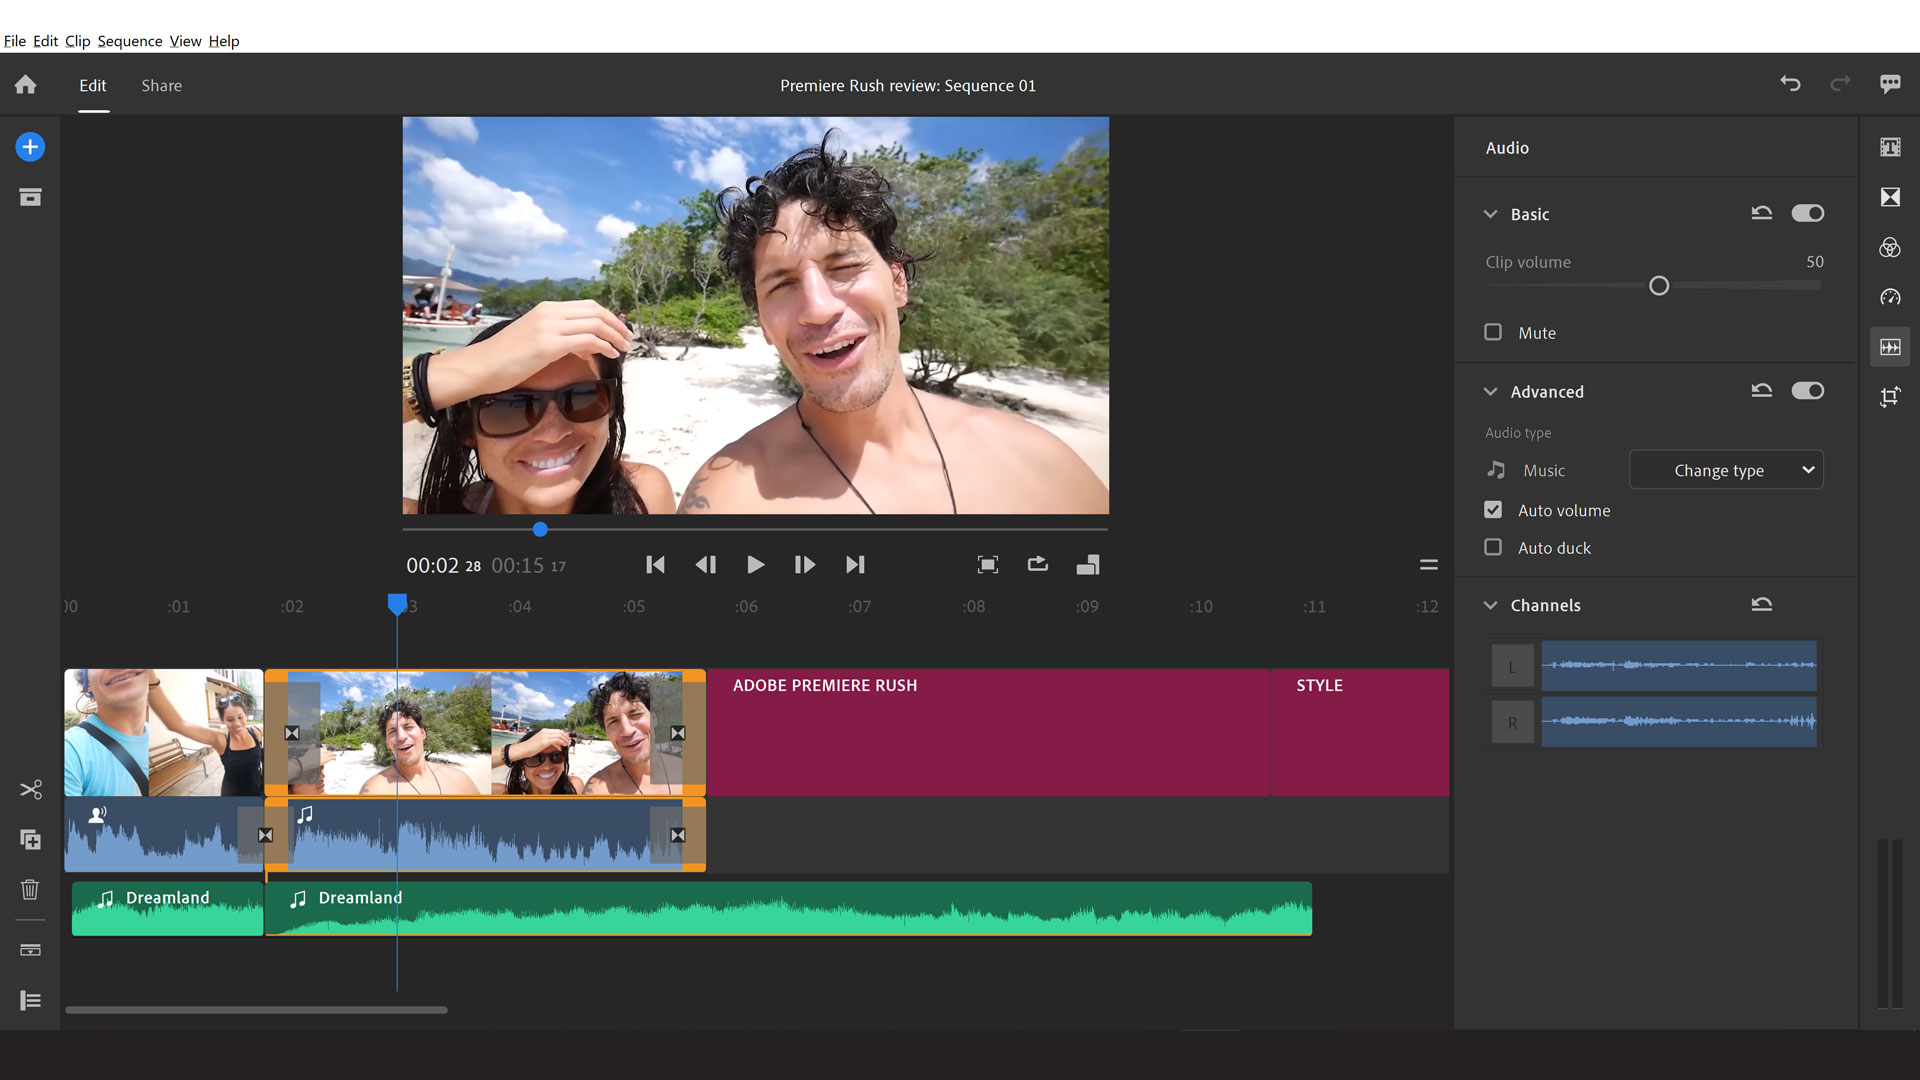
As well as adding music and effects, you can record voiceover directly into Premiere Rush. There’s a useful selection of audio adjustments you can make: both manual and auto volume levels, noise and echo reduction, and speech enhancement (which raises or lowers the pitch). Though not as in depth as you’d get on desktop software like Premiere Pro, these are intuitive and easy, not at all as fiddly as audio editing can become.
The audio channel in the timeline can be expanded for more accurate editing in one of two ways: either with the button bottom-left or by right-clicking the clip in the timeline and choosing Expand audio. This kind of doubling up is rarely seen throughout Premiere Rush, so is a little surprising.
However, in the Audio tool in the editing panel on the right you can make a few audio adjustments including volume, muting, and automatic volume and ducking adjustment. We’d like to see at least a simple manual editing tool for the audio here, similar to what we find in the Color’s ‘Edit’ column. For example, a basic compressor, parametric equaliser, and noise gate would be simple enough to include on sliders and useful for those that know a little about audio production to make some specific tweaks themselves.
Adobe Premiere Rush: Pan and Zoom
The motion effects are quite limited in Premiere Rush. Pan and Zoom was added in the August 2020 update, but it’s not customisable – you don’t even have the choice of whether to zoom in or out. Plus, it’s only available for still images and not video clips. Hopefully, the feature will be expanded in future updates.
Adobe Premiere Rush: Social publishing
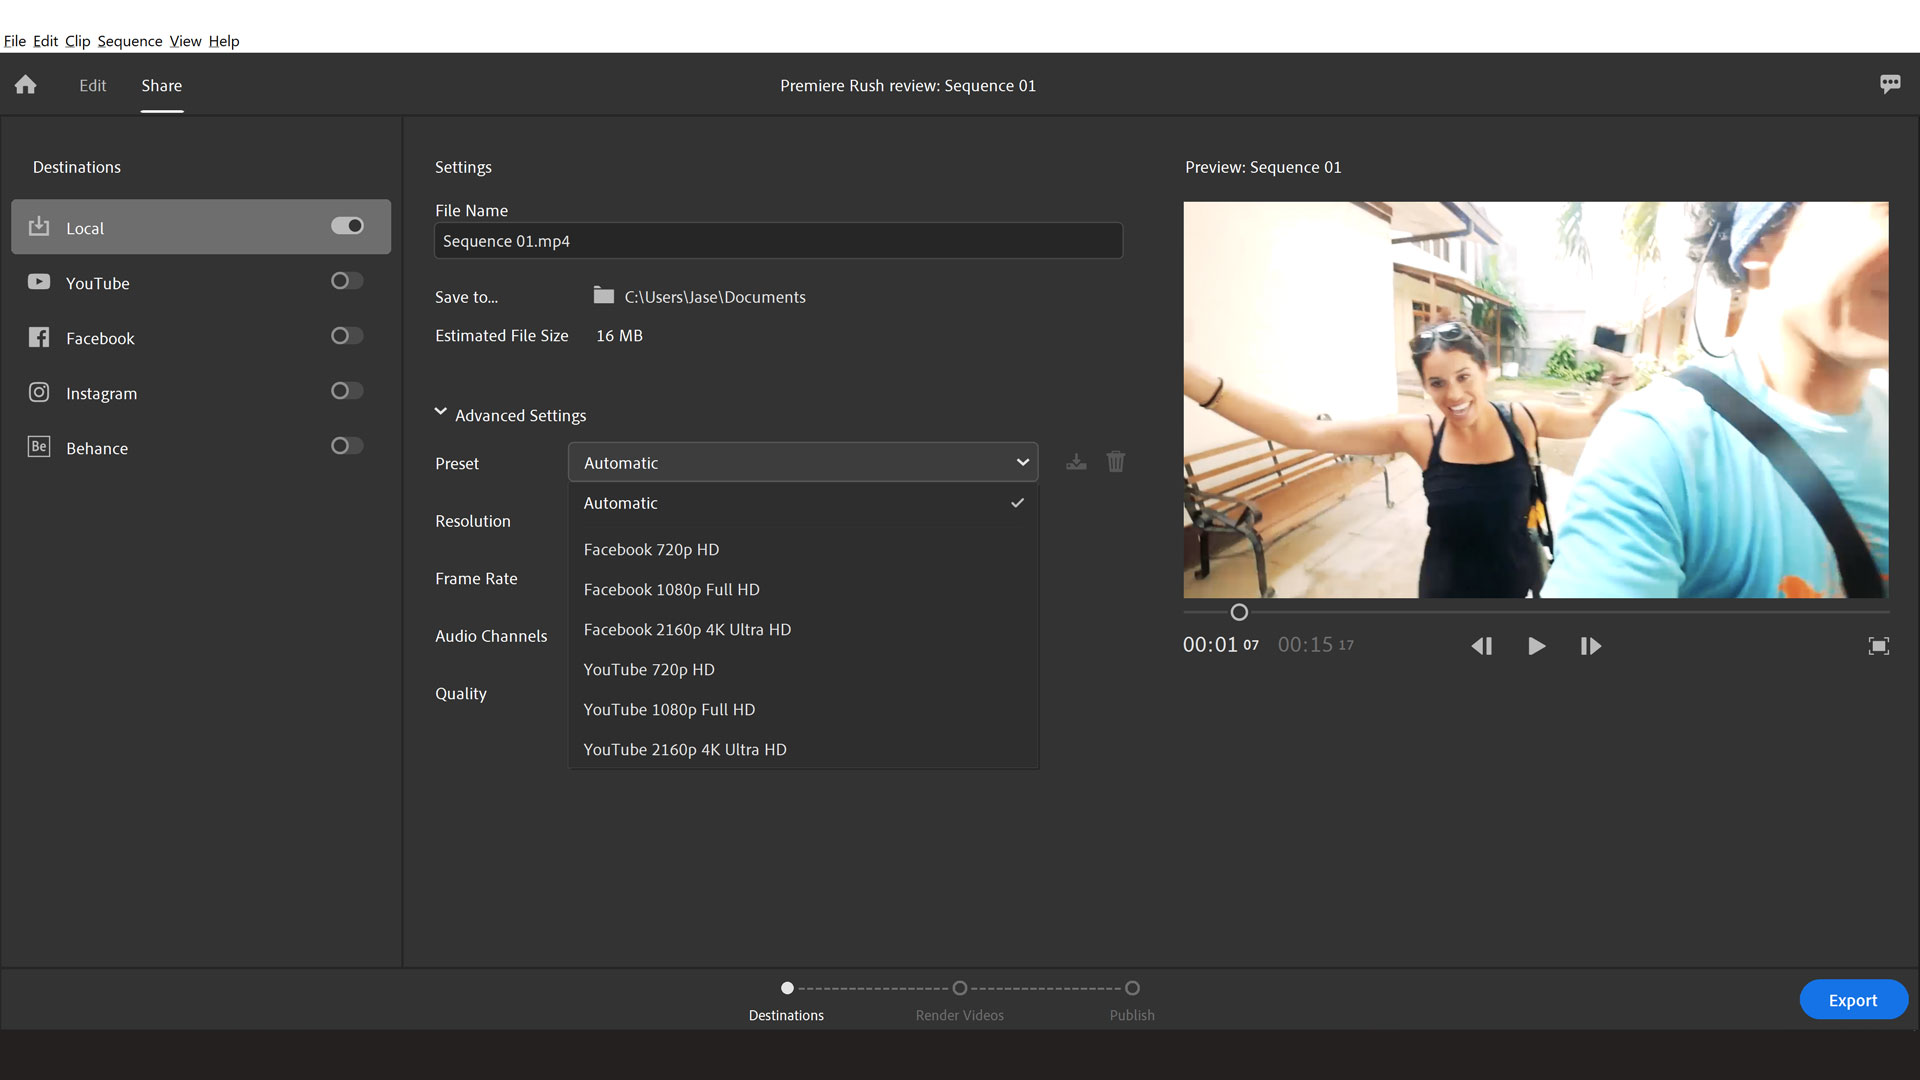
We love the speed and ease of Premiere Rush’s export ability. It lives up to Adobe’s “easy-to-use, all-in-one video editing software for online video creators” description by offering five options for media export. Four of which are social media output standards. You can publish straight to YouTube, Behance, TikTok and Facebook from the app once signed in, and save locally as well for Instagram and personal use. The export presets mean you don’t have to worry about file types, and there are options to add descriptions and tags. All this means the process of publishing to social media is very streamlined.
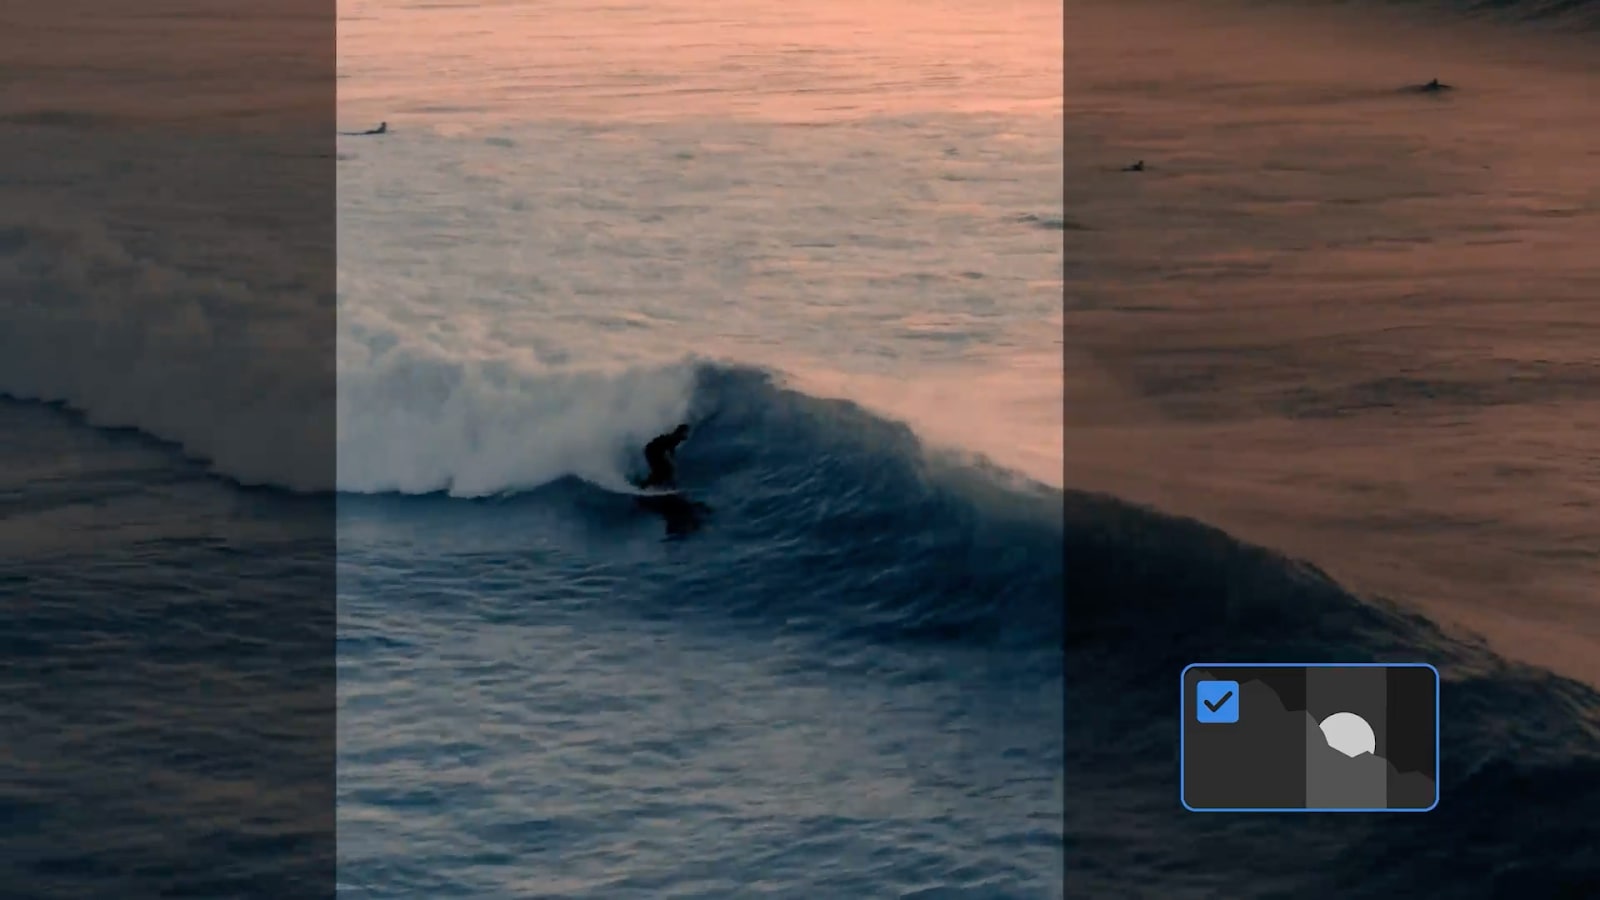
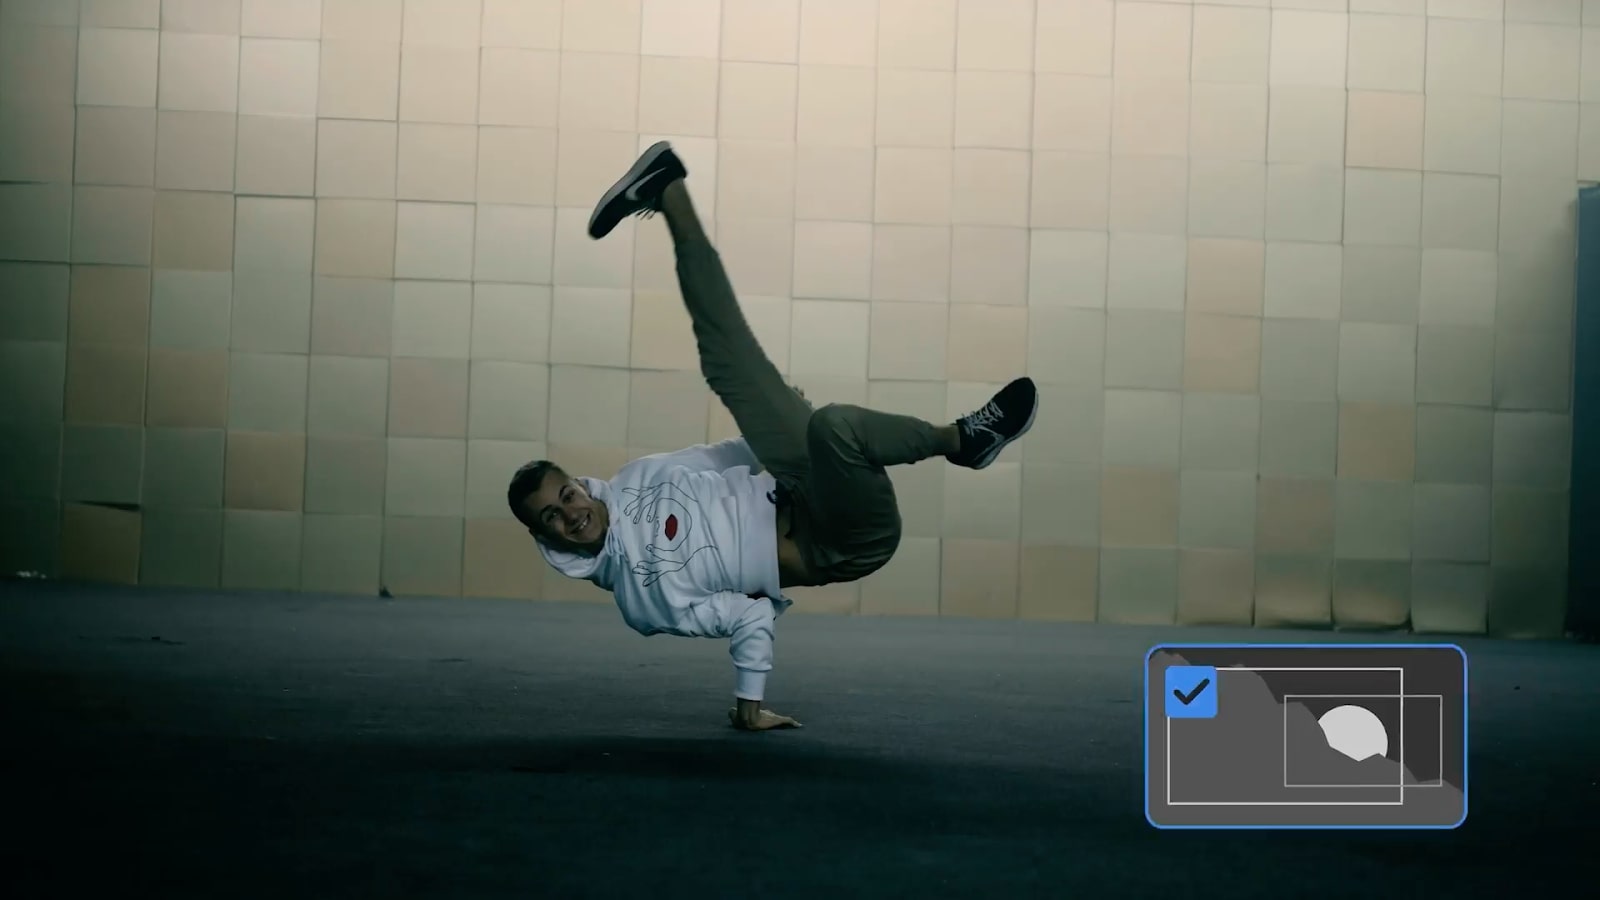
It's brilliant how easy this makes sharing content online for creators, with specific aspect ratios and quality required for each platform taken care of by the software. There’s an option to switch the aspect ratio of your edit between 16:9, 9:16, 4:5, and 1:1, and Auto Reframe was added in the August 2020 update. This intelligently locates the most important part of a clip and ensures it’s not cropped out when the aspect ratio is changed. Placement of graphics is also automatically adjusted for ideal positioning in each aspect ratio.
Adobe Premiere Rush: Premiere Pro compatibility
Because it’s significantly scaled down, those who want to really fine-tune their edits or make complex videos won’t find the options to do so in Premiere Rush. However, the Project Sync feature makes it possible to start an edit in Rush then send it to Pro. This is a useful feature for editors who want to begin an edit using their mobile device before fine-tuning it later.
Adobe Premiere Rush: Should you buy it?
For users looking to maximise their creative output and save time in front of the screen, Premiere Rush is a good, simple video editor with all the most basic editing tools you could ask for. It’s relatively inexpensive at $9.99 / £9.99 a month for the CC license, and means users can pick it up and put it down month-to-month as and when they need it.
Alternatively, you can buy Rush as part of a subscription to Premiere Pro for $20.99 / £19.97 a month, or as part of the Creative Cloud collection for $52.99 / £49.94 per month. It's not the cheapest video editing software, a strong competitor, KineMaster, costs just $4.99 a month.
It could do with a few extra manual controls for audio, and file navigation on the local storage space, but it’s clearly aimed at cloud storage with online publishing facilities, which it does very well. It sits in place with iMovie as being a simple video editor with minimal frills. Though for more in-depth editing Premiere Pro or Final Cut Pro X is certainly the better choice.
Premiere Rush suits the vlogger and YouTuber who wants to generate lots of content, or simply spend less time editing and more time shooting/publishing. It’s also ideal for creatives that want to edit on the go with mobile devices such as tablets or smartphones.
If you want to make more complex videos, you’ll be disappointed that many features lack depth, and other apps like KineMaster have more refinement available. However, the compatibility with Premiere Pro is an advantage, and buying the two as a package is worth considering for busy editors who sometimes have to start edits while on the move.
Adobe Premiere Rush: System requirements
Mac
- Multicore Intel processor with 64-bit support (Recommended: Intel Core i5 or i7, or equivalent)
- macOS X v10.14 or later
- 8 GB of RAM
- 8 GB of available hard-disk space for installation; extra free space required during installation (cannot install on a volume that uses a case sensitive file system or on removable flash storage devices)
- Internet connection and registration are necessary for required software activation, validation of subscriptions, and access to online services
iOS
- iOS 12 or later
- iPhone 7 and newer (devices with A9 ARM chip or higher)
- iPad (devices with A9 ARM chip or higher)
Windows
- Multicore processor with 64-bit support (Recommended: Intel Core i5 or i7, or equivalent)
- Microsoft Windows 10 with 64-bit support (Version 1709 or later)
- Intel Graphics Driver for Windows (version 25.20.100.6326)
- 8 GB of RAM
- 8 GB of available hard-disk space for installation; extra free space required during installation (cannot install on removable flash storage devices)
- Internet connection and registration are necessary for required software activation, validation of subscriptions, and access to online services.
Android
- Operating system: Android 9.0 (Pie or P) and later
- All the following devices running Android 9.0 and later are supported:
- Samsung Galaxy S10/10+,10e, S9/9+, S8/8+, A50, A70, Note 10/10+, Note9, Note8
- Google Pixel 3/3XL, 2/2XL, 1/1XL
- OnePlus 7/7 Pro, 6/6T devices, 5T
- Sony Xperia 10/10+, XZ Premium, XZ3, XZ2, XZ1
- Xiaomi Mi 9, Mi 8, Pocofone F1, Redmi Note 7/7 Pro
- ZTE Orange Neva jet
Read more:
out of 10
Adobe Premiere Rush has all the most used tools and export settings basic users will need, with a simple, intuitive layout. However, more advanced users will need to look elsewhere.

Jase Parnell-Brookes is the Managing Editor for e-commerce for Space and Live Science. Previously the Channel Editor for Cameras and Skywatching at Space, Jase has been an editor and contributing expert across a wide range of publications since 2010. Based in the UK, they are also an award-winning photographer and educator winning the Gold Prize award in the Nikon Photo Contest 2018/19 and named Digital Photographer of the Year in 2014.
After completing their Masters degree in 2011 and qualifying as a teacher in 2012, Jase has spent the last two decades studying and working in photography and publishing in multiple areas, and specialises in low light optics and camera systems.

