All you need to know about mockups, wireframes, and prototypes
Sign up to Creative Bloq's daily newsletter, which brings you the latest news and inspiration from the worlds of art, design and technology.
You are now subscribed
Your newsletter sign-up was successful
Want to add more newsletters?

Five times a week
CreativeBloq
Sign up to Creative Bloq's daily newsletter, which brings you the latest news and inspiration from the worlds of art, design and technology.

Once a week
By Design
Sign up to Creative Bloq's daily newsletter, which brings you the latest news and inspiration from the worlds of art, design and technology.

Once a week
State of the Art
Sign up to Creative Bloq's daily newsletter, which brings you the latest news and inspiration from the worlds of art, design and technology.

Seasonal (around events)
Brand Impact Awards
Sign up to Creative Bloq's daily newsletter, which brings you the latest news and inspiration from the worlds of art, design and technology.
Differentiating between different phases of the design process can be confusing, especially when the terminology is used so loosely. But that's no excuse for a designer not to know the difference.
While it might seem innocent enough, referring to a mockup as a wireframe is like a carpenter referring to a hammer as a screwdriver. And not knowing how to make a lo-fi prototype is like a surgeon not knowing where to cut.

These are a designer's tools of the trade, and so should be learned inside and out. So if you want to learn how to create website mockups, learn the best wireframe tools or master rapid prototyping, you're in the right place. If you're unsure, make sure your web hosting choice can support you.
This article will explain the basics: what each can do, why they're useful, some common methods for building each, and even some best practices. And we're going to start with getting their names right. Use the drop-down menu above to navigate to the page you want.
Wireframe => Mockup => Prototype
So what's the freakin' difference? While it's by no means the only procedure for designing a site or app, the traditional design process follows these three steps (skip all this with a website builder).
It's a gross oversimplification, not taking into account the countless variables in between, but for our purpose of explaining the basics, it's a good foundation. In general, this correlates to the level of fidelity, which usually rises as you move forward.
Again, this is an oversimplification and not a rule set in stone. For example, sometimes skipping mockups and creating a lo-fi prototype early on is what's best for your project. Alternatively, you might follow a process favoured by designer Steven Bradley in which you progress from wireframes to mockups and finish in code.
Sign up to Creative Bloq's daily newsletter, which brings you the latest news and inspiration from the worlds of art, design and technology.
Knowing that there isn't exactly a 'best' process (only the right process), let's explore what each type of design looks like.
01. Wireframes
Wireframes are like the blueprint of your design scheme. You create them early on, usually the first step (or second, if you prefer sketching first), and dedicate time solely to answering crucial layout, structure and organisation questions before the team iterates on visual details.
For this reason, wireframes are low fidelity. There's a time and a place for everything, and the visual and technical details should be decided later on, after the format and structure are solidified.

That's not to say wireframes shouldn't concern themselves with visuals at all – you only need enough detail to visualise the overall layout and required space for element categories (like a sidebar, top navigation, footer, primary content and so on).
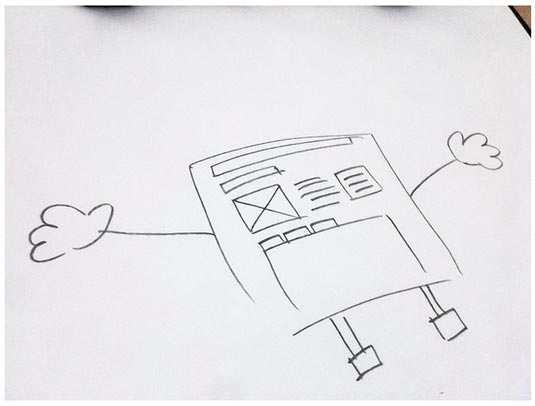
As we described in The Guide to Wireframing, that's why wireframes often include placeholders for later graphics in the form of squares with the Xs or bare-bone versions of the icons to come later.
Benefits
As stated above, wireframes enable the team to focus solely on the 'big picture' decisions before diving into the details. The advantages of wireframes are the same as outlines for any medium: they give a chance to properly plan before moving forward, reducing the risk of having to double-back because something was missed. (If you're working as a team, the right cloud storage will keep things fluid.)
Additionally, as a deliverable, wireframes can be shared with the entire team so that everyone's on the same page. If you're using a specialised wireframing or prototyping tool, different team members can modify or comment on the same document, which encourages collaboration right from the start.

Moreover, wireframes can be shown to stakeholders who want to see results early on, and reveal potential edits before wasting time developing them further.
Methods
Because of the low fidelity of wireframes, there are more hands-on methods to building them than the other phases. Let's take a look at a few.
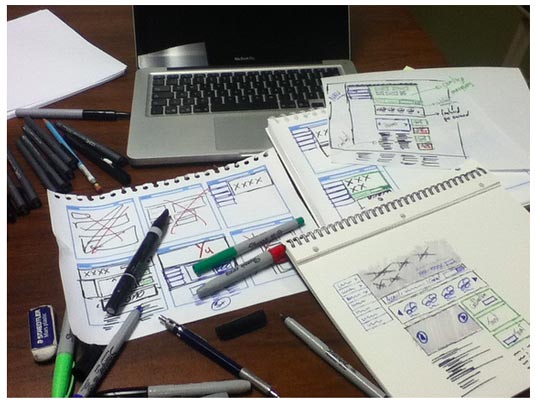
Sketching
The old fashioned way. Simply draw on paper what's on your mind, just don't get too bogged down by the details. This is fine for a quick wireframe in a situation like brainstorming, but these sketches can be problematic to share with the entire team, and can easily be misinterpreted. If you prefer a methodical and structured way to sketch, we highly recommend layered sketching.
Graphic design software
If using software like Photoshop or Sketch feels as natural to you as sketching on paper, go with that. However, this option requires an innate knowledge of the program, and lacks the ability to add interactions provided by some wireframing apps.
Presentation software
If you're wireframing specifically for a presentation, you can build it in software like PowerPoint or Keynote. The slide structure facilitates thinking of your design in terms of pages, but again this option lacks interactivity. Presentation software, however, is very familiar since most of us have all used Powerpoint or Keynote at some point.
Design software
Today, software exists specifically for wireframing and beyond, like UXPin, Axure, Omnigraffle and Moqups. The advantages here are streamlined features for wireframing, like drag-and-drop usability and how easy it is to add interactivity through a couple of clicks. The drawback is that some cost more than others. While Balsamiq is free, it lacks the interactive capabilities of Axure, Omnigraffle and UXPin.
The method doesn't matter so much, as long as it suits the project's needs and restrictions. The important thing is that you have a reliable idea of the entire project before you move forward to the more meticulous phases.
Next page: Everything you need to know about mockups
Jerry was a content strategist at wireframing and prototyping app UXPin, where he developed in-app and online content. Sadly, he passed away in April 2018.
