6 essential Photoshop layers to improve your images
The six most frequently used Photoshop layers for image editing, and how to use them to improve almost any photo.
Photoshop has many types of layers and adjustment layers available, but there are six that you’ll find you need to use again and again. Learning how they should be used may seem a little daunting for beginners, but there are plenty of Photoshop tutorials to help you out, and once you’ve got to grips with them, you’ll find they play a part in the creative process of almost every image you make.
Here are the essential Photoshop layers you need to know about, and details on how to use them.
01. Levels
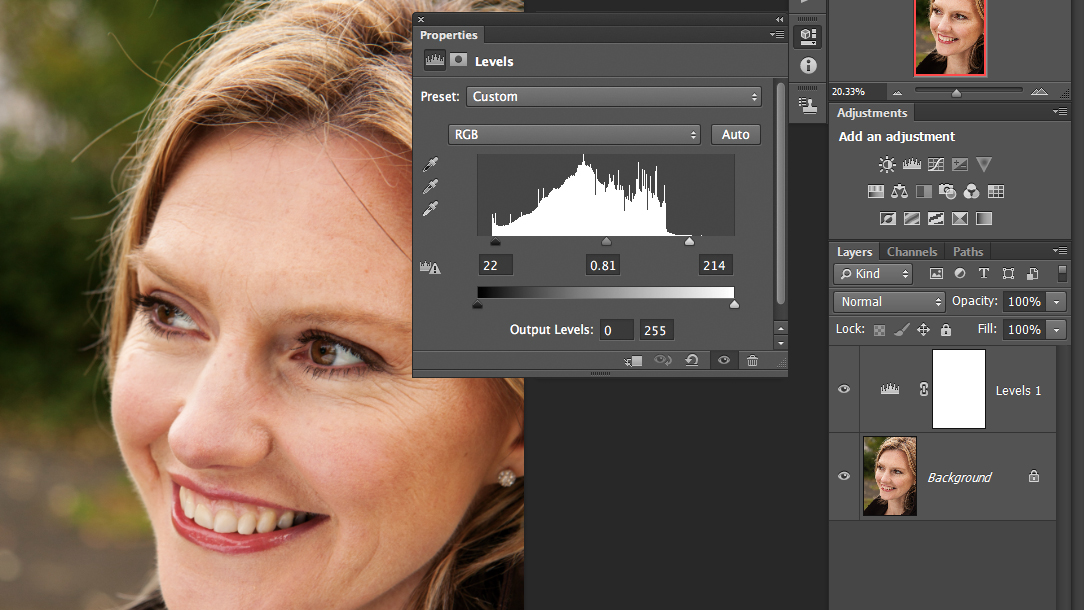
This should be the first layer you add to an image, because it fundamentally alters the tonal range of the entire image. Create a Levels Adjustment Layer, drag the Black Point slider inwards until it touches the lefthand edge of the histogram, and drag the White Point slider inwards to the right-hand edge. This remaps the tones of the image to make more of the available tonal range.
02. Curves
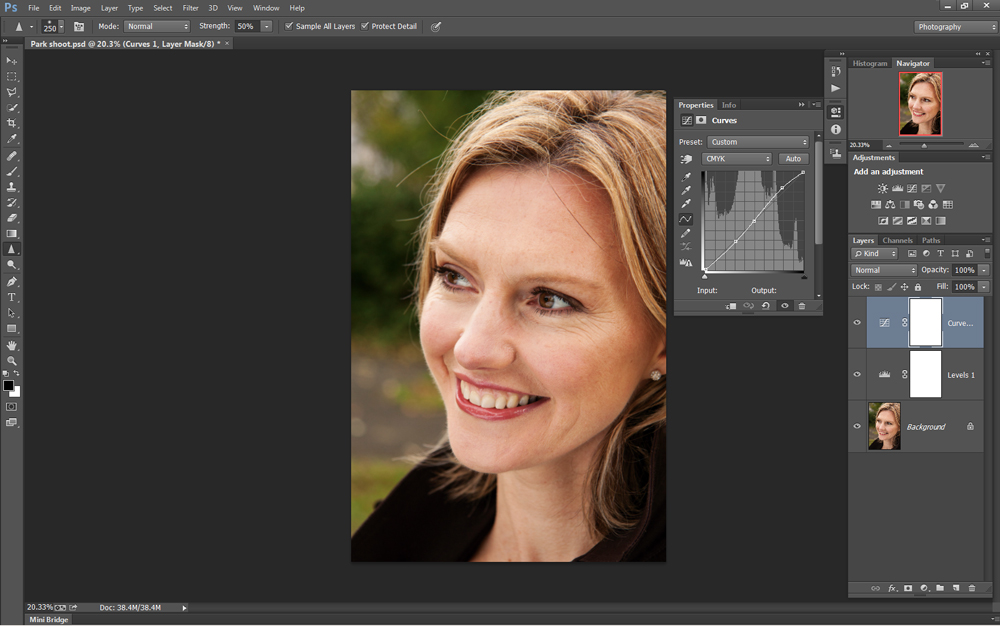
Curves is one of the most powerful adjustment layers. An S-shaped curve brightens the highlights and darkens the shadows, resulting in extra contrast.
Create a Curves Adjustment Layer and click the middle of the diagonal line to add a central control point. Drag down on the lower part of the line and drag up on the upper part of the line to improve image contrast.
03. Hue/ Saturation
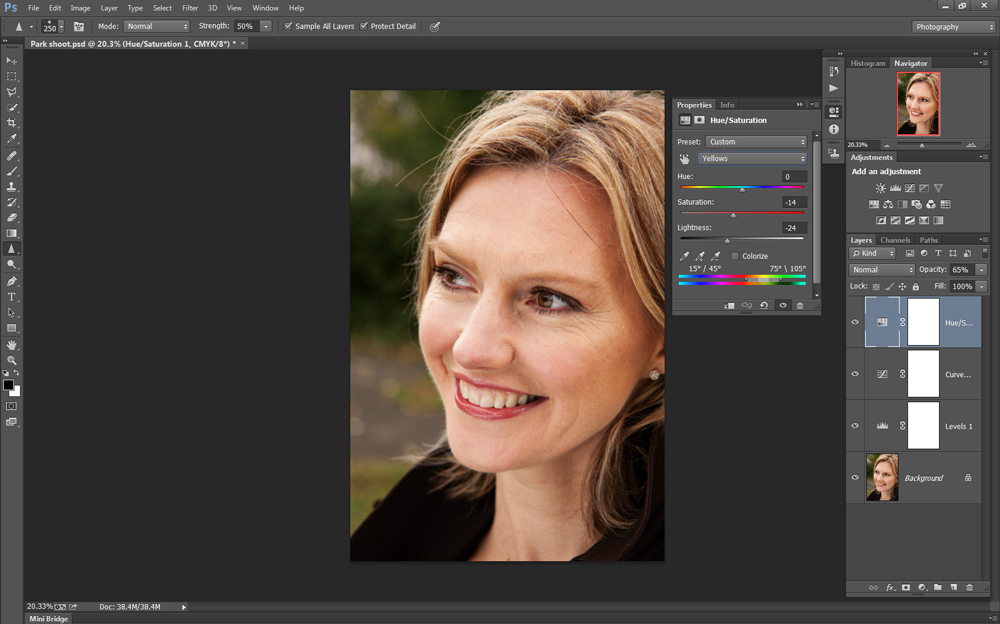
This adjustment layer is best used for altering the intensity and brightness of individual colour channels in an image – greens and blues in landscapes, for instance. Create a Hue/Saturation Adjustment Layer, click the Master menu and choose the colour channel you’d like to adjust. Small changes are usually the most effective.
04. Healing layer
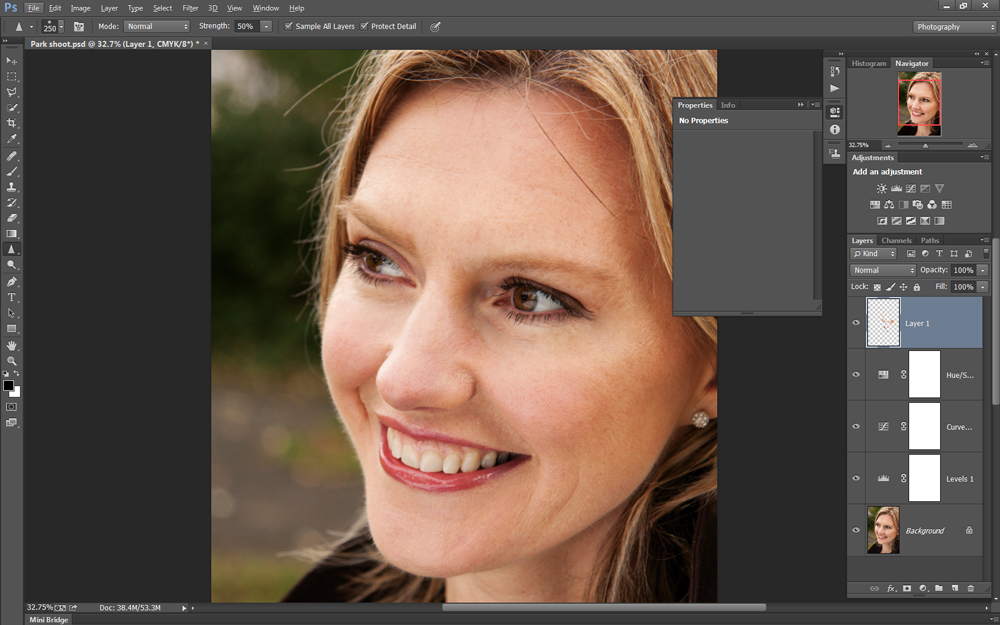
Most photos contain unwanted marks or blemishes. The Spot Healing Brush tool is effective at removing these. The best way to apply the healing is on a new blank layer, so that you can easily tone down or remove selected healing work later without having to start from scratch because you healed directly on the background layer. To do this, create a new blank layer, choose the Spot Healing Brush tool from the Tools panel and tick Sample All Layers on the Options Bar, then continue as normal.
Daily design news, reviews, how-tos and more, as picked by the editors.
05. Dodge and Burn
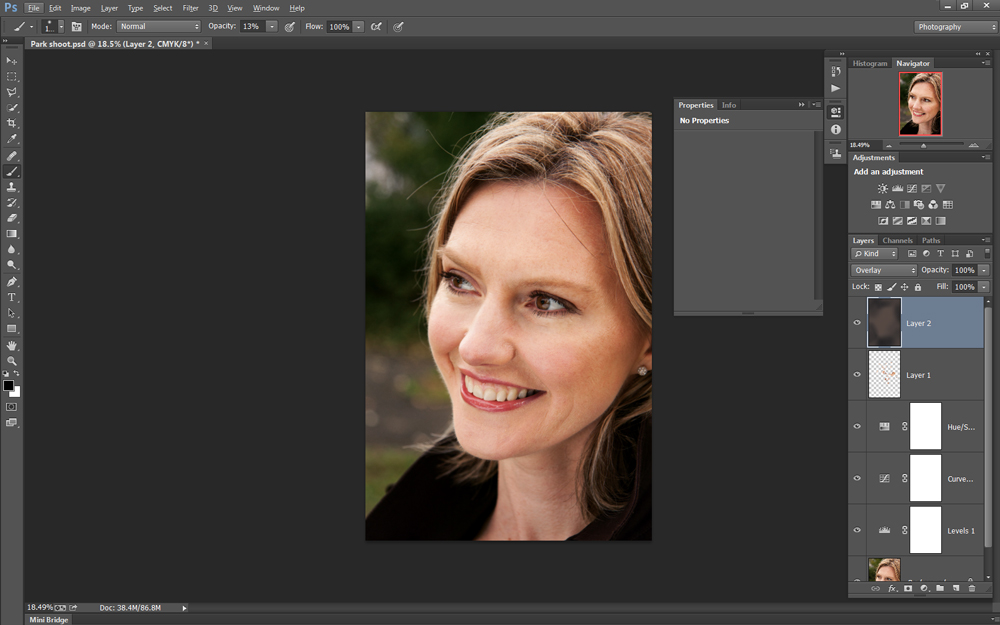
One of the best ways to enhance a photo is by lightening or darkening selected areas of the image. This can be done with the Dodge and Burn tools, but rather than use them directly on the image, a separate grey layer gives you greater control. To create a Dodge and Burn layer, hold down Alt and click the Create a new layer icon in the Layers panel. Give the layer a name, then choose Mode: Overlay. Check Fill with Overlay-neutral colour and click OK. Now use the Dodge and Burn tools (with Range set to Midtones) to work on the new layer.
06. Selective sharpening
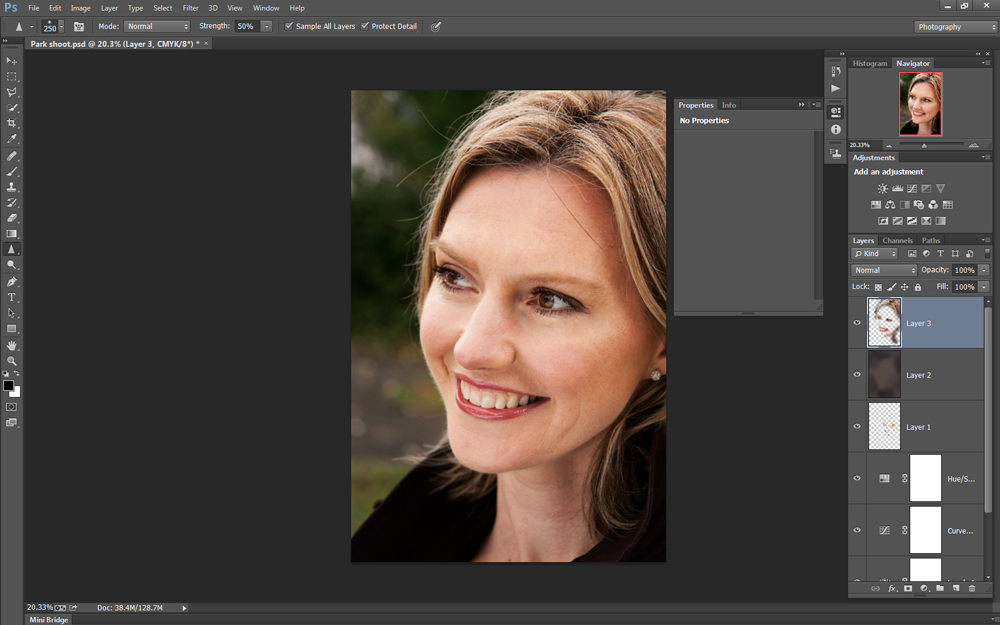
Once all other adjustments have been made, you need to sharpen the image for output. The traditional way is to create a merged layer at the top of the stack, apply Unsharp Mask, then paint on the mask to remove the sharpening from those parts of the image you want to remain soft. However, the Sharpen tool enables more control over the process by enabling you to build up the effect by brushing repeatedly with a low opacity brush. Create a new blank layer, select the Sharpen tool, tick Sample All Layers and set a Strength of 50% or lower.
Related articles:
James Paterson is an expert in all aspects of the photographic process, from capture to post-processing. He has contributed to numerous photography publications, including Digital Camera, Amateur Photographer, PhotoPlus and NPhoto, and his work has also appeared in Computer Arts magazine as well as several books. He is the editor of Practical Photoshop magazine, and has a well-deserved reputation as an authority on all things Photoshop-related.
