Sculpt a robotic female face in ZBrush
Richie Mason shows how to make more of DynaMesh and panel loops to improve your ZBrush to KeyShot workflow.
Sign up to Creative Bloq's daily newsletter, which brings you the latest news and inspiration from the worlds of art, design and technology.
You are now subscribed
Your newsletter sign-up was successful
Want to add more newsletters?
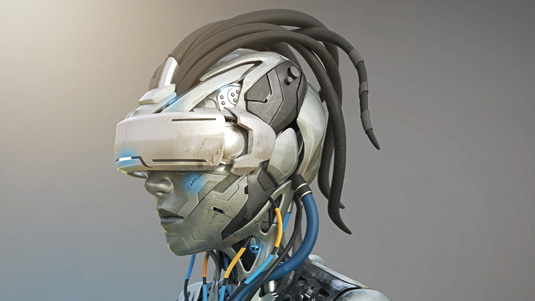
In this tutorial I'll walk you through the main steps to create the robotic woman from this month's front cover. I'll be using ZBrush and Keyshot together as this is a very easy workflow to use, and also extremely powerful. Keyshot gives great results in a very short time and is an ideal render tool to bring out the surfaces of your robotic and mechanical modelling.
We'll also use insert brushes in ZBrush, as this is a fast way to create high-quality details, and is a skill everyone needs to know. The idea for this model was to create a cyborg merged with a VR headset to celebrate the rise of the virtual reality technology.
The model itself won't be created for use in a VR environment, rather it's an illustration to showcase the magazine's content. I'll be touching on techniques that can enhance your still image renders for illustration and this will involve using Photoshop to give a more weathered and worn look to the robot's face. I'll touch on post-production techniques to add scratches and decals to the model, in order to deliver a used VR robot from a future where virtual reality is commonplace.
Article continues belowYou can download extra inserts and brushes from various sites for this tutorial, however I will talk you through how to use the ZBrush standard brush for the majority of the work.
01. Start with basic shapes
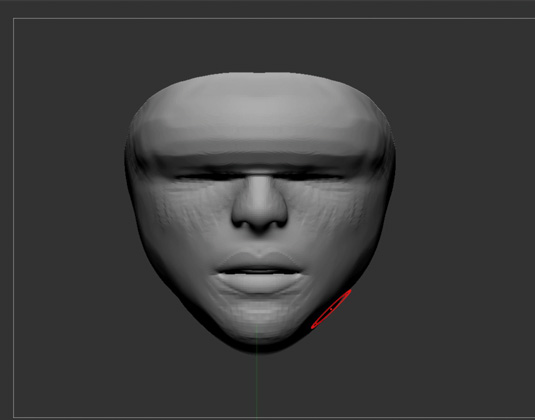
I start creating my female robot render with a sphere. Using the Clay Buildup and move brushes I begin to shape the face, but at this stage I'm not detailing, just establishing forms. Sometimes for this it's best to look at reference images of mouths and women's faces as you work, so you don't stray too far from reality. As this is going to be robotic I need to remember to keep smoothing out as I go using the ClayPolish tool.
02. Creating the body
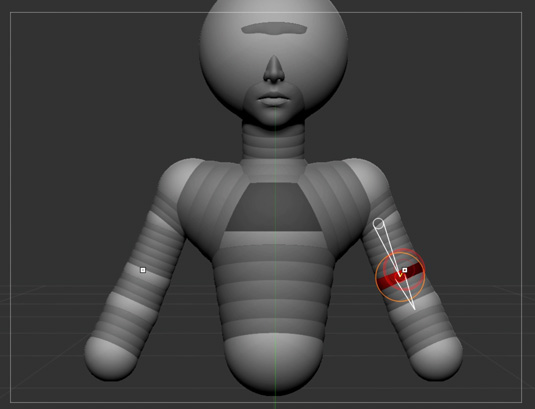
You can create the body in many ways, however I chose to use Zspheres. Go to your subtool menu, press Amend and choose a Zsphere – this will insert a sphere into your scene. Draw out the body shape you desire. When you have finished press A and then go down to the Adaptive skin menu and press make Adaptive skin. This will create a separate skin tool. Delete the Zsphere mesh and then amend with the new skin.
03. Dynamesh the body
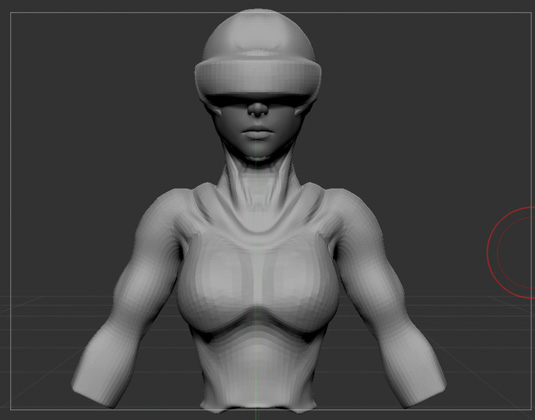
With the main form of the body set it's time to shape it into a stronger figure. First of all I dynamesh the character's body subtool as this will make it easier to sculpt. So firstly, press the dynamesh button, which can be found in the Geometry tab, and once this is dynameshed to a level that suites you, start drawing out and refining the shapes with the Clay Buildup brush.
Sign up to Creative Bloq's daily newsletter, which brings you the latest news and inspiration from the worlds of art, design and technology.
04. Shape and polish
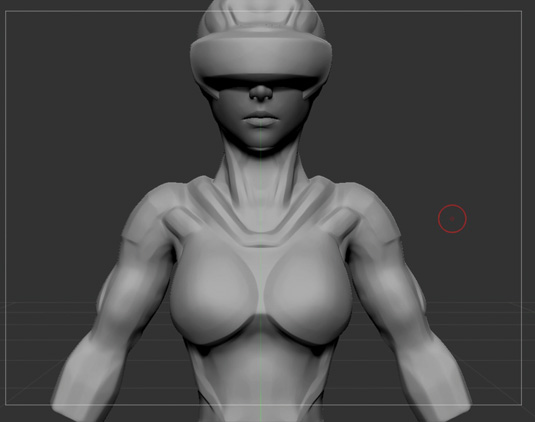
As I work on shaping the body I keep in mind the shape of the armour and plate location. Using either the slash or dam_standard brush, outline all the panels using the Add and subtract buttons, then press ClayPolish a few times to smooth out areas and crisp the lines to keep it feeling robotic. If there are bumps or curves that aren't feeling right, simply go over them with the hPolish tool until you're happy.
05. Create robotic wire hair
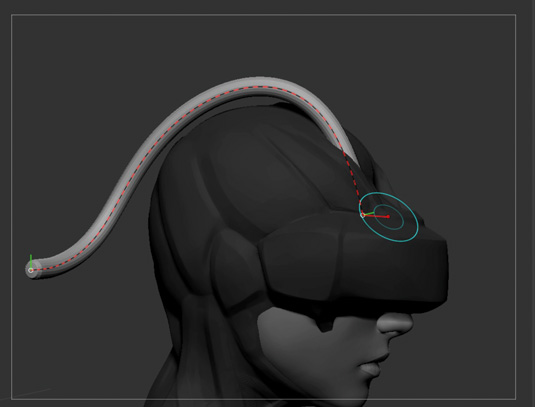
Use the Curvetube brush for creating the wires for the robot hair. The settings I use to give a hair-like tube are: Curveedit Radius 64, Curveedit Focalshift 0, Curve snap distance 60, Curve Projection Range 4. With this set, draw the hair over the top of the head. Now press Ctrl+Shift+click on the hair then click split hidden (found in the subtool menu under the split tab), this will put the hair on its own subtool allowing better control if you have to go back later.
06. Make hair connections
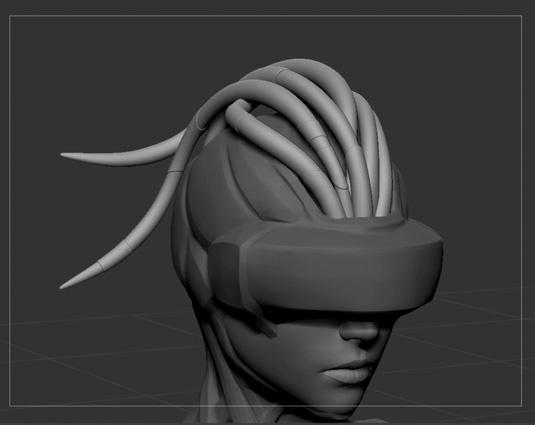
To make the hair connectors just duplicate the subtool. Hold Ctrl+Shift to change the tool to slice Curve and use it to cut around the bottom of the hair in a straight line. Hold Ctrl+Shift and click on the part you want to keep, then press the delete hidden button, which is found in the Geometry menu and modify topology tab.
07. Panel loops
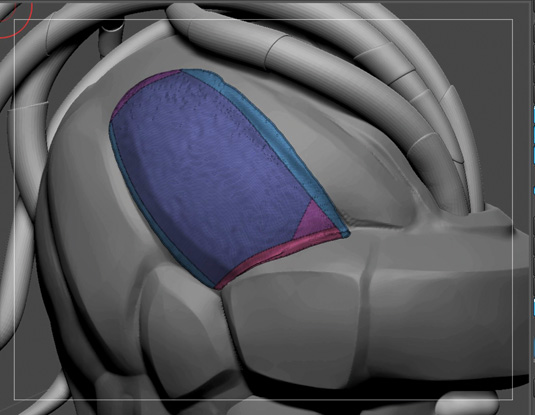
Panel loops is the main technique used on this robot and I will use this throughout the sculpting process. First mask-off a rough area you want as a panel and then under the subtool menu/extract tab click extract, and Accept. This will create a new subtool. Now Alt+click on any surface to highlight the subtool and select the extract option. Remove the mask by pressing Ctrl+Shift+click on the front face and press delete hidden again in the tools menu.
08. Prepping for panel loops
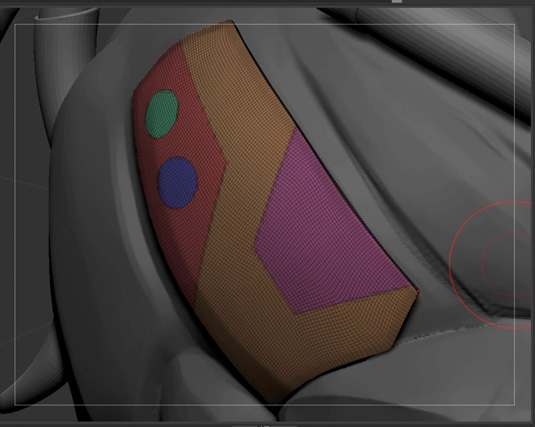
Use the slice Curve brush to slice the panel shape you want. When you are happy with it, Ctrl+Shift+click on the main shape and select delete hidden. Click X to turn symmetry on and click ZRemesher (found under the Geometry menu), to smooth out the edges and place it on the opposite side of the head. Now we are ready for panel loops. Go to the Geometry menu/edgeloop tab and turn the Bevel to 0 and do the same with the polish, then press Panel loop.
09. Use panel loops
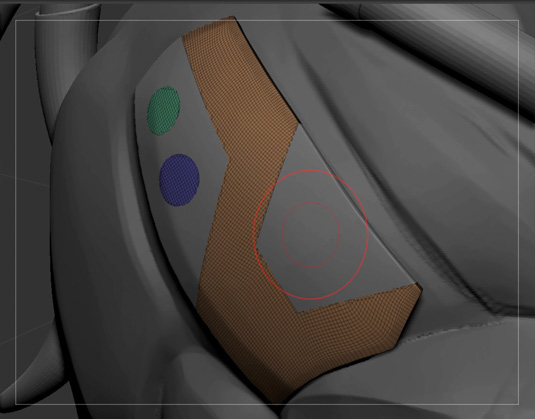
You should now have a nice clean panel. To add extra detail, go to the Polygroup menu and click Auto Group. Now go through the same process with the slice Curve brush and ZRemesher, and panel loop it again, but this time turn down the thickness and set the elevation to -100. Finally, use the move topological brush in order to pull out different parts of the sculpt.
10. Cutting the face
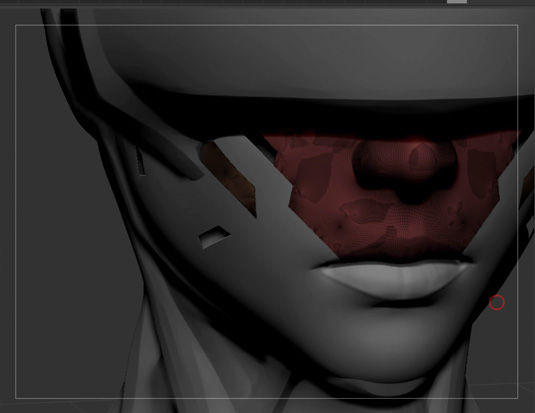
To split the face into two separate pieces we are going to use a slightly different method. Using the standard brush (or any you like to polypaint with) turn off the Add and turn on the RGB (at the top of the screen). Set the Focal shift to about -97 then choose Black and paint out the part you want to separate. To sharpen the lines up choose White and paint around the black edges – lazy mouse in the stroke menu can help. Pressing Shift+F will turn the Polygroups on so you
can see them.
Now go to the Polygroup menu and click From Polypaint. This will give you two polygroups. Go to the deformation menu and slide the Polish By Groups slider until you're happy. Press Ctrl+shift+click and use split hidden. Now you will have two parts of the face on two different subtools. ZRemesher both pieces to smooth them out, then just like the technique we used for the first panel we created, cut out sections of the face, (slice Curve>Ctrl+shift+click>split hidden and ZRemesher) as in steps 7-9.
11. The body
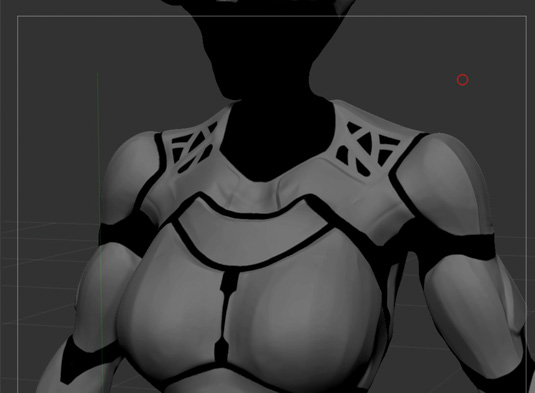
There are going to be a few different layers to the body panels, so we need to duplicate the subtool a few times. The first one will be the outer shell/armour panels, so draw out the polypaint of the shapes you want. The second body subtool will be used for the inner framework and will hold the outer panels, so these need to have the thickness turned up. Once cut out and the panel loop thickness is added, click the ClayPolish button to achieve a metallic feel.
12. Using insert brushes
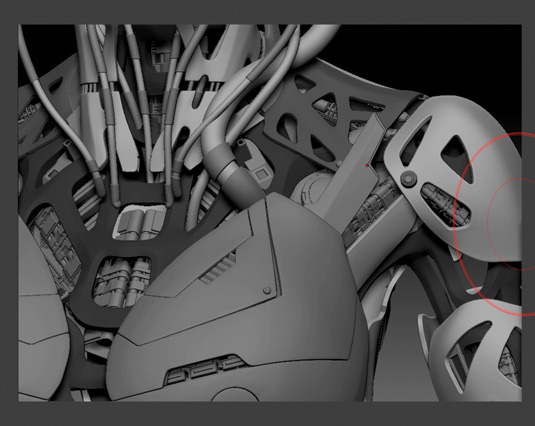
Insert brushes are an amazing part of ZBrush. First add bolts and screws, so select the imm_modelKit brush and press M to bring up the list of inserts. Look for ones that resemble bolts, select one and start adding them to the outer shell panels. For internal filler parts the imm_spaceship brush has some really good vents and panels. Using Ctrl+Shift+click, separate the bolts and inserts.
13. Tweaking the sculpt
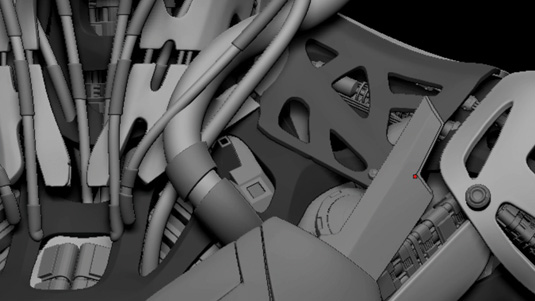
It's now time to have a good look over the model and tweak. The head is looking a bit plain to me so I create a few panels that will be made into glass in Keyshot. Also, if any part of the model is looking too low-res, just subdivide those parts. If the polycount gets too high on them, go to Zplugin>decimation master and then choose Pre-process Current. Wait until it finishes processing then press decimate Current. This will lower the polycount drastically but keep the detail.
14. Send to keyshot
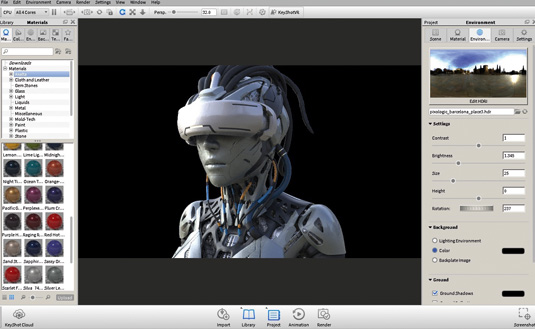
Keyshot is an amazing piece of software that's now integrated into ZBrush 4R7. In ZBrush, go to the Render menu at the top of the screen, select external Renderer and choose Keyshot. Now click your BPR button and it will automatically send everything over to Keyshot for you. However, if you don't have the latest update of ZBrush or the Keyshot Bridge, you can select each subtool and export them as .obj files, then open Keyshot and import them that way instead.
15. Using keyshot
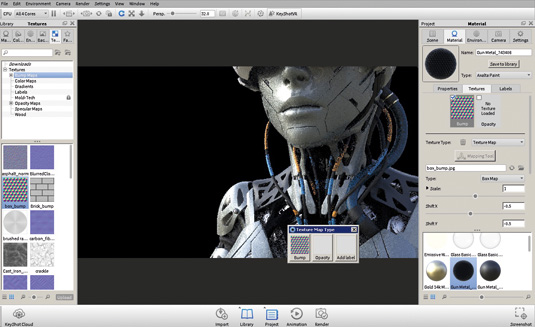
Choose your backdrop, then go to materials. I use the Axalta materials and select the silver leaf, then drag it onto the panels to colour. For the inner frames use the Gunmetal material. In the Project panel you can adjust Gunmetal; I set Roughness to 50%. Go to the texture tab and in library click Bump maps and choose Box Bump. Drag this onto the inner framework. When the menu pops up select Bump. Under material Properties scale the bump map and bump height.
16. Setting detail materials
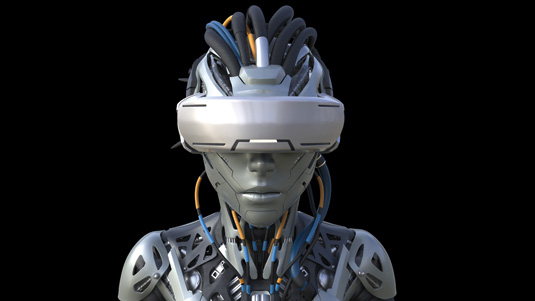
For the wires use the Rubber material under Plastics. For the bolts and inner details look in the Paint materials as they have some nice metal ones. Once you have put a material on every part of the model, choose an environment. I use one of the ZBrush bridge ones but you can find some really great ones for free on the Keyshot website. Now all you have to do is click Render, and then choose your size and quality.
This article was originally published in 3D World magazine issue 203.
