Follow my KeyShot and Photoshop advice for perfect renders every time
The secret sauce to compositing render passes the easy way.
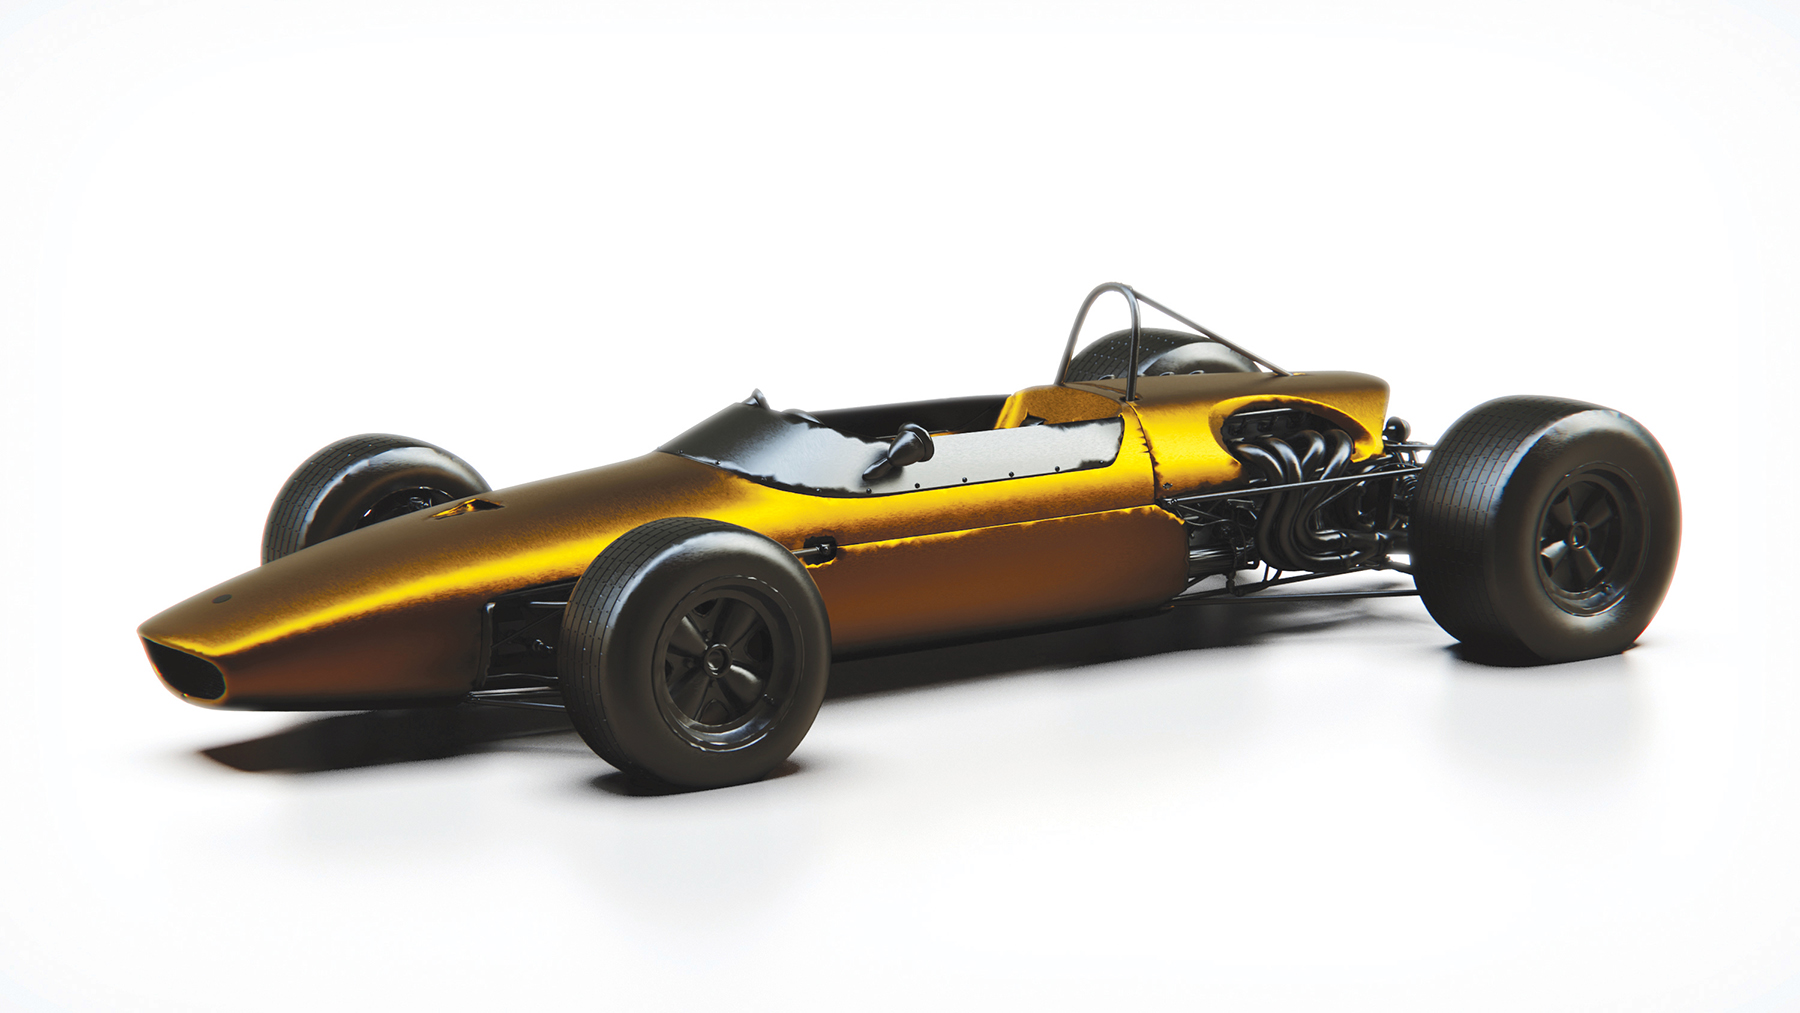
KeyShot is a fantastic niche rendering software that works as both a standalone package and a plugin. It’s possible to render still images, videos, and even augmented reality. The renderer hit the market as a product visualisation tool capable of mimicking a studio setup with high-quality lights, cameras, and a backdrop. Since its humble beginnings, it has evolved into a much more capable tool that’s a viable option alongside renderers including V-Ray, Arnold and OctaneRender (all of which feature in our best rendering software guide).
Compositing render passes is a common workflow for artists wanting to push their work to the next level. KeyShot isn’t the most robust option for this (read my KeyShot review), but definitely has everything required to make it happen for the majority of artists. But before we get ahead of ourselves, let’s look at what compositing actually is.
In simple terms, compositing is the process of combining a collection of render passes or elements into one final image. There are dozens of different types of render passes, but the main ones are Diffuse, Lighting, Global Illumination, Reflection and Refraction. Each of these is a separate pass, which only picks up and renders the specifics of that part of the process. As an example, the Reflection render pass will only pick up the rendered pixels that are generated from reflected bounces of light.

If you want global illumination in your final render and as a separate render pass that isn’t completely black, you’ll need to make sure Global Illumination is ticked in the Lighting tab. It’s easy to miss!
Each render pass is pretty useless on its own, but the real magic comes when they’re merged together using either a photo or video editing package, with great options being Photoshop or After Effects. Render passes can either be exported out of KeyShot as individual files or as individual layers within a single Photoshop file. The latter is definitely the most straightforward in terms of workflow and is the option that I’ll be unpacking here.
Once you have all your render passes as layers within your editing application, the next step involves blending them together so they actually end up working in combination rather than against each other. This is done using blending modes, with each of the render passes requiring a different type of mode to enable it to fulfil its function in the stack. The Reflection pass, for example, requires a ‘Linear Dodge (Add)’ blending mode.
I’ll initially cover how to export render passes out of KeyShot, before moving across to Photoshop and delving into the process of bringing it all together. If you want to learn more, read our 30 KeyShot rendering tips, now, below I go into a little more detail on my KeyShot / Photoshop workflow.
01. Render to PSD
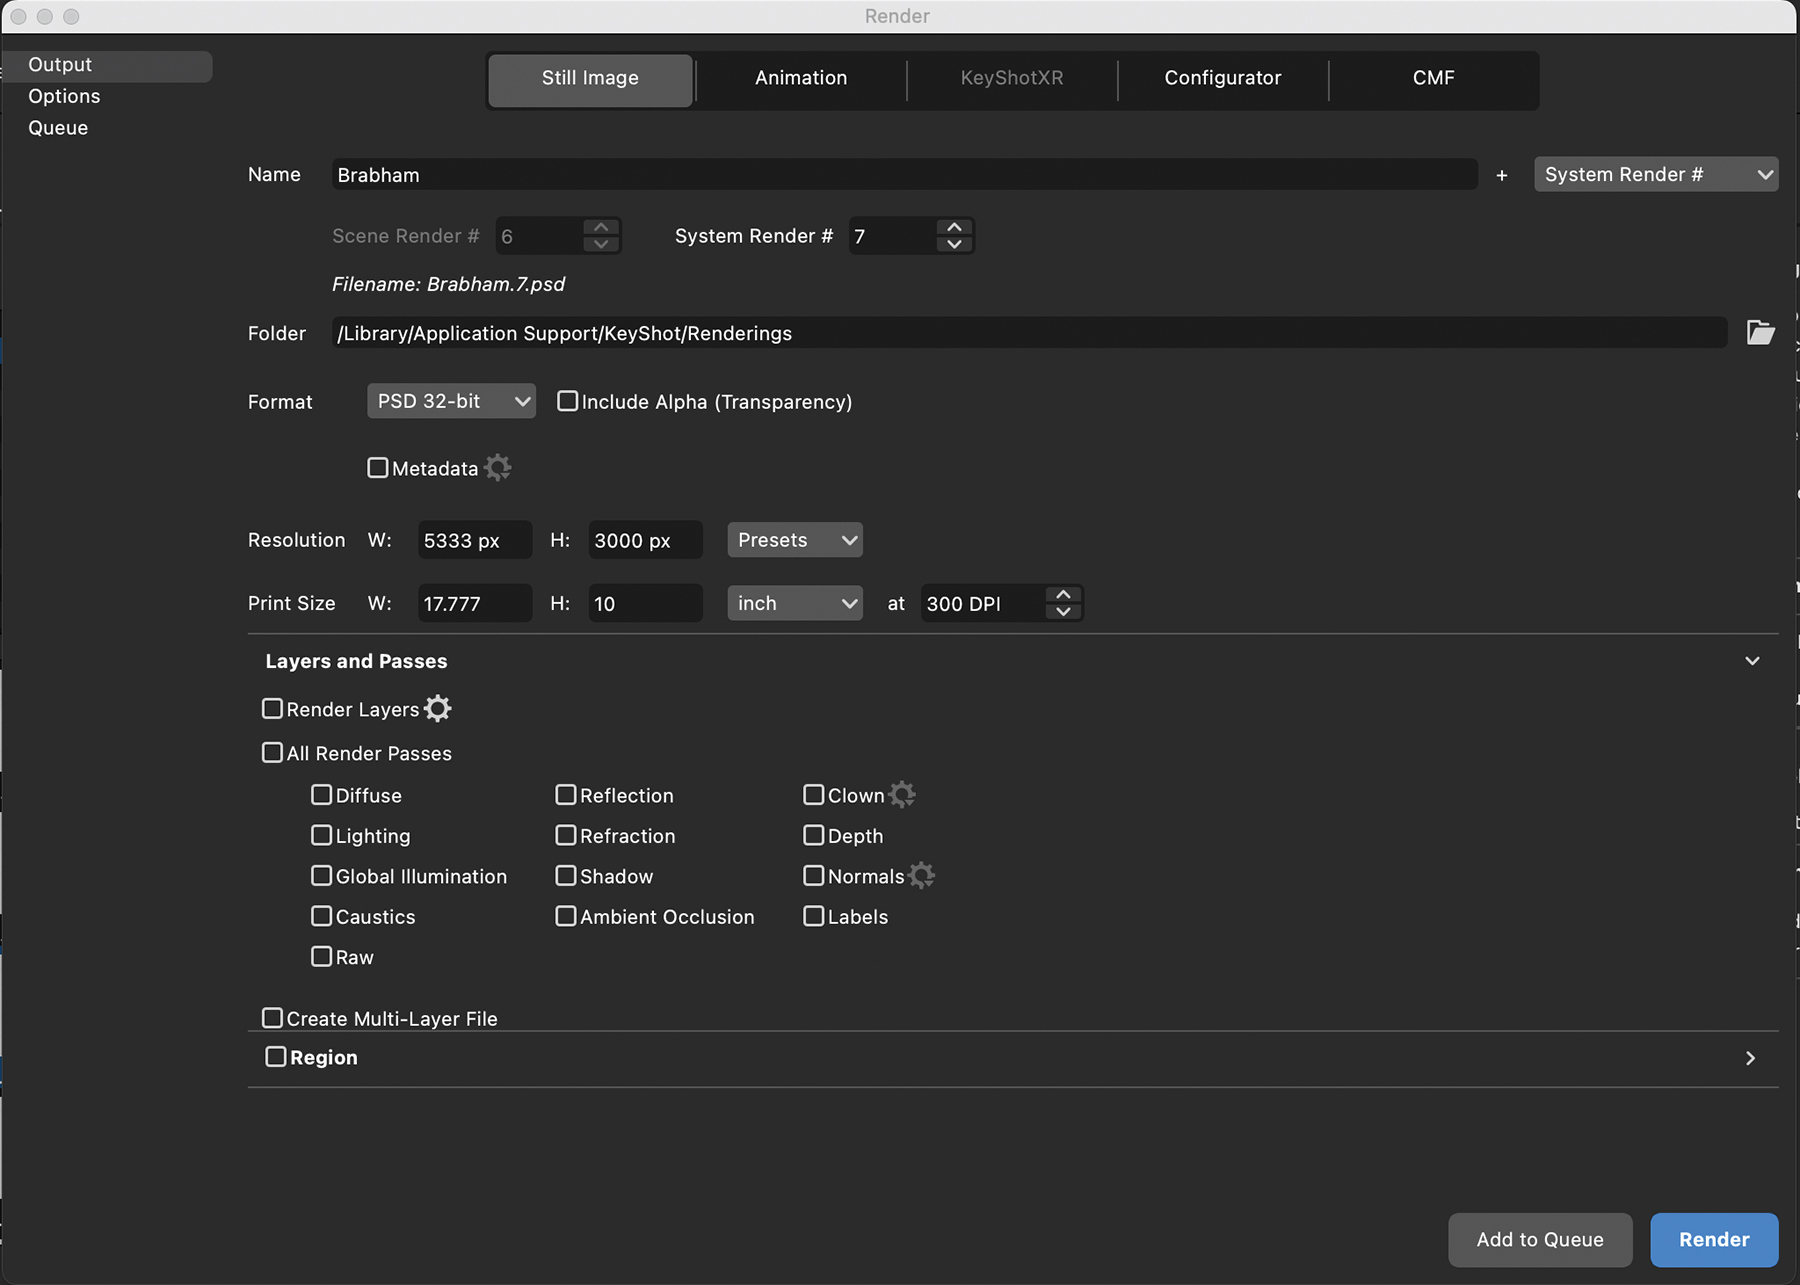
Open the Render dialog box by clicking Render from the tab of buttons at the bottom of KeyShot. This step might feel a little overwhelming at this stage, but with a little explanation it’ll be okay. The main thing to focus on is the Format dropdown. There are a variety of options, but we want to choose PSD 32-bit. It’s possible to choose 8-bit or 16-bit PSD, but only 32-bit will maximise the data available in post-production.
02. Choose render passes
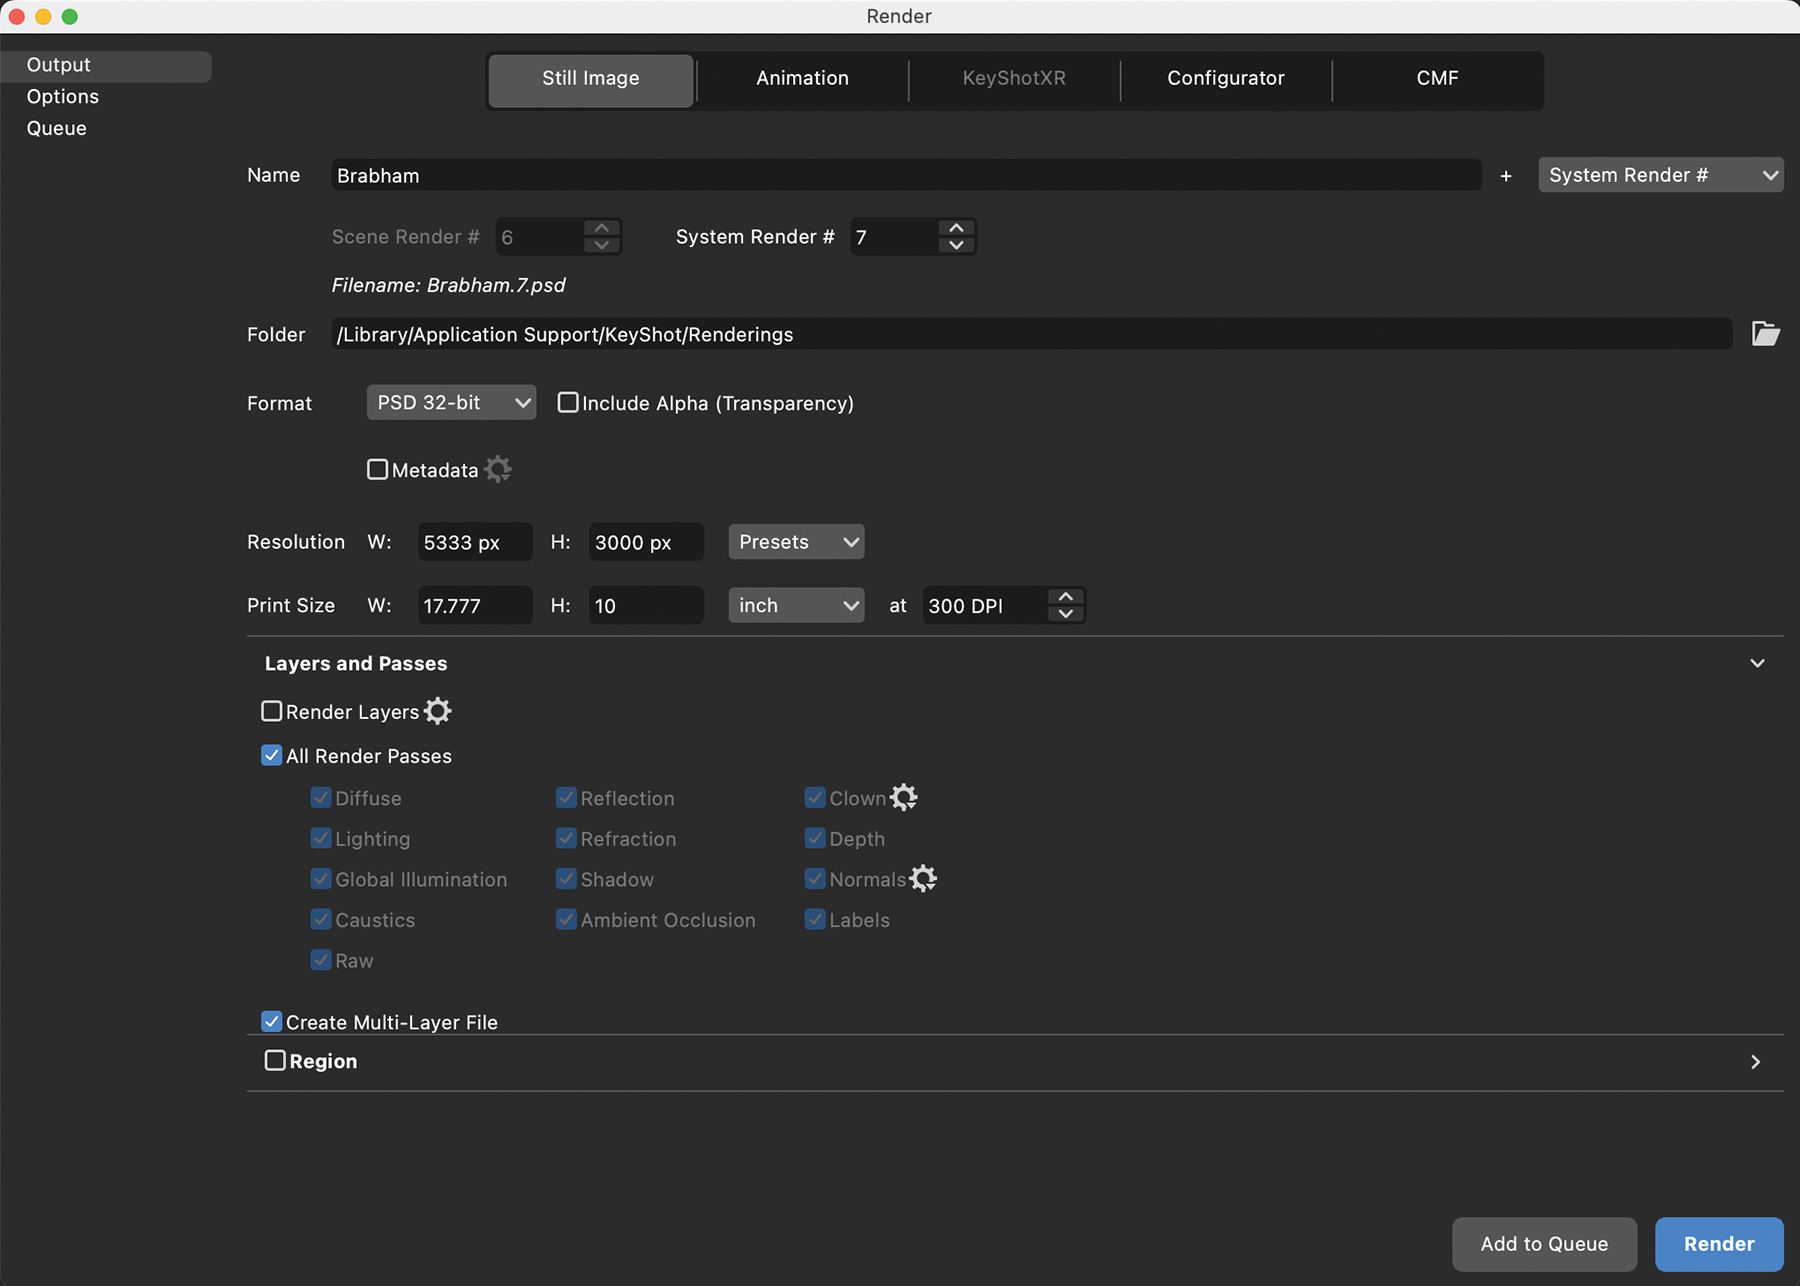
In the Render dialog box, scroll down to ‘Layers and Passes’. Here you can tick the specific passes that you want to export, or choose to render all of the options. Most of the time I’ll select all the passes so I have the maximum amount of flexibility in Photoshop. With that step completed, select ‘Create Multi-Layer File’, which will make sure that all the render passes are collated into a single file. Finally, click Render.
03. Blend the layers
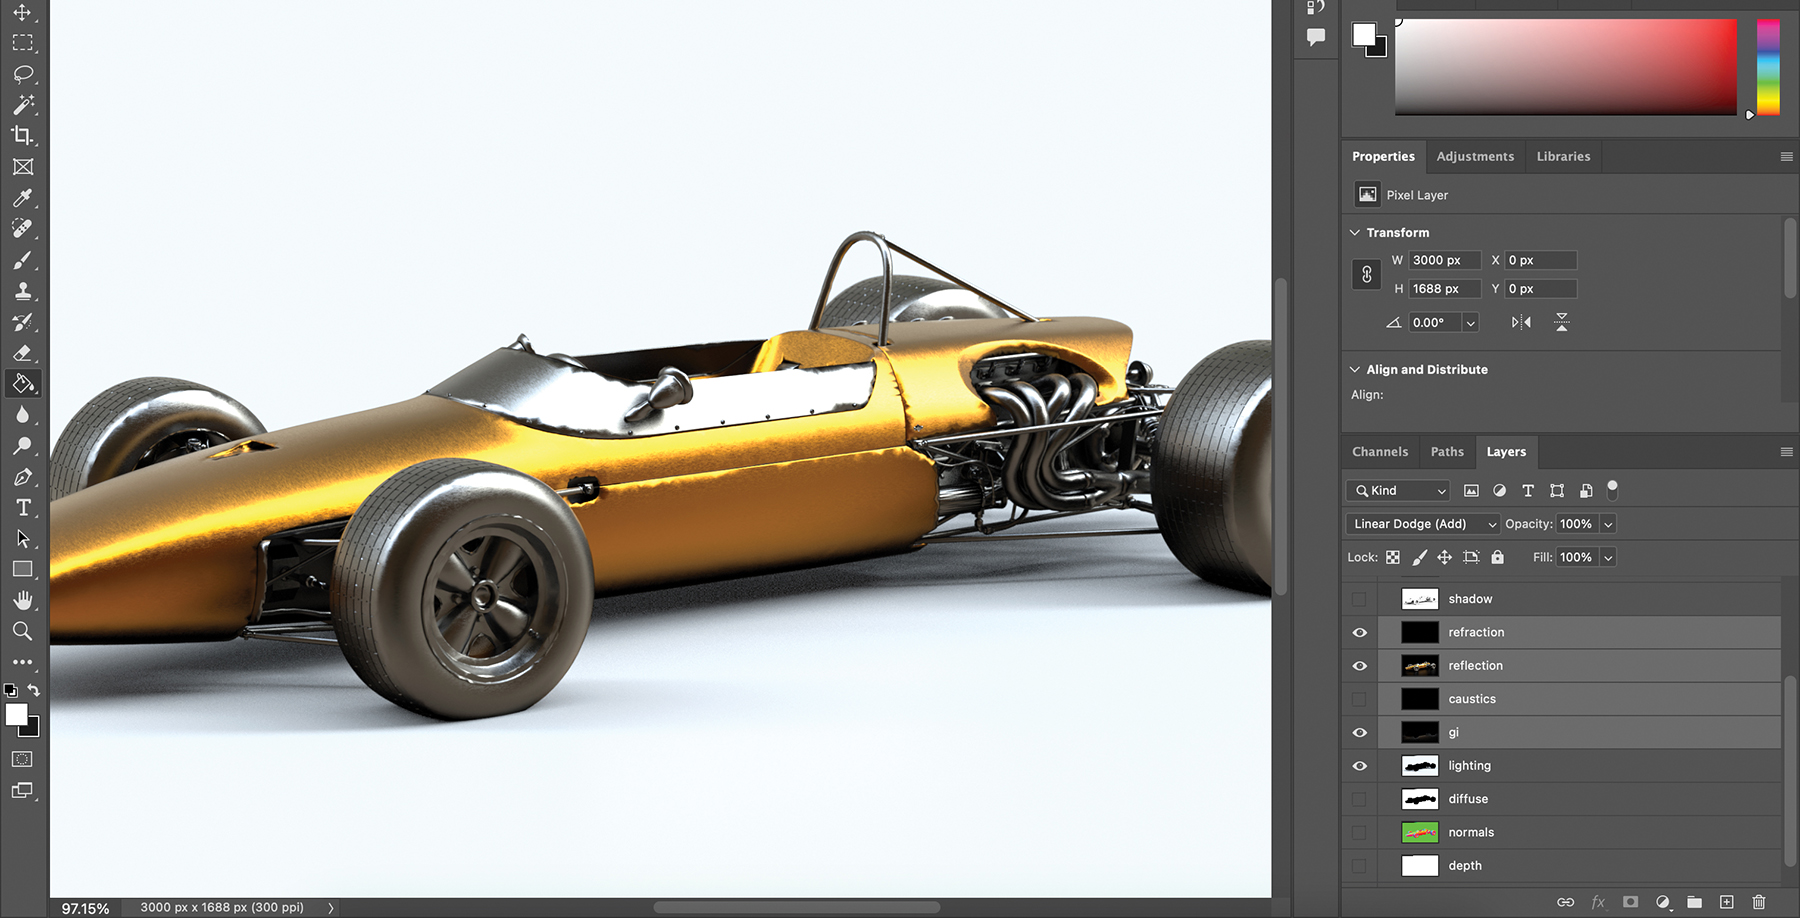
Open your rendered Photoshop file and make sure the Image>Mode option is set at 32-bit. Now deselect all the layers except Lighting, Global Illumination, Reflection and Refraction. Multi-select the Global Illumination, Reflection and Refraction layers, and set their blending mode to ‘Linear Dodge (Add)’. You should now start to see your image come back to life. If you have other render layers that you want to incorporate, you’ll need to make each of them visible and set their blending mode accordingly.
04. Get creative
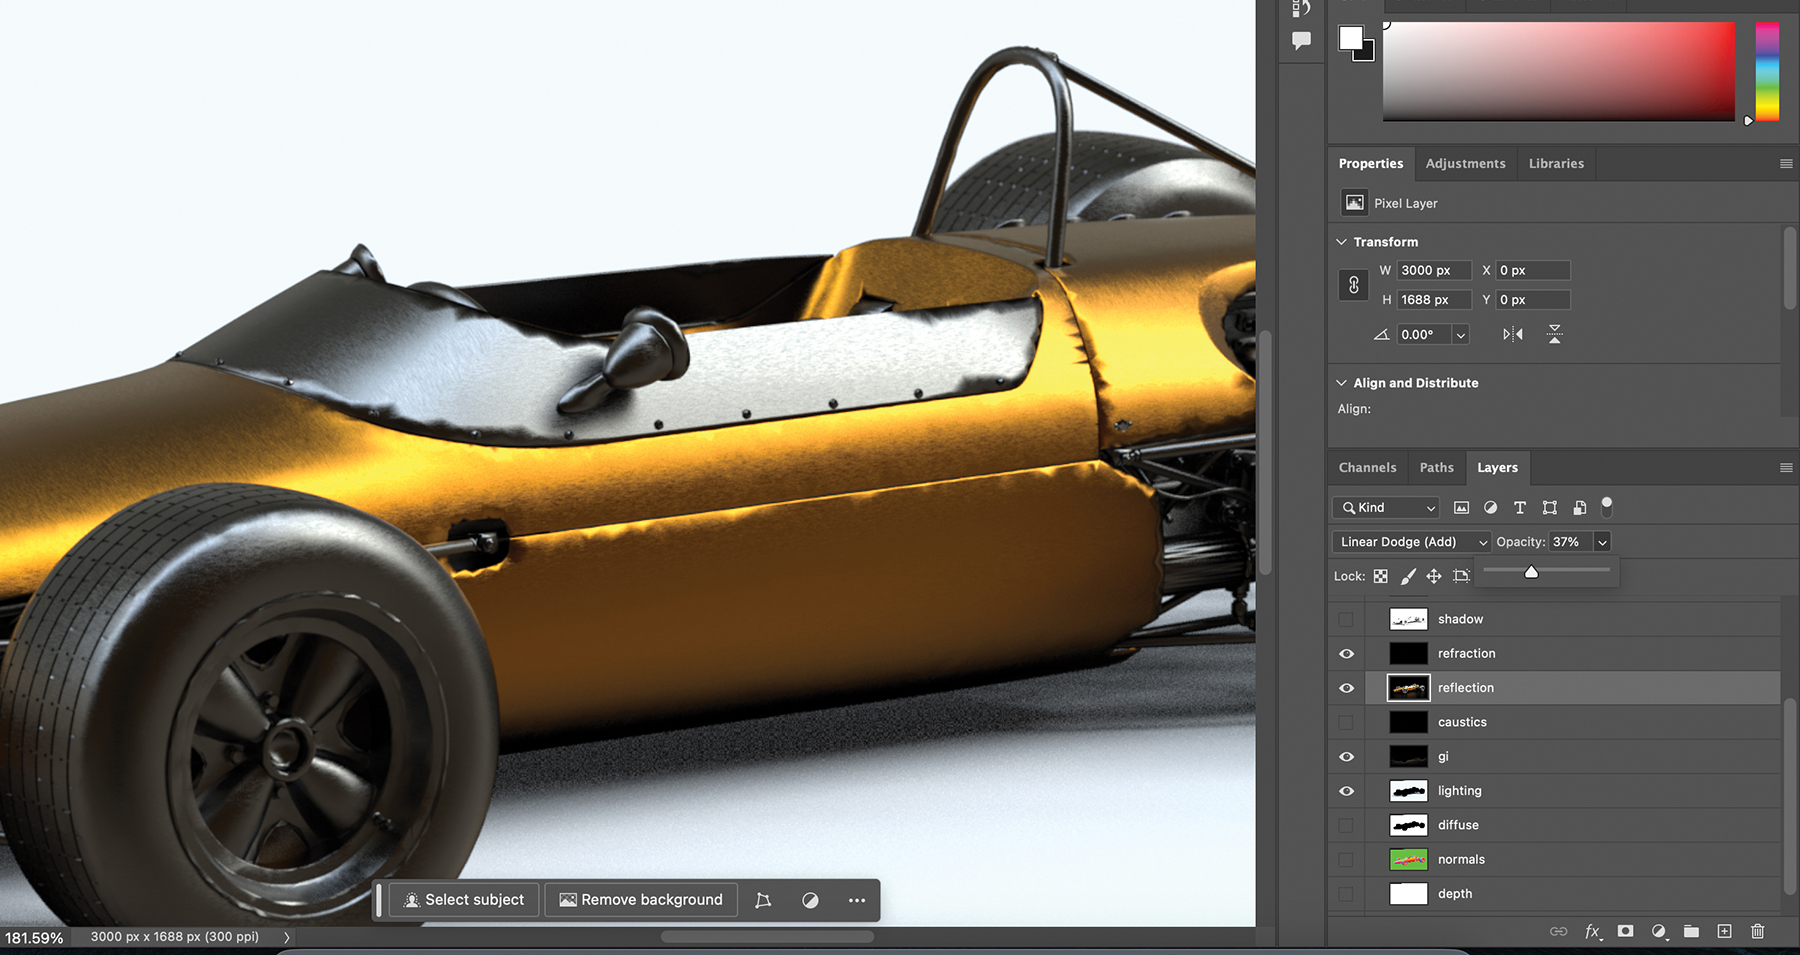
Now you have your stack of render passes correctly blended with one another, it’s time to start having some fun! One of the first things to do is adjust the opacity of some of your layers. For example, if you feel your reflections are just too strong, try dropping the Opacity for that layer to 80% or lower. If you’ve rendered a ZDepth render pass, you can use that to introduce depth of field with a blur effect.
Inspired by this workflow? Then read our guides to the best 3D modelling software and the best laptops for 3D modelling to expand your knowledge and kit.
Sign up to Creative Bloq's daily newsletter, which brings you the latest news and inspiration from the worlds of art, design and technology.

Paul is a digital expert. In the 20 years since he graduated with a first-class honours degree in Computer Science, Paul has been actively involved in a variety of different tech and creative industries that make him the go-to guy for reviews, opinion pieces, and featured articles. With a particular love of all things visual, including photography, videography, and 3D visualisation Paul is never far from a camera or other piece of tech that gets his creative juices going. You'll also find his writing in other places, including Creative Bloq, Digital Camera World, and 3D World Magazine.
You must confirm your public display name before commenting
Please logout and then login again, you will then be prompted to enter your display name.
