How to create a stylised character using ZBrush
Learn how to craft visually appealing characters and clean, polished meshes in ZBrush with João Sousa.
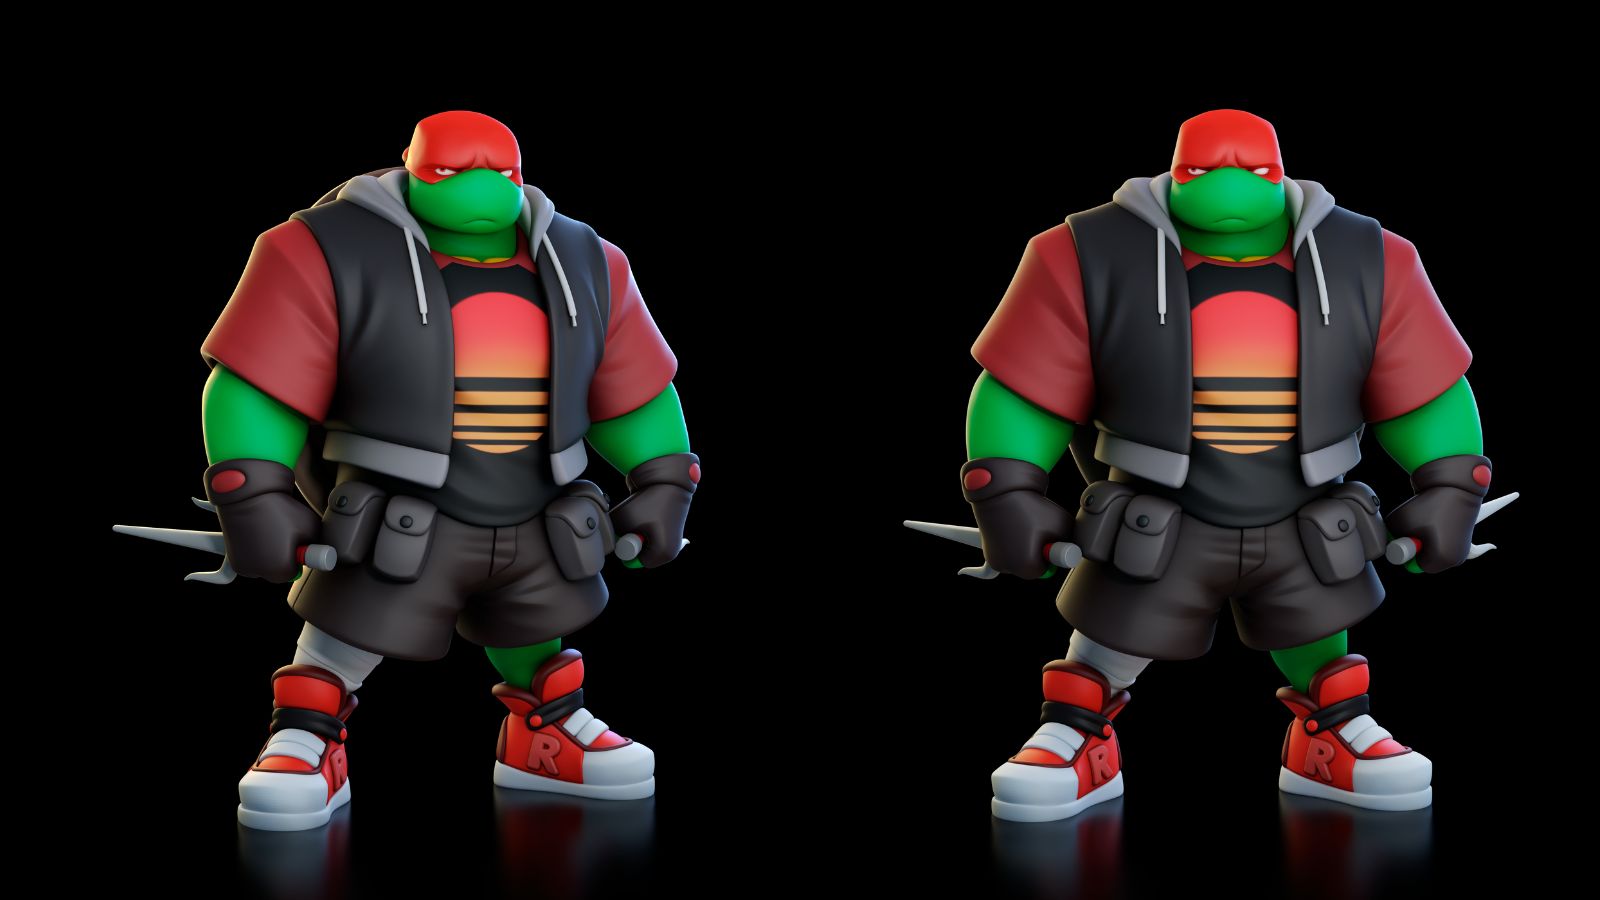
Whether creating your own design or bringing someone else’s concept art to life, your role as a character artist is to capture not only the likeness, but also the figure’s essence and transfer all these details into a 3D model. Achieving an appealing look is one of the most challenging aspects when sculpting stylised characters, but the reward is immense when you reach a stage where the character feels both believable and alive.
In this ZBrush tutorial, I’ll guide you through the process I followed to sculpt a different take on Raphael from the Teenage Mutant Ninja Turtles franchise, which is based on concept art by the awesome Luigi Lucarelli. He showcased not only the character’s appearance with clothing, which is our primary focus, but also a version without the jacket and T-shirt that’s highly beneficial for us 3D artists, as it offers a clearer understanding of the character’s torso.
If you want to know more about the software we're using, check out the full guide to ZBrush: everything you need to know, as well as our ZBrush 2023 review where we look at the pros and cons of the latest version of the software. For now though, on with the tutorial.
Article continues belowCharacter modelling in ZBrush
I hope you enjoy this tutorial. If you'd like to follow along step by step, head here to download the assets you'll need.
01. Placing references in ZBrush
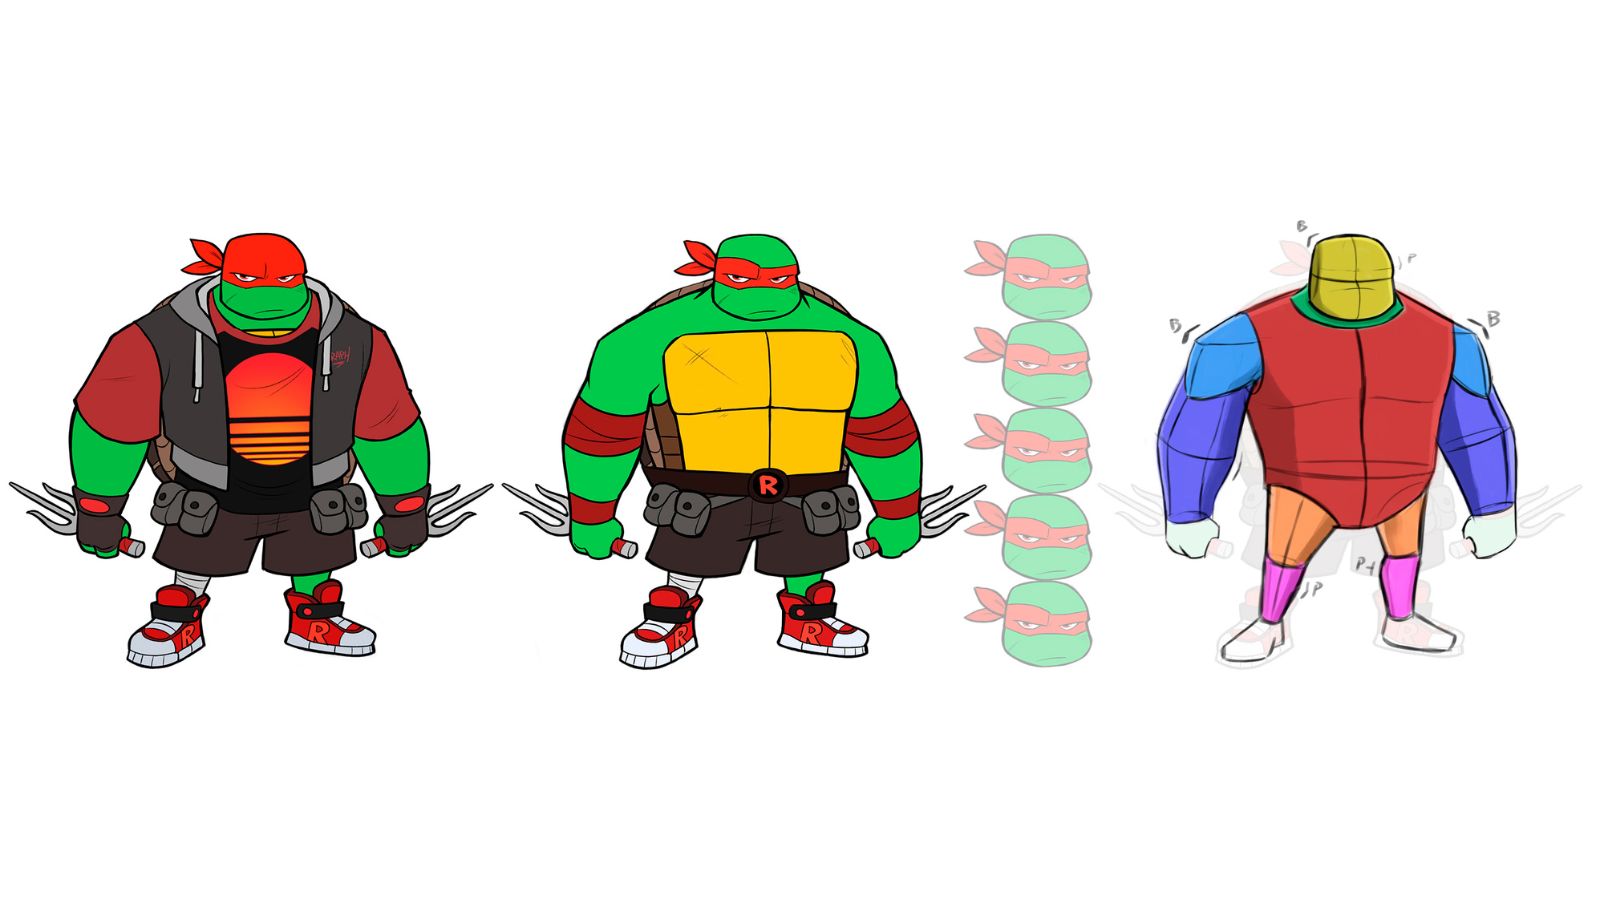
This first step is, by far, the most important of the entire process of translating a 2D design to a 3D sculpt successfully. Studying the concept art before diving into ZBrush gives you all the input you need to understand the character you’re sculpting.
First import the concept into Photoshop and try to deconstruct it. What I usually do is first break it down into primitive shapes. That way I can have a clear idea of the character’s proportions and how each element of the body relates to the others. Lower the opacity of the concept layer and create a new one to draw on top.
Take a closer look at where the angles of the silhouette change drastically or break, or look for the peak of those curves to know exactly where they start to change direction, as well as pointing out straight lines. This is also a good opportunity to measure the character and see how the height of the head relates to the rest of their form. With this information in mind, it’s time to have some fun in ZBrush.
02. Blocking out the anatomy
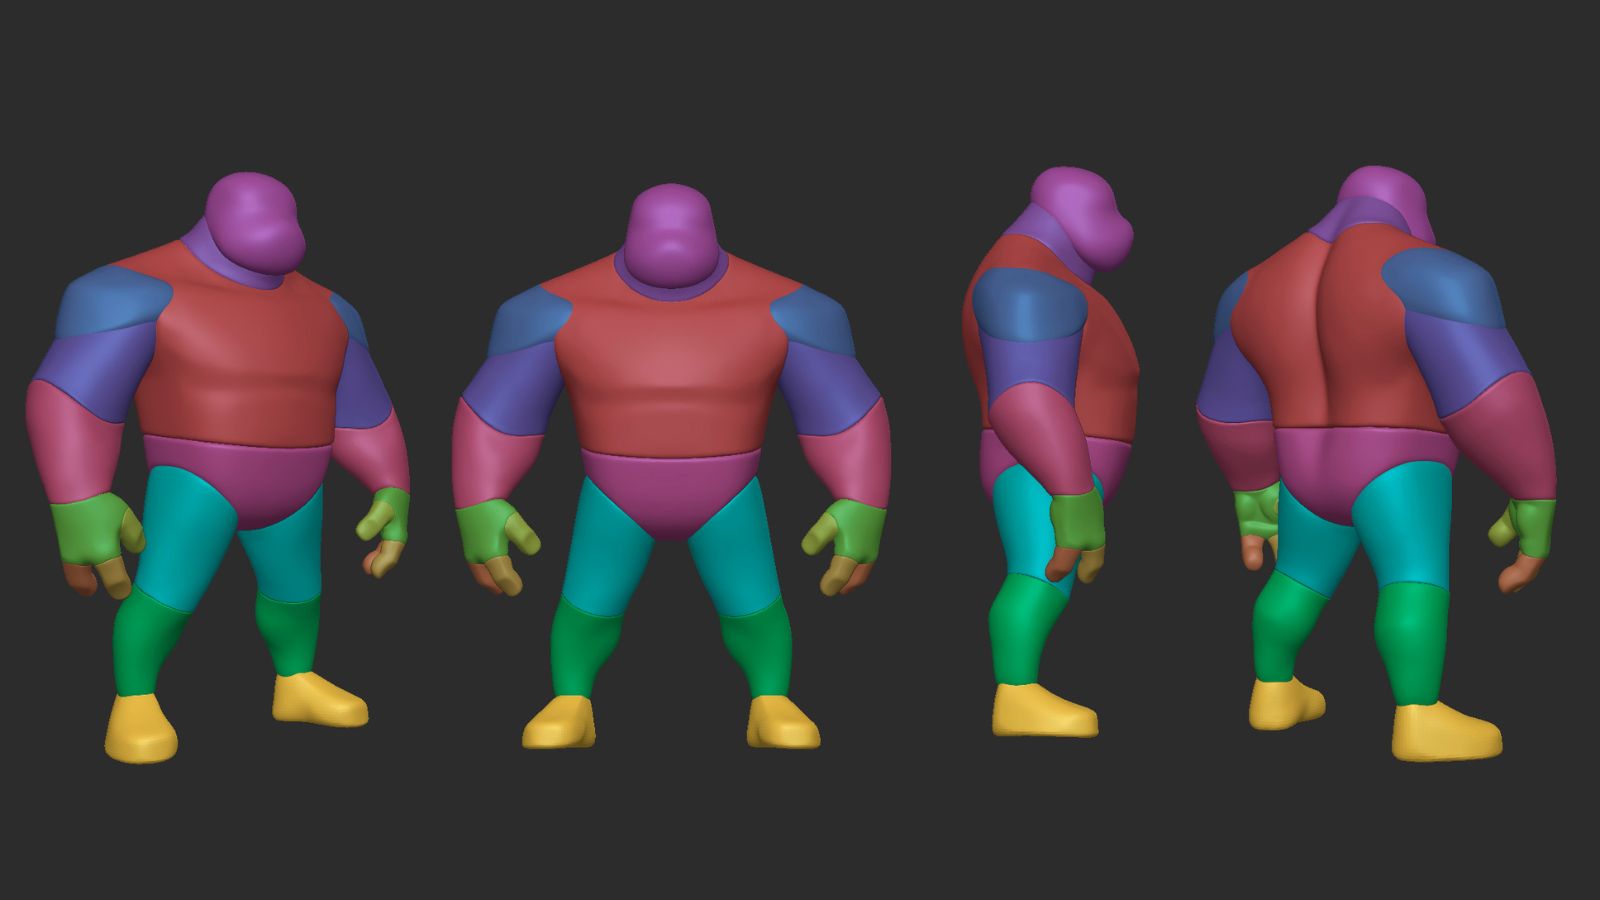
One of the reasons to break down the concept into multiple primitive shapes is that it allows for easy translation of details into simple 3D objects like spheres. With all the measurements we did previously in Photoshop, it’s a lot easier to be precise in ZBrush when blocking the character.
Begin by sculpting a sphere for the head, refining its shape until you’re happy with the silhouette and structure. I typically opt for low-resolution DynaMesh meshes during initial blockouts, adjusting the resolution as needed.
At this stage, focus only on the basic shape of each element; no need for any kind of details. Stick to the essential brushes like Move or Smooth. Once you’re satisfied with the form of the head, duplicate it and use it as a measurement tool for the rest of the character. Blockout the torso, legs, arms and hands using the same method, prioritising silhouette accuracy.
03. Combining shapes
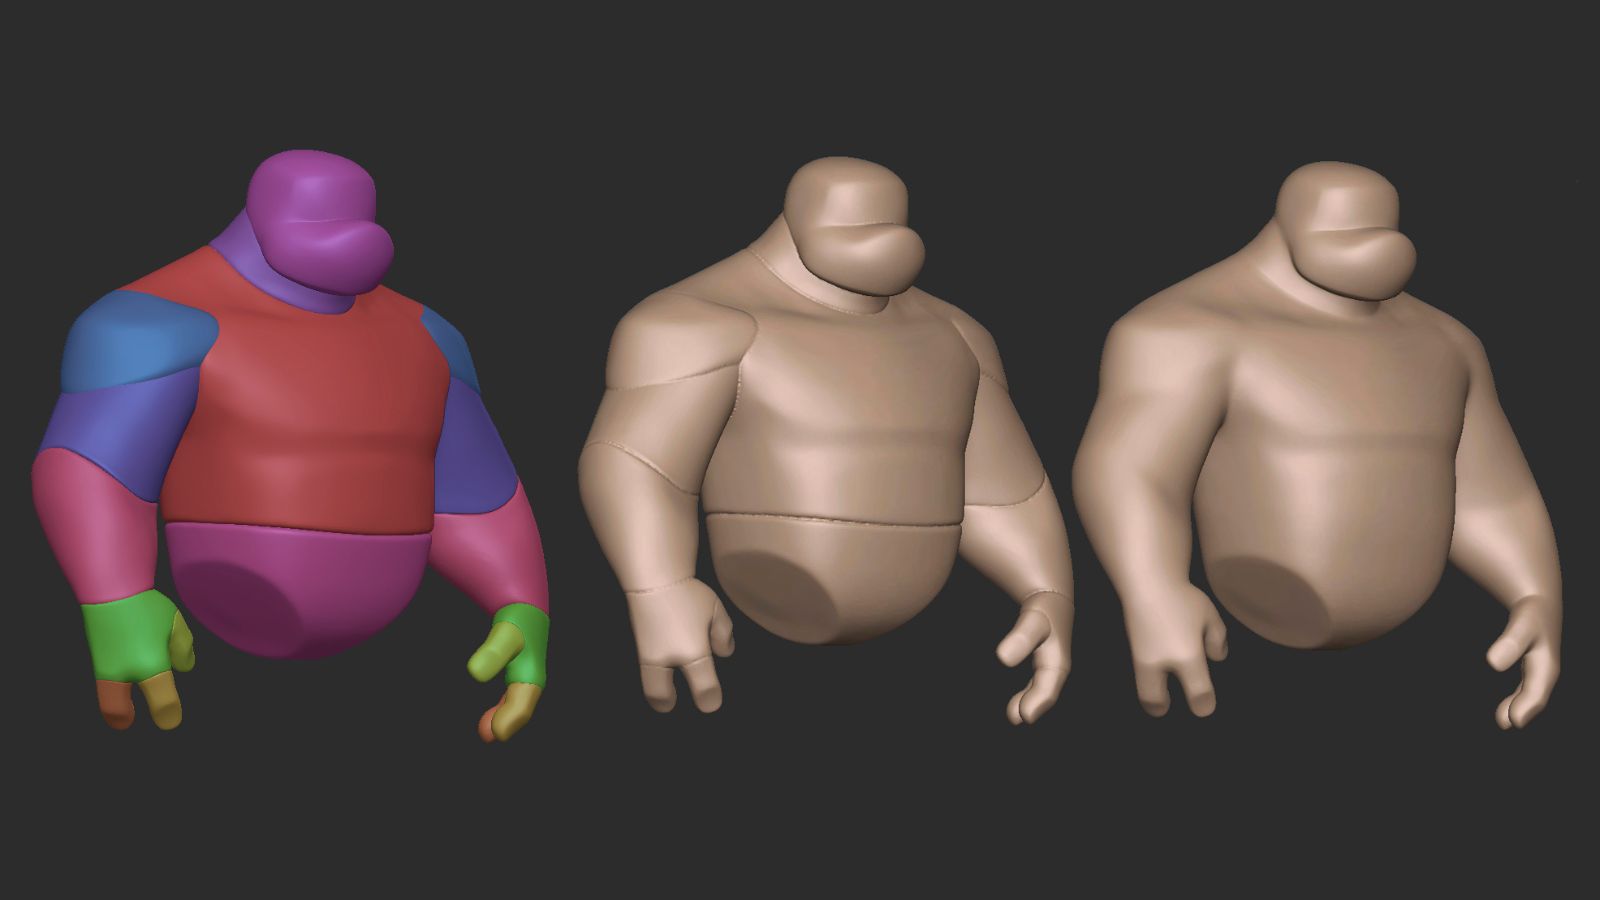
The blockout phase might be time consuming, but it lays a solid foundation for your work and also it’s a lot of fun. After shaping all the necessary forms, combine them using DynaMesh. If there’s no need to combine the entire character into one piece or SubTool, just split it into multiple SubTools like head, torso, arms, legs, and so on.
There’s a lot to clean up after that due to the fact DynaMesh combines multiple objects, which can create unwanted results, especially between the fingers or other parts close to each other. Either increase the resolution of DynaMesh or increase the space between those objects.
04. Cleaning up and primary details
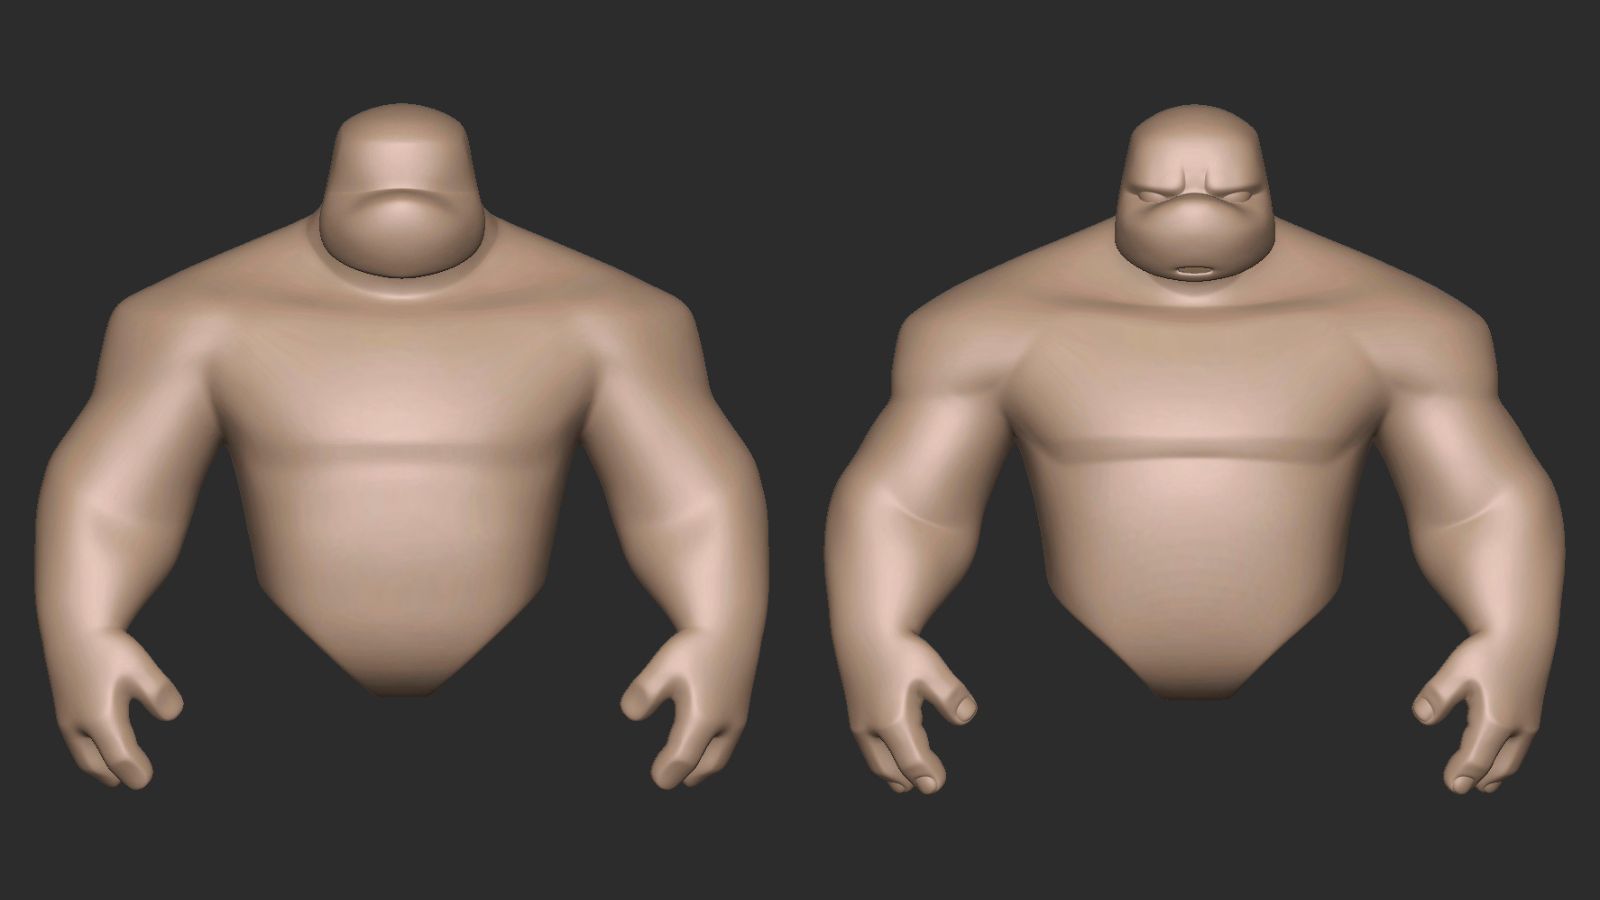
The choice is yours whether you choose more traditional sculpting approaches, or the blockout method using primitive shapes to sculpt elements like the lips, ears, eyelids and nose.
Personally, I prefer a blend of both techniques. For example, I’d use the primitive shapes to create ears, noses, or eyelids, as this approach allows me to keep these particular elements separate from the body, merging them later down the line at an appropriate stage.
Additionally, I’d also use the traditional sculpting techniques to sculpt mouths while using the DamStandard or ClayBuildup brushes. If you’re looking for brushes that are ideal for stylised characters, I highly recommend checking out Shane Olson’s brush set, which was made specifically for this style of sculpting. I also it use quite often.
05. Different ways to improve topology
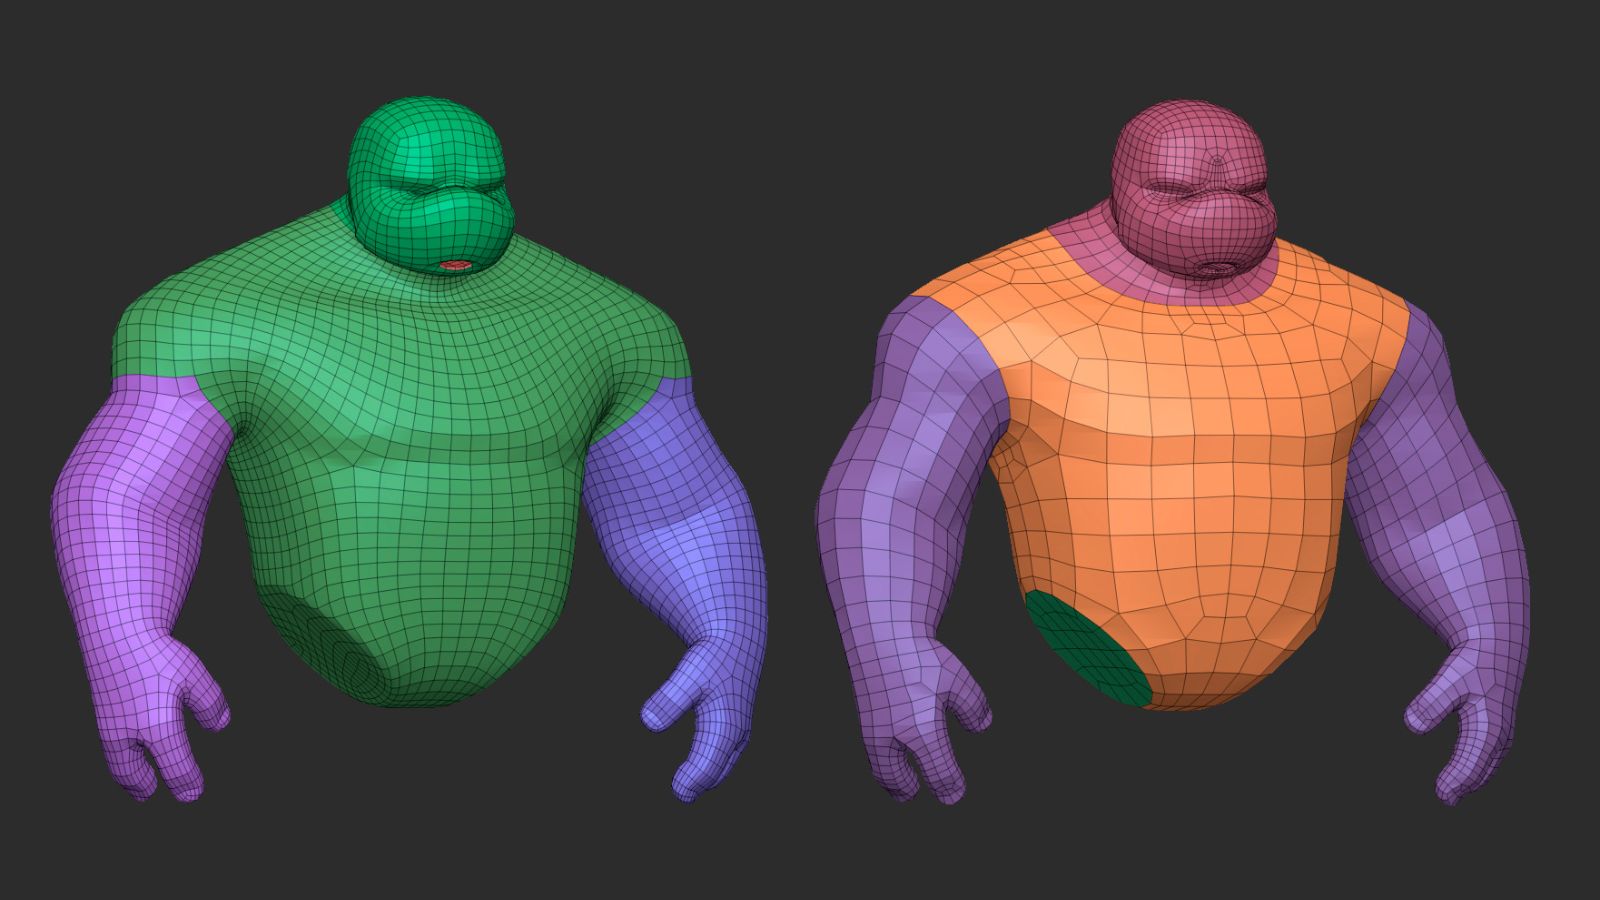
Improving the topology of your model is one of those steps that’s often underestimated, yet it’s a crucial element in achieving a polished model in conjunction with subdivision levels. This means that you either need to use ZRemesher, or create new topology by hand.
Either approach is fine here if you’re happy with the results you’re getting from ZRemesher. However, ZRemesher might not consistently produce good results. In those cases, the ZModeler brush features a decent option for retopology. Change the Edge Action to Extrude and the Point Action to Move in the ZModeler brush, making sure both actions have the modifier set to ‘Snap to Surface’. Use the Topology brush to draw a simple plane on the character, separate it into a different SubTool and use the modified ZModeler brush to create a new topology by moving points and extruding edges.
Alternatively, you can use an IMM brush to drop a planar object on top of the character, separate it into another SubTool, and start the new topology from there. When you’re done, add the subdivision levels you need to project the detail from the DynaMesh model.
06. Blocking out the clothing
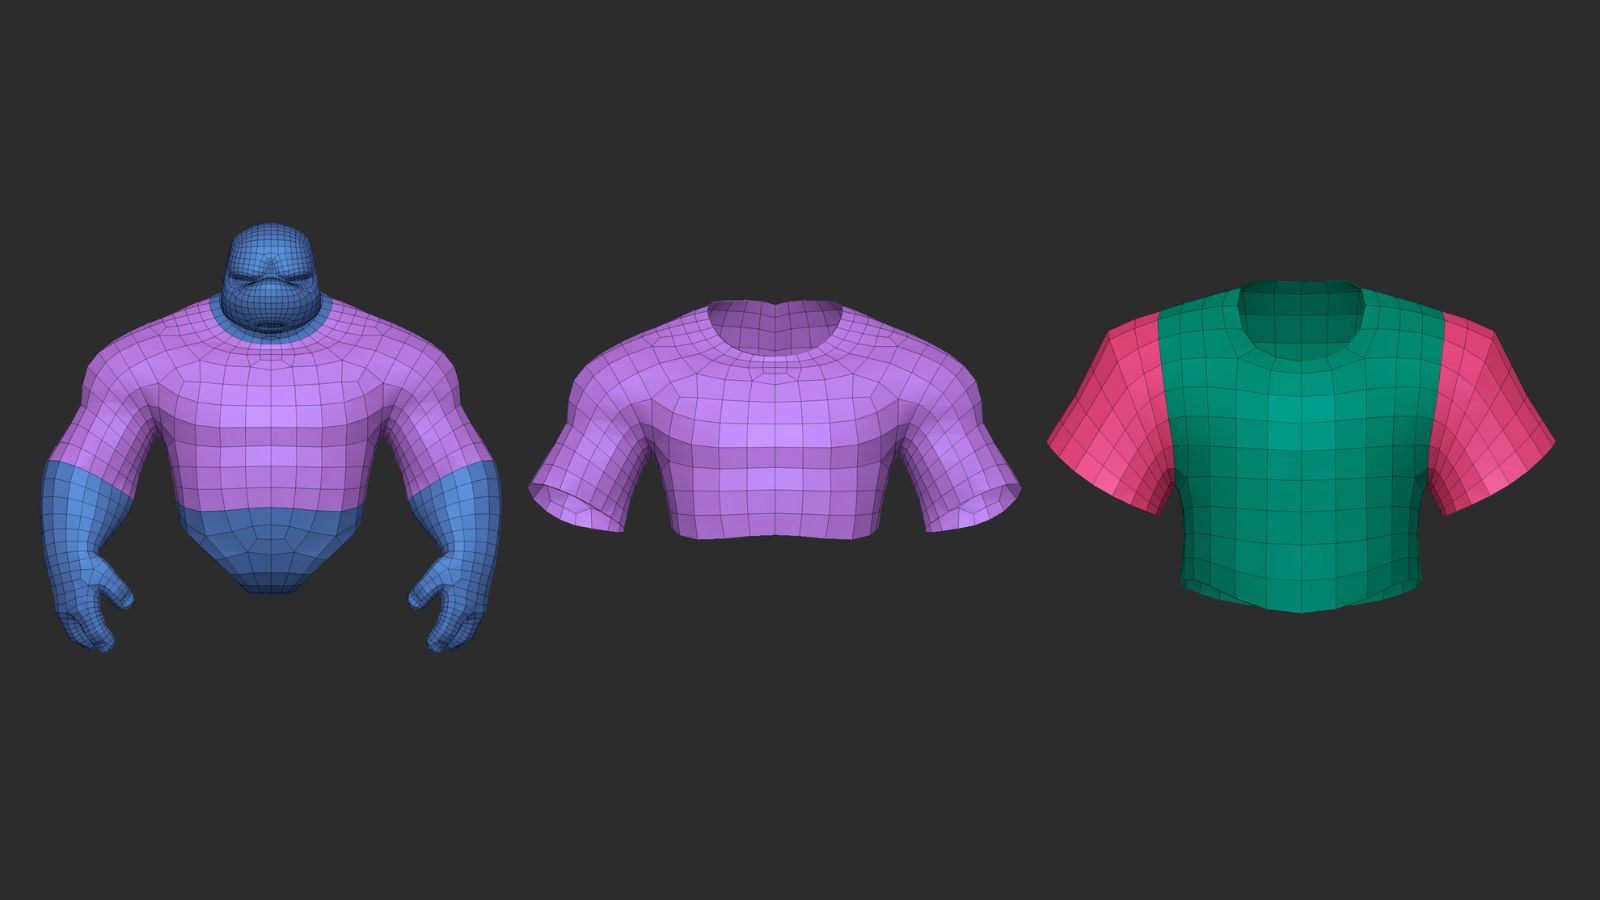
I often opt to create a fully naked model, even though the character will be covered in clothes. This approach simplifies the process of clothing creation by providing a good foundation to work on. I recommend using the box modelling method, or the one we used before to create new topology with the modified ZModeler brush.
This technique allows for the creation of a new mesh that has a nice topology, ready to accommodate all of the necessary details. In many cases where you have a full-body mesh with good topology, you can duplicate that SubTool and simply go to the lowest subdivision level, delete all the unwanted polygons and keep those you need to create a basic low-poly piece of clothing.
07. Adding thickness
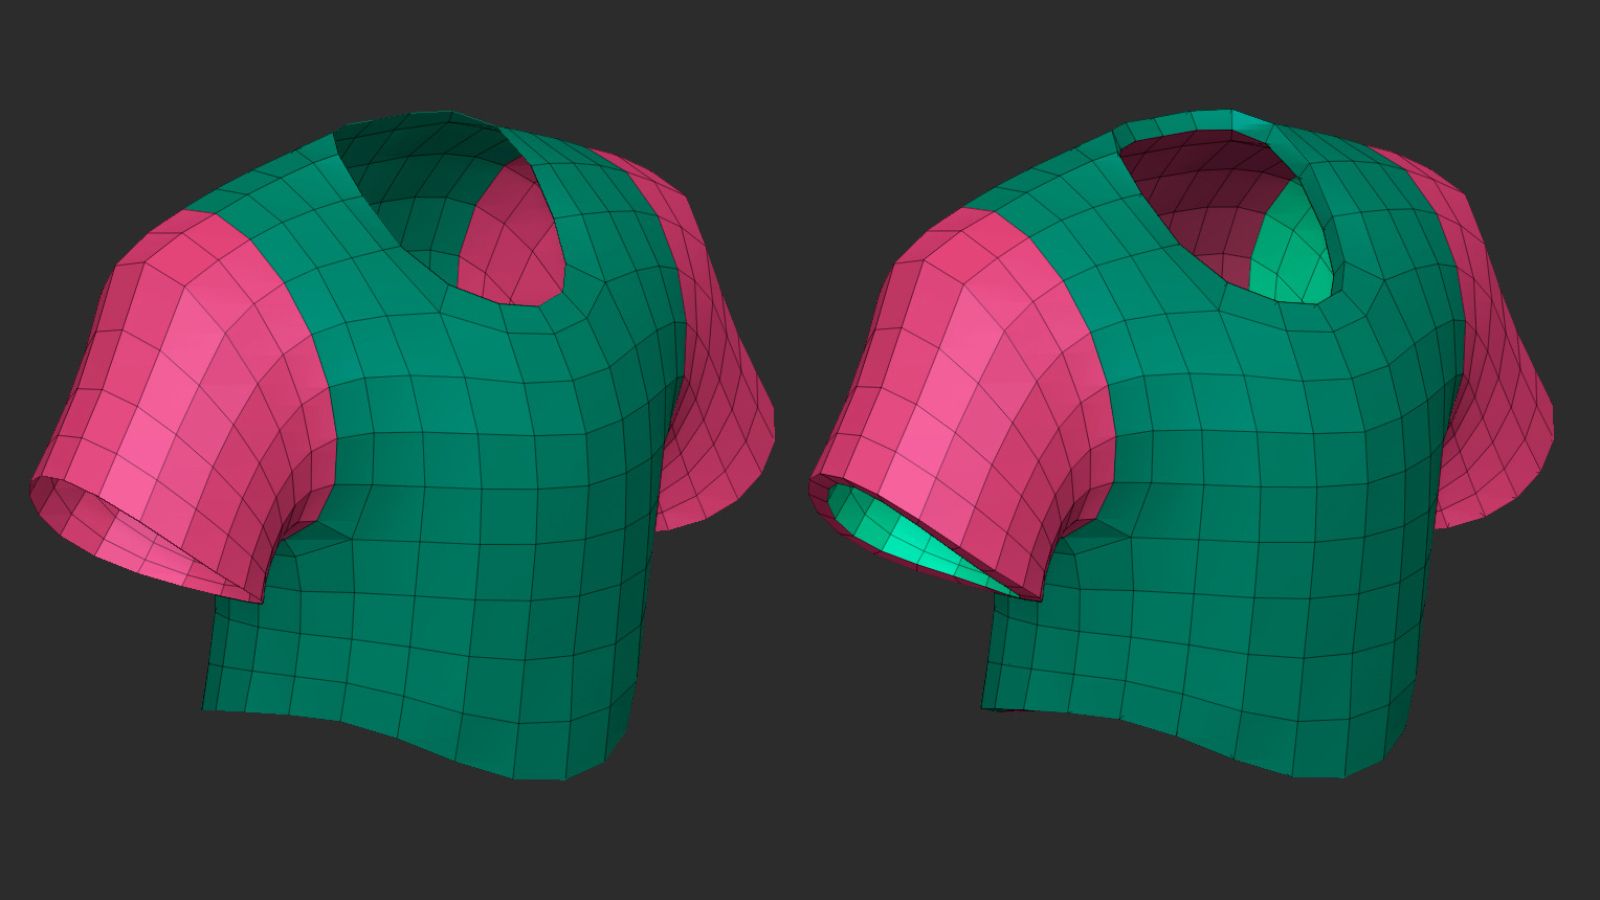
The time invested in refining clothing at this stage is a double-edged sword. On the one hand, posing a character is much easier with a single-sided low-poly mesh with no thickness or details. This means the time you spend working on a T-pose model is redundant, because you’ll have to add all the details again later or fix them when the character is posed.
However, it’s important to achieve a visually appealing character in either T or A-pose, especially for client projects. In these cases, it will be better to find a balance between having a simple piece of clothing with fewer details, yet captivating and easy to get approved.
For the character in this tutorial, the pose is quite simple and close to an A-pose, meaning you can add most of the details before posing. With that said, use the Dynamic Subdivision options under Tool > Geometry > Dynamic Subdiv and move the Thickness slider to add dynamic thickness. Press the Apply button when you’re done.
08. Creating creases in the clothes
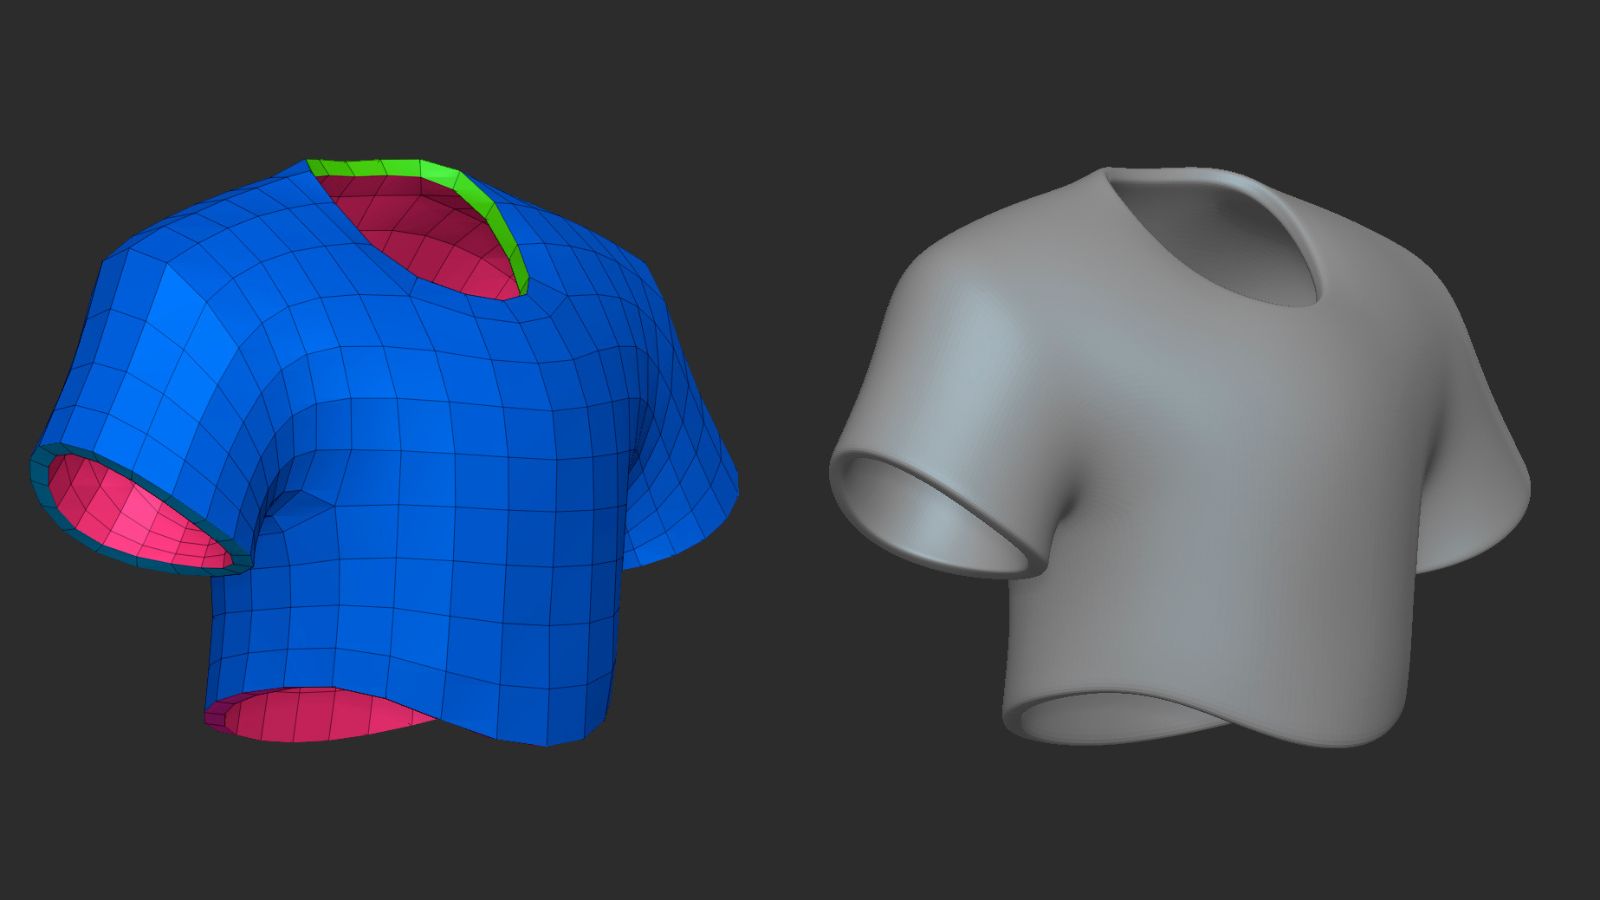
Before adding Dynamic Subdivisions, another technique for a non-destructive workflow is using edge creasing. Use the ZModeler brush to crease edges by hand by changing the Edge options to Crease, or go through the Crease options under Tool > Geometry > Crease for more automated creasing processes. If you have different polygroups applied to your model, you have the option to automatically add creasing by clicking on the ‘Crease by Polygroups’ button.
When you’re finished, play around with the Crease Level and Dynamic Subdivisions sliders to achieve different results. And when you’re ready to proceed, press the Apply button within the Dynamic Subdiv menu to create the actual subdivision levels and move on to sculpting.
09. Sculpting the folds
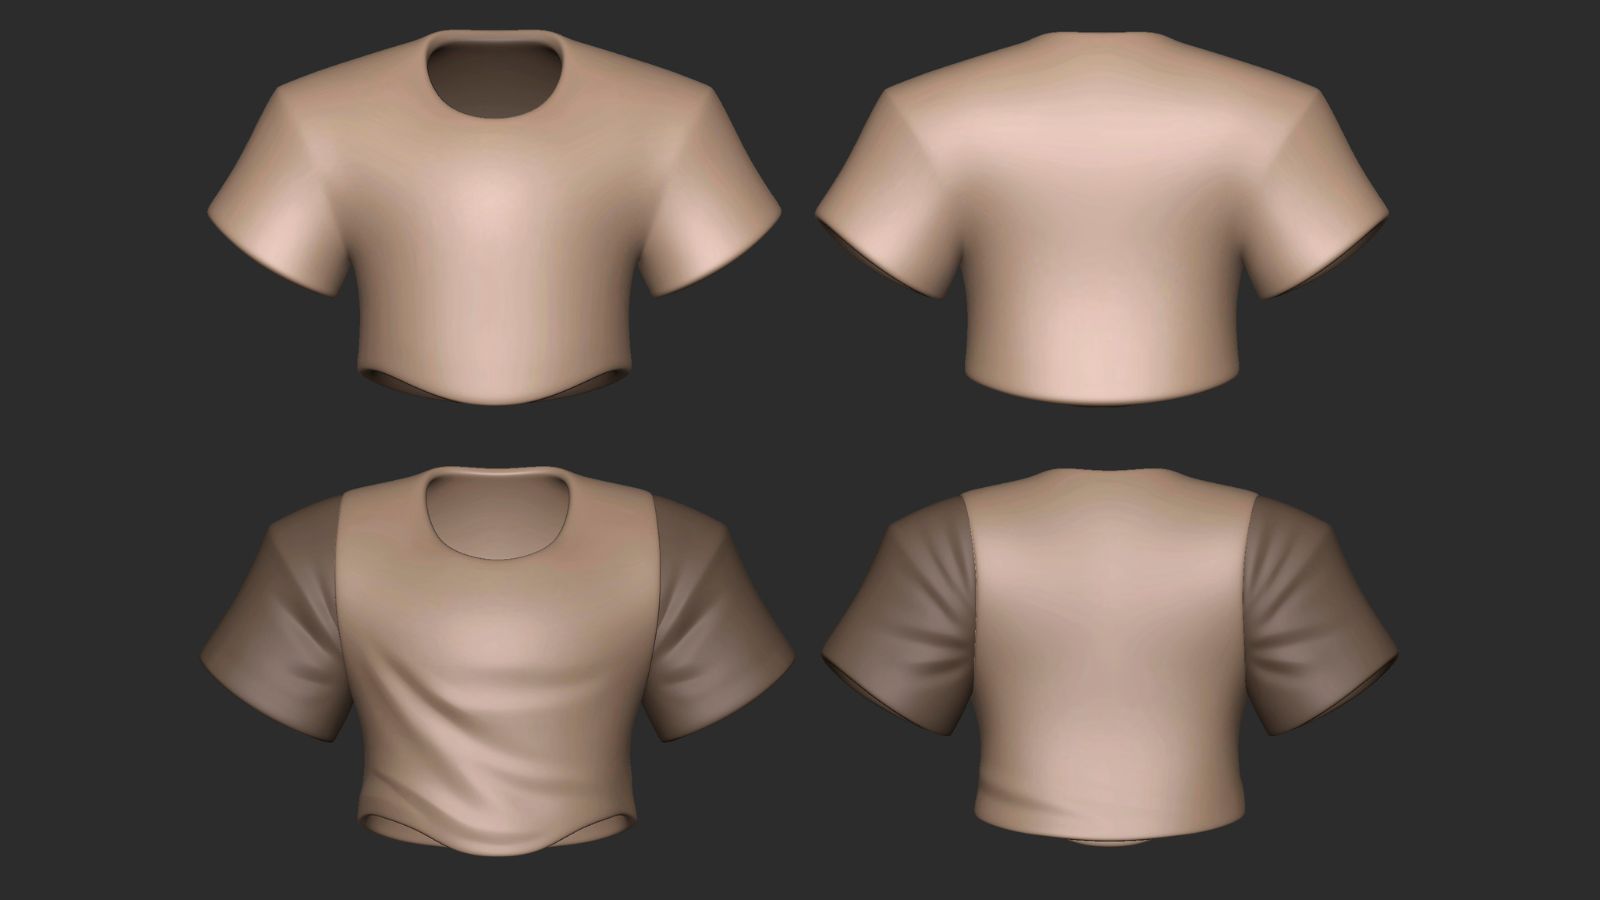
After adding thickness, you’ll notice that both the interior and exterior of the clothes have different polygroups. Now you can easily mask the interior, focusing on detailing the outer surface of the clothes.
With this in mind, it’s now the time to add in those much-needed folds to make the clothes believable. Realistic clothing will typically feature more folds, whereas stylised clothing tends to have fewer. Each fold significantly impacts the overall appearance, so it involves a bit of trial and error until they appear natural.
A key strategy is identifying points of tension first, especially around areas like the armpits. Gather some references and see what those folds look like in real clothes, and simulate that using fewer folds while also playing with scale variation between them. The brushes I like to use for folds are Orb Crack, ClayBuildup (with a low intensity and a circular alpha) and Shane Olson’s Cloth.
10. Creating the shoes
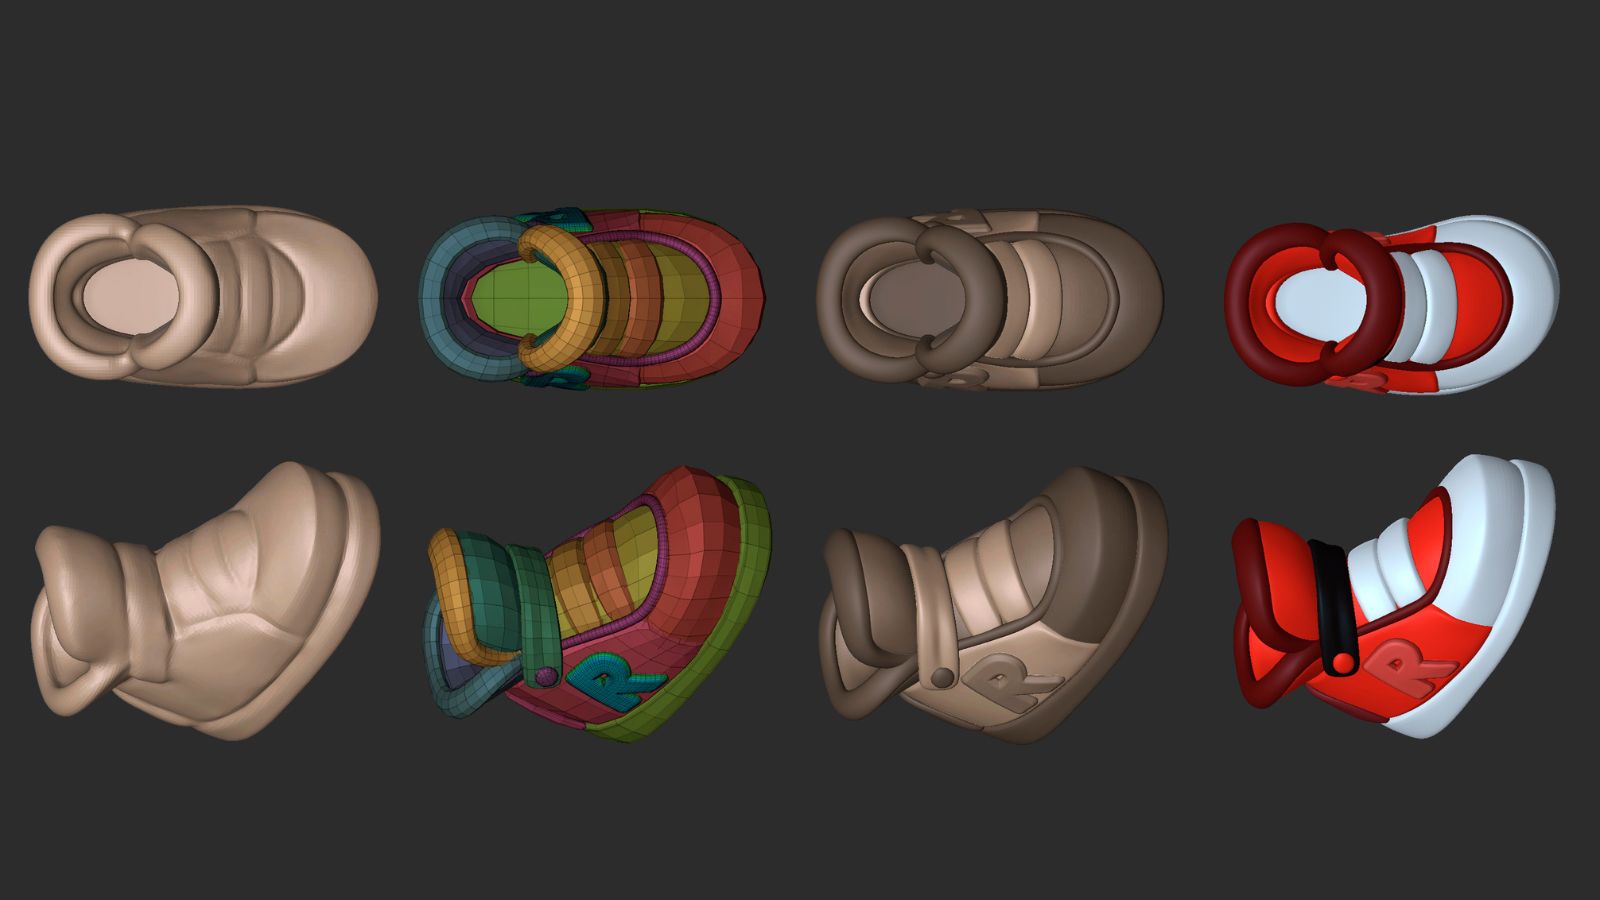
Symmetry is a powerful tool to use in ZBrush and digital sculpting. Even when objects aren’t perfectly symmetrical, you can still utilise symmetry to a significant extent. And when it comes to sculpting shoes, it’s the same principle.
The basic form of shoes are, for obvious reasons, not symmetrical, though you can still use symmetry up until the point where all the details are done. The last thing to do is make them asymmetrical to fit each foot.
Start by blocking the basic form of the shoe. The more detail you add at this stage, the easier it becomes to make all the elements that form the shoe using the methods explained before with the modified ZModeler or Topology brush.
Once you’re finished with all of the elements, duplicate that SubTool or the folder containing all the SubTools of the shoe, use the TPoseMesh function, turn off Symmetry, and shape the shoe to fit one of the feet. After shaping the shoe, click on the ‘TPose > SubT’ button to apply all the changes and do a Mirror and Weld operation for each mesh.
11. Creating the shell details
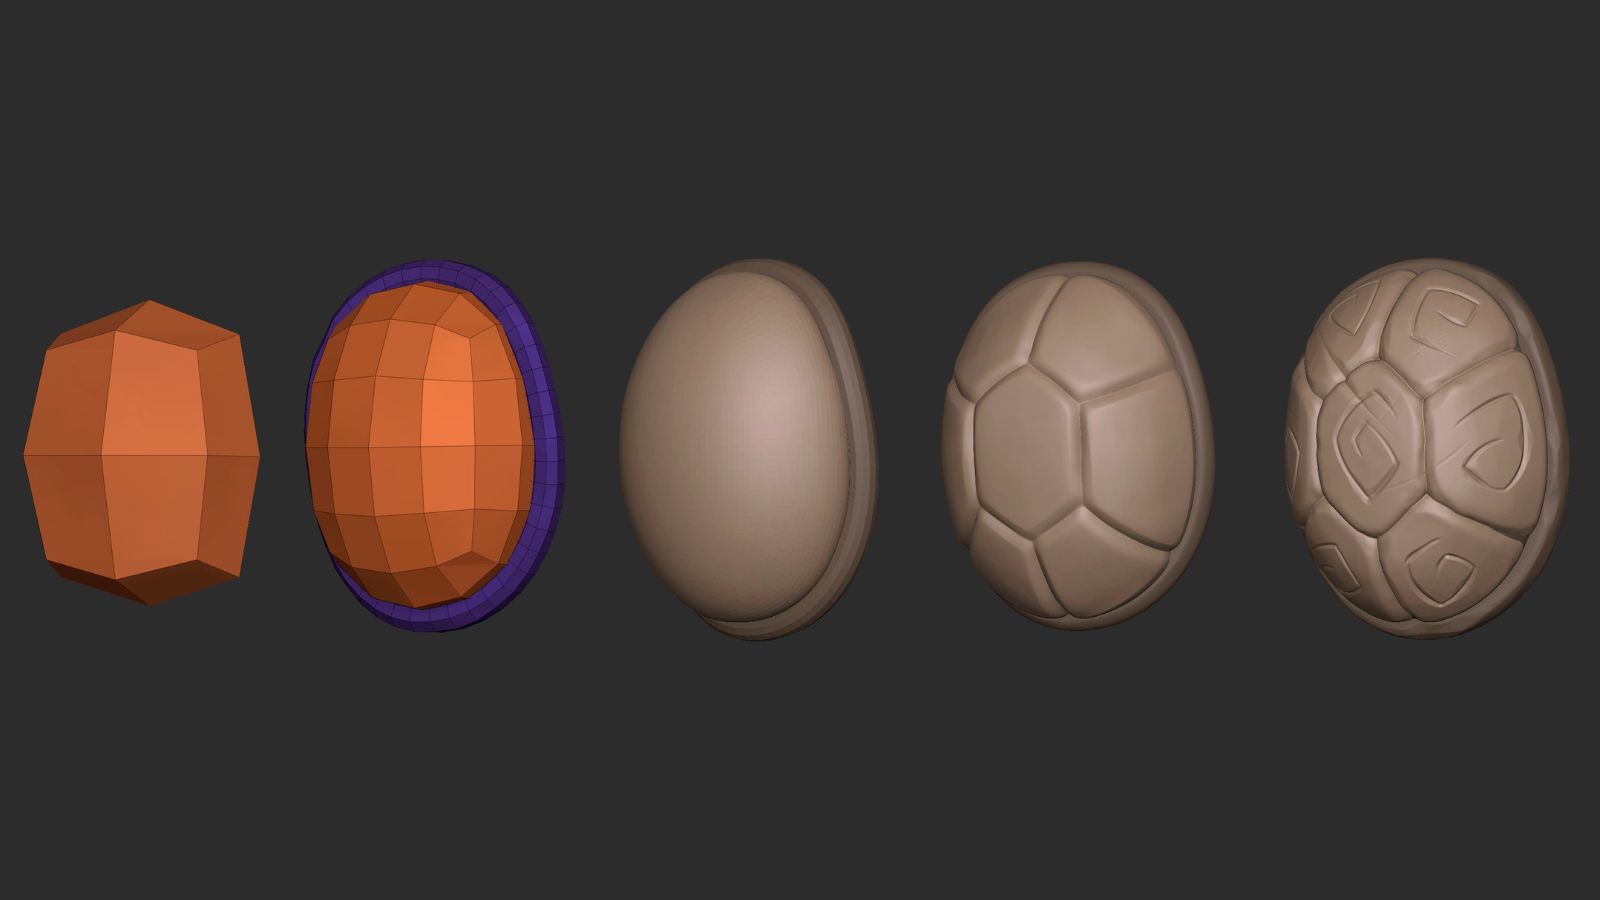
Start by creating a simple cube, add some subdivision levels, and shape it until you have a good mesh forming the prominent part of the shell. Then create a ring that goes around it and shape it so it encapsulates the borders of the shell.
Mask the area of the shell in contact with the ring, inflate the unmasked area, and start carving those big lines with the Orb Crack brush. Use the Trim Dynamic brush to trim some areas of the shell for a damaged look, while also using the hPolish brush to flatten and polish some areas of the shell. With the Orb Crack brush, you can also create some more damaged areas around the mesh that look like blade cuts by playing around with the brush’s intensity and size.
12. Modelling the sai
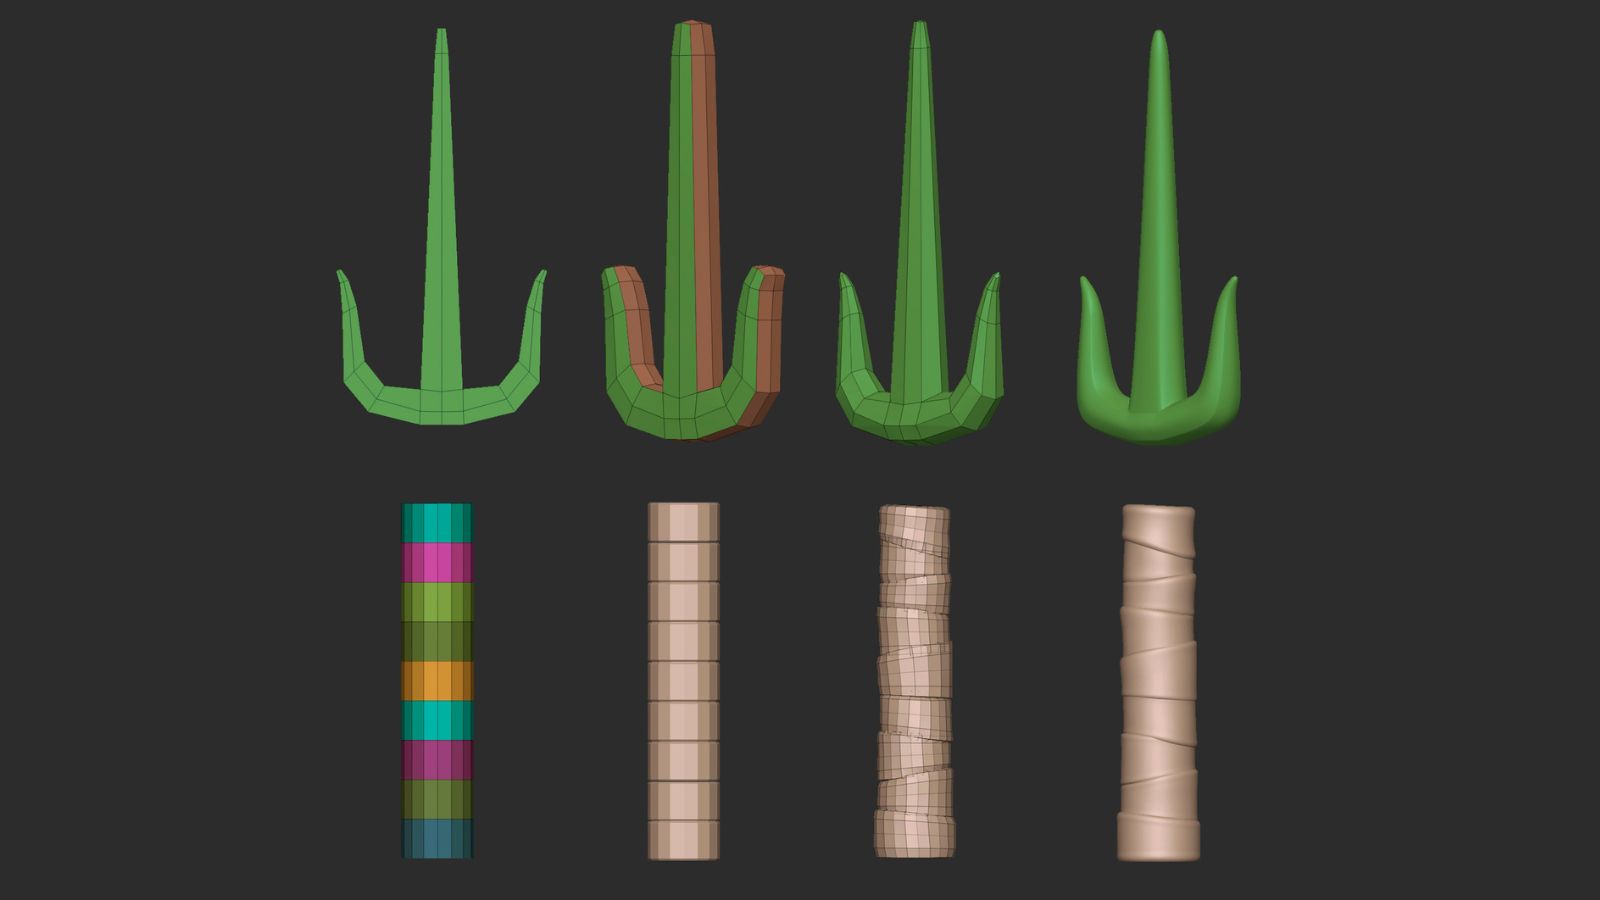
Create a plane, keep extruding edges and add edge loops to create the silhouette of the blade. When you’re done, add thickness by extruding the entire planar blade and create another edge loop right in the middle. Inflate that middle edge loop and keep shaping the blade by moving the points around, and make the tips thinner.
To make the ropes around the handle, you can just use a cylinder and create multiple edge loops. Assign a new polygroup to each loop and make sure you separate them before extruding them by going to Tool > Geometry > Modify Topology, and hit the Unweld Groups Border button.
Extrude each polygroup, add bevels on the top and bottom of each of the pieces, and add a couple of subdivision levels. Stack them on top of each other by moving one of the sides up or down to give it that layered look.
13. Defining the pose
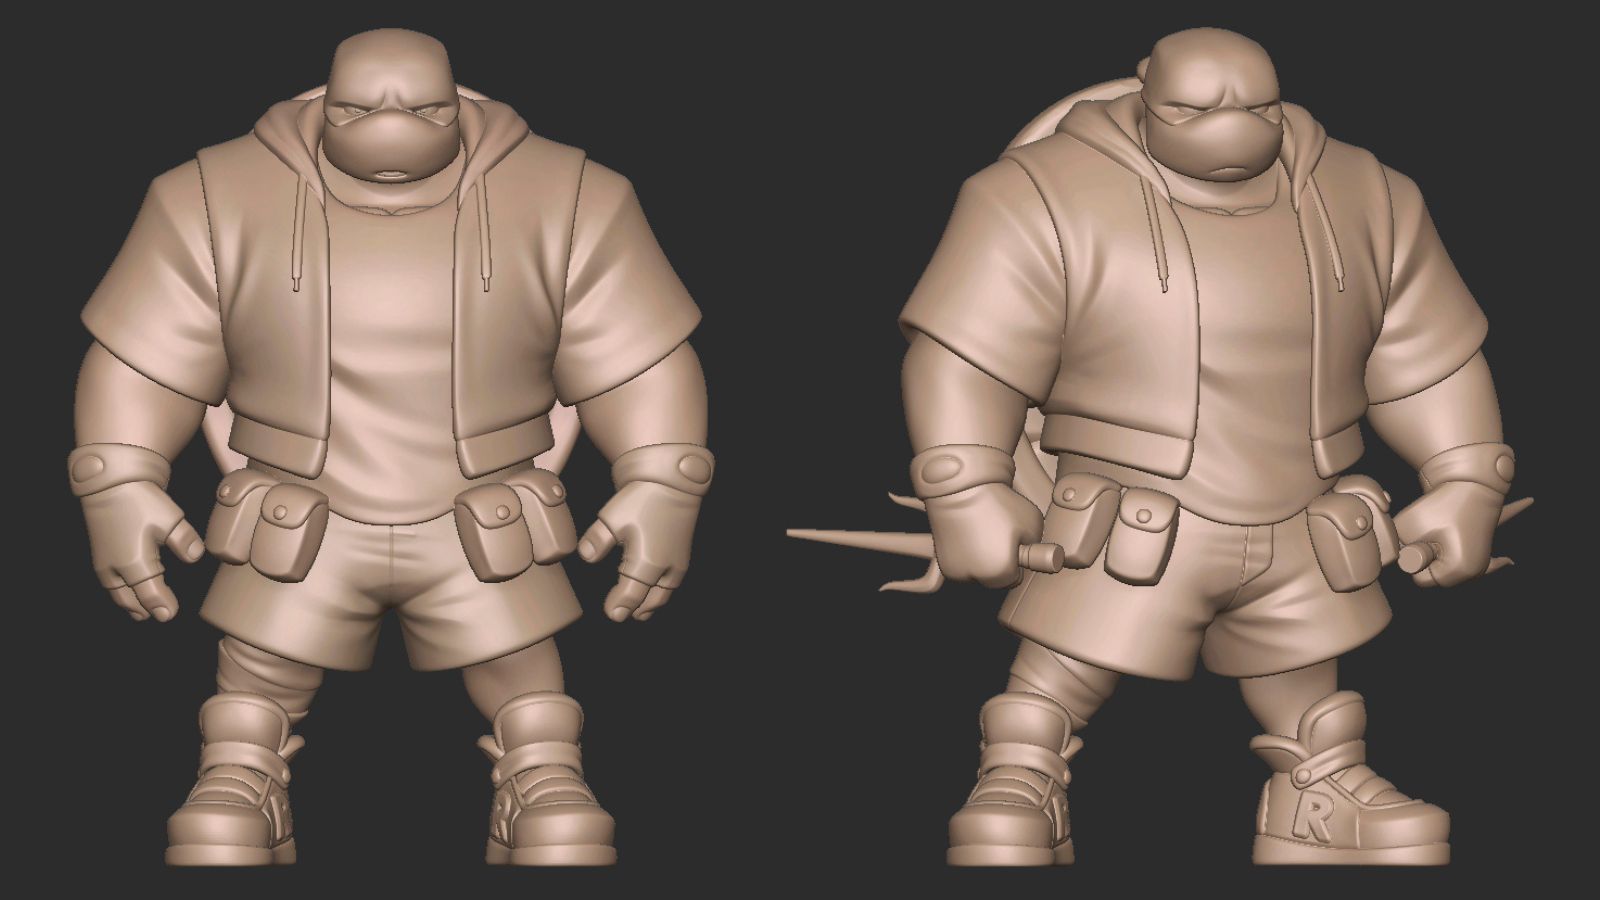
At this stage there are no secrets or any processes that will make this task easier. Posing in ZBrush is the most destructive thing you can do to your model, so make sure you save another version just for the pose.
It’s also a time-consuming task in ZBrush. If you want to test multiple poses, I recommend other software like Maya or 3DS Max and downloading a free rig you can use to quickly test poses. Another option, and the one I use these days, is using a posable figure like Sticky Bones, which was specifically created for animators and has impressive articulations.
Hit TPoseMesh and start posing the character by moving the pieces around, taking extra care on areas that will deform and need a lot of fixing like elbows and fingers. When you’re done, press ‘TPose > SubT’ to apply all the changes and keep working on each SubTool until you’re happy.
Character modelling in ZBrush: quick tips
Here are a few more quick tips to keep in mind when working on your character modelling and digital sculpting in ZBrush.

Concept breakdown
Take your time to study the design before sculpting and deconstruct it into more simplistic shapes. Pay attention to the silhouette and how the elements relate to each other.
Retopology with ZModeler brush
To quickly create a retopology brush with the ZModeler, change the Point Action to Move and the Edge Action to Extrude. Modifiers should be set ‘Snap to Surface’.
Creasing and Dynamic Subdivisions
Use Dynamic Subdivisions in conjunction with edge creasing for a nondestructive workflow. Play with the Crease Level and Dynamic Subdiv sliders for different results.
Symmetry
You can turn Symmetry on for objects like shoes to quickly block it out and create all the elements, and then turn the Symmetry off to fit each foot.
Get more software tutorials in 3D World
This content originally appeared in 3D World magazine, the world's leading CG art magazine. 3D World is on sale in the UK, Europe, United States, Canada, Australia and more. Limited numbers of 3D World print editions are available for delivery from our online store (the shipping costs are included in all prices). Subscribe to 3D World at Magazines Direct.
Sign up to Creative Bloq's daily newsletter, which brings you the latest news and inspiration from the worlds of art, design and technology.

João is a freelance character artist who has been working in the collectibles industry since 2020. He specialises as a digital sculptor for renowned brands such as Marvel, DC, Disney, Pixar, Warner Bros., and Nickelodeon.
