How to reduce camera shake in Photoshop CC
Repair your images in 6 easy steps with Photoshop CC's Camera Shake Reduction filter.
Sign up to Creative Bloq's daily newsletter, which brings you the latest news and inspiration from the worlds of art, design and technology.
You are now subscribed
Your newsletter sign-up was successful
Want to add more newsletters?
As a photographer, it's inevitable that you will wind up with the occasional blurry image. Fortunately, in Photoshop CC Adobe has a special 'Camera Shake Reduction' filter to help you repair these images. It automatically detects any motion in the image caused by your shaky hands, and counteracts it with sharpening and ghost removal.
There are some conditions though. If the camera shake is severe, the shake reduction might not work. Camera shake reduction works best with well-lit images with low noise. Indoor or outdoor images with a long focal length are good, as well as indoor images of a still life with a slow shutter speed and no flash.
Another place where shake reduction can help is when camera motion causes text to be blurred in images. It's also not the best for high ISO images, dark images or images with a lot of grain.
Article continues belowStep 01.
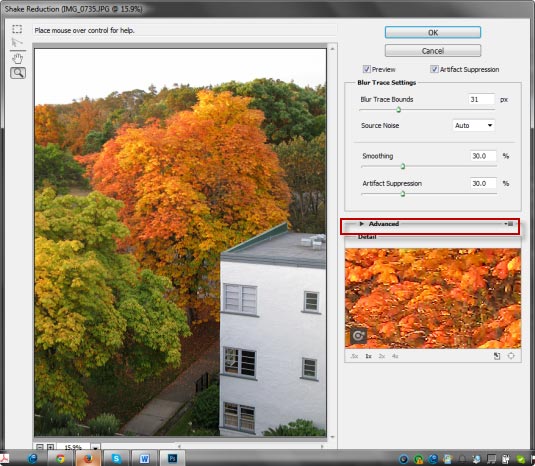
To get started, open the image you want to repair. Next, click on Filter>Sharpen>Shake Reduction. This opens the Shake Reduction dialog box.
As it opens, Photoshop automatically analyzes the image, the nature of the blur, selects an area which it thinks is best for shake reduction and applies the appropriate corrections to the image. Once done, you can see the corrected image in the Shake Reduction dialog box.
Step 02.
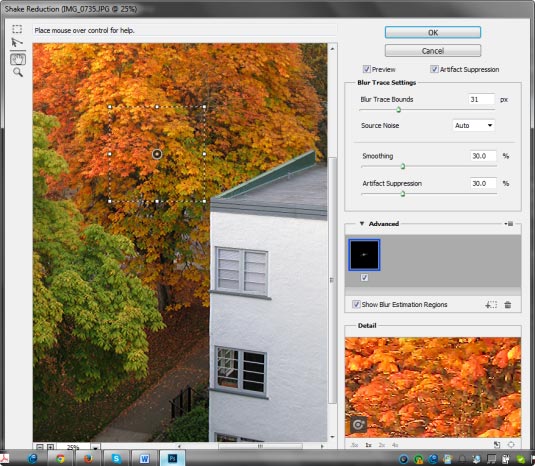
When you open the Advanced section, you see a Blur Estimation Region there, which is also represented by a box drawn in the image preview. You can use this position, you can move it to another location or you can draw addition blur estimations – ones which you feel would be better for the image.
Step 03.
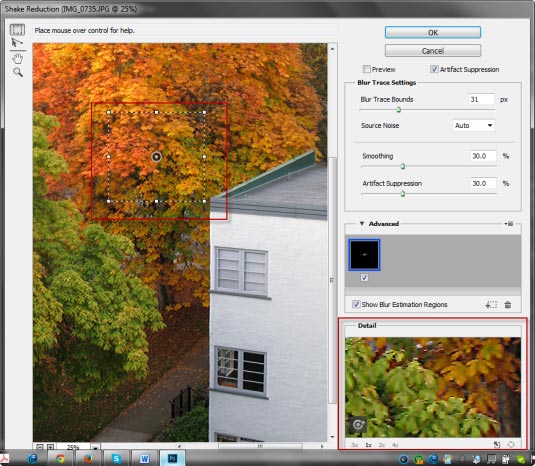
Before we do that, we'll zoom into the image. Notice that at the lower-right of the dialog box is a Detail section, which allows you to see more of what is going on with the image.
Sign up to Creative Bloq's daily newsletter, which brings you the latest news and inspiration from the worlds of art, design and technology.
In the lower-left of that section is a detail loupe, which allows you to see more of what is going on in the image. To activate it, click on the dotted square icon at the top-left of the dialog box. The cursor changes into a large crosshair icon.
When you click anywhere in the image, the results will be displayed in the Details panel. You can also use this icon to change the size of the Blur Estimation box.
Step 04.
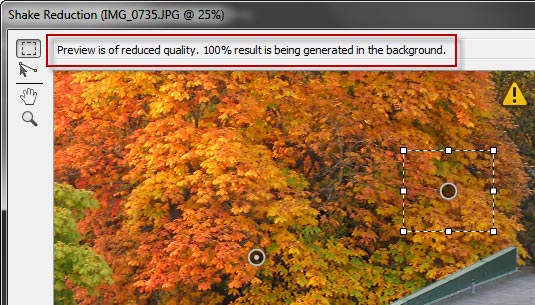
Now it's time to draw another Blur Estimation Box. Note the new icon which appears in the Advanced section. You will see an icon in the center of each Blur Estimation Box.
When you click on it, you will see a message at the top-right of the image preview which will read: 'rendering a coarse preview'. When it completes that preview, you'll notice a caution icon at the top-right of the preview. If you click on it, the message reads: 'Preview is of reduced quality. 100% result is being generated in the background.'
Step 05.
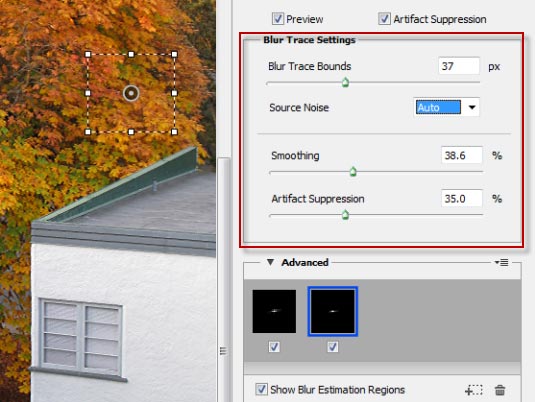
You can add as many Blur Estimation Boxes as you need to the image. As you do so, this will reduce camera shake and add some sharpening. It will also introduce some artifacting, which you will see as bits of clumping in the image.
You can manage this by changing the bounds used to trace the blur. You also can increase the Smoothness and Artifact Suppression by moving the sliders to the right.
Step 06.
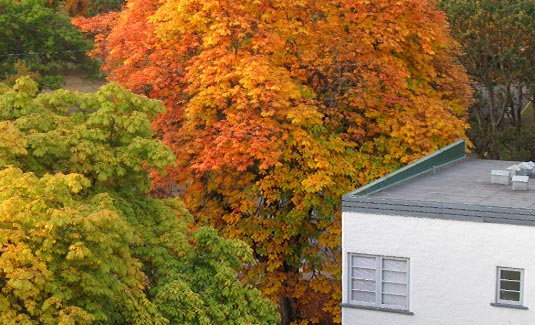
When you're satisfied with your changes, click on OK. In the finished image Photoshop should have considerably improved the sharpness. For in-depth information on how Camera Shake Reduction works, have a look at these resources.
With Camera Shake Reduction there are a great many tools to use for the right image. Devoting the time to doing that could be well worth it. You might be surprised with your results.
Words: Nathan Segal

The Creative Bloq team is made up of a group of art and design enthusiasts, and has changed and evolved since Creative Bloq began back in 2012. The current website team consists of eight full-time members of staff: Editor Georgia Coggan, Deputy Editor Rosie Hilder, Ecommerce Editor Beren Neale, Senior News Editor Daniel Piper, Editor, Digital Art and 3D Ian Dean, Tech Reviews Editor Erlingur Einarsson, Ecommerce Writer Beth Nicholls and Staff Writer Natalie Fear, as well as a roster of freelancers from around the world. The ImagineFX magazine team also pitch in, ensuring that content from leading digital art publication ImagineFX is represented on Creative Bloq.
