Create realistic 3D glass: 4 top tips
Learn how to make a lifelike glass material using Maxwell Render with these four tips.
Sign up to Creative Bloq's daily newsletter, which brings you the latest news and inspiration from the worlds of art, design and technology.
You are now subscribed
Your newsletter sign-up was successful
Want to add more newsletters?

Five times a week
CreativeBloq
Sign up to Creative Bloq's daily newsletter, which brings you the latest news and inspiration from the worlds of art, design and technology.

Once a week
By Design
Sign up to Creative Bloq's daily newsletter, which brings you the latest news and inspiration from the worlds of art, design and technology.

Once a week
State of the Art
Sign up to Creative Bloq's daily newsletter, which brings you the latest news and inspiration from the worlds of art, design and technology.

Seasonal (around events)
Brand Impact Awards
Sign up to Creative Bloq's daily newsletter, which brings you the latest news and inspiration from the worlds of art, design and technology.
I regularly create 3d art materials using the Maxwell Render plug-in for SketchUp, and you can also use Maxwell Studio, but for more complex materials requiring a higher degree of realism I use the Advanced Material Editor (MXED). MXED also allows for the quick editing of materials from the vast materials library found in the Resources section on the Maxwell Render website.
Before you start, it’s important to study the characteristics of the material you want to replicate. Here, you need to get familiar with the reflections and refractions in a wine glass in real-world scenarios. Another important element to consider is the lighting setup in the scene, as this will have an impact on how the reflections on the glass will appear.
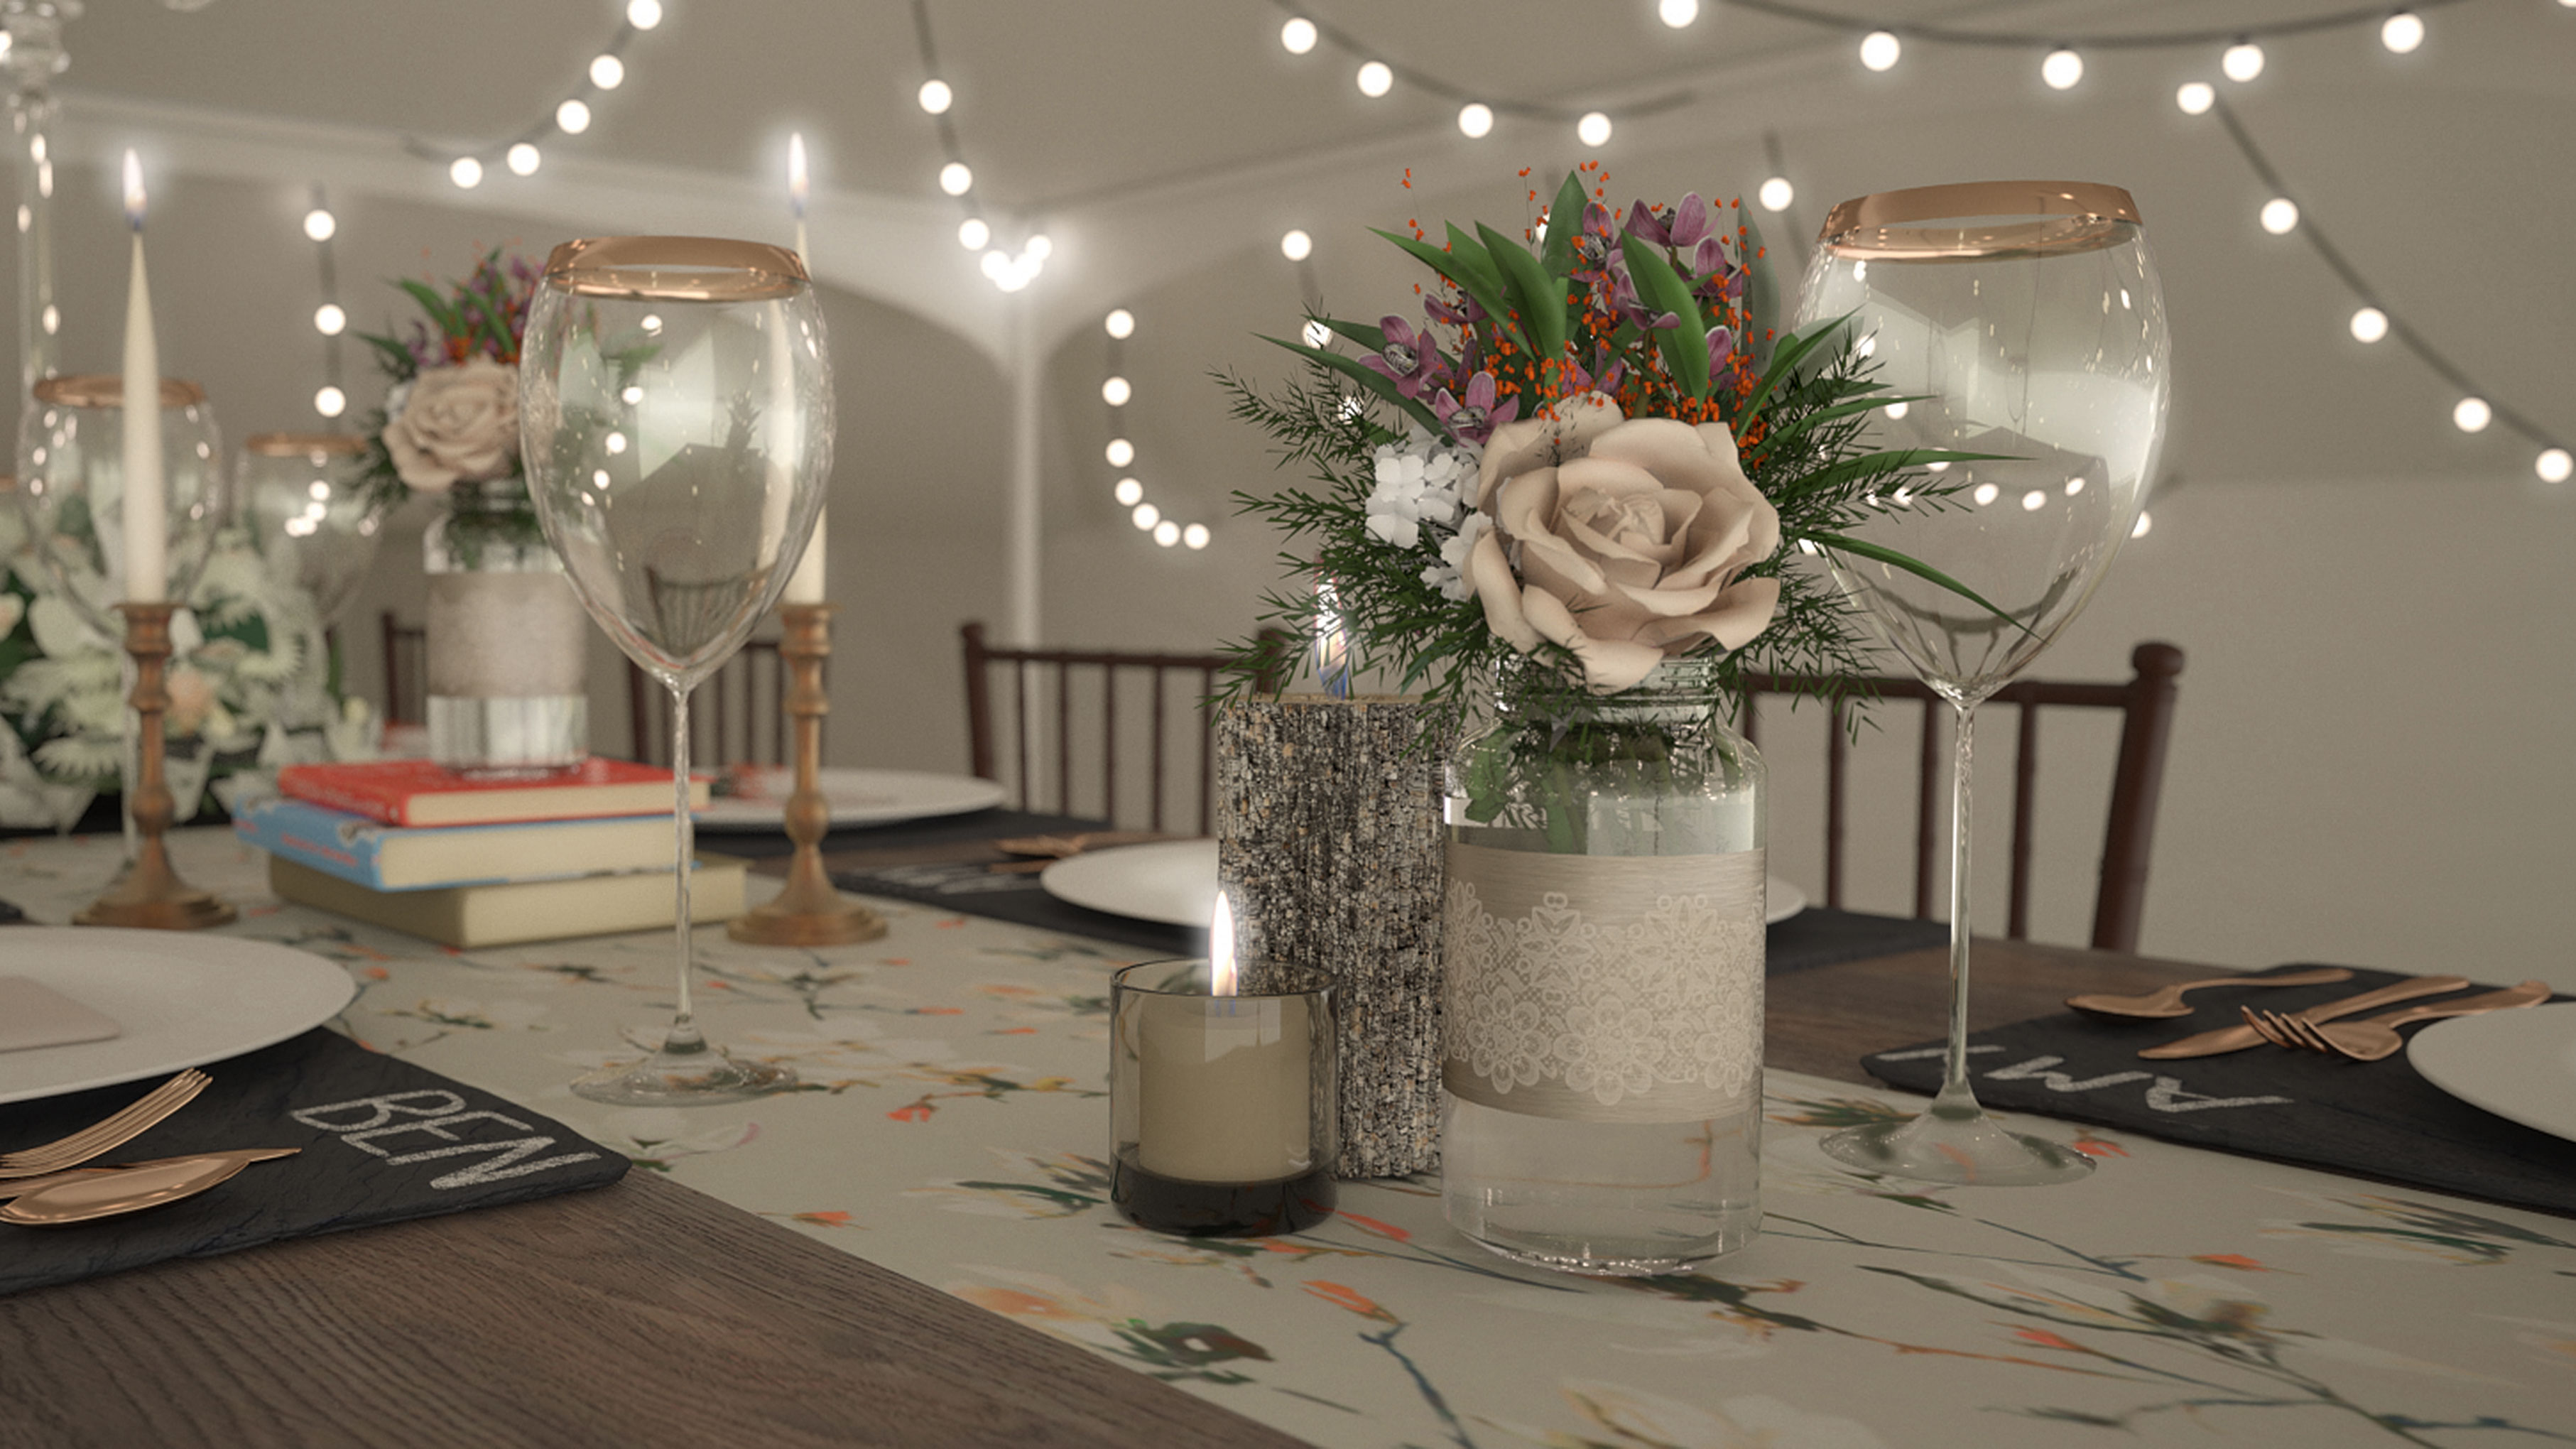
In the final rendered image, you can see that environment lighting was used to clearly illustrate the reflections on the glass. Careful consideration was given to the positioning of objects in the vicinity of the wine glasses, and objects were deliberately placed behind them to demonstrate how objects viewed through such glass appear distorted. This increases the realism of the scene.
Before you start, it’s important to study the characteristics of the material you want to replicate
There are four main aspects to creating a wine glass material in MXED: specifying the transmittance (colour); specifying attenuation (transparency); setting the ND parameter to control the index of refraction; deciding on the surface properties, such as roughness. For all this, you need to understand the effects of the various parameters in MXED.
The transmittance parameter controls the colour of light when it passes through a transparent material, and therefore this must be a colour other than black. Whilst selecting a brighter transmissive colour will result in clearer transparency, remember that this setting is also affected by the attenuation parameter.
The Attenuation distance parameter allows you to specify how far light can move through an object before losing half its energy. For this render, an attenuation distance of 3cm was used. For realism, the ND parameter was set at 1.560 with Force Fresnel activated. Again, this ensures that the rendered result is physically correct.
Spend time getting to know how the various parameters in MXED have a direct impact on one another, and then when creating a material you can fine-tune the settings until you achieve the desired result.
01. Create a new material
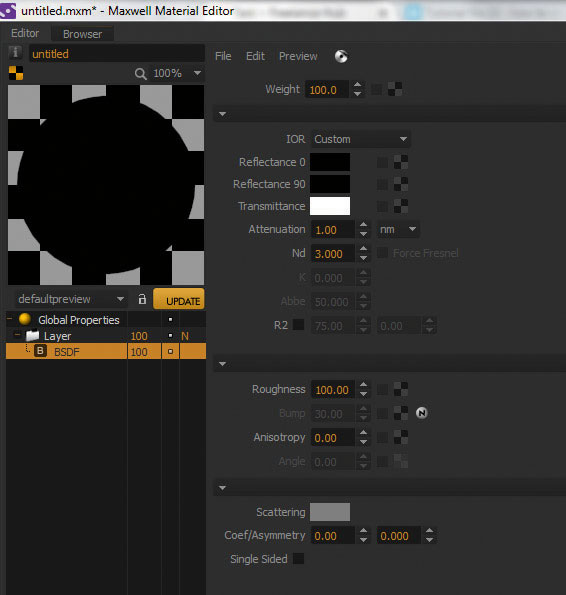
Open the Maxwell Render Material Editor and select Update to refresh the material preview. Click on the layer named BSDF to begin the process of creating the glass material. Change the reflectance 0 and reflectance 90 colours to pure black and change the transmittance colour to white. The preview will show a completely black material because the attenuation setting hasn’t been specified yet.
02. Specify Attenuation
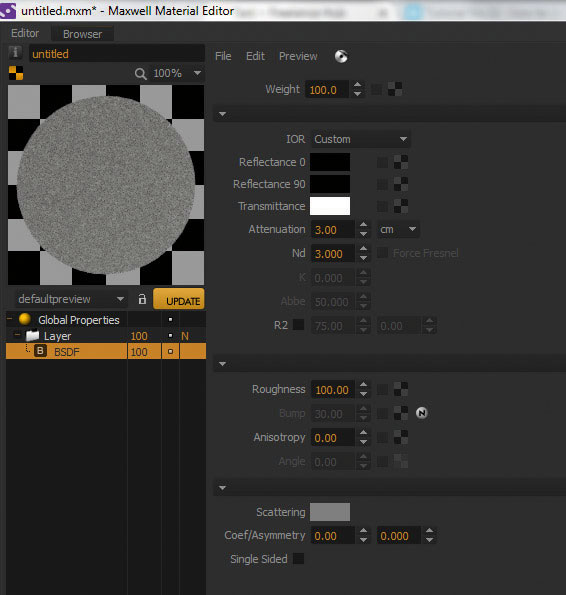
Attenuation distance and Transmittance work together. You have to set the Transmittance colour higher than RGB 0 for the Attenuation distance to become active. If your Attenuation distance is very small (for example 1nm), the object will remain opaque because the light can only travel a very small distance into the object and will not come out on the other side. I have set the attenuation at 3cm in this instance.
Sign up to Creative Bloq's daily newsletter, which brings you the latest news and inspiration from the worlds of art, design and technology.
03. ND parameter
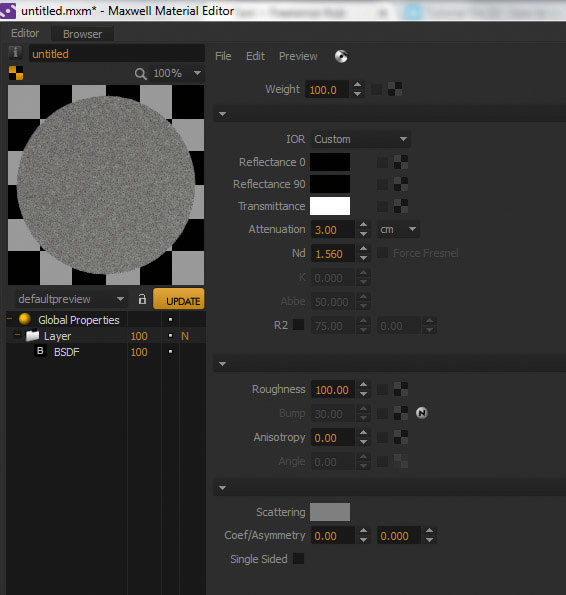
The ND parameter determines the IOR (Index of Refraction) of the transparent material. The higher the index of refraction, the more the light bends as it enters the object, producing the typical distortions of things seen through it. Remember also that surface reflections are stronger with increasing ND. For this glass material, the ND has been set at 1.560.
04. Roughness and Force Fresnel
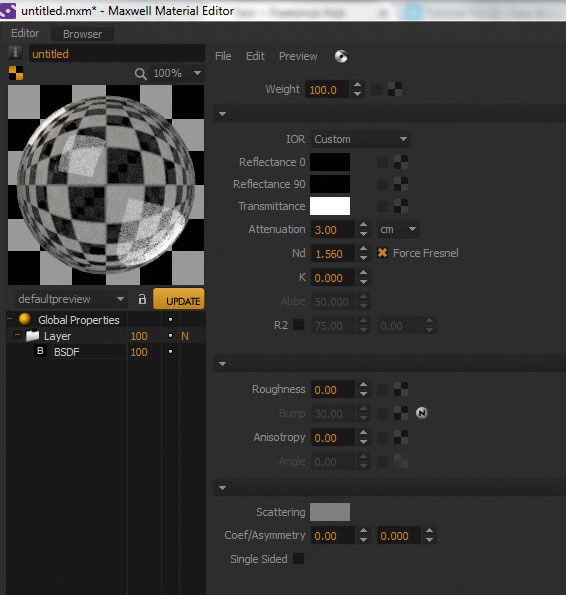
Finally, decrease the roughness setting to 0 and enable the Force Fresnel setting (to ensure that the result is physically correct). If the Force Fresnel parameter is enabled and the surface roughness is low (0 to around 15) then the Reflectance colours will not matter. The surface reflectance will instead be determined purely by the ND – and as we’ve mentioned, higher ND will produce stronger surface reflections.
Expert tip: Remember the Materials Library!
Download a glass material from the vast Materials Library on the Maxwell Render website to use as a starting point. The materials are generally of a very high quality and provide an excellent base for you to refine and perfect your desired material.
This article was originally published in 3D World magazine issue 212. Buy it here.
