If you’re anything like me, when you’re thinking of creating things that will mainly consist of flat graphics, you’ll instantly switch to Illustrator for its precise drawing capabilities. However, if it’s quick and simple results that you’re after, then you might be quicker using the new vector shape layers functionality in Photoshop CS6.
Don’t be put off by the fact that some of Photoshop’s tools are aimed more squarely at photographers either. Interesting results can be achieved by using Photoshop’s Content-Aware Move tool in conjunction with the precision of flat vector layers. Watch on as Photoshop tries its hardest to work out what to do, often resulting in very random but interesting effects.

01 Create a new document and a new layer filled with black. Select the Custom Vector Shape tool and, from the Shape Selector drop-down in the top bar, select Artistic 2 as the shape. Choose white as its fill colour and, holding Shift, draw a vector shape. Hold Opt/Alt to duplicate it until you have filled the canvas. Now merge the vector and black layers.

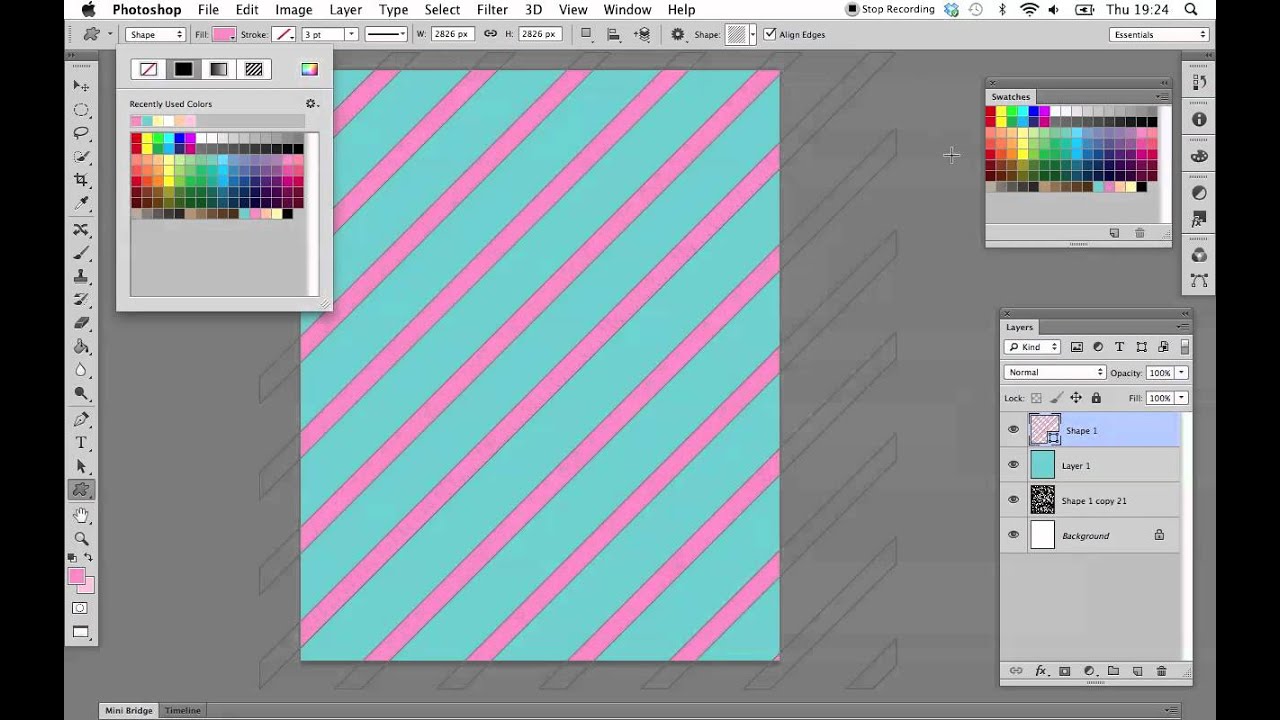
02 Create another new layer and fill this with a colour of your choice, in this case I’ve chosen a turquoise colour. Now, from the Shape Selector drop-down, choose the Tile 2 graphic, which is a square tile of diagonal lines. Specify a colour and, while holding Shift again, resize this to fill the entire canvas. You can merge both layers together again.

03 Repeat this process, experimenting with different vector shape layers and effects until you’re satisfied that you have a number of different flat pattern layers. Now draw a large rectangle that exceeds the document’s boundaries and rotate it slightly. Duplicate this by dragging it while holding Opt/Alt and, with both selected in the Layers panel, Ctrl-click on the layers and choose Merge Shapes.

04 We’re going to use our diagonal shapes as selections to create bands from the layers that we created earlier. Select the top pattern layer, duplicate it, turn off the diagonal shape layer and holding Cmd/Ctrl click on it to make a selection. Now hit Delete to knock out the selected area on the pattern layer. Repeat this process, moving the shape layers around and rotating them to create varying selection bands until you have a criss-crossing composition.

05 The Content-Aware Move tool is normally used in photography to seamlessly move one element to another position, but interesting abstract results can be achieved when used in graphic pieces. Select the Content-Aware Move tool, and start drawing and dragging selections. Be careful not to overdo it as we still want to maintain the overall structure of the piece, but simply mix it up a bit.

