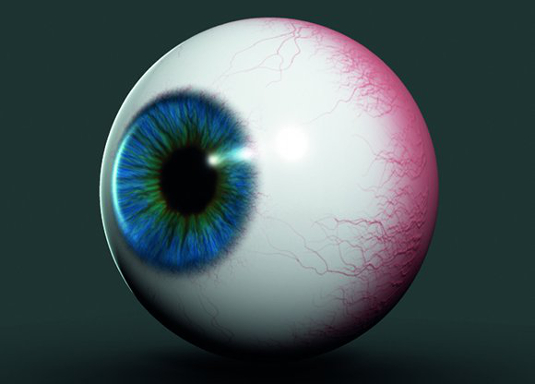
Create believable skin in Maya
How can you make a character’s skin look more believable when rendering Maya? Antony Ward has some suggestions.
Sign up to Creative Bloq's daily newsletter, which brings you the latest news and inspiration from the worlds of art, design and technology.
You are now subscribed
Your newsletter sign-up was successful
Want to add more newsletters?
There are many challenges a character artist will strive to overcome, and believable skin is one of them. Good use of textures and the shader setup can give you something approaching this, but by incorporating subsurface scattering (SSS) into your shaders you can take the effect further by giving the illusion that light is not only interacting with the surface, but also travelling beneath it.
This is, as the name suggests, what SSS is all about. So how do you achieve something like this in Maya? (See our Maya 2013 review for more on the software.) There are a number of approaches available: some quick but basic, and others more complex. Here, I’m going to focus on the misss_fast_skin_maya shader. With your scene ready, open the Hypershade (Window > Render Editors > Hypershade) and, under the mental ray tab, select the misss_fast_skin_maya shader.
Applying this to your character will give you a default setup, and if you generate a quick render you will see that rather than looking flat and boring, you now have a waxier-looking model. Not ideal, but it’s a good starting place.
Article continues belowOpen the misss_fast_skin_maya1 shader in the Attribute Editor. Initially all these settings will seem overwhelming, but the key here is to focus on one area at a time rather than try to adjust everything at once. The first area you should be aware of is found under the Algorithm Control tab. Depending on how your scene is set up, you will need to adjust the Scale Conversion value to get a good base to start from.
Ideally, you should be working with real-world units. So if your character is 2m tall and you are working in centimetres, ensure it is actually 200cm tall. If this isn’t possible, you can compensate by tweaking the value here which acts like a multiplier to the whole shader – the amount you change will depend on how your renders are looking as you work.
If you’re not sure, just leave this at the default value, but come back to it later if you find your values are turning out to be incredibly high or low. Once you’re happy to continue, you can start to adjust your shader values. First, go through and set all the Weight values – under the Subsurface Scattering and Specularity tabs – to 0.
With these disabled, you can now adjust each in turn – but initially, you need to focus on the Subsurface Scattering values. These all act as different layers for the skin, so Epidermal Scatter is the top layer, Subdermal Scatter is beneath the surface and Back Scatter is how light passes through the object to give you those nice translucent areas. Focus on the Back Scatter areas and begin by setting the Weight to 1, or even 5 to emphasise the effect, and generate a quick render.
Sign up to Creative Bloq's daily newsletter, which brings you the latest news and inspiration from the worlds of art, design and technology.
What you should see are red areas around the outside of the model, particularly around the fingers and thinner areas. If there is too much Back Scatter, adjusting the Depth will alter how deep the light will go into the model, and the Radius will dictate how far the light will spread. If you don’t see much of a difference to start with, ramp up the Weight value, or even revisit the Scale Conversion value, until you achieve the effect. Of course, for more control you could always use a texture added into the Back Scatter Color attribute to precisely indicate where the effect will be applied.
Once you are happy with how that is looking, move up to the Subdermal Attributes and repeat the process. First, add a little Weight, such as 0.5, and then balance this with the Radius. What you need from this layer is to scatter the light across the model so it bleeds into the darker, shaded areas.
Finally adjust the Epidermal attributes; again, use small values to begin with and tweak until you are happy. With all three now active, you will need to go back and adjust each setting further to balance out the effect. Once those are adjusted and you’re at a stage where you are happy to move on, you can focus on the Specularity tab.
You will notice there are two Specularity areas to control here. Primary Specularity is the main area to work on as this is the broader, global setting for the shader. The Secondary Specularity attributes control smaller, more focused highlights of the kind you get on lips, around the eyes and maybe on the cheeks. Once those are done, you should be get a much nicer, more natural skin set-up.
There are tonnes of other elements I could mention on this subject, more of which I will cover in the accompanying video, but I hope this short session has given you a foundation that you can use and build upon.
Complex shading made easy
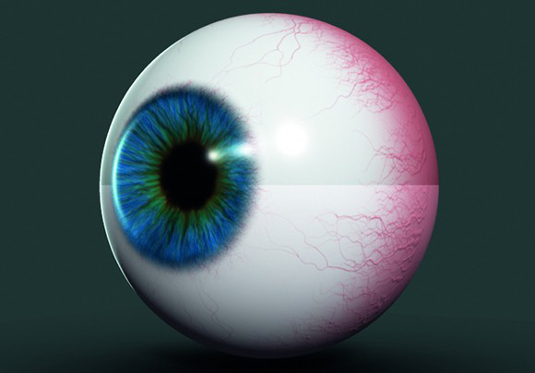
01 QUICK AND EASY SSS

Setting up a complex shading network can be a time-consuming task, especially if the object you are working on only needs a simple or subtle Subsurface Scattering pass.
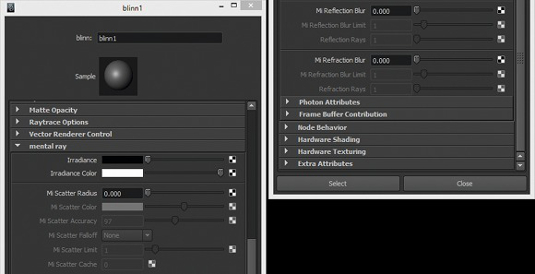
02 MI SCATTER RADIUS

Under each shader you will find a mental ray tab: in here, you will see the mi Scatter Radius attribute among others.
03 SUBSURFACE SCATTERING

Adding a value into the mi Scatter Radius attribute will activate the effect. Then just adjust the Radius, Scatter Color, Scatter Accuracy and so on to get the effect.
Antony Ward has been provoking pixels since the early 1990s. He has worked for some of today’s top studios and written three books
Discover the best 3D movies of 2013

The Creative Bloq team is made up of a group of art and design enthusiasts, and has changed and evolved since Creative Bloq began back in 2012. The current website team consists of eight full-time members of staff: Editor Georgia Coggan, Deputy Editor Rosie Hilder, Ecommerce Editor Beren Neale, Senior News Editor Daniel Piper, Editor, Digital Art and 3D Ian Dean, Tech Reviews Editor Erlingur Einarsson, Ecommerce Writer Beth Nicholls and Staff Writer Natalie Fear, as well as a roster of freelancers from around the world. The ImagineFX magazine team also pitch in, ensuring that content from leading digital art publication ImagineFX is represented on Creative Bloq.
