How to create realistic hair in 4 simple steps
Illustrator Mélanie Delon reveals how to master the art of painting beautifully realistic hair, digitally.

The most important thing when approaching hair is to think about the general appearance, which should suit the character's face. I always sketch different haircuts before settling on the right one. You must also consider the nature of the hair: is it curly or straight, thin or heavy?
Once you've decided on the hair type you can establish the colour scheme. I always start with a mid tone; it's easier to add light and shadows onto one. Don't forget that hair is reflective – it's affected by the environment’s light and colours, so don't hesitate to add, for example, some touches of blue if the character is outside. This will add to the realism of the piece.
Regarding the details and the texture, I always paint the base with a basic hard round edge set to a large diameter. This helps to achieve the general shape of the hair. Then I switch to a custom spackled brush to work the strands and the primary details. Once I'm happy with the whole thing I can focus on specific areas and add details where appropriate. I never overwork and texture the entire head of hair.
01. Choose your style
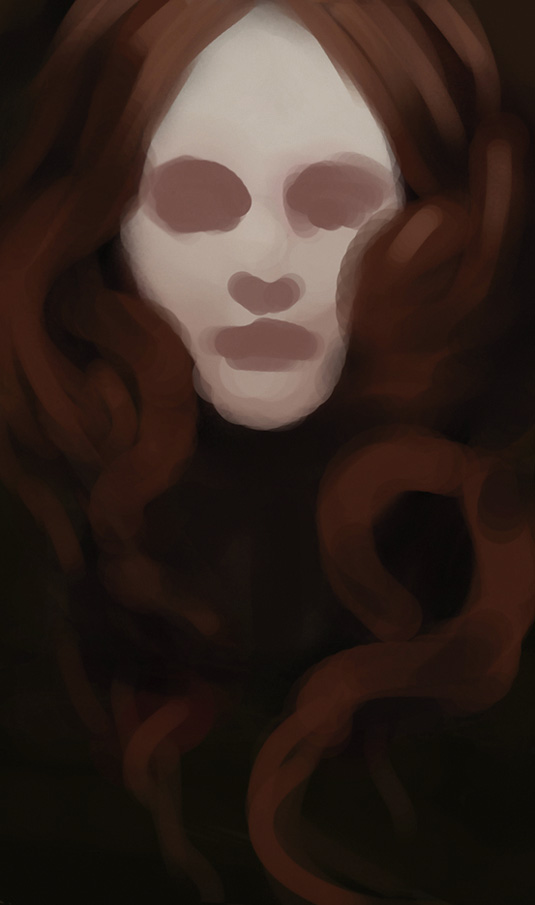
I start the painting process by choosing the shape and basic colour of the character's hair. You can see the main strands that will inject a natural and realistic look to the haircut. I use a very large brush; I don't want to lose myself in the details at this stage, so I keep everything very simple for the moment.
02. Refine your strands
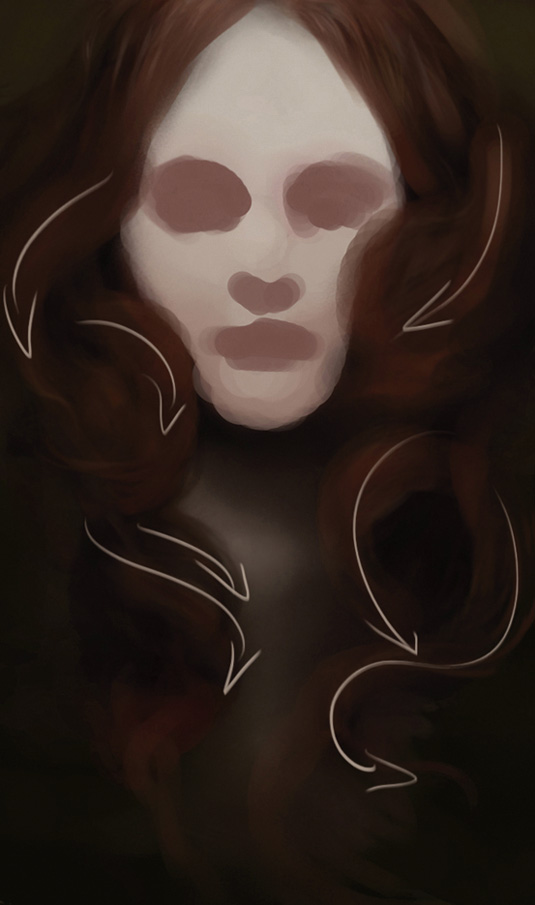
I'm now refining the strands, giving them an appealing look and shape. The hair of this character is wavy and so the curves need to be soft and light. The main light will come from above the top of her head, which means I must increase the lighting on this specific area and add more shadows on the bottom.
03. Work in the detail
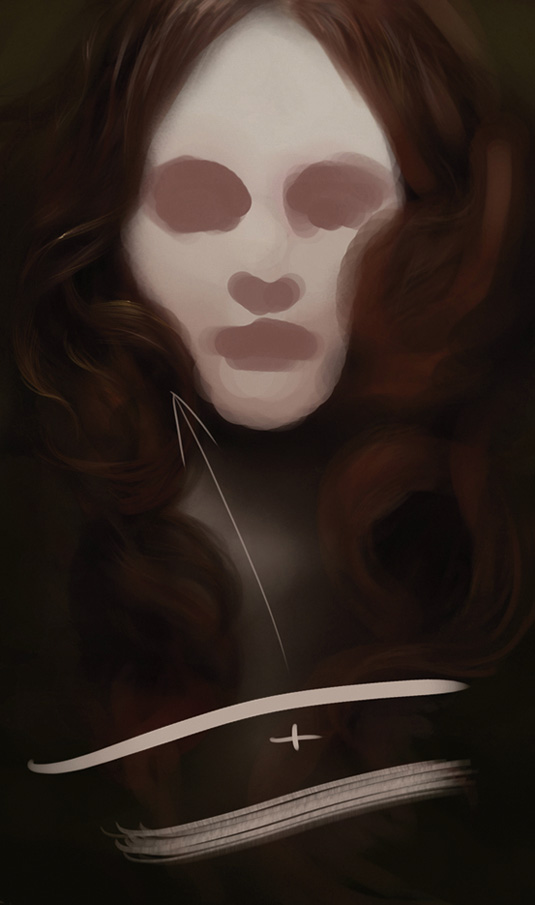
It's time to work in the details and the texture of the hair. For this stage I use a spackled brush and a basic round edge set to dynamic shape for the tiny details. I select a strand (ideally one that's near the focal point of the piece, where I want to attract the eye) and carefully paint a few lengths of hair.
04. Add light and effects
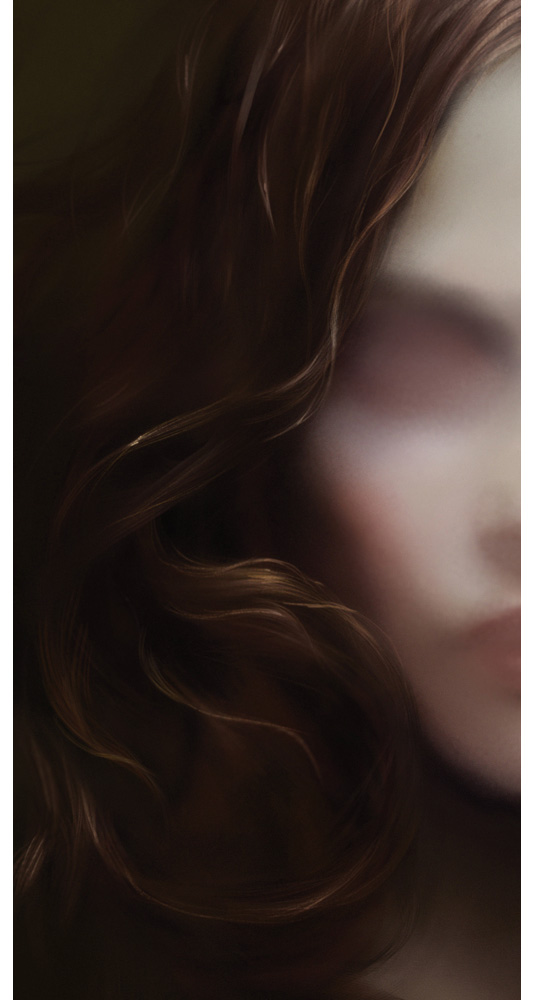
I repeat the techniques from previous step in areas of the character's hair where I want details to be visible, and then add dots of light on those particular strands, to make them stand out that much more. I also apply soft brush strokes with the spackled brush to add more refinement to the hair.
Daily design news, reviews, how-tos and more, as picked by the editors.
Artist's secret: Textured hair brush
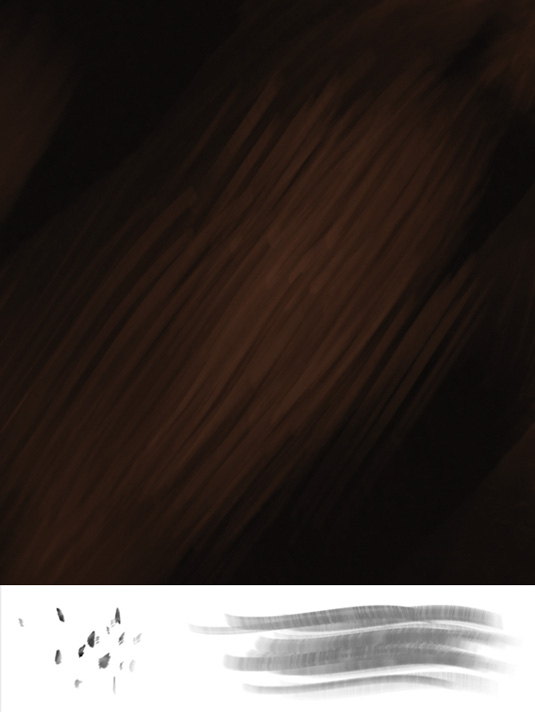
This is the type of brush I use for introducing extra texture to hair. I usually pick a slightly lighter tone than that of the hair and paint wild strands over the hair base. I blur the result and repeat until I achieve the right effect.
Words: Melanie Delon
Mélanie Delon is a freelance fantasy illustrator. She works as a cover artist for several publishing houses, and on her personal artbook series. This article originally appeared in ImagineFX issue 66.
Like this? Read these...
- 3 Tips for painting translucent vampire skin
- Free Photoshop brushes every creative must have
- Great examples of doodle art

The Creative Bloq team is made up of a group of art and design enthusiasts, and has changed and evolved since Creative Bloq began back in 2012. The current website team consists of eight full-time members of staff: Editor Georgia Coggan, Deputy Editor Rosie Hilder, Ecommerce Editor Beren Neale, Senior News Editor Daniel Piper, Editor, Digital Art and 3D Ian Dean, Tech Reviews Editor Erlingur Einarsson, Ecommerce Writer Beth Nicholls and Staff Writer Natalie Fear, as well as a roster of freelancers from around the world. The ImagineFX magazine team also pitch in, ensuring that content from leading digital art publication ImagineFX is represented on Creative Bloq.
