Compositing in animation: Learn the basics
Get to grips with the basics of compositing for 3D animation.
Sign up to Creative Bloq's daily newsletter, which brings you the latest news and inspiration from the worlds of art, design and technology.
You are now subscribed
Your newsletter sign-up was successful
Want to add more newsletters?
In this article, we will delve into the art of compositing for 3D. Exploring what it is and what exactly a compositor does, as well as giving you tips for how you can use compositing to make the most of your 3D animations and images. To cover the basics of compositing, I will be using the free version of Blackmagic Design’s DaVinci Resolve software, which offers all of the key features you'll need to get started.
Need some motivation to create your next masterpiece? We've picked 30 incredible pieces of 3D art to inspire you.
What is compositing?
Put simply, compositing is the process of combining visual elements from separate sources to create one image. In 3D art, this means combining two or more render passes to enhance the quality of your finished piece. So why does a 3D artist need compositing? Surely everything can now be done in a single render? The latest generation of render software can now create imagery on a laptop in minutes. Five years ago the same imagery would have taken hours on a workstation the same price as a nice car.
Article continues belowThe answer to why we need compositing is straightforward. Compositing allows a level of refinement of the imagery or animation that is still hard to achieve in 3D software. A decent compositing application also possesses an NLE (non-linear editor) which allows shots to be stitched together, retimed, colour matched and reordered according to the needs of an artist, as well as the client.
What does a compositor do?
Compositing has become a vital part of the 3D pipeline. Compositors are responsible for creating the final image by combining all the elements of a particular shot or image. This requires an in-depth knowledge of the process and a wide-ranging 3D skillset.
Often, a compositor will bring the entire piece together. A well-managed composite can change the colour in a sequence of shots or pop out a specific reflective highlight in less time than any 3D software could manage. Compositing software also offers a wide range of effects, enabling compositors to add particles, glows and text. Some compositing software can also take the raw building blocks of a 3D scene and import it as a 3D file via formats such as Alembic, which can be used to create new elements and masks for existing footage.
Compositors can take the best elements of any of the best 3D modelling software, such as a character from Maya, a simulation from Houdini, and a motion graphics scene from Cinema 4D, and combine them into a single shot. Compositing allows the shot to look better than it ever would have if it had been created in just a single piece of software. Now let's see how you can use it to level up your own work with DaVinci Resolve.
Sign up to Creative Bloq's daily newsletter, which brings you the latest news and inspiration from the worlds of art, design and technology.
Compositing basics
01. Get started with DaVinci Resolve
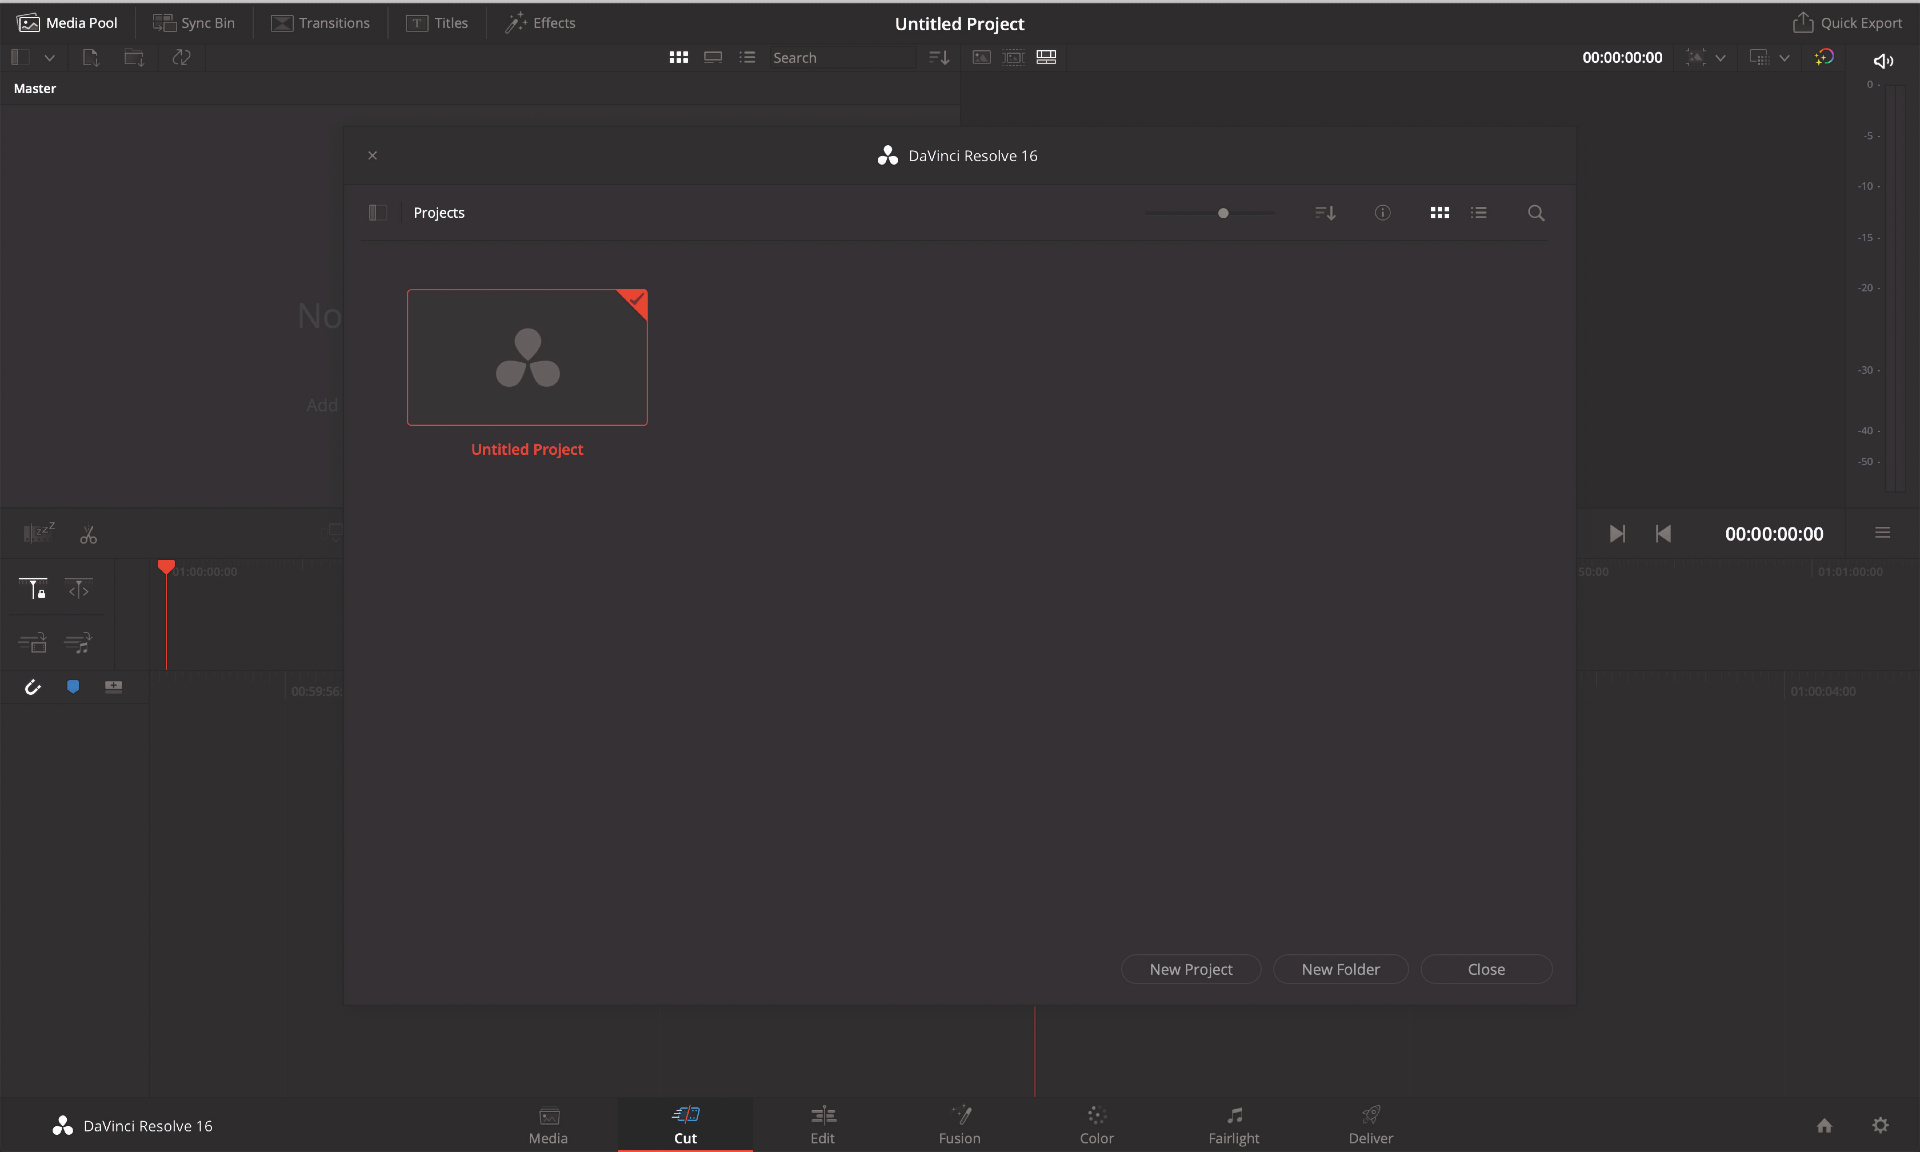
When first launched, DaVinci Resolve presents a helper window to set up an untitled project for the first time. A DaVinci Resolve project contains all of the timelines and Fusion Compositions. A project does not include the footage, which can live wherever the artists desire. DaVinci Resolve stores projects as part of its directory structure away from a distinct location, such as a Documents folder. To access the Project window and create and manage projects after the initial launch, you can select the small house icon at the bottom right of the screen.
02. Make a composition
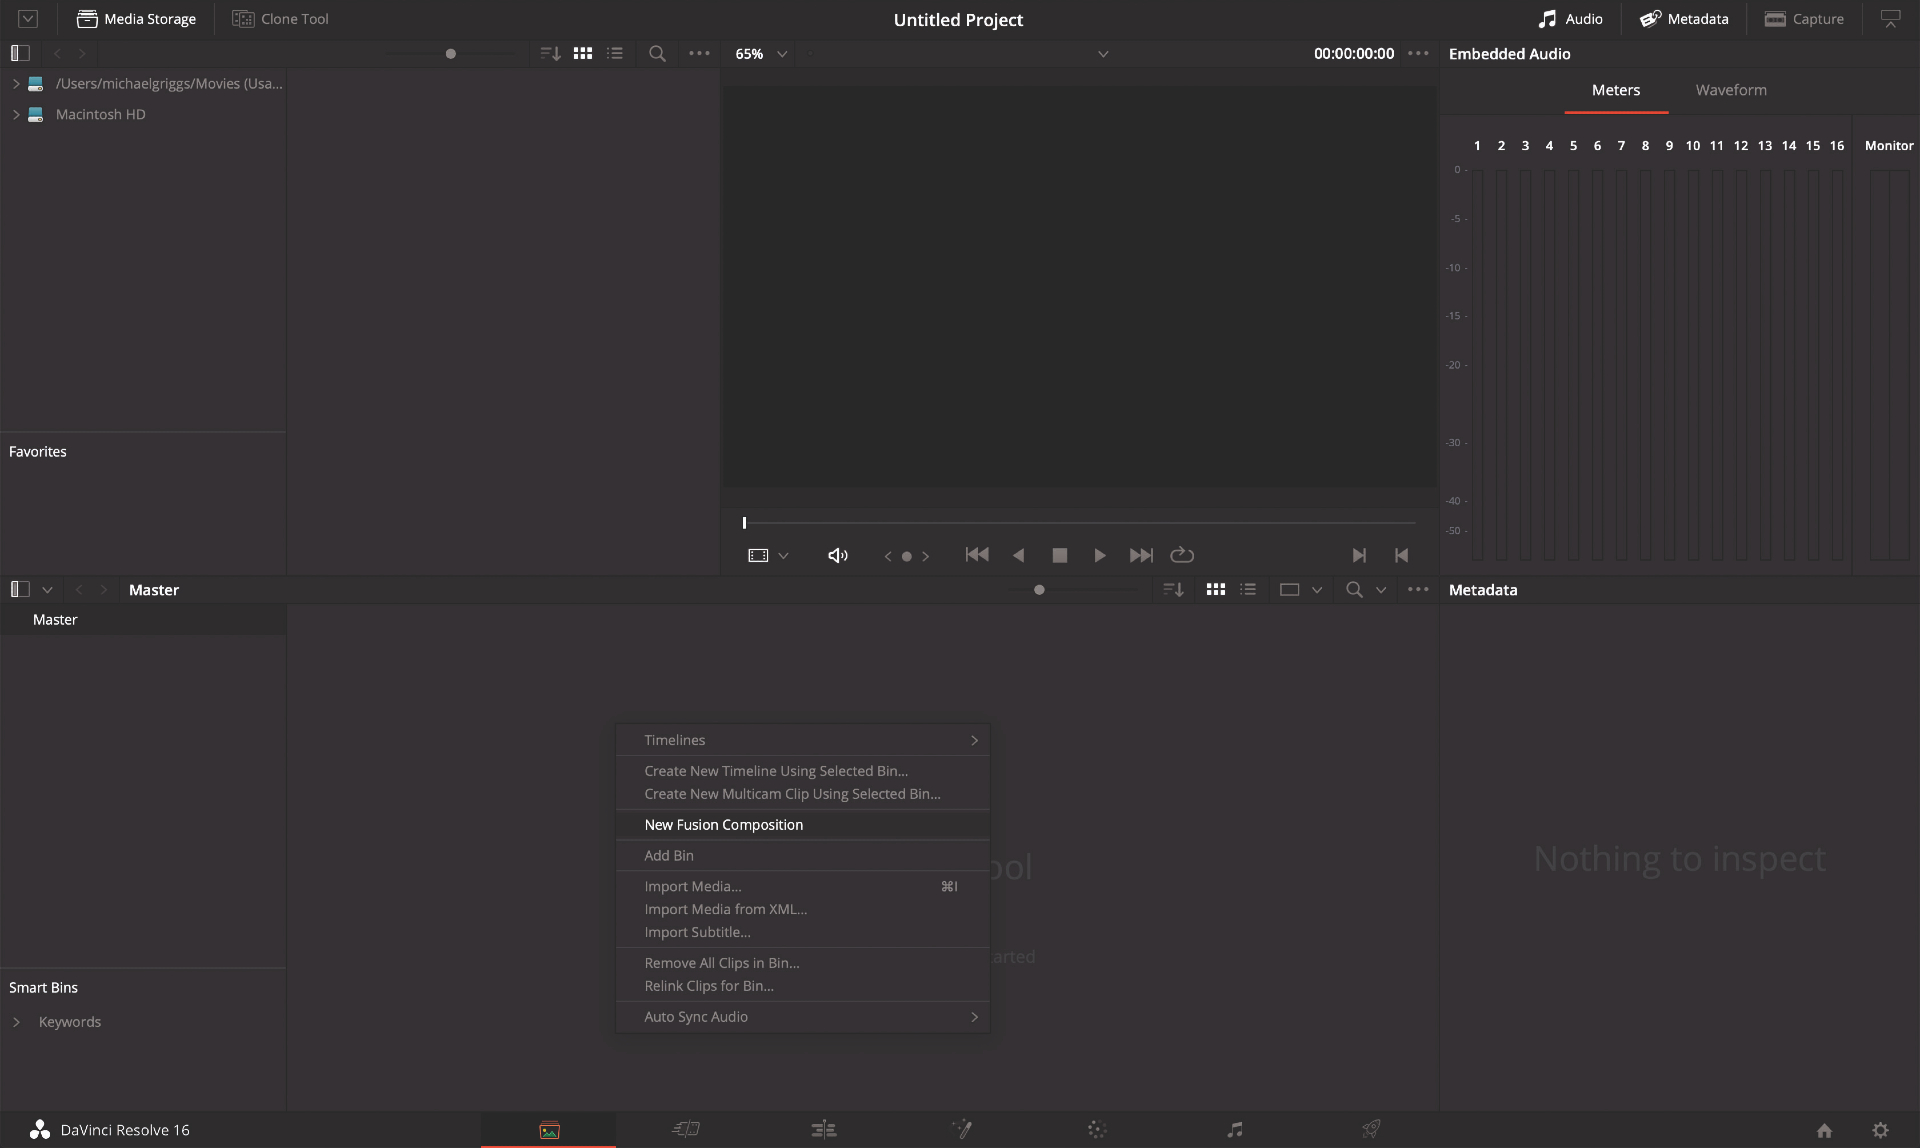
As this is an introduction to compositing, let’s find out where the compositing workflow lives within DaVinci Resolve. The software has seven different 'Pages' each dedicated to a different workflow. In the Media page, which is accessed either by the leftmost icon at the bottom of the DaVinci Resolve screen or via the Workspace > Pages > Media menu, create a new Fusion Composition by right-clicking in the Media Pool window at the bottom. Choose New Fusion Composition and give it a name.
03. Work with nodes
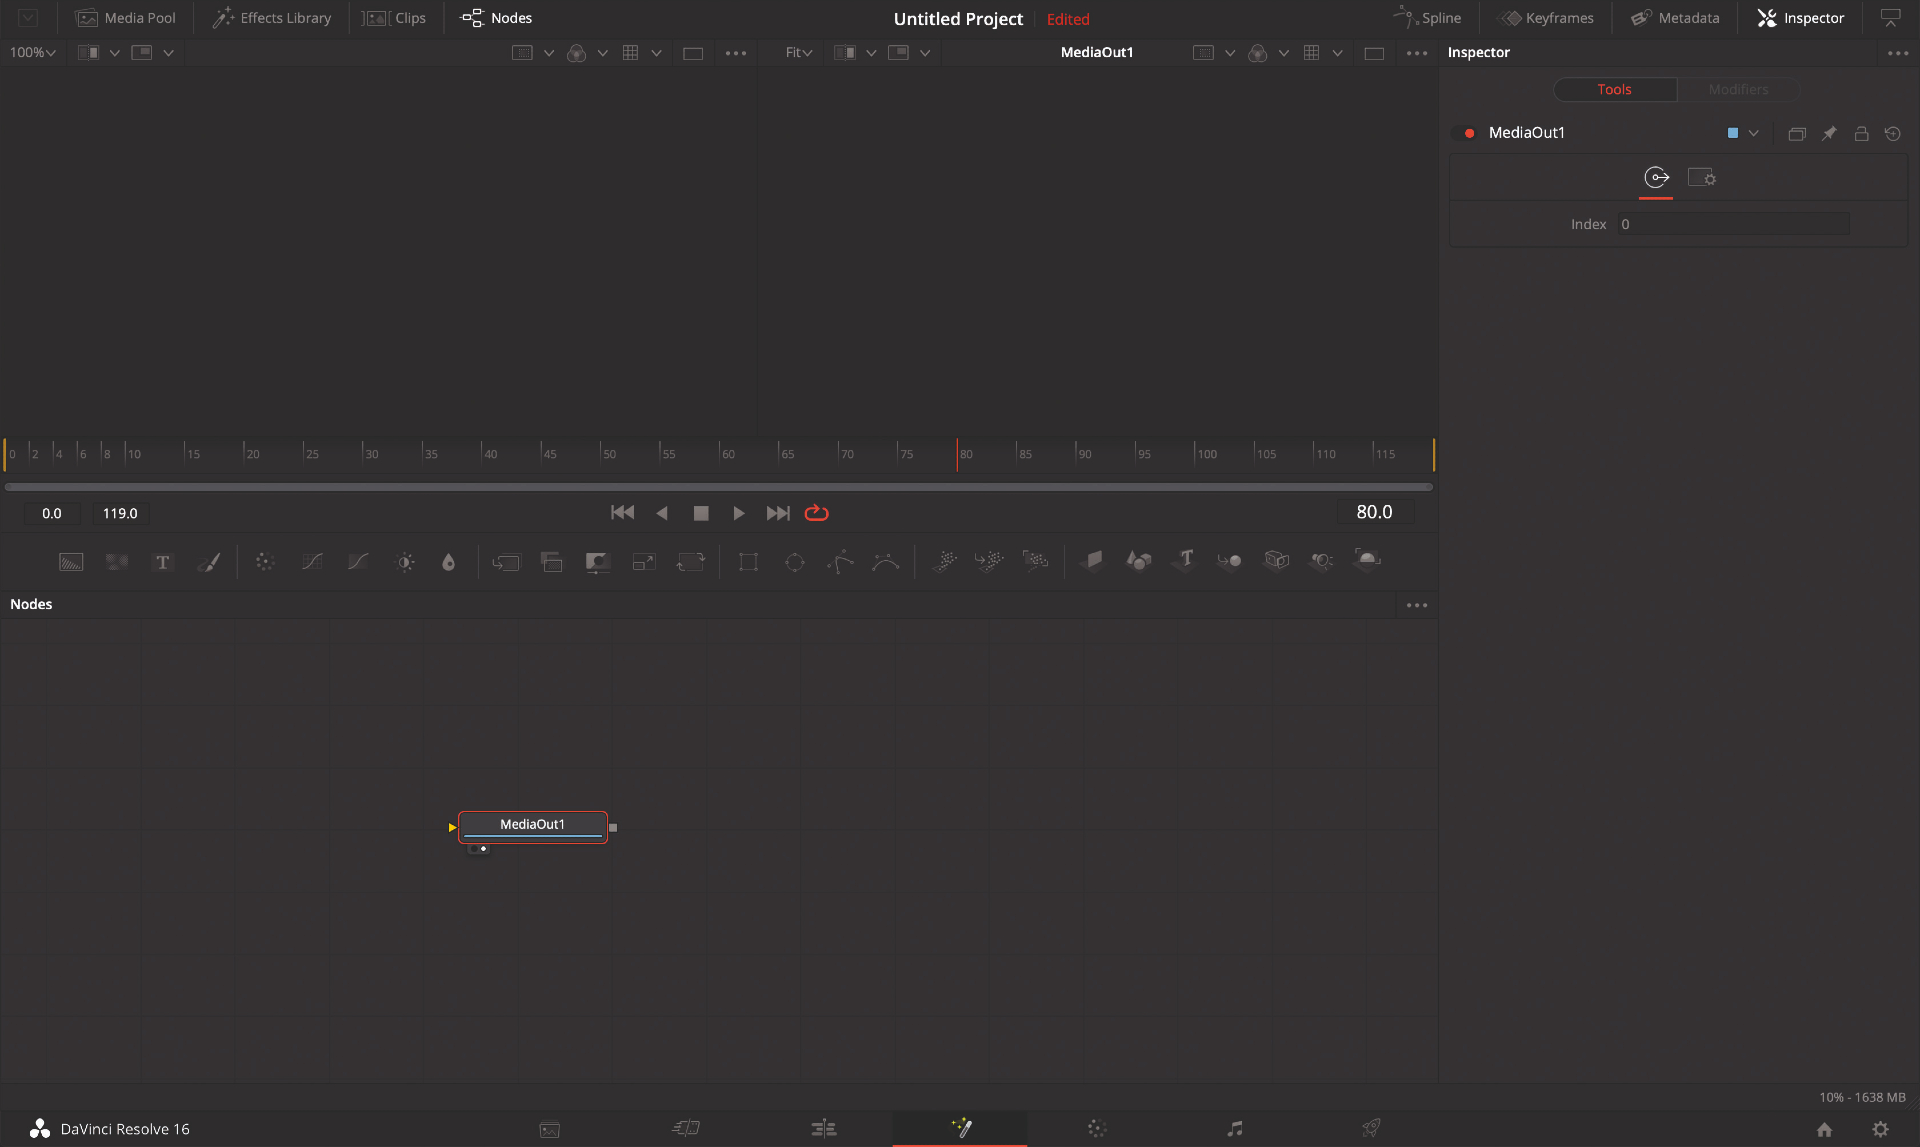
Double-click on the new Fusion Composition and this will open the Fusion page and show the contents. Fusion is a nodal compositor, which means each element that is used to create the finished shot, whether it is footage, an effect or even a basic transform, is represented as a 'Node' via an icon in the Nodes window. Nodes are connected via pipes that flow in a single direction, starting with footage or a generated image element, and flowing to the MediaOut node, which shows the final result.
04. Create a node tree
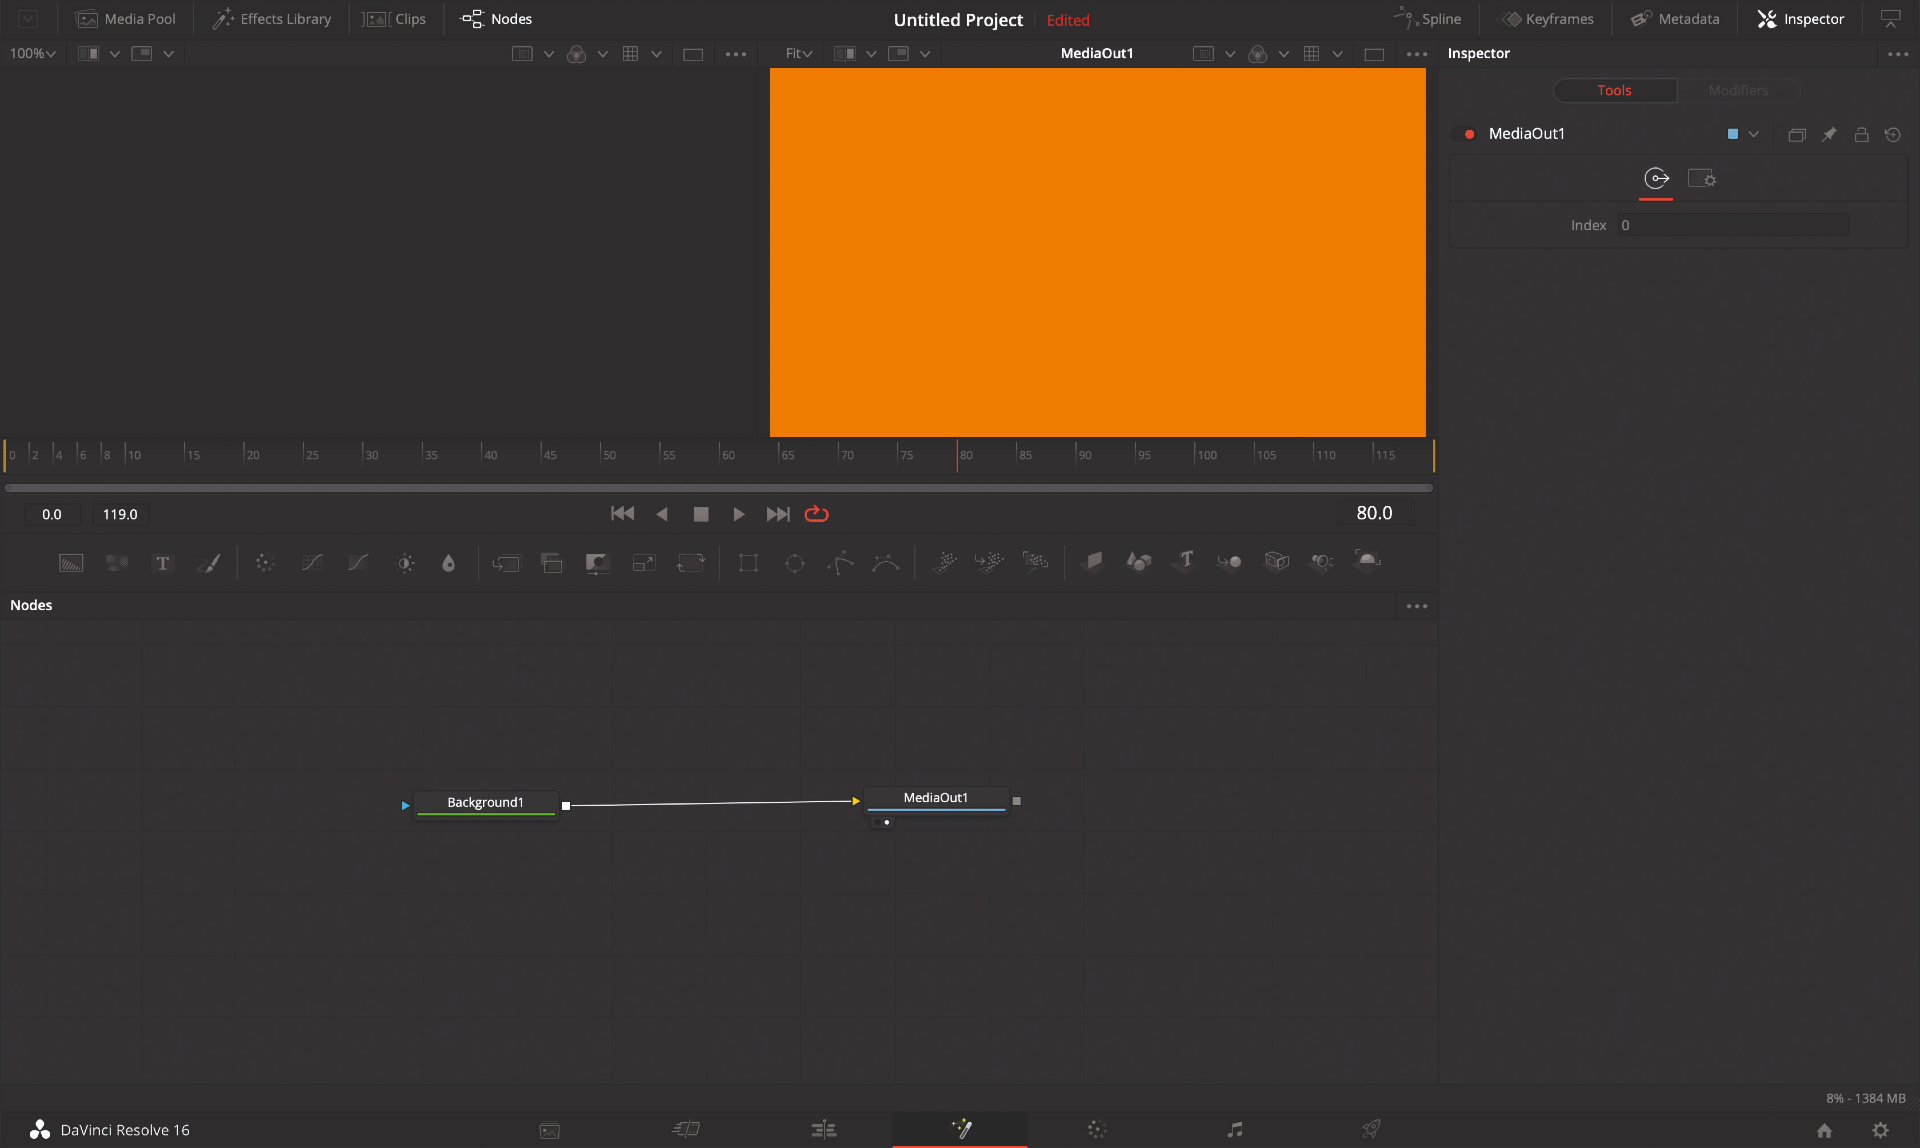
Fusion has a wide array of nodes to choose from, which can either generate imagery or work with existing footage via a MediaIn node. The most common nodes are available in a strip in the middle of the Fusion page. These can be dragged into the Node viewer. Select a Background node, which is the leftmost icon, and pull that into the Node window. The Inspector for the elected Background node allows parameters such as colour to be changed. Click and drag from the small square on the right of the Background node and connect it to the MediaOut node. This is a successful node tree.
This article was originally published in 3D World, the world's best-selling magazine for CG artists. Subscribe to 3D World.
Read more:
- What is colour grading? Here's all you need to know
- How to make an animated video: Expert advice
- Blackmagic Pocket Cinema Camera 6K review

Mike Griggs is a veteran digital content creator and technical writer. For nearly 30 years, Mike has been creating digital artwork, animations and VR elements for multi-national companies and world-class museums. Mike has been a writer for 3D World Magazine and Creative Bloq for over 10 years, where he has shared his passion for demystifying the process of digital content creation.
