Create sensational sunsets in Photoshop
Enhance sunsets by combining several flash bursts in Photoshop.
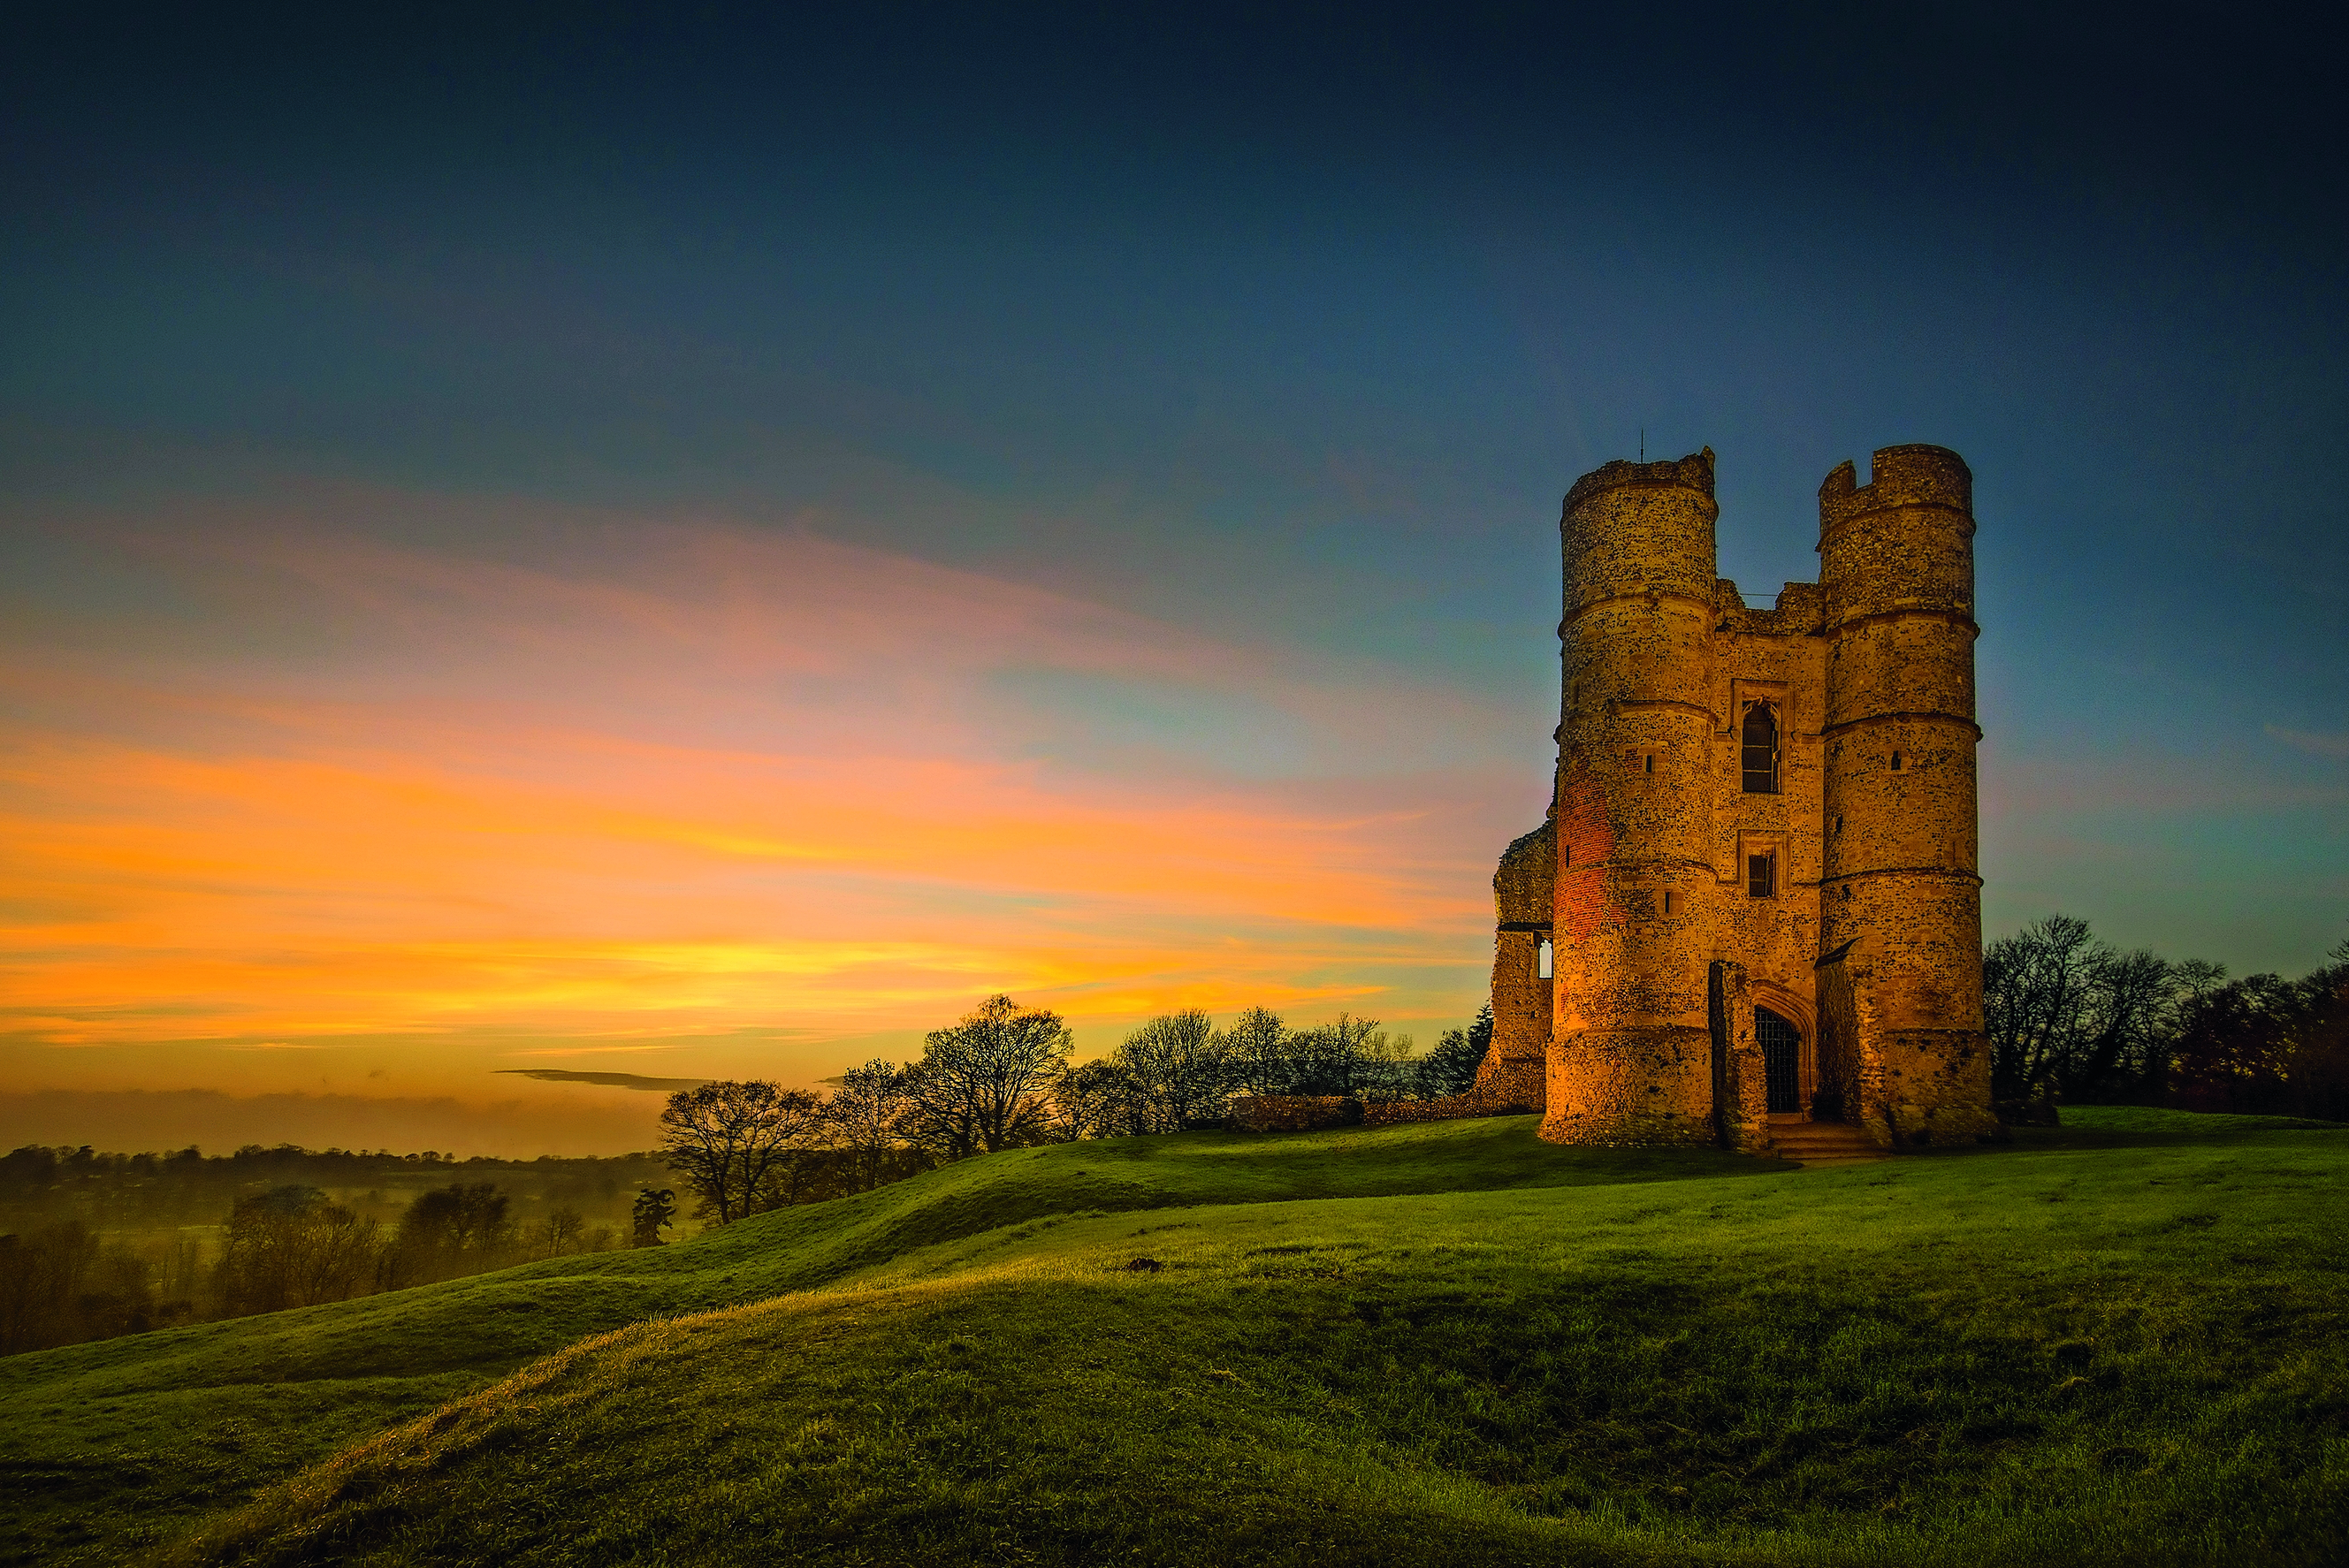
A beautiful sunset is such a thing of wonder that anyone with a camera feels almost duty-bound to capture it.
However, if you want to include foreground detail as well, this presents an exposure problem. The most impressive part of the sky is where the sun drops, and shooting into that lovely light means the land will usually come out dark. If you try exposing for the shadows, on the other hand, the sky becomes overexposed, and all the vibrancy is lost.
One approach would be to look for interesting shapes in shadows that make for bold silhouettes against the colourful sky – or perhaps shoot for an HDR image. But here we’re going to explore a third option. I'll explain below how to light the foreground with a series of flash bursts, then blend the exposures with Photoshop effects to lift your sunsets to new heights.
First up, let's look at setting up your camera for flash-lit sunsets.
01. Set up the shot
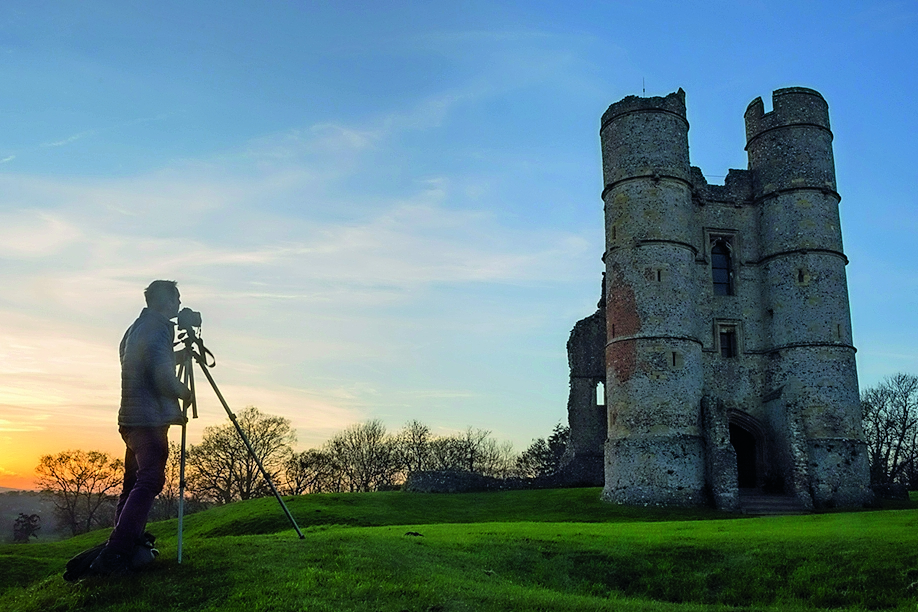
Use a tripod and cable release to keep the camera still. Set the camera to Manual mode and take a few test shots. Try overexposing slightly to blow out the sky and record foreground detail. This frame will come in handy later.
02. Balance your exposure
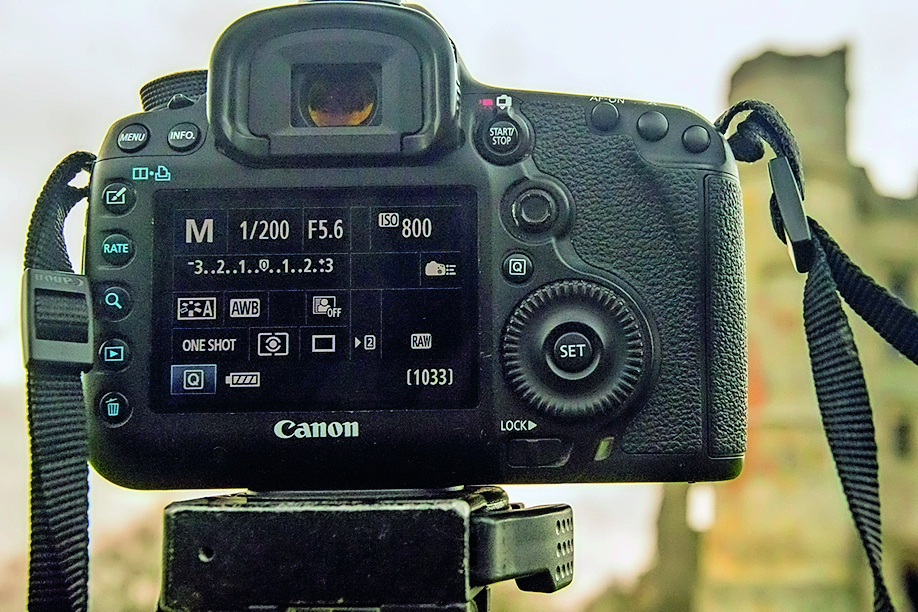
Work out an exposure for the sky. We need to account for the limitations of our flash power, so we may need to set the ISO higher than normal for a landscape shot. Here we had 1/200 sec at f/5.6, ISO 800.
03. Off-camera flash
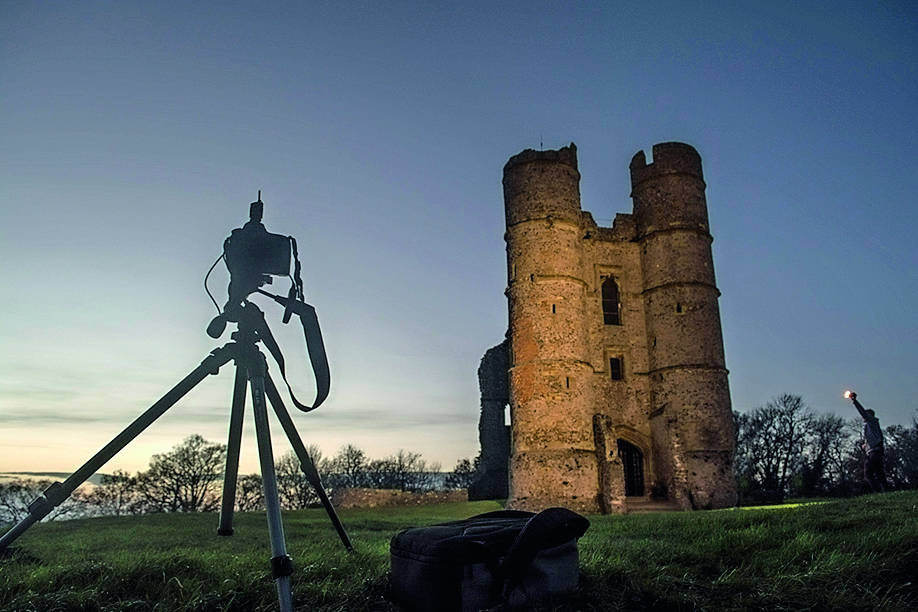
Attach a flash trigger so you can pop the flash remotely from wherever you choose. Then set the camera self-timer to give yourself a few seconds to get into position to fire the flash – you may need to run!
Sign up to Creative Bloq's daily newsletter, which brings you the latest news and inspiration from the worlds of art, design and technology.
04. Light the foreground
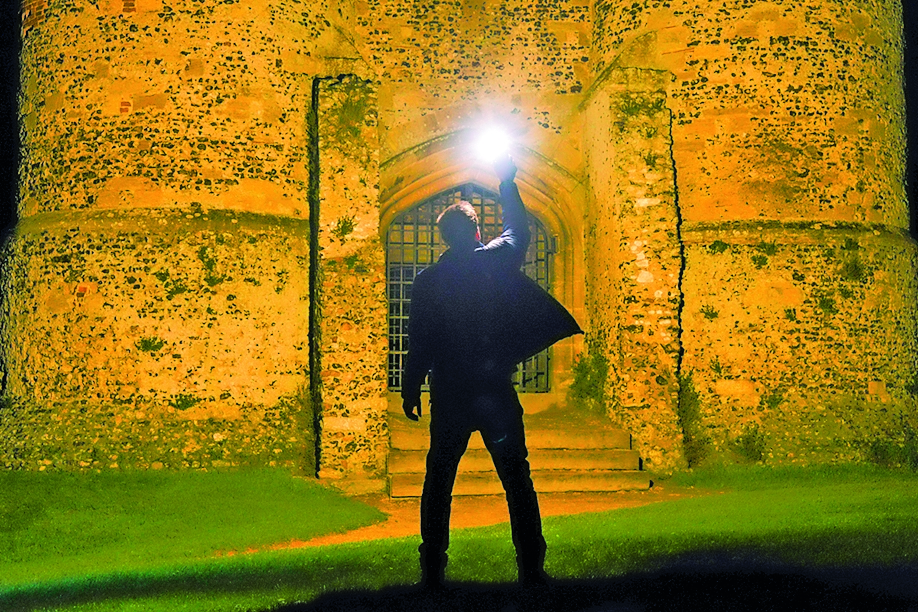
Set your flash to manual mode, full power, then fire off a test shot to see how it looks, and adjust the flash power if necessary. Take several frames while moving around the scene, lighting it from different angles. Now you're ready to merge your images in Photoshop.
05. Load your images as layers
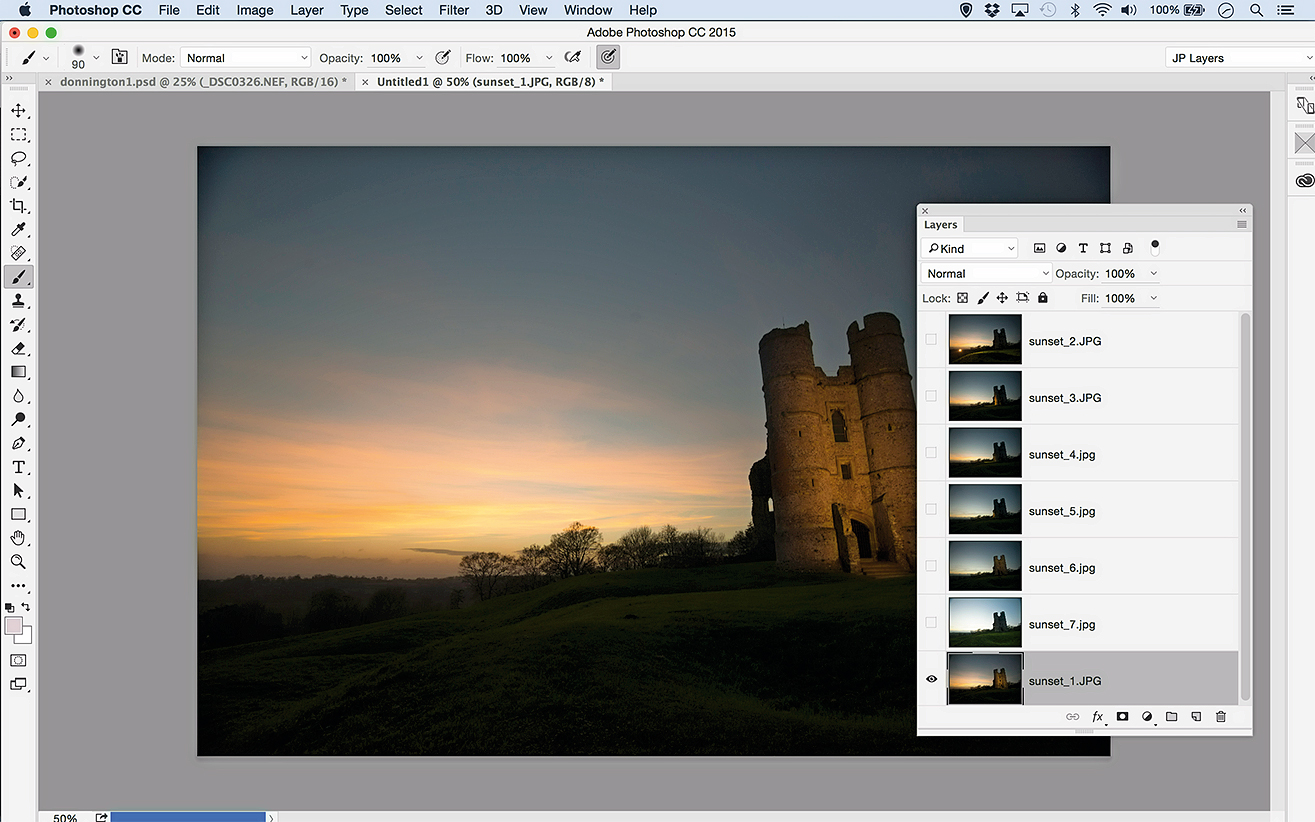
Select the images in Bridge. Go to Tools > Photoshop > Load Files Into Photoshop Layers. In Photoshop, go to the Layers panel, choose the frame with the most vibrant sunset, drag it to the bottom of the stack and hide the other layers.
06. Blend and mask
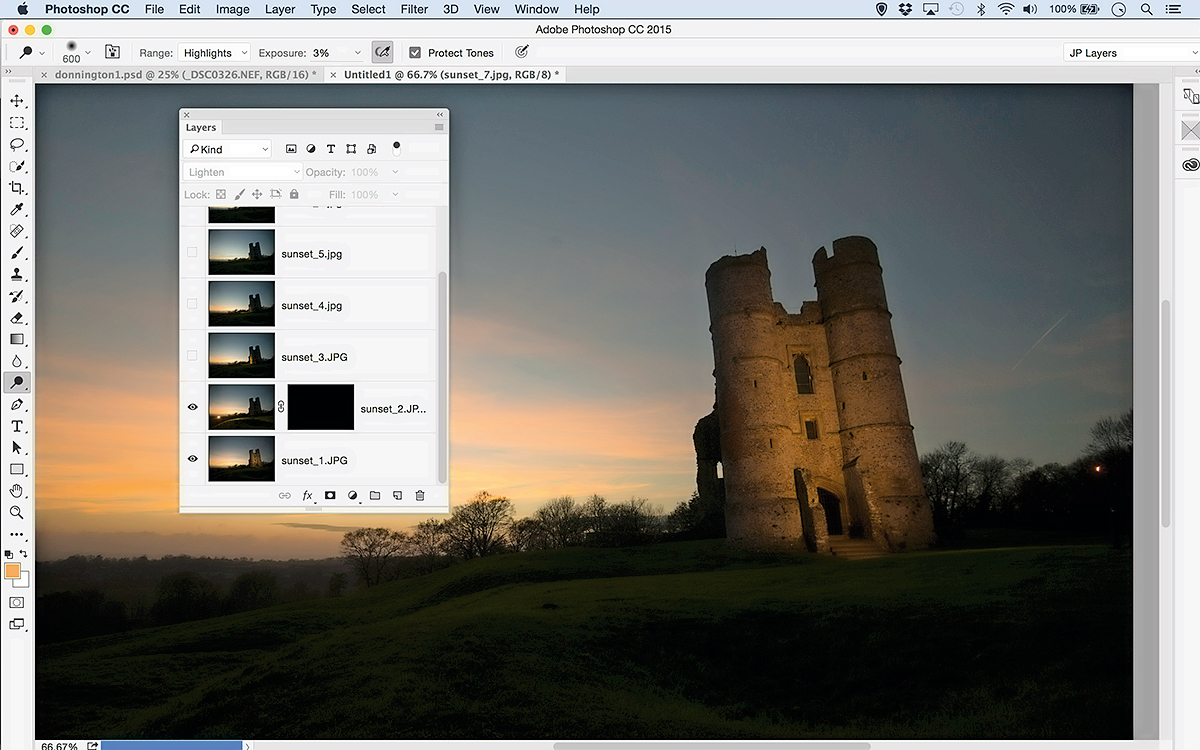
Next, reveal the flash-lit image above the bottom layer. Click the Blending Mode drop-down on the Layers panel and choose Lighten, then Alt-click the Add Layer Mask icon at the bottom of the Layers panel to hide the entire layer behind a black mask.
07. Paint to reveal
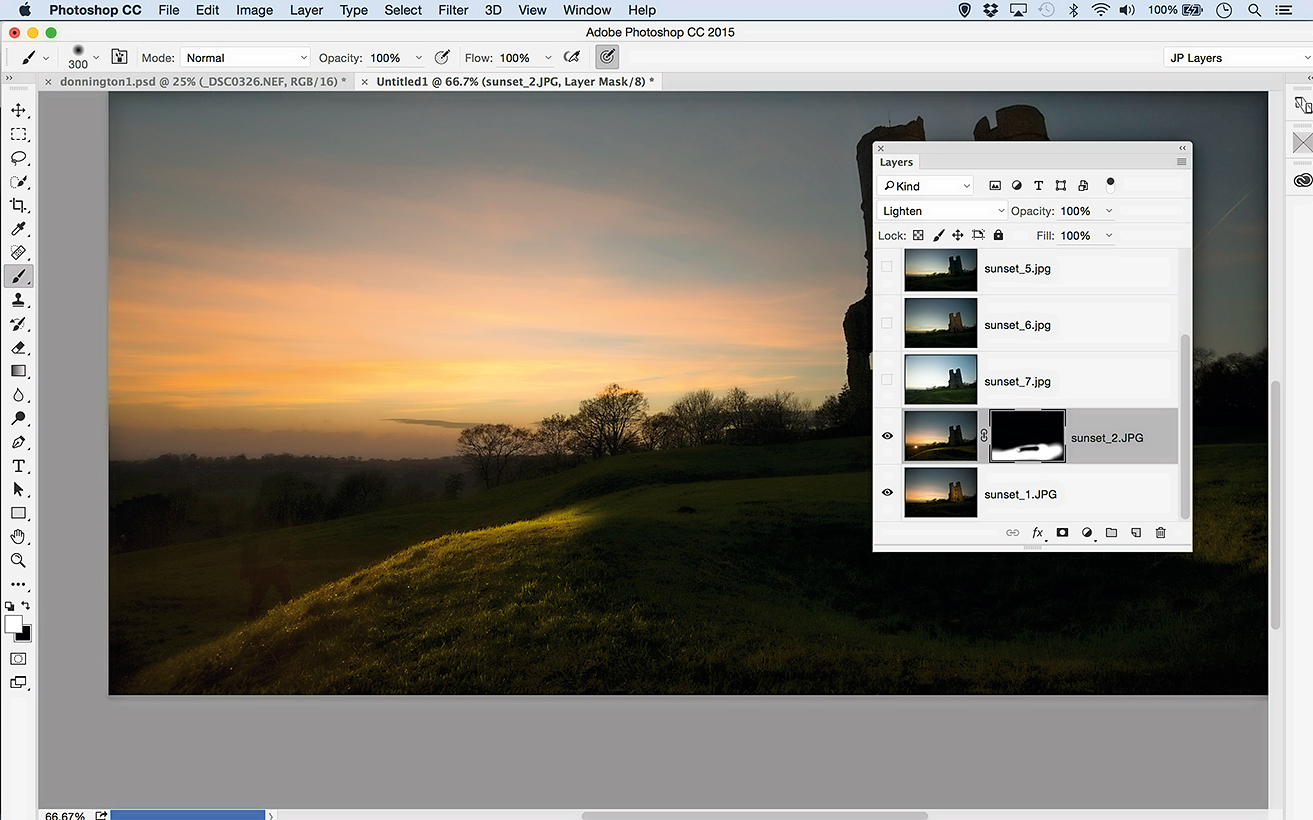
Grab the Brush Tool, set the foreground colour to white and pick a soft-edged brush. Making sure the layer mask thumbnail is highlighted, paint with white over the image to reveal only the parts of the layer that you’d lit up with the flash.
08. Piece it together
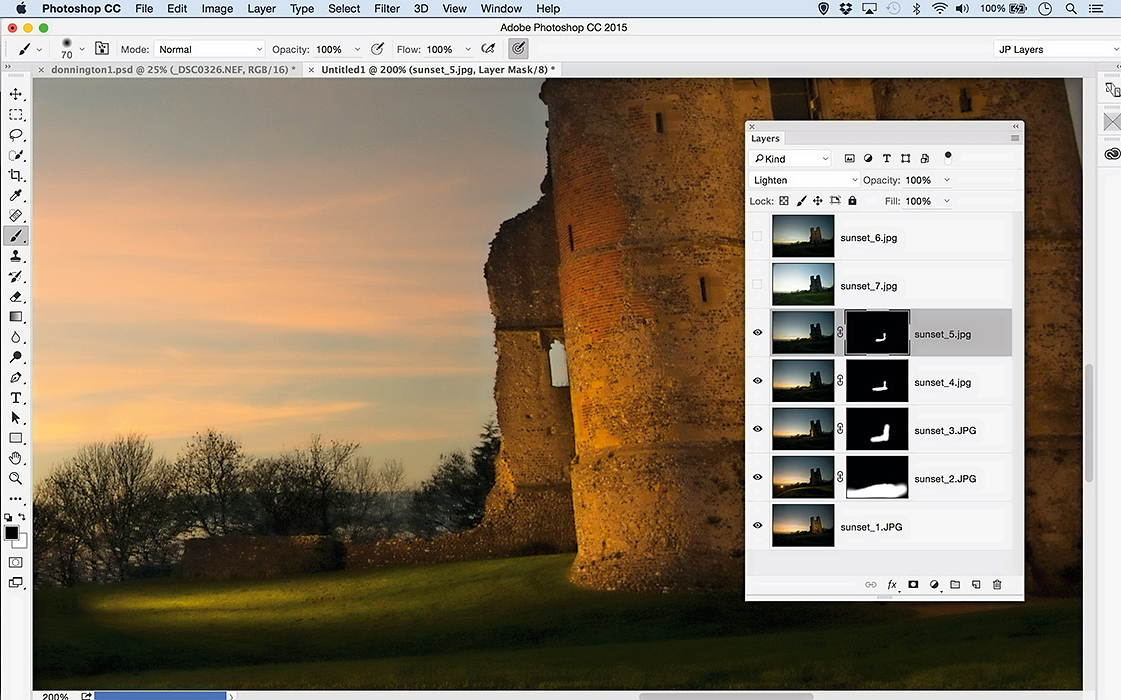
Continue through the layers to blend and reveal different areas of the flash-lit scene. Press X to switch between white, to reveal parts of the layer, and black, to hide parts. Reduce the layer opacity to tone layers down if necessary.
09. Add a fill-frame
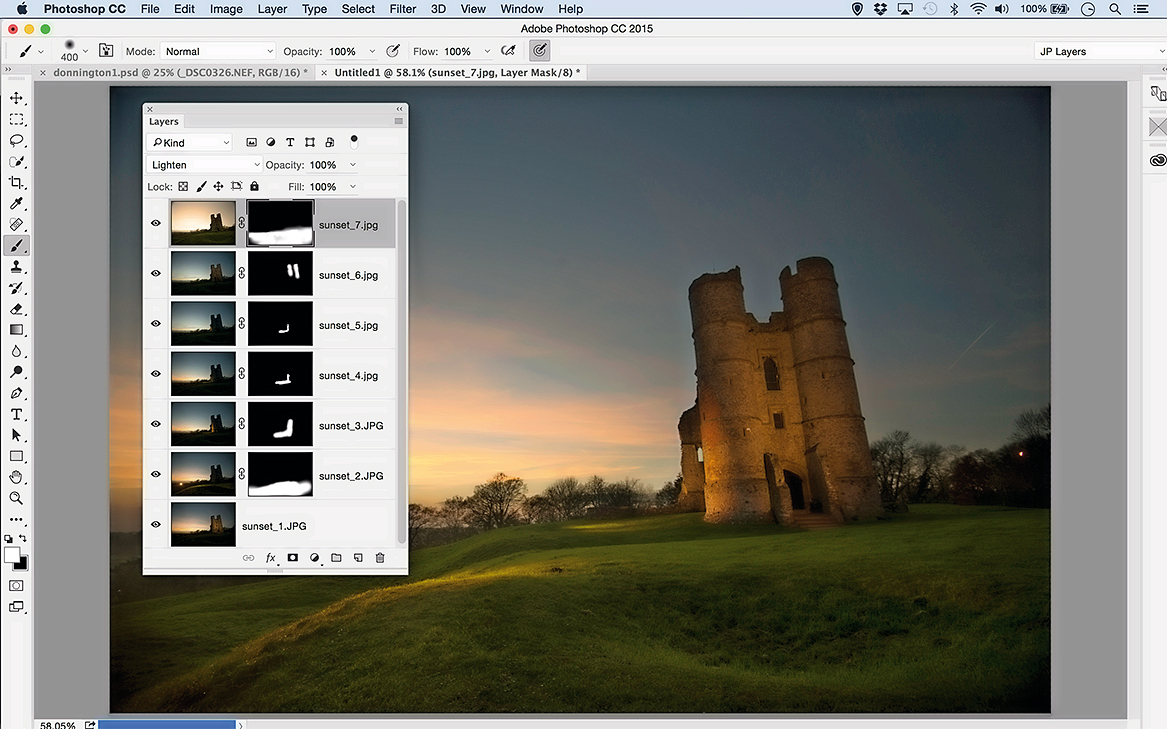
Use the original overexposed frame, taken without flash, as a fill light for the foreground. It needs warming, so go to Image > Adjustments > Photo Filter and use a warming filter to make it more yellow, then blend in the same way.
10. Finishing touches
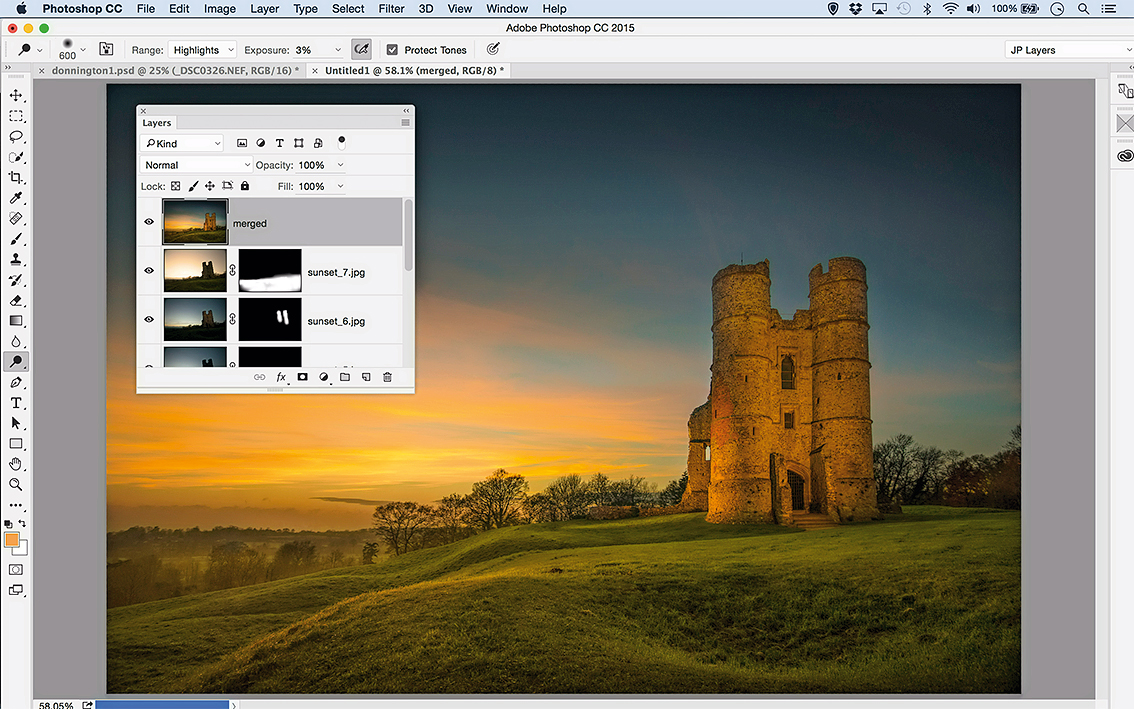
Press Cmd/Ctrl+Shift +Alt+E to create a merged copy, then refine the shot as you would any landscape. We’ve improved keystoning with the Adaptive Wide Angle Filter, and applied dodging and burning to enhance tones.
This article was originally published in Practical Photoshop magazine; subscribe here.
Related articles:

James Paterson is an expert in all aspects of the photographic process, from capture to post-processing. He has contributed to numerous photography publications, including Digital Camera, Amateur Photographer, PhotoPlus and NPhoto, and his work has also appeared in Computer Arts magazine as well as several books. He is the editor of Practical Photoshop magazine, and has a well-deserved reputation as an authority on all things Photoshop-related.

