How to edit photos with Luminar AI
Step-by-step tips for solving common issues and getting the most out of Luminar AI.
Luminar AI's templates provide a quick way to creatively grade your images to produce a range of attractive looks. However, by using a template, you do run the risk of making your shots look very similar to one another and somewhat 'standardised'. Your photos may also suffer from problems with under- or overexposure, colour casts and lens-induced distortion.
Luckily, there are steps you can take to solve these problems. In this guide, we run through top tips for editing your photos in Luminar AI, solving problems and avoiding pitfalls.
Luminar AI boasts a digital darkroom – the Edit module – that is packed full of tools that can overcome common picture problems. While the latest iPhones use Smart HDR to combine multiple exposures into a single well-exposed shot, if you shoot on DSLR cameras you may find it more challenging to capture detail in contrasting shadows and highlights.
Luminar can selectively adjust contrasting tones to reveal missing details. And of course, many of Luminar's Edit tools also boast an AI component to help you fix common problems with a few slider tweaks, which we will explain here. Not sure about Luminar AI? For other options, see our roundup of the best AI photo editing software and our pick of the best photo editing software.
How to restore shadow and highlight details
01. Enhance AI
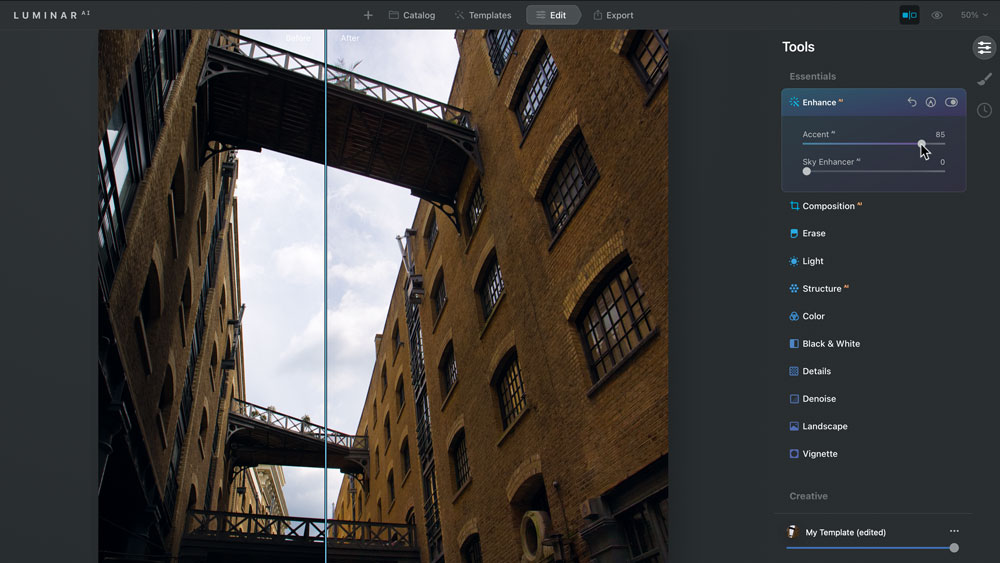
To fix a contrasting shot that lacks detail in both the shadows and the highlights, click on the Edit module. Toggle open Enhance AI. Drag the Accent slider right to simultaneously lighten shadows and darken highlights.
02. Make tonal tweeks
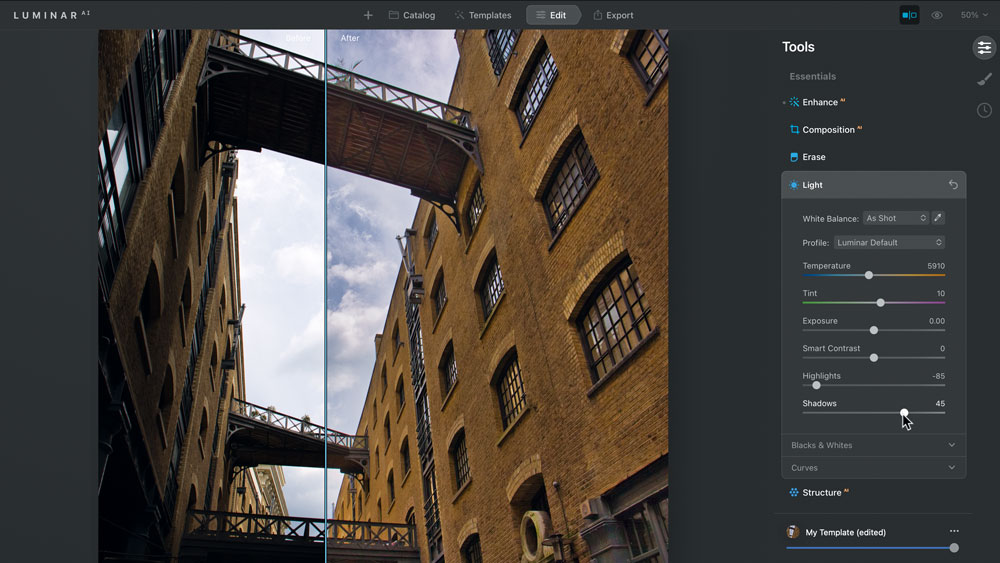
Drag the Enhance AI right to claw back more sky detail. Toggle open the Light panel. Manually reveal more colour and sky detail by dragging the Highlights slider left. Reveal more underexposed detail by dragging Shadows right.
03. Add delicate detail
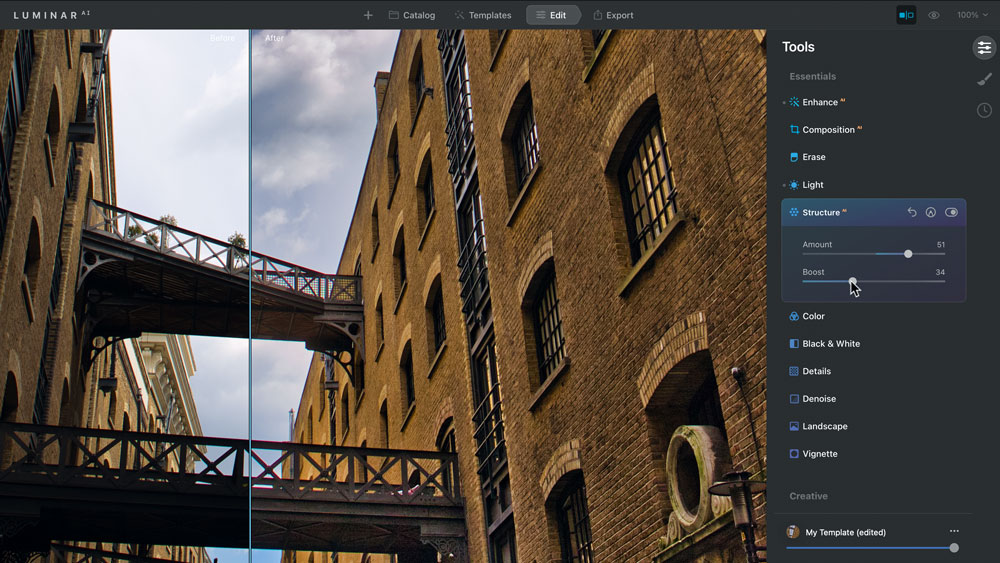
To create a print with more punch, open the Structure panel. Drag the Amount slider right. This increases midtone contrast and makes delicate details such as brickwork stand out more. Increase Boost to add extra impact.
How to reveal true colours
01. Add colour casts
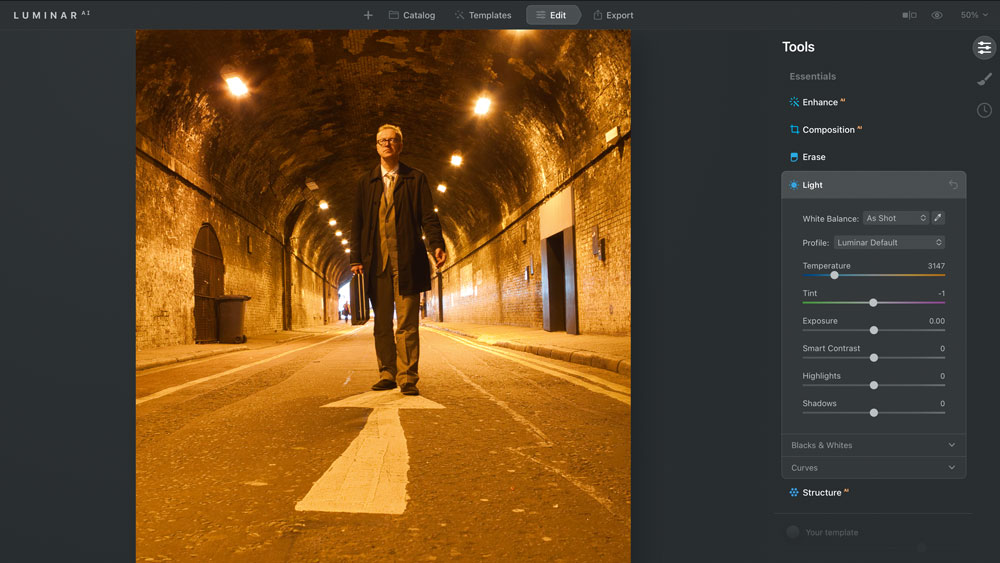
Different light sources can add warm (orange) or cold (blue) colour casts to a shot. Cameras attempt to perform an auto white balance (AWB) operation to remove casts and show true colours. This doesn't always succeed.
02. Correct manually
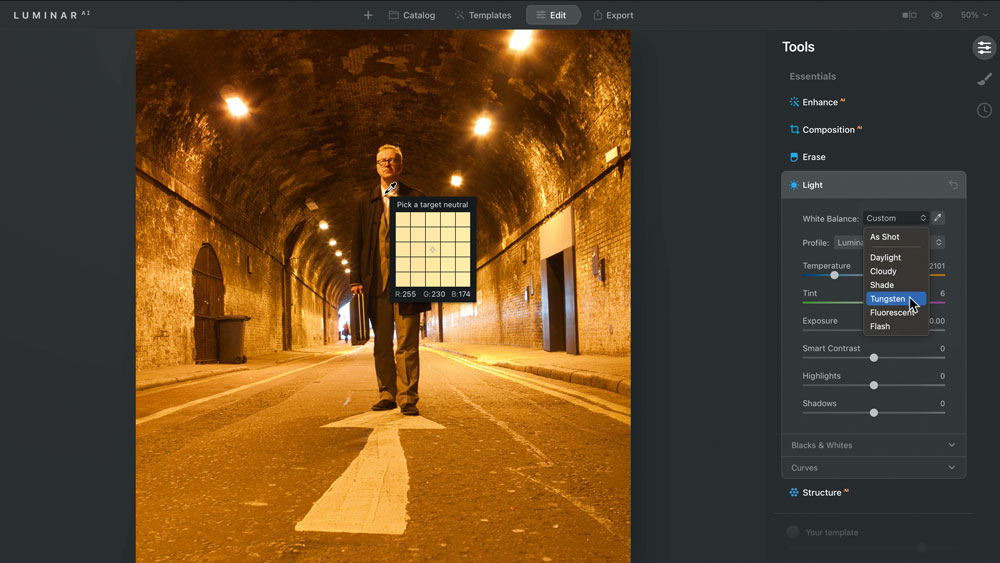
Toggle open the Light panel. You can try choosing WB presets from the menu, such as Tungsten. For more accurate results, click the eyedropper tool on an area that should be white. A warm image will cool down.
03. Fine-tune colour
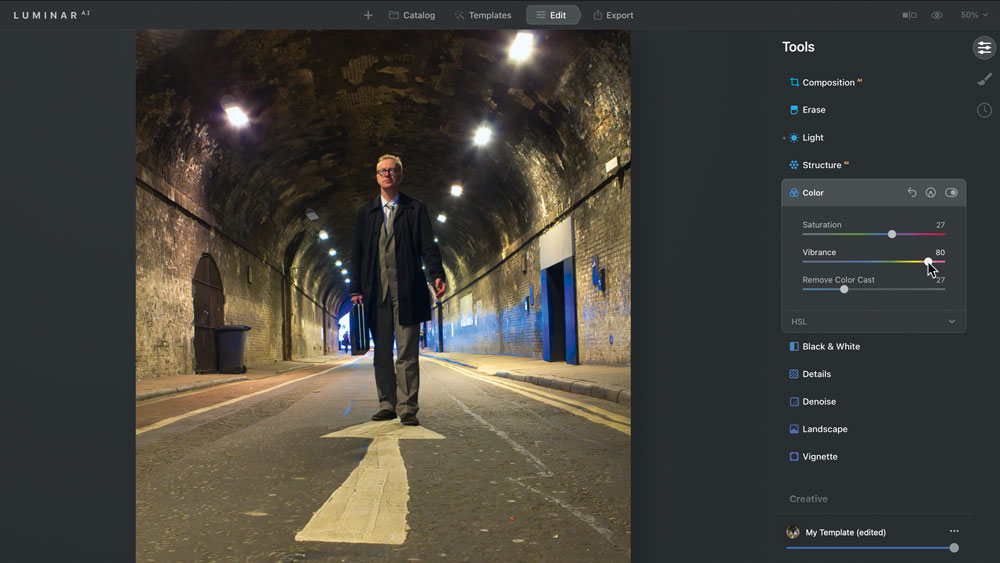
Toggle open the Color panel and drag Vibrance. This boosts weaker colours without over-saturating skin tones. There's also a Remove Color Cast slider, though this not as effective as performing a custom balance correction.
How to remove noise and distortion
01. View noise
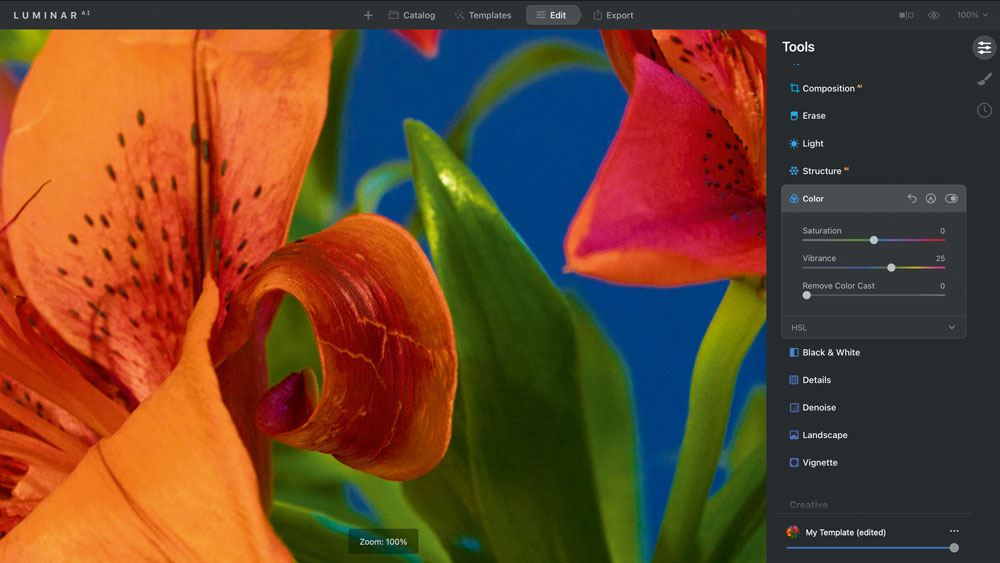
In low-light conditions, your camera may use a high (fast) ISO speed to capture more detail. However, this can lead to nasty specks of colour and luminance noise. Press ç+1 to zoom in by 100 per cent and check for noise.
02. Reduce noise
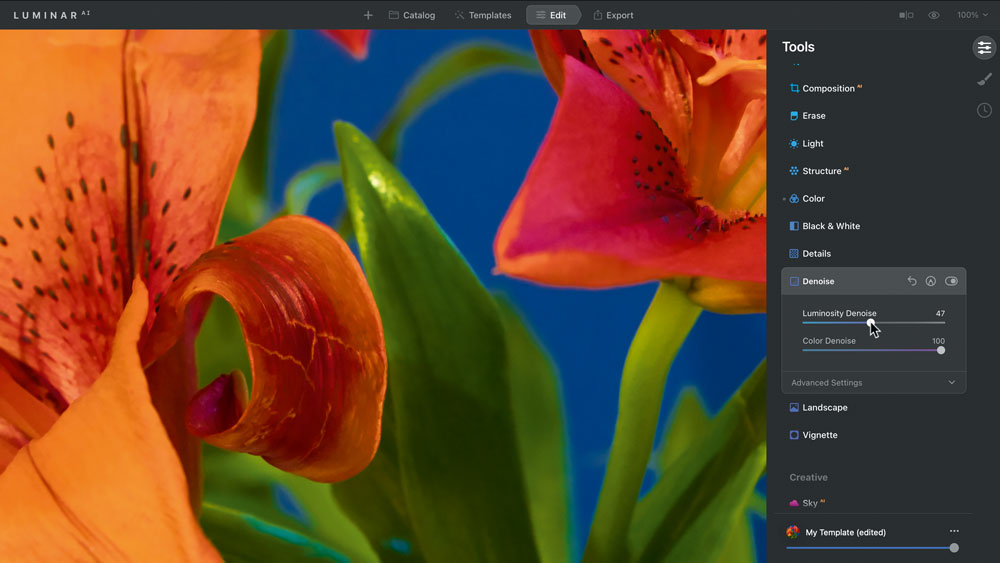
Toggle open the Denoise panel. Drag Colour Denoise to 100 per cent. This reduces rainbow specs of colour noise. Drag Luminosity Noise right to get a compromise between smoothing out noise while preserving key details.
03. Reduce distortion
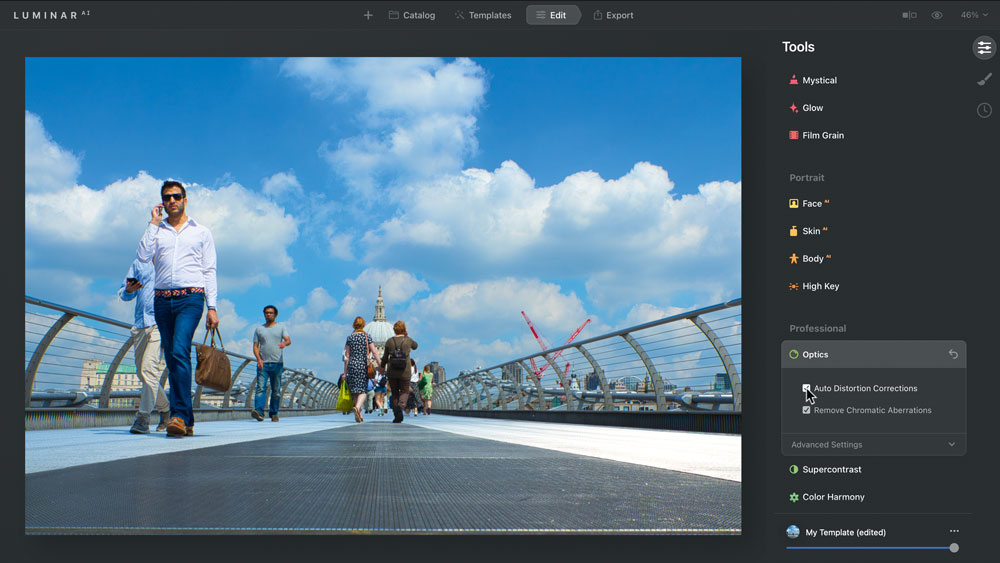
Every lens adds some distortion to a shot (causing straight lines to curve or barrel at the edges for example). Scroll down to the Professional section, toggle open Optics and tick the Auto Distortion Corrections box.
Read more:
- Best photo apps: Edit on the move
- Video editing software: Top tools for enhancing your footage
- Best laptops for photo editing: Get the power you need to edit seamlessly
Daily design news, reviews, how-tos and more, as picked by the editors.
