Essential JavaScript: the top five testing libraries
Jack Franklin explores five popular JavaScript testing libraries and provides examples of how to use them so you'll be able to choose the best one for the task in hand when your next JS project comes round
This is the second article in our Essential JavaScript series, following on from the last one on script loaders. Testing JavaScript has recently become more and more popular, and as such a number of libraries have sprung up to make your job easier.
Why bother testing?
At first when you get started with testing it doesn't seem like much benefit for a lot of extra coding. But as projects grow, having a bunch of code that can test your library is really useful. In particular I find there are three particular things it makes much easier:
- Planning out your API. Because you should write tests first, this means you have to write tests to use your library before you've written your library. Therefore, you get made to really plan out and think about how you want users to be able to use your library, which more often than not leads to much cleaner APIs.
- Refactoring. Once you have some code written, and tests that prove that code works, often you'll want to refactor. Refactoring can be done much more easily when you have tests to run to confirm if the code you're refactoring works. You can then refactor with confidence.
- Regression bugs. You'll have almost certainly been in a situation in which some code you wrote a while back has suddenly stopped working because of some new code you've written. But you've no idea how, or where this has happened. If you have tests, you can run tests as you write the new code and will be able to see if something has broken.
How test libraries work
Most test libraries have a similar structure – so before we look at the five I've picked out individually, lets take a more generic look at a testing library. Test libraries typically come with a range of assertions that check whether your code gives the right result. For example, most will have an equals assertion:
expect(5).toEqual(5)Here the assertion is that five equals five, which is of course true. Most libraries come with a huge array of assertions and most will also let you add your own too, which comes in really useful. We won't cover every assertion offered by every library in this article – that would take forever – but we will see examples of each of the five and discuss the advantages each has.
Most libraries also offer the ability to neatly divide your tests up into modules, or sections, usually by wrapping a function around them to keep them separate. This is a really useful thing to do and I encourage you to split your tests up, for two reasons:
- It keeps your code neater, which is never a bad thing.
- Some of the libraries we will look at only enable you to run a specific module of tests. If you've got a vast number of tests, and are only working on a little bit of functionality, it's going to be quicker to just run the code related to what you're working on. Of course when writing new functionality you should always run every test to make sure you've not got any regression bugs, but while developing only running a specific set of tasks is going to save you some time.
Some of the libraries, such as Jasmine, run their tests by having you visit a HTML page in the browser, whereas others enable you to run your tests through the command line – so that's another thing to keep in mind when choosing your library. Tests that run in a browser are always going to be more accessible, but I do find it quicker to run tests in terminal; this one is down to personal preference.
1. Jasmine
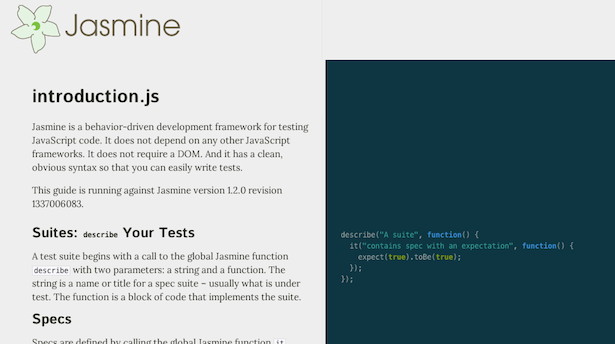
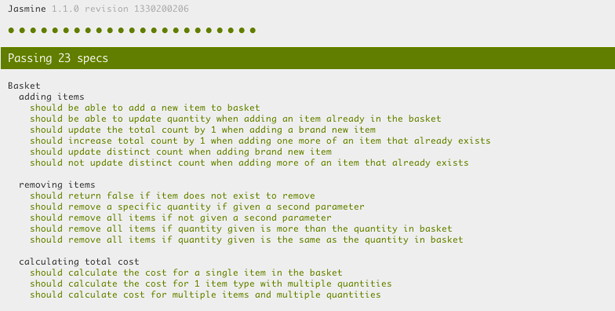
First up is Jasmine, which describes itself as "a behavior-driven development framework for testing JavaScript code". If you've ever done any Ruby testing and used the popular RSpec gem, Jasmine models itself on that, aiming to mimic the syntax and terminology as closely as possible. It even refers to its tests as "specs", so if you've used RSpec it's worth looking at Jasmine purely on the basis that you should be able to pick it up pretty quickly.
When you download Jasmine you'll get an example project and the HTML file that runs the tests, specRunner.html. The only bit of this you need to modify is the top:
<!-- include source files here... --> <script type="text/javascript" src="spec/SpecHelper.js"></script> <script type="text/javascript" src="spec/PlayerSpec.js"></script> <!-- include spec files here... --> <script type="text/javascript" src="src/Player.js"></script> <script type="text/javascript" src="src/Song.js"></script>The example project Jasmine comes with is a good way to get started. You can see you've got your tests within the spec folder and your source within the src folder. Typically you should have one file of tests for every JS file in your project – but that's not a hard and fast rule, it's just best to separate them out as much as you can.
Jasmine enables you to split your tests up using the describe function:
Daily design news, reviews, how-tos and more, as picked by the editors.
describe("testing basic maths", function() { it("should give 4 for 2+2", function() { expect(2+2).toBe(4) }); });Here we see our first assertion. The value we want to test is wrapped within the expect() function, and then we call an assertion on that (Jasmine refers to these as "matchers"). Here, toBe() compares the values using ===. Jasmine had a good set of matchers, and the ability to write your own.
2. QUnit
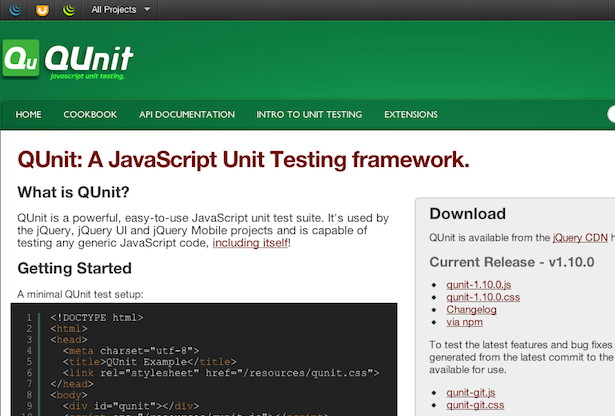
The next library to take a look at is QUnit. QUnit is the testing library of choice for the jQuery project, and is designed to enable easy testing of DOM manipulation, which makes it unique in this roundup. While other libraries, including Jasmine, can be extended with plug-ins to make DOM testing easier, QUnit comes with it built in – so if you want to test a lot of code that manipulates DOM elements, QUnit should be one of the main libraries you check out.
QUnit runs its tests in the browser but doesn't come with any HTML file; you've got to set that up yourself. It does provide the JavaScript and CSS files for you though. The HTML file you have to set up is pretty simple; here's a minimal example:
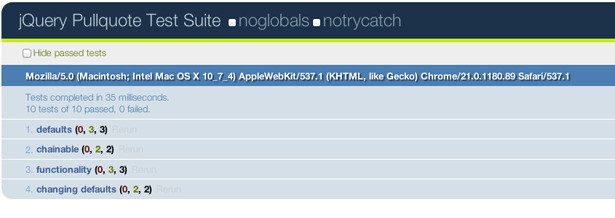
<!DOCTYPE html> <html> <head> <title>QUnit Tests</title> <link rel="stylesheet" href="qunitsrc/qunit.css" type="text/css" media="screen"> <script type="text/javascript" src="qunitsrc/qunit.js"></script> <script type="text/javascript" src="app/yourapp.js"></script> <script type="text/javascript" src="test/yourapp_tests"></script> </head> <body> <h1 id="qunit-header">QUnit Test Suite</h1> <h2 id="qunit-banner"></h2> <div id="qunit-testrunner-toolbar"></div> <h2 id="qunit-userAgent"></h2> <ol id="qunit-tests"></ol> <div id="qunit-fixture"></div> </body> </html>The key thing is to include the QUnit source, the CSS file and then your src and test files. QUnit does not depend on jQuery, but if you're testing something that uses jQuery then you'll have to include that too. Notice the last div, "qunit-fixture". This is where you put any DOM code you want to manipulate and then test against. QUnit will manage it for you automatically, including resetting it after every test so you can test it again in another one.
QUnit works similarly to Jasmine for declaring tests; each exists within a test() function:
test("some test", function() { //tests here });You can also split your tests up into modules, just by adding calls to the module() function between tests:
module("Module 1") test("some test", function() {}); module("Module 2") test("some test", function() {});QUnit has a much smaller range of assertions. The ones you will use most often will be ok(), which evaluates what you pass in to a Boolean and passes if it returns true, and equal(), which is passed in two values and compares them. When running tests which test the DOM, you just refer to the elements placed within the fixtures div. If your div contains:
<div id="qunit-fixture"> <h1>Hello</h1> </div>I could test the value of that by doing something like:
test("header says hello", function() { equal($("h1").text(), "hello"); });Even though the HTML is within the fixtures div, you can just refer to it without having to select that div for you. QUnit sorts all that out for you.
3. Mocha
Third is Mocha, a hugely powerful library. It has a massive range of features that I can't even begin to cover in this short section, so do go and give the documentation a thorough read if it sounds interesting; we'll only scrape the surface here. Mocha is not so 'beginner friendly' as the previous offerings in this article. It's built on top of Node.js and run through the command line, and it's installed through npm, Node's package manager with the line:
npm install -g mochaOnce you've got it installed, all you need to do to run it is place all your tests within a folder called "test". Then from the folder that contains that test folder, simply run:
mochaIt will detect your test files, and run them, giving you output in the terminal. What's brilliant about Mocha is that it doesn't tie you down to any assertion library. It's built to support many different ones, including Node's default assertion library, expect.js and Chai. In this article I'll stick to Node's assert library, but the others offer different features and syntax, so I'd encourage you to check them out.
Writing tests is pretty straightforward. First we load in the assertion library:
var assert = require("assert")And from there Mocha uses a syntax identical to Jasmine for describing and creating tests:
describe("My test", function() { it("should add 2 and 2", function() { assert.equal(2+2, 4); }); });Mocha is extremely powerful and, as I said, there's far too much to cover here. But if the above sounds interesting, do go and give the documentation a read to fully get to know the library.
One small feature I'll point out before moving on is the ability to have Mocha automatically run your tests:
mocha -wThe above tells mocha to run the tests, but the -w flag stands for 'watch'. Whenever Mocha detects a change to any JavaScript within the current directory, it will rerun your tests. Mocha can also run tests written in CoffeeScript without you having to compile it first, through this command:
mocha --compilers coffee:coffee-script 
4. Buster.JS
Our penultimate offering is Buster.JS, a testing library that's still in beta but is already pretty potent. Buster facilitates testing on both the browser and Node, which means it's worth taking a look at. As with Mocha, it's installed through npm; I wouldn't recommend this if you've no prior Node experience, because you might find it a bit confusing.
The docs recommend to install it globally, like so:
npm install -g busterHowever, if you're going to use it just for testing Node, and not the browser, I recommend installing it locally for every project you want to use it on. Make sure you're in that project's root directory and then run:
npm install busterWhat also makes Buster unique is that you have to give it a configuration file. As the documentation states, this has to be called buster.js, and can go in either test/, spec/ or in the root. It should contain something like:
var config = module.exports; config["tests"] = { rootPath: "../", //change this if you put your buster.js file in the root environment: "node", //or "browser" sources: [ "lib/mylib.js" //dont need to define sources if you're testing in Node ], tests: [ "test/*-test.js" ] }You only need to define the sources if you're doing browser testing, but I included it above to show you how.The reason why we don't need it for Node is because for Node tests, we directly load in the source in the test file. The above config also denotes that all test files will be within the test file, and called {something}-test.js. Lets write a simple test:
var buster = require("buster"); var myLibrary = require("../path/to/lib") buster.testCase("My Module", { "adds 2+2": function() { assert.equals(myLibrary.addTwoAndTwo(), 4); } });Notice how Buster adds its tests differently. It works by creating an object that contains tests for each module. Once you're set up, you can then run your tests in the command line with the command:
buster testWhile Buster is more complex and still in the early stages, it's also a very powerful testing framework, so I do recommend giving it a try. It's certainly aimed at those more familiar with Node and command line tools, so bear that in mind.

5. YUI Test
The last offering today is the YUI Test library. Although to use it you have to include the source for the entire YUI library, you don't have to be using YUI in your application to be able to test it with the YUI test library. Set up a blank index page:
<!DOCTYPE html> <html> <head> <script src="http://yui.yahooapis.com/3.6.0/build/yui/yui-min.js"></script> <script src="test.js"></script> </head> <body> </body> </html>Your test file is fairly straightforward:
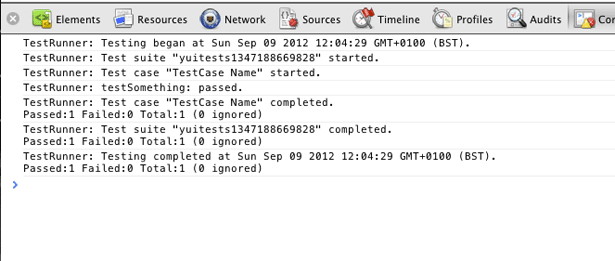
YUI({ useBrowserConsole: true }).use('test', function (Y) { var testCase = new Y.Test.Case({ name: "TestCase Name", //traditional test names testSomething : function () { Y.Assert.areEqual(2+2, 4, "2+2 is 4"); } }); Y.Test.Runner.add(testCase); Y.Test.Runner.run(); });YUI splits its tests up into test cases, although you can also use test suites to further organise. You then add these to its test runner object, and then run the tests. You can deal with the output in a number of ways, but by default the above will output into the browser's console. YUI lets you have the results in many formats, so if you do want to explore further, read the documentation linked to above.
Making your selection
We've finished our roundup of libraries, but which one do you use? As always, there's no one library that suits every situation. Personally, I think these libraries divide themselves up pretty well:
- Library with a lot of DOM manipulation: QUnit
- JavaScript library that's not built on Node: Jasmine
- Node module/application: Mocha or Buster
- App built on YUI: YUI Test
Although the YUI Test library can be used on its own, I find it's only worth using if you're invested in using YUI. Other than that, I would tend to use Jasmine for general app testing. QUnit shines as the best library for DOM manipulation thanks to its built in fixtures support, and that leaves Buster and Mocha to check out if you're writing Node modules or applications.

The Creative Bloq team is made up of a group of art and design enthusiasts, and has changed and evolved since Creative Bloq began back in 2012. The current website team consists of eight full-time members of staff: Editor Georgia Coggan, Deputy Editor Rosie Hilder, Ecommerce Editor Beren Neale, Senior News Editor Daniel Piper, Editor, Digital Art and 3D Ian Dean, Tech Reviews Editor Erlingur Einarsson, Ecommerce Writer Beth Nicholls and Staff Writer Natalie Fear, as well as a roster of freelancers from around the world. The ImagineFX magazine team also pitch in, ensuring that content from leading digital art publication ImagineFX is represented on Creative Bloq.
