It's day two of Vertex Week 2022, and we're looking at the future of digital art today with tutorials and talks on using scans, sculpting on iPad and how to create and sell an NFT.
We've had two tutorials from Ken Coleman today, first he used 3D scans to create an 80s inspired fantasy painting, and later he showed us how to make use of Adobe Cloud when creating art on the iPad in Procreate. Daniel Ibanez offered tips on getting more from ArtRage Vitae.
We ended the day with a detailed walkthrough of what are NFTs by Chris Petrocchi as he created and launched an NFT. He took us through an explanation of what are non-fungible tokens, and then minted an NFT on a marketplace. His video is below.
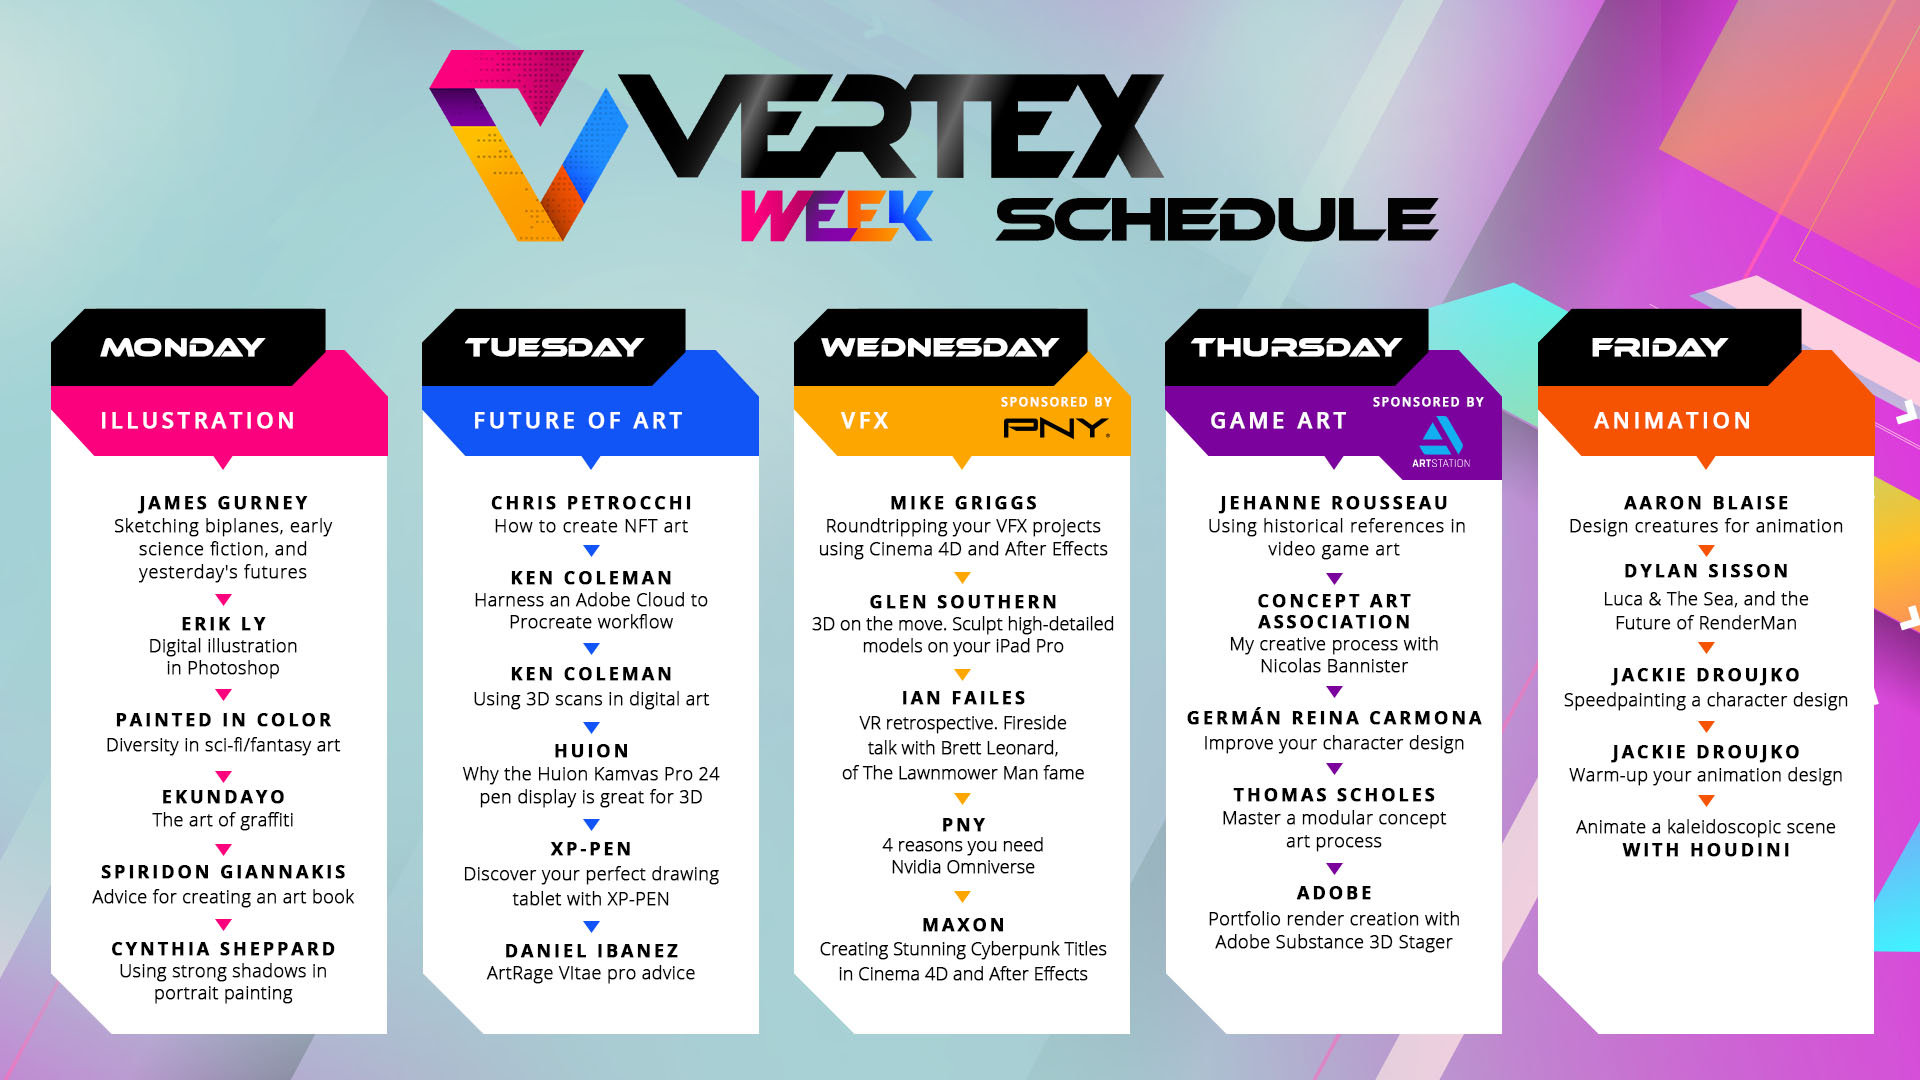
Vertex Week 2022 schedule
Use 3D scans in 2D retro art
ArtRage Vitae pro advice
Harness an Adobe Cloud to Procreate workflow
How to create an NFT
Here we are with Ken Coleman, who's going to scan in classic Masters of the Universe figures and then paint them into a retro piece of fantasy art. This should be fun!
If you're new to ZBrush, we have a collection of the best ZBrush tutorials to follow.
Ken's making this look easy. It's great when you see someone break down the barriers of 3D modelling to make it more approachable for everyone.
He's now imported, cut, scaled and attached a piece of scanned geometry into his Daz model. Easy.
Ken mentions ImagineFX , he's a regular writer for this magazine – the world's leading mag for fantasy and sci-fi artists.
Read more on ImagineFX and discover its great tutorials and interviews.
Lighting is crucial. Technically Ken is explaining how to set up lighting spheres in KeyShot, but he's also passing on some knowledge of what the colours represent and how tone and colour can affect the meaning and impact of light in a scene.
Great advice here, drag materials over and around your screen render to avoid it glitching and needing a reset.
Another tip here, place your render on a grey background to check for errors and random shadows.
Soft light is Ken's "go to" lighting source, it works great on bringing out Skeletor's bone texture here.
Advice here on how to get a vivid Eighties feel to this image.
Ken's adding some great home-made textures now, including one created from an rusted old iron gate.
He's aiming for a "painted palette knife feel".
Cheeky here from Ken. But placing your art on a magazine cover is a great way to test your composition if you want to create art for a purpose.
Understanding how other people may want to use your art can give it an extra dimension and even a new revenue.
Consider creating art that could have a use beyond looking great, and you may capture an art director's eye as they search for new people to work with.
An easy trick shown here by Ken for setting up light sources in Photoshop that match the model, so you can tie the model into the scene.
Ken name drops Bob Ross there. Nice.
Love how Ken makes all his own textures and materials – baby powder on black paper becomes bespoke moon dust and a particle glow.
Even Frank Frazetta hated painting feet. Ken's easy fix is to hide them behind foreground so you don't need to merge the feet and shadows into the scenery.
We're heading from Photoshop and into Corel Painter now.
Saving to Cloud docs so he can export to the iPad, see more on how Ken uses Adobe Cloud and paints on the iPad later today.
We're going to leave Ken here and watch him finish the painting process in Corel Painter.
You can watch Ken's tutorial at any time and find him inside the pages of ImagineFX.
Ken Coleman will be back with us later today as we live blog his tutorial to using Adobe Cloud with iPad to speed up your workflow.
We're here with Daniel Ibanez to go through some core advice for getting more ArtRage Vitae, if you want more info on how to get started with ArtRage Vitae take a look at our guide.
Let's learn some painting techniques…
Love watching Daniel create his art from simple geometric shapes, it reminds us of yesterday’s James Gurney for painting a plein air biplane tutorial.
The same strong graphic look is here, and Daniel gradually etches at it to define his shapes.
“You can really make the paint do anything you want,” says Ibanez.
By adjusting the stiffness of the bristles, the loading of the paint, and the thinness of the paint. This could be new to digital artists but traditional artists will feel at home.
“There’s really nothing else for oil painting,” says Ibanez.
Ibanez says he likes to work with big brushes and get as much paint down as possible and then go in and begin refining by adjusting the brushes and thinness of paint.
One more quick tip: using stiff brushes to mimic the dry brush technique of painting, merging paint in a bristly and rough way - it scrapes paint together. He uses a different layer to try out a technique.
ArtRage uses wet-on-wet mixing for its paint, so anything on one layer will merge and get messy – a new layer is good to try new ideas and dry brushing.
We're moving on now to look at how to give an existing painting a makeover, as Ibanez reveals how to use ArtRage's real painting tools to work up a Photoshop image.
He's painting over his whole painting on a new layer. Pay attention to the virtual lighting settings, vertical and horizontal strokes have a different 'chunky' feel.
The results are fantastic. There's a real sense of being able to push the oil paints around the image.
It's one of Ibanez's "secret sauce" techniques.
You can even import a Photoshop file directly into ArtRage from Photoshop, and retain all the layers and features of Photoshop.
"It seems so simple but has so much depth," says Ibanez.
Part 3… Now Ibanez is showing us how to use the palette knife in ArtRage Vitae.
He mentions he's using ArtRage on a PC, but it works perfectly well on iPad, tablet, and Mac.
Ibanez is once again using big shapes and brush strokes to get an idea of how the painting will take shape. He's not sketching or using line work.
The palette knife is a choppy but powerful way to work. "Three looks, two things, one stroke," says Ibanez.
The palette knife is his "sidekick to my oils".
Ibanez is making this look so simple. He paints a reflection in the water and just goes in and smudges and pushes the paint using the palette knife to create an effective look.
Thinners are turned up and paint loading down, which gives a "scratchy" dry brush technique.
The palette knife can be used to add chaos. Colour mixing can be automatic and haphazard just like painting in real life.
And… we're back, with blending.
ArtRage Vitae can mimic real life colour blending, which is fantastic.
"When you have brushstrokes colliding into one each other the paints gonna mix in a real way," says Ibanez.
You can control this with the amount of paint you're loading an the stiffness of the bristles.
The oil brush is used for hard edges and the palette knife for soft edges, sounds simple.
And we're done. We think you'll agree ArtRage Vitae looks great fun.
This is the end of Daniel Ibanez's tutorial live blog, but don't forget you can rewatch any time on the site with his ArtRage Vitae Pro Advice videos.
We're back with Ken Coleman for our third live blog today. He'll be showing how you can make use of Adobe Cloud with Procreate on the iPad to speed up your workflow.
Look for a future issue if ImagineFX, the leading magazine for digital artists, to read more about this process and download the assets Ken is using here.
Ken's out and about taking photos for textures there. We saw earlier in his tutorial for using 3D scans how he likes to photograph objects from around Ireland to create textures from.
Advice here on how to set up and organise your library of images to create textures and more images from.
Ken's good advice here is to think about how your art can be used. If an art director is looking for a cover artist for a book or album project, if your art looks like it will work they will be more inclined to commission you. Make the art director's decision easier.
Finding happy accidents! Remember to never assume you know where your art will go or how it will evolve as you work. Ken is demonstrating here how you need to remain flexible, see how things fit, and experiment as you go.
"We're making this look more like a painted piece," says Ken as he's playing with his image.
Ken is looking for a "slightly digital and organic" break in the headline. He's using custom brushes made in ZBrush and Corel Painter to dapple the head and create interesting shapes and cuts.
Everything Ken is doing is going into his libraries.
He's leaving his mistakes in from all the composite layers and models being combined. Ken will merge these properly in Procreate later.
This painting is looking wild. To think this began as a simple face render and a photo. It's now a weird organic alien face.
We're in Procreate on the iPad now. The fun starts.
All that work done earlier on the desktop is ready to go on iPad because Ken made sure to do everything through libraries. Doesn't it just seem so much more fun to make art on an iPad with an Apple Pencil 2?
Really interesting to see the brushes Ken likes to use to pull textures through and merge some areas of the photo-bashing.
He's bringing in some tips from life drawing here, including tiny white rim lights to bring out the details in the eyes and eyelashes.
The painting is almost finished, but now Ken is moving back from iPad and the desktop to add more textures.
One of the reasons to come back to the desktop is because Ken says he can mask off sections of his textures quicker using a Wacom tablet as opposed to the iPad.
"Rinse, wash and repeat," is Ken's mantra to this style of art. Keep adding textures on layers, experimenting with layer effects and get a sense of what works.
"One thing I've started to do is leave my mistakes in," says Ken who says he wants people to know this is digital art.
We're going back to the iPad for the finish. Again, look for an issue of ImagineFX where you can read more about Ken's process and grab these assets for yourselves.
We're finishing here with Ken, and remember to try this yourself. Working between your desktop and an iPad with the Cloud library is a great way to keep experimenting.
Come back soon when we live blog with Chris Petrocchi and his guide to creating an NFT.
We're here with Chris Petrocchi as he explains more about NFTs and takes us through the process of making one.
Chris has gone straight for the Matrix. Taking a look back at how NFTs have caught the eye of so many people is an interesting trip back in time.
A nice and easy to understand explanation of the blockchain here from Chris.
His description of what are NFTs is good too.
You can find more info on NFTs and blockchains as we explain NFT crypto, NFT marketplaces, NFT drops, and what are NFTs elsewhere on the site.
There are more Crypto wallets to use, Coinbase, etc but MetaMask is one of the most widely used and it's easy to understand.
Chris is using Ethereum here but you can use other cryptocurrencies.
OpenSea is one of the largest NFT marketplaces, but it's also a bit of a jumble sale / garage sale. There's everything and anything on OpenSea.
Chris' art is amazing. He teaches at the Walt Disney Family Museum, Academy of Art University, San Jose State University and the Bay Area Classical Artist Attelier.
He mentions fees – some marketplaces are now offering 'lazy minting' which is free to mint but places the cost onto buyers.
Polygon is interesting as it's one of the newer low-energy blockchains. The available stats suggest it costs the same as sending around three emails as it does to mint on Polygon. Other low-energy tokens to look for include Wax, Palm and Flow.
A lovely sketch from Chris there, it makes a nice NFT.
Over to Rarible now. A little more art focused than OpenSea, Rarible is a nice marketplace.
What's the price? This is every artist's biggest dilemma. How do you set the fee for your art?
We're told it can be cheaper to mint in the evening when fewer people are creating NFTs.
Boom… Chris' NFT is minted and listed on Rarible. Any buyers?
Promoting an NFT is a whole different tutorial, but a simple Twitter and Facebook blast is easy.
That's all from Chris and all from us for today. Tomorrow Vertex Week will be covering VFX and CG, with tutorials on Cinema 4D, After Effects, and more.
As ever, all our tutorials and talks are free to view on site.


