Model a stormtrooper in Maya and ZBrush
Learn to create a 3D model of the iconic Star Wars character.
Sign up to Creative Bloq's daily newsletter, which brings you the latest news and inspiration from the worlds of art, design and technology.
You are now subscribed
Your newsletter sign-up was successful
Want to add more newsletters?
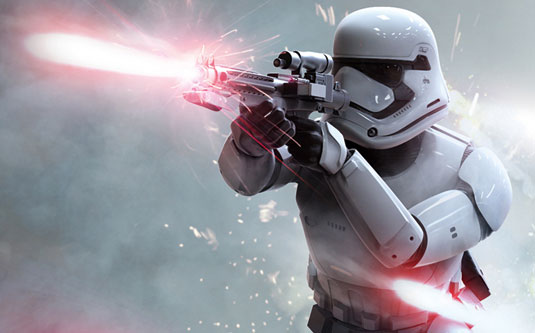
With all the characters to choose from in the Star Wars saga, selecting the aim-challenged stormtroopers to render as a piece of 3D art is a left-field choice, but artist Juan Martin Garcia Forn has his reasons.
"Stormtroopers are formidably introduced in A New Hope, but progressively start losing credibility as they're blasted by our heroes, and stoned by a pack of Ewoks in the last film. People nowadays make jokes about their aiming skills, so it came to mind that The Force Awakens will remind the world how fearless and precise these troopers are intended to be," Garcia Forn explains.
"I tried to merge my favourite films with a sport I love: paintball – hence the action pose, running through blasters, and shooting from the sights. But really the main reason is that my lovely girlfriend gifted me an awesome thermo flask of the First Order's stormtrooper."
Article continues belowStar Wars remains an inspiration for the flask-loving artist. Garcia Forn says the film franchise is still such a big influence on art because of the people involved in making the series what it is. "People like Ralph McQuarrie, George Lucas, Irvin Kershner, and everyone else involved in the making of Star Wars have brought us a new form of culture, that will never be forgotten. I think that from design to storytelling, Star Wars is there to tell us artists that our dreams can come true, with a little imagination and a lot of hard work – to not be afraid of our ideas because our art can influence history itself."
For this project, Garcia Forn reveals planning the composition ahead of beginning the modelling, and rendering proved the most challenging aspect, partly because the paintball-influenced pose restricted how he needed to work. "Since I had a very clear idea of how the final image should look, the lighting and camera angles had to be planned before the execution. Everything was then pretty easy thanks to KeyShot's very friendly interface."
For once, the Empire/The First Order's biggest joke appears as the heroic fighting force that once blitzed the galaxy far, far away. Now, keep reading to gain some insights into Garcia Forn's creative process…
01. Model from reference
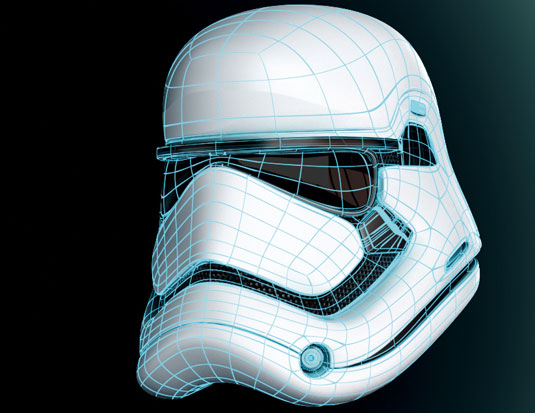
Finding references at the time of modelling was difficult. I had to mostly rely on photos from toys, and armour from conventions. The first part I modelled was the helmet. It was the trickiest because I wanted it to have as clean a topology as possible, hence why I used Maya. I started with the nose part as it gave me a nice spatial guide for the rest of the helmet. Inner extrusions were especially helpful to maintain proper edge flow.
Sign up to Creative Bloq's daily newsletter, which brings you the latest news and inspiration from the worlds of art, design and technology.
02. Draw topology in ZBrush
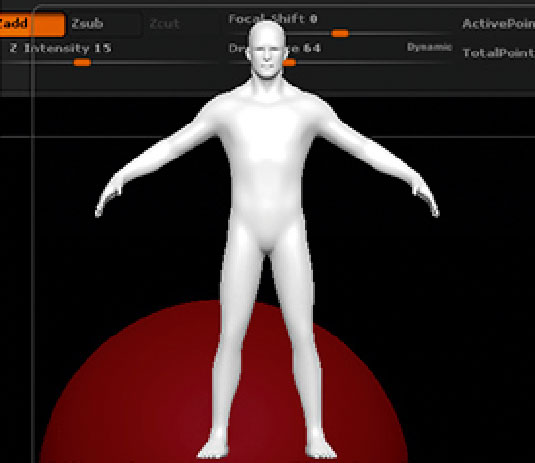
For bigger armour parts, such as the chest area, I used the topology tools within ZBrush. I picked a base mesh for guidance: Nick Zuccarello's human male from ZBrush tools. I created a ZSphere and bound the mesh to the ZSphere for rigging. The Edit Topology function was used to draw the topology over the base mesh, and once I was happy I created an adaptive skin.
03. Work on edge flow
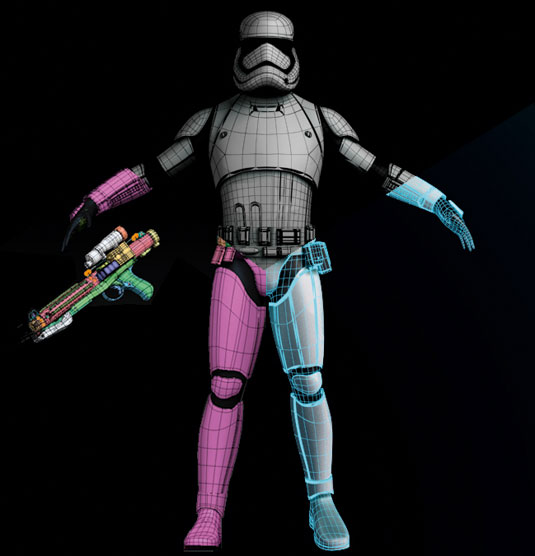
I took a lot of care on the edge flow as it was key for keeping the armour smooth and even. Also, if needed, it makes it useful for rigging and different types of animation. Only one side of the armour from the limbs was modelled; it was then mirrored to quickly get the other side, since it's symmetrical.
04. Model the gun
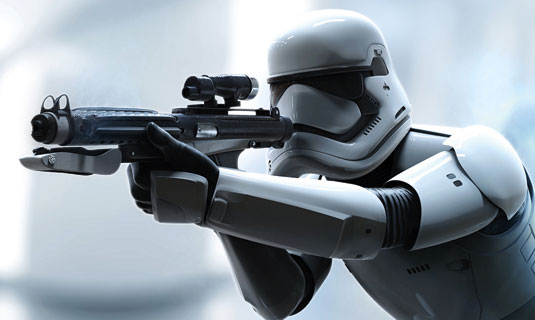
I chose Maya to model the rifle because it has a very specific design, and the program's orthographic views and easy polygon modelling system gave me a very satisfactory result. The final model was then imported to ZBrush so that I could add small details, such as screws with an IMM brush. It has 42 separate pieces in total.
05. Use ZBrush for detail
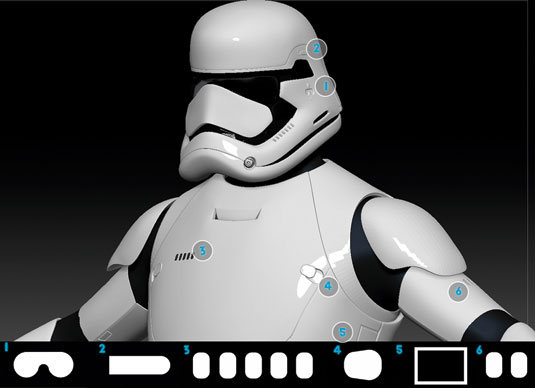
Alpha images were created in Photoshop to make it easier to import into ZBrush, where I could begin adding extra detail to the armour. I used the Standard brush set on negative, with DragRect stroke for more precision.
06. Pose your character
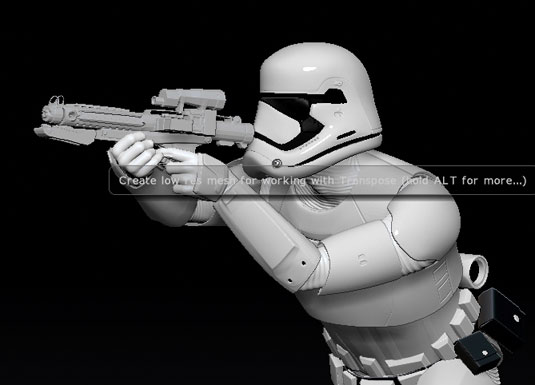
The character was posed in ZBrush without the need for a rig, simply by using the Transpose Master plug-in. Using this plugin enabled me to pose all the subdivided tools in their lowest division, without losing any details in the final pose.
07. Use KeyShot for rendering
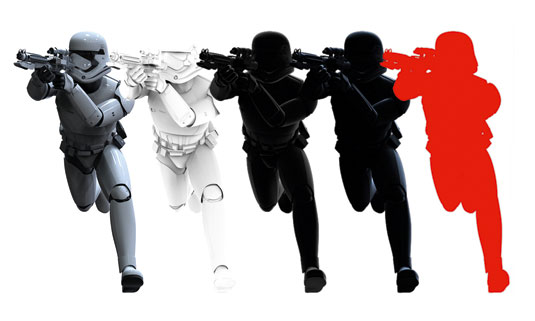
Rendering in KeyShot is very easy and intuitive, I just had to choose the materials from the library and do a few tweaks. Render passes helped me build a stronger, more custom image. I did a raw render, an ambient occlusion pass, a rim light pass, a second rim light pass to be used as the light emitted by the blasters, and a clown pass to generate a mask in Photoshop.
08. Composite the final image
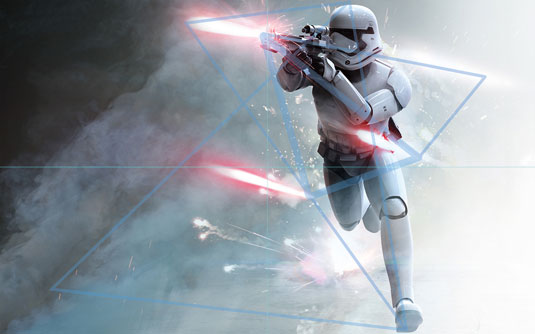
Compositing and final effects were done in Photoshop with matte painting and hand-painted details. The most important thing was composition; for the image to have a lot of action, I based composition upon triangles and colour gradients.
This article originally appeared in 3D World, the world's leading magazine for CG artists. Subscribe here.
Read more:
