How to get started in Houdini
John Moncrief explains how to overcome the pitfalls of starting out in a new 3D software package.
Sign up to Creative Bloq's daily newsletter, which brings you the latest news and inspiration from the worlds of art, design and technology.
You are now subscribed
Your newsletter sign-up was successful
Want to add more newsletters?

Learning a new 3D package can be a daunting task. There always seems to be a never-ending black hole of sliders, checkboxes, and rollouts.
Plus, each company wants you to call their geometry something different (is it cube or box, sphere or ball, grid or plane?)… But try to remember the goal is the same; to design a visually interesting image or develop a tool that helps another artist to do so.
The best way to learn Houdini is to tinker about with it. Remember you can save your work at any time and delete the file later if you want to, so get exploring and break things. When they break try and figure out what has happened.
Almost every node, pane, and parameter in Houdini has an accessible help file. Look for the '?' icon in the top right corner of panes, and while hovering over the name of a parameter press F1 to get specific help relating to that parameter.
When you're tinkering, adjust values aggressively. Set the parameter's values high and low to see what it’s capable of doing, what it controls, and what it can be used for artistically.
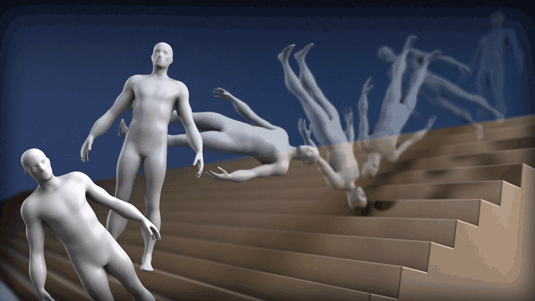
However, it's important when exploring like this to always bring a parameter's value back to something reasonable before moving on to see what the next parameter does.
That way you are isolating the results of your changes to just the parameter you're currently adjusting. Once you get a good grip on what each parameter does, then you can start blending them together to get really creative.
Sign up to Creative Bloq's daily newsletter, which brings you the latest news and inspiration from the worlds of art, design and technology.
You'll find a folder containing .hip files to be opened in Houdini in the downloadable assets – use these to follow along in the interface of Houdini. These files contain several more tips and tricks that are clearly noted within the interface of Houdini using the built-in Sticky Notes tool. There are several folders which are empty, but are required for Houdini to work properly.
01. Set up your project
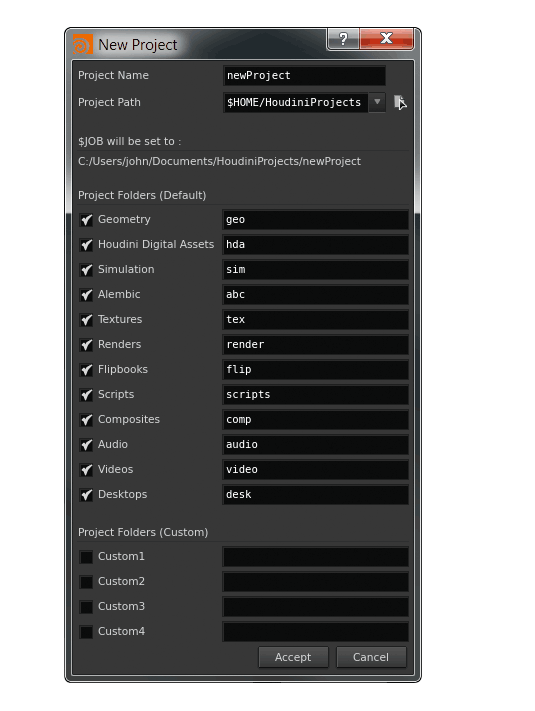
Houdini 14 now uses a project-based system that automatically constructs a set of folders for every project you work on. To
set up a new project, go to File>New Project, choose a directory to house your project folders and click Accept.
If you're working on multiple projects, go to File>Set Project to pick an existing project folder. It's a good idea to have a default project
you can use just for tinkering, then use a separate project for actual production work.
Let's break something!
- Set up geometry
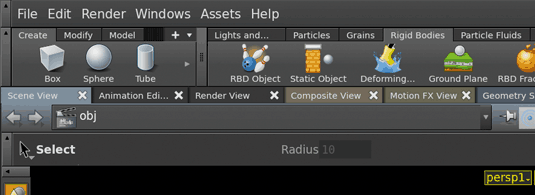
Create a sphere by holding [Ctrl] and clicking the sphere icon on the left shelf. In the Parameters pane set the Y translation of the sphere to 5. Next, click the Rigid Bodies tab on the right shelf and click on RBD Object. Select the sphere in the viewport and press Enter.
- Make Breakable
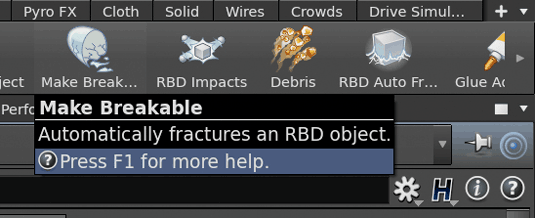
Still in the Rigid Bodies tab, click Make Breakable. Select the sphere from the viewport and press Enter. Click on the Ground Plane icon, which will give the sphere something to collide with. Hold down the spacebar and press [A] to frame all the objects in the viewport.
- Simulate
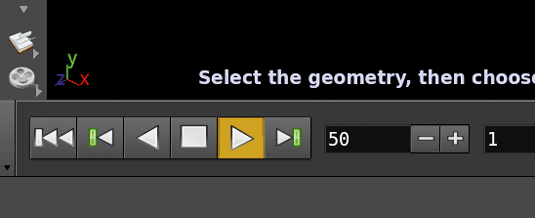
Set the timeline to playback in real time by clicking the second button from the end of the timeline called Real Time Toggle. Click Play on the timeline and watch your first Houdini simulation! Remember to dig around inside the nodes that were created by the shelf tools to learn more.
02. Using shelf tools
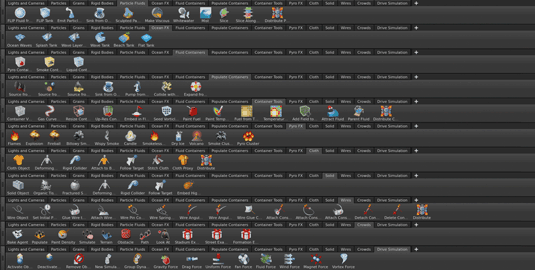
Houdini's shelf tools are very robust. With a few clicks you can have a strong base for most types of simulations.
You might feel like everything you do needs to be built from scratch, and while there's probably not too many final shots created with the click of one shelf button, it's worth noting that even in large studios many scene setups begin with the shelf tools.
03. Use the right desktop
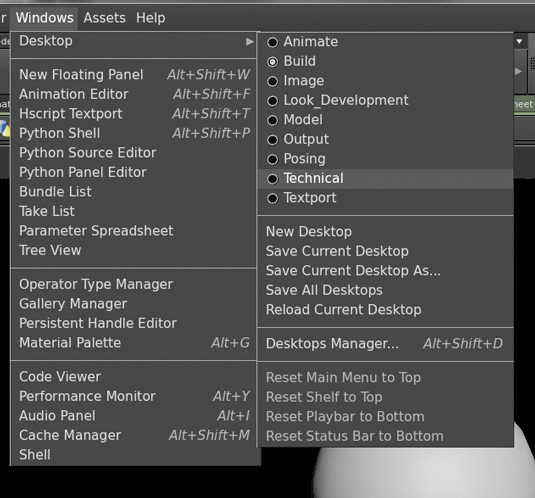
Spheres, fluids, dynamics and particles are data. Each area of the interface (pane) visualises or manipulates this data. One pane might be the network view, one the Material Palette.
The pane arrangement is a Houdini Desktop. If working in dynamics use Technical desktop; for general tasks Build desktop. Customise the Houdini UI and save as desktops.
04. Understanding Contexts
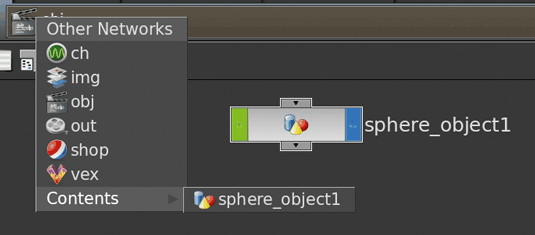
Houdini has different 'contexts' that handle different operations and each one has custom tools. The SHOP context for example handles Shading Operations; the DOP context handles Dynamic Operations.
The tools within these contexts are called nodes. Houdini is very context sensitive, which means that you only get access to the nodes you can use in that context. This is great because it prevents you from creating a node in the wrong context.
05. The TAB key is your friend
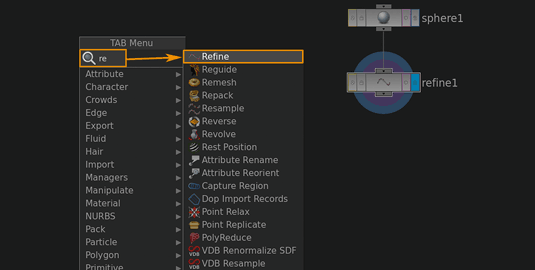
When searching for tools in Houdini you only need a part of the tool's name. Instead of having to go to Tool Menu>Nurbs>Refine, all you have to do is hit Tab then press [R] and you'll see all the nodes starting with R that are relevant to the context you are currently in.
So no matter where the tool is located in any menu, you can easily find it with just a couple of quick keystrokes.
06. Learn From Orbolt

Example files are a great way to learn. Use the Asset Browser pane to find a link to the Orbolt online resource. Assets are available including character rigs, dynamic effects, shaders, and models. Once you choose an asset it's automatically added to the Asset Browser in Houdini's interface.
Find training and help online
- Start here…
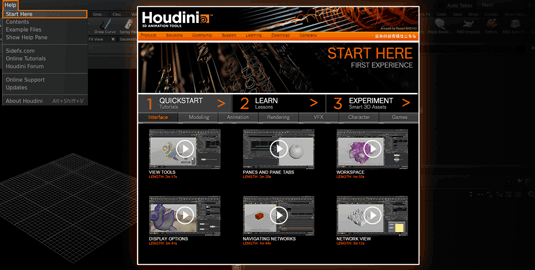
Go to the Start Here link in the Help menu. The videos bring you up to speed on everything from viewport basics to building a digital asset.
- Training

Visit Digital-Tutors to watch a variety of video-based training for all levels of Houdini software users.
- od[force]
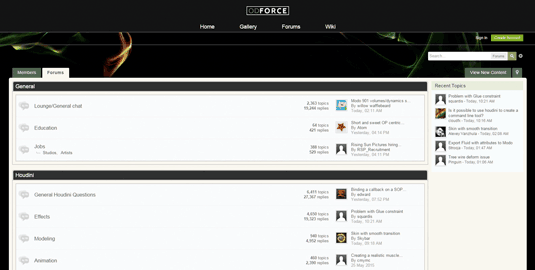
od[force] built a family of artists and technicians. Users share insights and tips with newbies and veterans. There are also example files available.
07. Explore the Preferences
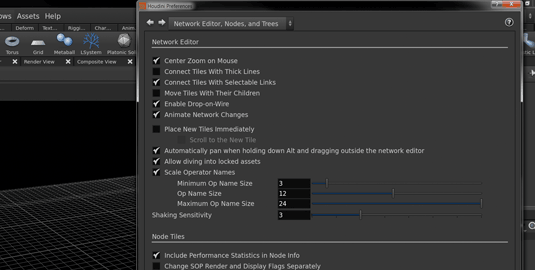
Go to Edit>Preferences and start exploring. Here are a few things to adjust when you're first getting started: in General User Interface, enable Color Pane Headers and Show Images for Image Files.
Under Network Editor, Nodes and Trees, enable Show Full Input and Output Names on VOP Nodes. In Save Options change the Auto Save interval to 10 minutes or greater. It can be quite annoying if the file is trying to save while you're simulating.
08. Turn on Auto Save
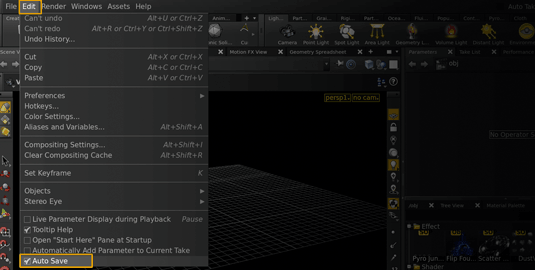
By default, the auto save feature in Houdini is turned on. But don't be fooled: this setting is session-dependent, so you'll have to do it manually at the beginning of each Houdini session. The option is found under Edit>Auto Save.
It's a good idea to have this on while you're building a scene, but before you get ready to run a big render or a complicated simulation, turning this feature off can save some system resources and help speed up your workflow.
09. Drag equals Control
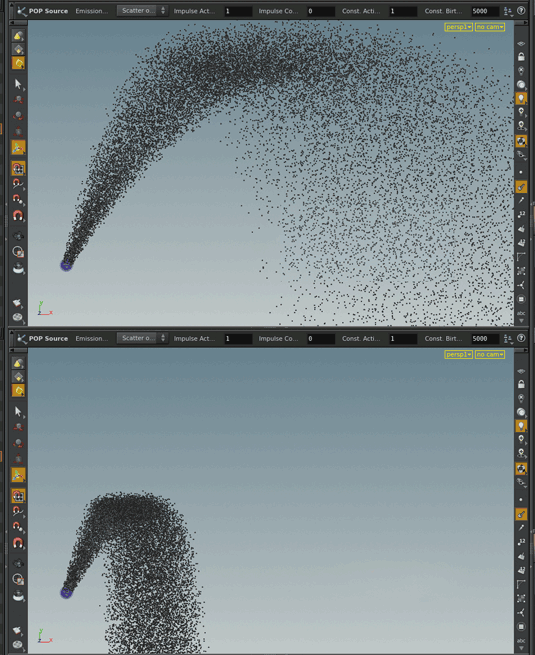
When setting up particle or fluid simulations, always add a Drag Force node to your simulations.
Drag mimics the loss of energy over time by applying force and torque to objects, helping them resist their current direction of motion. Drag will help you to control your simulations while maintaining a natural looking motion.
Words: John Moncrief
John is the resident Houdini and dynamics tutor at Digital-Tutors. His deep passion for putting beautiful, explosive effects on screen is only matched by his strong desire to share his skills. This article originally appeared in 3D World magazine issue 199.
Liked this? Read these!
- The beginners guide to After Effects
- Warhammer artist reveals how he creates 3D work
- Download free textures: high resolution and ready to use now

The Creative Bloq team is made up of a group of art and design enthusiasts, and has changed and evolved since Creative Bloq began back in 2012. The current website team consists of eight full-time members of staff: Editor Georgia Coggan, Deputy Editor Rosie Hilder, Ecommerce Editor Beren Neale, Senior News Editor Daniel Piper, Editor, Digital Art and 3D Ian Dean, Tech Reviews Editor Erlingur Einarsson, Ecommerce Writer Beth Nicholls and Staff Writer Natalie Fear, as well as a roster of freelancers from around the world. The ImagineFX magazine team also pitch in, ensuring that content from leading digital art publication ImagineFX is represented on Creative Bloq.
