How to model a photoreal helicopter scene
Technical illustrator Gary Weller reveals the techniques he uses to create this photorealistic image of an AW101.
Sign up to Creative Bloq's daily newsletter, which brings you the latest news and inspiration from the worlds of art, design and technology.
You are now subscribed
Your newsletter sign-up was successful
Want to add more newsletters?
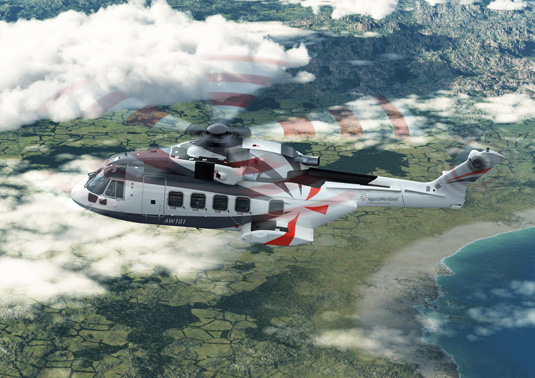
The image shown here is of an AgustaWestland AW101, a medium-lift helicopter used in both military and civil applications. The model was created in 3ds Max using reference material sourced from photos, engineering drawings and CATIA (CAD/CAM) data.
The initial model always comes in much too complicated and the meshes are mess, so I recreate a neater one, whcih makes life much easier when it comes to mapping and reducing render times, especially in animations. The model is constructed like an Airfix kit, broken down into real-life components.
I use V-Ray for rendering the .max files. For still images I render the helicopter directly onto the background, retaining the subtlety of the rotor motion blur, which can get lost when using alpha channels for composition. I have baseline render settings, which means I have minimal post work to do in Photoshop. I'll tweak the levels and saturation, and add a bit of light bloom.
Article continues belowThe background and reflection maps are created in Vue xStream. I want a domestic feel to these to reflect the origin of the product. I took some time to get the clouds in the right place too. I like to get into the detail – in the model, the mapping and the background. The hint of a panel line or slight distortion in the paint reflection all add to the overall effect. I take great pride in getting things right.
My inspiration comes from the real world, and I try to recreate it. If someone says 'that's a nice photo', I've done my job right. I hope my tips can help add to the reality of your models.
- Download the source files for this tutorial here
01. UVW maps
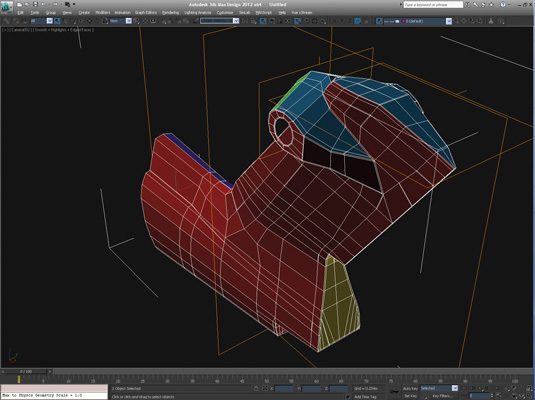
Start with a low-poly mesh, grouping polys together with material IDs. Apply six planar UVW maps; some cover just a portion of the mesh to reduce blanks in the bitmaps.
02. Shooting your geometry
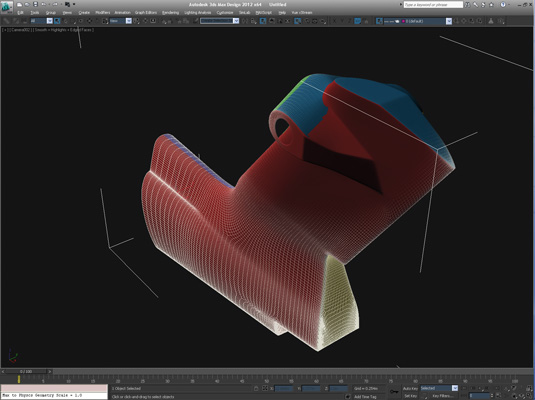
Apply a TurboSmooth Modifier, checking the material ID groups, and give it three iterations as the model will be viewed close up in high res.
Sign up to Creative Bloq's daily newsletter, which brings you the latest news and inspiration from the worlds of art, design and technology.
03. Bitmaps
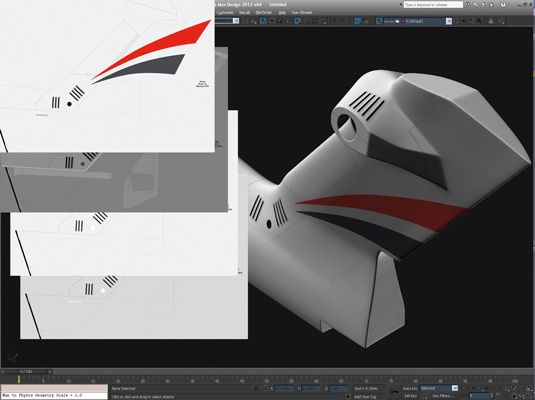
Create and apply bitmaps for Diffuse, Bump, Glossiness and Reflection – 24 for this mesh. I use a Falloff map for the reflection, using the same map in facing and side slots.
Words: Gary Weller
Gary Weller works at AgustaWestland in Yeovil creating CGI stills and animation. He has been at the company for 25 years and started in 3D with Macromedia Extreme 3D. This article originally appeared in 3D World issue 180.

The Creative Bloq team is made up of a group of art and design enthusiasts, and has changed and evolved since Creative Bloq began back in 2012. The current website team consists of eight full-time members of staff: Editor Georgia Coggan, Deputy Editor Rosie Hilder, Ecommerce Editor Beren Neale, Senior News Editor Daniel Piper, Editor, Digital Art and 3D Ian Dean, Tech Reviews Editor Erlingur Einarsson, Ecommerce Writer Beth Nicholls and Staff Writer Natalie Fear, as well as a roster of freelancers from around the world. The ImagineFX magazine team also pitch in, ensuring that content from leading digital art publication ImagineFX is represented on Creative Bloq.
