Top CG tips: how to make a render look more realistic
3D World technical editor Rob Redman explains how using splines can achieve believable results.

It is often the little details that make a CG render look more realistic, at least on a subconscious level. We are so used to looking at photographs and the real world around us that we miss the little flaws and the objects that we take for granted. A beautifully modelled lamp with perfectly created textures and shaders just wouldn't be believable unless there was a power cord snaking its way towards a power outlet.
These are the kinds of details that are important to work into your renders to increase the realism - if that is your aim, obviously. This question is a useful one as it points us towards certain tools such as splines, and Cinema 4D provides us with quick and easy ways to use them.
If you have a flat floor or a shelf and are just snaking a cable across it, then you won't have many issues. You can plot out a spline for the path of the cable or wire, and then sweep a profile spline along it using the Sweep Nurbs tool (which you will find has been renamed 'Sweep' in C4D R15). All you would need to do then is move the end points into position at the socket and the lamp.
Article continues belowWhere things get more complex - or at least far more time-consuming - is when you have uneven ground or surfaces. Using the technique above you would have to add many spline points for the path, then manually adjust each one so that it was in the correct position along the ground. This takes time and even so, you may not get perfectly predictable results. It is quite easy, for example, to end up with parts of the cable intersecting with the ground.
There are all kinds of examples of this, such as the cable for a lawnmower, a garden hose, or something more industrial like an oil pipeline. However, Cinema 4D provides you with a useful tool for achieving believable results, which you will find nestled under Mesh>Spline>Project. Whatever object you choose to create, the technique to do so will be the same.
Spline experiment
Start by building your terrain or mesh that you want your pipe/cable/hose object to follow. Ideally you will need to finish this first, so that Cinema 4D has something to project onto. It is possible to alter it later on, but that would mean going into your spline and adjusting it manually.

You don’t need huge polygon counts for this to work properly but it does work best if you have a reasonable level of detail, so try adding your mesh to a Hyperburbs Object. That way you can increase or decrease the subdivision level without making the change permanently. It's usually best to work non-destructively to make it easier to adjust things later should you need to.
Sign up to Creative Bloq's daily newsletter, which brings you the latest news and inspiration from the worlds of art, design and technology.
Next up, you need to draw the path. If you are using terrain as your base mesh, I would suggest you use the top-down view. It doesn't matter which spline type you use to draw your path, but once it's done you will need to ensure it has enough control points, or you can get some odd intersections where your pipe/cable may pass through the terrain.

The thing to remember is to add the points at areas of sharp change in the underlying surface; for example, if you have a flat field with a hill in the middle you would only need the extra points on, and directly next to, the hill. You can add the points as you draw the path, or use the Knife tool to cut them in afterwards.
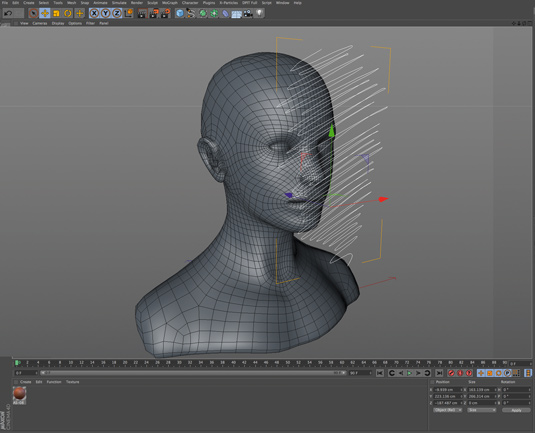
Now you need to lift the path above the terrain. Go to Mesh>Spline>Project and, in the Attributes menu, click Apply (assuming you are still in the top view). Go back to your Perspective viewport and you should see that the spline now conforms to the terrain. All that is left to do is to add the spline, along with a profile spline, to a Sweep Object and position it as near or far to the ground as you like.

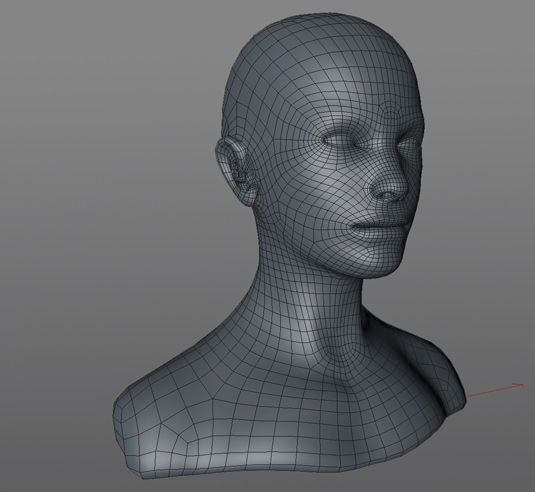
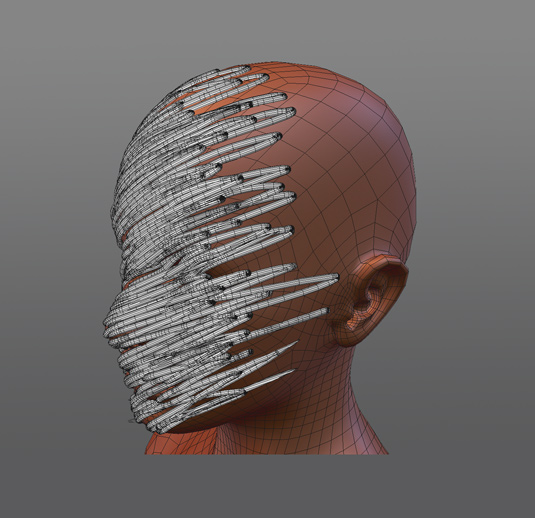
This is also a fun way to create some abstract art. Try using a head model and making some wire-like sculptures by projecting a mass of splines over the face, then deleting the head underneath. As with most 3D tools, experimenting is the best way to learn, and you can come up with all kinds of results using a few simple tools.
Words: Rob Redman
Rob Redman is 3D World’s technical editor and a 3D artist and trainer. This article originally appeared in 3D World issue 176.

The Creative Bloq team is made up of a group of art and design enthusiasts, and has changed and evolved since Creative Bloq began back in 2012. The current website team consists of eight full-time members of staff: Editor Georgia Coggan, Deputy Editor Rosie Hilder, Ecommerce Editor Beren Neale, Senior News Editor Daniel Piper, Editor, Digital Art and 3D Ian Dean, Tech Reviews Editor Erlingur Einarsson, Ecommerce Writer Beth Nicholls and Staff Writer Natalie Fear, as well as a roster of freelancers from around the world. The ImagineFX magazine team also pitch in, ensuring that content from leading digital art publication ImagineFX is represented on Creative Bloq.
