Adobe CC 3D tips for graphic designers
Get to grips with that extra dimension with these top tips for graphic designers.
Daily design news, reviews, how-tos and more, as picked by the editors.
You are now subscribed
Your newsletter sign-up was successful
Want to add more newsletters?

Five times a week
CreativeBloq
Your daily dose of creative inspiration: unmissable art, design and tech news, reviews, expert commentary and buying advice.

Once a week
By Design
The design newsletter from Creative Bloq, bringing you the latest news and inspiration from the worlds of graphic design, branding, typography and more.

Once a week
State of the Art
Our digital art newsletter is your go-to source for the latest news, trends, and inspiration from the worlds of art, illustration, 3D modelling, game design, animation, and beyond.

Seasonal (around events)
Brand Impact Awards
Make an impression. Sign up to learn more about this prestigious award scheme, which celebrates the best of branding.
Illustrator CC
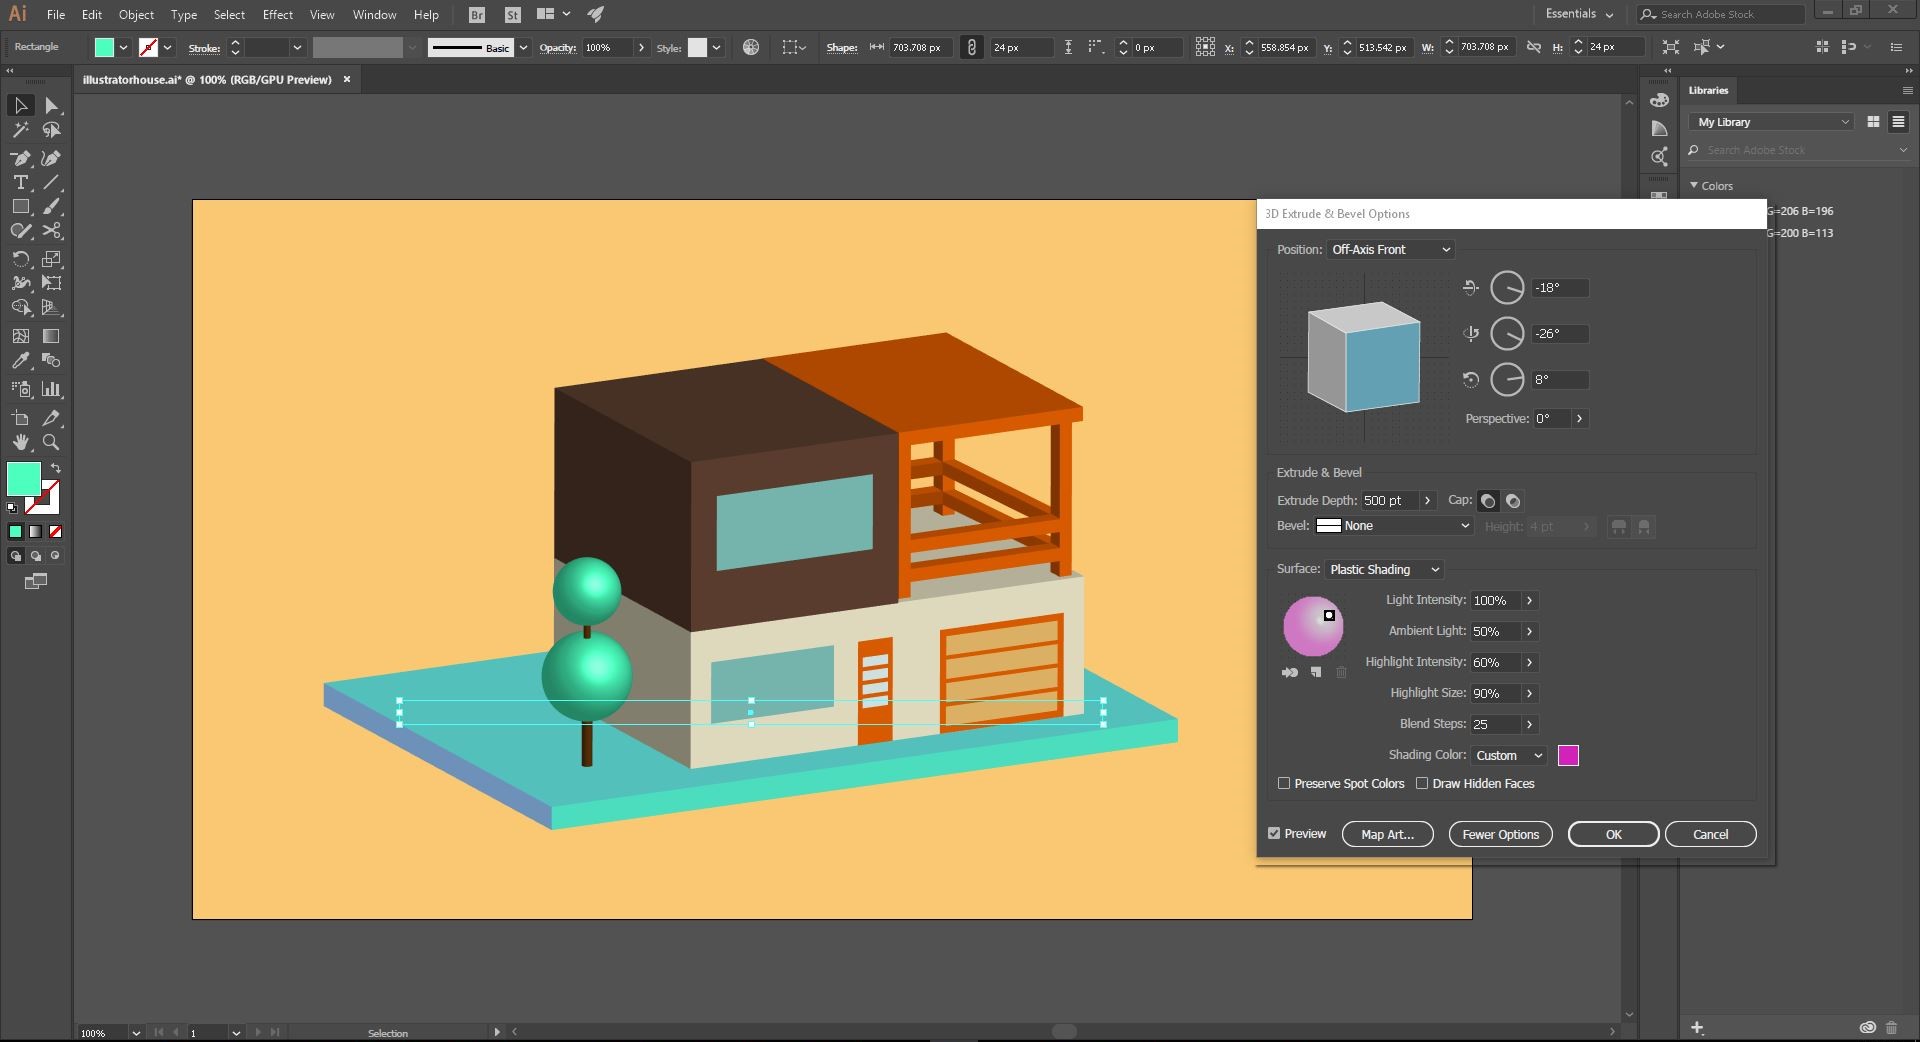
Did you know you can choose a lighting colour other than one that creates black shadows in Illustrator’s 3D settings?
Let’s select our ground shape for this step.
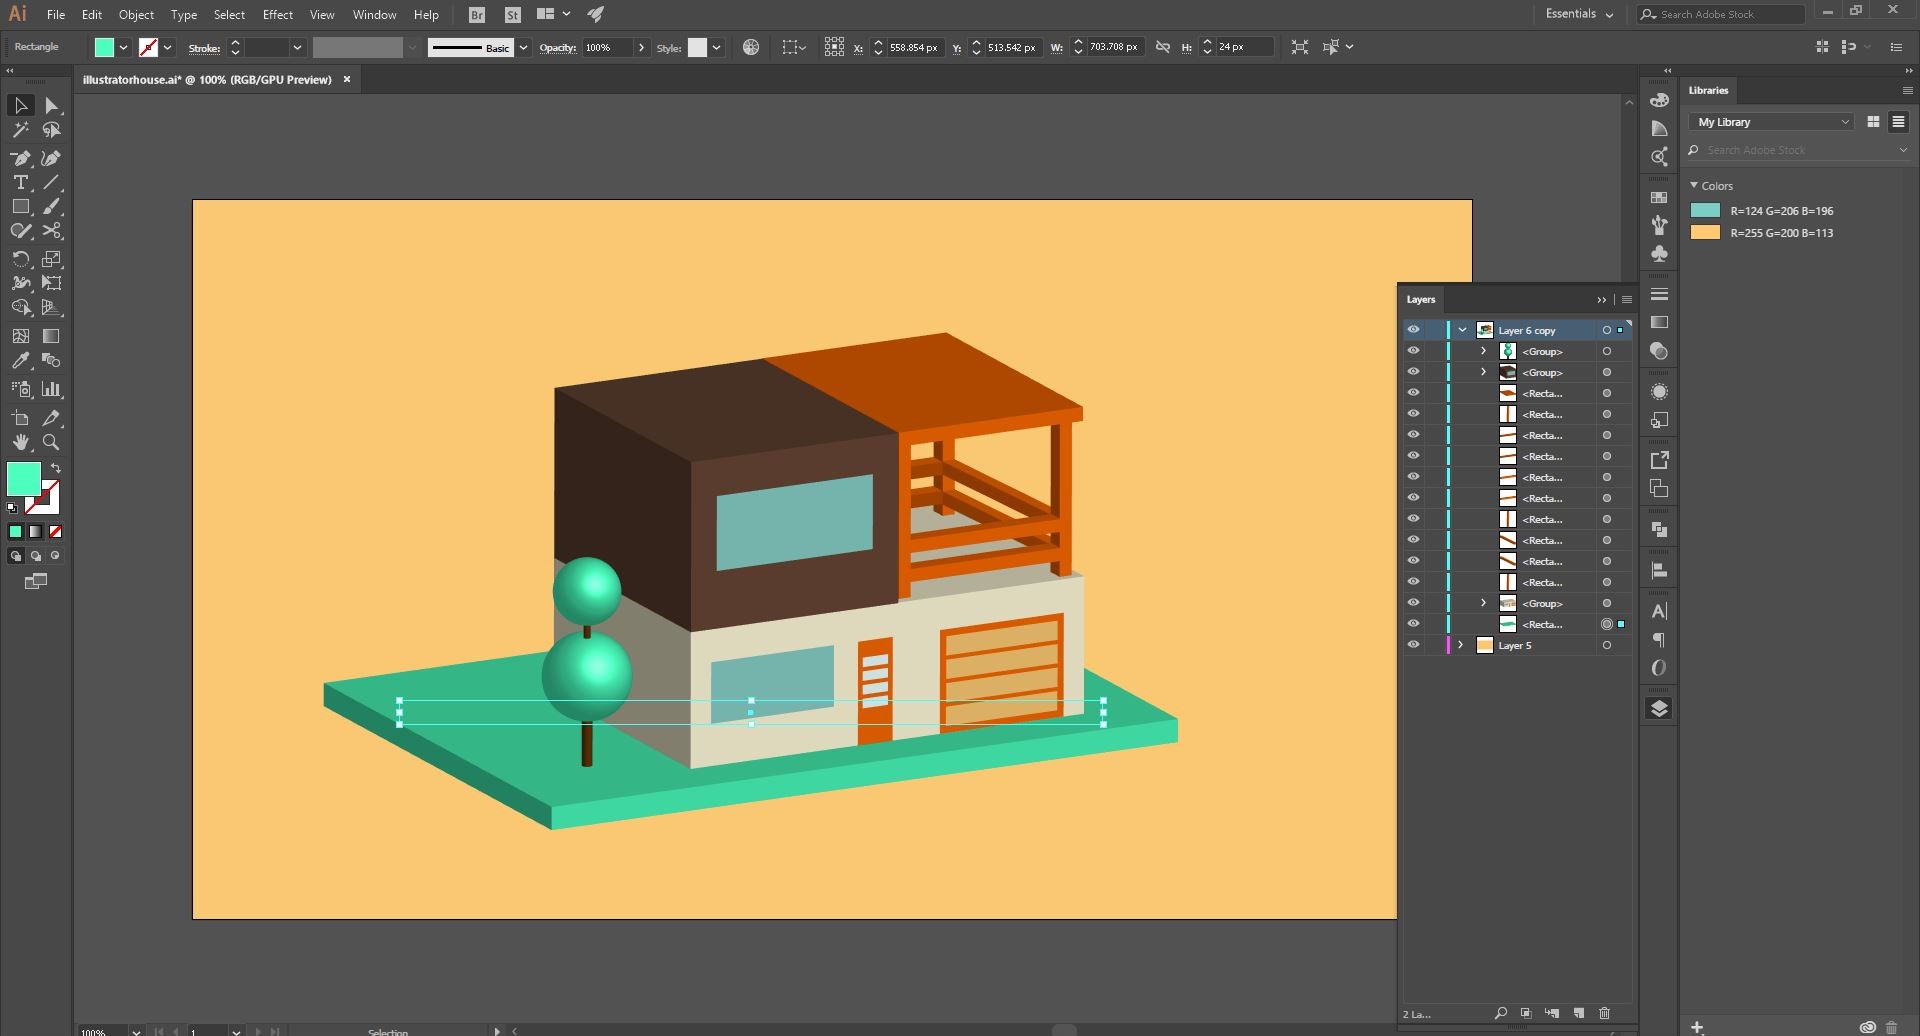
Now, click the appearance panel and click the existing "3D Extrude & Bevel" effect.
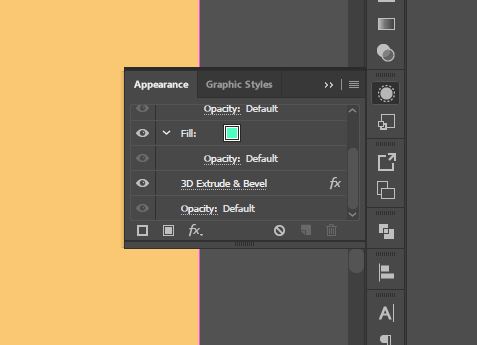
The shape will appear to go back to a 2D look but click the “Preview” option in the lower left corner of the 3D Extrude & Bevel Options Dialog that appears and it will go back to 3D.
Make sure you have "More Options" selected so that you can see all of the settings available.
Look towards the bottom of this Surface section of options, and click the drop-down next to Shading Color. Choose Custom.
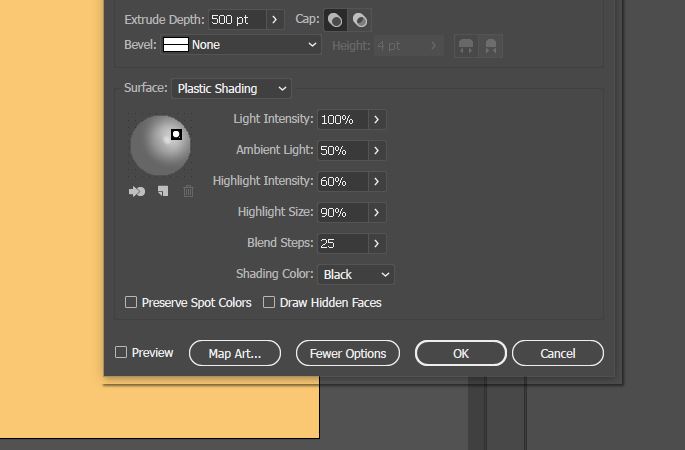
Click the color-chip next to Custom and a Color Picker Dialog will appear.
Choose any color you like for your lighting.
Daily design news, reviews, how-tos and more, as picked by the editors.
Experiment to see how changing the color of your lighting can interact with the existing colors of your scene. I’ve chosen a pink-purple color.
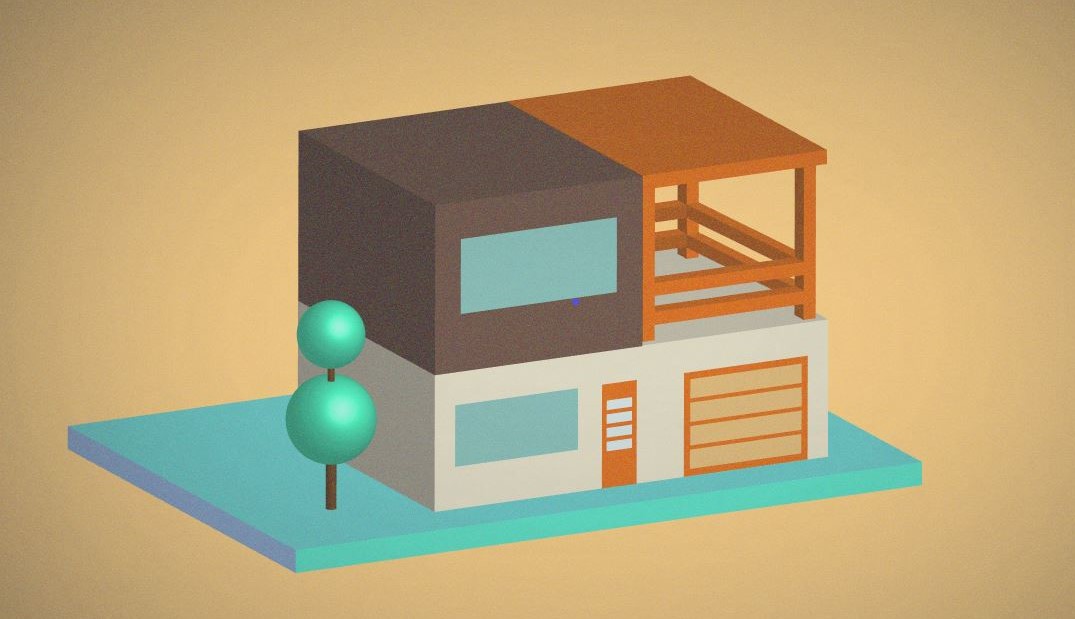
Next are some post tips in Illustrator that will make your flat-looking 3D into a masterpiece. You can also try similar techniques in After Effects and Photoshop.
First, we’ll add a vignette. You can draw these in Illustrator but I find it easier to use an existing image because it’s easier to get a very soft gradient without much time.
Add a vignette image to a new layer in your composition.

Position and resize the image as needed over the top of your artboard, covering the whole thing.

With that layer selected, choose the transparency panel and choose the “Multiply” Blending Mode from where it says “Normal” in the dropdown.

Next, we’ll add some grain. Create a new layer and make a black filled shape with no stroke. The shape should be the same size as your artboard. With this layer selected, choose the appearance panel, and click the fx button.

Now choose Texture, and then Grain. A dialog will appear where you can begin to edit the appearance of your grain. First, zoom out and reposition so that you can see all four sides of your black shape. You have some room to play with it, but I’m going to turn the Intensity to 100 and the Contrast to between 20 and 50.

Click OK. Choose the “Screen” Blending Mode for this layer in the Transparency Panel.

If you’d like to learn more about 3D in the applications we’ve discussed, check out Pluralsight. Laura Coyle’s course Illustrator CC Working with 3D will give you a much deeper dive than what we’velearned about here.
If you want to learn more about Photoshop’s 3D capabilities check out Understanding 3D in Photoshop. Introduction to 3D in After Effects CC is a look at most of the 3D capabilities After Effects offers, and Introduction to CINEMA 4D Lite for Graphic Designers is a great place to start if you’re ready to jump into a dedicated 3D package (you must have After Effects to be able to access this Lite version). To see any of the updates to the 3D Renderers made in After Effects as well as other After Effects 2017 updates check out After Effects CC 2017 Updates.
Related articles:

Laura is a passionate visual effects and motion graphics author at Pluralsight. Her favourite projects are her two in-depth After Effects introductory courses on Pluralsight, which were each built around training motion artists and VFX artists, respectively. Using her vast skill set, Laura has taught thousands of artists everything from shot-tracking and rotoscoping to motion design.
