Create realistic shadows in 4 simple steps
Cast convincing shadows in just four steps with this expert advice.
Sign up to Creative Bloq's daily newsletter, which brings you the latest news and inspiration from the worlds of art, design and technology.
You are now subscribed
Your newsletter sign-up was successful
Want to add more newsletters?
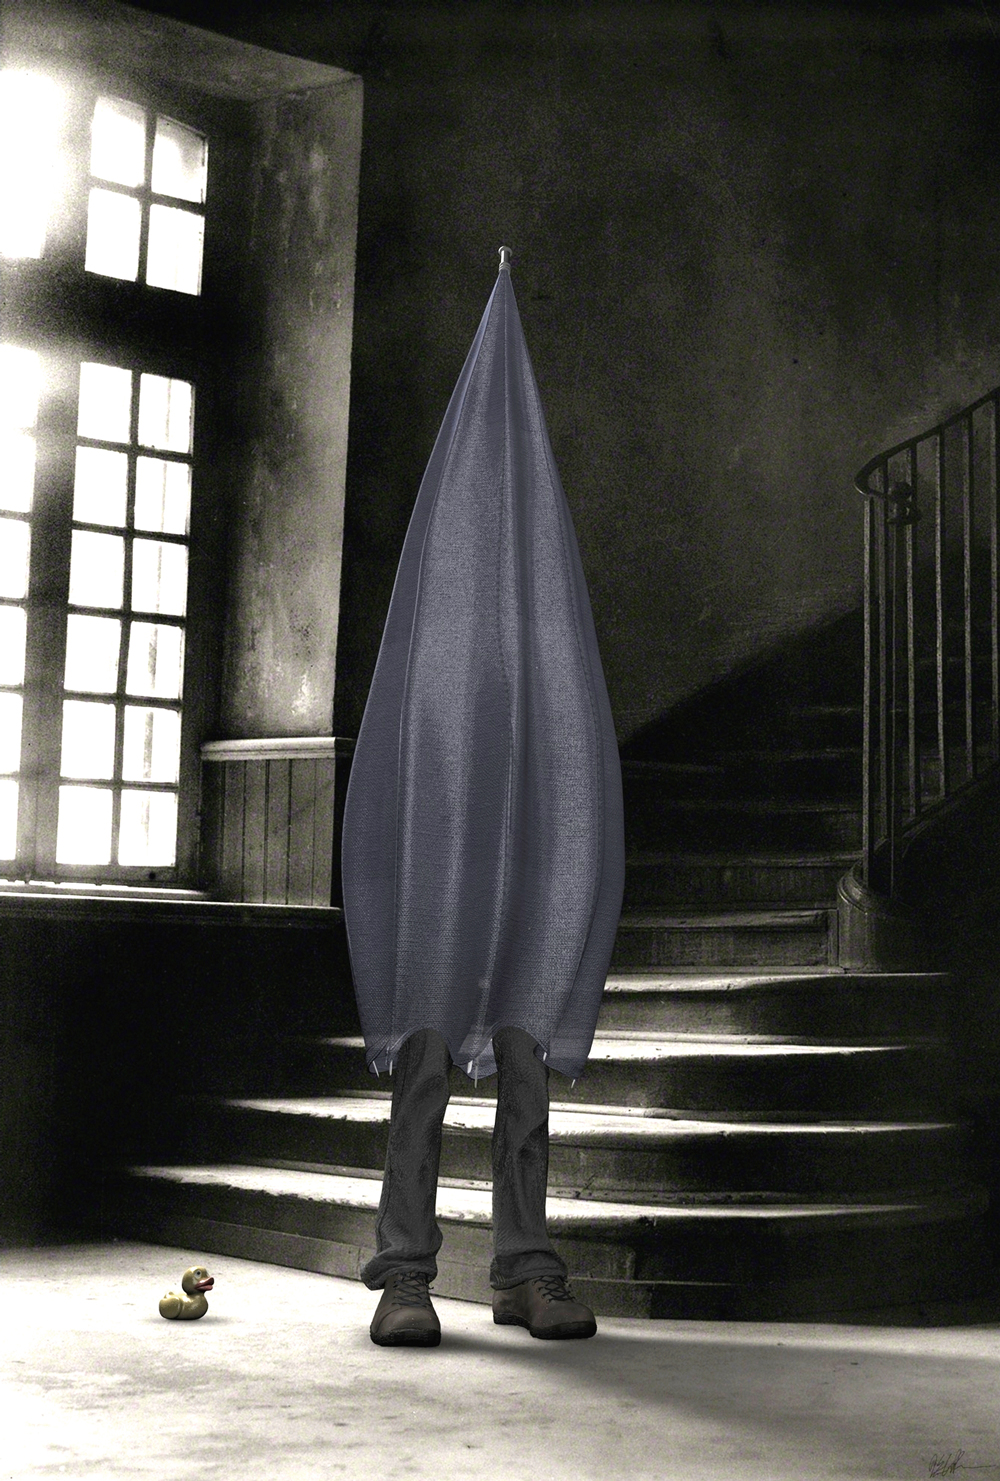
In my image titled Pluvia Mundi (which is Latin for Rain World), I used Cinema 4D to set up and render convincing 3D objects and shadows over a 2D image that I use for the background. Although the process is pretty straightforward, sometimes getting the shadows to cast and feel realistic can be a bit tricky.
In this article, I cover the four steps I use to get everything set up using a still photo as the background, while casting shadows from 3D objects onto the floor.
The background image was obtained from the US Library of Congress. I felt it had the perfect mood for what I was trying to achieve, and it also saved me the trouble of having to model and texture something similar for the background. It also had no known restrictions on use or publication.
Article continues belowThe software used in this post is Cinema 4d R17. However, if you're lucky enough to have the latest release of Cinema 4D, there is some exciting news. Maxon has just rendered everything I have written in the steps below obsolete. In Cinema 4D R18, you can easily integrate 3D objects into photos or live footage with the new Shadow Catcher shader. You simply apply the shader to geometry that roughly matches the footage or background image and composite the rendered result using an alpha that includes shadows.
For the rest of us that are still using the older version of Cinema 4D (and why not?), my method works like a charm. So without further ado, let's get started.
01. Create background
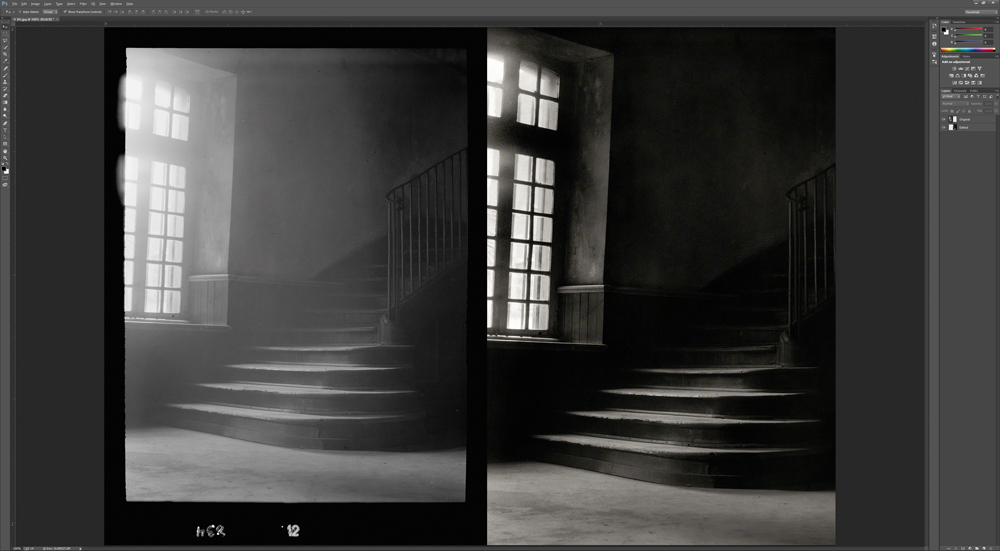
I start by cleaning up my image in Photoshop. Once I’m happy with it, I then create a new material in Cinema 4D and add my edited image to the Color channel, turning off the Reflectance channel. Under Create>Environment, I add a Background Object and apply the previously created material.
02. Line up the floor
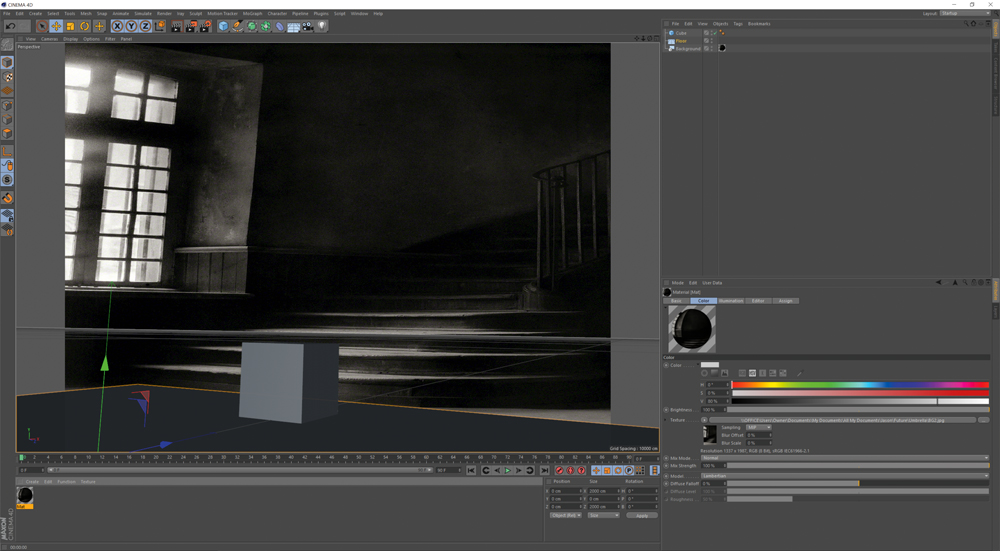
I notice that my background image looks distorted. This can be corrected by adjusting my render settings to match the aspect ratio of my background image. Next, I add a Plane Object and adjust the view so that the Plane Object roughly lines up with the floor. I test the perspective by adding a Cube Object to the scene.
Sign up to Creative Bloq's daily newsletter, which brings you the latest news and inspiration from the worlds of art, design and technology.
03. Set up Camera
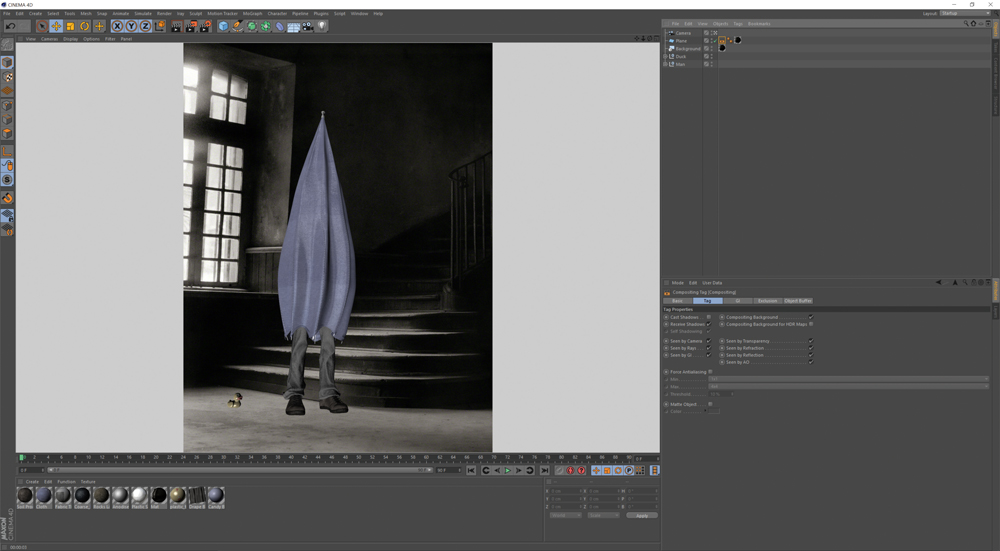
I create a Camera, make it active and add a Protection tag so I don’t move it by mistake. I apply the same background material to my Plane Object and change the Projection from UVW Mapping to Frontal. I add the Compositing tag to my Plane Object. In the Compositing tag properties, I turn on Compositing Background and turn off Cast Shadows.
04. Add lighting
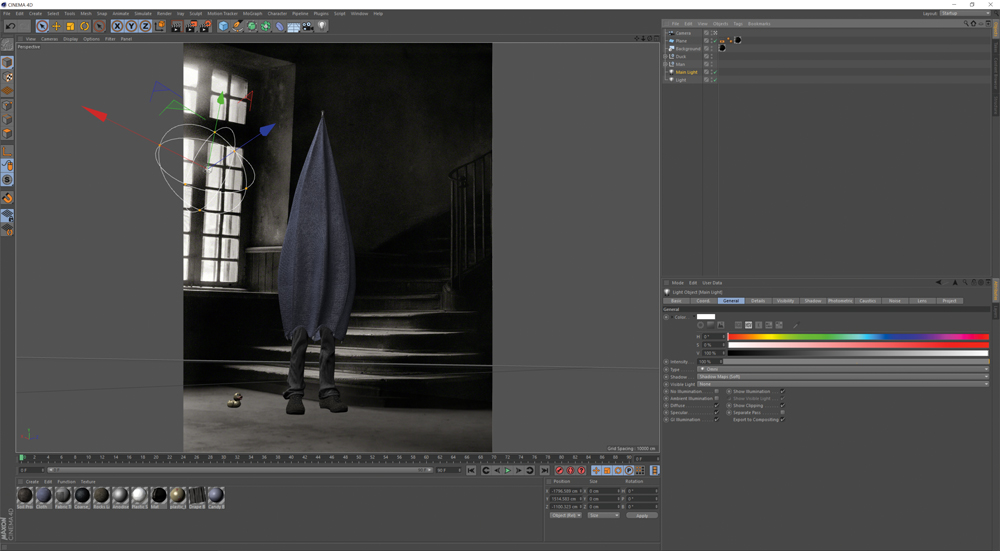
The Plane Object is displaying the background image correctly, but I don’t have any shadows yet. I add one main light near the window as the primary light source. I set the type to Omni and turn on Soft Shadows. Next, I add additional lights (without shadows) and tweak all light settings until I have lighting and shadows that match the background.
This article was originally published in 3D World magazine issue 214. Buy it here.
Related articles:
