How to move over from Photoshop to After Effects
Apply your Photoshop skills to start making images that move.

Sign up to Creative Bloq's daily newsletter, which brings you the latest news and inspiration from the worlds of art, design and technology.
You are now subscribed
Your newsletter sign-up was successful
Want to add more newsletters?
Getting into motion design with After Effects can be quite intimidating, but there are a lot of similarities between Adobe's motion graphics, animation and video editing tool and Photoshop.
After Effects is a complex, huge application – just like Photoshop. But there are plenty of After Effects tutorials around to help get you started, so with a little time and patience, you can master the basics.
A seasoned Photoshop user should be able to get up and running with After Effects within a weekend, if not a day.
Article continues below- Get Creative Cloud
After Effects presents the features you need to create stunning moving images and motion graphics; it's up to you to provide the ideas and software solutions to make them happen. Just like in Photoshop, a little experimentation goes a long way.
01. The Timeline
Probably the most unfamiliar thing about After Effects will be its timeline. After all, you're now dealing with moving, not static, imagery. If you've played around with Photoshop's Timeline (perhaps when making an animated GIF) you're already on the right track.
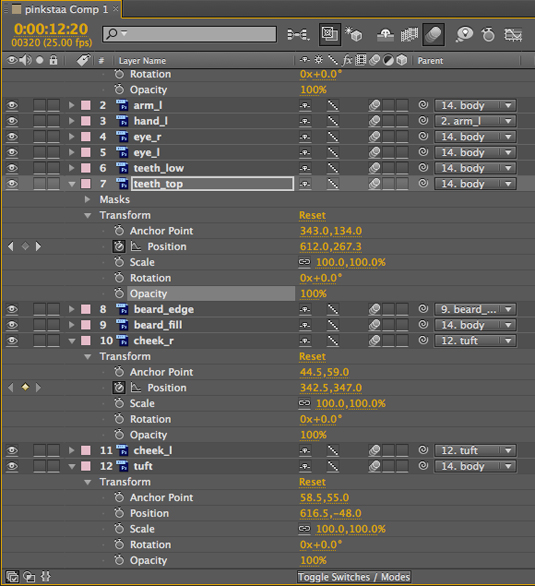
Take a look at the After Effects timeline in the screenshot above: you'll notice there are layers just like Photoshop (this is explored in more detail below) along with details of the properties of that layer.
Next to each property is a stopwatch icon. This enables you to set keyframes that determine such properties as position, opacity, scale and so on – meaning you can animate these over time.
Sign up to Creative Bloq's daily newsletter, which brings you the latest news and inspiration from the worlds of art, design and technology.
Auto-keyframe
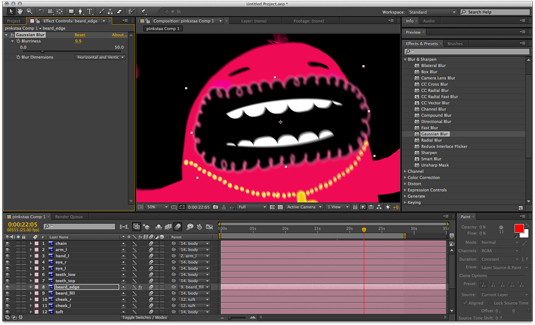
You can also set the timeline to auto-keyframe (the stopwatch icon second from the right, circled in the screenshot). This means when you move a layer, mask and so on in the Composition window, your keyframe will be recorded at that time. It's handy for tweaking movement.
So, with that in mind, import an image (JPEG, PNG or whatever) drop down the arrow next to the image name in the timeline, hit the stopwatch icon next to Position, drag the timeline marker to 01:00s and then move the image in the composition window.
Play back to see how it moves and experiment with different properties in the same way. Bringing keyframes closer to one another will speed up the animation.
02. Layers
A common feature across Photoshop and After Effects are layers. But in After Effects they work in a different way: there's no Layers panel, so layers are dealt with on the timeline. Layers in After Effects can be animated independently, and you can animate properties such as position, scale, rotation and opacity by using the drop-down arrow next to the layer name on the timeline.
When importing a multilayered PSD file, you are asked whether you want to merge layers or select an individual layer – choosing to keep or ignore layer effects (you can add the equivalent of these in After Effects and animate them independently).
In short, you can think of the timeline as your Layers panel in which you build up an animation or motion piece, just as you would a still in Photoshop.
03. Adjustment Layers
Adjustment Layers are probably something you're very familiar with in Photoshop – and in the image-editing app they work in a relatively formulaic way. You choose to add a new Adjustment Layer, then choose the type (Photoshop has preset options such as Brightness/Contrast, Hue/Saturation, different filters and so on) and adjust your opacity or create a mask as appropriate.
In After Effects, Adjustment Layers do the same thing but are much more flexible. By going to 'Layer > New > Adjustment Layer' you set up a blank layer that you can then apply any effect to (by dragging the effect from the Effects and Presets panel directly onto the Adjustment Layer name in the Timeline). The Adjustment Layer affects – like Photoshop – the layers beneath it in the stack.
Just like Photoshop, you can use After Effects' masking tools to only reveal part of the adjustment layer (ctrl+Right-click on the Layer and choose 'Mask > New Mask' before drawing a freeform or set shape). Then you can animate either the adjustment layer, the mask (including feathering, opacity and shape) or both, by using the arrow drop-down to the left of the layer or mask name.
04. Filters and effects
After Effects has a myriad of effects and filters for things like creating special effects, tweaking footage or correcting colours. Just like Photoshop, you apply your effect to a layer or group of layers, but unlike Photoshop, you use a mask to hide or show the effect rather than applying it to a selection in the first place.
There are two ways of quickly applying an effect to a layer. You can either drag it from the Effects & Presets panel directly to the layer in the composition window (a bounding box will appear showing you which layer it will be applied to); or, if you have many layers, you can simply drag it from the Effects & Presets panel onto the layer name. Its properties can then be animated over time in the normal way.
You can apply multiple effects to a layer, and the result will be determined by how the effects are layered in the stack.
05. Masks
Masks in After Effects work in a similar way to Photoshop or any image-editing application, in that they show or hide what's on the layer they are attached to. Like Photoshop, you can set up multiple masks on an After Effects layer. And of course you can animate the properties.
As explained in tip 03, you add a mask by either selecting the Layer and going to 'Layer > Mask > New Mask' or ctrl+Right-clicking on the layer in the timeline and selecting the same option.
Masks are drawn either using the Shape tools or the Pen tool found in the main tools panel. You can also paint masks by selecting the Brush tool, going to the Paint panel and chaining the channel drop-down to Alpha.
Then, in the timeline, double-click the layer you want to be transparent. Next, paint black for transparent and white for opaque – the same as you would do when creating a layer mask in Photoshop.
06. Rotoscoping
Another option for masking is the Rotobrush tool (CS5 or later, found in the main tools panel), which acts very much like Photoshop's quick selection, enabling you to isolate a moving object over time with relative ease (although you will need to clean up points).
To use this, first select the tool from the main Tools panel, then double-click the layer in the timeline you wish to work on and begin to paint over the object you want to cut out. You can change the brush size by ctrl or cmd-dragging on the canvas (rather than using the [ and ] keys as you would in Photoshop).
There are many other masking options in After Effects, but these are the basics. Masks and selections are indeed a little more complex than in Photoshop, but adhere to the same basic principles.
07. Rendering
Unlike Photoshop (unless you're creating a movie or 3D file) when you've completed a sequence in After Effects you'll need to render it. This essentially means taking all the objects and footage you've animated and putting it together as one file (or a sequence of files).
After Effects has a RAM preview, which allocates RAM to play video and audio in the Timeline, Layer or Footage panel at real-time speed. You can, for the most part, just use Spacebar to preview your project at any time – but this depends on the speed of your Mac or PC.
To Render, you need to set up the composition in the Render Queue. This is tabbed by default with the Timeline. Go to 'Composition > Add to Render Queue', then click on Best Settings next to Render Settings to choose a size and the quality (this is using the Render settings at its most basic).
Hit OK and then click Lossless next to Output Module, choosing a format. When you're done, click on the name of your composition next to Output To to specify a save location.
Related articles:

Rob is editorial, graphic design and publishing lead at Transport for London. He previously worked at Future Publishing over the course of several years, where he launched digital art magazine, ImagineFX; and edited graphic design magazine Computer Arts, as well as the Computer Arts Projects series, and was also editor of technology magazine, T3.


